Beginner’s Guide V1.0.1
Tutorial
The initial tutorial of the game starts from when you first launch the game and progress up to level 30. Once you reach level 30 you cannot kill the boss and you’ll be forced to rewind so the upgrades to equipment and stats don’t matter too much here. Where as using Souls, Hero Medals and Gems would matter a lot more as they can have greater impact on your overall progression as apposed to your current run.
During the tutorial you’ll be forced to do certain tasks and click certain things, outside of that you’ll have access to everything a normal player would have such as equipment and stats.
For the first 30 levels you should be following a general guide for stats and equipment that you’ll end up following throughout the whole time you play Endless World.
Stats
To quickly get through the first 30 levels I’d advise the following stat distribution –
- In your stats page put as many points into Attack as you possibly can.
- Keep Health and Defense upgraded to the same level. They should always be a lower level than Attack.
- Have 5-10 points in Crit AND Toughness.
During the first 30 levels you’ll need to deploy Mercenaries (mercs). You shouldn’t worry too much about which ones you have and which ones are “the best” at this point. Just equip any 5* options available to you followed by 4*. If possible during the first 30 levels try not to use any souls to upgrade your mercs as once you’ve spent souls you can only get back 80% of what you’ve spent and they’re not an easy currency to come across in the early game.
After you’re forced to rewind at level 30, it’s highly suggested (especially for F2P players) that you re-roll “Lucky Cards” for the shards until you obtain a legendary. Legendaries are default 5* which is a huge help to new players.
Min/maxing
If you REALLY want a great start, after you finish the Tutorial, if you don’t see any legendary shards with 100 or more Shards available in the draw, you can reset your account and redo the tutorial. Doing this only takes 45mins – 1hr. It’s a good way to guarantee a decent start.
You can reset your account by going to settings > account system view > restart
Stats and Abilities
Stats
Stat distribution and ability selection is extremely important past the tutorial and you should always follow a general setup when progressing through stages. From level 50 to level 5000+ You should always be doing a similar thing with your stats and abilities. And of course this is what you spend your gold on, stats can’t be purchased any other way.

I briefly went over stats during the tutorial phase so this will be a little more detailed.
- Attack – Increases the damage of base attacks, spells and abilities.
- Health – Increases the Health of your Hero and your Mercenaries.
- Defense – Reduces the incoming damage taken by you and your Mercenaries.
- Toughness – Reduces the chance to be critically hit by incoming attacks.
- Crit – The player base is currently unsure of the exact stats of Crit, all we know is that it’s not worth having much of in the current meta.
Every 5 levels of each stat will also increase your mercs stat. For example –
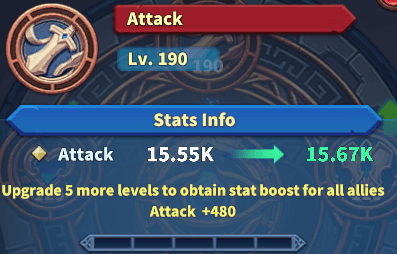
Here you see that once upgraded 5 times the attack of all mercs will increase by 480 as well.
As I mentioned attack should always be the highest stat, this is due to the fact that it’s raw damage and effects spells/abilities as apposed to any chance effects such as Crit.
Health and Defense should always be around the same level but always lower than Attack. What I personally do is keep Health and Defense at 1/5th of the cost of 1 Attack point (So adding 5 to the Health stat is the same as adding 1 to the Attack stat).
With Crit and Toughness you should only invest in these when it becomes ridiculously cheap to do so, in the current meta the only purpose of these “upgrades” are to allow you to obtain a new ability point.
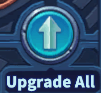
And NEVER click this button!
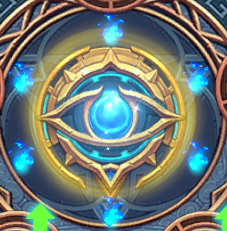
Abilities
In the stats page you can see 4 blue flames in the inner circle of the page, these flames indicate your progress to the next ability unlock. Once you have flames going all the way around you’ll be able to select a new ability that will increase a stat for a specific class by 5%.
The best options to choose for these abilities are as follows –
(Every ability is a 5% bonus regardless of level)
From “best” to worst –
- Attack Speed – Faster attacking is 1) More damage and 2) higher chance of a crit.
- Attack Damage/Ability Power – AP for Mages and Supports, AD for everything else.
- Critical Damage
- Health
- Defense
- Critical
- Toughness
Obviously when you have a better understanding of which class should have what you may be able to prioritise a little better, for example – Tanks don’t really need that much damage so taking Health for them might be more helpful if they’re dying.
Equipment
When progressing with equipment you shouldn’t be crafting much (if anything) to start off with.
Whenever you get the red icon above your equipment tab, it means you can equip something that offers better stats/has a higher level than a previous item you or one of your mercs were wearing.
If this red icon is visible I advise you click on equipment and auto equip down the line.

Meaning on your hero page, click auto equip – Click the next icon to move onto the next Merc – Auto equip – Next icon – etc.
Using this method works for generic progression, especially if you have your best Merc/DPS mercs in the first slots (S,D)
Fusing
DO NOT Dismantle all items, dismantling will turn your items into Dark Iron, which is helpful but it’s also done automatically when you rewind. A better use of items would be to fuse them. The best way to fuse items is to obtain the guided task that requires you to fuse 15 items. The task on the left most side of guided tasks switches between 3 options. Advance 10 levels – Kill 2500 Enemies – Fuse 15 equipment.
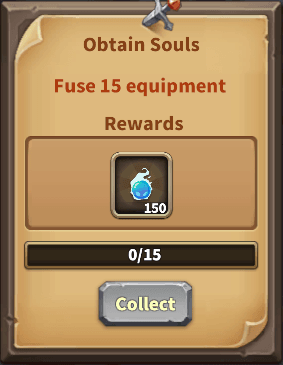
Because of this you want to auto equip the items you pick up when you’re progressing, and once you’ve rotated round to this specific task you want to auto fuse your equipment, then equip the gear that’s become better from doing this.
Using this method will give you the most amount of souls with the least amount of expenses. If you can’t move past “Advance 10 levels” due to a wall, if you think it’s possible to beat the boss with a small improvement to equipment, consider fusing some things together and try again.
Customising
- Re-rolling
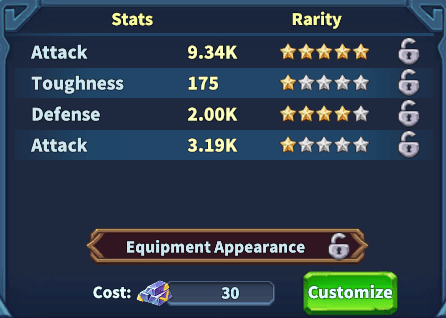
Customising items allows you to switch/increase the stats on any given item. This uses Dark Iron, a resource you can obtain from dismantling, the shop, clicking Armoursmith mine-carts, Achievements, Daily tasks/sign-ins, Time reversals.
When customising you can lock certain attributes that you want to keep, such as having 5* Attack or Health and keep the unwanted stats unlocked to re-roll them. Every reroll will cost 30 Dark Iron, and an additional 15 per locked stat. The first two stats of any given item are locked to that stat type, for example you wouldn’t be able to re-roll a 2nd stat of Toughness to Attack, you’d only be able to re-roll it into a higher * rating of toughness.
- Min/Maxing rolls

The best stats you can get on re-rolls are % based, these are extremely rare and can range anywhere from 3% – 7.5%. Aiming for these rolls are obviously what you want to be doing but there’s no need to spend all your Dark Iron try to. Getting one or two 4-5* stats in Health and Attack is all you’ll need if you decide to do some Customising.
- Unlocking through Customisation
Running the Armoursmith dungeon a few times (when available) to get some Epic gear will help with this as you can fuse 3 epic pieces of gear to obtain a legendary item of the same slot (Chest, Boots, etc). Once you have a Legendary item you can customise over and over to unlock other legendaries that you can craft. The reason for re-rolling legendaries with the appearance lock OFF is because legendary items have set-bonuses and by re-rolling them you’re able to directly craft whatever legendary you’ve picked up. Meaning you don’t have to randomise your legendaries when you need a specific set bonus and can just craft the set you want instead.
- Crafting
Whenever you hit a wall you should consider crafting and rerolling gear. The only reason for crafting is if you are completely stuck and need just a little boost in order to progress. You don’t want to be crafting all the time because it’s incredibly expensive and when you move up stages the base level of items increases, so if you craft a legendary with a level 7 piece of gear you’ll soon be replacing it with a common level 10+ piece (most likely).
The best way to use the crafting system is wait until you want to go on a marathon run in the mid-late game and craft some legendary sets for all your mercs and hero then get to as high of a stage as possible. This way you’ll of had enough time to stock up on Dark Iron, be able to get loads of rewards from rewinding and by the time this comes you should have enough space in your tombstone for most if not all the legendaries you craft.
Artifact
- Dragonscale
To level your Artifact you use Dragonscale which can be obtained through Rewound time challenges, Achievements, Guided tasks, the shop, plot, Daily sign in, and Speedrun challenge.
If you upgrade your Artifact with dragon scale and switch to a different weapon (lets say you’re using Sword of the Annihilator and you switch to Feather of the Windrunner) the level will stay the same. Upgrading your Artifact stays throughout whichever weapon you decide to use. Because of this there’s no reason to be stockpiling Dragonscale, if you can upgrade your Artifact, do it.
- Mana crystals
To unlock a new Artifact you’ll need Mana Crystals. The way to collect these is through Dailies, Daily Sign-in, Plot, Guided Task, Shop and Exploration. They’re harder to come across but not needed as much as Dragonscale. At the time of writing this there are 12 Artifacts you can unlock, each with a different set of abilities and Awaken effects.
- Awaken

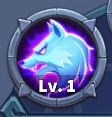
After you’ve dealt/received enough damage you will be able to “Awaken” and transform into a Werewolf for a limited time, doing this will give you a flat stat increase as well as giving you life steal and a special effect while you’re a Werewolf.
If you click the Artifact icon and click the wolf image it will show you what those bonuses are.
- Elementals/Classes

When selecting the Artifact to use, each Artifact also comes with a Class and Element.
These classes are effected by the abilities you can acquire through the “Stats” tab so be sure to pay attention to which Artifact you’re using for the best result.
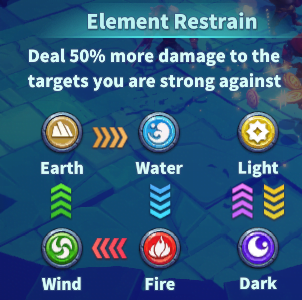
Every element has counters to it, Meaning if you’re fighting an Earth type boss, using a Water based element will receive damage because Earth > Water. Most of the time using a countered Element doesn’t make as much difference as you might think, having said that it DOES make a difference so if you’re getting stuck in the 200’s and are fighting Water based mobs/bosses then using an Earth type Artifact will help more than using Wind. (Especially because Gaea’s Shield is an incredible Artifact and is used by most if not all players early – mid game regardless of counters).
Mercenaries
Mercenaries, like Artifacts, have the same Element and Class restrictions that the Ability selection will effect.
With team setups the most basic guideline would to to have 1 Tank, 1 Support and 2 DPS. Obviously this can be different based on what you’re going for. For example if you’re going for a bleed setup you may not need a tank.
Additionally if you decide to you can use Gaea’s Shield when you unlock it and use your hero for tanking. This is suggested as Gaea’s is an incredible Artifact that gives you access to CC and a taunt to help your Mercs DPS without dying so easily.
Some Mercs that aren’t too difficult to get that’re highly rated would be as follows –
(I wont be including every merc, this is more of an “A/S” tier list for now of Mercs that are good and don’t heavily rely on a specific combo setup)
BASIC Tier List –
- S Tier – Lili, Drac, Feu, Pandora, Fern, Dynor, Kaguya Luna
- A Tier – Petyr, Vonil, Eva,
- F Tier – Ironheart (Please never use this Merc)
Once you have a decent base team setup don’t randomly spend souls. Make sure to upgrade the mercs you want instead of changing your mind all the time because whatever quantity of souls you invest you can only get back 80% of the souls used.
Evolving
Evolving Mercenaries will increase their Star (*) rating up to a (current) maximum of Blood Moon (BM) In order to Evolve Mercenaries you need 1 of the same Merc type, 1 of the same element and 1 of the same job (Class – Archer, Warrior, etc). You can use 3 of the same Mercenary if you want/can because obviously they fit all the previously mentioned criteria.
If you use a Merc that’s already been leveled (eg using a level 40 Feu to evolve a Kaguya Luna) you’ll get back 80% of the souls you’ve spent. The same amount as doing a “Level Down”
![]()
When evolving a Blood moon hero the quantity required is increased but the general premise remains the same.
![]()
Switching
Switching (The player-base calls it “Rerolling”) Mercenaries cost “Hero Medals” which can be obtained through Achievements, Speedrun event, Shop and Daily reward chest.
When you switch a Mercenary it will replace it with another RANDOM merc of the same * level. This does mean that you can get the same merc that you’re trying to reroll which can be frustrating. On the bright side if you reroll a merc that’s been leveled you’ll keep the levels on the merc you’ve rolled to.
For example – If you have a 5* Merc at level 20 and you decide to reroll it, whatever merc it switches to (could be the same one by chance), will retain the levels through the rerolling process.
Note – When you’ve upgraded a base 3* Merc (Rare) to 5*. If you re-roll it, it will turn into another 3* Merc but WITH the upgraded 5* rating. For example if you evolved Moss to 5* and rerolled him, you could get Afra 5*.
Rewinding Time and Lunar Power
How it works
- Time Energy
While playing you’ll receive “Time Energy” for killing mobs, this energy goes up very slowly during the early game but there’s things you can do later on to speed it up by quite a bit.
For example doing Explorations. With explorations you can send out some mercs for 12 hours to find some Time Energy. The higher level your mercs (Both star and raw level) the more reward they’ll bring back. Later on this can scale quite high.
![]()
Immediate Rewards
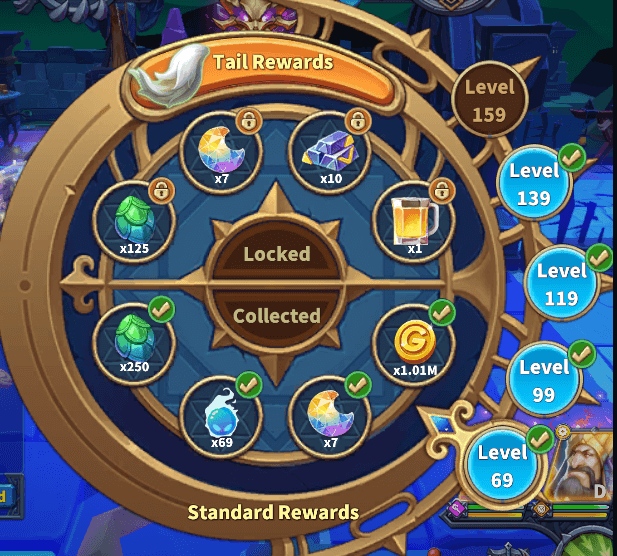
- The Clock
On the face of the clock you can see multiple different rewards that you’d obtain from rewinding. The rewards on the face of the clock scale and increase based on the level that you rewind from so it’s always a good idea to rewind as far into the game as you possibly can.

Rewound Time Challenge Rewards
Once you rewind you’ll receive the “Rewound Time Challenges” icon that will give you rewards based on and around the level you decided to rewind from. Again these rewards also scale based on the level you decided to rewind from so “it’s always a good idea to rewind as far into the game as you possibly can.”
Tombstone
When you click rewind you’ll be prompted to place some gear into storage, that storage is called a “Tombstone” which you can collect after you reach the level that you just rewound from. As a base Tombstone you can only deposit 4 items. If you visit “The clock” you can upgrade this tombstone to be able to hold more items. This costs Diamonds or Souvenir Tokens. All the gear you decide not to deposit will be automatically dismantled and turned into Dark Iron.
Other players can collect your tombstone if they’re A) On your friends list and B) At the level you left it, this will also give you 20 flowers in the mail. The items will still be there when you return to that level and you’ll be able to claim what’s yours. This goes the same way if YOU are collecting other players Tombstones. Every time you collect a friends Tombstone you’ll send them 20 flowers and receive the items they stored inside, except those items will be scaled down to “Common” rarity but will have the same initial stats but wont have the 1-3 additional stat slots that would be on a rare – legendary item.
Lunar Power
Lunar Power is effected by Lunar essence that’s acquired from the immediate rewards as well as the Rewound time challenges. Every time you upgrade your Lunar power you gain additional base power (viewable in your profile accessible at the top of your screen) as well as the current adventure difficulty being decreased. The adventure difficulty is the difficulty of your current run can go up to 300%. The higher the % the harder the run will be. The % of Adventure difficulty will increase per stages cleared.
- Everything in this section is “crazy” min/maxing and is rather difficult to pull off but is still a helpful
- Insight into how Lunar Power works.
- If you convert all your Essence into power instantly as soon as you rewind you may find yourself
- Getting stuck later on, especially if you have quite a long way to go in order to reach your previous
- Level. The way to “combat” this is to save your Essence as much as you can and deposit it
- IDEALLY when you’re at 300% adventure difficulty.
- The reasoning for this is because 300% Adventure difficulty is the hardest it can get and wont go
- Any higher. Adventure difficulty increases based on the stages you clear. If you invest all your
- Essence at level 20 then you’ll be wasting it as it will go up until you hit a wall. If you wait until
- You’re at 300% and then invest, you’ll have saved a few % from not using it earlier, as
- The amount | you deposit corresponds to the amount of levels you can clear.
- For example –
(JUST AN EXAMPLE) - Lets say you gain 1 negative % every time you advance one level and 1 positive % every time
- You deposit. If you’re at 300% and manage to do 20 more levels. That would be 20% that
- You’ve absorbed. If you deposit it all instantly then that 20% will still be a detriment as each stage you
- Clear (even if you’ve cleared it before) adds negative %.
Diamonds
In this section I’ll briefly cover what to spend Diamonds on excluding paid content, such as the Tail of the werewolf, as that’s a direct payment and can’t be purchased with Diamonds. However If you were to do any direct purchases. The “Tail of the werewolf” should be the first thing to get.
- Dragonscale – Dragonscale should be the “go to” response when you can purchase it from the shop. Contributing towards your Artifact upgrade that will last through rewinds.
- Souls – Obtaining Souls in anyway is always a good idea provided you spend them wisely instead of randomly leveling Mercenaries without having a decent team-setup in mind.
- Lucky Cards – Only available after a rewind, if the Merc shards are worth it (e.g 100x 5* shards) then it’s always a good idea to reroll a couple times to acquire the shards you want.
- Mana Crystals – Provided you have Diamonds to spare, purchasing Mana Crystals will help out as they’re very hard to come across from just playing and allow you to unlock your different Artifacts a little bit quicker.
- Tavern – If you’re going to purchase drinks from the Tavern, always purchase 10. The Merc shards you get in the Tavern can be 3*-5* from the Diamond purchase drink and with the “10x” purchase you’ll always obtain a 4* Merc.
When you get into the later stages of the game (having a decent merc setup with some high levels on everything) You should probably invest in the Tombstone. The Tombstone levels will give you more item slots to deposit items into when you rewind which will allow you to hold onto any 4 set legendaries your hero’s carrying as well as any from your mercs instead of having to lose them on a rewind.