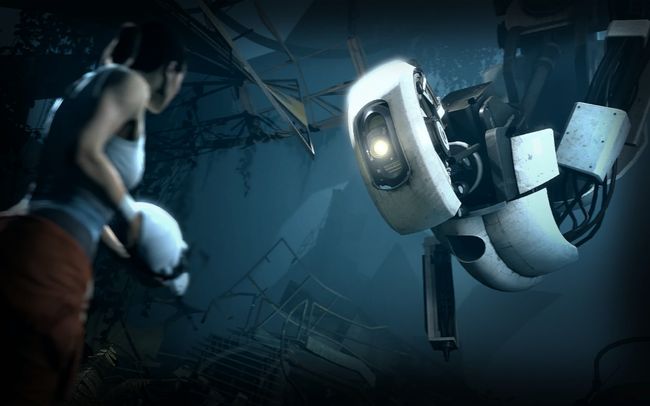
GLaDOS Test Chambers
TEST 01 – DEADLY LASERS
In this test chamber, you have to place the first portal on on the floor just below the laser emitter. The 2nd one should be on the ceiling right above the laser catcher. Before doing this, make sure that you are on the piston, the elevator that is present that takes you right up to the exit.
TEST 02 – YOU HAD YOUR EPISODE
First, make your way to the corner that has a reflection cube. Portal your way inside and then take the cube to the laser that is emitted by the laser emitter. Reflect the laser with the cube, so that the laser goes to the laser catcher. Make sure that you place the cube on a portable surface (surface on which portals can be placed). Make your way up by the stairs. Now, place a portal right below you on the portable surface. After that, place the 2nd one just below the cube and grab it. Place that cube on the button and get going!
TEST 03 – LASER LOVER
First, grab the reflection cube on the elevated surface which is present in front of the entrance. Grab that cube and make your way onto the elevated surface that gets lifted afterwards with panels. Make sure to take the cube with you. Align that cube so that the laser can be reflected to the laser catcher. Now, make your way back again to the elevated surface in front of the entrance. Now, place a portal on a portable surface in front of a laser and another on the elevated surface you standing on, to make the laser go to the laser catcher. Now, both the lasers are in the laser catchers. Make your way to the exit.
TEST 04 – CREDITED
First, place the blue portal on the left hand side when you come through the entrance. And the orange one on the portable surface near the button in front of the entrance. Now, travel between the portals to the button and press it in order to dispense the cube. Now, place the orange portal on the portal on the portable surface where the laser goes to. Now, there will be a platform coming to you, so grab the cube and jump onto it. Now, jump above the laser while being transported or block the laser with the cube and make your way to the button. Drop the cube onto the button and then go through the exit and onto the next test.
TEST 05 – PLATE’S FAITH
This test requires no portals, so don’t use ’em. Launch yourself with the aerial faith plate onto the exit. Now, press the button and observe carefully. As soon as the cube touches the aerial faith plate below it, at that same time, you launch yourself with the aerial faith plate, and grab the cube in mid-air. Now, place the cube onto the button near the exit and get going.
TEST 06 – AERIAL MOMENTUM
First, launch yourself with the aerial faith plate, without a care in the world. Now, place one portal on one angled panel, and the second on the other angled panel and momentum through to the button. Press the button 2 times and then grab the cube as it comes to you. Make sure that those 2 portals remain there on the angled panels. Now, grab the cube and place it on the button by placing a portal on any portable surface near you and another on top of the button. Throw the cube onto the button and get going. REMEMBER! You can’t get stuck in this test chamber, there is always a way to get back in flow.
TEST 07 – LOVELY COMPANION
First, block the laser with the companion cube to make the piston come down. Jump onto it and then place a portal right below the cube and another anywhere to unblock the laser. Now, place a portal on the right angled panel that faces a button. Now, place the 2nd one right below the cube to take it. Now, place a portal right below you on the surface where the laser was. Grab the cube and use momentum to get to the button. Place the cube onto the button and place the portal on the other angled panel that faces the exit instead. Now, once again use momentum to get to the exit and complete the test.
TEST 08 – PEEK HOLE
First, go inside through the emancipation grill and press the button. A reflection cube will drop. Now, you can see that there is a hole in the glass in front of the button that you pressed. Now, from the outside, place a portal on any of the portable surface and other near you. Go through the portal to reflect the laser to the laser catcher from the inside through the emancipation grill. Now, go to the exit any way you like and proceed to the next test.
TEST 09 – AN EAGLE
After a painful process on jumping on that aerial faith plate thrice in a row. Place the blue portal on the ceiling right above the angled panels on your right when you come through that entrance. The orange one on the ceiling right above the aerial faith plate. Now, launch yourself with that faith plate and go ahead. Go left from there to see 2 angled panels. Place the blue portal on the angled panel that is facing a button on an elevated surface, connected to a cube dropper. Now go through that portal and launch yourself with that aerial faith plate once again. You will be launched to that button, so press it and get that reflection cube dropped down. Place the blue portal on the 2nd angled panel that faces the cube dropper. Now, jump into that portal once again to launch yourself with the aerial faith plate to the cube that is dropped. Take that reflector cube and align it so that the laser gets reflected to the laser catcher. You can see that there is a wall between the laser catcher and the laser itself. So, reflect the laser to that wall only. Now, place a portal on another angled panel that faces the exit instead. Go through that portal and launch yourself with the aerial faith plate to the exit door. Now, place a portal on the wall where the laser is going to, and another in front of the laser catcher. Now, you can see that the laser goes through a portal to the laser catcher, which opens the exit door for you. Now, get going!
TEST 10 – OVERCLOCKER
You can see that there is a space beyond that aerial faith plate where there is a cube. Use momentum to make your way to that cube and grab it. After grabbing the cube, portal your way back to that aerial faith plate. Now, launch yourself with that aerial faith plate, while grabbing the cube. Now, place the cube in front of the laser catcher to block the laser. Now, go back to that aerial faith plate, and launch yourself to an even higher platform. After getting even higher, place a blue portal on the left on that portable surface. You can also see that there is a button over there, press it and have the reflection cube dropped. That cube will come to you automatically, grab it and go down. The cube that you placed to block the laser, remove it and replace it with the reflection cube. Reflect that laser to the portable surface just opposite to the aerial faith plate that launches you to an even higher platform. Now, place the orange portal on the portable surface you reflected the laser to. You can now see that the laser goes to the laser catcher, so that the restrictions get raised. Now, grab that standard cube and get launched with the aerial faith plates. You will get to the exit, now, place the cube onto the button and get going!
TEST 11 – RISE AND SHINE
First, place the orange portal on the portable surface where the hard light bridge goes to. Place the blue portal right beside the exit. You will see a button over there, go ahead and press it. After pressing the button, there will be cubes you can see that will be dropped continuously into the deadly goo. Now, place the blue portal opposite to the gap in between the walls, and go through the portal to it. Now, go inside the gap on that hard light bridge, and you will see some portable surfaces. First, place the blue portal right below you on a portable surface and land on it. Then, on your right, place a blue portal on the portable surface right below you, once again and land on it. Now, grab the cube that continuously falls into the goo. Take that cube through the portal and drop it. Now, on your left from the entrance you come in, you can see that there is a button, behind some glass. So, place the blue portal on the portable surface opposite to that. Now, go through the orange portal with the cube and drop it on the button. Now, go back through the blue portal and place a blue portal beside the exit once again to make your way to the exit. Now, get going!
TEST 12 – BACK TO TESTING
After, you get through that entrance door, place the blue portal right above the hard light bridge that is present on the left from the entrance. Place the orange portal anywhere near you. Go through that orange portal to land on the hard light bridge. Now, place the orange portal onto the portable surface where the hard-light bridge goes to. Then, place the blue portal right under the cube dropper which was present on the left hand side after you entered the chamber through the entrance. Now, go ahead and press the button that activates the cube dropper and grab that cube. Now, place the blue portal right opposite to the wall where there is the exit. Jump on the hard light bridge with the cube and drop it onto the button to open the exit and get going!
TEST 13 – PALE SPHERICAL THINGS
All you have to do in this chamber is just take out turrets. Believe me, it’s very easy. Knock out the first one by holding and throwing or releasing it. The second-, wait a minute, this is very easy. No need to give a walkthrough for this thing. Just place portals behind, below, or above the turrets and take them out by going through the portals and holding them and then throwing or releasing them. At the last, just take a cube from the starting, and place it on the button to open the exit door and get going!
TEST 14 – LASER PARALLEL
First, move that reflection cube from its position and place it so that the laser goes through at least two of those…..cones. Then place a portal on the wall where the laser goes to, and another on the wall near the third cone. This way, all the three cones will be lit by the laser of the laser emitter, and the exit will open for you, so get going!
TEST 15 – CAN’T TOUCH THIS
First, place an orange portal to where the hard light bridge goes to and then place the blue portal on the wall beside the turret which was present on the left in order to block its vision like the turrets in the front are blocked. Now, get as close as possible to that turret on the left and then quickly place the blue portal elsewhere and knock out the turret. Now, in the front, you can see that there are 4 turrets on the right, guarding a cube. Place a portal on the portable surface in front of you on the pillar to block their vision. Make your way to the aerial faith plate in the front now. As you see, that when you launch yourself with that aerial faith plate, you get launched to another one. Now, place the blue portal on the wall present on the left side that i.e. opposite to the turrets. This will prevent you from launching from one side to the other, resulting in you getting stopped in mid-air, and landing on a platform. Now, go straight and drop on the cube to knock out all the 4 turrets and take the cube. Now, drop the cube onto the button to remove the glass that prevents you from entering the exit. You can see that there are 2 turrets over there, so block their vision too with a hard light bridge and portal yourself behind them to knock ’em out. And, make your way to the exit to proceed to the next test.
TEST 16 – SINGING BLASTS
First, avoid the turret that is in a vent on the left when you come through that entrance. Now, stand on the button, one portal on the floor where the laser goes to, and then another on the wall in front of the 3 turrets that stop you from going any further. This will destroy all the 3 turrets as the laser comes in contact with them. Now, carry the standard cube from there and place it on the button that activates the laser. Let the portals stay where they are. Now, use the reflection cube to reflect the laser to the 4 turrets that stand in your way and then just reflect the laser to the laser catcher and proceed to the exit to get going!
TEST 17 – NEUROTOXIN IMMUNITY
This test is the trickiest of all in my opinion. First, portal your way to the hard light bridge to get the cube. Now, place the portal on the portable surface where the hard light bridge goes to. And place the other portal near the entrance where the button is. In other words, just make the hard light bridge come right above the button. Now, take the cube through the portal to the bridge right above the button. Use the cube to block the laser. Now, go ahead and stand on the piston that leads you to the exit. Now, remove the portal which is having the cube on it and place it somewhere else. The cube will drop unblocking the laser and onto the button. This will open the exit and you will also be transported to it. Hopefully, that makes sense.
TEST 18 – TURRET DEFENSE CONTROL
After getting the worst ever surprise in portal history, place a blue portal anywhere near you and another on the wall that is behind the turret on the right hand side. Go through the portal and press the button. You can see that both the reflection cubes collide with each other and a have a seriously bad ending. So, place an orange portal on the ceiling where the vertical hard light bridge goes to. Then place the blue portal in front of the aerial faith plate that is on the side from where you came. This will prevent the reflection cube from going to the side from where you pressed the button and the other one will come over to there. Now, place a portal right behind you on a portable surface and portal behind the hard light bridge. Now, on the left hand side, where the laser is, you can see that there is also a portable surface, so place a portal there and the 2nd one should be right under the reflection cube so that they can get transported to the laser. Do the same with the second cube. Now, portal yourself to the laser as well. Place one reflection cube to reflect the laser onto another reflection cube. Take the second reflection cube and direct the laser to the turret and blow it up! Now, take the first reflection cube and reflect the laser to go through 2 cones. Now, put the second reflection cube right in front of the second cone and reflect the laser to the remaining 2 cones and the laser catcher. Now all 5 ticks are there to open the exit, so it’s opened. Now, place a portal on the ceiling where the hard light bridge goes to, and the 2nd on the left hand side of the exit to make a bridge to the exit and get going!
TEST 19 – LASER POSER
First, put a portal on the ceiling above the aerial faith plates and another in front of it on the floor. You can see that you get launched in the sky due to this. This is how you will use momentum in this chamber. Now, if you have placed the blue portal on top of the aerial faith plate on the ceiling, and orange on the floor, you have to placed a blue portal somewhere in order to get launched just like velocity. I hope that makes sense. You can see a laser on your right leading to nothing but a wall. Portal on that little area with the reflection cube. As soon as you get there, reflect the laser to the cone that is present on the left beside the laser. Now, if you go back to the entrance you can see that there is also a reflection cube on the right. Place a portal on the ceiling over there and travel through another portal to grab that reflection cube. After grabbing that reflection cube, once again use momentum to get the cube where you lit up the first cone. Place a blue portal on the ground, orange on top of the faith plates, and then when it launches itself in the sky place the orange one on the wall opposite to where the first cone was lit up by you. Make sure to also go yourself and not the cube alone. After doing so, once again reflect the laser from there to the cone that was present in front of the entrance to light up that one as well. Now, the last phase comes in. If you go back to the entrance then you can see that there is also a reflection cube on the left on an elevated platform. But as discussed earlier, use momentum to get to that cube. Grab it and portal to the entrance straight away as there is a portable surface over there as well. Take the cube with you over there and yet again reflect the laser to the laser catcher this time. Make sure that you also destroy all the turrets over there with the laser that you reflect. Now, once AGAIN use momentum to launch yourself to the panels that pop up once you get all the things done. Make your way to the exit now to get going!
TEST 20 – TRI-LASER SHOW
When you come in, you can see that there are 3 lasers. On your right, you can see 3 laser catchers. Place a blue portal over there in front of the 3 laser catchers on the pillar. Then, on the left, you can see an angled laser pointing at the wall. Place the orange portal over there at that point. You can see that the laser goes straight to the laser catcher. Now, reflect the laser that comes from the ceiling to the laser catcher that is on the right. In the end, the laser that is normally placed and comes straight can be reflected in between the 2 lasers to go to the laser catcher in the middle. This way, all the laser catchers get activated and the exit door opens.
TEST 21 – THE ESCAPE
First place a portal to where the beam bridge goes to and then another on the left hand side of the exit where the button is. Travel through the portal and press the button to dispense the cube. But, wait a minute, who turned the lights off? Oh wait! SPOILERS! SPOILERS!
TEST 22 – THE DEER
Come in and die if you want to. There is a companion cube on a button, opening the door to heaven. You do wanna go there right? Oh, wait a minute, SPOILERS! SPOILERS!