This guide has everything you need to know about Railjack and Empyrean update. It’s constantly getting updated and will expand it as it goes. If you have other questions that are not inside this guide , feel free to ask and I will add them to the list.
Warframe Empyrean & Railjack Update Guide
Intrinsics Farm / Must Have Talents
The way Intrinsics work is just like Affinity from the Core game. Everything that you do to help mission succeed , from repairing the ship , killing boarders , completing missions , killing fighters gives Intrinsics points. Also Affinity Boosters work on Intrinsics so I highly recommend using one if you want to max them more efficently.
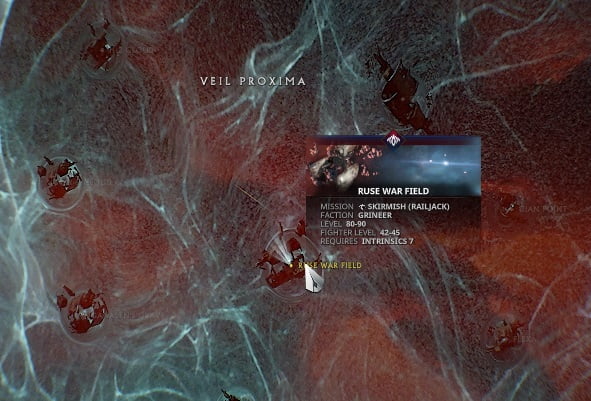
The fastest way is Either doing the Highest leveled mission you can on Veil Proxima “Ruse War Field” , or alternatively doing a mission that doesn’t have an active / primary objective , such as ” GIAN POINT ” , where your only requirement is to kill 90 Fighters and 6 Crew Ships. Hence you can finish the mission faster and repeat. This is also a good way to get LAVAN / VIDAR components for Railjack , because Mission completion bonuses are the only way to farm them.
Tactical Level 3: to be able to teleport WITHIN the ship, so in case of emergency or just for the convenience sake, you can teleport to everything that is useable inside the ship (Forge, Slingshot, Side Guns, Pilot seat, etc) [In order to use this function, click “L” button to open the Tactical Command screen]
Tactical Level 4: for being able to Teleport to the Railjack when you’re outside of the ship (The way you teleport is you click your Omni tool from Gear scroll, and instead of taking out the repair gun, it teleports you back to the Railjack after a 4 second cooldown.
Tactical Level 10: So you can teleport yourself to your teammates
Level 2: Gunnery gives you 360-degree vision (Removes the ship entirely from your vision so you can shoot at any direction)
Level 3: Gunnery Allows you to use Slingshot, which allows you to catapult yourself to the enemy Crew Ships without ever leaving the safety of Railjack (Works really well with Tactical Level 4, because once you destroy the Crew Ship’s reactor, you can click your Omni tool and teleport back to the Railjack, hence never actually use your Archwings and risk dying.
Level 5: Gunnery Allows you to use the Frontal Artillery, which is the ONLY way to kill Crew Ships without infiltrating them and destroying their core from the inside ( You have a lot more chances to 1 shot a Crew Ship, the more closer the Railjack is positioned to the Crew Ship itself. So on Veil missions, ideally you would want 1 person piloting, and keeping the Railjack as close to the Crew Ship as possible, while another crew member shoots the Crew ship. This way you can almost guarantee a 1 shot kill every time and not waste additional DOME charges.
Level 6: Gunnery Reduce Turret Heat acceleration by %20 which allows you to shoot more, which is always great
Level 7: Gunnery Reduce Overheat recovery time by %50 which is also great, allowing you to shoot more often = more DPS
Engineering: is just a masterpiece in itself.(First 5 levels allow you to craft weaponry while still in a mision, excluding 4th which gives %25 more Forge yields) every other level of Engineering gives really good benefits, %25 Faster forgery crafting, %50 more yields from forgery, so normally you would craft 50 Relovite, at Level 7 Engineering, you craft 75 instead. etc , I recommend maxing this tree after getting everything +5/+6 levels.
Level 9: Engineering gives %10 more yields from Refinement , So it is a really useful talent to have , but since it’s so deep down the tree , by the time you get it , you will probably have more materials than you know what to do with. It is a really good ability but it’s uses are diminished by the fact that requirements for it are too much (Also you can just avoid farming materials all together via buying a “Repair Drone” from the Market which mitigates having to farm resources for part repairs.
Level 5 Pilot: works really great, but it’s kinda weird. Instead of using it as a boost, the way it works is you double click shift (or your boost button) when you’re STANDING STILL, then click forward afterwards, the longer you hold, the longer you can blink, With my MK III engines, I can travel +8000 Meters with just 1 boost charge , which is insanely good. It can out-speed blink archwings with ease.
Veil Proxima Ships Healing
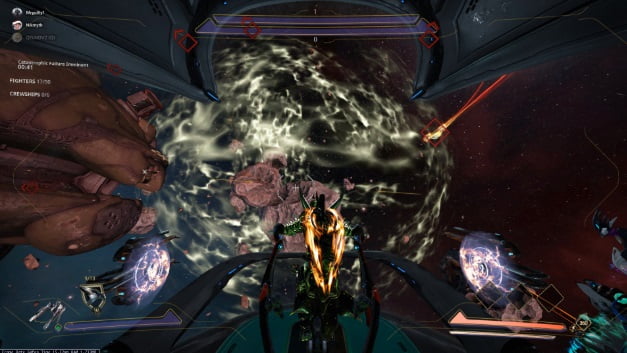
In Veil Proxima missions , Crew ships have the ability to throw out a White Shield to the friendly Fighter ships that are damaged ( Similar to the ones Nullifiers have right now ) , these Shields heal all the ships that are located inside these shields. Sadly as far as I know only the HOST can see these shields (Bugged for everyone else ATM) , so whoever is the Host , should put some guns that has a high fire-rate on Pilot guns section ( Vidar Carcinnox MK III’s are my choice) , and actively hunt these shields to avoid enemy ships getting healed constantly (Sometimes the ships gets bugged and they heal forever even though they’re not in the shields anymore , which makes them practically immortal)
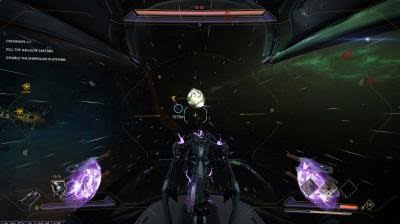
Hidden Quest (ERRA) SHEDU Farm
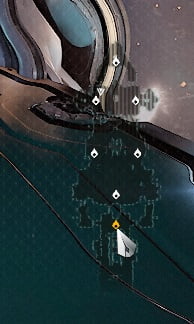
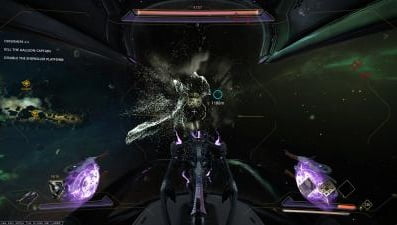
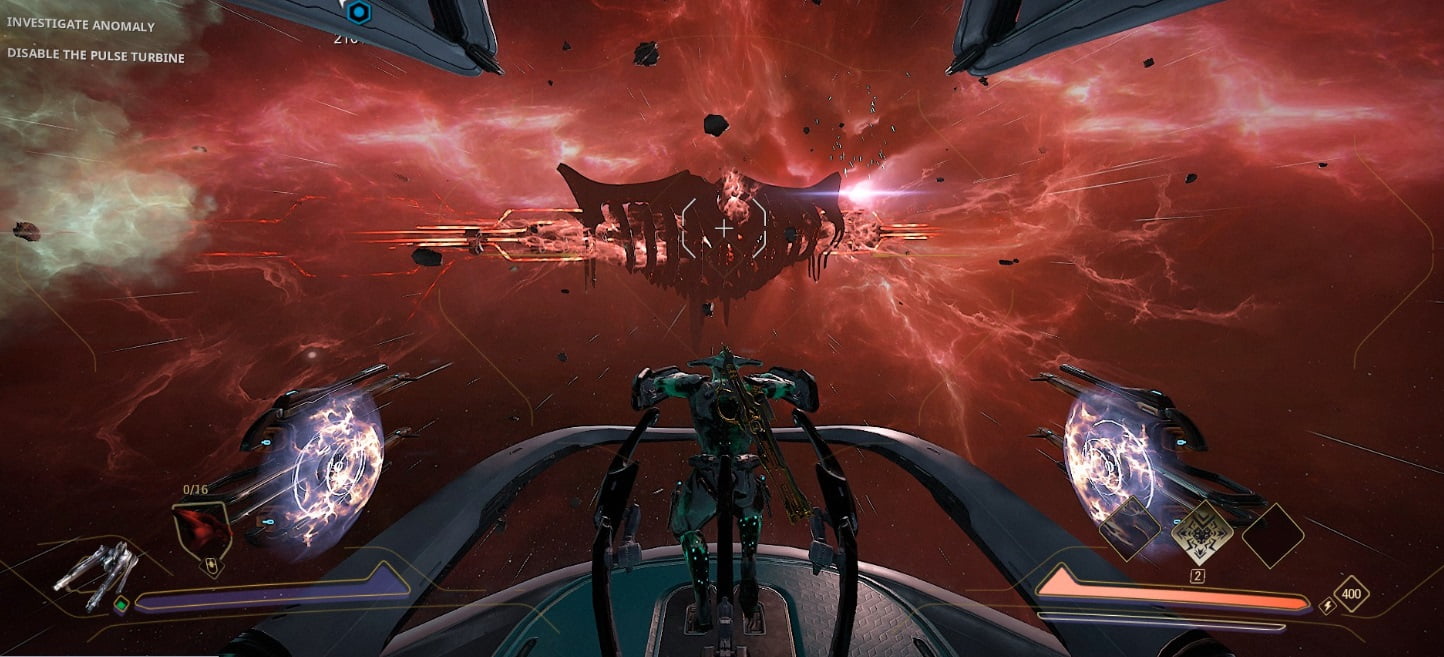
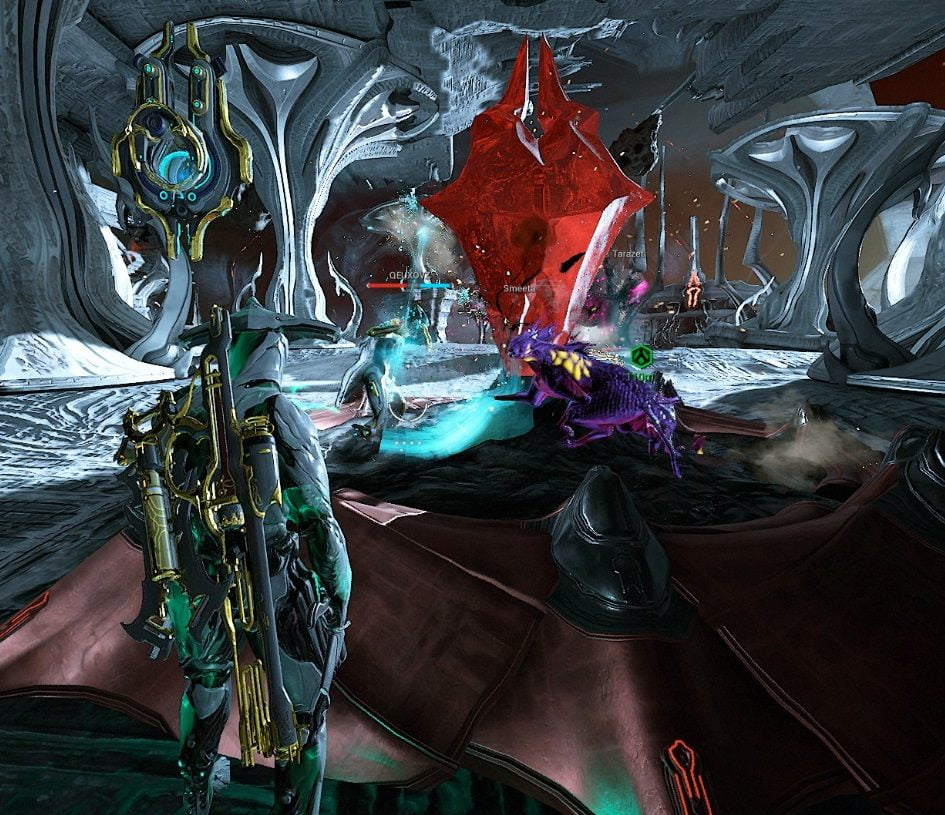
The mission has a chance to spawn randomly at any Veil Proxima node , the node where the Sentient ship spawns , blinks red on the Star map. It spawns a mission objective called “Investigate Anomaly”. The quest appears randomly every 3 hour for 30 minutes and is an actual mission objective , so you don’t need to scour every part of the map to find it. (The ship is extremely huge so it will be hard to miss it anyway)
NOTE: You MUST have Paracesis equipped! (Acquiered from Chimera Prologue quest) in order to destroy the Red Crystal at the end , otherwise you won’t get the quest.
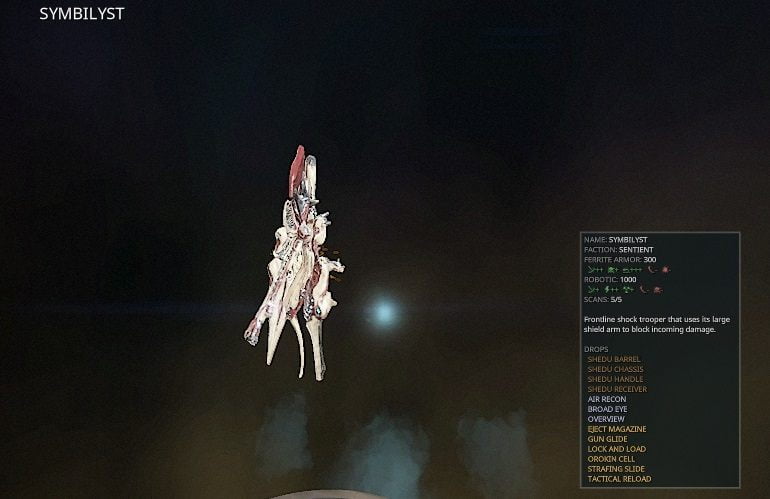
NOTE 2: Nekros Desecrate works on SYMBILYST SHEDU part drops , highly recommend using one.

1.000 Ducats , 15 Orokin Crystals , 5 Eidolon Shards , Galatine (BP of Galatine can be bought from the market)
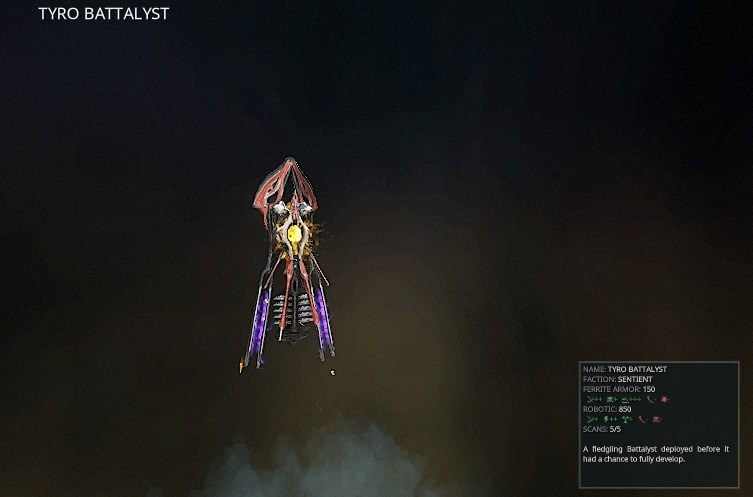
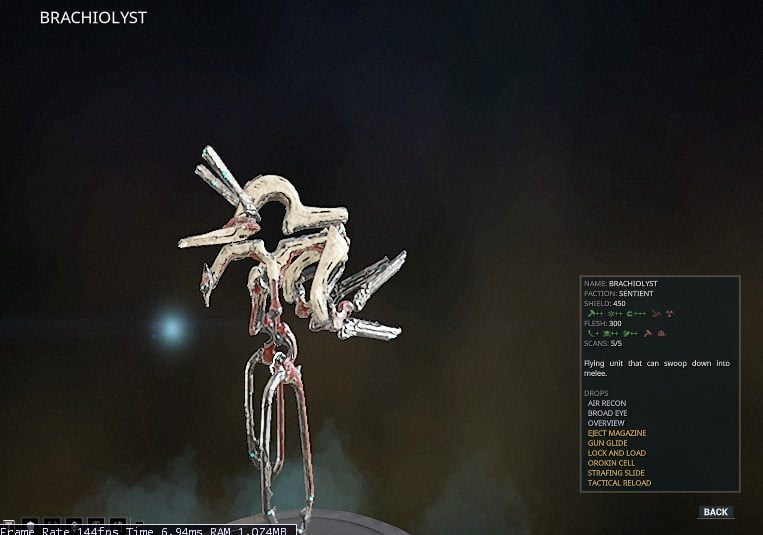
Inside the ship , you need to kill 20 Sentient beings , among them there are new Sentients that are just being introduced , such as Symbilyst , Brachiolyst , Tyro Battalyst.
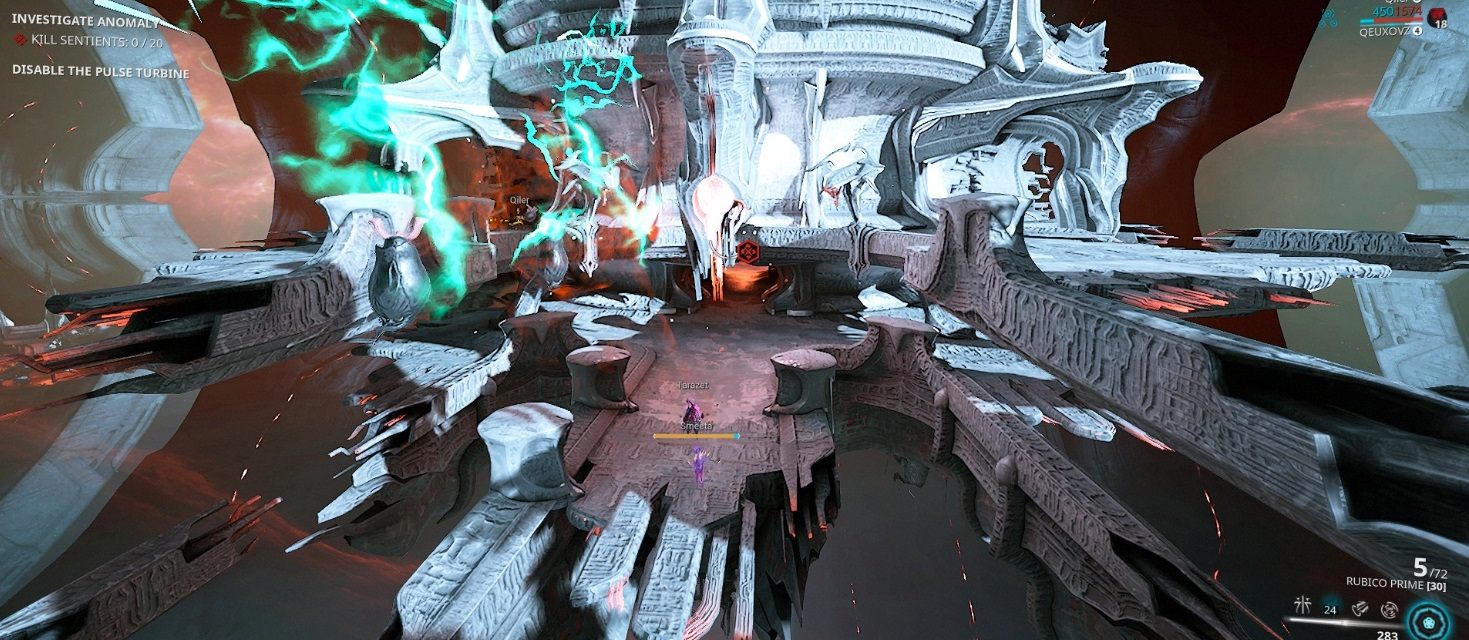
Symbalists are the only important one for now , because they drop SHEDU weapon parts.
After killing every sentient on the ship and making your way to the end, Just in front to exit , there is a big red crystal that can be destroyed ONLY with Paracesis equipped. You have to just auto-attack the red crystal and it will shatter. Upon completing the mission , you should return to the relay and ERRA quest will start unfolding.
In order to Craft the SHEDU weapon , you need to farm its parts , they only drop from SYMBYLIST sentients , and have only %4 chance to drop any of the 4 parts.
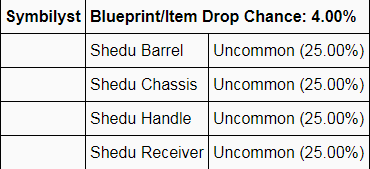
- Symbilyst Blueprint / Item Drop Chance : 4.00%
- Shedu Barrel Uncommon (25.00%)
- Shedu Chassis Uncommon (25.00%)
- Shedu Handle Uncommon (25.00%)
- Shedu Receiver Uncommon (25.00%)
How to Increase Avionics Capacity ?
Avionics Capacity can be increased by getting a better reactor. Default Capacity is 30 , any additional capacity can only be added by getting a Reactor Component
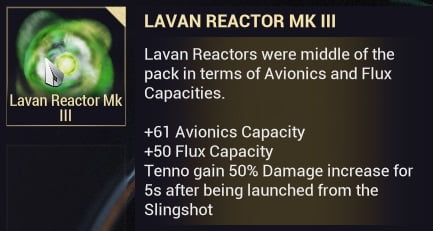
Lavan Reactor MK III gives relatively high Capacity , ranging from +30 to +60 as you can see below. But best possible reactor drop would be Vidar , which can give +90 Avionics Capacity
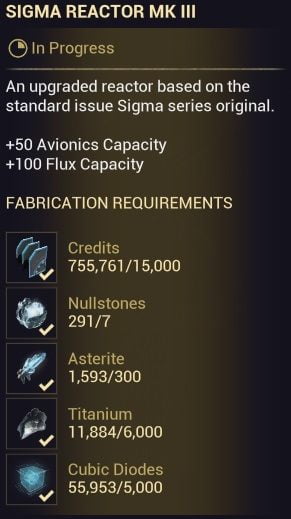
Easiest way to obtain a decent one is from Dojo Research. a MK III Sigma Reactor Gives +50 Avionics Capacity , which is higher than any MK III Zetki Reactor can give.
Vidar Reactor is rumoured to be able to get +90 Avionics capacity but sadly I don’t have one myself yet. ( I will update the guide as soon as I get one )
Which loot goes to the Forgery ?
ONLY the loots you get from outer space , ( the blue orbs that drops from destroyed enemy ships gets added to the forgery , and yes if you don’t refine after the maximum payload capacity is reached (Which is 200) , the rest will be wasted. So remember to refine often.

Unused resources are automatically refined now if you teleport the ship to the Dojo after mission completion.
New Weapon Blueprints
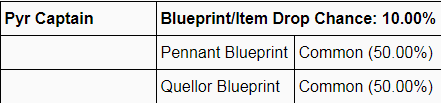
The new weapon Blueprints can be looted from Astroid Bases , Grineer Galleons. Pennant and Quellor Blueprints are now shared pickups; no longer required for all players to manually collect the pickup!
- Pyr Captain Blueprint/Item Drop Chance: 10.00%
- Pennant Blueprint Common (50.00%)
- Quellor Blueprint Common (50.00%)
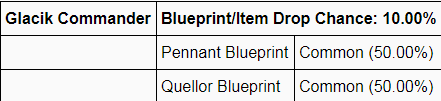
- Glacik Commander Blueprint/Item Drop Chance: 10.00%
- Pennant Blueprint Common (50.00%)
- Quellor Blueprint Common (50.00%)
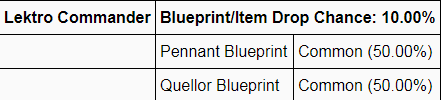
- Lektro Commander Blueprint/Item Drop Chance: 10.00%
- Pennant Blueprint Common (50.00%)
- Quellor Blueprint Common (50.00%)
- Blite Captain Blueprint/Item Drop Chance: 10.00%
- Pennant Blueprint Common (50.00%)
- Quellor Blueprint Common (50.00%)

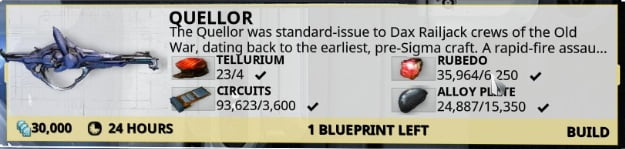
Quellor Build Requirements
Pennant Build Requirements
Intrinsics Archwing Buffs Work on PoE/Fortuna
So , Level 8 of every Intrinsics tree gives an Archwing buff.
- Tactical level 8 Reduces Archwing Blink Cooldown by 25% (From 3 second Default to 2.2)
- Piloting Level 8 Archwing speed increase by 20%
- Gunnery Level 8 Increases Archwing Power : Damage 25%, Ability Strength 20%, Ability Range 20%, Ability Efficiency 20%
- Engineering Level 8 Increases Archwing defense, Health 30%, Shield 30%, Armor 30%
- Itzal Blink is back on the menu ! 6×3 Eidolon Hunters should definitely consider getting Tactical 8 and Piloting 8 for Travel speed!
Which Armaments are best to use and why ?
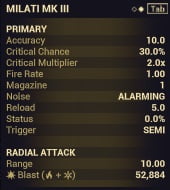
Milati; Pretty much your go to if you’re lacking damage. Has the highest damage out of all the Armaments but it’s harder to use compared to Tycho Seekers , which practically has Auto Aim.
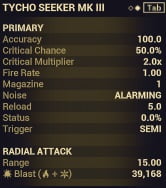
Tycho: Missiles are my go to in any mission. MK III version can 1 shot any ship (Excluding crew ships) , especially if you have Warhead Avionics mod , which increases Armaments damage by +60.5%
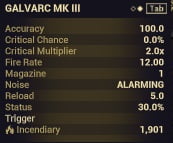
Galvarc: Is probably the worst out of the bunch. Really underwhelming compared to the other two. I wouldn’t recommend using it. It can only shine if you manage to trap all the enemies in one place with Void Hole / Tetter Battle mods , but then again , Tycho Seeker and Milati also does “Splash Damage” so it still performs worse.
I highly recommend having this Mod in your arsenal. Allows you to 1 shot pretty much every single fighter ship even on Veil difficulty.
How to use Frontal Artillery effectively and 1-shot Crew Ships on Veil
In order to access Frontal Artillery , one must have Level 5 Gunnery Intrinsics unlocked first.
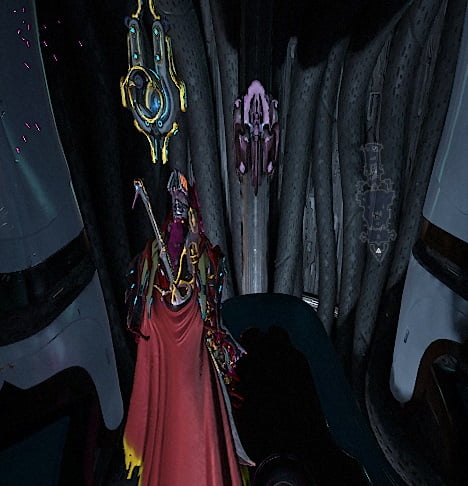
It’s located just behind the Pilot seat as you can see below.
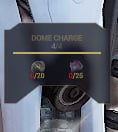
Then you need to make sure you have DOME Charges crafted to fire. They’re the ammunition of Frontal Artillery and can be Crafted from Forgery (Max Capacity is 4)
Level 7 Engineer can craft 2 Dome charges instead of 1
You need 20 Carbides and 25 Plustrels to craft 1 ( or 2 if you’re Engineer 7 )
You can 1 shot ships on Earth Proxima , and Relatively Easy with Forward Artillery Avoinics on Saturn , but for Veil Proxima , it gets a bit more difficult.
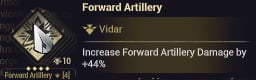
Is a good addition if you want to 1-shot Crew Ships on Veil Proxima.
The key condition to 1 shotting a Crew Ship is , someone with high Puncture Weapon , aka Plasma damage (Railjack specific damage type while on Archwing) has the ability to Reduce enemy max health and armour value, [similar to corrosive and viral procs])
This strips all that extra armor the Crew Ships have and allows the Forward Artillery to 1-shot really consistently on any Veil Proxima mission , even without Forward Artillery!
Do I still keep the materials and Blueprints / Intrinsics levels if I don’t have a Railjack of my own?
Yes you do. You can still improve your Intrinsics while you’re on your Ship if you Click ESC—>Profile—>Intrinsics and level them up from there.
The Materials and Blueprints works like any other resource in the game. But be careful , you have a limit on how many Broken ship parts (Blueprints) you can carry. You can buy more slots from the Market if you wish.
Your best bet is still trying to get your OWN Railjack as soon as you can!
Damage types for ARCHWING WEAPONS
The following applies to your railjack weapons as well as any elementals you have equipped in your archguns:
Any combined damage types in archguns are separated to their individual elements when used on railjack specific enemies (ie crew ships and fighters.)
However, if used on normal enemies (ie grinner invading your railjack), the combined damage will be used instead.
- Impact becomes Ballistic damage (concusses enemies. They have reduced aim and damage)
- Slash becomes Particle damage (Breaks through hull, allows increased damage over time [similar to corrosive proc and damage])
- Puncture becomes Plasma damage (Reduces enemy max health and armour value, [similar to corrosive and viral procs])
- Toxic becomes Chemical damage (Confuses enemies to friendly fire, [similar to a radiation proc])
- Electric becomes Ionic damage (Deactivates enemy ship controls, [similar to a stun])
- Heat becomes Incendiary damage (Causes fires within ships. Damage over time effect)
- Cold becomes Frost damage (Freezes enemies to a stop)
If you, for example, use corrosive damage on an enemy ship, it will be separated to electric (Ionic) and toxin (Chemical).
For using archguns against enemy ships, build for status, ignore crit builds. Crit builds are not more effective than status builds.
Most efficent way to spend your RELOVITE and why you SHOULDN’T repair Hull Breaches as soon as you can
Don’t repair the “Hull breach”s as soon as they appear. There is a 55 seconds timer on it.
The way it works is , you can hold the repair to the last 10-15 seconds ( Ship is immortal in this state) so you can save yourself from running out of RELOVITE really quickly or just wasting resources in general.
This way you give more time for Forge to finish building , and pretty much as long as you’re killing enemies with a relatively fast pace , your ship will be immortal even though you may have 0 defensive Avionics.
Repairs:
- Electricity (Blue) decreases max Shield capacity by 100.
- Hull Ruptures (Orange) decrease max Hull capacity by 300.
- Heat (Yellow) deals damage over time to hull, 1 damage per second for each.
- Cold (Dark blue) freezes the doors shut.
How and When to Refine , General Forge Usage
You can refine materials at the Forgery (Located at the tail of the ship) , which sends extra/unused materials to your inventory for further use (aka repairing broken component parts)
Refining is done automatically now at the end of a mission IF you’re going back to the DOJO. If you don’t return and just start doing another mission instead , the materials on Forge will stay in their place.
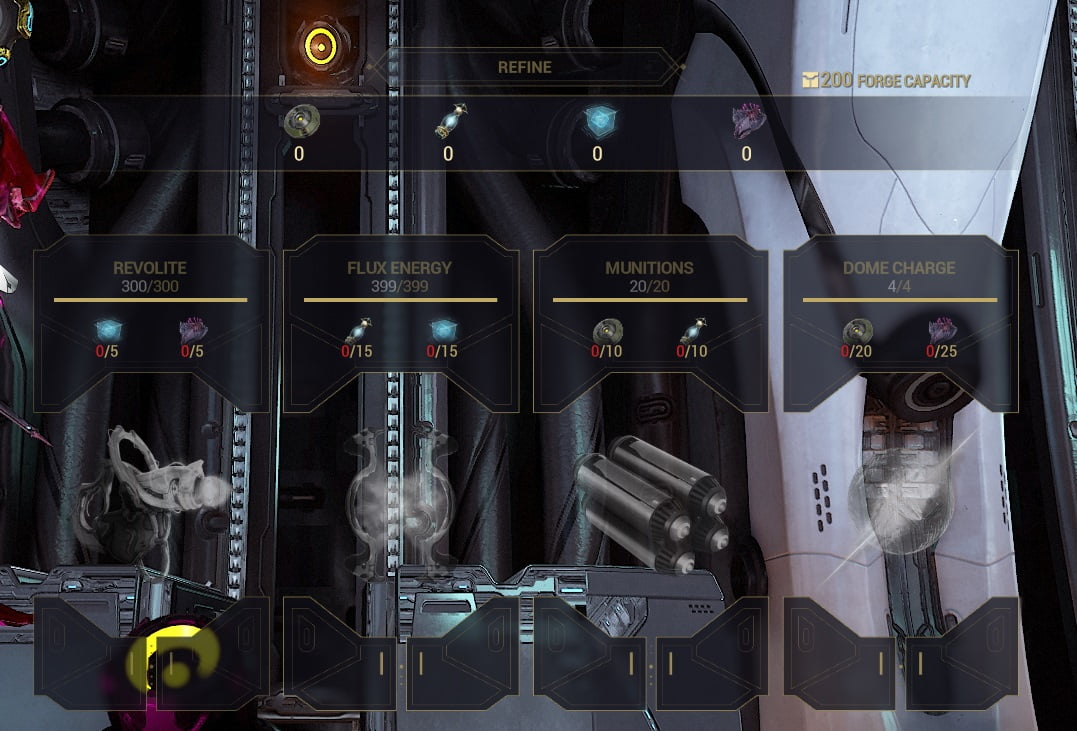
Forge has 200 Material Capacity of Each. After this , the collected surplus resources will be wasted.
One should Refine often if you don’t want to waste resources but , be sure to craft every supply that you can ( Relovite, Flux Energy, Munitions, DOME charge) first , ESPECIALLY
Relovite if your ship is not a fully upgraded immortal Goliath already. Relovite is used to repair the ship with your Omni tool.
Crafting becomes more efficent as you level your Engineering level.


All CARCINNOX MK III Houses and Comparison
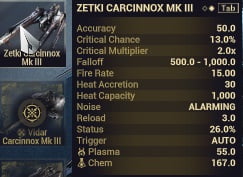
ZETKI CARCINNOX MK III
- + Best accuracy (50%)
- + Highest Status chance (%26)
- + Highest Base Damage (55 Plasma) (167 Chem)
- – 3 times the Heat Accreation ( Compared to VIDAR / LAVAN counterparts )
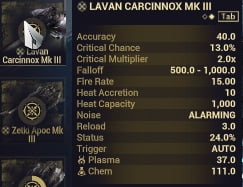
LAVAN CARCINNOX MK III
- + Lowest Heat Accretion ( Equal with VIDAR house)
- – Less Base damage (37 Plasma) (111 Chem) Compared to ZETKI (55 Plasma) (167 Chem)
VIDAR CARCINNOX MK III
- + Best Crit Chance (19%)
- + Longest Falloff[(the damage reduction from distance) 2,000-4.000 meters]
- + Lowest Heat Accretion ( Equal with LAVAN house)
- – Less Base damage (37 Plasma) (111 Chem) Compared to ZETKI (55 Plasma) (167 Chem)
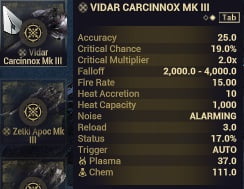
TL:DR Get Vidar , it’s best.
All PHOTOR MK III Houses
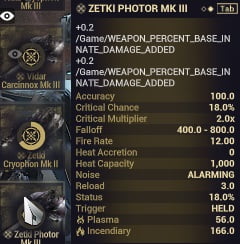
ZETKI PHOTOR MK III
- + Best Crit Chance (18%)
- + Best Crit Multiplier (2.0x) [Same as Vidar]
- + Highest Status chance (%18)
- + Highest Base Damage (56 Plasma) (166 Incendiary)
LAVAN PHOTOR MK III
- + Lower Heat Accreation (Even though it shows 0 everywhere)
- – Less Base damage (36 Plasma) (112 Incendiary) Compared to ZETKI (56 Plasma) (166 Incendiary)
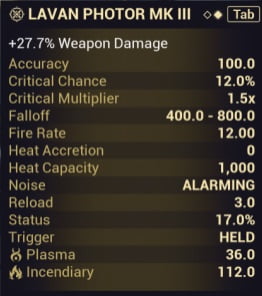
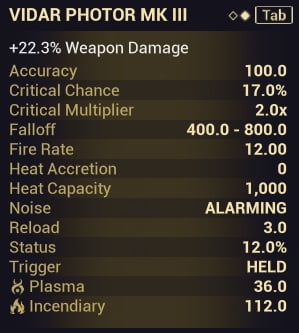
VIDAR PHOTOR MK III
- + Lower Heat Accreation (Even though it shows 0 everywhere)
- – Less Base damage (36 Plasma) (112 Incendiary) Compared to ZETKI (56 Plasma) (166 Incendiary)