Challenge Guide
Tips and tricks on how to win the challenge maps and gain the associated achievements in Project Hospital.
Mainly concerned about the 6 Challenge Scenarios available in the game and their associated achievements:
- Challenge 1: Emergency Master
- Challenge 2: General Surgery Master
- Challenge 3: Internal Medicine Master
- Challenge 4: Orthopaedy Master
- Challenge 5: Cardiology Master
- Challenge 6: Neurology Master
The tips and strategies in this guide are geared toward completing the challenges, but, some of the information may be useful in other scenarios and even in a sandbox map.
This guide is written with the expectation that you, as the player, already know the basics of how the game works and how the UI is set up. These challenge maps should not be the first thing you do when you buy the game. Play the tutorials and the campaign first before jumping into the challenges. If a basic walkthrough is needed then please check out the other guides here on steam.
This guide was written with version 1.2.19532, Doctor Mode DLC and Hospital Services DLC installed.
Hostpial Services DLC is not required but highly recommended.
No mods were used while researching this guide.
The term “Hospitalization” – I will use this term throughout the guide to refer collectively to observation, ICU, HDU and regular hospitalization for all associated departments. I may use more specific terms when it is relevant.
NOTES ON DLC
The Hospital Services DLC is not required to complete the challenges but is highly recommended.
In the Hospital Services DLC you get access to new departments which include the pharmacy, pathology and the gift shop.
Pathology is all about doing autopsy’s on dead patients. If your patients are dying enough to warrant pathology then you are going to lose the scenario; don’t bother with pathology.
The Gift Shop is about selling stuff to visitors who are in your hospital to see hospitalized patients. Visitors will seek out a lounge area to meet with patients. so in order for the gift shop to be effective you also need to build a lounge. The expected income from a gift shop will not support the investment needed for a 10 day challenge with limited funds, however, it will generate some revenue. Build the gift shop at your own risk.
The pharmacy basically prints free money. Every patient that is treated in your hospital will have some kind of medicine they need to alleviate their symptoms. Without a pharmacy they just walk out the door and give their money to the drug store down the street. If you have a pharmacy department you essentially get bonus money for every treated patient. This bonus can range from 10-400 dollars per patient and can be worth more than the treatment itself.
The pharmacy should be placed near the entrance of your hospital (where patients leave) and can be fairly small. I suggest hiring 2 pharmacists during the day and 1 for the night and watch the money role in.
GENERAL STRATEGY
Each challenge map has the same objective; treat 90% of all patients you receive each day for 10 days.
Seems simple enough, right?
The challenge is that each day (starting with 36 on day 1) the game will increase the number of total patients that come to your hospital. By day 10 you will have 90 patients to treat. On top of that the challenge modes have limited resources. You are given 100,000 dollars at the start of each map and
there are no loans available. Another problem you have to deal with is that the default hospital they give you is inefficient and won’t get you passed day 5 on the easiest of maps.
In addition to this, all departments are grayed out except for the clinic, the specialization of the map and the new services and pathology departments.
Events are locked during the challenge mode.
No other insurance objectives will be available other than the default challenge.
Random events can occur which can increase or decrease the number of patients or the amount of money you can earn. Usually, random events are double edged sword. You get more patients which gives you more money and gets you closer to the daily goal, but, you put more strain on your hospital which risks more patients leaving in frustration.
All of this makes the strategy about designing an efficient hospital with limited funds that can handle the large patient load without too many people leaving or dying. Because the challenges ask for 90% you can have a few patients leave or die each day, but, if this happens too often you will lose.
MONEY SAVING TIPS
Basic Tips
1 – Don’t worry about the floor tiles. Floor tiles cost money and have no effect on the game.
2 – Move items around instead of deleting and re-buying. Deleting an item will only get you a partial refund. Moving items is perfectly free. If you need room to move things around then put items in a nearby corridor or even outside if you need to.
3 – Sell unneeded items. Each map has a ton of excess items just lying around that you can sell for extra cash. All the items outside (including the road signs) are sell-able. Do you really need 4 potted plants in the lobby? There is even junk on the roof of the building which is sell-able. Most people never look at the roof, but, there is free money up there! Also, look for decals on the wall. The decals do nothing and can get you a few extra bucks.
4 – Don’t use prefabs! Prefabs are bigger than required and contain a ton of unneeded items which you still have to pay for. Of the three most important resources on the challenge maps (Time, Money, Space) prefabs waste two of them; money and space. it may be a little tedious at first, but, you are well advised to design your own prefabs with minimal space and objects.
Advanced Tips
5 – Don’t worry about walls…that’s right, you heard me. the game actually doesn’t require walls for rooms to work, only that a space on the ground is designated as a room and has the proper equipment within that space. Some equipment will require a wall to exist because it has to hang up (life support for HDU beds for example). Just a single section of wall for the item you need. Even though this game is designed with realism in mind, one thing it does not simulate is privacy!
6 – Don’t worry about restrooms or staff rooms. Employees, patients and visitors have needs to fulfill. When they go to fulfill that need (like using the restroom) they search for the nearest object, not a room. This is an advanced tip because you can get really crazy with this. You can put toilets in the hallway, sofas in the xray room, vending machines in the surgery ward and it all still works! The only needs related items you will really want are a toilet, coffee machines, water coolers and a sofa. Coffee machines and vending machines can also produce income when used by patients and visitors, these are free for staff to use.
7 – Don’t worry about prestige. Prestige is important for campaign and sandbox because it can directly affect the number of patients which then influences your income. The Challenge maps have a preset number of patients every day so prestige is mostly unimportant. This means you can forego things like decorations, radios and TV’s and you can worry less about employee traits. That nurse is unpleasant? Who cares if they can help get patients treated faster!
8 – Sell the ambulances! On challenges 2-6 you will start the game with 5 ambulances. This is overkill as the map says it will only ever send 10 trauma patients to your hospital on the final day. each ambulance can get you 3 patients so you only need 3 to meet 9 out of the 10 patients on the final day. That is 2 extra ambulances that you will never need. But, wait! What if you sold all the ambulances? Guess what, you can still win the map. If you have no ambulances the game just sends trauma patients in the form of patients collapsing in the hallway. Each ambulance is worth 35,000 dollars! This is a huge influx of cash, use it wisely.
TIPS AND TRICKS: Part 1
This section will detail some general tips and tricks that apply to all challenges and may be transferable to other scenarios and sandbox mode.
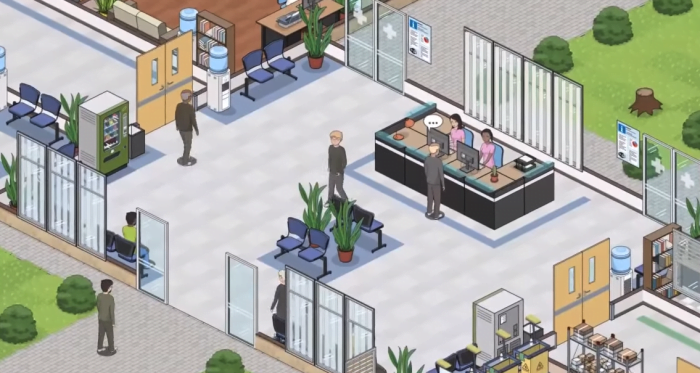
Tip 1: Survey and Redesign – As soon as the challenge begins pause the game and do a survey of the hospital. You will want to get a general idea of what departments you have and where all the rooms are placed. You may notice that some rooms are disjointed. For example, in challenge 1, the waiting rooms are all over the place. you can easily fix this but re-drawing the rooms to make them more contiguous. Having one long contiguous waiting room can help distribute the patient load among your doctors. If each office has its own waiting room then the game may assign more patients to one office than the others. This can lead to one office having a critical workload while the others are left idle.
Once you have done your survey, you will most likely realize just how inefficient the default hospital really is. The inefficiency stems mainly from the fact that the hospital is built using the in-game prefab rooms. The prefab rooms look cool and are designed with “realism” in mind. However, this is a game and as such “realism” is only going to cost you money and space.
On challenges 1, 2 and 3 you can keep the prefabs as-is and expand with more efficient layouts as you progress. On challenges 4, 5, and 6 you will want to completely re-do the layout for higher efficiency. For example, if you create your own 4×6 design of the clinic doctor’s office you can easily squeeze in all the “needed” items and be able to get more offices into the same area which in turn allows you to see more patients with the same amount of floor space.
Redesigning the layout will take you quite a lot of time which is why you want to pause the game. While doing this, you save a ton of money by moving objects from the old room to the new room. Only move the required items to get the room operational. Any excess items you can sell for extra money. If an item is not able to be moved it’s probably because it is a workstation that is currently assigned to an employee or it is a chair that is currently being interacted with. To unassign a workstation you can simply delete the room. With the room deleted, the employee has no workspace so the desk and computer can be moved and the empolyee can be reassigned. For chairs or other objects that are currently being used, you will have to un-pause the game and wait for the employee to move.
When you are familiar with the layout and have redesigned the rooms you need to go through every room in every department and ensure that each room has staff ready to go. You will want to make sure the clinic is open for the night shift. Make sure each department has at least 1 janitor for day and night. Have at least 1 receptionist in the start, by day 5 have 2 receptionists for the day and 1 for night. Each lab should have 2 technicians working day and 1 at night and every radiology room should be staffed day and night. The on-call rooms should start with 1 nurse and doctor for day and night and should increase by 1 every other day depending on how many patients there are. For maps with a surgical department you will want 2 surgical teams on day shift and one for night shift. Surgical teams are in addition to the doctors you have in the on call room for hospitalized patients.
Tip 2: Add New Foundations – On challenges 4, 5 and 6 you may need more room to expand. You can do this by deleting all the exterior items (which you should do for extra money anyway) and then expand the foundations of the building as needed. this also gives you more space on higher floors.
Tip 3: Efficient Hospitalization – When designing hospitalization (Observation, ICU, regular hospitalization and HDU) create a single, large room with many beds. Each time you make a separate room, those rooms will all need the same items in order to be complete. For example, you will need a defibrillator in each room. If you build multiple HDUs for each patient (ie a private room) then each room will need its own defibrillator. However, if you build a large ward with 20 beds, then you only need a single defibrillator to make the room “complete”. This can save a ton of money.
Hospitalization will be one of the major bottlenecks in these challenges. The game starts you off with a few beds, but, by the end of the scenario you will need 20+ beds in HDU alone so space is a premium. remember that privacy is not an issue in this game so you can squeeze those beds together as close as it will let you and the game will still function just fine.
For added efficiency put a nurses station and on-call doctors office right next to the HDU and do not add walls. this will give the nurses and doctors direct access to the patients they need to serve.
Tip 4: Hidden Efficiency – The game isn’t great at letting the player know what items have actual use and which ones are just for decoration. In addition to the items you need to make a room operational there are some items that you can benefit from that aren’t even listed in the items for the room.
- Defibrillator – When a monitored patient crashes a doctor or nurse will need to run over to the nearest defibrillator in order to save them. If the room is large (as suggested in the tip above) this can lead to patients dying if the defibrillator is too far away. So, even though you only need one to complete the room, having an extra one and placing them in strategic spots is going to save patients in the long run.
- Mobile Workstation – When a patient is prescribed medication during hospitalization the doctor must go to the nearest computer in order to do the prescription (I guess its simulating inventory or just updating patients records). If the nearest workstation is in the on-call room, then they have to walk all the way back to the on-call room in order to prescribe the medicine. What a waste of time! The mobile workstation offers doctors a place to do prescriptions without needing to go back to their desk. HDU and regular hospitalizations do not require a mobile workstation, in fact, they don’t even show up as recommendations. You have to search through all the medical equipment to find it, but, its well worth the increased efficiency.
- Whiteboard – when a doctor has the advanced diagnosis skill and performs a differential diagnosis, they will use a whiteboard to make this diagnosis faster, otherwise it takes a while. Paging Dr. House!
- Toilet/restroom – As stated above, patients and employees have needs. When patients are mobile they can be seen getting up out of the beds and wandering the halls for a toilet. This can delay treatment as nurses and doctors can’t treat or move a patient if they are not in their bed. If you build a small set of toilets in the ward they don’t have to go very far. If you build a sofa and bookcase in the ward the patients will use those as well.
TIPS AND TRICKS: Part 2
Tip 5: Personal Rounds – On challenge maps 4, 5 and 6 you will need to take a more micro-management role in the treatment of your patients. Each night at 20:00 (shift change), go through all your hospitalization wards and check on each patient. Often times your doctors and nurses will only administer treatments for life threatening symptoms and only if it directly relates to the diagnosis. You also can’t treat a symptom if its still hidden. A patient can have a 100% diagnosis but still have hidden symptoms. Patients seem to recover faster when all of their symptoms are treated and revealed and at the very least, it prevents the patient from collapsing and dying. (There may even be a direct connection to how much the spend at the pharmacy when they leave). Your job during your rounds is to ensure that all patient symptoms are revealed by ordering new tests and prescribing all the available medications to treat all the symptoms. Make sure a mobile workstation is nearby to improve efficiency. A patient is fully tended to when all symptoms are revealed and they are all black in color (which means they are suppressed). Treatments will show as orange if they are in the process of being administered. If any symptoms are red then they need to be tended to immediately or could lead to a collapse.
Tip 6: Debt is your friend – The game in general does not end if you are in debt. You will still be able to pay staff wages and you can continue to hire new staff (and even uncover hidden traits of candidates) while you are in debt. You should use this to your advantage. You can also buy anything so long as you have at least 1 dollar in your account. This means that you can buy an MRI machine (which costs ~60k) with just a single dollar. This even works on prefabs; with just 1 dollar you can buy an entire prefab because the game considers it a “single” purchase.
Whats more important is to know when to spend your money. Staff wages are paid at shift change (7:00 AM and 20:00 PM). If, somehow, you managed to make enough money to have some extra cash (like say 100 dollars in the positive) but shift change is coming and you need a new bed in HDU then spend that money now before shift change occurs. The caveat here is that you can only make one purchase and if that drops you in the red then you are done.
In the case of buying new beds for HDU, each bed has other items it needs in order to function (a table and a life monitor machine). The order you buy the items is also important and may require you to do some math if money is tight.
For example a Bed may cost 599, life monitor is 1499 and table is 99.
if you have 2000 dollars available you can’t buy all the items without going into debt. If you buy the life monitor and bed first then you will go into debt before you can buy the table, but, if you buy the table and bed first, you can go into debt buying the life monitor and have a working bed to add to HDU. An even more advanced strategy is to buy a prefab HDU as a single purchase, then move the equipment you need and sell the rest. Or, you could move an unused bed from another unit (ICU, observation, regular ward) and just buy what you need, assuming those wards are not already full.
This kind of mathematical micro-management may mean the difference between a patient getting treated (and you getting paid) or dying on the floor (and you losing the scenario) if there are no beds available.
Tip 7 – Staff Specializations – On challenges 4, 5 and 6 you will need to start micromanaging your staff, their specialties and their assigned jobs, which can all be found on their employee card. You will need to have a dedicated surgical team which should be separate from the on-call doctors that look after the patients in the hospitalization wards. Your nurses should also be specialized appropriately. After hiring a nurse ensure they either have the patient care or the surgical nurse specialty and set their jobs appropriately. It’s also a good idea to have some of your nurse interns (the ones with no specialties) set to patient transfer only. Setting some nurses to transfer only helps reduce transportation wait times.
Tip 8 – Stretch Goals – Around day 8 you may start to get messages that you don’t have enough stretchers. To help with this make sure you have at least 1 stretcher per nurse. Also, make sure your stretchers are in convenient spots. You can put stretchers anywhere, even in corridors and your staff will find them. However, they have to travel all the way to its location, transfer the patient then go all the way back to where it was originally found. Putting stretchers in strategic locations all throughout your hospital should help reduce transportation times.
Tip 9 – Rooms Within Rooms – This game’s “room” mechanic is quite powerful. You can create rooms of any size and and shape. you can even build rooms within other rooms. A great way to take advantage of this is to build a large HDU ward with lots of beds and then use the space in the middle for a nurses station and on call doctor’s office. since the rooms don’t require walls you can give the nurses and doctors wide open access to the patients. Since the HDU is all one room you don’t need a lot of excess equipment to make it operational. Just make sure the needed equipment is easily accessible to improve efficiency. You can also do this with lounges and gift shops, or restrooms and common rooms. You can experiment with different designs in sandbox, but, knowing that this is possible can help make your design more efficient.
WALKTHROUGH: Challenges 1, 2 and 3
I am not sure if it’s by design, but, the challenges seem to be in order of difficulty with challenge 1 being super easy and challenge 5 being diabolical without good micro-management. In general, the game is only going to give you patients that your hospital can handle, so, if they only give you a clinic its not going to send people with heart problems. Also, the other departments are not available to build, so, in a way that makes things a bit easier. The exceptions are the new DLC departments of pathology and services which can be built in all challenges.
In all challenges, oddly enough, the prefab laboratories they give you are fine; no changes needed. I suggest staffing them with 2 techs on day shift and 1 on night shift.
Challenge 1 – Emergency Master
This one is a cake walk and, honestly, with a bit of good randomness you can probably win this challenge without doing anything. Use this challenge to get your feet wet and get used to the games ever-increasing waves of patients. Experiment on efficient office designs and get used to taking over patients and administering tests and treatments (practice doing your rounds on the trauma patients in observation). Consider this your tutorial challenge.
Challenge 2 – General Surgery Master
On this map, the challenge ramps up a bit, but, notice that we have 5 brand new ambulances to sell immediately!
We also have a second department to manage.
On floor 1, in the clinic, we are given 6 doctors offices which should be enough, but, if you can find room for two more, it wouldn’t hurt.
We have 4 trauma centers and 8 observation beds which I find suitable.
ICU on the second floor is the perfect example of using multiple rooms of the same type where only one is needed. You can see on the second floor we have one ICU with 4 beds and another ICU with one bed. if you get rid of the excess junk, knock down some of the internal walls and combine the rooms together you can get 6 beds in here easily.
Radiology is good to get you through the first 5 days, but, eventually you will find that the X-Ray rooms are getting a critical workload and become a bottleneck. You will certainly want 3 X-rays and maybe a 4th if you can afford it. You should be good with the MRI and CAG rooms as is.
The General Surgery Department on the third floor is laughable. This is where things get complicated. It will work for a few days, but, very quickly you will start running out of beds and be behind on surgeries. Also, note, that all specialty departments have their own version of a clinic with doctors offices. So you really have three departments in one; general surgery clinic offices, the surgical ward and hospitalization.
The suggestion here is to expand to a new floor and move your general surgery clinic offices and regular hospitalization wards to the new floor. use the extra space on the third floor to get another surgical room and expand the HDU. HDU should always be near surgery as most surgery patients start and end in the HDU. Your HDU should aim for 20 beds. It is also a good idea in general to have dedicated nurses and on-call rooms for each hospitalization area.
You have 2 specialty doctor’s offices as well as 1 each of diagnostics, cardiography and sonography. You should expand each of those rooms to 2, just to prevent bottlenecks. Regular hospitalization should aim to have 10 beds.
Challenge 3 – Internal Medicine Master
As of the current version of the game, Internal Medicine no longer has a dedicated surgical ward. When the challenge was designed internal medicine did have surgery, so now we have a free surgical room which we can dismantle for some extra cash.
Your clinic only has 4 offices. I suggest expanding this out to at least 6.
Trauma center should be fine as is.
Internal Medicine is like General Surgery only we can get rid of the entire surgical wing. Expand your offices and specialty rooms to have 2 each and HDU to hold 20 beds and regular to have at least 10.
ICU on floor 3 should be expanded to at least 6 beds.
Radiology will be the big bottleneck here. Internal medicine needs to look inside the body and that is what radiology is all about. You will want at least 2 MRI and 2 CT and 3-4 X-ray. 1 CAG should be fine (that is specialized for cardiology). The MRI and CT are very expensive, so watch your money closely. You also have a patio on the third floor which you can build on, but, you may need to expand your foundations a little bit to do so.
WALKTHROUGH: Challenges 4, 5 and 6
Challenge 4 – Orthopaedy Master
This is going to be similar to internal medicine where you are going to have a mad rush for radiology. Orthopaedy is a lot of broken bones which require x-rays, MRI and CT scans to fully diagnose. In fact, radiology on this map is absolutely pathetic and is why this challenge is harder than before. we only have 1 x-ray, 1 MRI and 1 CT. I suggest moving all of these rooms to a new floor at the very top and expanding there. This will also give you more room on floor 1 for more clinic space.
As before you will want to expand your clinic to have 6-8 doctor’s offices. The trauma Center here is a bit lean so I suggest building foundations in the courtyard in the back and adding more room for 2 more trauma centers and at least 6-8 observation beds. expanding the foundations on the first floor also gives you more room above.
On floor 2 ICU only has 3 beds, you will want 6.
Also on floor 2 is orthopaedy. Like the last few challenges you will want 2 surgery wards with dedicated teams day and night. HDU should have room for 20 beds, regular ward should have 10 beds. Expand the offices to have 2-3 of each.
Interestingly, floor 3 is already built and is completely empty. use the space to expand your radiology department and your orthopaedy offices. (its like the devs were giving us a hint that we would need to expand…)
Challenge 5 – Cardiology Master
This is the boss challenge. Before now, you really didn’t have any life threatening diagnoses. With Cardiology, most diagnoses will be life threatening. The biggest problem on this map is going to be people collapsing in the hallways and patients collapsing in their beds. Even if you do everything right you will probably have at least 1 or 2 patients die during the challenge. This is expected and possibly unavoidable. As long as you hit the 90% treated mark, then you will still win the challenge.
On Floor 1 you have 6 clinic offices. if you look closely you have a strange waiting area between two offices. this is unneeded and can be converted into another office. you also have an office that is way too big. subdivide that into two offices for a total of 8 and you should be good to go.
The trauma center is adequate but with so many patients collapsing all the time it is suggested to expand emergency into the courtyard and add two more trauma centers. 8 observation beds should be enough. You might also want a few more desks for nurses or transportation will become an issue later.
Radiology, as always, will need to be expanded. The CAG room specializes in looking at the heart and arteries. This being the cardiology challenge, guess what you will want at least 4 of? Also try to get 2 each of xray, MRI and CT, but prioritize CAG.
You will want 3 cardiology offices, 3 diagnostic offices and 4 cardiography rooms. Sonography you can get away with only 2.
Again, they give you 3 separate rooms for ICU where only 1 is needed. Combine all the ICUs, push the beds together and sell off the extra stuff. 7 beds here is good.
(and what the heck is going on with those corridors…?)
Finally, you should have two surgical wards with dedicated teams. HDU should strive for 25 beds and 10 in regular ward. when building your hospitalization wards make sure the defibrillators are easily accessible and centralized as you will get a lot of patients collapsing due to heart attacks and what not. This is also the map where you need to make sure you do your nightly rounds (see Tip 5 above). Often times a patient will have an open wound or go septic because the doctors will only treat a symptom if its directly related to the diagnosis.
I also suggest saving the game every day after midnight. That way if you have a bad day or make a bad purchase you can reset without losing too much progress.
Challenge 6 – Neurology Master
For some reason, this challenge is much easier than cardiology. I only had 5 patients collapse in the hallways over the 10 days and was nearly 100% or more on the daily targets everyday.
Still, preparation is always key to success. I suggest the following rooms:
- 2 MRI
- 3 Xray
- 3 of each Neurology room (office, diagnostic, etc)
- 2 surgical teams (one day, one night)
- 10 HDU beds, 10 regular, 4 ICU, 6 Obs
- 6-8 clinic offices.
- 4 trauma centers
- as always the starter labs are fine.
Just do your nightly rounds, stay on top of clinic patients that want to leave and you should breeze through this one.
What does OBS even mean?
PS: Here’s an additional tip. Set the specialized department plus the ICU to “high” certainty. By doing this, you ensure that even when patients have been diagnosed and treated, the doctors will look for additional hidden symptoms, allowing you to treat them easier and reducing the risk of collapse/death from hidden symptoms.
good but i cant sell the ambulances on the second one.
Challenge 2 – General Surgery Master