Welcome to our Against the Storm Beginner Guide. Here’s everything you need to know before you get started, based on common questions we saw during the demo. We know that there are people who have a hard time finishing the Against the Storm game. If you are one of those who find it difficult to finish the game, let’s take you to our Against the Storm guide.
Updated on 11.8.2022
Against the Storm Beginner Guide & Tips
I put in about 100 hours into the demo and got a pretty good grasp of what was offered. Most of my knowledge so far deals with the Royal Woodlands, no Harpies, and the first three levels. Now that the game is out, I’ve been playing to see the rest of the game and I’ll add my tips and tricks as I got along.
As it stands, I recommend any new players to stick to the Royal Woodlands themselves as it’s the most straight forward. Most of this information is to get you on your feet. I didn’t bother with anything above settler during the demo since the level cap was at 3. Maybe I’ll make another guide for higher difficulties once I’ve played around, but I’m willing to bet those Epic platform players might beat me to it.
Need to know Basics
Master Race?

This is what I call a jackpot caravan. Beavers are my choice for best race. The simplest economy is wood to planks to building materials and beavers have a chance of doubling that all along the way. Humans are my second go to as they give a great hearth bonus (See below) and run most of the farms that usually end up being a key piece to surviving.
Hearth Bonuses

Each race gives a different bonus when working the hearth.
- Humans – 25% Slower Impatience (My favorite)
- Beavers – 25% Slower burn rate on fuel (Stuff burns longer)
- Lizardmen – +1 Global Resolve
- Harpies – 5 Additional Carry for workers.
Modifiers
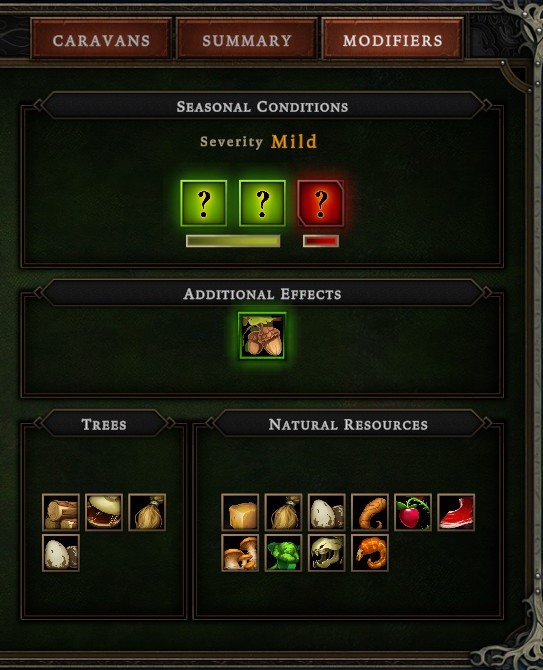
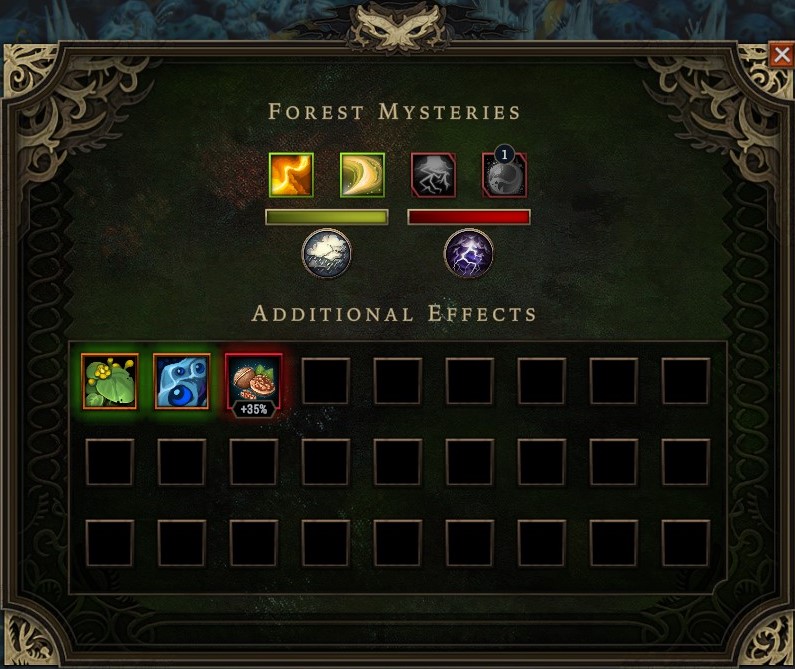
Modifiers, what are they? A lot of people seem to ask, “Why is everything going horribly wrong?” Well, they either help you or hinder you. Anything that helps, will be only during the ‘Drizzle’, anything that hurts will be during the ‘storm’. Be sure to check what modifiers you get before even starting anything in the town. Some are completely negated by basic housing, others with services, and some might require clothing.
One negative you will always have is a -4 resolve per level of hostility during the storm period. The more woodcutters, more glades you open, and how old your town is all contribute to the hostility level as well as other factors. If you get lucky with your perks, you can keep the hostility down through different means and just outright avoid the negative perks.
Switching out items
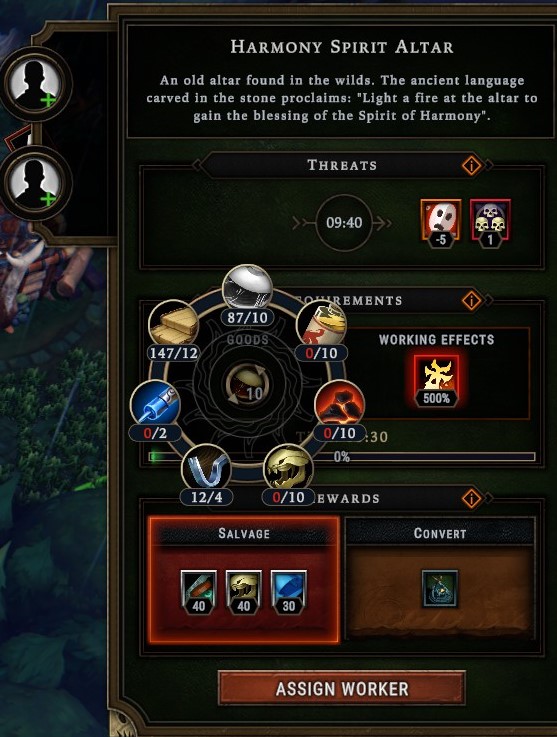
Anything with arrows around an item, can be changed to something else. This is true for manufacturing buildings and events. Lots of people didn’t know this and unfortunately they resigned themselves to letting villagers die because they didn’t have incense or something.
Industry, Trading, and you.
The Core Resources
There are three core manufactured resources that buildings and events all use. Planks, Cloth, and Bricks. When choosing your buildings, focus on trying to pick three stars of these three. Although, the carpenter’s building is slightly better than the lumber mill due to the ability to craft tools to open caches.
The Farms
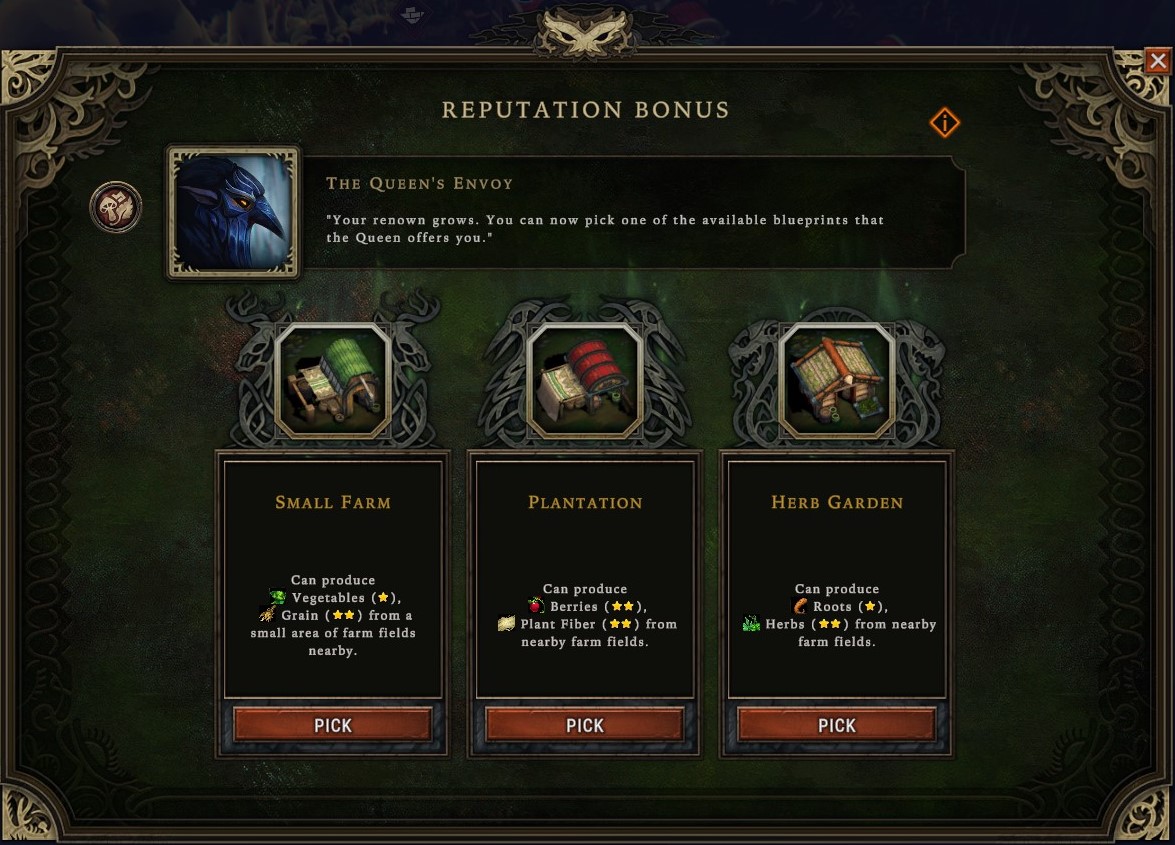
Early game, you’ll be seeing one of these. I would recommend choosing at least one of these in your initial three choices for blueprints, otherwise you might be looking at an empty field until one comes around.
Now it’s going to depend wildly on what cornerstones you get. If you get a +2 to broccoli production, get the small farm. If no real perks push you, get the herb garden. It has great synergy with the bakery or cookhouse as the roots can be made into flour and the herbs can be combined with flour to make biscuits. One of the great perk combinations I’ve seen is every 75 biscuits you get +1 Herb and root production. Get it early enough and food production just snowballs.
Crops are planted in Drizzle, Harvested in Clearance, and the fields are plowed in the storm.
Trading
Almost essential to the game, you’ll want to get a trading post up by at least end of year 2. Even if your industry hasn’t fully been set-up. Every time a trader comes you’ll want to sell any excess planks, cloth, and bricks over 10. If you have a ton of wood, either through time or really good perks like Woodcutter’s prayer, use that a filler once you’ve thrown everything else up. Packs of good get you more bang for the amber, but don’t use the makeshift post to make them beyond whats needed for orders, it’s just not efficient resource wise.
Setting Limits
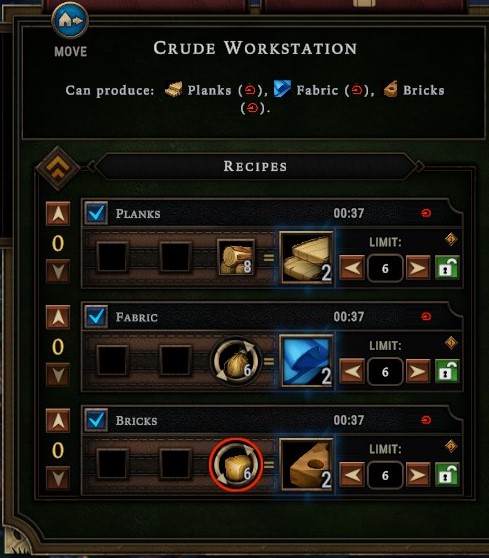
For both crude buildings, you are going to want to set a limit. They are the worst in terms of resource efficiency so you don’t want them constantly running. My initial limit is 6, just enough to get the good stuff built.
How Dangerous is Dangerous Really?
A new player, looking all these skulls over the larger glades, can understandably be intimidated. Don’t be! Most of these glade events take Resin, a fairly common/uncommon resource for the woodlands, and 2-3 citizens to handle. If not that, then one of the core resource I spoke about previously or nothing at all. Take a look at my gallery and see what I mean.
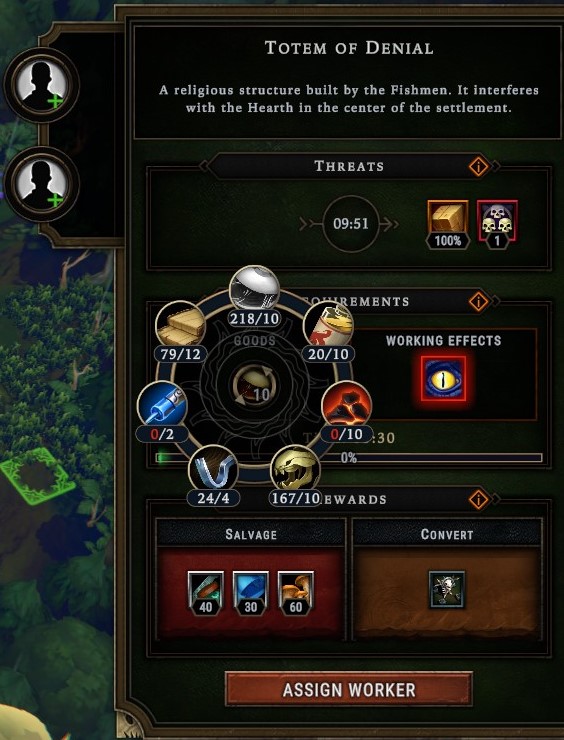

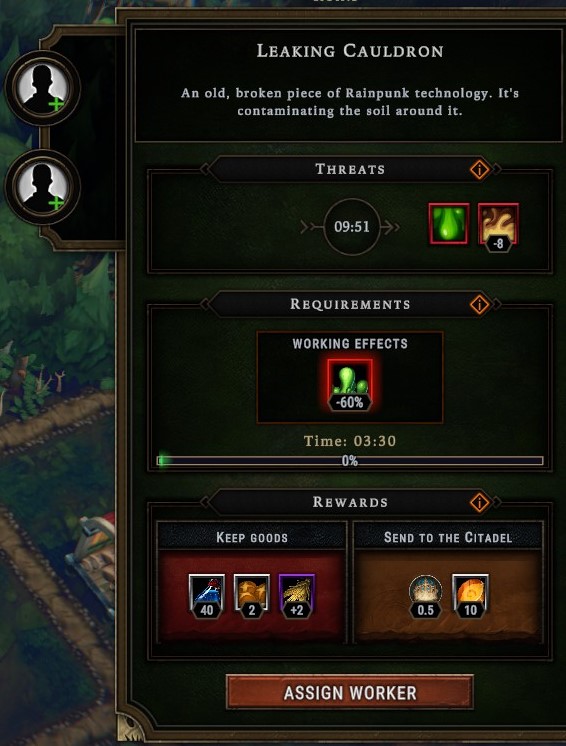
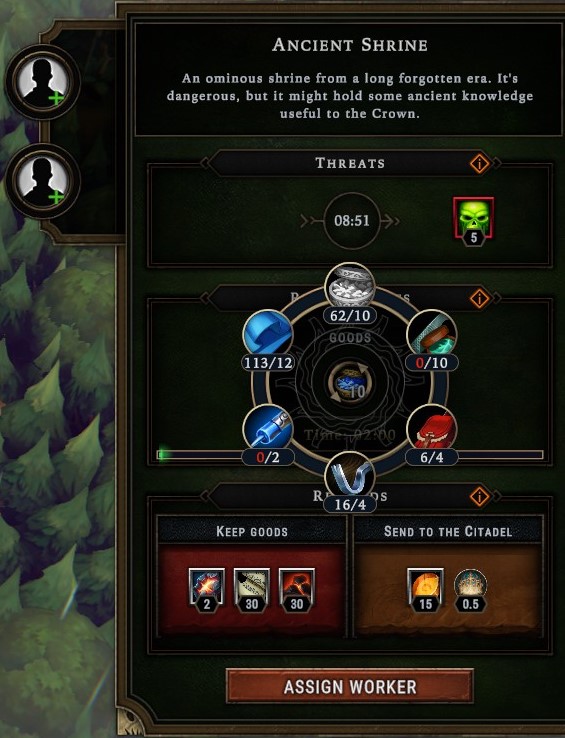
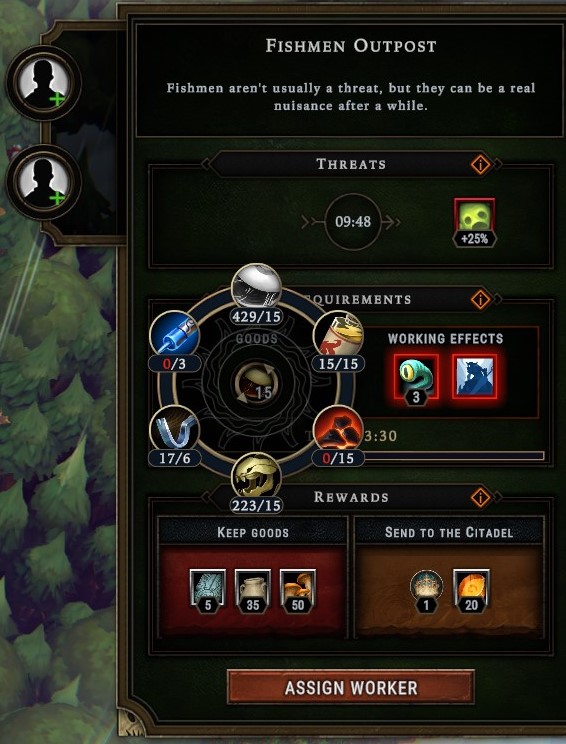
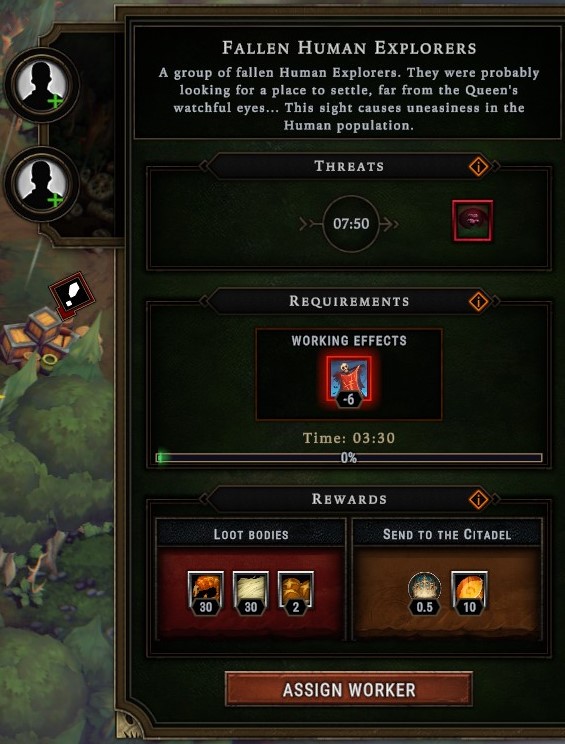
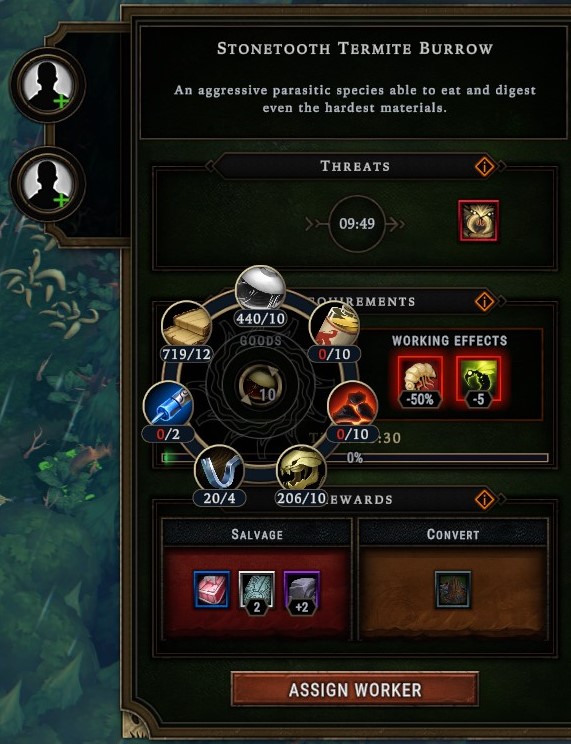

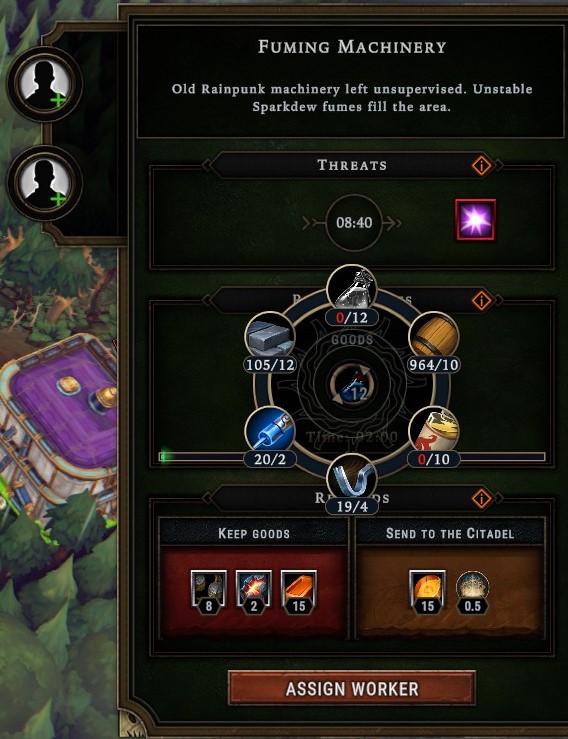
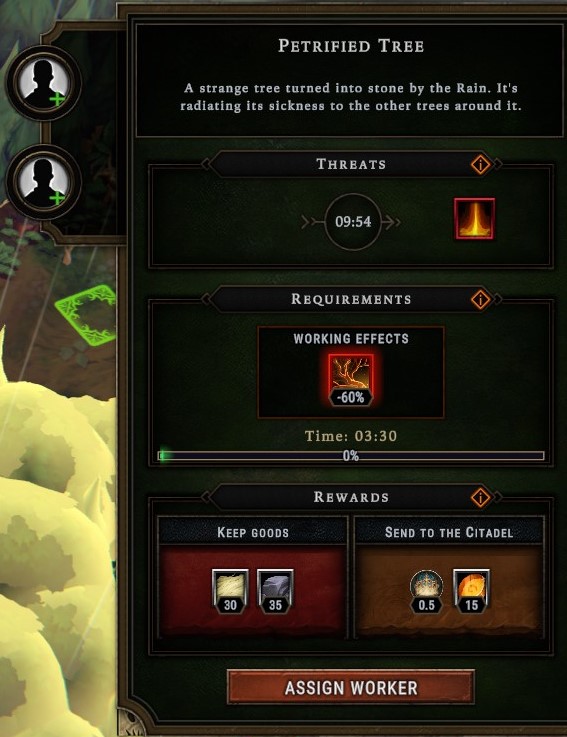
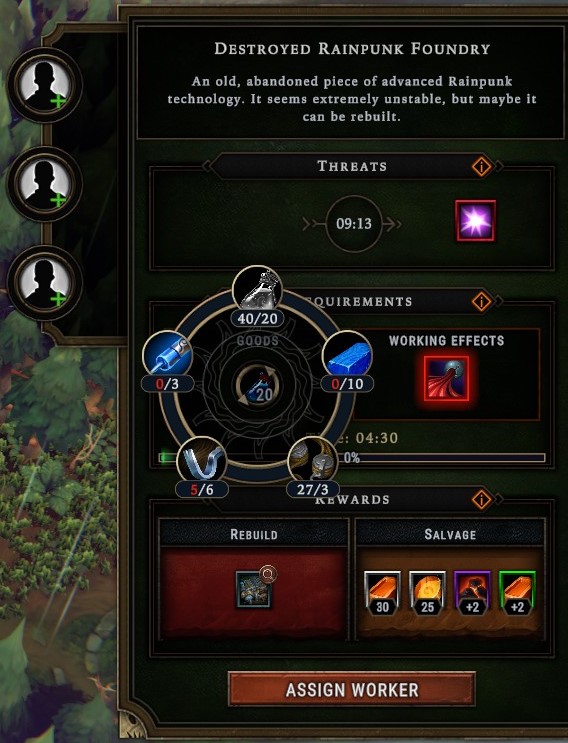
Also take note and look at the resources you can gain by solving these easy events. Sometimes salvaging the shrines can make your life easier. It’s gonna be a case by case basis for you. These dangerous glades can also have ruined buildings that can be fixed and larger than normal resource nodes.
What About the Forbidden Glades?
These can be trickier, and can utilize a wider array of resources.

City Layout
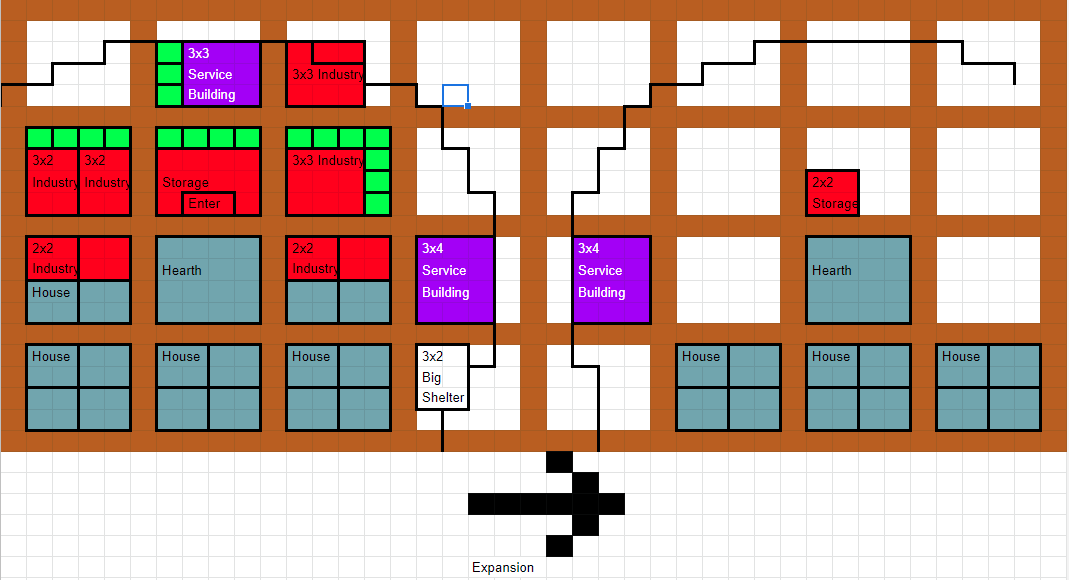
This is the layout and essentially the grid I use to expand from. I find it to be the most efficient given the size of buildings, the paths villagers need to take to get around, and the need for decorations for hub upgrades. Anyone wanting to follow this design doesn’t need to have exact placement like pictured, but the basic jist is 4×4 squares surrounded by road. I recommend getting the four squares behind the storage decorated and three houses up when able, it’ll upgrade the hub and reduce early hostility.
As you cut down trees, just extend the roads outward in the line. This will help woodcutters bring resources back quicker. The hearth radius can’t overlap, so no matter what there will be gaps. Industry can work outside the radius so fill gaps with those if needed. If a hearth doesn’t fit this exactly due to resources or farmland. Don’t sweat it, move it up or down a grid.
Biomes that we Roam – Against the Storm Beginner Guide
Royal Woodlands
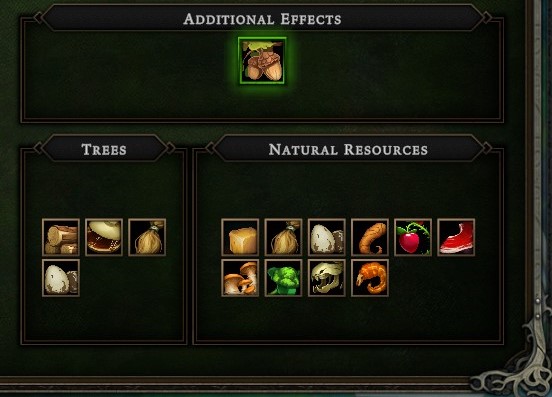
This will be the easiest biome for new players. Trees give more wood with a good chance of resin and plant fiber, smaller chance for eggs. So right off the bat, Planks and Cloth raw materials are secured and there’s a small trickle of food (Don’t rely on this). You won’t find easy stone or copper in this zone outside of cache’s or sea marrow (20% chance for stone).
Scarlet Orchard
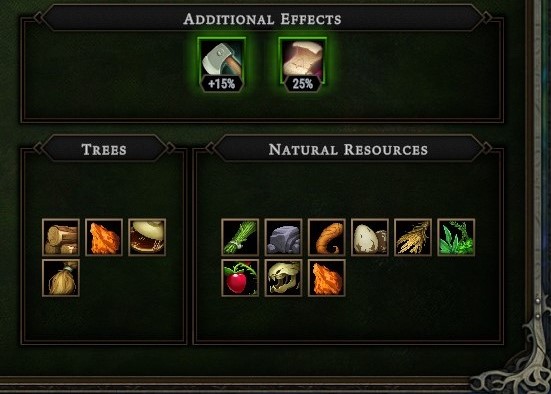
Possibly the second easiest to branch into. You don’t get as much wood or even resin per chop, but trees drop copper at 5%. Some time later you will get copper roads which is a nice 25% speed increase. Very quickly you’ll find you have enough copper to make upgrades essential roads. This biome also comes with a small bonus to cutting speed and burn duration.
Marshlands
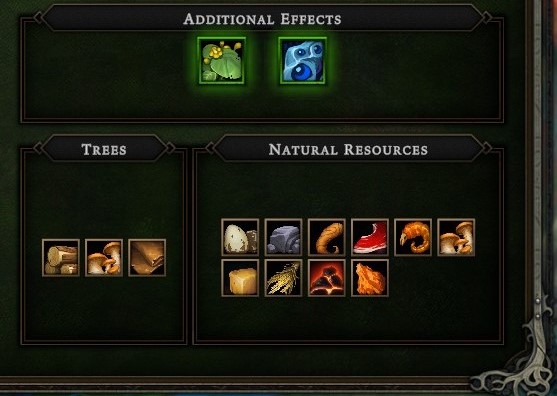
A curveball biome, but one that can be fun. Mushtrees still drop wood, but only mushrooms and leather. Dangerous glades are going to be slightly tricky, but remember they all take a planks, cloth, or bricks. Camps get quicker for every worker in a camp. I’ve seen woodcutter’s literally take .5 seconds to cut a tree down, it was amazing. Also super nodes can be found in forbidden glades.
Coral Forest
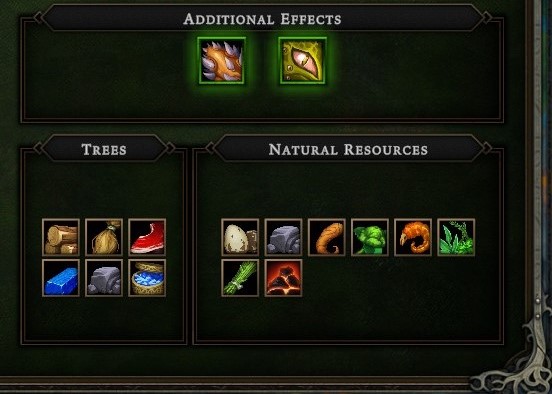
Another curveball, there are four different “trees” that give different resources. Meat, Crystal bars, Stone, and Incense. The incense is kind of neat because early game there’s not a lot of buildings that make it and some glade events can be solved with it.
Cursed Royal Woodlands
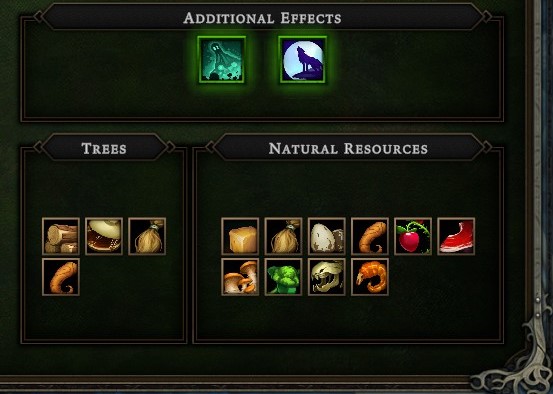
A very rough biome. You can’t tell what a glade is going to be and more than likely a ghost with very specific demands are going to be in them. I’ve only had one opportunity to try this zone and I failed pretty spectacularly. Will update once I learn more.
Against the Storm Building Choice Tips
Basic Buildings
Kiln – This little 2×2 is pretty amazing. Creates Coal at 3 stars, but can also make jerky, which is considered a complex food that many races eat, and bricks at a 1 star rate. Coal is also widely used in a lot of glade events and is the best fuel source tying with Sea marrow.
Service Buildings – Ranked in order of how great they are. Note: Service building effect don’t stack. Don’t build more than one each unless you really need one for a hub upgrade.
Guild Hall – Services Luxury – 1 Worker activates a 50% faster incoming trader buff. Three workers provides a stacking retroactive +1 Resolve buff for every 30 amber worth of goods sold.
Bathhouse – Services Cleanliness – 1 Worker activates a 30% slower villager leaving buff, for when resolve is in the red. 3 Workers activates a global +25% production bonus.
Clan Hall – Services Brawling and Religion – Three workers activates a 50% camp production bonus, but not for woodcutters. This is a great bonus for the marshlands.
Explorer’s Lodge – Services Brawling and Education – Three workers activates a stacking +1 resolve for each rebuilt or salvaged ruin. This building actually goes up in value if settling next to “abandoned settlement” modifier on the world map.
Tavern – Services Leisure and Brawling – 3 Workers activates a flat +3 resolve.
Monastery – Services Leisure and Religion – 3 Workers activates a flat -100 hostility.
Temple – Services Religion and Education – 3 Workers activated a 25% longer burn on sacrificed resources.
Perks of the Job, What to look for
Woodcutter’s Prayer
Once this shows up on the perk screen, the game will pause, if you unpause you won’t be able to choose it. This perk initially looks bad, lose all my fuel for just +1 wood? Listen, this doubles the production from woodcutters and if a beaver is in the woodcutter, it’s a 10% chance to quadruple. Look at your fuel, is it all wood? Then take it. Under 100 coal or sea marrow? Take it. Any amount of oil? Take it.
- Normally – 1 wood per cut, beaver 10% of the time makes it 2.
- Prayer – 2 Wood per cut, Beaver 10% of the time makes it 4
- Prayer x2 – 3 Wood per cut, Beaver 10% of the time makes it 6.
Have you ever traded 8000 wood for all the trader’s inventory? Feels fantastic.
Anything that Increases production after 25 production cycles
On a baseline, a villager will go to a node, use 1 charge to get 1 resource. 25 production cycles later, he’ll get 2 resources per cycle per 1 node charge. More bang for your buck. Make sure the map supports the resource. Made this mistake with mushrooms on coral forest. :X
Dirty Deeds, Done Dirt Cheap
WIP for Deeds
So you build a city, right around the turning point where you start snowballing, you win. Sorry! No more deeds, citadel resources, or exp! Well, keep your eye out for a positive modifier called ‘Important Matters’. It reduces the queens impatience by 80% during drizzle, with a human in the hearth it’s straight up 0 impatience during that season.
So here’s what you do, get all your building pips on the reputation bar, then don’t do anymore orders and turn off consumption of items so people’s resolve doesn’t get too high or too low. It’s a little juggle, but it’s easily do-able. Once you get a trader called Sorhur or whatever his name is, look for an item that extends drizzle and reduces storm. He sells one that extend clearance, avoid that. Boom, you now have the longest possible time to get deeds.
Why you ask? Won’t this take up a lot of time from the cycle? Well, there’s some pretty extensive deeds to get and this beauty doesn’t come around often.
- Treasure
- Win a game after looting 20 Caches found in Glades.
- Harpy Utopia
- Win a game with: 30 Harpies, 15 x Harpy House, 1 x Bath House
- Human Utopia
- Win a game with: 30 Humans, 15 x Human House, 1 x Temple
- Beaver Utopia
- Win a game with: 30 Beavers, 15 x Beaver House, 1 x Guild House
- Lizard Utopia
- Win a game with: 30 Lizards, 15 x Lizard House, 1 x Clan Hall
- Ruins
- Win a game after taking care of 10 Ruins found in Glades. (Although I’ll be honest, this is better with the abandoned settlements map modifier, but check below for a different tip for end of cycle play.)
- Living Matter Farmer
- Win a game with 3 active Living Matter clones on the map.
- Efficient Explorer
- Win a game after solving 25 Glade Events.
- Trade Baron
- Win a game after completing 20 Trade Routes.
Make Her Wait
Alternatively, what you can do is wait for a city that’s founded near the end of the cycle. It won’t matter how long you take since you won’t be able to found another city. You don’t need the drizzle modifier, you can just do the same thing, stretch out that impatience to 13, and finish an order to complete the game.