Explore the Bunker Walkthrough
Head down the stairs and head straight through the doorway in front of you (we will come back for the doorway on the left in a minute).Once you head through the doorway, you should notice a laser grid a few yards in front of you.
Walk towards the laser grid, and interact with the hand scanner on your right. This will trigger the next section of the quest, telling you to bypass the laser grid.
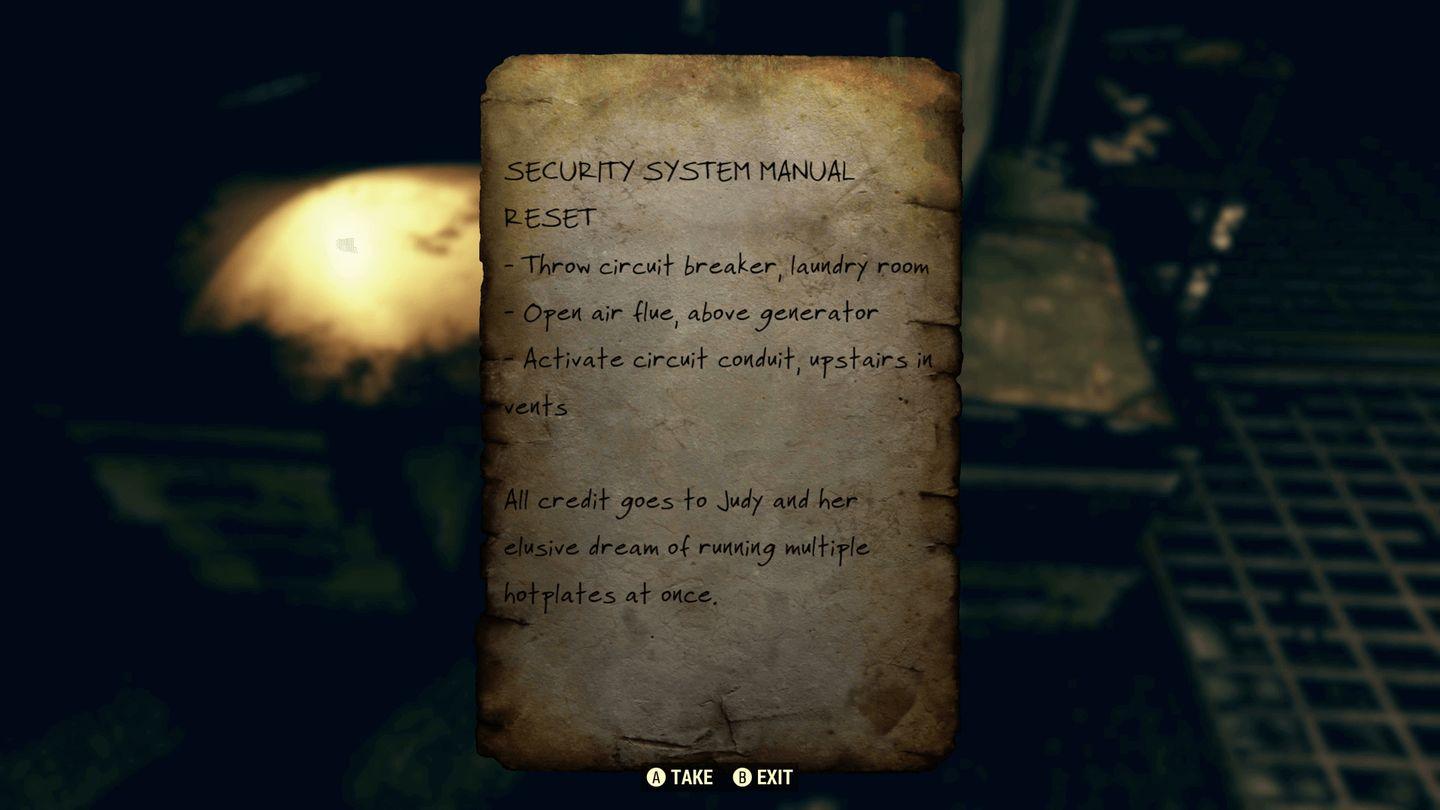
Remember that doorway on your left hand side when you first head down the stairs? Head back that way now and walk up the stairs around the corner. You will notice you are now above the laser grid. You will see a room, with a painting on the ground next to a terminal. Access the terminal (Judy’s Terminal) and comb through the logs. You learn this bunker belongs to Judy’s Father, a Senator on the run, who sequestered them down here shortly before the bombs dropped. Continue on to the control center, directly above the laser grid, which you will be able to see through the floor. There is a desk on your right with a broken terminal on top of it. Searching the desk will give you the note “Security System Manual Reset”
Follow the instructions on the notes, if you have a skill:3 Hacking level you can simply hack the terminal next to the desk and turn off the laser grid. This is a high hacking skill level, so if you are to low don’t worry, you will just need to complete the optional objectives instead.
The three optional Objectives are:
- Throw the Circuit Breaker: Located in the laundry room downstairs.
- Reset the Circuit Conduit: Located in the upstairs area near the Security System control center. instead of continuing across the bridge, head out onto the vents through the broken railing. The conduit will be around the corner next to the red light.
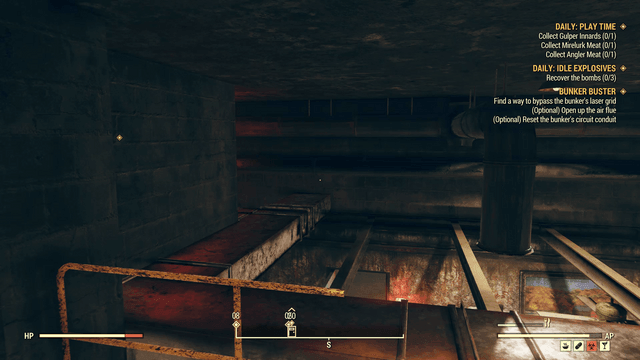
- Open the Air Flute: Located downstairs in the generator room. Above the generators near the roof, to the right of the red light.
Once you complete all three optional objectives, the lights should go out for a second then come back on. Interact with the hand-scanner once again, but this time it will grant you access through the laser grid, deeper inside the bunker.
Secure Room
Once you are through the laser grid, the hallway will lead you to Senator Sam Blackwell’s Secure room within his bunker. While exploring the room you will come across a keypad on the wall that requires you to enter an access code.
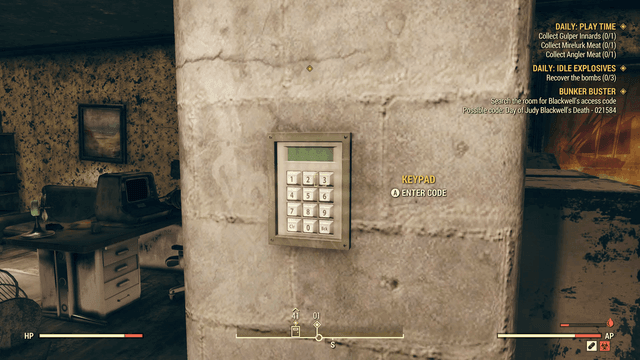
On a desk to the left, you will see Sam’s terminal with his Journal inside. Inspecting each entry will provide more context to Sam and his final days, slowly losing his mind to an undisclosed disease. Sam lost Judy on 02/15/84 to “the disease” losing her almost as quickly as she fell ill. Putting Judy’s day of death into the keypad unlocks a secret compartment behind a painting next to his desk.
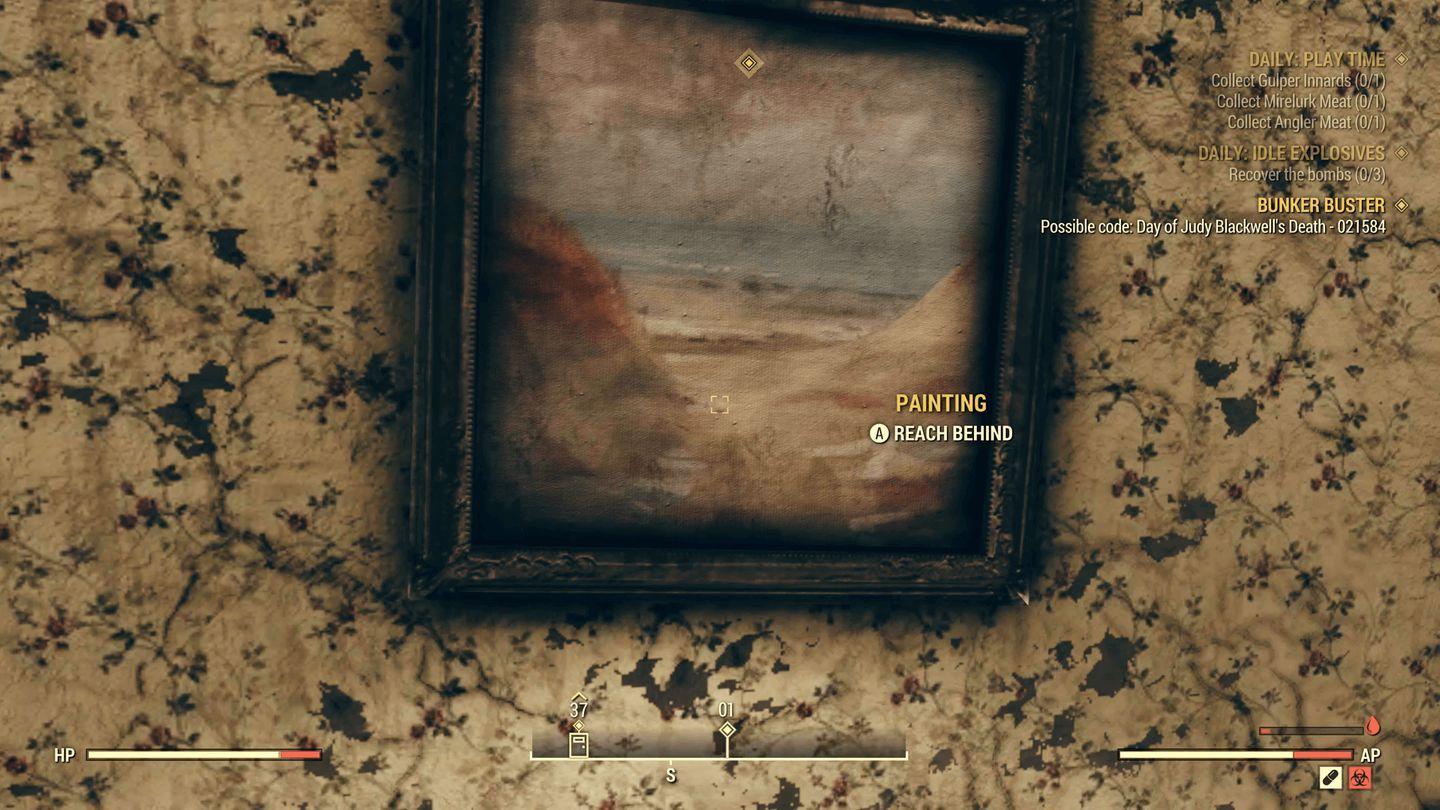
Reaching behind the painting will give you a holotape titled “Welcome to the Whitespring” and a Congressional Access Card.
Listen to the holotape you just acquired and that is it! This Bunker has been busted. Listen to the holotape closely as it triggers the next Enclave quest, One of Us.