Arcade Editor
When starting a map you have the option to select a Canvas and Game-mode. You also have the option to edit one of your prieviously made maps or a map you have favourited in the Browser.
Canvases
Canvases are a computer-generated environment built from scratch when you load up a canvas. These are helpful for pre-made environments and map leveling if you don’t really know how to edit the terrain. The canvases available are:
- Cedar Forest
- Jungle
- Savanna
- Swamp
- Rocky Island
- Outerworld
- Winter
Game-Modes
Game-modes will judge how your map will be played really. The objective for each game-mode is different. The Game-mode can be changed once in the Editor, however this will delete all AI already placed onto the map. The Solo / Co-op Game-modes along with objects required are:
Assault
- Kill all the enemies (no objects required).
Journey
- Make it to the exit (an extraction point is required).
Bounty-Hunt
- Eliminate the targets and escape (AI targets and an extraction point is required).
Outpost
- Kill all the enemies at the outpost (an alarm is required).
The Multiplayer Game-modes along with the objects required are:
Deathmatch
- Free-for-all, no teams (no objects required).
Team Deathmatch
- 6 vs. 6 deathmatch (team 1 spawns / team 2 spawns).
Budget / Settings
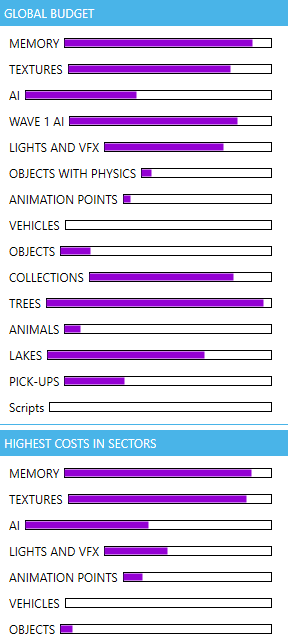
Budget
The budget is where you can check how much space you have left on your map. The top panel shows how much space you’ve taken up across the whole map. It covers objects and more. The bottom panel covers high cost areas of the map, so you know which parts of the map have high detail or take up performance. When certain areas reach a full budget AI and objects cannot be placed there unless you delete others. When your map reaches the limit you will be notified, at this point there is an option to continue building, this makes the map unable to be published; the other option is to delete a lot of objects so more space is avaliable for publishing. The ‘budget squares’ can be shown through the Arcade Editor settings. Yellow is moderate detail and red is over detail in that ‘budget square’.
Properties
This is where you can create a snapshot for your map. Snapshots are required for you to publish the map. You can also add a tag which uses one word to describe your map (this is optional). You can also change the game-mode (you will be able to save the old version firts), by changing the game-mode will all of the AI on the map will be removed.
Settings
The Arcade Editor Settings are just for HUD options whilst you create your maps. This makes creating your maps a lot easier as visibility is much clearer. Options for fog, shadows, icons and more can be shown or removed.
Gameplay Modifiers
Gameplay Modifiers are for extra game changing options. These can work in single player and multiplayer.
Solo / Co-op
Options for Solo / Co-op gameplay modifiers are listed below:
- Disable health regeneration
Player can only heal with medkits. - No fall damage
- No fire damage
Damage from flamethrowers / other fire. - No explosive damage
Damage from grenades etc. - Invincible
Nothing kills you. - Infinite ammo
- Unlimited underwater breathing
- Friendly fire
Co-op partners can be shot. - One shot kills enemy
Any gun kills enemy AI. - One shot kills player
Any AI can kill you in one hit. - Reckless driving
Vehicles don’t take damage. - Modified jump height
Change how high you can jump. - Modified gravity
Change the gravity of your map (1: Normal G / 100: Zero G). - Highlight NPC
All human AI is highlighted (basically wallhack). - Hunter’s Instinct
All animal AI is highlighted (basically animal wallhack). - Countdown
Sets a countdown for your map, when countdown finishes game ends (in seconds // min: 10 seconds / max: 1 hour). - Game over when detected
If detected by any enemy AI the game will immediately end.
Multiplayer
Options for Multiplayer gameplay modifiers are 99% identical to Solo / Co-op gameplay modifiers, except some are removed. There is also an option for Team 1 modifiers and Team 2 (TDM) modifiers so each team have the option to have different modifiers activated. Extra option listed below:
- Countdown
Countdown to end of match is slightly different (in seconds // min: 5 minutes / max: 15 minutes) - Score to reach
The score for the player / team to reach (score min: 5 / max: 200 kills)
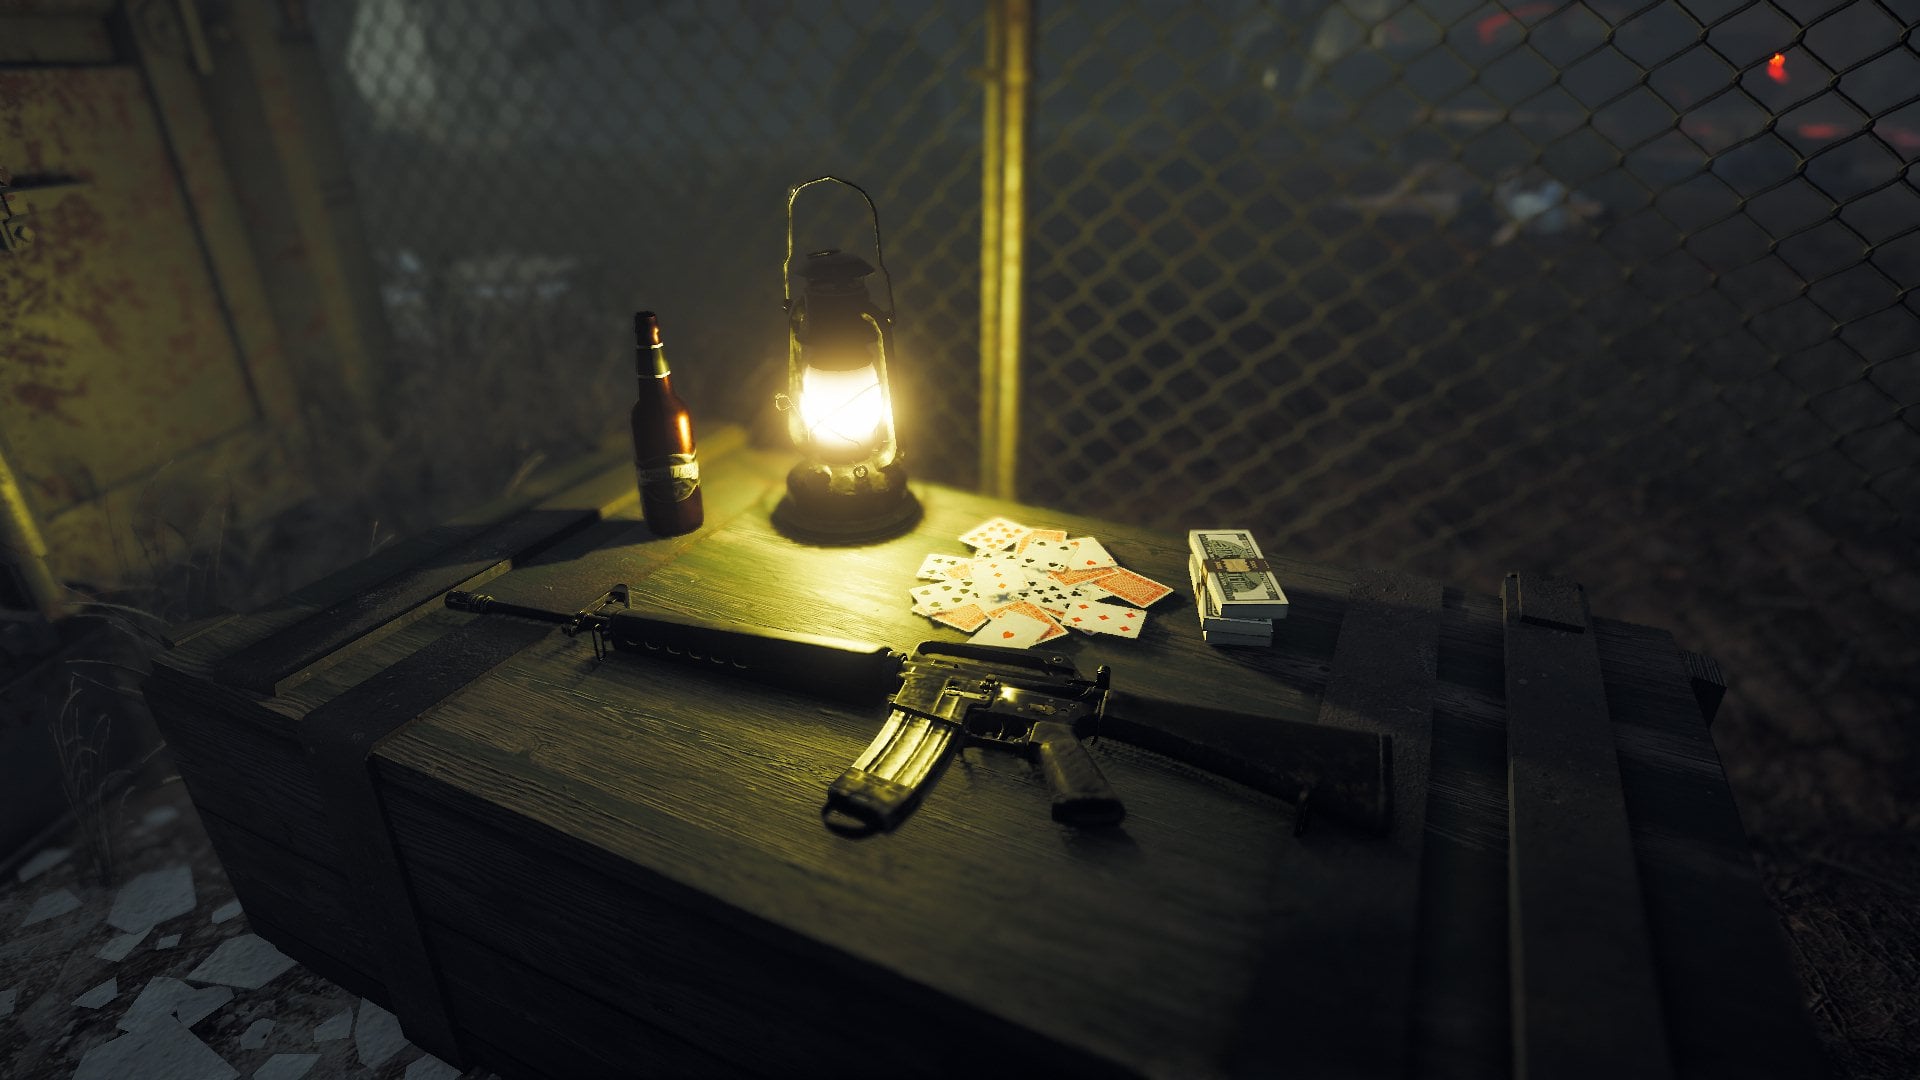
Objects
Placing Objects is the main and most crucial part to making a map, because without objects there isn’t a map. Read the information below to see what objects are avaliable in the Editor, this section only includes objects not AI.
Library
The objects library includes a wide-range of objects from Far Cry 5 and other Ubisoft titles. Objects found in the game-mode objects section include objects like: Spawn points, objective markers, and any other objects depending on the game-mode. Search this library for an endless supply of objects to create what ever maps you want.
Movement
Once an object is placed you can move it in multiple directions. However some natural objects like, trees, bushes, etc. cannot be moved vertically across the Z axis as they are stuck to the ground.
If you want to do more precise movement you can use the movement panel, where you can move the item decimal by decimal or digit by digit, depending on how far you want to move it.
Rotation
Rotating objects works almost exactly like moving, items can be rolled and turned, vertically or horizontally. Just like movement though, objects like trees, bushes, and now ladders cannot be rotated vertically along the Z axis. Also precise rotation can be done with the rotation panel.
Audio / Visuals
Audio volumes are technically a trigger point for the player to walk into. Once the play walks through the volume the background sounds will change. As far as editing goes for these Audio volumes only their XYZ axis size can be changed.
Soundpoints
Soundpoints are scriptable sounds that are originally set on an infinite loop. For these items to work scripting must be used. There are no editing options for soundpoints.
Visual FX
For visuals you can have many different variants, flame effects, water effects, smoke effects, etc. These visuals can be used for basically anything you want. Most of the visual effects can be scripted. Effects such as the flame effects can damage you so if you don’t want the effects to damage you, turn off fire damge in Gameplay Modifiers.
Lighting Visuals
Lighting is also another item found in the Visuals section. The two lighting objects are the Omnilight and Spotlight. Options for the lights are: RGB colour, flickering options, render distance, light intensity and light distance. Both light objects can be scripted.
Terrain
Tools
With the terrain tools you can use tools such as the Texture Tool, Painted Vegetation, Road Tool, Bump, Raise / Lower, Flatten, Ramp, Set to Height, Smooth, Noise, Erosion, Water and Hole tools. The previous tools read are listed below:
- Textures
Textures paint the ground, they vary from grass to sand etc. - Painted Vegetation
Plant life that can be easily placed. It varies from pine trees, to rocks and shrubs. - Roads
Roads can be drawn onto the maps, these come in helpful for AI pathing as AI which are in vehicles often follow this pathway (if not linked to a Control Zone). - Bump
Raises / Lowers terrain at a slow rate, edges are smoothish so forming isn’t too dramatic. - Raise / Lower
Raise / Lower is different to the bump tool, raising is much more exagerated compared to it, this will make vertical edges. - Flatten
Sets terrain no matter what height to an equal flat level. - Ramp
Turns a hill into a smooth 30 degree ramp which is flat. - Set to Height
The terrain is set to a certain height, this flattens it at a very specific height. - Smooth
Smooth jagged hills to smooth hills. - Noise
Makes hills jagged and in a random pattern slash form. - Erosion
Makes hills look like pre-landslide, makes hills slightly bumpy. - Water
Water levels can either be set to a height, this is called Ocean Water. However objects named lakes can be placed which can be scaled to fit in certain areas of the map you are creating. Tides can be set to very quiet up to very strong. - Hole
Holes delete sections of the terrain so you can see straight through the natural floor.
Natural Objects
Natural Objects are items like placeable rocks, shrubs and other plant life. These iteams can be moved individually and do not require the user to paint on the canvas. Every item, except plants can be rotated / moved from every angle. Plants cannot because they’re fixed to the ground like real plants would be, however fallen trees and some stumps / logs can be rotated / moved in multiple directions. These items come in handy as they can form natural looking map boundaries and make natural environments look more alive and realistic.
Environmental Settings
Environmental Settings are one of the key features to a map. They set the time of day, weather, fog, music, background sound and more. Without environmental maps your map would be plain and boring. This section is put into different parts to highlight each area of the environment of your map.
Skybox
The Skybox area changes the theme of the map and overall appearance of it. The list below shows each part of the Skybox section in the Editor:
- Time of day
Scales the time from 00:00 in the morning to 23:59 at night. - Latitude (sun and moon)
Sets how bright the time of day / night is, decides whether the natural brightness is extremely bright or dark. - Sun Angle / Moon Angle
Sets which navigational direction the sun / moon will shine on. - Moon Phase / Size
Phase allows you to choose the state of the moon (full moon etc.) The size of the moon sets how close / fat away the moon is to your map. - Preset Options
Sets the overall mood on the map, whether you have it as an exterior setting or a interior setting, however this really doesn’t affect the maps actual theme. - Ambient Colours
A RGB slider which shows the lighting colours on the map. This effects how Red, Green or Blue the Map is.
Weather
The weather changes the settings of the sky box colours and type, weather effects and more sun / moon options.
- Sky options
The sky options change the appearance of the sky, certain colours etc. The clouds tab changes the cloud sky box, to show how cloudy your map is. Height of the clouds can be changed and if the clouds cast shadows. Along with that a wind force can be changed, this effects items like flags and windmills etc. - Extra Sun / Moon options
Sun and moon lens flares can be changed here to make the sun / moon more or less obvious when the player looks at it (this does not affect the brightness of the map). - Storm
Currently their is only one storm option which is a rainstorm.
Fog
Fog is really more of a detail aspect to your map, it changes how ‘foggy’ your map is. All these options change how dense the fog is. You can set the max height and the min height in the options so the fog doesn’t completely take over your map. RGB colours can also be changed here to set the perfect mood of your fog.
Backdrop
Backdrop creates an extra addition to the skybox, these vary from an Alpine, Alpine Snow, City, Desert and Mountain backdrops to make your maps look bigger than they are and to make the world feel more alive. Height and angle of the backdrop can also be changed.
FX
Post FX can change the colour effects on the map these set certain themes to the map. Also HUD effects can be added, at the moment these only vary from dirty and vignette. Both of these Post FXs can be scaled.
Audio
Audio options vary from the ambient sounds such as Forest, Mountain sound effects etc. Music Themes can also be changed, these vary from theme music used in other Far Cry games aswell as Far Cry 5. These help set the intensity of the map you are creating.
NPCs (AI)
AI is what makes a map a map, mainly because you cannot publish any single player map without at least 1 wave of AI. AI in the Arcade can be edited and scripted in high detail. Read more to find out how to edit AI in the Editor.
AI
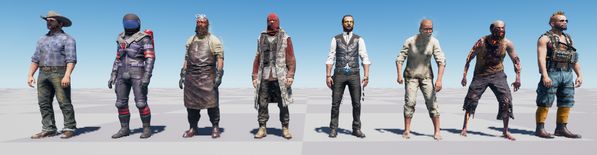
The AI come in many different types, Enemies, Friendlies, Neutrals and Animals. These types of AI are very diverse and can be used in multiple situations on your map, below are the listed types of AI that can be used in the Editor.
Enemies
Enemies come in many different varieties, there are 8 catergories for this AI Type: Follower, Security, VIP, Chosen, Heralds, Angels, Zombies and DLZ NPC. Below is a brief description about each Enemy Category:
- Follower
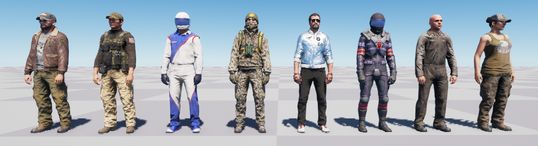
Default AI for the game characters vary from, Badass Followers, Cult Followers, Flight Crew, Vietcong Soldiers and more. Each character has 7 versions, this changes what weapons they carry (they can be either male or female). These versions are named: Assaulter, Beserker, Brawler, Defender, Pistolero, Rocket and Sniper (bottom of NPCs Section). - Security
Security AI are similar to Follower AI except they have different types, these vary from: Bikers, Daredevils, Omega Security (Far Cry 3: Blood Dragon) and more. There is one new addition to the Character Version in the Security Section, the Flamer and Heavy characters (bottom of NPCs Section). - VIP
These are iconic mini-bosses from the Far Cry 5 Campaign, these vary from a Baptist, Butcher, Chemist, Priestess, Scientist and Trainer (bottom of NPCs Section). - Chosen
Chosen are the pilots from Far Cry 5’s Campaign, versions can be either the Defender or the Hunter (bottom of NPCs Section). - Heralds
Heralds are the main antagonists from Far Cry 5’s Campaign, the characters are: Jacob Seed, John Seed, John Seed (Trenchcoat Variant), Joeseph Seed, Joeseph Seed (Shirtless Variant). - Angel
Angels are the original Campaign’s version of Zombies, farmers who are in a trance at basic. These enemies all use melee and use hammers, hoes, knives, shovels or their fists. - Zombie
Zombies have three versions. They carry nothing and usually swarm the player, if not scripted. The versions of the Zombie Type are: the Roach, Walker and Behemoth (below). - DLZ NPC
These are the Enemy AI from the Dead Livng Zombies DLC. These characters vary from the Vulturez gang or the Evil Corp Military. Both versions use the same version system as the Followers and the Security, excluding the Flamer / Heavy.
Allies
Friendlies are reskins of the Enemy AI, however they do not attack you. However enemies like Heralds, Angels, DLZ NPC’s etc. are not avaliable as an AI Friendly. This time they are not linked into categories so you’ll have to find them the hard way. New additions like Resistance Fighters can be found near the bottom of the Friendlies category.
Neutrals
Neutrals can act as normal Civilians, Hostages and more, they can be male or female, African American or White American.

Animals
Animals are really a side feature to your map (sometimes) they help make the world feel more alive and natural to the player. There are many variants of animals, including zombie versions of some. Different Types are listed below:
- Air
Eagles, Crows, Owls, etc. - Ground (Domestic)
Dogs, Cats, Goats, etc. - Ground (Wild)
Bears, Wolves, Deer, etc. - Water
Salmon, Trout, Smelt, etc. - Arachnids
Hatchling Soldier (Elite), Queen (Elite), Scout (Elite), Soldier (Elite), Worker (Elite). - Zombies
Zombie Yeti, Moose, Bear, etc. - Blood Dragons (found in Zombies)
Blood Dragon (Easy, Normal & Hard Difficulty).
Classes
These are all the classes for the AI characters (Allies / Enemies).
- Assaulter
AR-C / 1911 / Frag Grenades - Beserker
M199 / MAC-10 / Smoke Grenades - Brawler
Melee Weapons / Throwing Knives - Defender
AR-C / 1911 / Frag Grenades - Pistolero
1911 / Frag Grenades - TNT
.44 Magnum / Dynamite Sticks - Sniper
AR-CL / 1911 / MAC-10 - Heavy Gunner
M60 - Heavy Flamer
Flamethrower - Hunter
Bow / Arrow
Enemy Waves
There are a maximum of 5 Waves in Solo Maps, this is mainly based for Enemy AI however Friendlies, Neutrals and Animals take up the Wave 1 Budget.
Wave 1
This Wave starts as soon as the player spawns. They are the only Wave out of the 5 that can be scripted.
Game-modes: Outpost – Wave 1 cannot be reinforcements.
Wave 2
This Wave spawns after a certain amount of Wave 1 enemies are killed.
Spawning Options: Spawn After: One / 25% / 50% / 75% / All Dead (Cooldown Options Avaliable)
Game-modes: Outpost – Wave 2 enemies can be classed as reinforcements as an option.
Wave 3
This Wave spawns after a certain amount of Wave 2 enemies are killed.
Spawning Options: Spawn After: One / 25% / 50% / 75% / All Dead (Cooldown Options Avaliable)
Game-modes: Outpost – Wave 3 enemies can be classed as reinforcements as an option.
Wave 4
This Wave spawns after a certain amount of Wave 3 enemies are killed.
Spawning Options: Spawn After: One / 25% / 50% / 75% / All Dead (Cooldown Options Avaliable)
Game-modes: Outpost – Wave 4 enemies can be classed as reinforcements as an option.
Wave 5
This Wave spawns after a certain amount of Wave 4 enemies are killed.
Spawning Options: Spawn After: One / 25% / 50% / 75% / All Dead (Cooldown Options Avaliable)
Game-modes: Outpost – Wave 5 enemies can be classed as reinforcements as an option.
Game-modes
Outpost – Any wave apart from Wave 1 can be reinforcements – Once one is selected the following waves also class as reinforcements (Wave 2 = Reinforcements therefore 3, 4 & 5 are also reinforcements)
Bounty Hunt – Any wave can be a target.
Animation
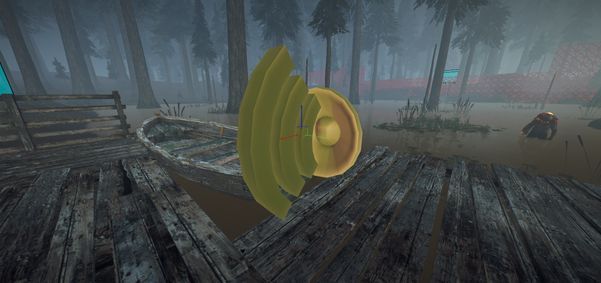
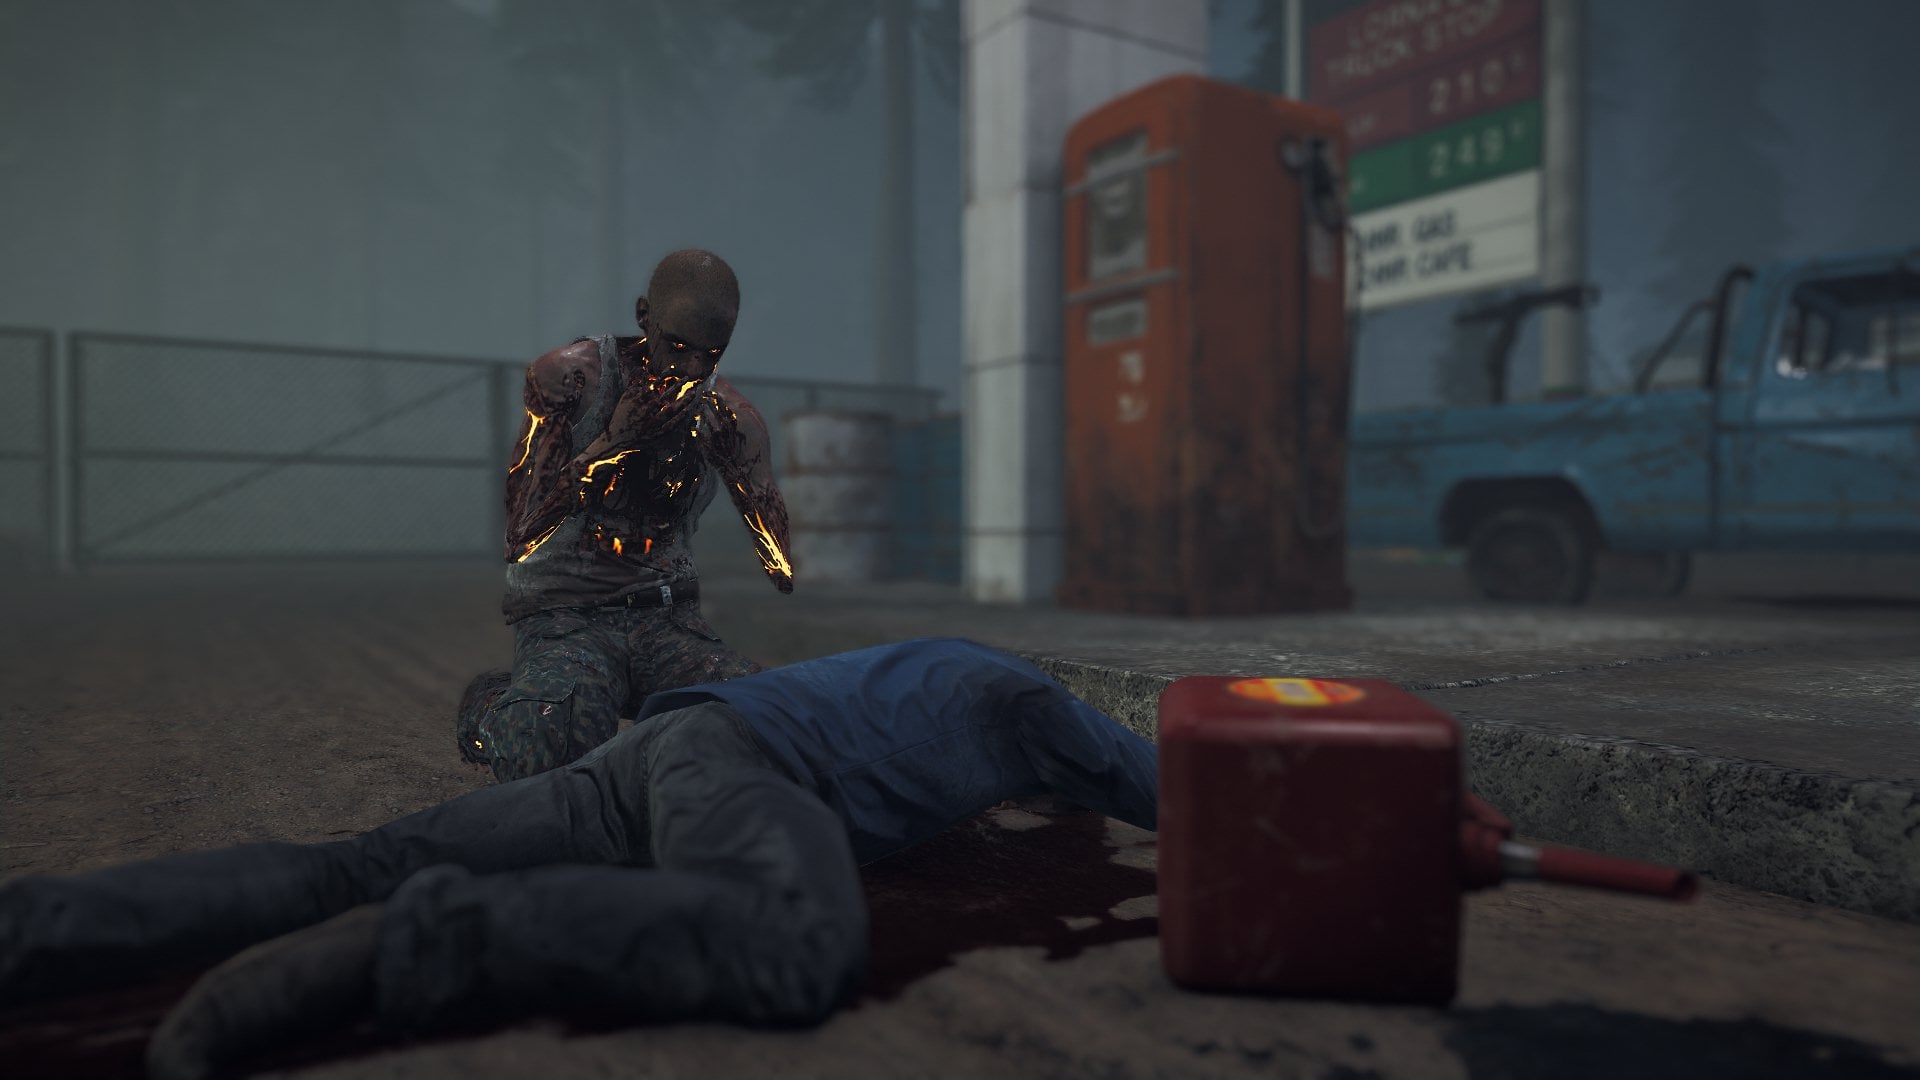
Animation Points are creative more making the map look realistic and more dynamic to the player. Animation Points can be placed in the vacinity of the AI you want to commit the action, however this will not always work. The AI will tend to wander off away from the Animation Point and will not commit the action. For AI to stay in the area so they can commit the action a Control Zone must be placed, for more on Control Zones head down to PART 16. Also to point out Animation Points do not work unless the AI commiting the action is ‘related’ to the animation point for example: A Zombie must be linked to a Zombie Animation Point etc. Animation points can be infinitly looped or can be looped on cooldown of a time you choose. Below is an example of a Zombie eating a corpse on my map Swamp Things.
Navigation
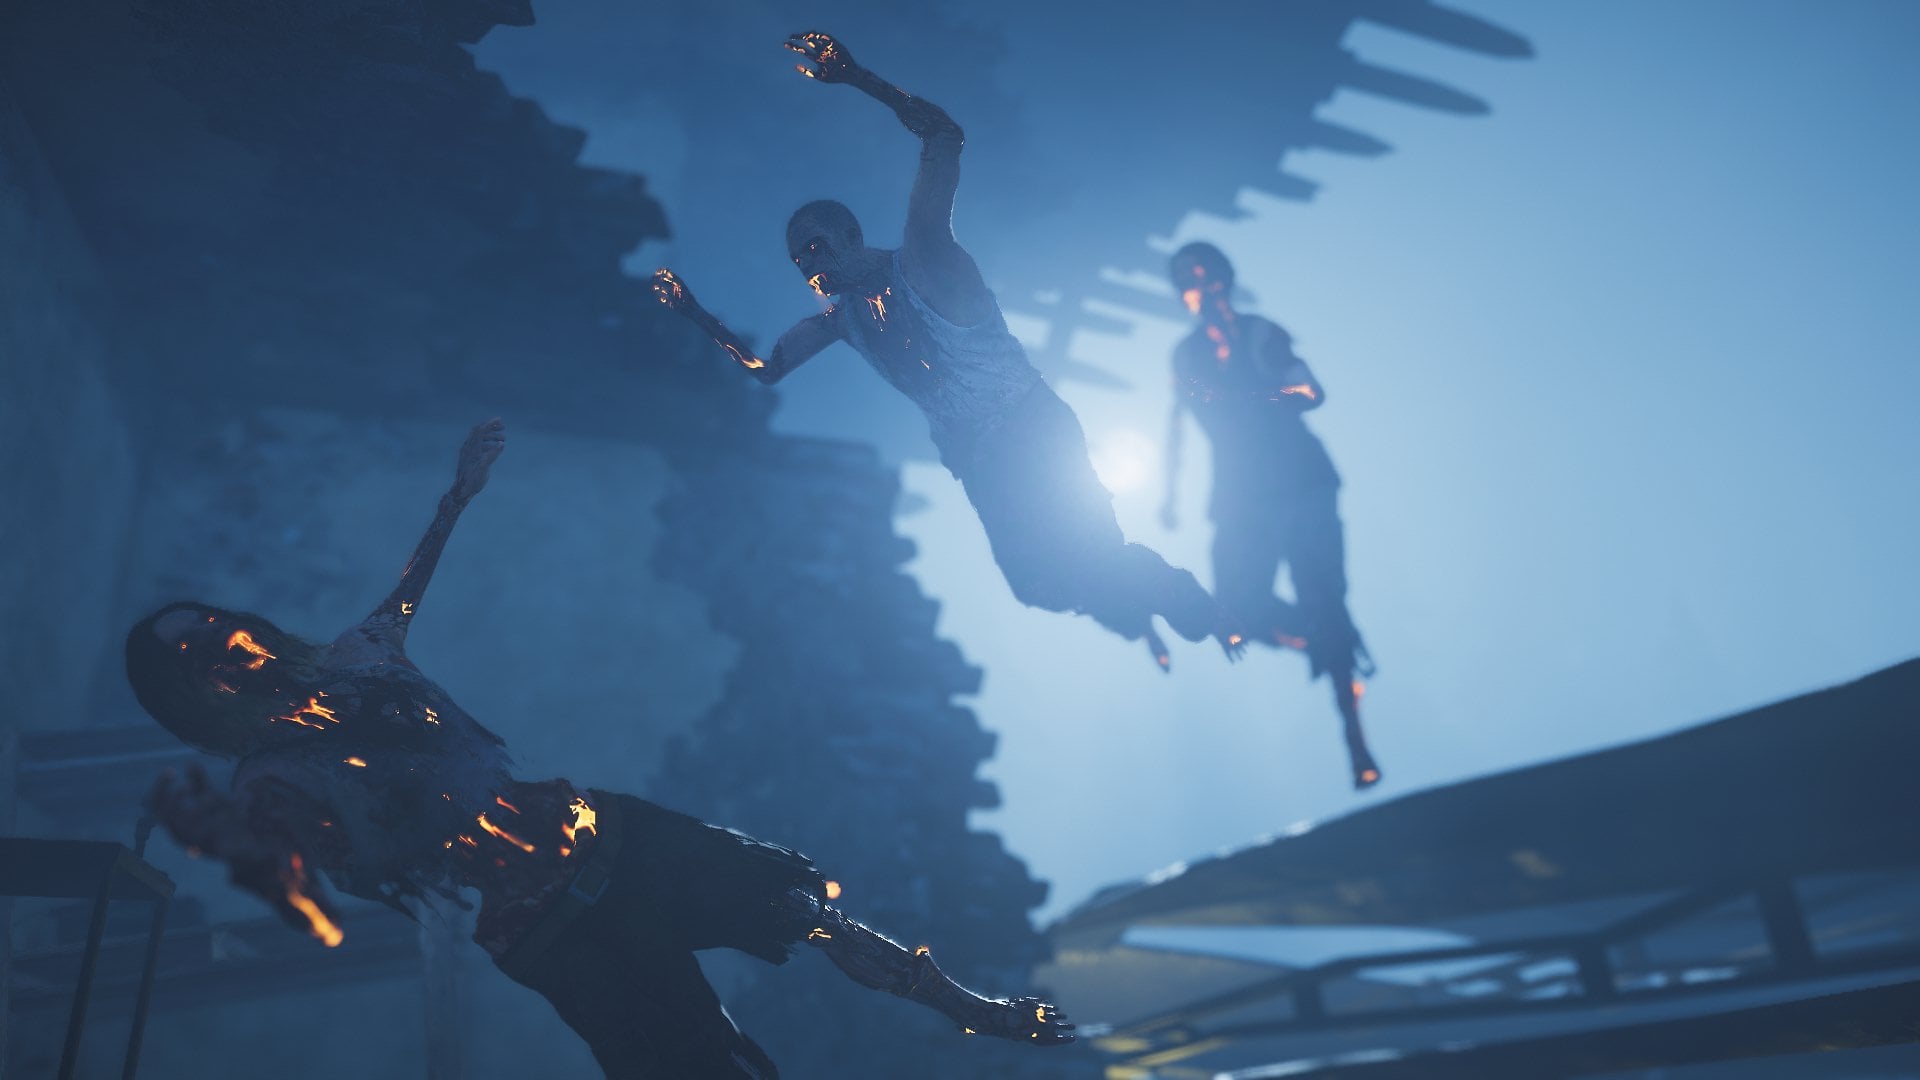
This is an object that can be found in Gameplay > Climbing & Navigation > AI. It is a jump mechanism which works for zombies. If a zombie crosses the object they will automatically ragdoll, this works great for jumping across ledges and etc. In the object preferences you can select how high the zombie will fall from for it to work.
Control Zones
These are Volumed objects that keep AI in a certain section of your map. Editing options allow you to change the width, length and height of the Control Zone. To link an AI to a Control Zone open up the AI’s Object Preferences Menu and press the drop-down bar on ‘Control Zones’ then select the Control Zone Volume you would like your AI to be linked to for example: Defend – 138 (the number represents the number of the object that has been placed down). Listed below are the different types of Control Zones.
- Defend
A Zone where the AI linked to it and stands completely still, will sometimes commit default idle animations or say general dialogue. These zones are good for keeping a AI in a certain area, especially for Animation Points. - Defend Cautious
Almost exactly the same as the Defend Control Zone the Cautious Zone makes the AI act ‘cautious’, almost as if they suspect you are near. - Move & Defend
A Defence area where the AI walks around a specific area as if they are on a sort of Patrol around the area. - Rush Point
A Zone which is not a Volume, it is a point on the map where the AI chosen is scripted to run towards the point where the Rush Point is. Once the action is complete the AI will wonder aimlessly but not too far away from the original object. - Territory
Only applies to animals. Basically a Defend Control Zone made for all Animal AI. - Alarm
Only applies for Outpost game-mode. When player is spotted AI enemy assigned to this control zone will set off the alarm.
Triggers
Triggers are what causes the Script to complete it’s action(s). Without a trigger point a script will not complete the action read the following information on trigger points to understand how to use them.
Events
Trigger events are where an action from the player must take place for the script linked to work. Listed below are the different events you can use to set up a trigger point.
- On AI death
Link AI to trigger point by pressing ‘add event target’ and then selecting the AI you would like to target. - On object destroyed
Link a destructible object to the trigger point by pressing ‘add event target’ and then selecting the object you would like to target. - On wave started
Select which wave you would like to have linked to the trigger point, the script should work after this.
Look At
A trigger look at is where the player must look at the trigger point for the script to activate. The only thing that can be edited for this trigger point is the draw distance (the distance the player must be away from the trigger for the script to evacuate the smaller the number the closer the player must be).
Volumes
A trigger volume is where the player must enter the triggers area for the script to activate. The only thing that can be edited is the size of the volume (XYZ measurements)
Linking
Scripts can only be linked to a trigger point in one way (trigger to script not script to trigger). At the bottom of the trigger’s object preferences a drop down bar will reveal the scripts that trigger can be linked to. Also multiple triggers can be linked to one script. Select the script and then the script should work once obviously triggered (script must include actions).
Scripts
Scripts add a lot more diversity to the map, they can even change the total structure of your map. Read below on how to perform certain script actions.
Actions
Read the following text to learn how to do each item below:
- Spawn object
(select object) - Spawn object with lifetime
(select object and then select the time it takes for it to despawn) - Despawn object
(select object) - Spawn AI
(select AI) - Despawn AI
(select AI) - Delay
(delays following script by certain amount of seconds) - Teleport player
(place two teleport points [sender and reciever] on the locations you want the player to be teleported to) - Change time of day
(select what time of day you want your map to change to) - Set fog
(changes fog on the map to some or none) - Set storm
(adds / removes rainstorm environmental settings) - Change music theme
(adds / removes or changes background music) - Set slow motion
(changes the speed of your game; change with slider tools, this can change the speed of death loading time and objective complete time)
Actions can be moved up / down or removed. This determines which script plays first, scripts also have options for when another script is already running. This is kind of limited as you can only ‘queue’ the script or ‘stop’ the script from working, it’s a shame you can’t run two scripts at once. Once the script is complete you can then link it to a trigger point.
Publish / Update
Map Validation
Once you believe that every object has been placed down correctly and complete, you must now either fly around and check that no object is clipping through another or the terrain as this can ruin performance and also make the map look buggy and awful. You can do this at the end of everything, but I would recommend checking each and every time you add a new object to the canvas. The Map Validation section does help with this however as it points out which items are clipping (items that are marked with a red ‘X’ mean that the map cannot be published before this problem is solved and items that are marked with a yellow warning symbol mean that there is a problem but it doesn’t affect the maps performance or gameplay).
Add-ons
Some game-modes require certain objects which are required for the map to work. If these are not implemented into the map, the map cannot be published.
- Journey
- Extraction point.
- Bounty-hunt
- At least one target and an extraction point.
- Outpost
- Alarm and at least one Wave 2 enemy.
(All maps require at least one spawn point, a snapshot and at least one enemy AI)
Updating
To update a previously made map, you first need to ‘request deletion’ from the Arcade Browser, not the map menu as this will delete your map completely. After this edit the map you’ve just deleted and press publish to add it back to the public browser. Now when you look your map will have a little ‘v2’ in the corner to show the map is updated.
Publishing
Press ‘file’ and then ‘publish’. Maps with offence stuff etc. will be removed by Ubisoft so watch out!
After looking for something that will help build a map in Far Cry including viewing lots of video, created by some clever people I stumbled across this.
I wish I had found this guide sooner – it really is comprehensive and has been very helpful in clarifying so much and in particular scripting and triggers, – Excellent work and many thanks to the author.