Hello from our FNAF Ruin DLC Walkthrough guide. Presenting players with an enticing opportunity to revisit the Pizzaplex following the events of Security Breach, Five Nights at Freddy’s: Security Breach – Ruin introduces a free expansion featuring a brand new campaign and protagonist. As Cassie, you embark on a mission to return to the now rundown mall in search of your friend Gregory. Fortunately, we’ve prepared a comprehensive FNAF Ruin DLC walkthrough to help you navigate through the harrowing depths of this terrifying location with ease.
FNAF Ruin DLC Walkthrough
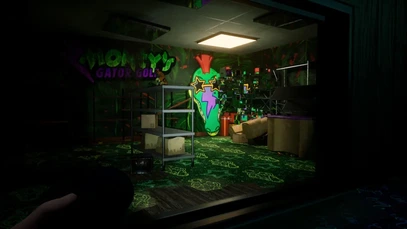
Welcome to our FNAF Ruin DLC Walkthrough guide. Following a cordial welcome from Monty in Ruin’s Prologue, we’ll be transported back to a familiar setting from the main campaign of Five Nights at Freddy’s: Security Breach – Monty’s Gator Golf. In the walkthrough provided below, you’ll be skillfully guided through this section, ensuring your survival amidst the various threats you’ll encounter while exploring this area.
Entering the Pizzaplex
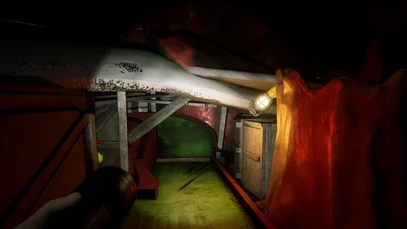
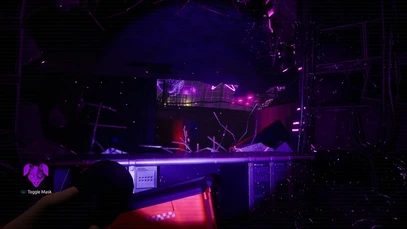
Ruin commences with a brief cinematic, revealing Cassie’s entrance into the Pizzaplex through a massive shattered window adorned with flyers. As she drops into the mall, you gain full control of her actions.
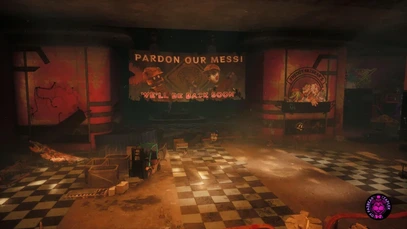
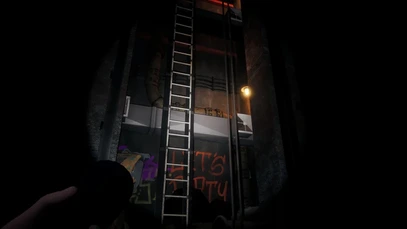
Start by heading down the ladder to your left and proceed into the lobby. A short cutscene will trigger, during which Cassie realizes she needs to reach higher ground to search for Gregory. Once the scene concludes, turn right and advance towards the right-hand side of the lobby.
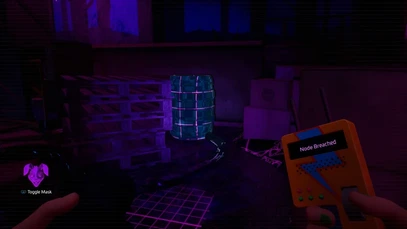
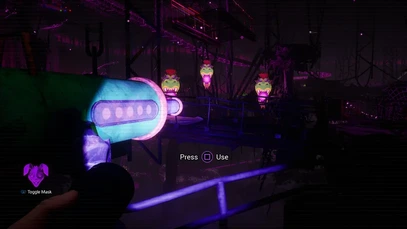
You’ll notice a path leading deeper into the lobby, but it’s obstructed by gates, and Cassie is apprehensive due to the darkness. She fears she won’t be able to see properly. Instead, go to the nearby booth on your right, which is where the Entry Pass was discovered during the base campaign. You’ll find a security bot holding a flashlight at the booth. Grab the flashlight and then pass through the gates and enter the gift shop.
Find the Walkie Talkie
Continue through the gift shop, ascending the stairs to the second floor. As you progress through the shop, a nearby security bot will activate and startle you. Fortunately, it poses no threat, so continue onwards without concern.
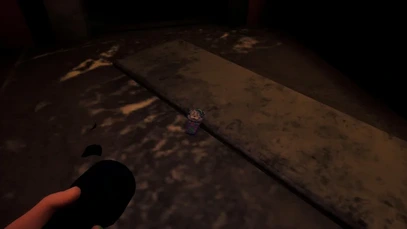
Pass through the doors at the back of the second floor, and you’ll arrive at a balcony leading to the elevators and the entrance to the daycare area. Here, you’ll hear Gregory’s pleas for help coming from nearby. Follow the sound, and you’ll find a walkie-talkie in front of the left-hand side elevator.
Approaching the walkie-talkie will automatically prompt Cassie to pick it up, and she’ll communicate with Gregory. He’ll reveal that he’s been captured and ask her to head to the sinkhole beneath Roxy Raceway to rescue him. Despite Roxy Raceway being on the other side of the Pizzaplex, Cassie agrees to help him nonetheless.
After the conversation, proceed through the gap in the elevator ahead and climb the ladder to your left. Climbing a few rungs will trigger a cutscene where the elevator behind you plummets to the ground. Once the scene concludes, continue scaling the ladder until you reach the top.

Now, you’ll find yourself on a small maintenance platform. Crouch and navigate through the open vent in front of you, following its path until a cutscene occurs where the vent breaks, causing Cassie to fall into the kitchen below. After she recovers, follow the path through the kitchen and brace yourself, as a jump scare is imminent.
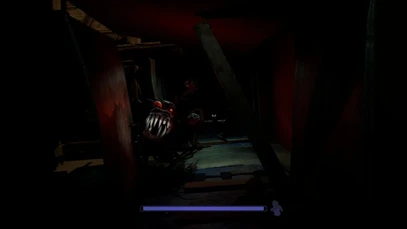
Continue following the route towards the drinking bird toy on the desk. As you approach it, Chica will grab Cassie but deactivate just before delivering a fatal blow. After the scene concludes, resume your journey and continue moving forward.
How to Solve the Faz-Wrench Puzzle
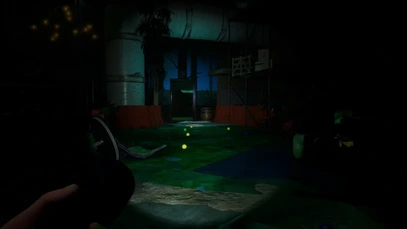
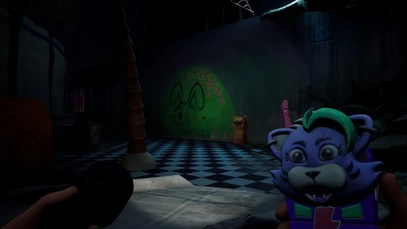
Proceed along the path into the vast room filled with junk ahead. You may hear unsettling noises, but don’t worry, it’s safe to explore… at least for now. At the end of this route, you’ll discover our next valuable tool.
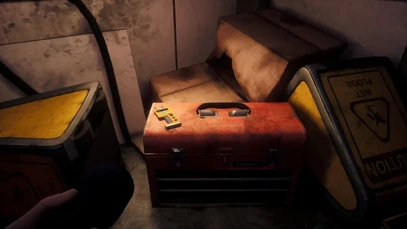
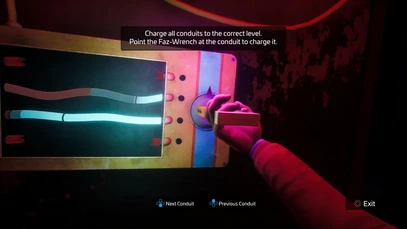
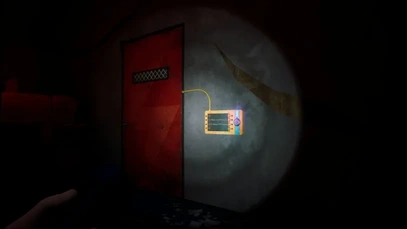
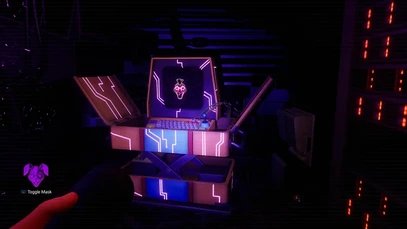
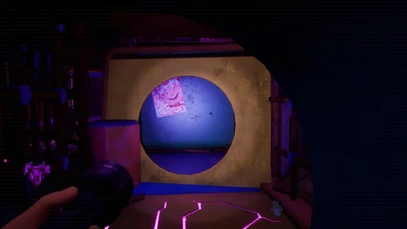
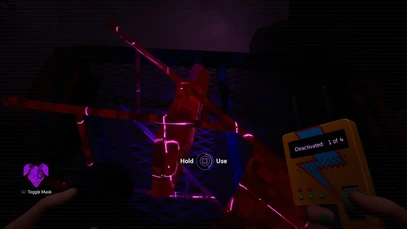
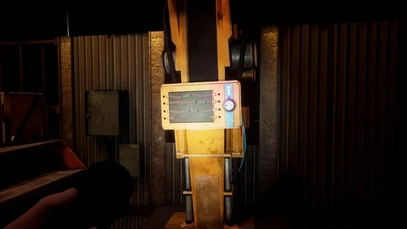
Near a toppled shelf, you’ll find the Faz-Wrench resting on a toolkit. It’s depicted in the picture above. Pick it up, and Cassie will add it to her inventory. Once you’ve acquired the wrench, crouch beneath the shelf next to it and approach the yellow panel on the wall.
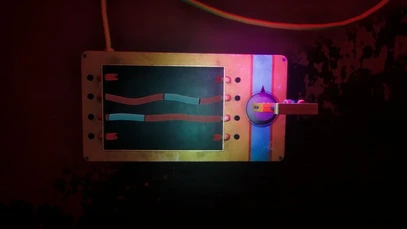
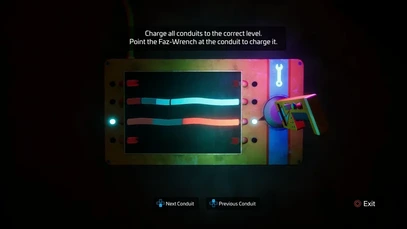
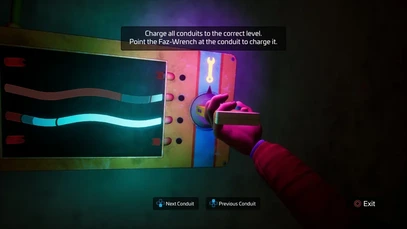
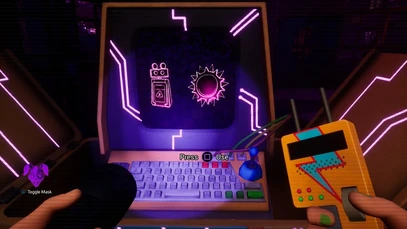
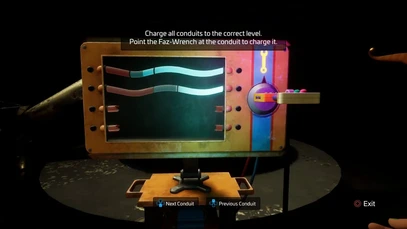
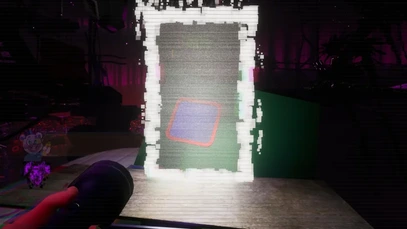
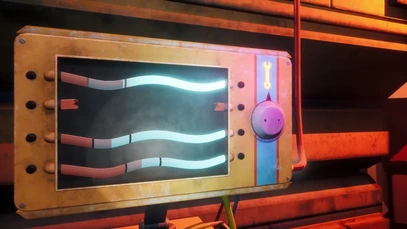
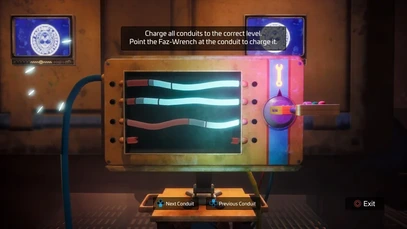
This marks our first Faz-Wrench puzzle. As shown in the diagram above, these puzzles feature long wires marked with red and blue sections. To solve the puzzle, you’ll need to manipulate the Faz-Wrench to supply power to each cable.
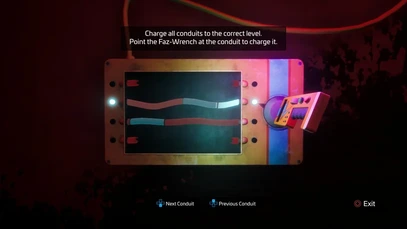
As you supply power, the cables will gradually change from red to blue, indicating the amount of energy they hold. When the Faz-Wrench is not filling a cable with power, its energy will gradually deplete. The objective is to ensure that every cable in the circuit glows blue.
For this specific puzzle, start by completely filling the lower cable with energy. Then, swiftly switch to the upper cable and begin filling it while the lower one’s energy depletes. As the bottom cable starts to deplete, the upper one should fill up, causing them both to turn blue simultaneously. Once accomplished, the door next to the puzzle will swing open.
Descend the stairwell until you reach the door at the bottom. Again, eerie noises may accompany you, but rest assured, we are entirely safe during this prologue section. Continue through and follow the path ahead until you reach an area with a large pipe to your right.
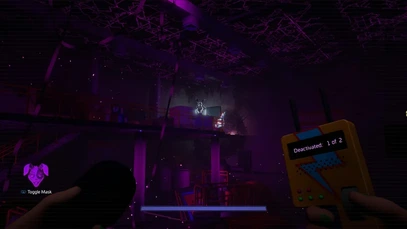
Prepare yourself and peer into the pipe. Monty Gator will lunge, pushing you backward into the water and signaling the official title card. With this unsettling introduction complete, you’re now ready to move on from the prologue and confront the true horrors of Ruin…
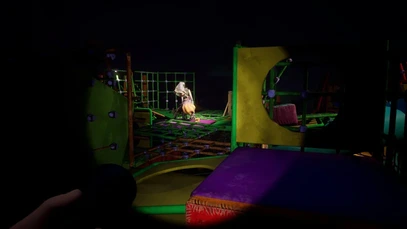
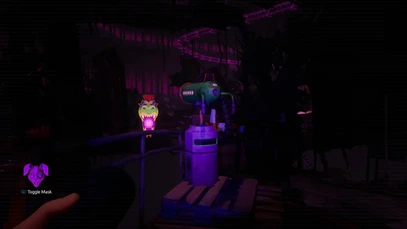
Back at Monty’s Gator Golf
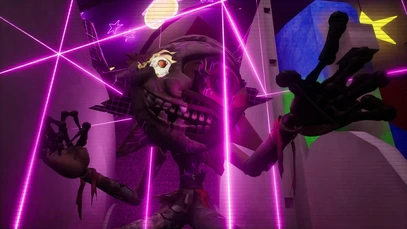
Upon returning to Monty’s Gator Golf, steer clear of the giant alligator head and seek out a path leading away from it. This route will take you through the broken golf course zones, amidst scattered debris.
Carefully make your way through the debris in a crouched position and follow the tunnel. Though you may hear various noises, rest assured that there are no enemies to worry about at the moment. As you approach the end of the path, you’ll be greeted by a familiar character who appears seemingly out of nowhere.
The Security Mask
The character, formerly known as the Map Bot, makes a reappearance but with a new identity: the Mask Bot. It seems he’s undergone a career change, and now he’s here to offer you something special – the Security Mask.
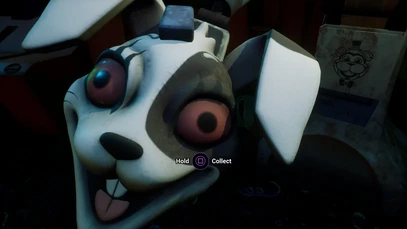
Strangely resembling a villain from the original game, the mask can be donned by pressing L1. When you put it on, you’ll enter an augmented reality (AR) world and meet a new helper character called Helpi.
Helpi will explain that the Security Mask grants you access to cyber-space, enabling you to repair security nodes that are essential for the proper functioning of the Pizzaplex’s mesh network.
Inside a small tunnel, you’ll notice a Faz-Wrench panel on the right wall. Activate it to initiate a puzzle.
Your objective is to fill the upper cable entirely and then quickly switch to the lower cable, filling it as well. Once both cables glow blue simultaneously, the doorway to your left will open. Proceed inside and continue your path through the following bathroom.
Eventually, you’ll encounter a locked door. Putting on the Security Mask will magically open the doorway, allowing you to proceed. Keep following the path until you reach a long corridor. Move forward, cross an elevated platform, and drop down into the main atrium of Monty’s Golf.
Operating the Fazbear Technician Remote Camera Station
Prepare to explore the next area featuring the all-new Fazbear Technician Remote Camera Station (we’ll refer to them as Camera Stations from now on to save my fingers from excessive typing).
These yellow CCTV stations are scattered throughout the Pizzaplex, serving as replacements for Gregory’s Fazbear Watch camera ability. With the Camera Station, you can conveniently monitor each camera in the vicinity. Let’s give it a try. Approach the Camera Station and access its controls.
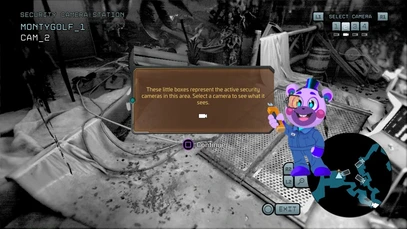
Upon accessing the camera, you’ll notice Monty’s presence on the screen, but there’s no need to worry. This is simply a demonstration to acquaint you with the station’s functionality. For the most part, the camera systems function similarly to those in the base game. You can switch between different cameras in the area using the R1 and L1 buttons and adjust the zoom with R2 and L2.
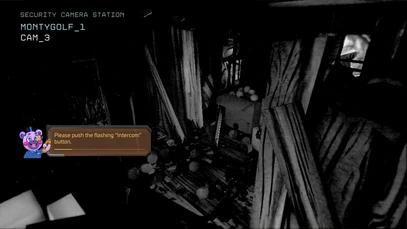
However, the major addition is the Intercom mechanic. This feature allows you to attract animatronics to the camera you’re currently viewing by pressing X. When activated, a recording of Cassie’s voice will play, providing a distraction that allows you to slip past the animatronics unnoticed. Let’s try it out now with Monty.
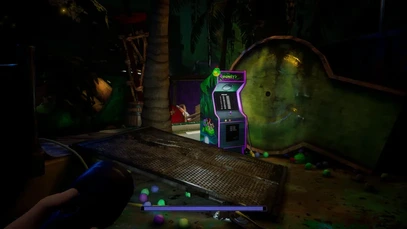
When you’re ready to proceed, exit the camera view and focus your attention back on the path ahead. Monty will disappear for now, so you can traverse the route freely. Proceed through the course ahead (feel free to pause for a game or two of Monty Golf on the arcade machine if you’re in the mood) and head towards a small area containing maintenance equipment and a mesh fence.
Here, Monty will reappear, crossing your path and then running off into the distance. Once he’s gone, follow his trail, hopping over the nearby stack of boxes, and descend onto the course below.
Deactivating the Mother Node
To disable the Mother Node, once you drop down onto the course, Gregory will initiate a conversation, emphasizing the need to shut down security to save him. Once Cassie finishes speaking, you’ll regain control and encounter a security door emitting electronic sparks ahead of you. However, before you can proceed through that door, you must deactivate the power.
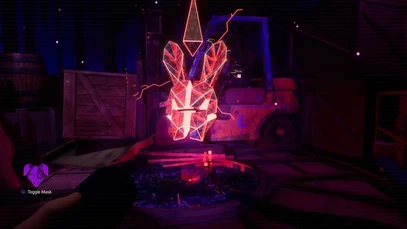
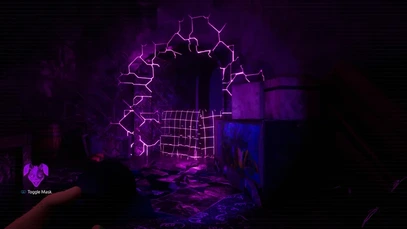
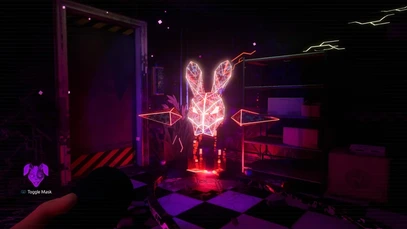
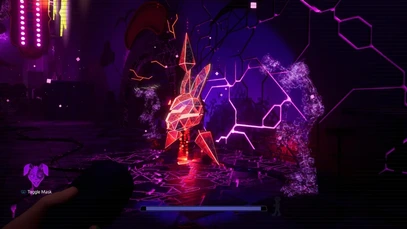
Equip the Security Mask and pass through the obstruction blocking the left-side stairwell. This will lead you up to a long walkway. Follow the walkway until you encounter another obstacle. Utilize the Security Mask to phase through it, revealing a red holographic bunny head suspended in the air just ahead.
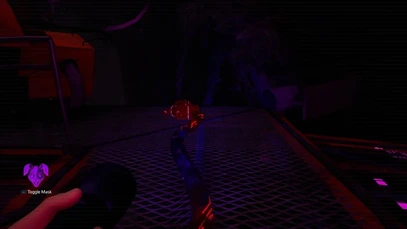
Gregory will inform you that this is the Mother Node and to access it, you’ll have to deactivate its child nodes. To locate these nodes, follow the glowing red wire emerging from the bottom of the bunny head, rather than the large plume of yellow light coming from the top (as the game might not be explicitly clear about this). The wire will lead you to a barrel located just steps away from the node.
Illuminate the node with your flashlight to make it more visible. Interact with the child node to activate it officially and unlock the Mother Node. Once unlocked, interact with the Mother Node to initiate a puzzle.
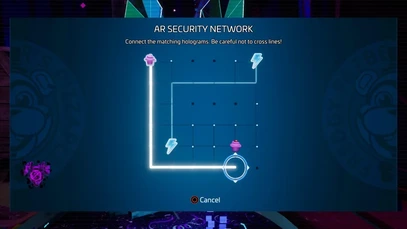
The puzzle is straightforward: you’ll be presented with two sets of emblems, and your task is to connect each emblem to its partner without crossing any lines. The solution to this particular Mother Node puzzle can be seen above. When you successfully complete the puzzle, the forklift positioned behind the Mother Node will elevate, allowing you to duck under and continue with your mission. Follow the path until you reach a tunnel of boxes that you can crawl through.
Confronting the Glitchtrap Attack
After passing through to the other side, put on the Security Mask once again and you’ll notice a new node to your right. Follow the two red wires to locate the child nodes connected to the main node, which should be a Monty Gator cutout and a red barrel.
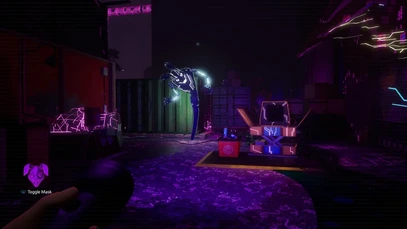
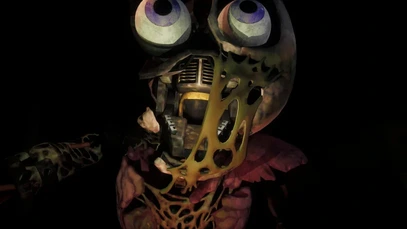
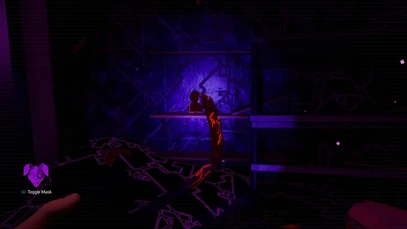
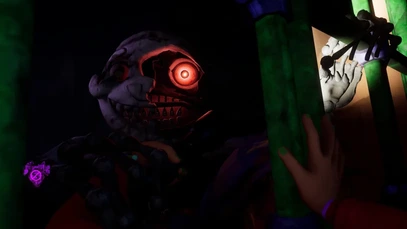
Upon deactivating the second child node, you’ll be confronted with a new threat. Helpi will warn you about a rogue virus that has entered the AR world, and shortly after, you’ll come face to face with a virtual monster called Glitchtrap. This formidable villain poses a new danger in Security Breach. Glitchtrap can only appear while you’re wearing the Security Mask, and though he cannot directly attack you, he will move erratically and slowly towards you until he reaches your position.

If Glitchtrap manages to reach you, he’ll summon Monty, who is much more dangerous than his virtual counterpart. You can still evade Monty if he spawns, but it makes completing your objectives more challenging. However, there’s an essential detail to note: Glitchtrap is confined solely to the AR world and cannot harm you when the mask is off.
Unfortunately, to complete the Mother Node puzzle, you need to wear the mask, and Glitchtrap will continue to pursue you during the attempt. When you’re ready to tackle the puzzle, equip the mask and return to the node. Solve the puzzle as swiftly as possible to activate the node. Afterward, the shutter to your left will lift.
Inside, you’ll find a second Mother Node. Fortunately, all the child nodes are within the room, so locate and activate them before completing the Mother Node puzzle. Glitchtrap will be less active in this section, so you needn’t worry as much about being grabbed.
With that task accomplished, leave the garage. Gregory will inform you that the electrified door is now open, so you’ll want to backtrack all the way to the golf course where you initially found it. Crouch and proceed through the tunnel used to reach this area. During this moment, a cutscene will play where Monty attempts to grab you, but the tunnel will collapse as he does, revealing a new path back to the door.
Follow the newly revealed path and you’ll descend to the location where you first encountered the Mother Node. From here, make your way back to the electrified door. Don’t worry, Monty won’t be pursuing you, so there’s no need to rush. When you reach the door, it’s now wide open, allowing you to pass through and continue following the path.ü
Security Route
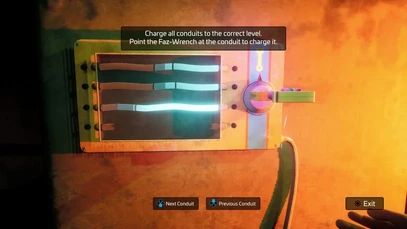
Navigate through the Security route, proceeding until you encounter a door secured with a Faz-Wrench panel.
Interact with the panel and solve the puzzle by filling the bottom cable until it’s full, then fill the upper cable while the bottom one drains. When both cables turn blue simultaneously, the door on your left will unlock.
Enter the unlocked door and continue following the path until you reach a security booth. Step inside and equip the Security Mask. Inside the booth, you’ll find another Mother Node, and conveniently, all the child nodes are located within this booth as well. Activate all the child nodes and then proceed to solve the Mother Node puzzle.
While solving the puzzle, Glitchtrap will appear outside the window. It may seem like a jump-scare moment, but Glitchtrap is not just fooling around. Within seconds, he’ll enter the booth. To evade him, unequip the mask and exit through the door opposite to the one you entered.
Continue following the route until you reach a large storage area. Go upstairs, and you’ll find another Mother Node. There are two child nodes here: one is a box directly opposite the Mother Node on the second level, and the other is a nightmare plush on a conveyor belt on the lower level.
After disabling the first child node, Glitchtrap will appear again. A good tactic is to destroy the child node on the top floor first and then quickly head downstairs, as Glitchtrap has difficulty navigating stairs.
Once you’ve dealt with both child nodes, take off the mask to make Glitchtrap despawn. Return to the node and complete its puzzle. With that done, the door behind it will swing open.
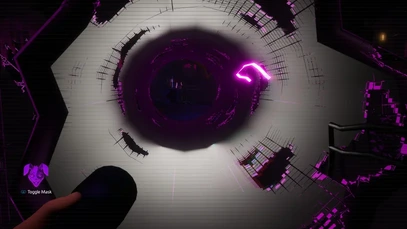
Pass through the open door and continue following the route. You’ll have to crawl through a nearby vent to proceed, leading you to a closed-off room with a broken Camera Station. Put on the Security Mask to access the AR version of the station, which comes with a unique ability.
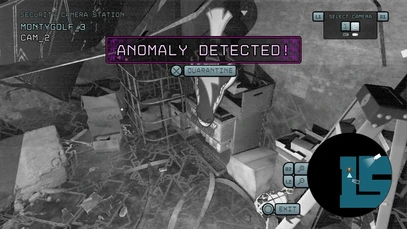
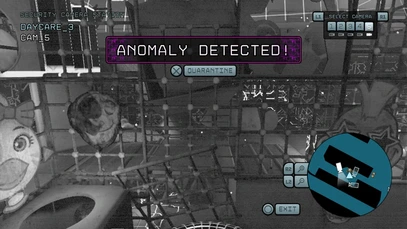
Using the AR Camera Station, you can locate and destroy Anomalies, creating new paths in the real world. For this station, navigate through the cameras until you spot a giant Monty Gator cardboard cutout. Press X when prompted to quarantine the anomaly, which will open up a new path through the wall in the current room.
Head through the wall to access the Daycare center, and thus, conclude your adventures in Monty Gator Golf. It’s time to check in on your old friends Sun and Moon…
Returning to the Daycare Centre
Upon entering the Daycare through the wall’s opening, proceed forward and take a right, following the path around until Gregory contacts you via the radio. He’ll inform you that you must reach the theatre located at the back of the Daycare. However, doing so requires passing through the playpen situated in the center of the auditorium.
After your conversation with Gregory, continue following the path, passing a series of arcade machines. Eventually, climb the boxes at the path’s end, using them to access a hole in the nearby wall. This will lead you into the playpen. Navigate through the structure, crouching through any small tunnels you encounter.
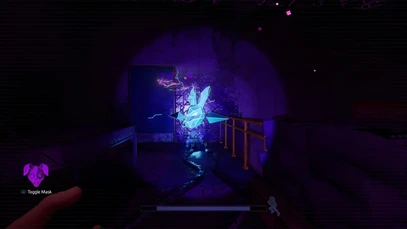
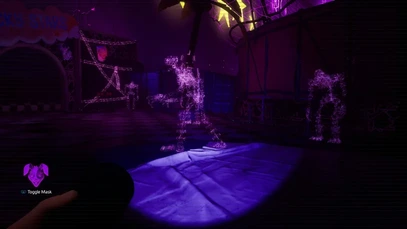
Soon, a cutscene will trigger where Moon grabs you through the play structure’s bars. It appears that our old adversary is still active in the Daycare, seeking new victims to torment. After freeing herself, Cassie must proceed forward and crouch-walk down the long spiral slide.
At the slide’s base, you’ll encounter an obstacle that can only be crossed while wearing the Security Mask. Put on the mask and proceed through to trigger another cutscene. This time, you’ll communicate with Sun, who pleads with Cassie to reboot him using her Faz-Wrench. However, Sun cannot hold Moon for much longer and requests that you locate two generators in the playpen to activate nearby spotlights. These spotlights will immobilize Moon temporarily, allowing you time to hack into his systems.
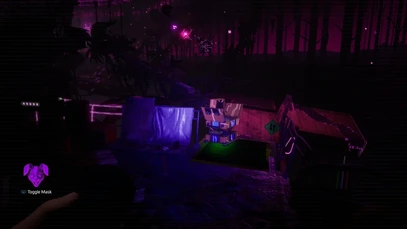
Finding the First Generator
Once Sun makes his request, he’ll climb to the top of the central play structure and stay there for the duration of this section. He won’t stalk you, but that doesn’t mean there’s no danger at all. Glitchtrap will be present, so remain vigilant.
To find the first generator, enter the play structure on the left-hand side of the area and equip the Security Mask. You’ll come across an AR Camera Station, which will be slightly different from the last one you used. Before hacking into the machine, you’ll see two symbols in a line. Your task is to quarantine these symbols in the specific order shown on the screen. For this particular terminal, quarantine the Moon on camera 5 first, and then quarantine the Sun on camera 3 second.
Once you’ve successfully quarantined the first symbol, Glitchtrap will appear. Swiftly switch to camera 3 and quarantine it before he can reach you. With that done, the moon cutout blocking a nearby tunnel will vanish, granting you access to crawl through.

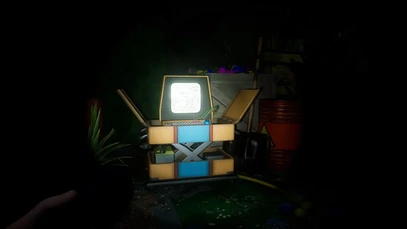
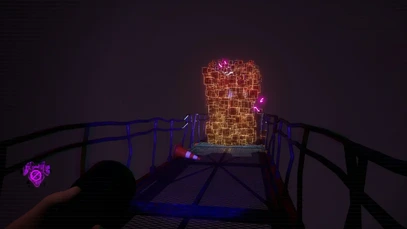
Continue following the path through the structure until you reach the first generator, as depicted in the image above. Activate it, and then shift your attention to locating the second generator.
Finding the Second Generator
After successfully activating the first generator, descend to the floor below and follow the route to a spacious area with another blocked tunnel.
Equip the Security Mask and locate another AR Camera Station. This time, you need to quarantine a small cleaning robot and a sun emblem. Find the cleaning robot on camera 4 and the sun emblem on camera 2. Be cautious, as Glitchtrap will once again make an appearance during this section.
Once you’ve quarantined both emblems, proceed through the newly unblocked tunnel and continue along the path through the structure. It will eventually lead you to the second generator. Activate it, and Moon will become immobilized. Now, make your way towards him and initiate the hacking process.
Drop down to the floor on the left side of the generator and continue following the path into the central play structure. Progress until you ascend two sets of stairs and arrive directly in front of Moon. Approach and interact with him.

This interaction triggers a cutscene where Cassie hacks Moon, resulting in his transformation into Eclipse—a fusion of both Sun and Moon. Eclipse will guide you down from the play structure and out of the playpen, allowing you to continue your journey freely.
Getting to the Theatre
Upon leaving the playpen, you’ll find yourself in a small area leading to the gift shop and the theatre. Unfortunately, the theatre gate is closed.
Wear the Security Mask to reveal a mother node just outside the door. Now, before finding the three child nodes, be aware that in this section, you’ll encounter both Glitchtrap and Endoskeletons in the AR world.

The Endoskeletons won’t move when you face them, but they’ll move towards you when you look away. While wearing the Security Mask, the Endoskeletons can walk around freely but won’t see you, making it easier to complete objectives with your back turned or move between them without getting caught. Still, be cautious as they can grab you if they come into contact with you.
When ready, locate the first child node. Two of the child nodes are easy-to-find objects (a lifebuoy opposite the doors to the playpen and a cart to the right of the theatre doorway), but one is a bit trickier. Head to the gift shop and find the Faz-Wrench panel behind the central stand.
To solve it, fully fill the upper wire, then quickly switch to the lower wire. They should both turn blue simultaneously, lowering the mechanical hand to your right. In the hand, you’ll find a sun plushy, which is the next child node.
Return to the mother node, avoiding Glitchtrap and any wandering Endoskeletons, and complete the puzzle. This will open the theatre doors and block out the Endoskeletons waiting behind you.
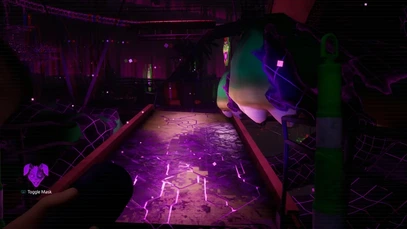
The Theatre
Upon entering the Theatre, you’ll be on the bottom floor. Proceed to the center of the area and locate an AR Camera Station.
Wear the Security Mask and access the station. This time, you’re searching for three symbols: a sun, a moon, and a cleaning robot. Find the first symbol on camera 6, the second on camera 4, and the third on camera 2. Once you’ve identified all the anomalies, a colossal Endoskeleton will appear, visible only in the AR world. This creature has broken through the theatre screen and will become your means of escape.
Head to the stage and climb the boxes just beneath the Endoskeleton’s mouth. From there, climb into its mouth and descend through the hole below.

Cassie will become anxious, prompting you to remove the mask, and you’ll find yourself in a vent. Crawl forward to trigger a cutscene where Cassie falls from the vent onto a hanging gondola. She somehow ends up back in Monty’s Gator Golf. Enjoy the ride until Cassie realizes that she’s run out of track, at which point she’ll jump from the car to the catwalks below. Now it’s time to figure out a way to Maintenance…
The Catwalk and the Maintenance Room – Heading to Maintenance
After Cassie regains her footing, Gregory instructs her to activate the nearby mother node to divert the track. This node has four child nodes connected to it, so thorough exploration of the area is necessary.

Before we proceed, it’s essential to understand the main threat on the catwalks. We’ll rely heavily on the Security Mask in this section. It enables us to cross bridges and access the turrets that connect walkways. However, beware, as Glitchtrap lurks in the AR world, ready to exploit any missteps. Keep an eye on your surroundings and remain calm if he appears. He’s not too fast, giving you time to react. Find a safe spot, remove the mask momentarily to force him to despawn, and then continue with your objective.
Deactivating the First Child Node
When you’re prepared, don the Security Mask and proceed through the debris in front of the node, continuing along the path. Ahead, you’ll spot a mounted turret. Enter Security Mask mode and press SQUARE to use the turret.
Shoot the target that appears in front of you to create a path to the next section of the walkway. Keep an eye out for more turrets going forward, as they will grant us access to new parts of the walkway.
Resume following the path. At one point, the walkway you’re about to step on will snap, causing several items to slide down. This platform is covered in slippery black gunk, making walking more challenging. Be cautious since falling here means an instant game over. Try to stay as central as possible on the path.
Continue along the route until you reach a wide gap. Put on the Security Mask and cross it. Then, take a left and follow a section where the catwalk deviates. Follow this path until you encounter a Camera Station and another significant gap.
Equip the Security Mask again, and you’ll see AR bridges connecting to the opposite catwalks. Cross these bridges to find the first child node.
Deactivating the Second Child Node
After destroying the first child node, return towards the Camera Station and locate another Gator turret nearby.
Jump on the turret and fire at the three targets ahead of you. Once all three targets are destroyed, the bridge above them will drop, granting access to the next section of the catwalk.
Follow the path to the left, reaching another gap. Wear the Security Mask and cross the bridge ahead. As you start crossing, a static doorway will open. Enter it to be teleported to a new area. After Cassie questions this bizarre revelation, proceed through the next door to be teleported to another new catwalk.
When you arrive, head up and find yourself at a branching path. For now, take a left, and as you follow the path around, you’ll pass by a Camera Station and spot the Monty Gator toy on the floor. This toy marks the location of the second child node.
Deactivating the Third and Fourth Child Nodes
Once you’re prepared, return to the walkway from where the path branched and head right. Continue along the route until you encounter another turret.
Jump and shoot the four targets moving around the bridge ahead. Be cautious of Glitchtrap’s presence here. Afterward, the bridge behind the targets will drop, creating a path to the next section of the catwalk.
Cross the bridge and find yourself at yet another branching path. First, head left and grab the third child node, which appears as a fallen chair on its side. When that’s done, return to the branching path.
Now, go right and approach the large cyber pipe connected to the opposite catwalk. Walk through it, and you’ll come across another static doorway. Step through to find yourself on a vast, stretching walkway in a huge empty room.
As you move forward, Glitchtrap will appear, rapidly darting towards you. But before he can reach you, a red barrier will manifest, sending the monster away. Gregory will then call and inform you that he’s disabled Glitchtrap. For now, he won’t be a threat, so you can use the mask freely.
Once the encounter is complete, you’ll return to the pipe. Follow it to the end, where you’ll find the fourth and final Child Node. With that accomplished, make your way back to the Mother Node. Activate it, complete the puzzle, and the doors above will open.
Diverting the Tracks
With the Mother Node task completed, take a left from the node and follow the path back up to the Gondola Station. Next to the steps, you’ll find a Faz-Wrench Panel.
This panel is slightly more challenging than the ones you’ve encountered before as it has three wires to contend with. To make it work, fully fill the top wire, fill the bottom wire just slightly above the blue section, and then switch to the middle wire. It may take a few tries to get it right, but when you do, the gondola above will activate.
Hop inside, and Cassie will ride the gondola through the doors that were opened earlier. During the ride, Gregory will inform you that you’re getting closer to reaching him. Once the conversation concludes, disembark from the gondola and head towards the door on the opposite side of the room.
You’ll enter a stairwell. Ascend to the very top, and you’ll arrive in a large maintenance room surrounded by generators.
The Maintenance Room
When you’re ready to proceed, move to the other side of the room and locate a Faz-Wrench panel.
To complete this panel, fill the top two wires fully and then switch to the bottom wire and begin filling it. The lights on all the wires should turn blue simultaneously when the panel is properly configured.
Next, find a ladder to your immediate right and climb it to reach the second floor of the Maintenance Room. On your right, you’ll find another Faz-Wrench panel. Fill the middle wire and then the top wire before switching to the bottom wire. Again, the lights should all turn blue simultaneously.
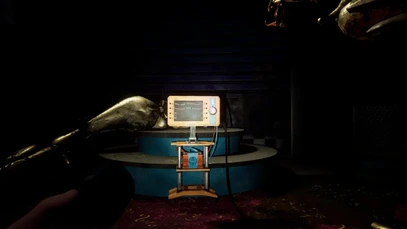
Finally, follow the path to a third and final Faz-Wrench Panel. For this one, fill the top two wires, and then switch to the bottom wire. Upon completing the panel, you’ll witness a short cutscene showing Chica being transported on a conveyor belt. After the scene, the conveyor door to your right will open.
Climb onto the conveyor using some nearby boxes, and then walk through the now-open conveyor doorway. Follow the path until you come out above Chica’s Bakery. Use the Security Mask to phase through the gate ahead, and a cutscene will follow.
In the cutscene, Glitchtrap returns, kicking you out of the network using a jammer. After contacting Gregory, Cassie learns she must deactivate the jammer to regain access to the mask. It looks like a visit to Chica’s Bakery is in order…