
Custom Maps Guide
Step 1: Enabling The Developer Console
To start, we’ll enable the developer console. This lets you type in various commands that will allow you to enter your maps.
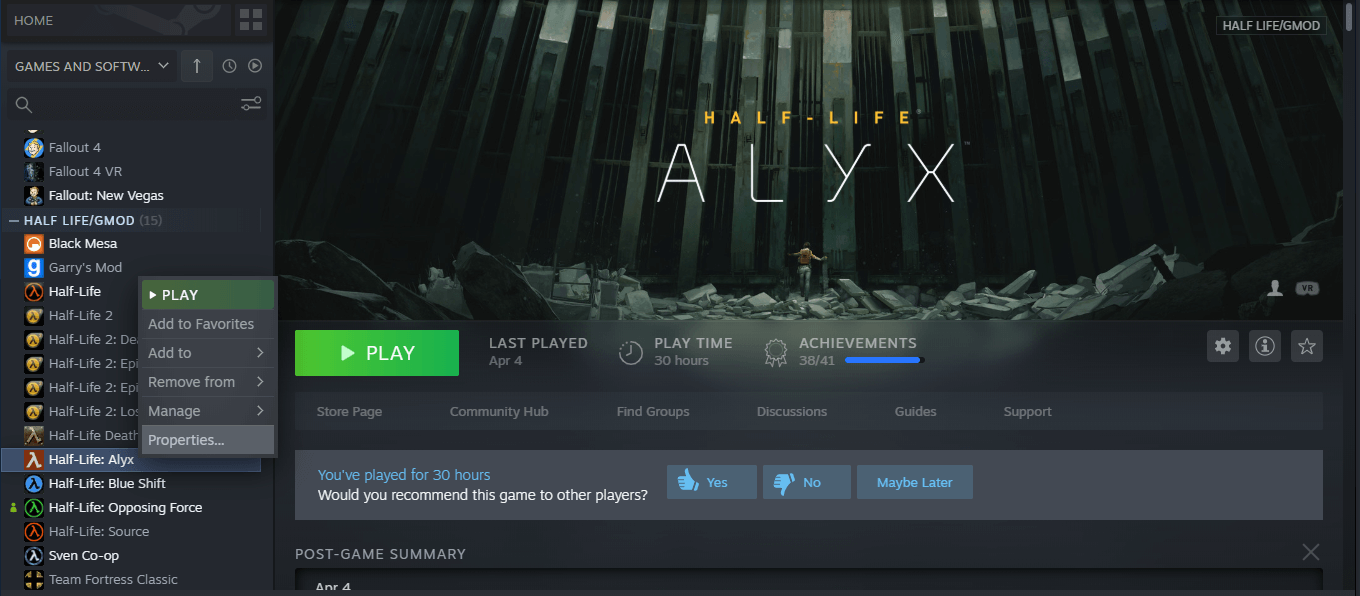
First, right click Half-Life: Alyx in your steam library, and select “properties” from the drop-down menu that appears.
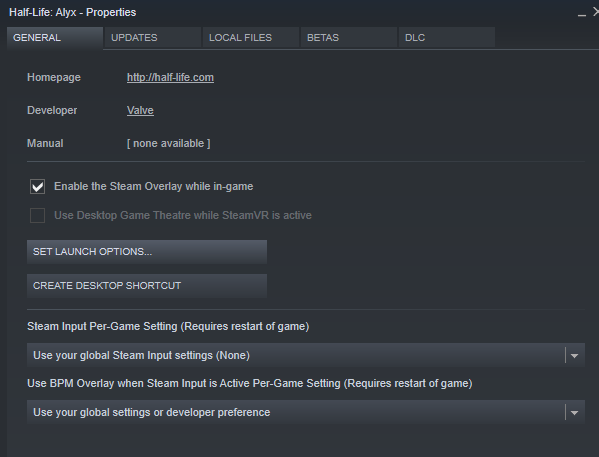
Next, select “Set Launch Options” on the properties menu that is created.
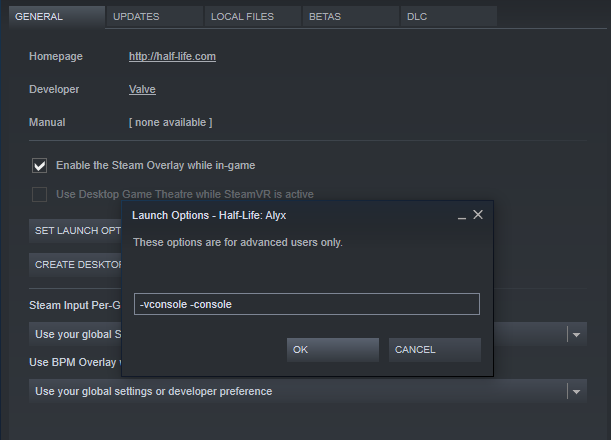
Finally, type “-console -vconsole” into the launch options, then hit “OK.”
Step 2: Installing your Level
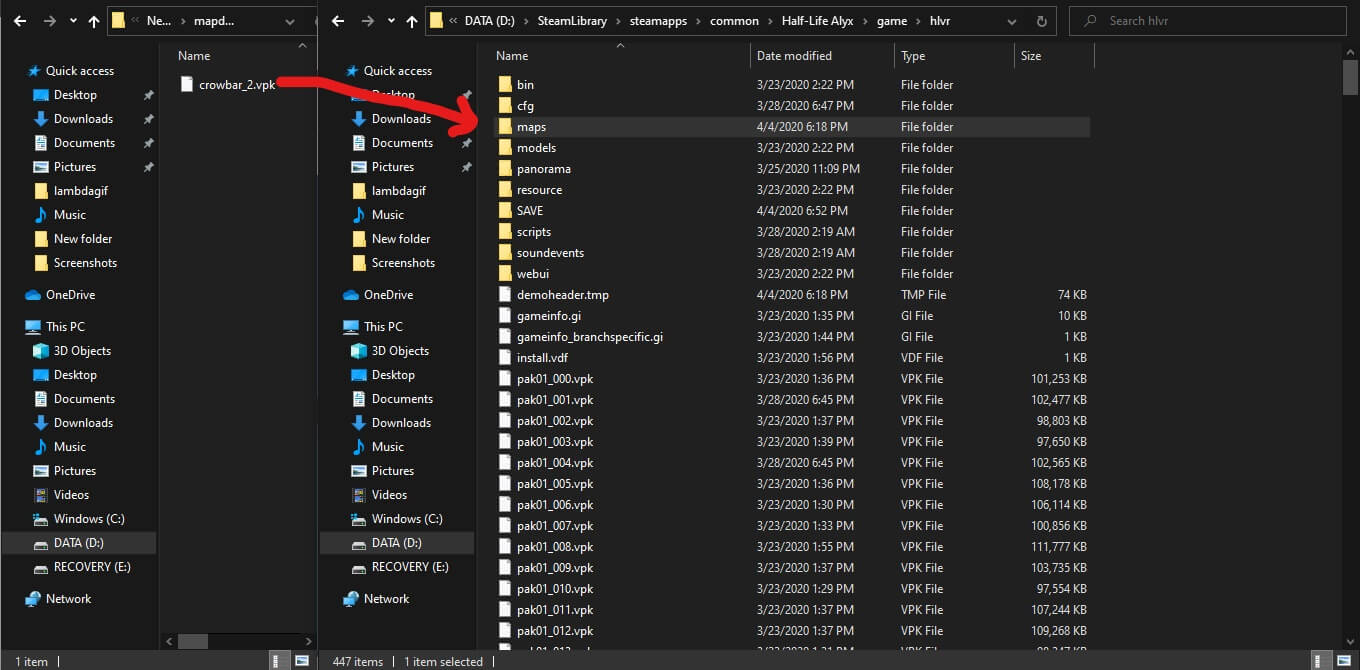
Now we are going to install the level you’ve downloaded into the game.
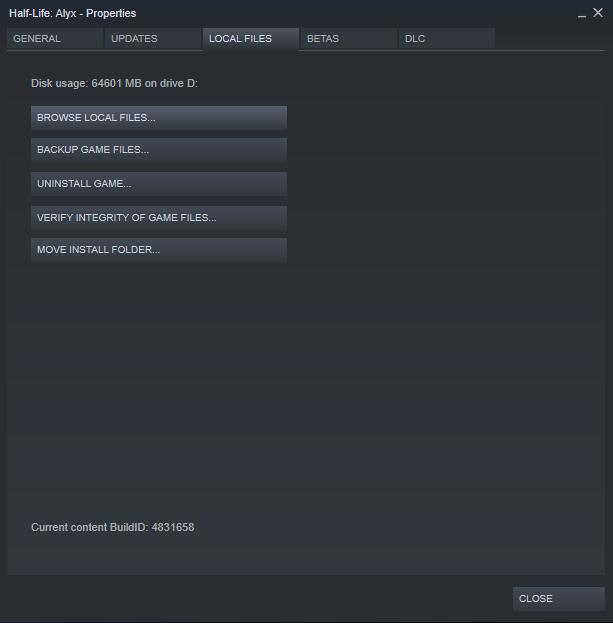
Open the properties of Half-Life: Alyx again and go to Local Files, then select “Browse Local Files.”
Now Navigate to \SteamLibrary\steamapps\common\Half-Life Alyx\game\hlvr and open a new file explorer window where you have your downloaded map file.
Drag the map file into the folder called “maps.”
Step 3: Launching The Map
Finally, we’ll launch the map.
First, launch Half-Life: Alyx to the main menu, then press the ~ key. (it’s above TAB)
A window called VConsole2 will apear.

Type in the area labeled “Command” : map [map file name].

Your map will now start loading and you’ll be on your way to gaming.
Be sure to join the HLA: Modding Hub discord for maps and map creation!
https://discordapp.com/invite/cvGYF2H