This will be a simple guide to help you find all aliens you may have missed! This guide assumes you are both following it and exploring on your own as if you had started the level for the first time. However, as long as you have a very basic sense of spatial awareness, (hopefully) the images we include will help point you in the right direction and find where to go, anyways. Check out our Interior Worlds All Alien Locations guide without wasting time!
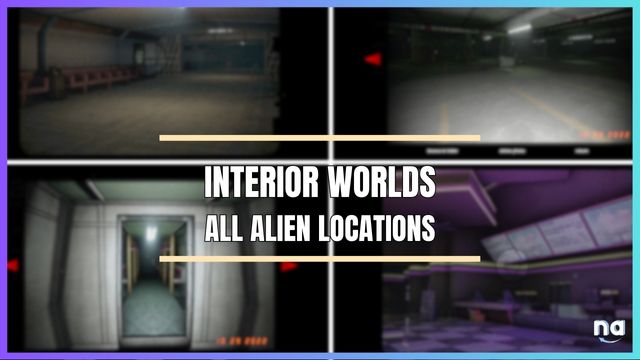
Interior Worlds All Alien Locations
Welcome to our Interior Worlds All Alien Locations guide. A comprehensive guide on where to find all the aliens in each area, including pictures for your reference. No secrets beyond that are included.
Level 1: The Parking Garage
Alien 1:
You will need the green key, which you should find naturally on your own, since it’s found in the same area a snapping spot is at (Section B, behind the gates to be specific). Once you’ve gotten the key, go back to where you first entered Section B and go up the stairs to Section C, you should be able to use your green key at that point and find the alien politely sitting behind the door.


Alien 2:
Now, from Section C back to Section B, follow the right side of the room and keep moving forward. If moving correctly, you should find a door you can’t open surrounded by graffitti, keep sticking to the wall and moving forward until you find *another* door surrounded by graffiti, with 6 pipes to the right of it. This door is openable, so go inside until you see a short set of stairs that lead down to a bunch of junk. The alien is hiding behind the stone parking blocks (i think is what those are called).


Alien 3:
Assuming at this point that you’ve also gotten the red key naturally exploring the area, go to the exit found in Section B that needs the red key and go down as far as you can. You should see a shopping cart next to the exit door. Go behind the stairs(as if you were going to go down another layer) and you should find the last alien hiding right below the stairs. That should wrap up all the aliens for the Parking Garage.


Level 2: M.T.
Alien 1:
Follow the natural progression of the level until you find yourself standing in a loooong room with what seems to be a map of the metro under a green light. From there, go left until you’re at the two ticket machines next to the slanted bench. Jump over the bench, and you’ll see some garbage bags blocking a doorway, where the alien will be hiding behind.


Alien 2:
After you’ve found Alien #1, go back to the two ticket machines and go down the stairs behind the “Subway” hanging sign. I believe you need to use a red key to open this gate (which you’d have gotten if you went right when you first entered the long room). As soon as you open the gate, go right until you see two planks shoddily blocking off a little room with garbage bags and the alien hiding behind. A set of garbage boys these aliens are, huh?


Alien 3:
Again, following the progression of the level, you should eventually find yourself in the “middle” section of both train tracks. Loop around this area until you are able to enter the train on the left. After pushing the wood planks down to exit the other side of the train, get back onto the main platform using the plank as a ramp (doing this just for references sake). Now, facing the train, go right until you see two wood pallets propped on top of a stone parking block. The pallets are used as your way into this second opening into the train, so run and jump onto the pallet and you should find the alien #2 inside. That should be all the aliens for the Metro.


Level 3: A.P.
Alien 1:
The route I took takes quite a while to find the first alien, so go explore and take pictures at the snap spots as you see them until you find the area of the Airport with the locked exit gate and the plant in the middle of the room. Unlock the gate next to the ATM machine using the button in the maintenance room and head inside. Once a little ways inside the room, turn right and you should see a desk with a computer on it. The alien should be hiding behind the desk.


Alien 2:
From that room, go down into the Employee’s Only (Exit) hallway and keep going until you see a garbage bin to your right. (For reference, you should see a soda machine on your way down the hallway.) There is garbage bags behind the garbage bin, where the alien is hiding behind.


Alien 3:
Now, leave this area as a whole and go back to where all the Airplanes are docked; You should see pillars with hanging signs telling you Terminal 1, Terminal 2, etc. etc. If you don’t have the key yet, go to Terminals 1 and 2 and look to the right. There should be an area chock-full of chairs, and there should be a door in this area you can open that has the key inside. Once you’ve grabbed it, move up till’ you find Terminal 4 and use the Blue Key on the locked door, where the last alien should be.


Level 4: H.T.
Alien 1:
From where you start, you want to go to the pool area. So go forward until you’re at the split path, and then go left. Keep going forward this way until you reach a set of stairs that leads you into an (initally) tidied up room full of dining tables and chairs propped up on said tables. Move on past this room until you reach the pool area, and go to the far end of the area, where you’ll find an area with two pool chairs below a piece of hanging cloth. You can jump through said cloth, so do so, and find the alien hiding behind.


Alien 2:
Now, leave the pool area, past the tidied up chairs, but don’t go back into the main area- go down the hallway in the room you should be currently in, with the Exit sign hanging from the ceiling. Go into the Fire Exit, and up the stairs to the top floor. Go to the end of this hallway and down the hallway closest to the window. Look for a door that is openable, and inside you should find a blue key. In this same room, look behind the couch to the left of the T.V. and you should find Alien #2 hiding behind there.


Alien 3:
Leave this room, and continue going down the hallway (not back the way you came!) and you should find another door already open with stairs “barred” up with tape. Do a sick 360 through the middle all the way down (or y’know. take your time) and you should see that there aren’t any stairs that let you get back up this way, with wooden planks propped against the incomplete/broken stairs, some more garbage bags, and some more danger tape. Alien #3 is hiding behind the garbage and the planks. That is all the areas in this alien.


Level 5: S.B.
First of all. God. alien #3 was tough to find.
Alien 1:
From where you start, keep walking forward until you see an orange (or red in the picture) house. Walk past it taking the open gap in the left from the house or through its gates and you should see this green house with a van partially parked inside its garage. Go inside the garage and you will find the first alien hidden behind a circle of garbage bags.


Alien 2:
Exit the garage and follow the sidewalk to your left. You should find two large trash containers, with a fence behind them holding two sets of swingsets. Alien #2 is hiding behind these garbage containers.


Alien 3:
Continue doing your snapping spots until you find a large water tower. For reference, stand in front of it so that your compass says you’re facing south, then turn right (west) and move forward until you see a large red house with a van parked halfway into the road. To the right of this houses’ garage should be a button you can press, with this sneaky bastard hiding behind a bunch of garbage. this alien. Little garbage boy.


Alien 4:
From there, continue going westwards. You should find a playground. From this angle, you should already see the little guy peeking out from the slide, and you can get closer to them by getting up from the stairs behind them.


Level 6: T.T.
Alien 1:
From where you start, go forwards to the concessions stand, and then left. Jump over the rope, up the stairs, and then go right until you see the bathrooms. Go inside, and open the stall in the very middle. INVADE that aliens’ privacy and force him to stop with a picture.


Alien 2:
Leave the bathroom and go left (south) down the hallway. It’s a long walk, but make it to the very end. You’ll see a flickering light and a boarded off area. Crouch underneath the planks and tape and take a picture of the garbage alien hiding behind.


Alien 3:
You’ll find the last area in the same place place you get the blue key. If you’re following from Alien 2, go ALL the way to the other side of the hallway, (north) until you see a theater advertising “The She Beast”, it’s very obvious from the unique green lighting. Go inside, and then go out the *other* side of the room, where you couldn’t enter the first time. You’ll find them hiding behind some movie posters.


Level 7: S.
Alien 1:
Absolutely the easiest one yet that I don’t think anybody would miss. Walk forward. Open the stools. Crazy!


Alien 2:
When you find the gym, there will be four sets of bleachers (TL, TR, BL, BR). The alien will be hiding behind the Top Left bleachers, since it’s the only one that has a gap in it. Go behind the bleachers and snitch on that alien for skipping P.E.


Alien 3:
While exploring, you’ll find the “Main Entrance” of the school. (There will be the school’s logo on the floor, as long as the usual long set of doors for a large pack of students to get in and out from.) There’s also four corners of ferns, and, like the bleachers from the gym, the alien will be hiding ABOVE the Top Left (facing east) fern, in the open crevice near the roof. Up to this point, this is the only alien that hides above you.


Level 8: M.
Alright, as of now, this is the last location in this game! The creator said that they might add more locations in future updates, and I’ll try my best to update this guide as they are added as well. (Maybe I’ll even update the photos if there are any I especially like.)
Alien 1:
From where you start, go forward until you’re at the 4-way split path. Choose the right path and go to the very end. You should see escalators boarded up and a “Restrooms” hanging sign to your left. Go down that hallway and into the bathroom. You’ll find the alien in one of the stalls. Again. (Completely irrelivant but I can’t believe the first time I actually jumped in this game was from a fart sound effect. It caught me so off guard it was so funny LMFAO)


Alien 2:
Continue exploring until you’re able to get into CostMart. Go to the back, where you can’t go any further because of the rest of the shop being boarded up. For reference, if you look north-east, you should see the “Baked Goods” neon sign. But don’t go directly to it, because the alien is hiding behind the only stocked shelf in the area you’re at, in front of the pillar.


Alien 3:
The last alien is in Lacy’s. Go up the escalator, into the weird mannequin room, and turn south-east. You should see three empty shelves, where the last (as of now) alien should be hiding behind.

