Core Combat Mechanics
While the game’s tutorials do a good job of explaining how things work, having an out-of-game reference guide can be handy in case you want to review.
Combo Meter
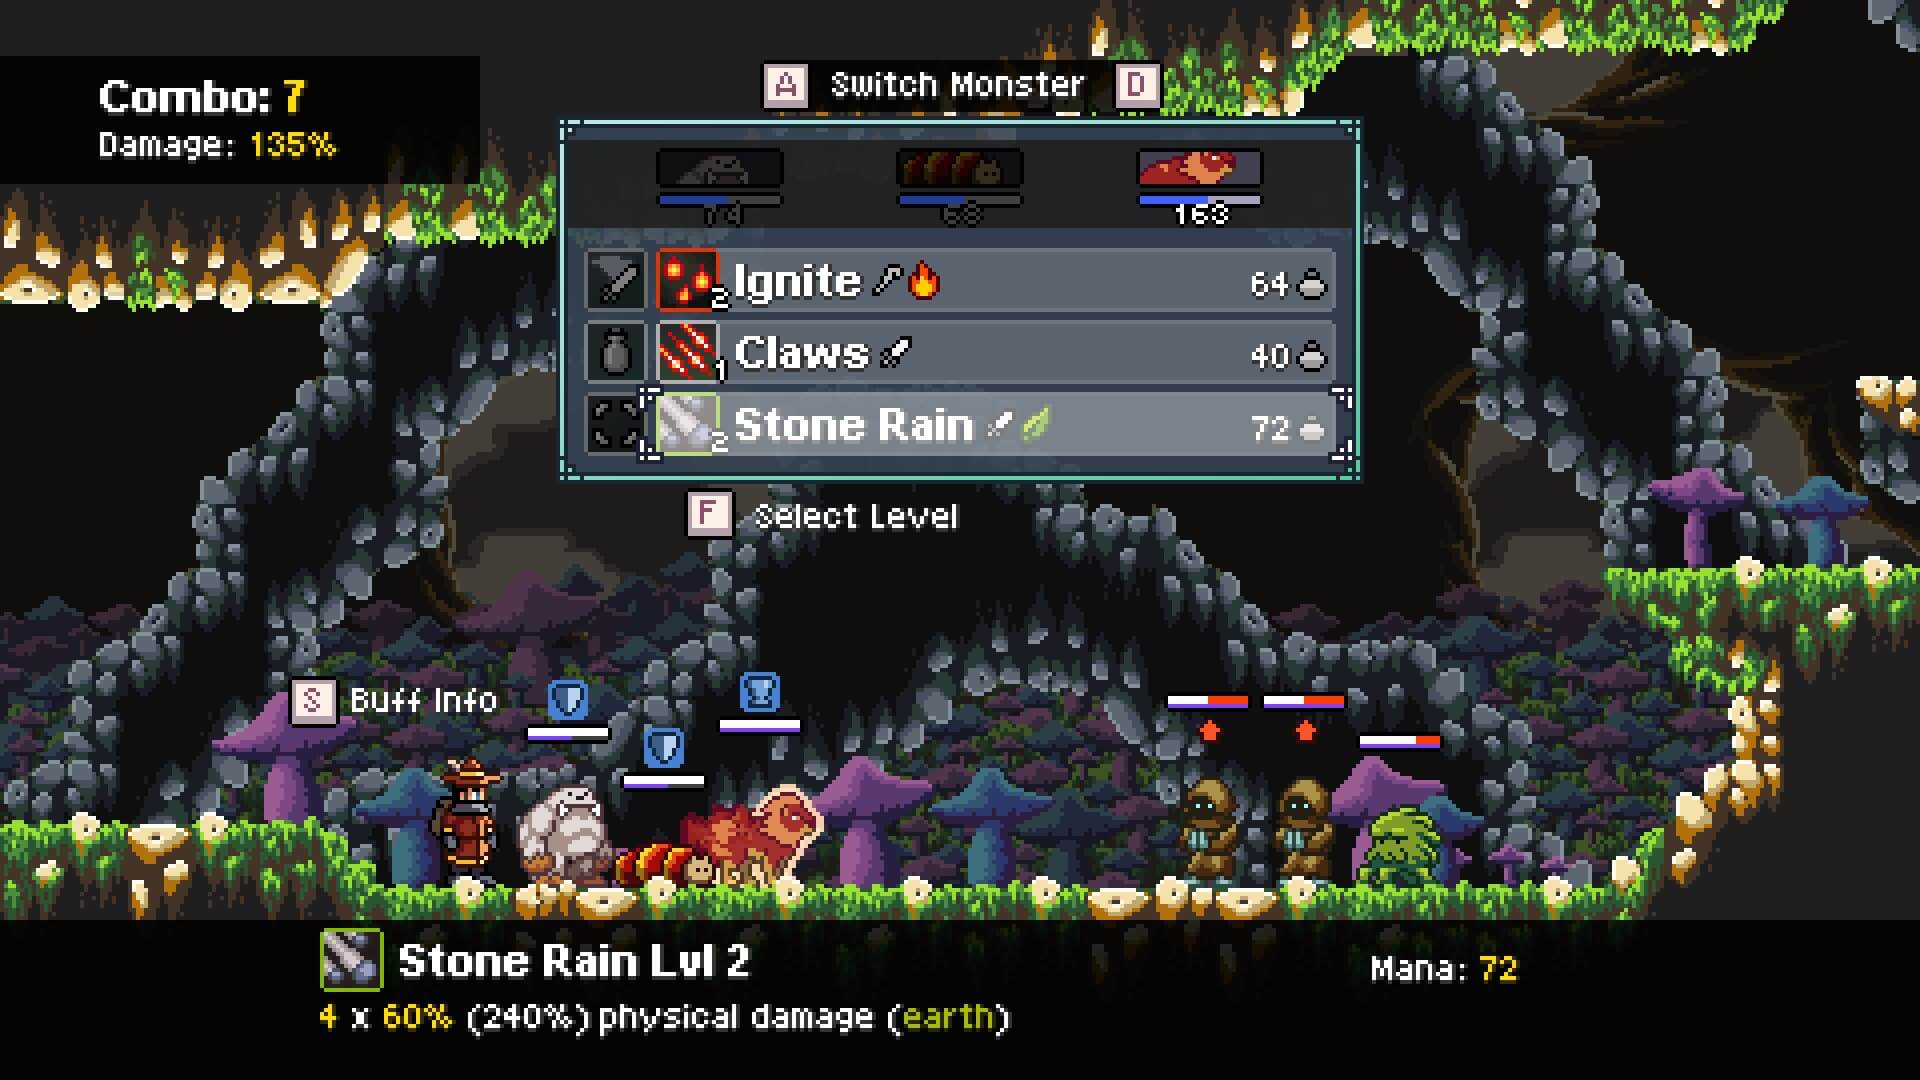
The combo meter increases with every action taken. This means that every move will increase the damage of each subsequent move during a round.
Example: If you have an attack that does 4x 80% damage then the combo meter will get 4 “stacks”. Each stack is worth 5% extra damage. Therefore, that would be 20% increased damage for your next monster.
Tip: If one of your monsters has a skill that applies buffs or heals to your party, it is recommend to use the buffing (or healing) move first during the round as this doesn’t benefit from combo, but still adds to your combo counter. Then, make sure to have your “heaviest hitter” go last so as to get the most benefit from the combo meter bonus.
Scoring System
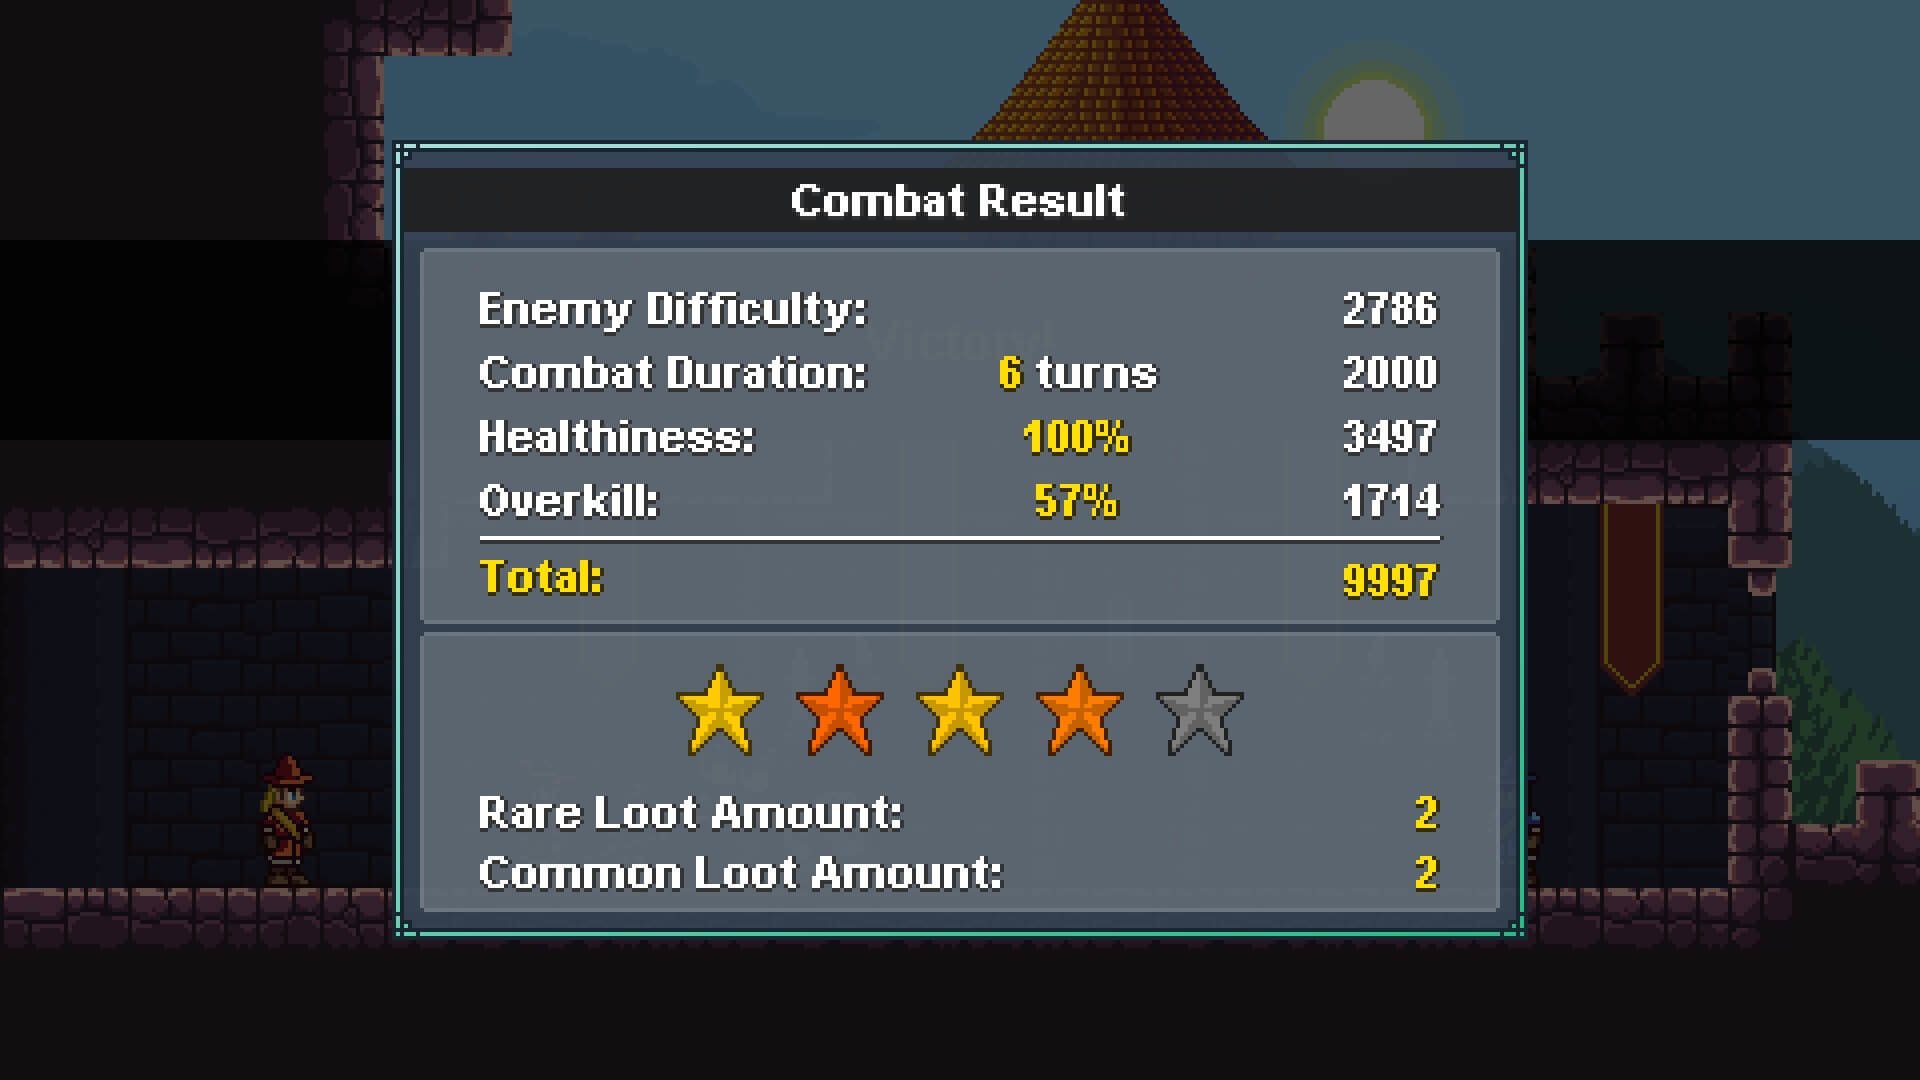
In Monster Sanctuary, winning the battle isn’t all that counts. Instead, winning them in an efficient manner is what really matters.
As you can see in the screenshot above, there are three main categories which you should concern yourself with: Combat Duration, Healthiness, and Overkill.
Duration: Winning the fight in a smaller number of turns.
Healthiness: How much health your monsters have at the end of each turn.
Overkill: How good your execution of the battle was.
On one hand, this is pretty self-explanatory, however, there are a few clarifications that you will want to know:
For Duration, every move that each individual monster makes is considered 0.33 of a turn. This means that if you can finish the battle with just one or two of your monsters making a move in the final round, your score will say X.33 or X.66 turns. This will of course increase your score by having a lower turn count number.
For Healthiness, the key part is “health at the end of each turn”. This means that it’s ok to take a few hits during battle, as long as you heal them up before each turn ends. Depending on how badly wounded your monsters are, sometimes it’s worth taking that “one extra action” from your healer to drastically improve your Healthiness score.
If you’re “hardly wounded”, however, it’s likely best to end the battle “that much sooner” and increase your Duration score. Since Healthiness only measures “health”, using shields is an effective way to protect your health (and Healthiness score) since the damage your monsters take are applied to shields first before their “actual health bar”.
For Overkill, not only is “overkill” damage a factor, but it also counts having your team buffed and debuffing the enemy team. This means that if you want to score well in a battle, it will be beneficial to actually cast buffs on yourself and hamper the enemy with poison / burn / chill etc. At the earlier parts of the game, this can be a little easy to overlook, but I would recommend keeping it in mind.
So Why Should I Care About Score?
As seen in the above screenshot with the scoring breakdown, the higher the score you get, the better loot that you find! More importantly, this effects egg drops from monsters. The higher star rating you get, the higher chance an egg will drop from a wild monster.
Something special to note, however, is that when fighting Champion monsters, you must achieve a 5-star-rating to get its egg to drop! Champion rewards are different from regular encounters since they’re only awarded once for the entire save file.
For example, if you get a 3 star rating on a champion, and fought it again later, no matter how good or bad of a rating you get, you will never get the rewards again since you’ve already collected them. The only way to get more rewards is to achieve a higher rank than you’ve done before (essentially, a new “high score”).
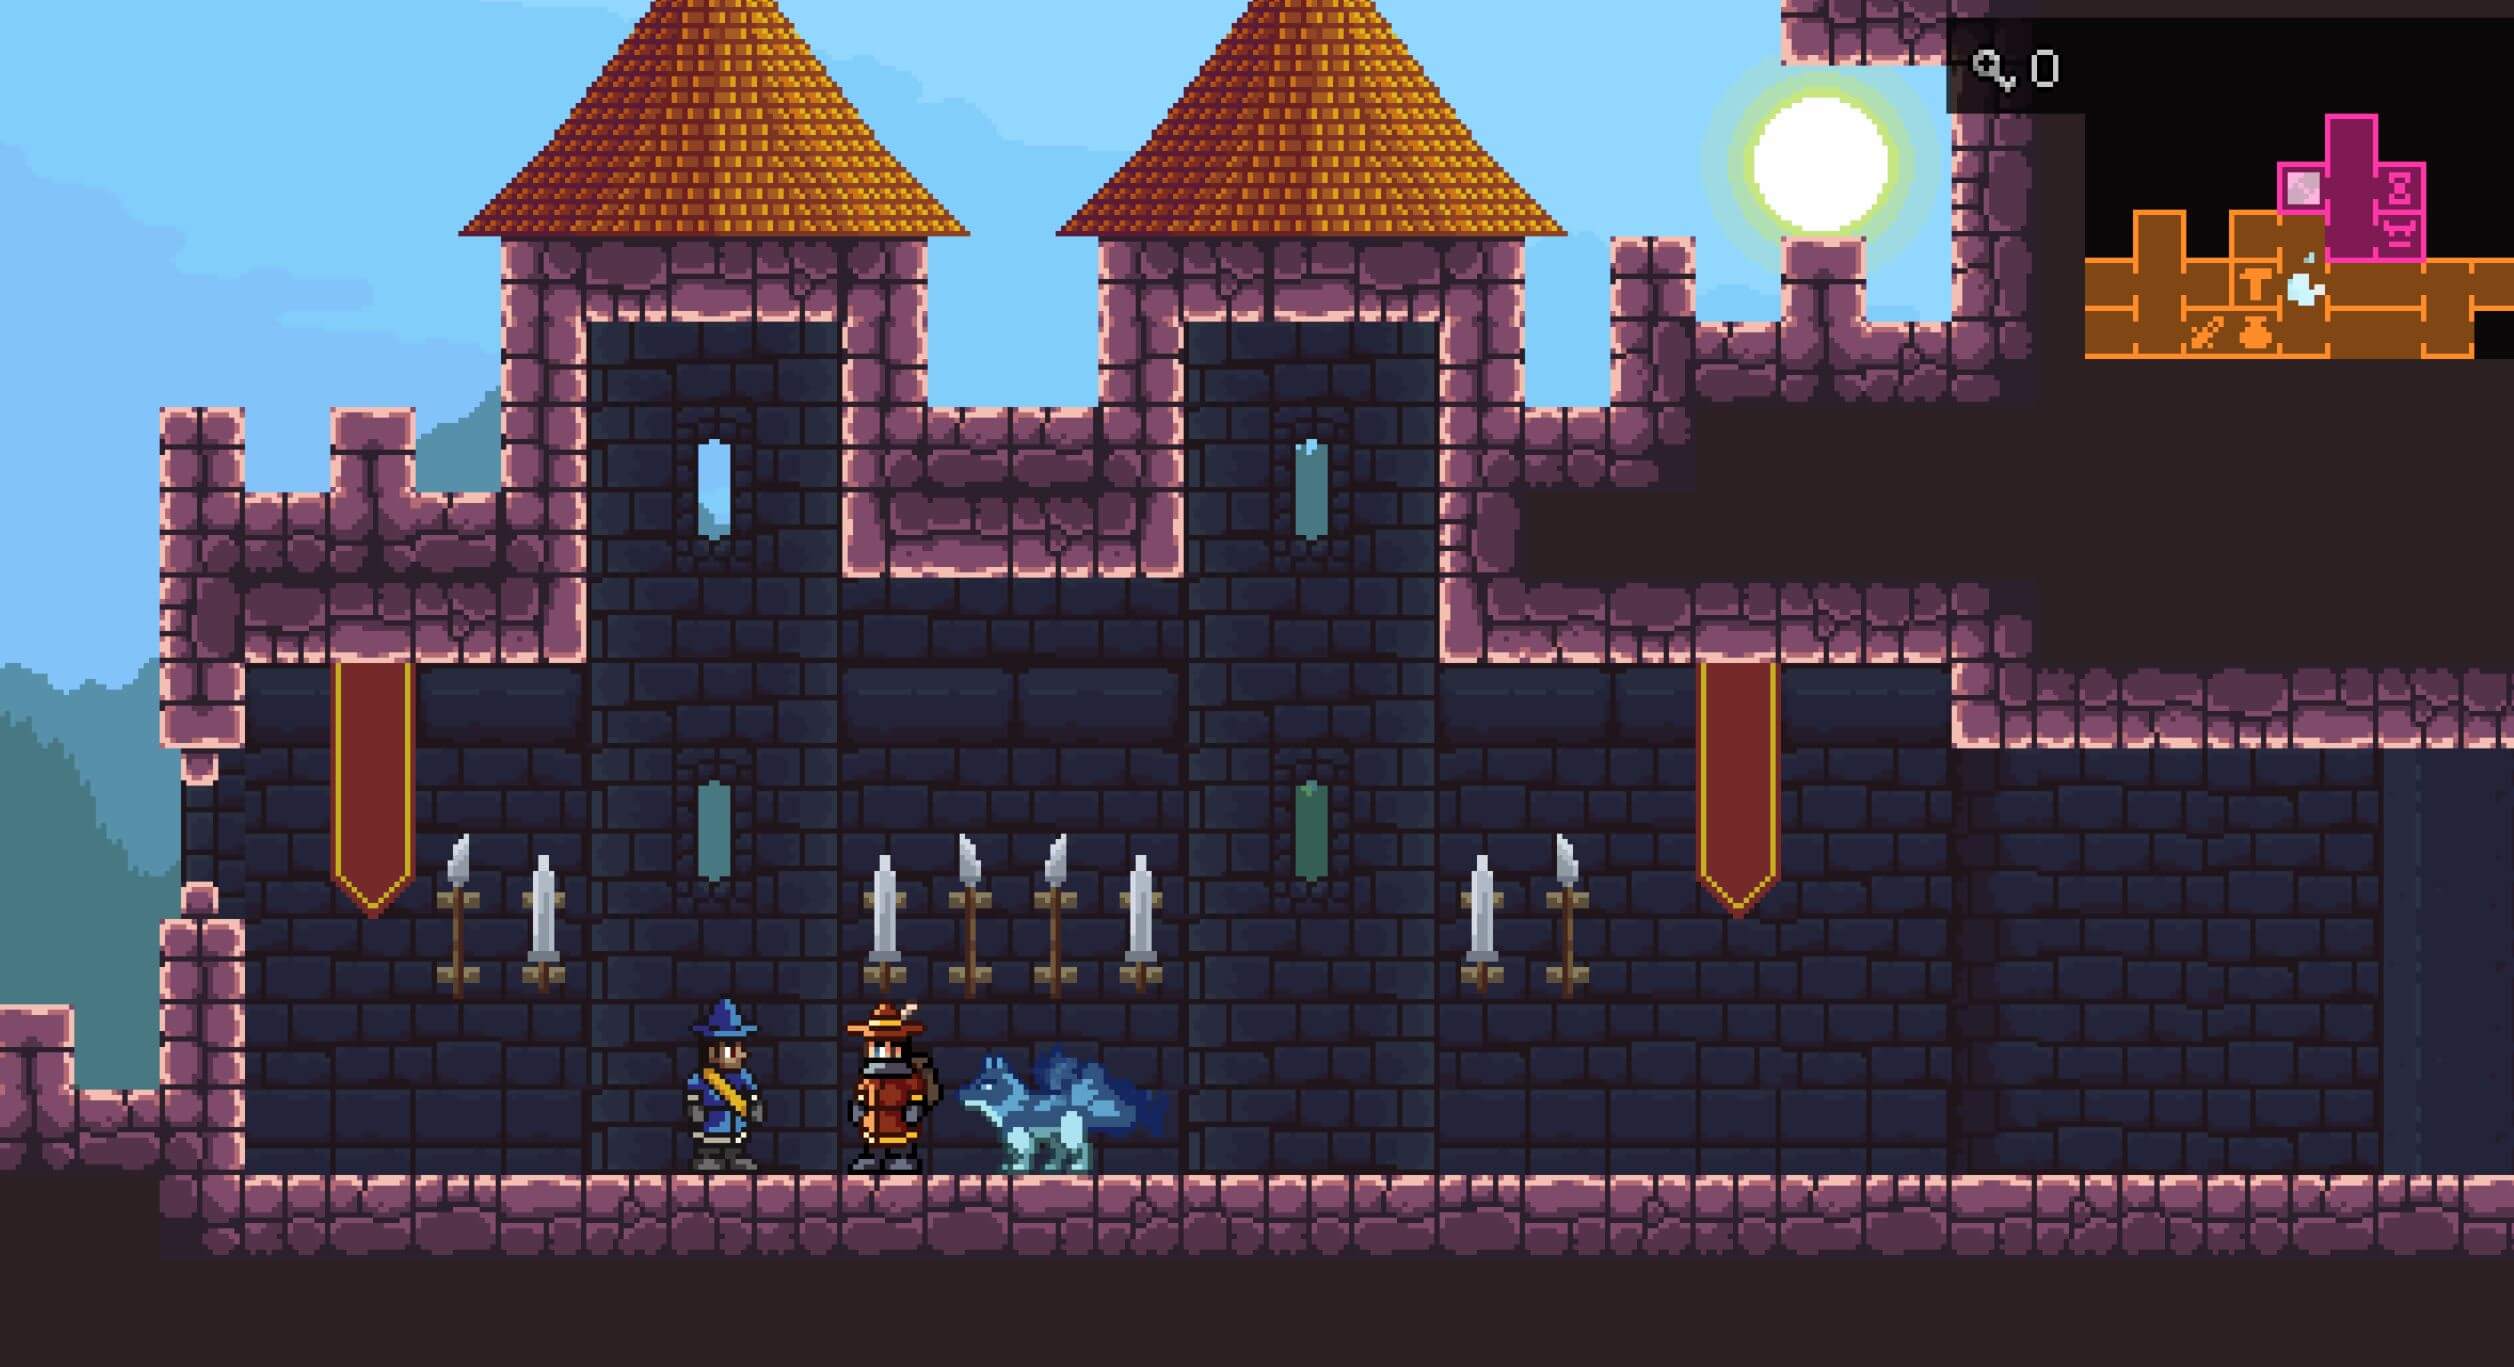
Thankfully, you can rechallenge champion creatures which you’ve already defeated at the Keeper’s Stronghold.
Keeper Battles
Keeper battles are currently the equivalent of PvP, and the rules are a bit different:
- Each Keeper uses their full team of 6 monsters, but there will only 3 monsters active as usual.
- If a monster gets knocked out, its keeper must switch in one of their reserve monsters (pending they have any left in their active team of 6 monsters).
- The turn order in a Keeper duel is determined by chance, with the Keeper who goes first only getting two turns as a drawback for the advantage of going first. (Note that vs NPCs the player always goes first for keeper battles. In PvP, when it’s implemented, it’s planned to be random).
- Items (such as potions) are not allowed during a Keepers duel.
- In a Keeper Duel, all damage, healing, and shielding abilities are half as strong.
- You win the duel by defeating the 6 monsters of your opponent.
Tips and QOL Info
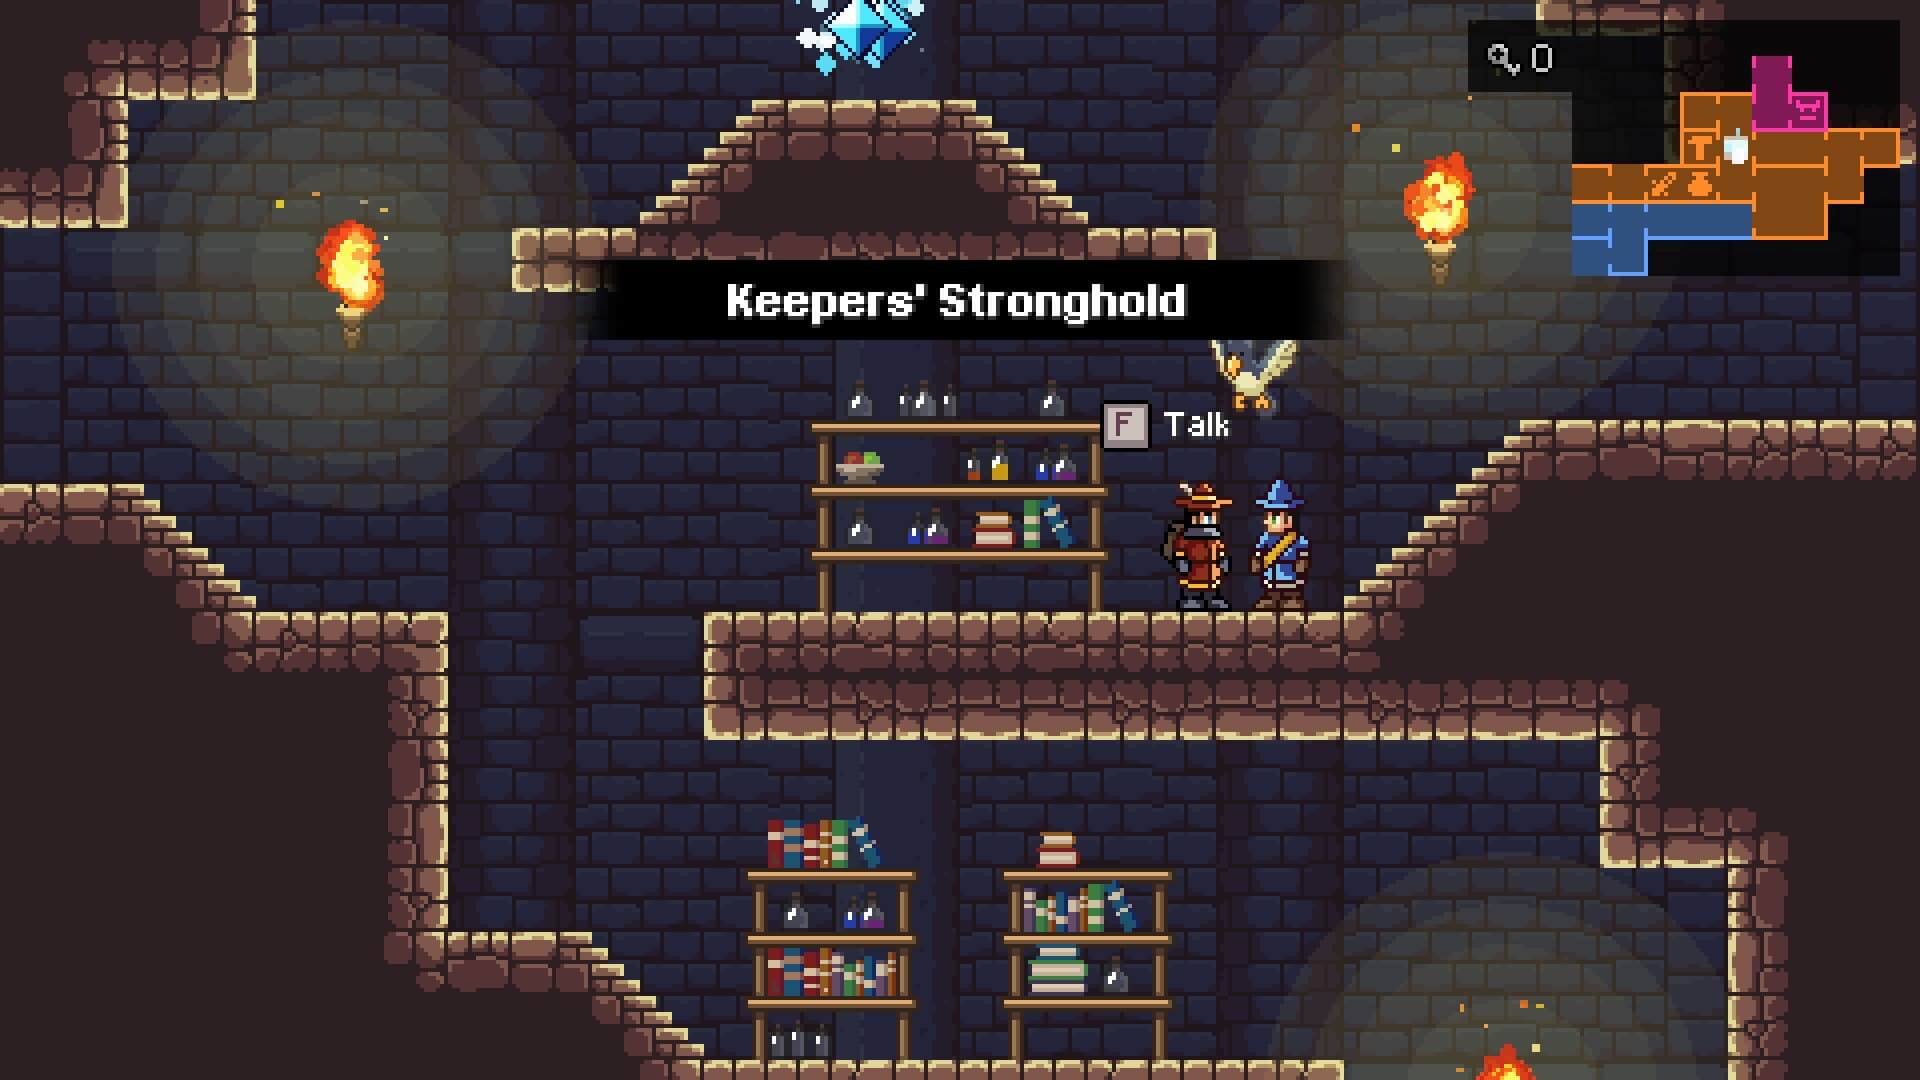
– You can “donate” extra eggs and monsters at the Keepers Stronghold by talking to the blue person in the screenshot. This process gives smaller rewards upon donation, and larger rewards on getting a certain threshold of army strength donated. Donation is also great to keep your monster inventory clean if you don’t need extra copies of common monsters.
– Stores will sell better items the higher your Keeper’s rank is.
– The Infinite Arena (also found in the Keeper’s Stronghold in the fuchsia-colored) gives reward boxes, which contain items, potions and eggs! This is a great place to “farm” experience and some harder-to-find items.
– You can reorganize your skills by using a skill resetter (Note, the order is which you level your skills will reflect the order in which the menu shows you during battle). Since this is of course a “strange thing”, the devs have stated that they intend to make skill reorganization a feature in the future. This is just a “workaround” for now.
– Monsters respawn after you’ve done three battles. Repawn is NOT based on a time period or walking around.
– There is a name-changer NPC standing in the same area as the Evolution Tree. So if you change you mind on a name, no worries, you can always change it.
– If you ever make a mistake and want to quickly “undo it”, note that the game only saves in two instances: 1. When you go to the menu and select “save and quit” or 2. When you “change an exploration screen”. When changing screens, you will notice in the bottom corner of the screen “autosaving”. As long as you don’t trigger either of these “save conditions” you can press “Alt – F4” on your keyboard to fully-close the game without saving. BE WARNED: be very careful with this so as to only quit without saving when you want to. Thankfully, the game auto-saves so often, that even if you end up in a situation where you “accidentally” closed the game without saving, you’ll likely lose only a few minutes of playtime.
– In options you can change the combat speed up to 2x, this will save a good amount of time if you are grinding or just enjoy a faster pace!
-Food gives a semi-permanent buff. Each monster may have up to 3 food-bonuses active at a time. For every new food given to a monster, the oldest food bonus will be removed and the new one gets placed at the beginning of the food list. Since you will find better quality food as you progress in the game, if you’re going to feed your monster (for example) “two lesser bonus foods and one higher bonus one”, it is best to use the weaker food first, then the stronger one, so the weaker ones will get overridden first when you give it better food later on.
Authors: Rilvenar and Conan The Librarian