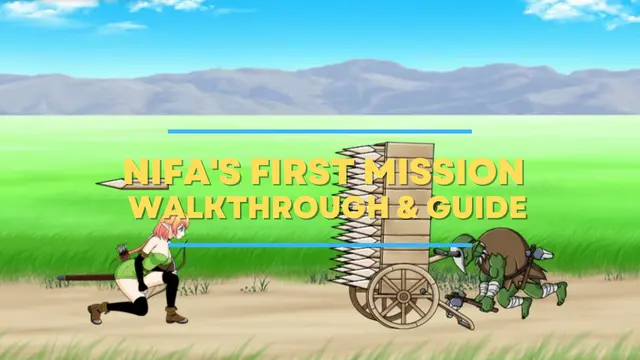
Hello from our Nifa’s First Mission Walkthrough Guide. This is where the game shows you the controls post some exposition. Travel, to the right until Nifa states monster when; you, encounter with the first one, a slime. After you kill your first slime you collect a life shard. They restore your health. After, that there’s more exposition; then, you defeat more slimes until you meet Free. When, her exposition ceases; she, will give you seven Lilna flowers. After, that you’re tasked via Free to save fellow soldiers and the princess. Although, whenever you restart the game; you’re, forced to redo it again.
Nifa’s First Mission Walkthrough Guide
Welcome to our Nifa’s First Mission Walkthrough Guide. This guide to assist with a strategy to beat this game. Normal difficulty!
Note: Flowers are obtained from either within certain level or from saving fellow soldiers.
Stats:
- Health-Max HP
- Attack-ATK
- Technical-TEC
- Defense-DEF
- Mobility-LEG
- Restoration-REC
Elf Forest
After, the title of the game disappears; move, towards the statue. It, allows you to save and level up stats; once, you increase it enough to unlock abilities. Use the seven flowers given to you to increase attack via three, defense via two, and technical via two.
After this continue right until you percieve a pitfall. Once, in the below section; you’ll, encounter your second monster, a wasp. Continue right post killing monsters until you return to surface area. Collect, the two Lilna flowers you can reach with single jump; prior, to confronting two giant slimes and saving your first captured comrade.
Flower locations:
1: First area
2: Second area prior to pitfall
3: Second area past #2 that requires dash and double jump
4: In pitfall area that requires double jump
5: In pitfall area that you can collect
6: Final area that requires double jump
Ruto Plains
Travel to Black Gate, in order to have six flowers towards the statue. Upgrade attack via two, technical via two, and recovery via two.
This is a very simple level. You encounter a spike wall in the first area. Whithin, the second area there are two of them. Then, you’ll encounter the third monster; which, is a humpbacked orc. You must perfect your timing via wither crouching or blocking his projectile and striking the wall. He, flees towards the second wall; post, destroying the wall. After that you’ll encounter your second boss, a orc. Defeat him and save the comrade.
No wild flowers.
Kurgus Woods
Once, you enther the first area; which, the boss throws a spike wall towards you prior to fleeing. Then, you’ll encounter your fourth monster; which, is a male dryad. Travel right towards the statue within the second area. Then, continue to the third area; where, the boss throws two boulders at you. Once, you’r in the fourth area; you must be quick falling through gaps in the floor. Which, you’re efficient enough can avoid them. Then, you’ll have to defeat the boss; post, taking care of a humpbacked orc firing a projectile at you. However, interact with statue to spend eight out of nine flowers towards stats; which, are attack via four and defense via four.
Note: I didn’t, save prior to fightning the boss via using up that amount; then, spawned back at the temple with 17 flowers.
Flower locations:
1: Accessible within the first area via jumping
2: Accessible within the second area via jumping down from platform under statue
3: Third area that requires dash and double jump
4: Fourth area on platform that’s accessible via wall platform
5: Fourth area on a platform that you jump down to from rock floor
6: Fourth area that you jump to from #5
7: Fourth area that requires double jump
Additional comrade locations:
1: First area that requires double jump
2: Upward platform to the left of statue will take you to a room where you must slay two dryads and two wasp hives
Mt. Hydeguld: Foot
You’ll encounter the fifth monster, a hellhound soon after entering this level’s first area. Then, you’ll encounter two rolling spike walls. Then, the second area deceives that it’s a dead end; when, you must wait towards the farthest right part of that area. Then travel left until you percieve wall platforms in order to enter the third area. Save at the second statue. Once, you’re in the fourth area; which, you’ll encounter the sixth monster, a baby angel. Which, you’ll have to hopscatch your way around the fifth area. The boss is in the room right next to the third statue. Increase technical and defense via two.
Flower locations:
1: Third area on platform
2: Fourth area on platform
3: Fifth area on platform that you can jump down to
4: Sixth area on left platform
5: Sixth area on right platform
Mt. Hydeguld: Summit
After, you spawn on this level; which, its boss will destroy the bridge and you fall. Which you wind up in the second area. Then, you encounter the seventh monster; which, is a skeleton without legs. Increase health and attack via two at the statue. After that you encounter a boss too early in the level. Once, in third area you encounter spore launching monster. The area post the second statue involves a fairy guiding you through a dark level prior to completing this level. You’ll, encounter the eighth monster via this area; which, is a ghost.
Flower locations:
1: First area post bridge destruction
2: First area on other side of destroyed bridge
3: Second area on top of mushroom
4: Third area on platform
5: Third area on platform
6: Fifth area easy to perceive
Riddle Tunnel
Flower locations:
- 1: First area requires double jump
Comrade locations:
- 1: Second area on floor platform to the left
