Welcome to our Pathfinder Wrath of the Righteous Sword of Valor Walkthrough guide. This guide will show you what you need to know about Sword of Valor.
Pathfinder Wrath of the Righteous Sword of Valor Walkthrough
Crusader’s Camp – Pathfinder Wrath of the Righteous Sword of Valor Walkthrough
- Go into the camping tent on the west side of Crusader’s Camp to begin your next main missions and stock up on products, scrolls, etc (talk to Vissaly).
- The Commander’s Tent on the northwest side contains Half-Plate of Vigor.
- Provide Elven Notes from the Gray Garrison to Storyteller in the center of the map to acquire 330 XP, completing Notes for the Storyteller.
- Examine the encampment on the north side of the map
- Take A Look At the Eagle Watch encampment on the west side of the map
- Successfully intimidate Wilcer Garms to get Righteous Crusader’s Ring and a little XP.
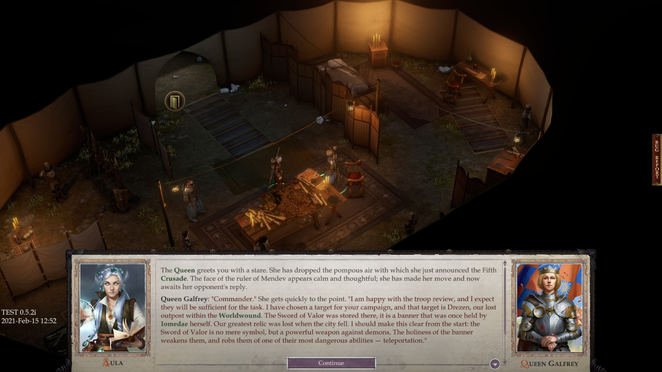
Once you’ve done all that, go into the primary, large camping tent and speak to Queen Galfrey. If you pick the “wicked” choice in regards to Staunton, she’ll reply, “Not in my army.” Once you’re finished with organization, she’ll provide Sosiel into your party.
Just outside the primary tent to the right is Liotr Hawkblade. Speak to him to advance While the World Burns.
Go into the main camping tent once again and use the world map icon to leave the location.
Crusade System


As soon as on the world map you’ll get your intro to the Crusade system. Start by recruiting a basic. To do this, select equipment icon in the bottom ideal corner. It can be discovered to the left of the “Legion I” button. Then choose “set leader” then “purchase leader”. Choose whichever you like, then click their portrait to set them as the leader of Legion I.


Next, send the “Legion I” pawn toward the “Demon’s Army” pawn with an exclamation mark beside its name. (Select it manually or with the “Legion I” button in the bottom right corner of your screen.) As soon as in battle, use you general’s capability to buff your footmen, then protect in the corner with the footmen. When the enemies show up, attack until dead (merely click on the enemies to eliminate them). For your victory you will make 1200 Finance Points (FP).

Hover over your Legion I pawn now and you’ll see its “Estimated Army Strength” is 2. What you want is to have that pawn battle only other pawns of equal or preferably lesser strength, hence minimizing losses. Have the pawn take a right and battle the Giant Flies (still marked as “Demon’s Army”, with the rewards listed as FP). When you lack movement points, click the “Skip Day” button in the top right to reset them, then continue on.

When the Giant Flies are beat, go to the Recruit menu and recruit another 100 Footmen. These will form “Legion II”. Have Legion II meet Legion I and integrate forces (a button will appear when they are on top of each other). Use the combined forces to take on the unit a little east of Nameless Ruins, which will yield Divine Favour x20.

Utilize the Divine Favour to recruit some Clerics, and have them integrate with the other systems, then level them up (Defensive Training works well). Use this unit to combat the first blue unit, near Nameless Ruins and marked by an exclamation point. Don’t be tricked by the number 16: your priests are extremely sturdy and in combination with the footmen, will make short work of the opponent.
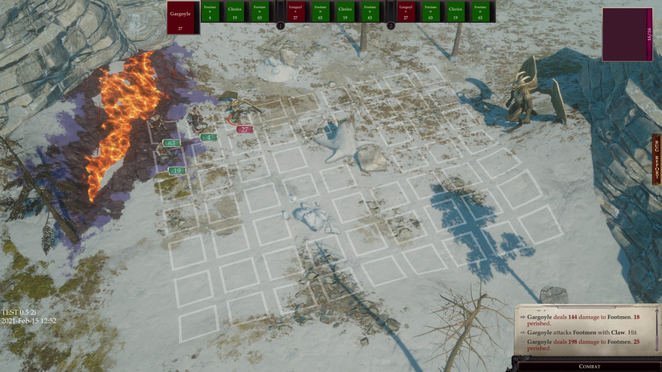
Later, use the “Skip Day” function till more employees become available on the Recruit screen. Employee a 100 stack of Footmen (plus enough to make up for any losses you sustained for any previous losses in your other unit) and 4 Clerics to a second unit (Legion I). Send Legion I to Legion II and combine the forces, splitting them as necessary so you have 2 stacks of 100 Footmen and one stack of Clerics. Make certain the Clerics are in the front (top) row, so they can tank, and position the Footmen to the left and right of them so they can attack quickly. Then send this system to the blue opponent system south of Nameless Ruins, which is consisted of a Gargoyle and his leader.
When the systems battle, merely have the Cleric heal himself while the Footmen attack the Gargoyle. Utilize your leader’s power on the Cleric each turn. With this you will suffer no losses.
Level up now; “Cure Wounds” is a good concept. As soon as everyone south of Drezen/Leper’s Smile has been wiped out (minus the Strength 7 and Strength 4 units to the west and east, respectively), you need to advance the primary video game with your main character system as normal in order to gain access to the staying areas with your army. Going forward in this chapter, you must have the ability to manage it on your own. Simply keep utilizing the defend and heal strategy, recruit in order to strengthen your system rank, get smaller sized enemy units, etc, until you’ve wiped out everyone. As soon as you get Hellknights in the next area, things will end up being considerably easier.
By Hell’s Ordinance
Head northwest to Nameless Ruins. Along the way, the Hellknights will request your help with some pesky gargoyles.

Head south to Reliable Redoubt where you’ll fulfill Regill. Enthusiast your party then diminish to the lower level, defeating gargoyles all along the way. When you reach the bottom, battle 2 more sets of them, using Glitterdust, Evil Eye – Air Conditioner + Cackle to facilitate work of them. Afterward, loot the bodies to find Bastard Sword of Hope.


Look for the cavern on the east side of the camp. Buff up once again if needed, as you’re about to be pincer assaulted. Inside the cave, talk with Regill (the Evil option will just see him agree with you), then murder some gargoyles. Post-combat, talk to him again, at which point he’ll consent to provide the force of the Hellknights to your cause if you like (highly recommended).
Pass the Mobility check to find a skeleton holding Demonic Heart (ring).
The Music of the Abyss – Pathfinder Wrath of the Righteous Sword of Valor Walkthrough
Travel slightly northeast of Nameless Ruins to Leper’s Smile to trigger this mission. After picking who to compromise to the vescavors (you can go with different party members if you “check out the faces of your buddies”), choose whether to fight or scatter. The former choice will see whoever you selected to sacrifice die (well, most of them).
Buff your party (especially anything that assists Fortitude) and equip non-piercing/slashing weapons if possible, then press forward as you battle your way through the swarms.
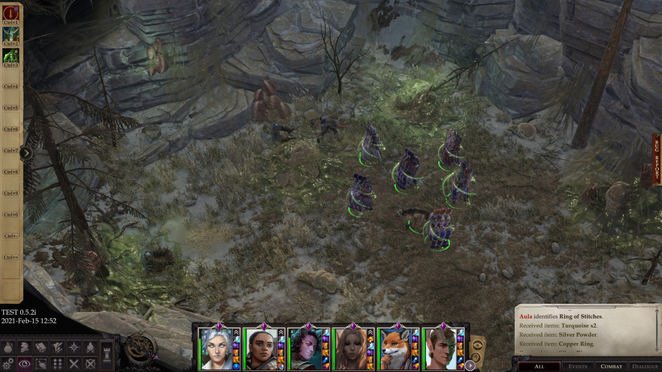
Take your very first left and loot the camp to acquire Silky Veilds (bathrobe). In the southwest corner with the two swarms you’ll discover Ring of Stitches. Slightly north of that you’ll come across Vescavor Royal Guard and discover Keen Shortspear +2.

In the center of the map you’ll find a narrow crevice, from which a weird sound originates. Passing the Perception check will expose an individual of small stature at the bottom; failing the Athletics check will see the vescavors consume him alive.
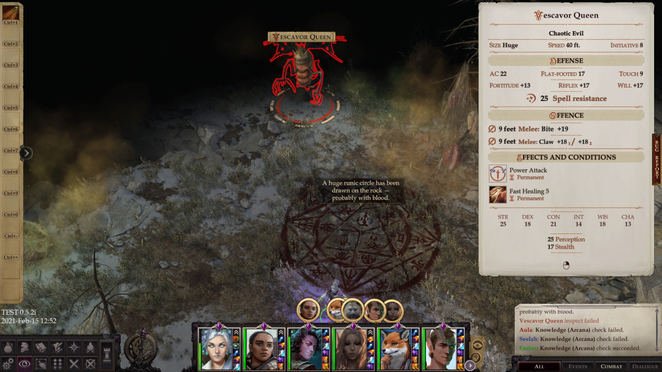
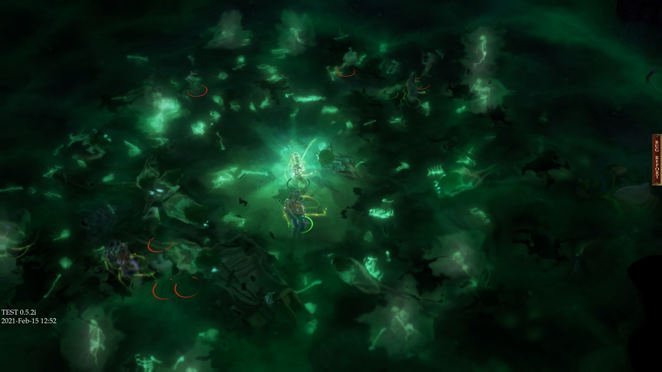
More north you’ll find the Vescavor Queen at last. Buff up then target her with Fortitude spells like Ray of Sickening (after utilizing Vulnerability Curse for her high spell resistance). Keep a close eye on your tank too, as they’ll take huge damage here.
After the battle, you’ll discover a scarf was planted on you to draw in the vescavors. Gather up the queen’s goop if you want to use her swarms in the fight to come.
Nurah will appear next and establish somebody recently summoned the Vescavor Queen. Rob the body in the corner later to obtain Hunter’s Assurance (shortbow).
Wight Cave
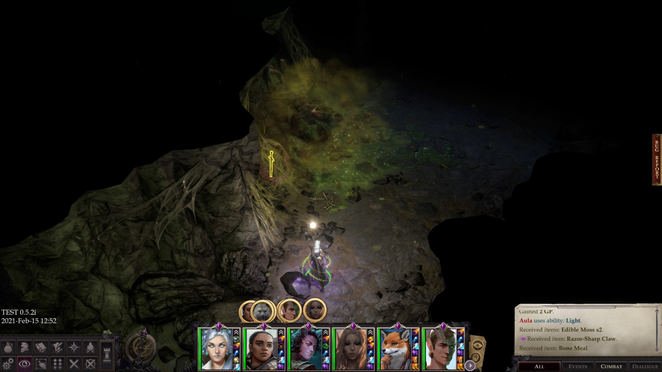
Take the exit into the cave, where you’ll fight Wights. Northwest, along the water you’ll find a skeleton holding Belt of Incredible Dexterity +4.
Even more along you’ll encounter Garkel and his Wight minions. All of them will continue to rise after being “eliminated” unless you utilize the Wand of Zacharius in the box along the coastline. If you choose the evil option, the corpses will be sent into oblivion and you will earn 54XP. Loot the location later to obtain Curse Pilaff (recipe).
Back at the entryway, take the northeast course now to discover Longsword +2 along the left wall with the larvae. Advance north to fight two Vrocks, which ought to drop easily. Rob the people afterward to discover Radiant Kukri +1.
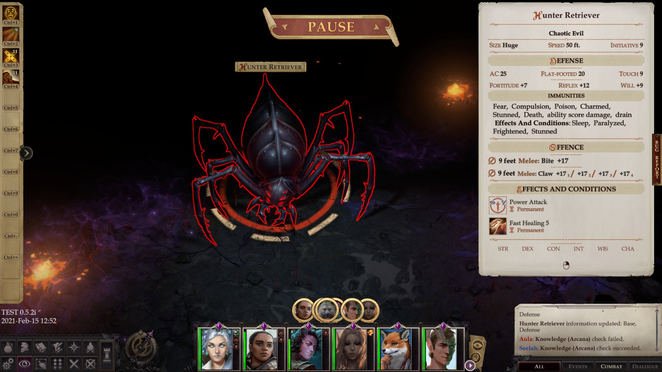
Backtrack a bit, going south then east to battle a couple Derakni. Post-fight, try to find the Athletics look at the northwest side. Pass it to combat Hunter Retriever, the one in charge. Rush + Ray of Exhaustion will work marvels here. After the fight, loot Retriever’s Claw (dagger) from the body along with Amulet of Apothecary from the body to the right.
Rob Voice of Hollow (1H mace) in the rear corner (east side of the map) near where you combated the Derakni, then leave the cavern, making sure to take Vermin Bane Elven Curved Blade +2 with you.
Take the ladder above the routine symbol out to the world map.
Banner Over the Citadel/ A Strike From the Sky
Crusade time sequel. Pack your army full of Hellknights (buy Materials Points if you have to), and about 200 archers. Totally insulate the archers on the development screen as opponent melee units will make a beeline for them and kill them. You wait until now to utilize archers for the very first time for this reason, and because you need about 200 at the same time in order to effectively handle Dretches, which cast Stinking Cloud on your entire army, possibly creating chaos.
Once everything is set up and your army strength is about 7, head north/northeast to Drezen/east of Drezen and take out all enemy systems listed below your level that consist of Dretches.
Move your main party (not your army) north previous Leper’s Smile towards Drezen. Prior to you reach it, you’ll be attacked by gargoyles. Prior to you exit the tent, buff.
Run around the camp, taking out gargoyles and getting party members. At the south end, loot the human body (near a couple of gargoyles) to acquire Phylactery of Positive Channeling.
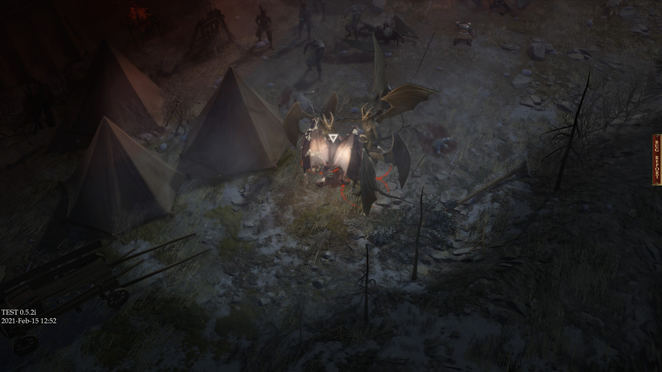
At the north end you’ll come across Irabeth facing down the satanic force Nulkineth. Before you can attack him, he’ll disappear, taking Irabeth with him.
Return to your camping tent and convene a council by speaking to Anevia, then head directly west on the world map to Lost Chapel, where you’ll discover Nenio, Ember, and Daeran.
Make your method up the hill, defeating gargoyles and evil spirits along the way. When you reach the employees, executing them for cowardice will see Yaker authorize. Shortly after, you’ll discover Sosiel mourning the dead, then some evil spirits pretending to be remains (you’ll observe as much if you pass the Perception check).
At the top of the hill you’ll find the chapel. Inside, a transformed Rathimus is hosting a preaching of sorts. If you fail the Intimidate check, you’ll be required to take him and his pals on. After the battle, loot Shield of Magical Retribution and Amulet of Mighty Fists +2.
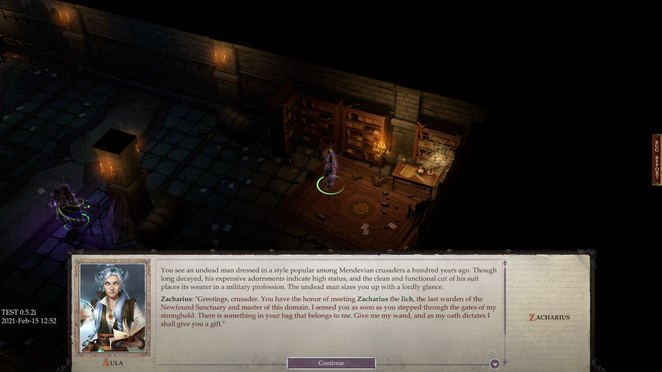
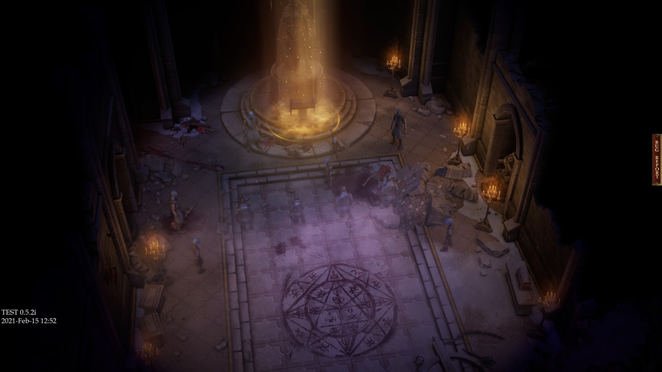
Cleanse the location by interacting with the statue, then head downstairs. In the west room you’ll come across Zacharius the Lich. Presuming you have the Wand of Zacharius from earlier, you have options here. Opting for the Evil choice will provide you the chance to soon become a Lich. Perception 20 will expose a surprise hallway (and trap) behind Zacharius.
Southwest you’ll discover Lesser Maximize Metamagic Rod in a chest (after beating a Spectre and Stone Golem).


Go back to the upper floor and take the north exit out of the chapel into a space where a soldier is being tortured by evil spirits. Stealth will permit you to save him, and the exact same for the soldier outside in the cemetery (north exit). Open the south door to discover Irabeth. Upon rescuing her, head outside to satisfy Nulkineth and Minagho.
Grease and Good/Cold Iron weapons are your good friends here, as is anything that buffs Will and/or Unbreakable Heart to safeguard versus Nulkineth’s Hold Person, Mass spell. Midway through the battle, you’re provided a choice on what to feel. If you opt for the Evil option, the ghouls will defend you. When Nulkineth drops, loot him to obtain Belt of Mighty Constitution +2 and Cloak of Resistance +1.
Head southwest to meet with Anevia and Queen Galfrey.