Heat. What is heat? We will simply explain how this applies to the game. This guide will show you the heat and how to get the most out of your machine’s systems without cooking you or the pilot. Check out our Phantom Brigade Heat and Machines guide without delay.
We know that there are people who have a hard time finishing the Phantom Brigade game. If you are one of those who find it difficult to finish the game, let’s take you to our Phantom Brigade guide.
Phantom Brigade Heat and Machines
Welcome to our Phantom Brigade Heat and Machines guide. During combat your mechs perform actions, waiting, walking, attacking, and dashing. There are more, but these are the primary actions. Of these, attacking and dashing generate heat, which builds up to a limit, whereupon the mech overheats and begins to take damage.
To counteract this, you have dissipation, how much heat your mech removes per second, and heat capacity which is the max amount of heat a mech can sustain before overheating. We’ll get into detail on what effects both later, but for now just keep in mind each mech has these, shooting and dashing fills up the capacity, and dissipation empties it.
Simple, right? Well, yes and no…
Example mech “Vanguard” (The basics)
Lets see an example. Here’s one of my current builds, “Vanguard”, a CQC shield mech.
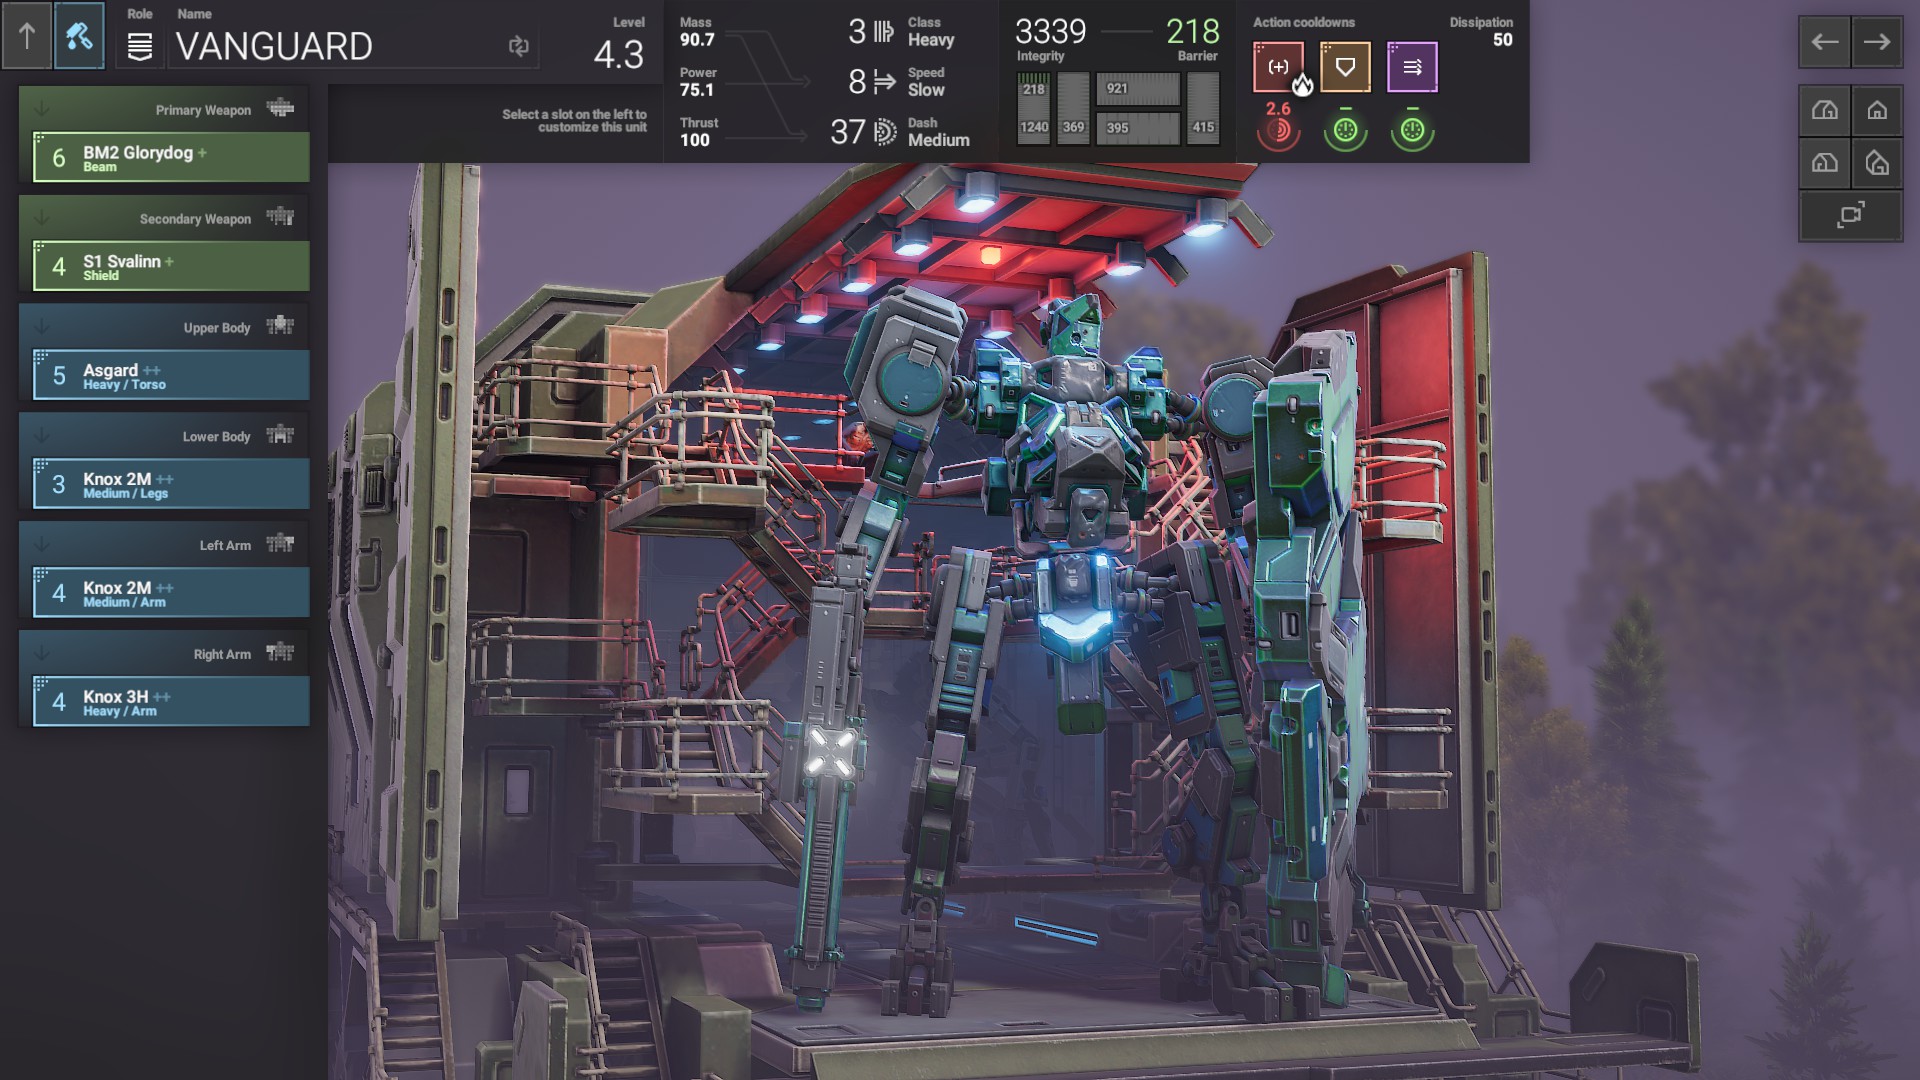
As you can see, he’s very slow and bulky, relying on his dash to move and therefore requires it to be used rather frequently whilst being powerful enough to actually move him, but is also outfitted with a BM2 Glorydog beam weapon alongside his shield.
Now, right off the bat you can see the glaring red icon below the active cooldowns at the top right, an instant warning that this weapon should cook him with a single shot, but for now we’ll focus on the thruster.
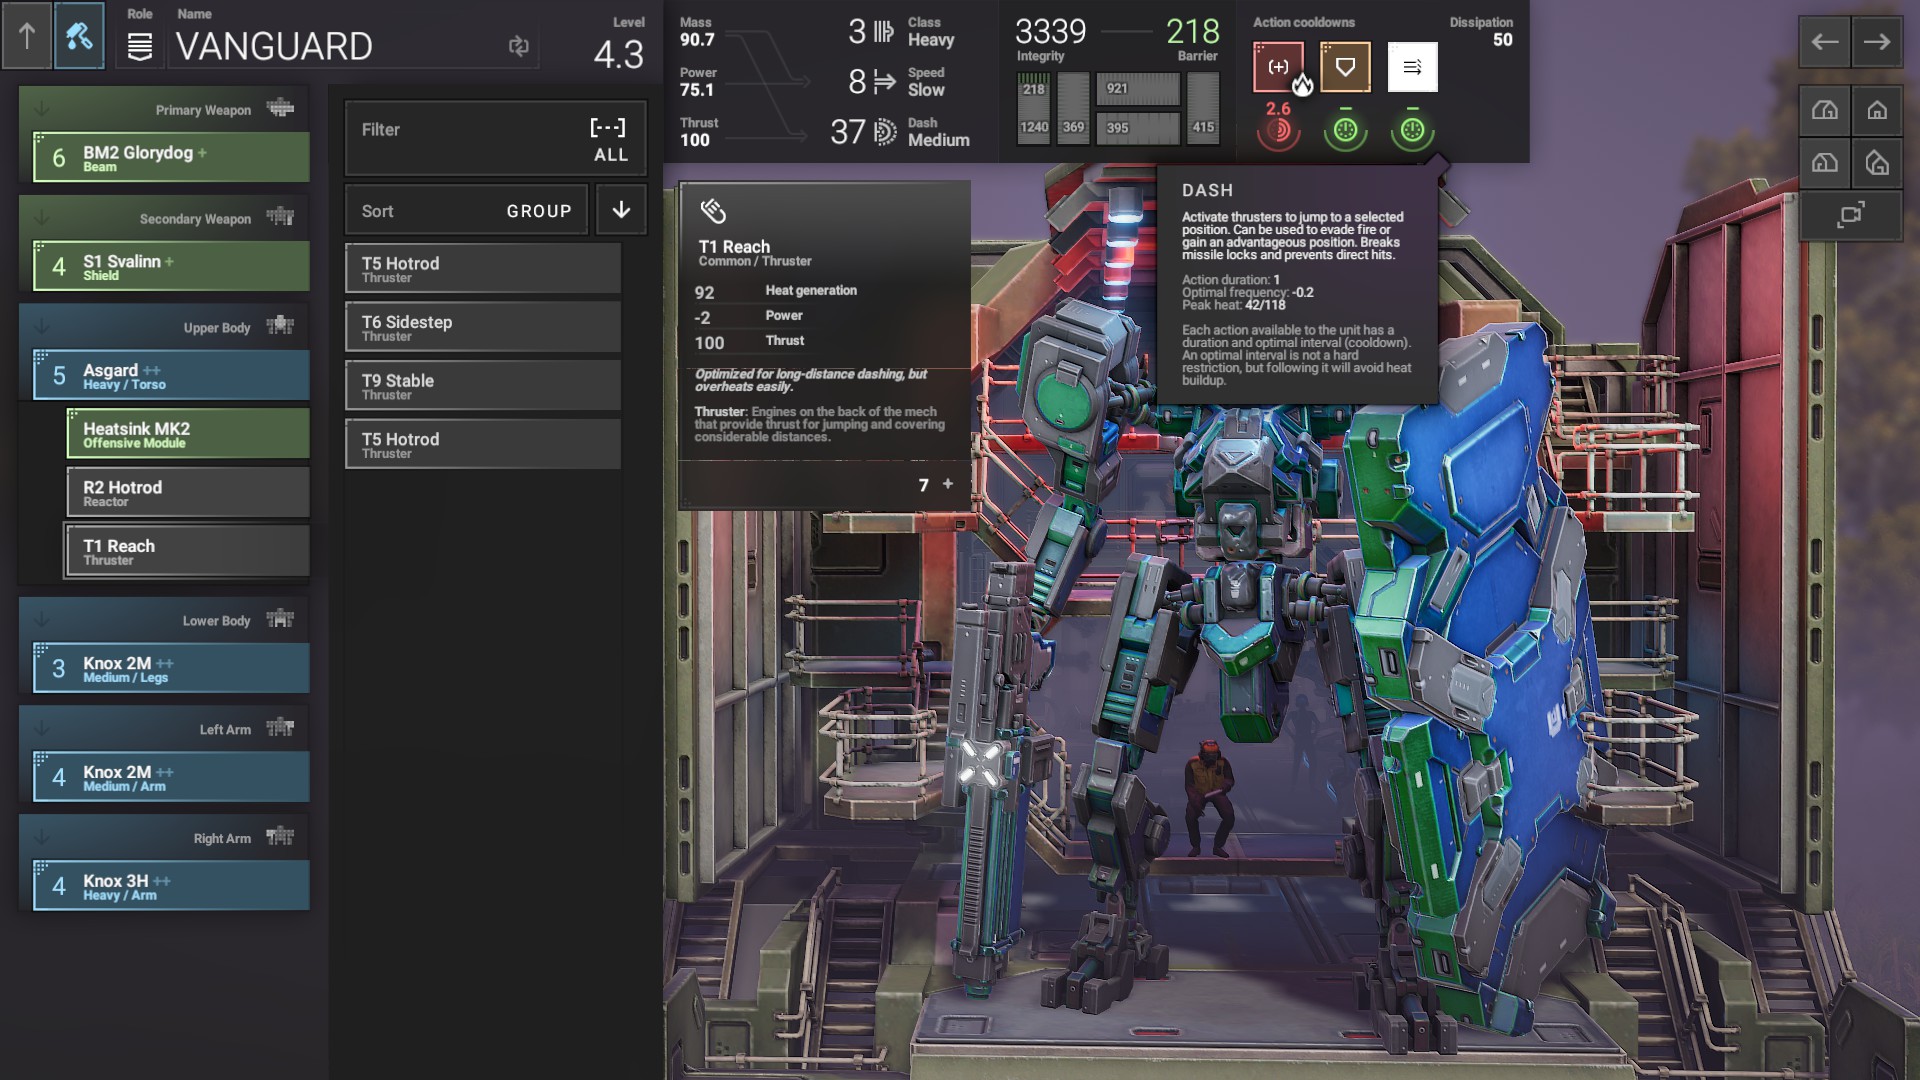
The T1 Reach is a powerful thruster, a full 100 thrust for 92 heat gain per use, and -2 power. As you can see, by mousing over it is active for one full second, and peaks at 42 heat, which is the 92 heat gained minus that taken away by the dissipation system, 50. This means that it can be used just under three times in quick succession from no heat, and thus is given a tick from the game.
Lets see a combat test then.
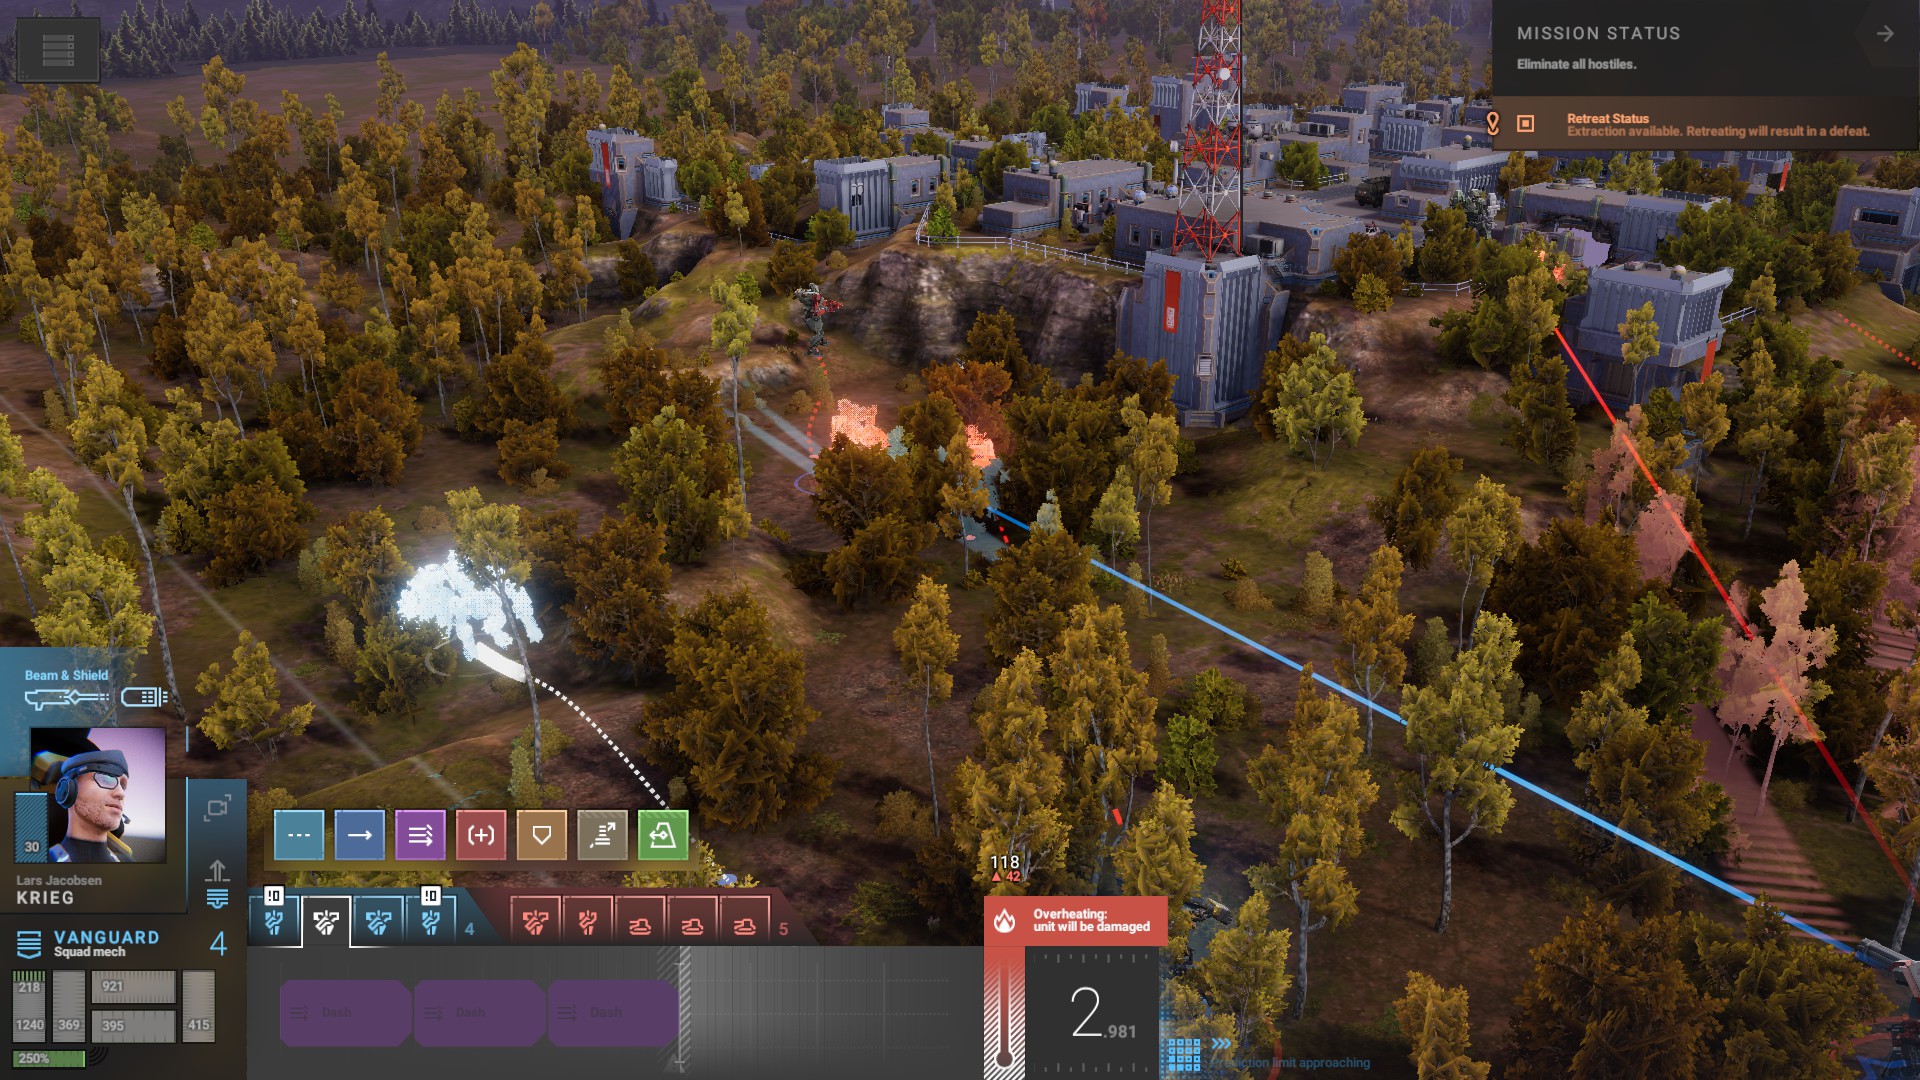
And we can see that yes, the math checks out, and the dash can be used two times in a row with a third overheating it, requiring a short wait between uses.
The issue with the UI
Now, however, for the beam.
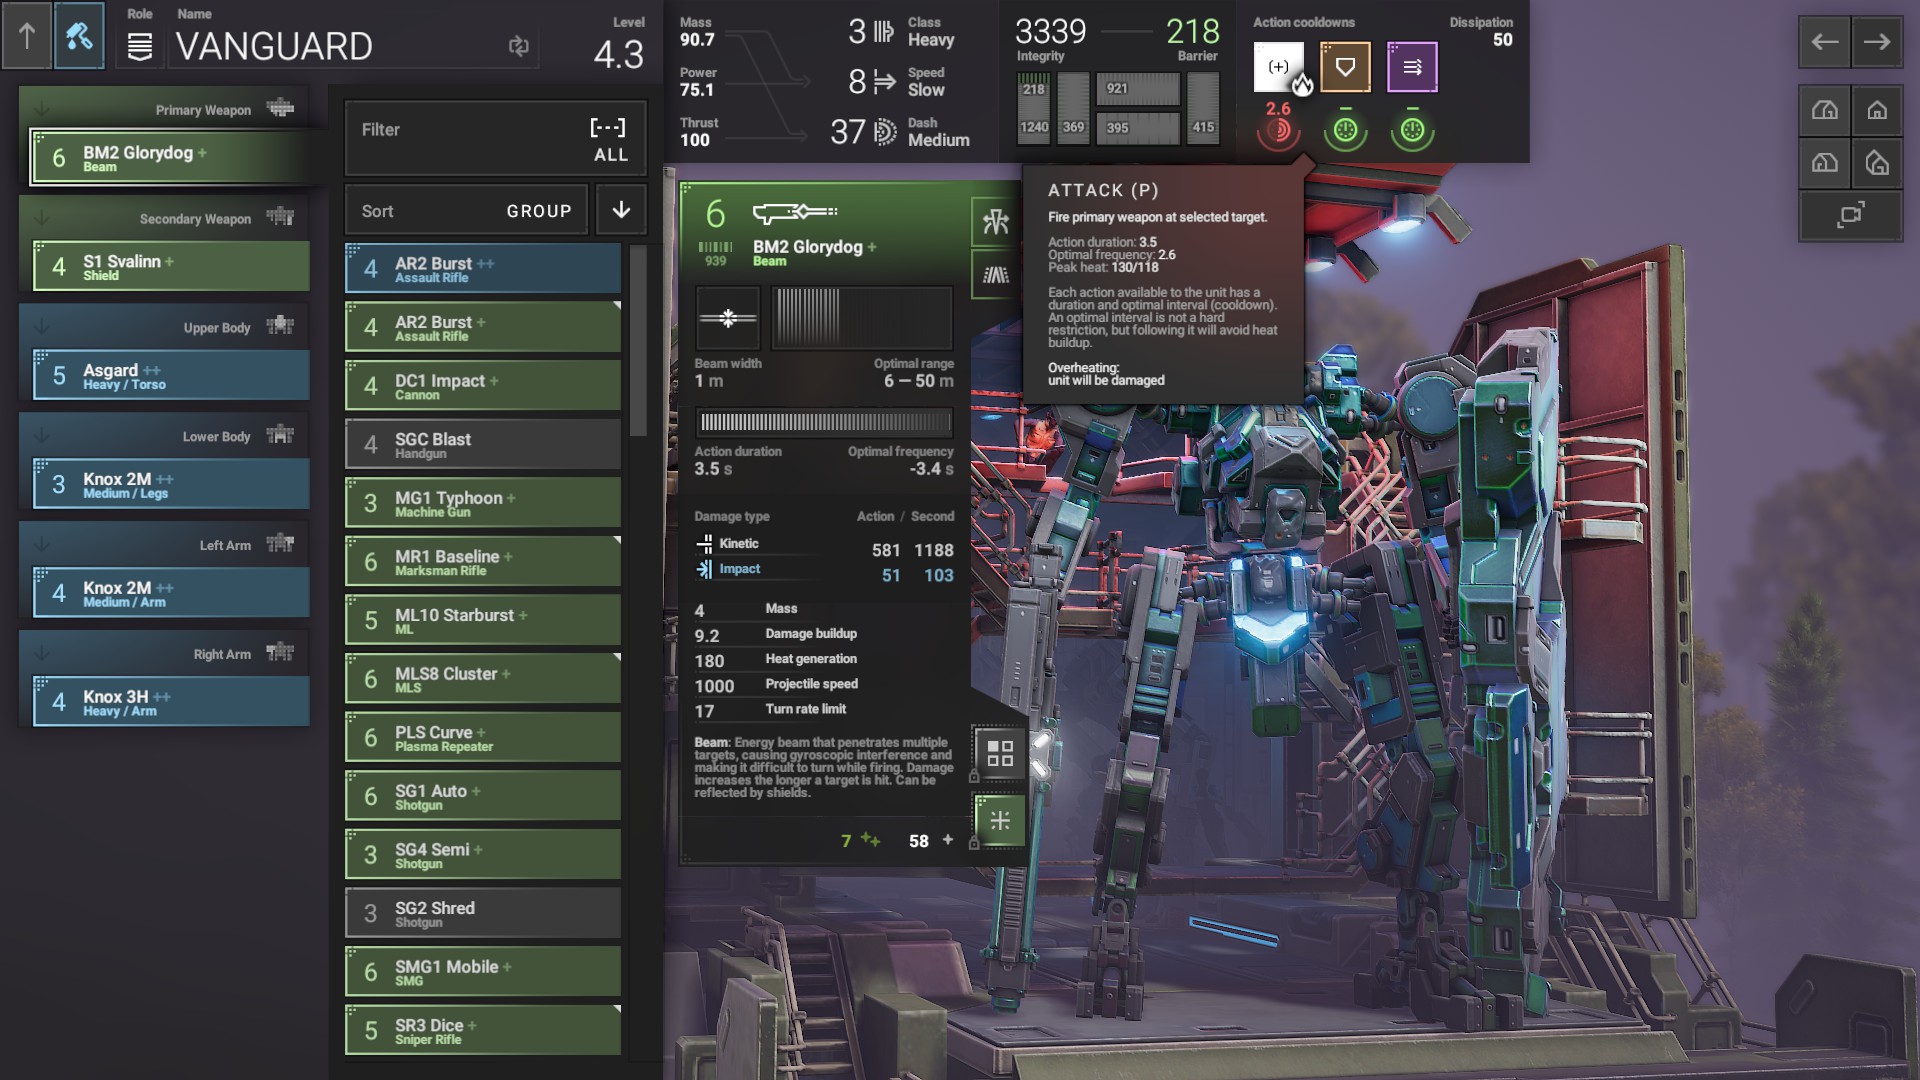
Here are the full stats, where we see the heat should peak at 130, apparently 50 less thanks to the dissipation but leaving the heat a full 12 points over the max limit of this mech, which should indicate that the warning is as correct as it’s pass for the dash.
However, unlike with the thruster, this is false, and the proof is in the maths.
This weapon fires for 3.5 seconds, generating 180 heat overall. This means that each second should be producing just over 51 heat per second. Now note the heat dissipation, the heat removed per second, is 50. This means that in actuality the heat gained is not 130 overall, but in fact only 1 per second, adding up to around 4 heat. This means that in fact the beam can not only be fired during combat without overheating, it can be sustained, able to be fired nonstop for several turns thanks to it’s minimal heat gain, and in fact if the math plays out it can be fired nearly 30 times in a row.
And indeed, in combat, we can see that it is in fact the case, gaining a minuscule 5 heat.
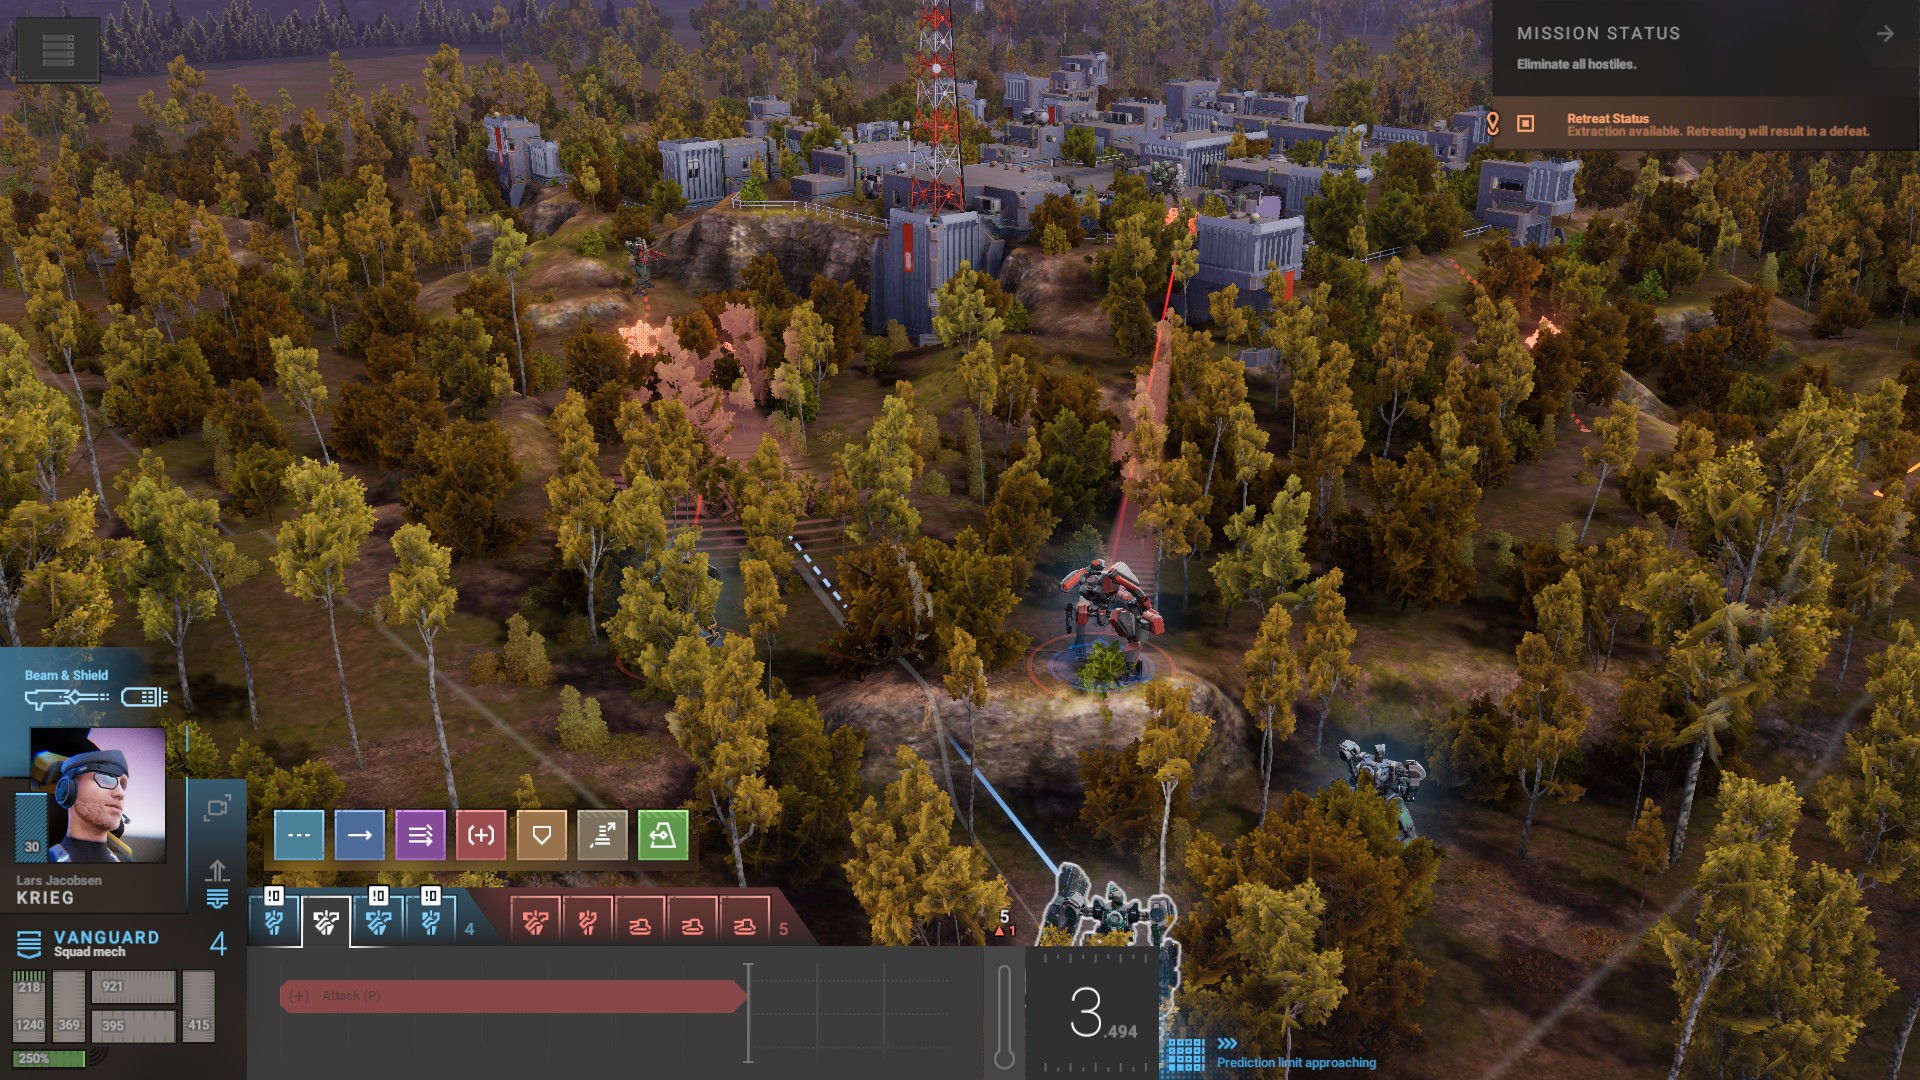
Which is the issue with the UI. It only gives information for one second. Now, i’m sure this is a simple bug, which will no doubt be fixed one day, but for now it’s a problem you’ll have to keep in mind for any weapons and equipment your mech uses that are used for more or less than a second. Not much of one, considering the math plays out just fine in combat, but remember to do a little math to make sure and you’ll be right as rain.
Example mech “Carnage” (Don’t always trust the UI)
Just a quick backing example, proving that this is indeed not an isolated issue.
Here’s “Carnage”, my big bad heavy weapons bot with a ‘mini’ gun the size of a bus and a thirst for blood.
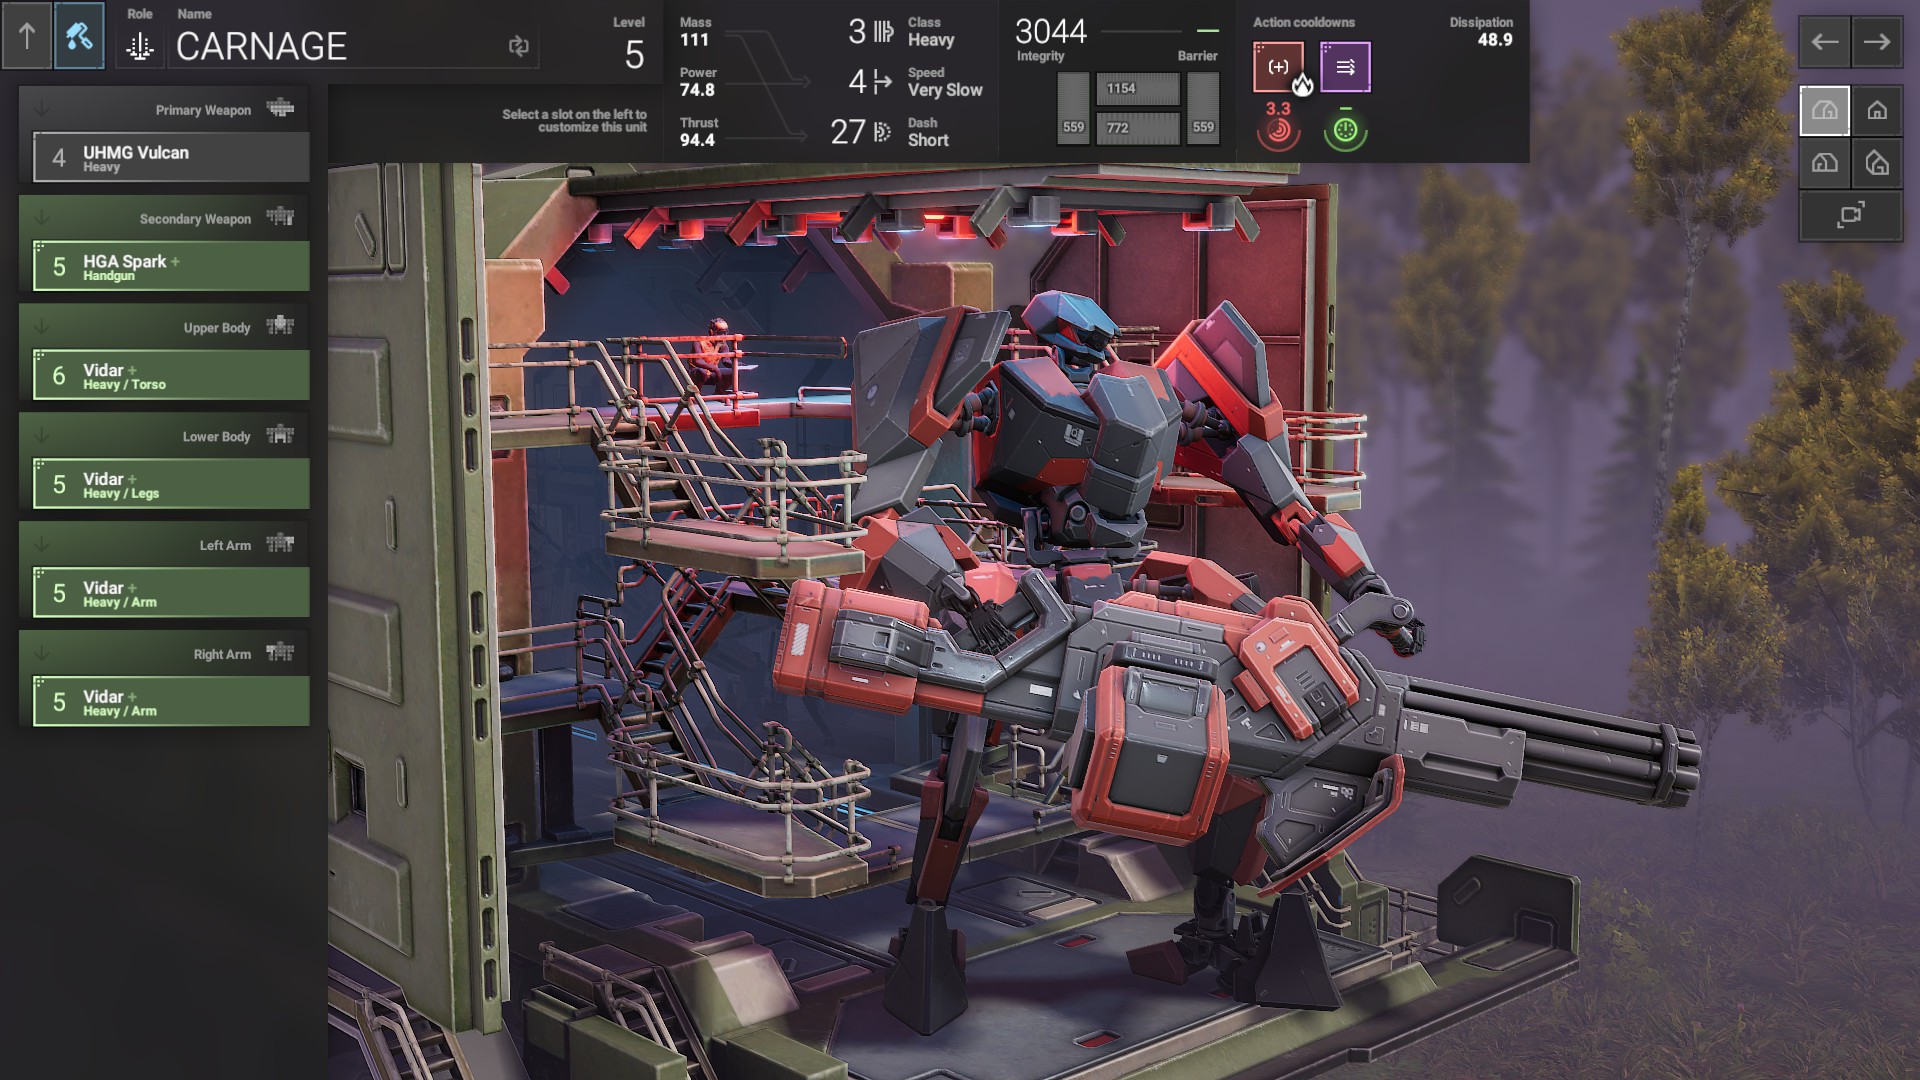
His UHMG Vulcan generates 212 heat over the 4 seconds of fire where it blasts out 150 rounds (Fun fact, that’s 2250 rounds per minute), and as we can see here:
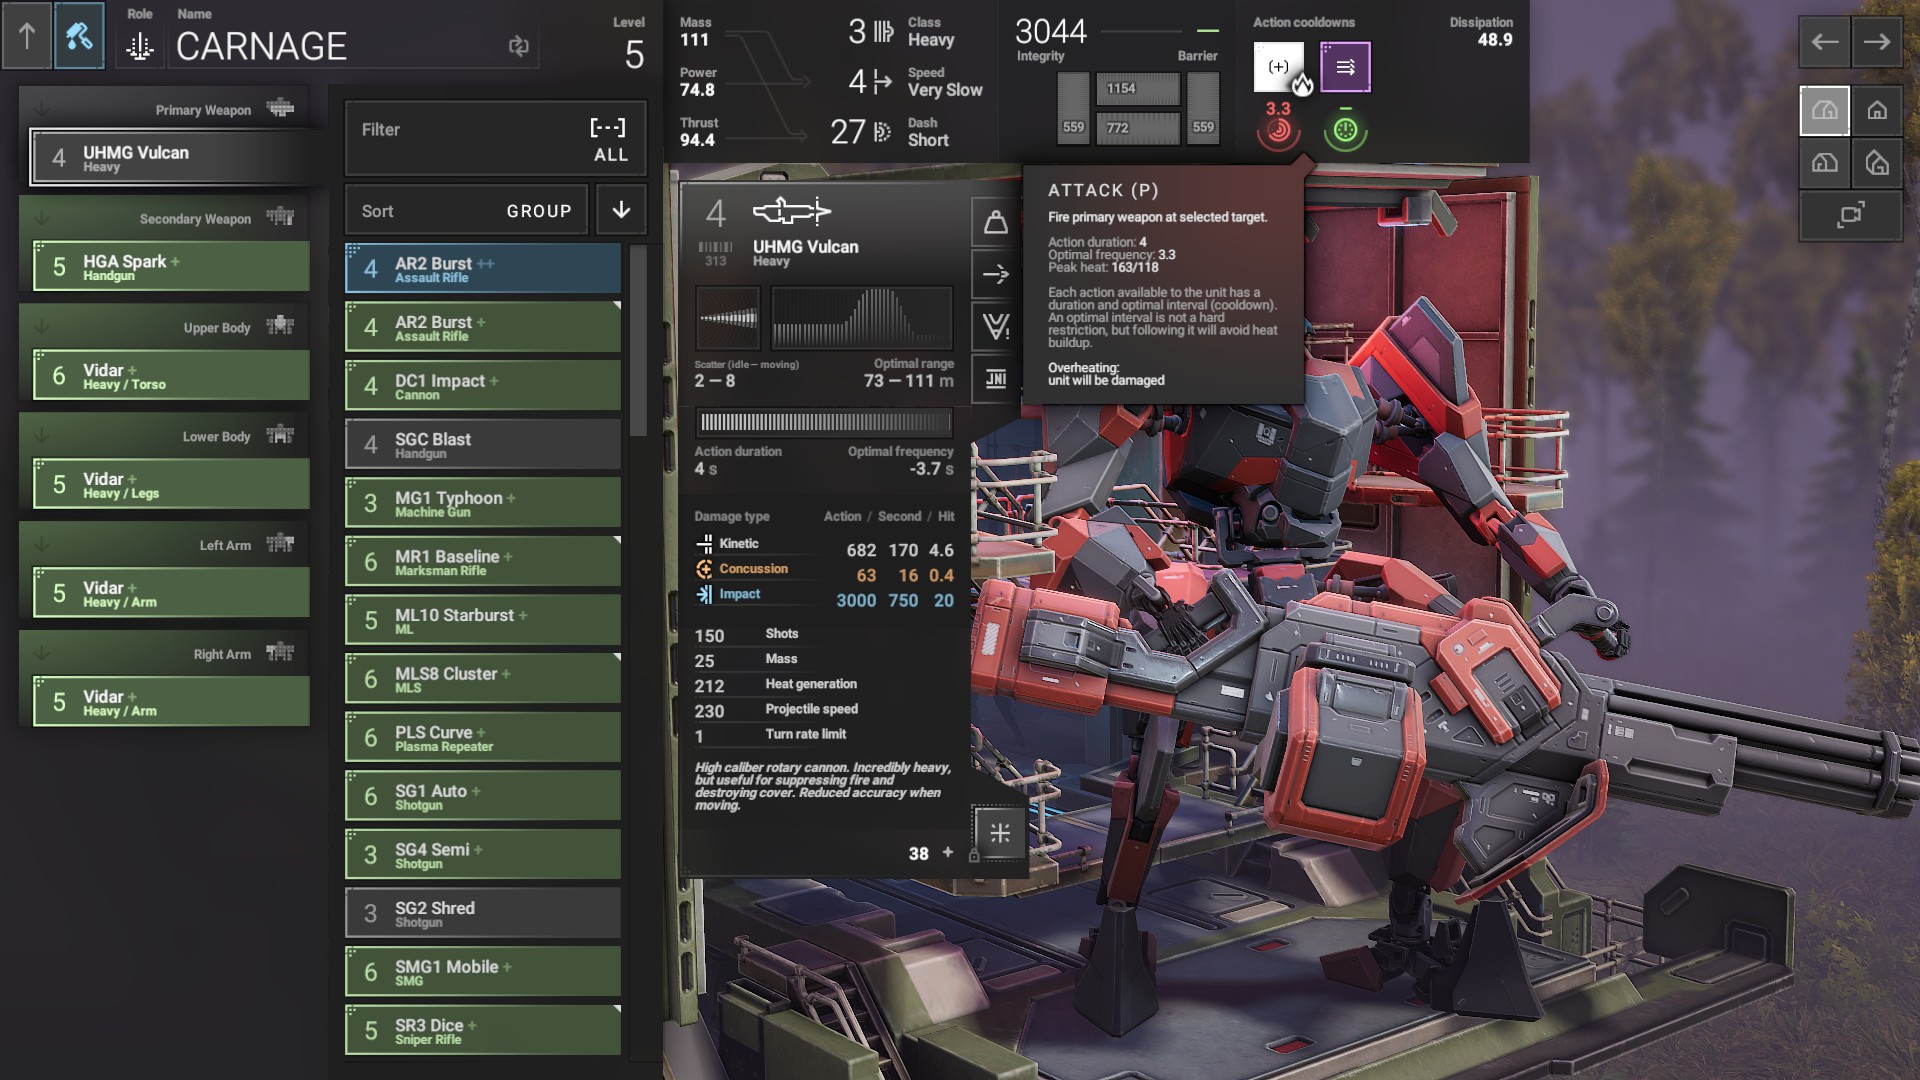
The UI is not happy. 163 heat out of 118, you’re gonna cook!
And yet, as we know now, that’s not true.
Heat disspiation on this mech is 48.9, and 212/4 means the gun generates 53 per second, leaving the heat generated at only a bit over 4 per second, your pilot nice and cool as they let rip with the big gun, and as we see here:
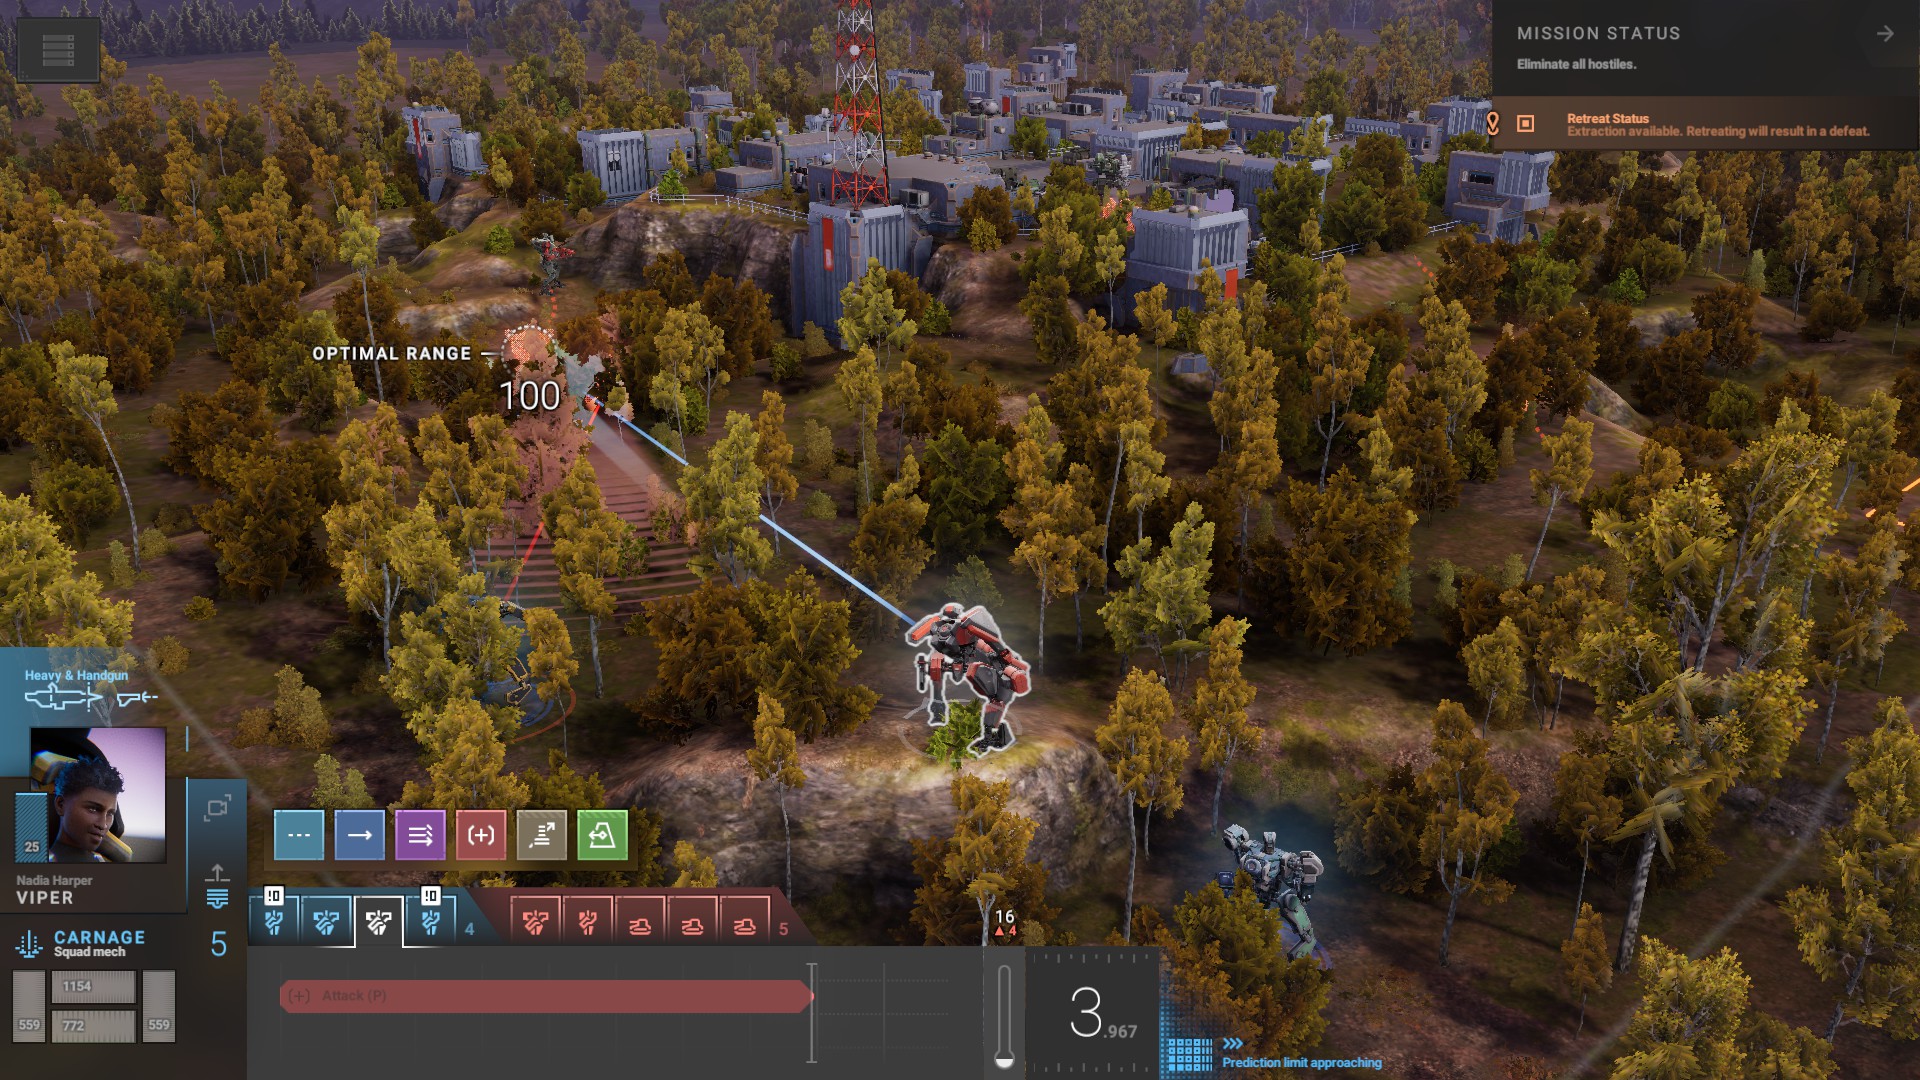
Combat once again plays out as it should, with the gun generating only 16 heat with a single burst, letting the mech sustain the ‘slow’ 2250 rounds per minute fire rate for almost 30 seconds with a little over 7 bursts capable from no heat.
Heat Components
So, now you know how the UI works (or doesn’t in some cases), how do you get more capacity and dissipation?
Well i’m glad you asked, random internet stranger, here’s how it goes.
The main things you need to focus on are the body components, and the reactor.
There are minor components, offensive modules in armour can slot in capacitors for more heat or heatsinks for more dissipation at the cost of some power, so although they aren’t the main source of these they can be used to give you that last little bit to make the build work, but keep in mind you may have other components you want or need to slot in in place of them, and not all body components even have slots for them.
What body components do all have though is a built in heat dissipation, heavier components generally dissipating less than their lighter counterparts, but it’s not always the case, as different components have different stats. This seems small, but an average of 5 dissipation per component can add up to 25, after all.
However, these also need to be balanced for weight and durability, to make sure your mech can actually survive, which makes reactor choice more important, Each one has a built in dissipation and capacity, and will be your main source of these. Keep in mind you need a green tier upper body component to actually swap one out, and a reactor to swap back in, so you’ll be limited at the start.
We’ll use our old friend Vanguard for an example here.
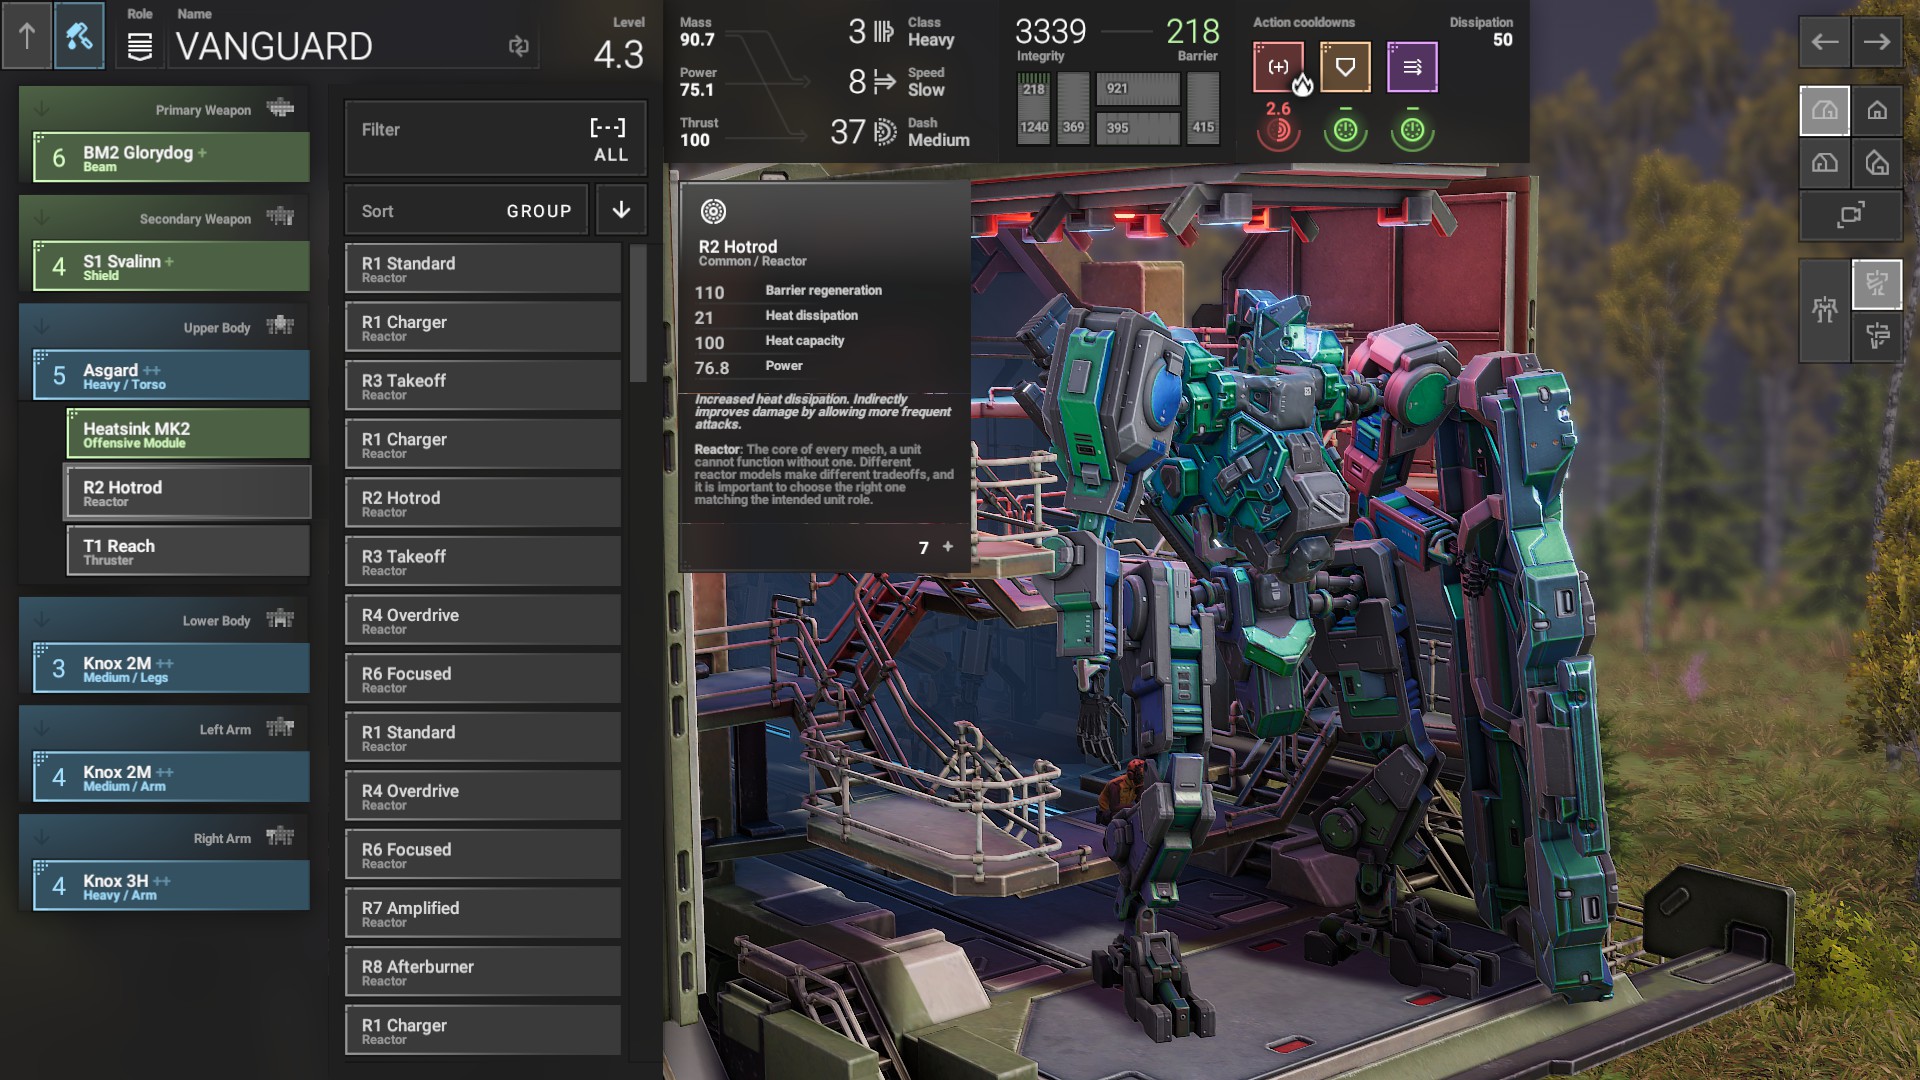
He’s using a T2 Hotrod, a wonderful reactor that boasts a whopping 21 base heat dissipation and a large 100 base heat capacity, a great core for any heat build, which is why Carnage also uses it. However, reactors are also useful for other things, and i’ll use another mech for comparison, Raider.
Example mech “Raider” (Reactor trade offs)
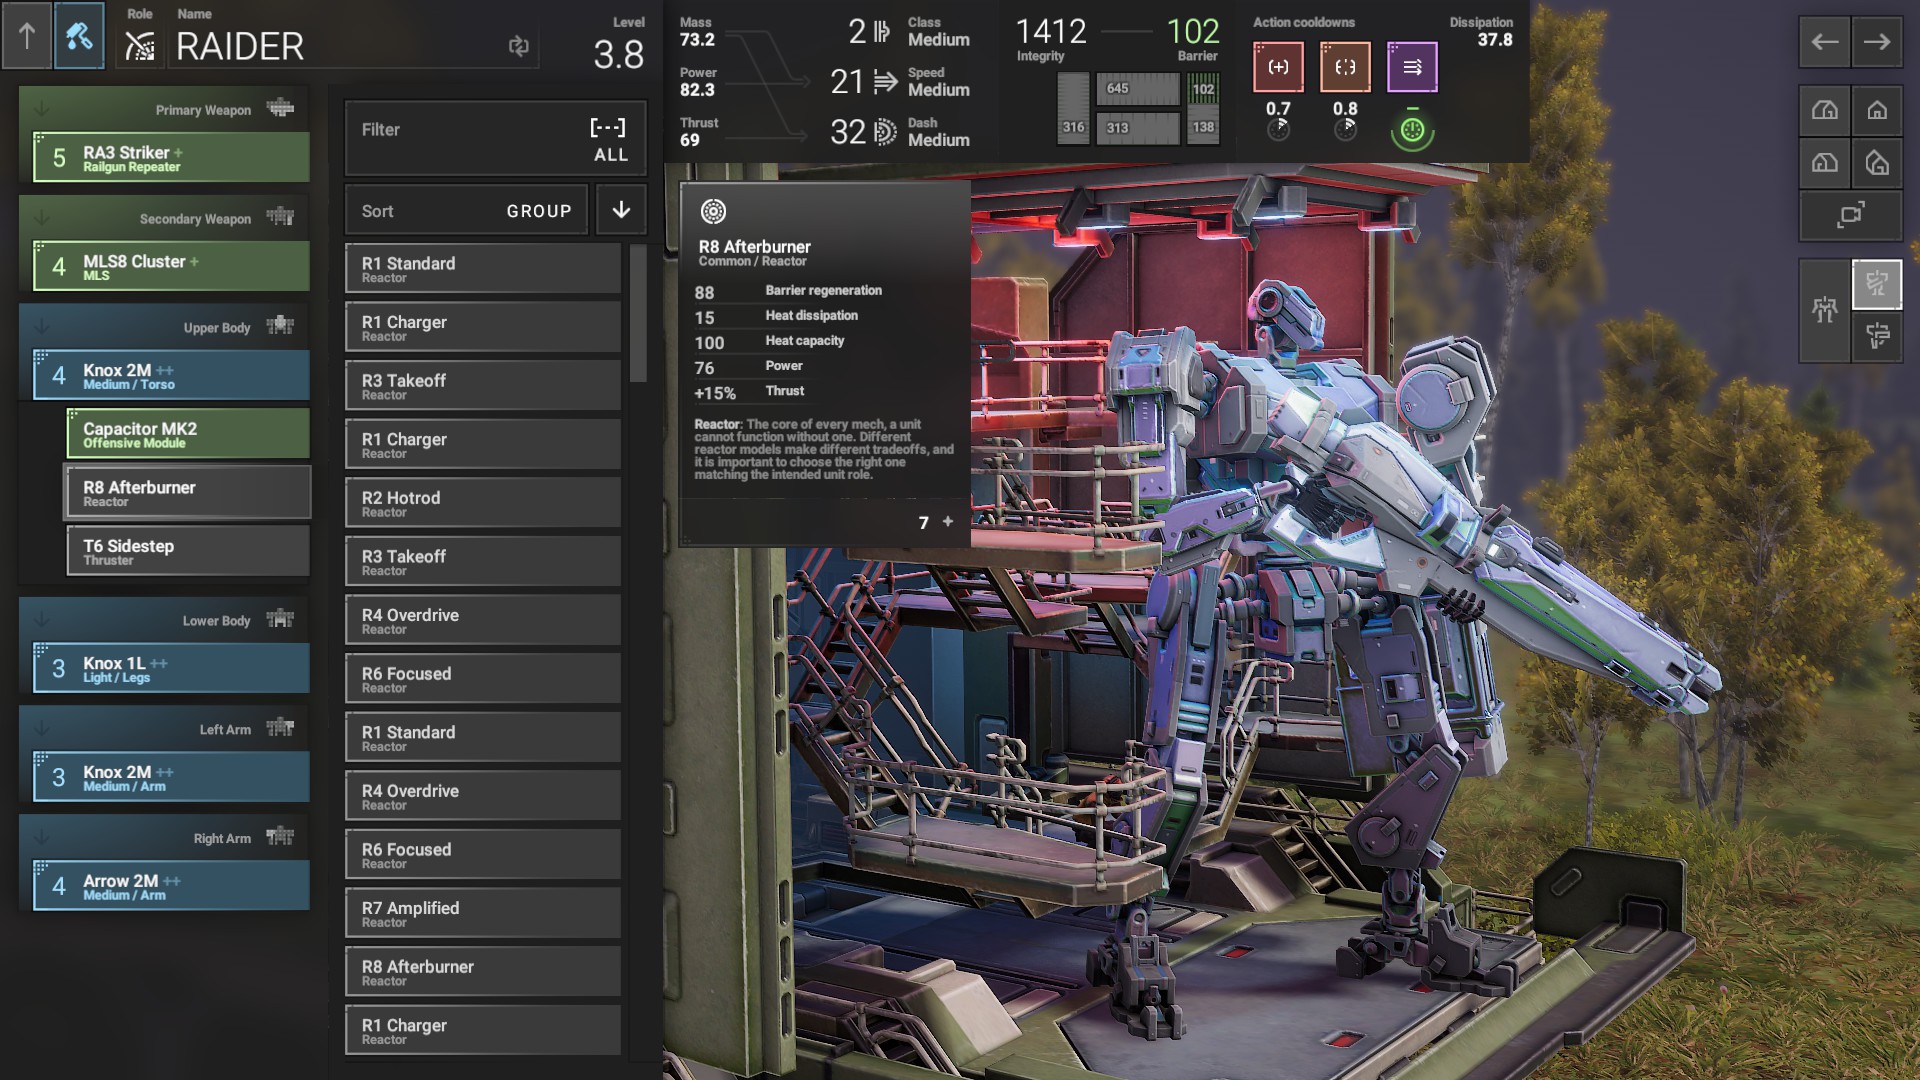
Raider here’s got a lot less dissipation out of his R8 Afterburner, 6 down to only 15 base, and it shows with his lower 37.8 total dissipation, but he maintains the 100 base heat capacity, and gains a nice 15% thrust boost, letting his middling T6 Sidestep boost him further than usual whilst keeping it’s relatively low heat gain, enabling it to go much further with a long boost chain.
His weapons do suffer accordingly though
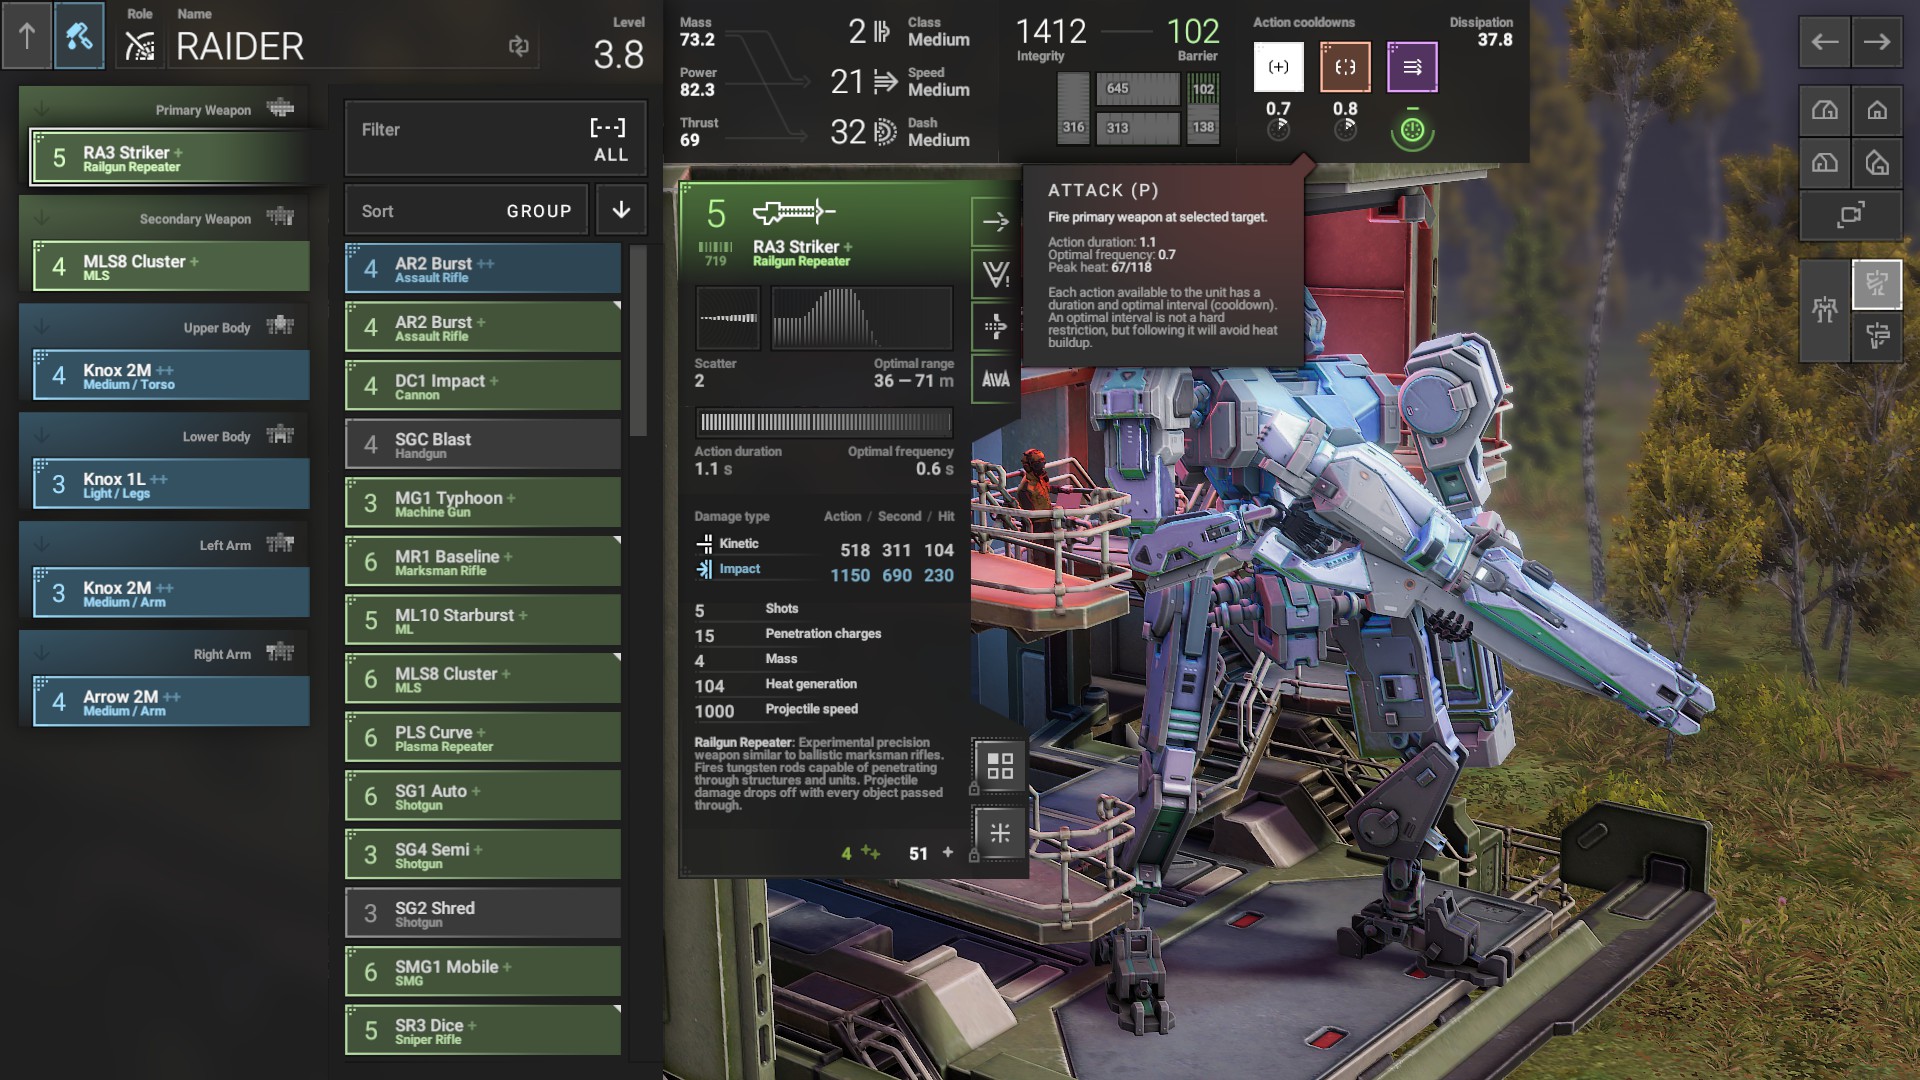
His RA3 Striker railgun, 104 heat in 1.1 seconds is close enough that the 67 heat gain per use the UI declares it has is close enough for for us, and indeed it can’t fire two times in quick succession even from no heat.
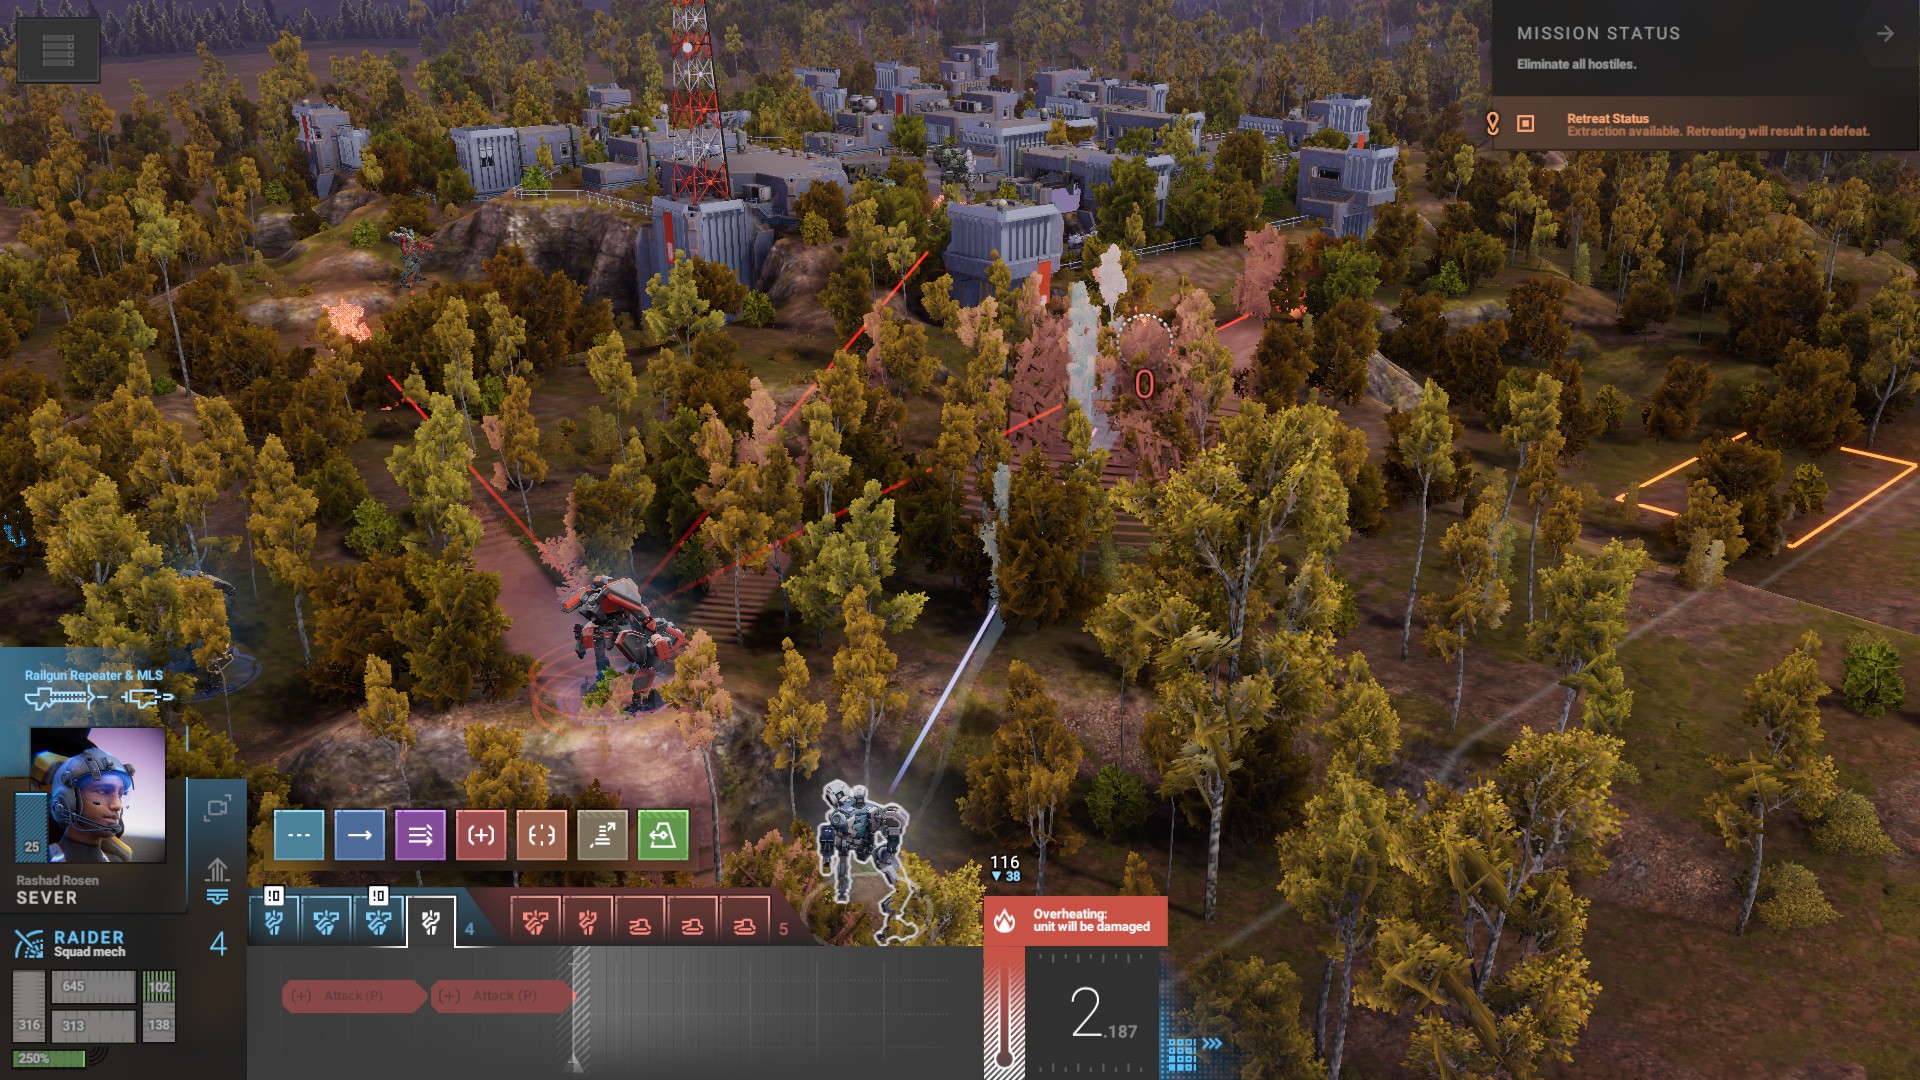
The MLS cluster is the same, and with roughly the same performance
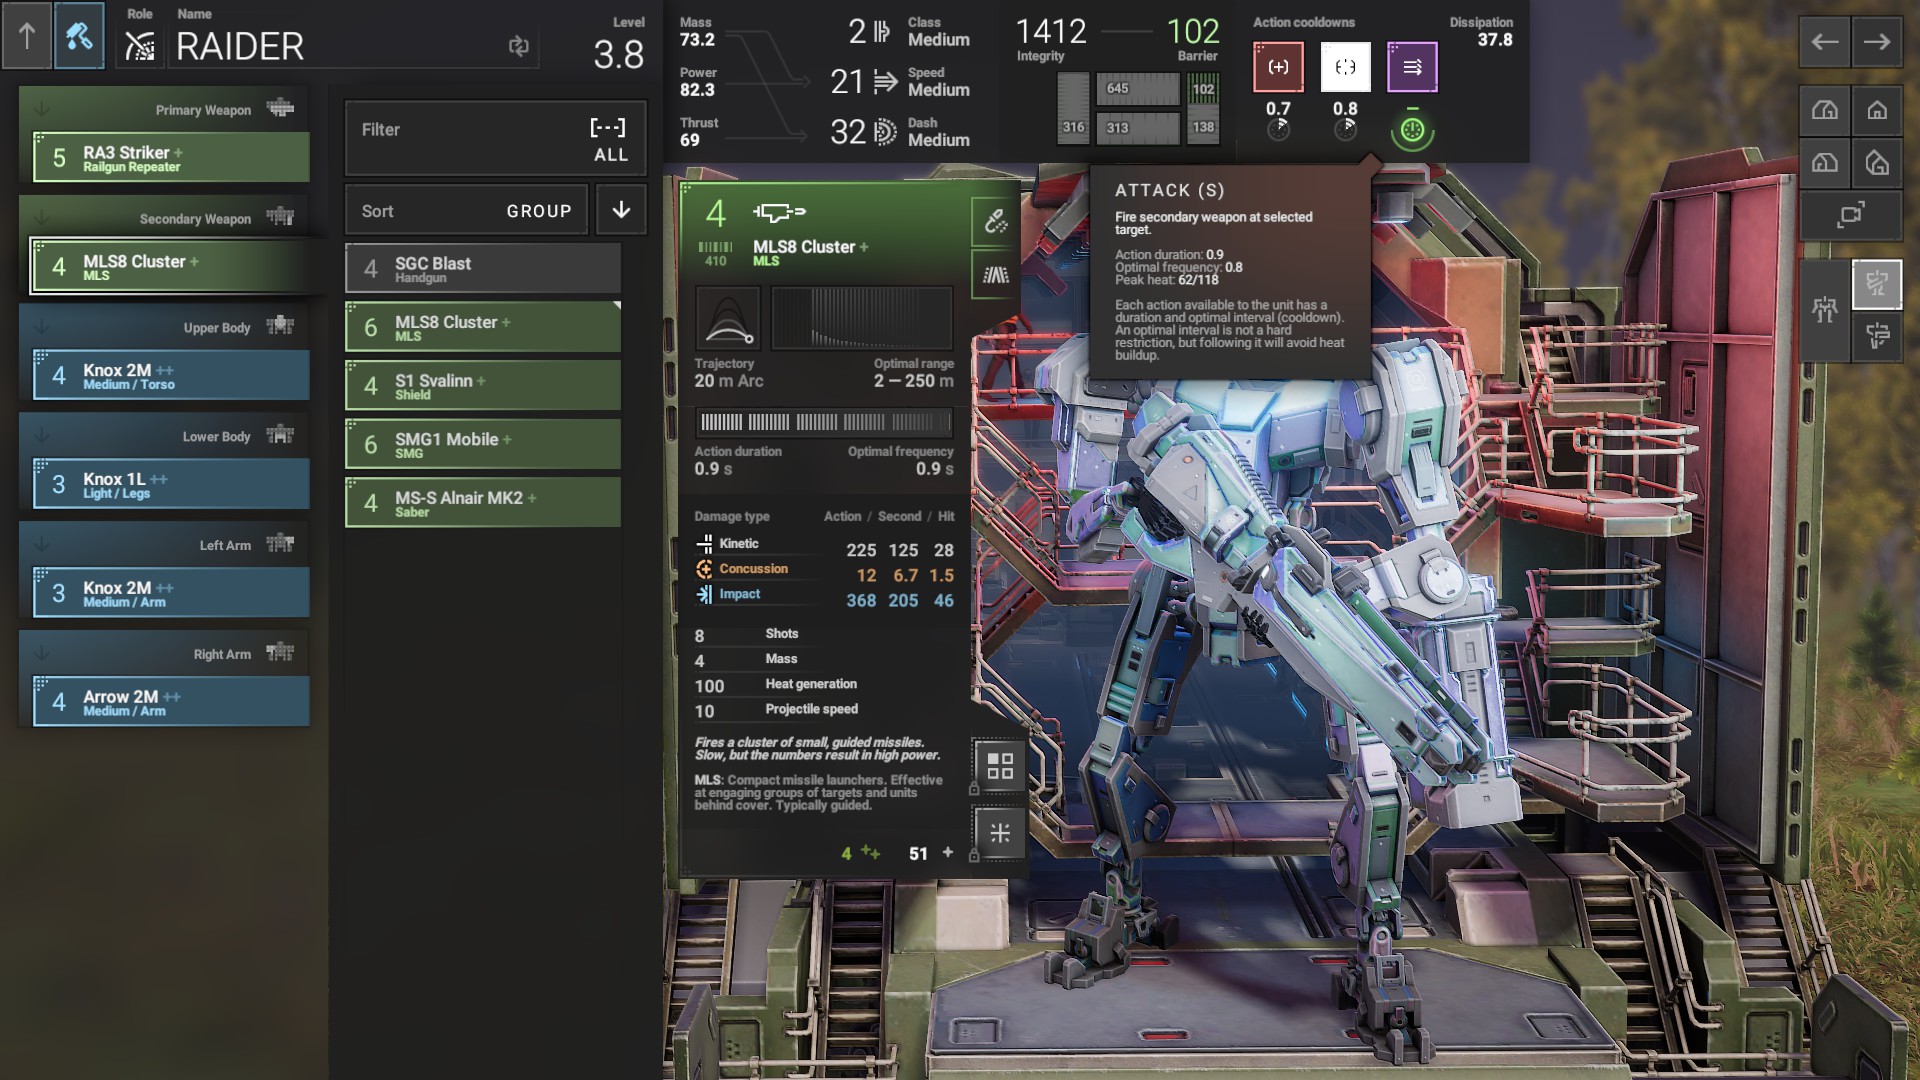
And combat again backs this claim up, with similar results
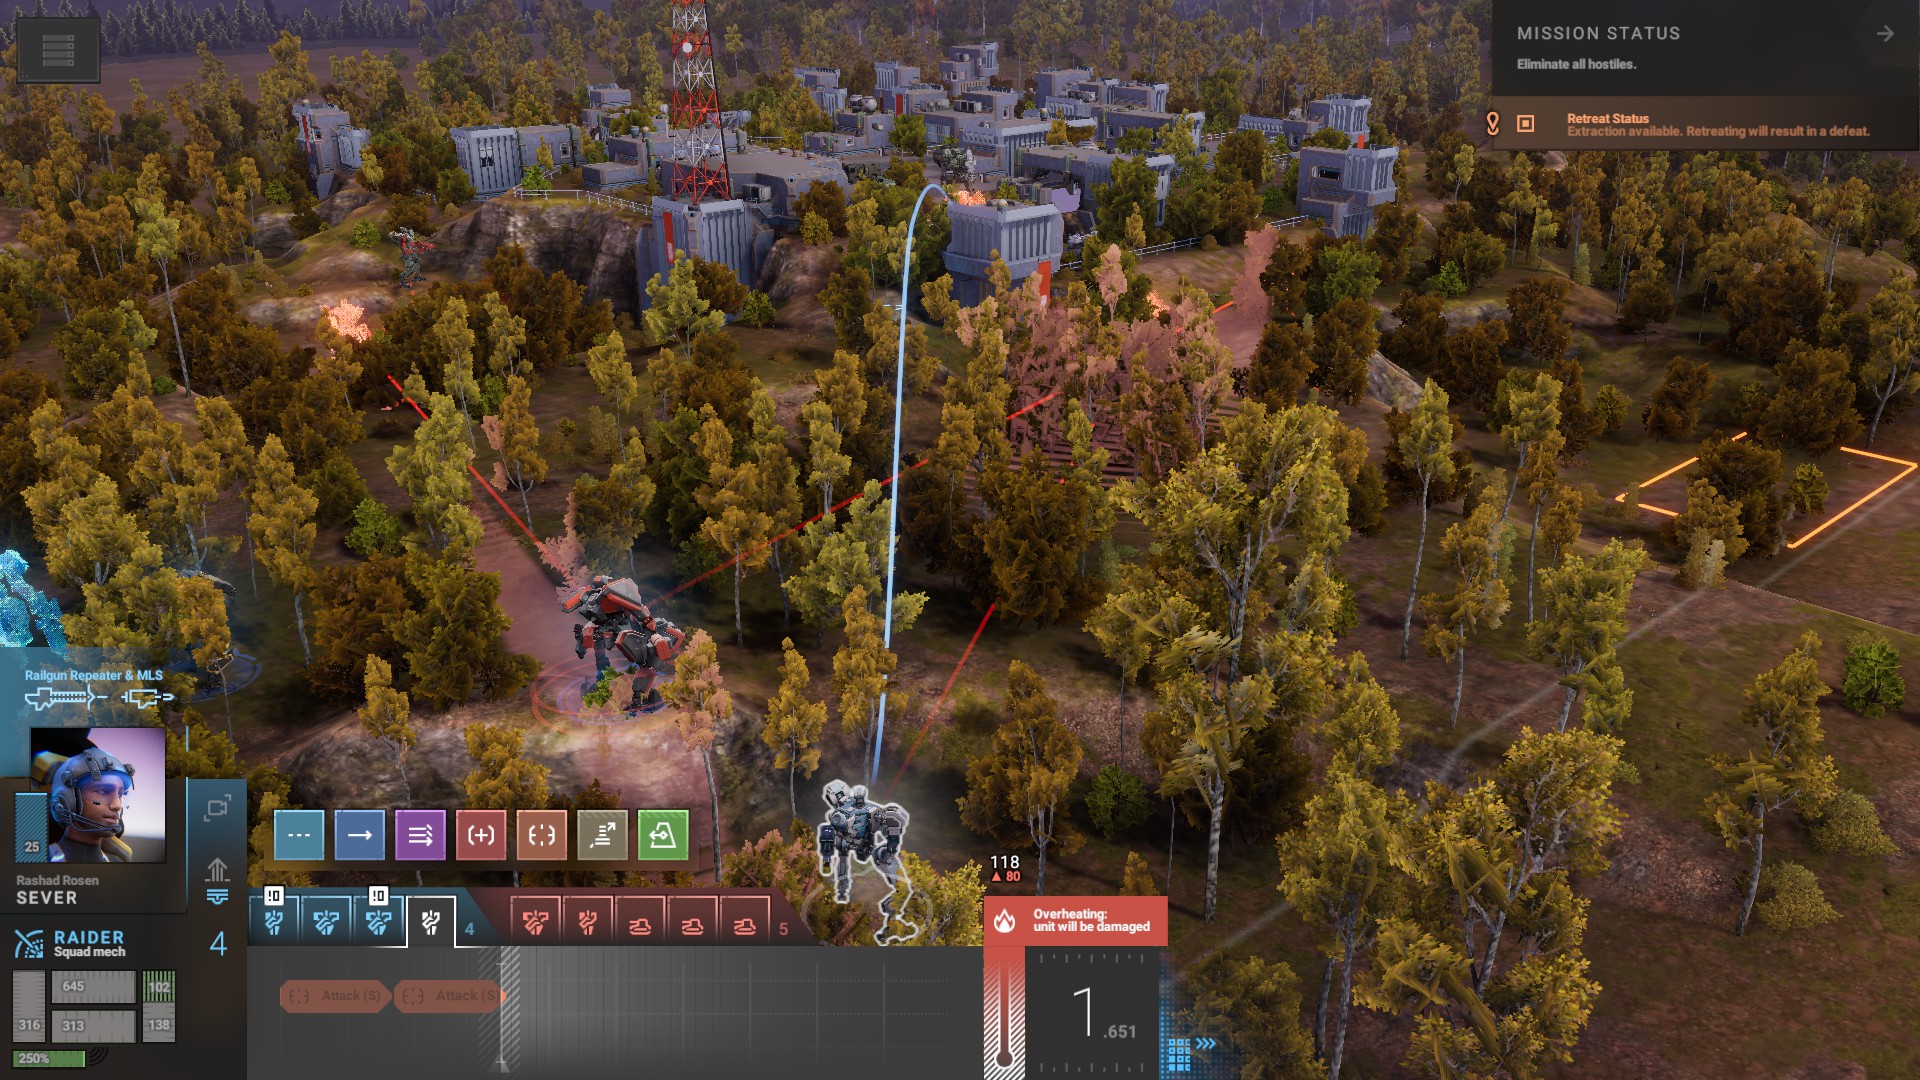
But the dash. Oh the dash.
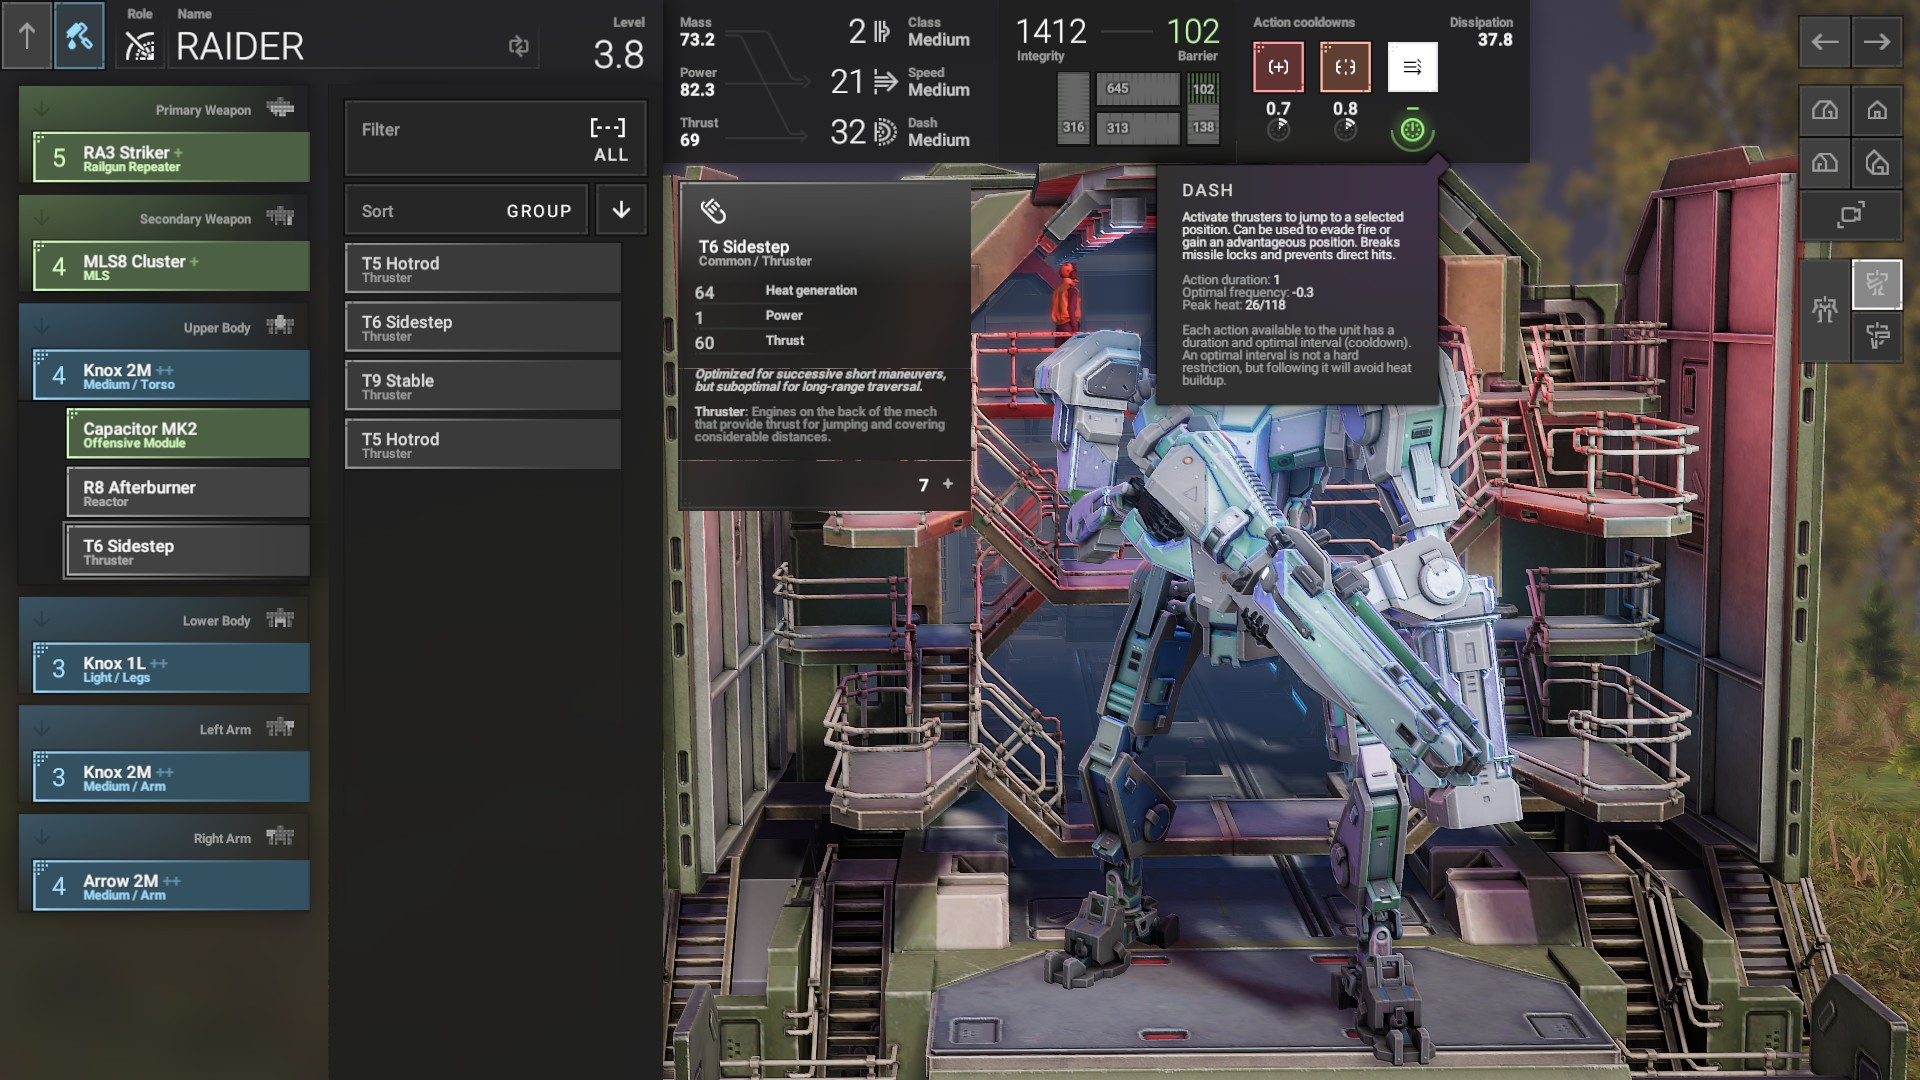
With only 26 heat gained per second, it’s middling boost range can be chained for extreme manoeuvrability, enabling it to rapidly reposition and strike on it’s own terms.
This however, is edging more into more advanced unit building techniques where this is a more simple guide on heat, so I’ll cut it here.
So, in summary, heat is another plate added to the balancing act of speed and durability, and the UI can be wrong, so make sure to do a little self calculation first before you let a great weapon sit unused thanks to the extreme heat warning, or set up a wonderful loadout only to find out that you can’t fire the weapon more than once per turn.