Welcome to our Pokemon Gaia Walkthrough & Guide. Pokémon Gaia is a tough one, so if you need a little nudge in the right direction (or to keep you from becoming Zubat’s food), this guide is for you. Let’s begin!
Pokemon Gaia Walkthrough & Guide
Pokémon Gaia is a tough one, so if you need a little nudge in the right direction (or to keep you from becoming Zubat’s food), this guide is for you. Let’s begin! We know that there are people who have a hard time finishing the Pokemon Gaia game. If you are one of those who find it difficult to finish the game, let’s take you to our Pokemon Gaia guide. Also check out our guide to Pokemon Gaia Cheats and Items.
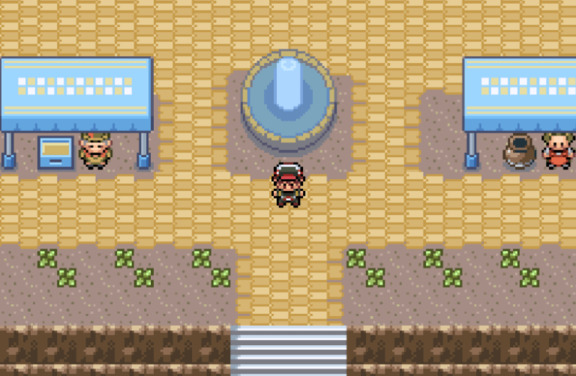
Celanto Town

Welcome to your humble home in Celanto Town. Your first steps in the Orbtus region have you returning a Library book and bringing it to someone who’s waiting for you in the Ruins just South of the town. I’m sure this won’t be important to the story in any way!

Grab the Dusty Tome from your desk upstairs and deliver it to the lady in the Ruins. She explains that the book never belonged to the Library and is a family heirloom of hers. Hand over the book and return to the town.
Your mom informs you that the Professor in the Library is giving away Pokemon, so head West to pick yours.
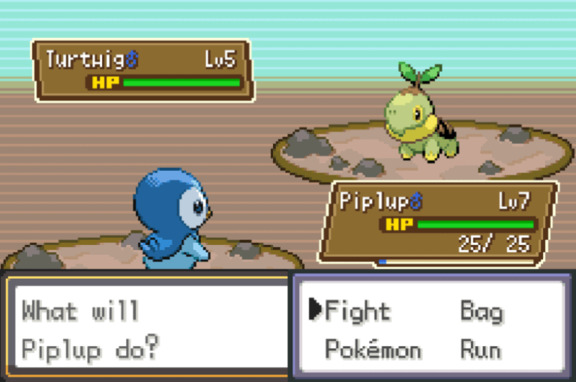
Picking The Perfect Starter
You could make a case for any of the Starters being the ‘best’ so I urge you to go with your favourite. The general consensus is that Turtwig is the strongest and Piplup is the weakest, but I used the latter without issue. There are plenty of opportunities to catch powerful Pokemon, so go with what you think is the coolest.
Your Rival will always pick your Pokemons counter, and as far as Pokemon Rivals go, he’s alright! When you’re ready, head West to Celanto Path.
Celanto Path
You can’t catch any Pokemon here as you don’t have Pokeballs. I like to level my Pokemon up to Level 6 in preparation for an upcoming battle, but it’s optional. Walk through the tall grass and West to Archan Town.
Archan Town
Head into the ‘Redwood Residence’ right next to the Pokemon Center. Professor Redwood will give you a Care Package you need to open in your inventory; it contains a Pokedex, Redwood Card and Town Map. Speak to the Professor again, and he will give you some Pokeballs and Potions.
When you’re ready, head West to the mouth of Archan Tunnel, where your Rival is waiting to challenge you. He only has the Starter he was given.
Rival – 1st Encounter
Starter – LV5
Keep using your basic attack, and you should win without a hitch. Return to the Pokemon Center to heal and head into Archan Tunnel.
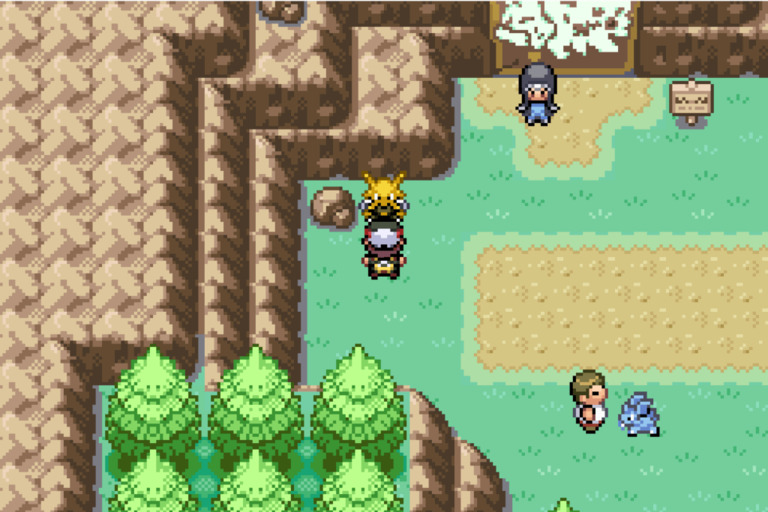
Archan Tunnel

There are a few easy Trainers to defeat here, and you’ll run into plenty of wild Pokemon. As you have your first Gym battle in the next town, I recommend fighting every Trainer and wild Pokemon you come across for the EXP.
Drilbur is worth catching if you come across one because it can use all the Rock-Based HMs and Cut.
When you reach the bridge, head South. Your destination is East off that path, but if you keep heading down, you’ll find the lost Weedle for the boy at the tunnel entrance. Fortunately, you don’t have to travel back to give it to him. His mom will appear when you interact with the Weedle and provides you with a Soothe Bell for your troubles.
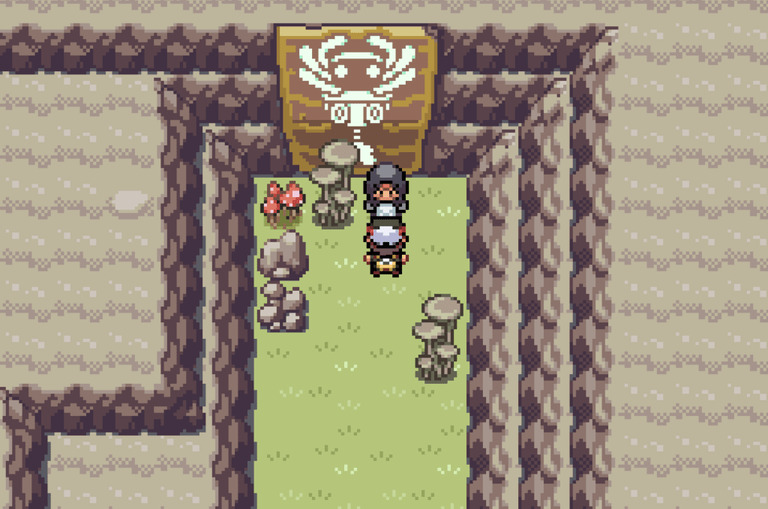
Want a Clefairy?
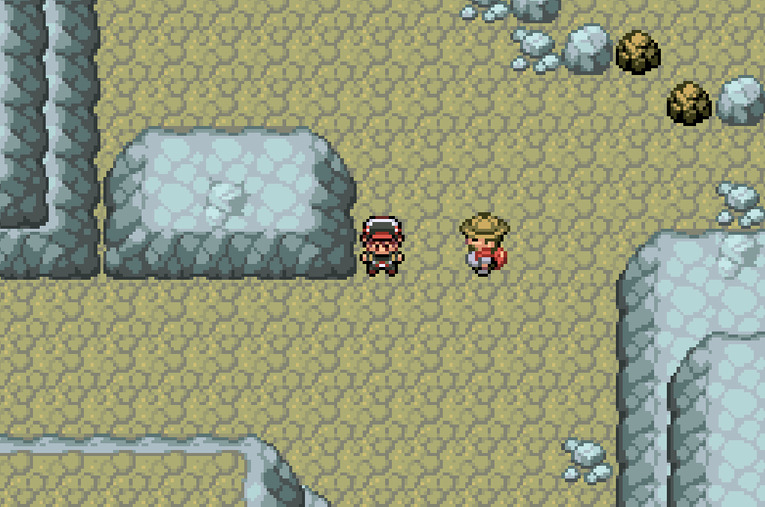
When you reach the Hiker (pictured above), you can head West instead of South. Heading West will take you on a short path to a strange room with a Clefairy inside. The Clefairy should be easy to catch as it’s only LV5 and is an excellent early addition to your team.
Seros Village
You’ll bump into the Professor and your Rival as soon as you arrive in the town. Once they leave, you’re free to explore. Use the Pokemon Center and stock up on supplies from the Poke-Mart, as your very first Gym is ready to be challenged!
Pokemon Day-Care
The Day Care centre is just to the West of the Pokemon Center. You probably won’t have much use for it now, but feel free to use it later.
Seros Gym
Welcome to your first Gym, where you’ll face off against Fernando, a Fairy-type specialist. You won’t have a counter to Fairy-types yet, but they aren’t much of a threat as it’s so early. Make full use of your Starter here and use its most potent attacks on repeat. I was able to clear this battle comfortably with my Starter at LV15.
Gym Leader Fernando – Fairy-type
- Clefairy (Fairy) – LV11
- Ralts – (Psychic/Fairy) – LV11
- Jigglypuff (Normal/Fairy) – LV13
Nobody Likes A Sore Loser
Ever had a Gym Leader refuse to give you a badge? Well, that’s what’s happening right now! After defeating Fernando, he flees West to Wisp Forest, and if you want that badge, you best go after him!
Wisp Forest
Wisp Forest is a golden opportunity to grab a Ghost-Type Pokemon if you want one. I stayed here until I caught a Ghastly (Gengar is one of my favourites), but it’s not essential. Once you head deep enough into the Forest, you’ll find a sulking Fernando, and he will give you the Mystic Badge.
The Day-Care Man will give you HM01 – Cut when you return to the town. Make sure you visit the Gym after Fernando’s little outburst, as he will provide you with the Charming Cry TM. Afterwards, head around the back of the Gym and use Cut on the trees blocking the way to Aerous City.
Aerous City

Even though there’s no Gym here, there’s still tons to do! If you’ve committed the cardinal sin of misspelling your Pokemon’s names, you can fix them by talking to the Name Rater. His house is West of the Pokemon Center.
Spend More = Get More
The man in the house North of the Pokemon Center wants to sell you an unknown item for 5000G. That item is an Amulet Coin, increasing the gold you earn from battles. The sooner you buy it, the sooner it pays for itself.
Aerous City Museum
It’s all kicking off here, and we’re introduced to our Antagonists, the New Elders. All the Grunts in here should be easy to dispatch. Fun fact, There’s a combination code if you stand on the stool and interact with the wall on the 2nd floor.
If you enter code 1104, a room will unlock with a ruthless trainer inside! She will rip you to shreds with an entire team of LV60 Pokemon. Needless to say, stay clear for now.
Aerous Art Club
Since you’ll probably be a little poor after buying the Amulet Coin, head to the top floor of the Art Club via the stairs on the right. One of the patrons by the counter will give you a Nugget if you talk to him. It sells for a tidy 5000G.
How to Get an Eevee!
If you head West on the ground floor of the Art Club, there are four trainers to battle, each with a single Smeargle. At the end of this gauntlet is a trainer called Vincent. He has a team of 6 Smeargles with an unpleasant array of attacks and status effects. You’ll want to switch your Pokemon out for healing if they get any Status Ailments, so having a few reliable Pokemon will help here.
Every Pokemon in the Art Club is LV16, so having Pokemon a little stronger would be ideal. When you defeat Vincent, he will give you an Egg with an Eevee inside.
Nestpine Town

If you’re not accustomed to this upgraded difficulty, Nestpine Town can catch you off guard, as there are a couple of demanding battles in this area. Your main goal is to conquer the Gym, but you’ll be thrust into a bout with your Rival first. He’s waiting at the door of the Gym.
The Move Deleter
If you need a Pokemon to forget a move, speak to the Move Deleter. He lives just North of the Pokemon Center.
Showdown with Your Rival
This fight is tough if you’ve not got a counter to your Rival’s Starter Pokemon. You can beat him on level difference, but make finding a counter your priority after this fight. This is your Rival’s line-up.
Rival – 2nd Encounter
- Makuhita (Fighting) – LV20
- Starter – LV22
- Roggenrola (Rock) – LV20
- Swablu – (Normal/Flying) LV20
The biggest threat in this battle, without a doubt, is the Starter Pokemon. This thing will usually KO your own Starter in a single hit! If you don’t have a proper counter, your best bet is to catch something that is at least neutral and level them up before the fight.
Upon defeating your Rival, you gain access to the Gym and the coveted EXP Share Item! Always give this to your weakest Pokemon and use it so none of your squad falls behind.
Nestpine Town Gym
Aria might give you a little trouble if you picked the Grass-type Starter. Chatot, in particular, is a horrid opponent that knows ‘Chatter’. Chatter inflicts Confusion, and it’s a miserable status ailment no matter what Pokemon game you’re playing! Aria’s Pokemon are as follows:
Gym Leader Aria – Flying Type
- Vullaby (Dark/Flying) – LV21
- Gligar (Ground/Flying) – LV21
- Chatot (Normal Flying) – LV23
Vullaby and Chatot are weak to Electric and Rock-Type attacks, as you’d expect. Gligar’s strange Type combo makes it completely immune to Electric, and Rock will only do normal damage. On the bright side, it’s weak to Water and Ice if you somehow have an Ice move already.
After you’ve emerged victorious, head South-East to Frostbite Cave.
Frostbite Cave
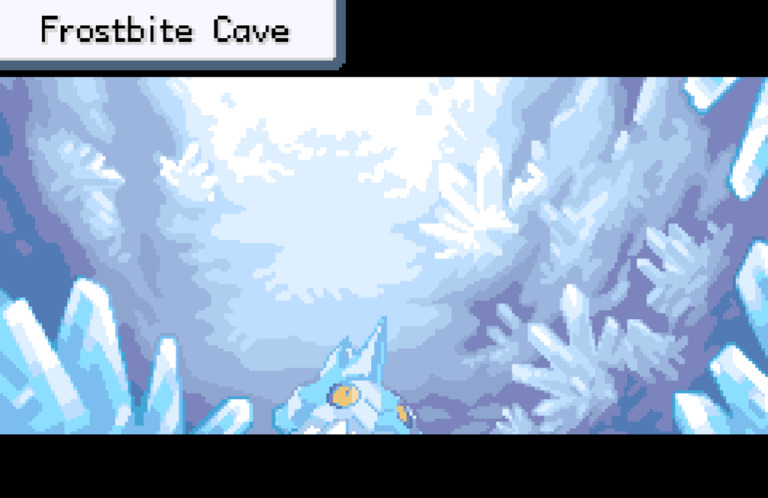
Frostbite Cave isn’t complex, but it’s long and full of battles. Make sure you inspect the coloured rocks for hidden prizes. As I mentioned at the start of the guide, random encounters are in full force in Pokemon Gaia, and you’ll get a real taste of that here! Don’t be afraid to splash out on Repels.
Elder Knight Eunice
Before you leave the Cave, you’re introduced to your first New Elder commander, Elder Knight Eunice. Eunice is no pushover and likes to use Hailstorm, which batters both of your Pokemon each turn. To make matters worse, all her Pokemon, aside from Noctowl, resist that damage. This is her team, and take note of their levels as they hit hard!
Elder Knight Eunice – 1st Encounter
- Snover (Grass/Ice) – LV24
- Froslass (Ice/Ghost) – LV24
- Noctowl (Normal/Flying) – LV24
- Amaura (Rock/Ice) – LV26
You’ll have an easy time here if you picked Chimchar as your Starter but beware of Eunice’s Amaura, as it’s not weak to fire. Ideally, you’ll want to use Fighting or Steel against it, as it’s very weak to both. The biggest threat here is Hailstorm slowly chipping away at your squad. Froslass uses it, and as it’s so fast, it will usually go first. Be generous with your healing items, and you’ll be fine.
Windmist City

I’m sure you’re itching to earn another Gym Badge, but before the Gym unlocks, you must make your way up to the top of Apex Tower to the North. Considering the grandiose name, it’s a minor area. There are a few trainers to battle, but nothing of note, and they shouldn’t pose a problem.
Windmist City Gym
Arguably, Nina is a pushover compared to Eunice in Frostbite Cave. Nina specializes in Fire Pokemon, and her team is as follows:
Gym Leader Nina – Fire-type
- Pignite (Fire/Fighting) – LV26
- Magmar (Fire) – LV26
- Heatmor (Fire) – LV26
- Camerupt (Fire/Ground) – LV28
Naturally, you’ll stomp the entire Gym with Water-types and Ground-Types work just as well, even against Camerupt. Any Gym is easy if you’ve got the appropriate counters, but Nina’s roster has no tricks or curveballs. It should be a pushover.
After you’ve conquered the Gym, Professor Redwood will offer to take you back to Aerous City. He will also give you a Bike Voucher to spend there! You can find the Bike Shop just East of the Pokemon Center. When ready, head South to board the S.S Wake to Sabulo Island.
Sabulo Island
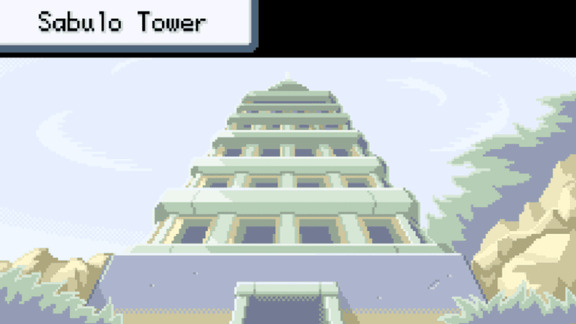
Since there’s no Gym, your goal here is to battle all the way to the top of Sabulo Tower. The trainers in this Tower are no joke, and you’ll need to beat five of them! As they put up quite a fight, here’s precisely what you’ll be dealing with.
Expert Nicholi – Normal-Type
- Glameow (Normal) – LV27
- Teddiursa (Normal) – LV27
- Herdier (Normal) – LV27
- Diggersby (Normal/Ground) – LV29
Expert Maya – Grass-Type
- Skiddo (Grass) – LV27
- Wormadam (Bug/Grass) – LV27
- Jumpluff (Grass/Flying) – LV27
- Grovyle (Grass) – LV29
Ace Trainer Atsushi – Fire-Type
- Litleo (Fire/Normal) – LV27
- Numel (Fire/Ground) – LV27
- Fletchinder (Fire/Flying) – LV27
- Larvesta (Bug/Fire) – LV29
Ace Trainer Mikel – Water-Type
- Barboach (Water/Ground) – LV27
- Mantine (Water/Flying) – LV27
- Basculin (Water) – LV27
- Basculin (again) (Water) – LV29
Expert Agem – Dragon-Type
- Goomy (Dragon) – LV30
- Dragonair (Dragon) – LV30
- Tyrunt (Rock/Dragon) – LV30
- Gabite (Dragon/Ground) – LV32
The Achilles heel of each of these Trainers is there are no tricky type combinations. A single good counter to their types (Electric vs Water, for example) will quickly wipe out their entire squad.
Once you’ve fought to the top, you’ll face Belle, and she means business! Still, you’ll be given a Mega Ring for Mega Evolutions when you take her down.
Successor Belle
- Heracross (Bug/Fighting) – LV30
- Sableye (Dark/Ghost) – LV30
- Manectric (Electric) – LV30
- Mawile (Steel/Fairy) – LV30
- Audino (Normal) – LV32 (Mega!)
Sableye is an infamous Pokemon as it’s immune to Normal, Psychic and Fighting attacks. Only Fairy attacks will really hurt it. Belle’s trump card is undoubtedly her Audino which will Mega Evolve and hits like a freight train. Fighting-Type attacks will make short work of Audino; otherwise, just hit it with the strongest attacks you have.
Sabulo Cave
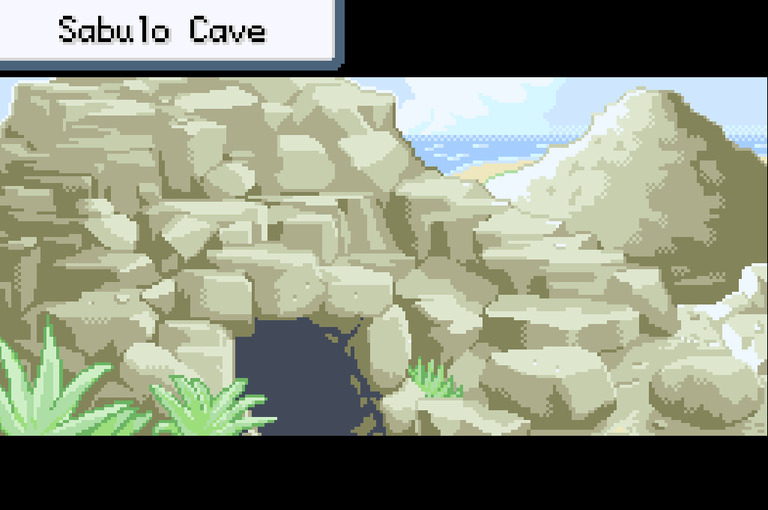
After hearing some commotion, Sabulo Cave is your next destination South East of the town. At the entrance, you’re scolded by Elder Knight Enoch for interfering and challenged to a battle.
Elder Knight Enoch
- Tyrantrum (Rock/Dragon) – LV30
- Diggersby (Normal/Ground) – LV30
- Golurk (Ground/Ghost) – LV30
- Aerodactyl (Rock/Flying) – LV32
You can dismantle Enoch’s entire team with Ice attacks, but even without that, Enoch’s roster is less threatening than what you’ve just dealt with in Sabulo Tower.
Remember to go into the Cave after the battle as you need to grab the ‘Ragged Map’ from inside. Your Rival will meet you in the Cave and give you HM03 – Surf. Belle will meet you on the way back and give you another Pokemon to add to your roster, one of the original Kanto (Red/Blue) Starters!
You don’t get to choose, but it will always be the one that would be weak to your Starter, so if you picked Chimchar, you’d get a Bulbasaur. It can also Mega-Evolve, making it the most dangerous Pokemon on your team.
When you’re ready to leave, head to the South of Sabulo Island and Surf down to Valoon Way.
Valoon Way
A surprisingly long gauntlet of Grass, surfing and Trainers stands between you and Valoon Town. Ultimately, this section isn’t too awful, but you can get worn down if you run out of items. Fortunately, there is a Nurse halfway through the area. After beating her, she will heal your Pokemon whenever you need it.
Valoon Town

Your goal here is to conquer the Gym and earn your next badge! You need to do a couple of things before the Gym opens, and the first is a trip to Nemesis Cave to the North. Nemesis Cave is a small area full of trainers, but it shouldn’t cause trouble much like Apex Tower. Once you’re done, go to the Ranger HQ in Valoon Town for the Bug-Catching contest.
Bug-Catching Contest
This is a fantastic little side area but just note you can’t actually win the contest on your first try. The contest is rigged, so Vernon, the Gym leader, always wins. Catch anything you want to end the event, then make your way to the Gym.
If you decide to come back here later, it seems that points are scaled off how much HP the Pokemon you catch has. With this in mind, try and catch Pokemon without attacking it. Many goodies are up for grabs, including several Mega-Evolution stones if you win.
Valoon Town Gym
Vernon specialises in Bugs, so hopefully, you’ve got some Flying or Fire Pokemon in your party! Vernon’s Pokemon are as follows:
Gym Leader Vernon – Bug-type
- Shuckle (Bug/Rock) – LV34
- Scizor (Bug/Steel) – LV34
- Masquerain (Fire/Flying – LV34
- Beedrill (Bug/Poison) – LV36 (Mega!)
The big problem in this Gym is that Masquerain and Beedrill both know U-Turn. U-turn is a hard-hitting Bug move, and each Pokemon will enter combat, smack you with it and swap. U-Turn hurts because of STAB, so use Fire or Flying attacks if you can.
Upon earning the Honeycomb badge, your next destination is Telmurk City.
Telmurk Swamp
Telmurk Swamp stands between you and Telmurk City. The swamp is straightforward, but there are plenty of Trainers to fight. Make sure you’re stocked up on items for the journey.
After you’ve passed through, you need to fight your Rival again. Don’t worry if your team is in a state as he (thankfully) heals your squad before the battle. He now sports a complete roster of six Pokemon, and they are as follows:
Rival – 3rd Encounter
- Hariyama (Fighting) – LV34
- Rotom (Electric/Ghost) – LV34
- Starter – LV36
- Boldore (Rock) – LV34
- Flareon (Fire) – LV34
- Altaria (Dragon/Flying) – LV34
Thanks to the Kanto Starter you were given earlier, your Rival becomes much easier to deal with as it will always be a direct counter to theirs. In the future, you’ll need to look out for their Altaria, but it’s not a problem yet.
Battle Marsh
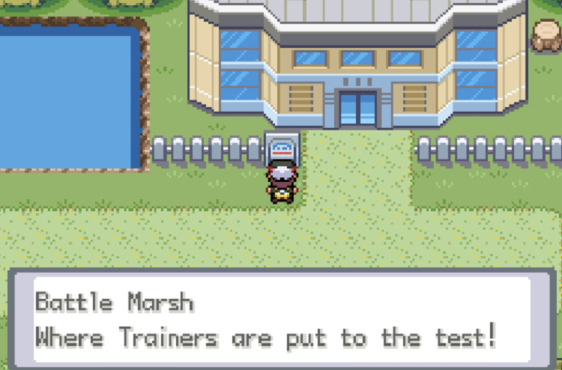
Battle Marsh is Pokemon Gaia’s answer to Battle Tower from the mainline games. This is the place to go if you really want to test your skills as a Trainer. There’s no EXP to be earned here, but you can battle strong opponents in fierce battles where you’re only allowed three Pokemon, and they are all set to LV50.
You can earn BP here, which can be exchanged for powerful items like Rare Candys! Even if you don’t want to compete, it’s still worth visiting and talking to the man on the West side of the room. He will give you a Focus Sash, which can prevent your Pokemon from getting KO’d!
Telmurk City
Telmurk City is a strange place under the control of a shady group called the Mighty Mightyenas. On the plus side, you can battle members of the group in the city for easy EXP!
Telmurk Department Store
If you’re looking for creative ways to spend money, Telmurk City has a vast department store spanning 5 floors. They sell the usual Poke-Mart stock, equipment to power up specific Pokemon moves and expensive items to increase stats.
Want some Fancy Pokeballs?
If you’re after some rather exclusive Pokeballs, you can buy some from Ms Murkrow. She lives in a house to the East of the Pokemon Center. Her stock includes things like Dusk Balls that have a much higher chance of catching Pokemon in caves.
The Mighty Mightyenas
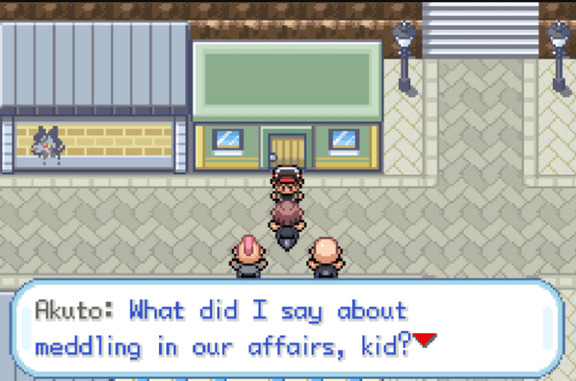
Before you can challenge the Telmurk City Gym, you need to take care of their little gang problem first. To trigger the battle against the Mighty Mightyenas, head East to the house with graffiti on the wall. These goons shouldn’t pose a problem as your Rival was a much tougher opponent but watch out for their leader, Akuto.
Mightyena Boss Akuto
- Lairon (Steel/Rock) – LV37
- Bouffalant (Normal) – LV37
- Mightyena (Dark) – LV39
Bouffalant is easily Akuto’s most dangerous Pokemon. It hits incredibly hard, and as it’s Normal, only Fighting-type moves are Super Effective.
After the fight, in an unexpected act of goodwill, their leader will give you HM02 – Fly! The Telmurk City Gym is now open as well.
Telmurk City Gym
Telmurk Gym is actually a sewer; how lovely! This Gym specialises in Poison-types making Ground attacks very strong. Just be cautious as many of the Pokemon here are Grass-type. After you’ve made your way through the Gym, the leader’s roster is as follows:
Gym Leader Sid – Poison-type
- Arbok (Poison) – LV40
- Nidoking (Poison/Ground) – LV40
- Drapion (Poison/Dark) – LV40
- Venusaur – (Grass/Poison) LV42 (Mega!)
As I mentioned earlier, Ground moves are fantastic in this Gym and will hurt all of Sid’s Pokemon apart from his Mega Venusaur. For that, either Fire or Flying are great choices.
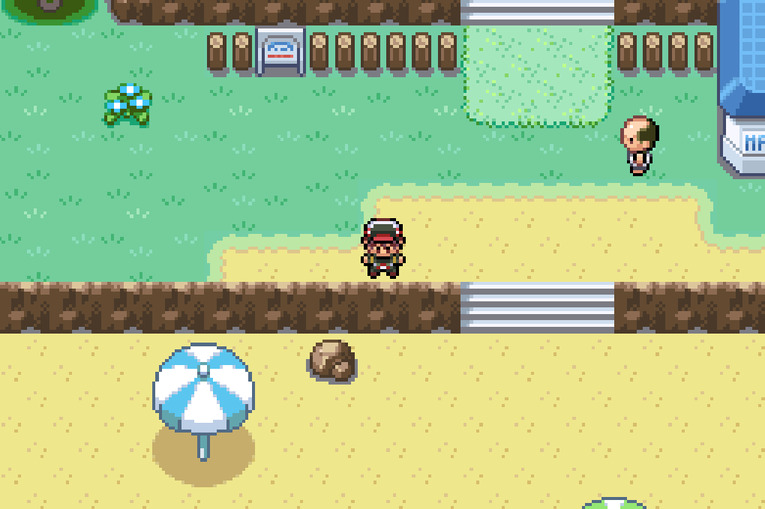
Upon defeating Sid, he will give you a Badge and the Sludge Bomb TM. When ready, leave the city and head North through the Underground Tunnel (it’s in a building) until you reach the seaside. Even though the route is short, you will need both Rock Climb and Rock Smash to proceed.
Ferre Ruins
It’s easy to miss this place! When you get to the beach in the picture above, head East instead of surfing North. This will take you to the Ruins. Inside the Ruins, there’s a small army of New Elders to take care of. They shouldn’t pose a problem, but I advise using ‘Repels’ as you’ll be fighting every few steps otherwise.
This area has three small floors, and most fights are unavoidable. Just be aware that you will need a Pokemon that knows Surf in your party to traverse the second floor.
On the third floor, you’ll meet the final Elder Knight, Ezekiel, who promptly slams a door in your face. You’ll have to solve a puzzle to get in. Honestly, this one stumped me for ages! The code is in Braille; if you don’t want to work it out, the solution is 4519. You’ll battle Ezekiel as soon as you enter this room, and this is his team:
Elder Knight Ezekiel
- Skarmory (Steel/Flying) – LV42
- Aggron (Steel/Rock) – LV45 (Mega!)
- Cradily (Rock/Grass) – LV42
- Doublade (Steel/Ghost) – LV42
- Claydol (Ground/Psychic) – LV42
Ezekiel’s trump card is his Mega Aggron, but it’s very weak to Fighting and Ground. If your Pokemon are at a similar level, you’ll likely KO Aggron in a single hit from either type. Once you’ve beaten Ezekiel, you can Surf North through Precimos Strait to Precimos Island.
Precimos Island
You don’t want to come here before beating the Ruins because the Gym is locked until you’ve done so. With the Gym now open, you can head straight there.
Precimos Island Gym
This time around, you have Psychic Type Pokemon to deal with. Typically, you want to use Bug, Dark or Ghost attacks.
- Gym Leader Will – Psychic-type
- Xatu (Psychic/Flying) – LV42
- Metagross (Psychic/Steel) – LV42
- Slowbro (Water/Psychic) – LV44 (Mega!)
- Jynx (Ice/Psychic) – LV42
- Exeggutor (Grass/Psychic) – LV42
At this point, your team should have attacks to deal with a wide range of threats. Ghost-types are ideal as they’re Super Effective against all of Will’s Pokemon. If you don’t have that, you definitely have access to HM01-Cut, which is good against everything aside from Xatu and Metagross.
After defeating Will, you earn your 6th badge and the Calm Mind TM. When ready, head to the Precimos Hotel to the East.
Precimos Hotel
This area is packed full of Burglars to battle. It’s worth snooping around as some rooms contain items. You can find Leftovers in the room to the South East. Leftovers is a powerful ‘Hold’ item that recovers a small amount of your Pokemons HP each turn.
A Burglar is guarding one of the rooms to the South. This is the door you need to get through, but he won’t move until you beat every other Burglar on the floor.
Inside the hotel room, you’re given the ‘Tablet Idol‘ Key Item for later, and your party gets healed fully.
You’ve probably noticed by now that Pokemon Gaia isn’t easy, so why would it give you a free heal? You guessed it; your Rival is waiting outside for a cheeky battle. Show him who’s boss! This is his party:
Rival – 4th Encounter
- Hariyama (Fighting) – LV42
- Gigalith (Rock) – LV42
- Starter – LV45
- Rotom (Electric/Ghost) – LV44
- Flareon (Fire) – LV44
- Altaria (Dragon/Flying) – LV45
I said last time that your Rival was much easier with the Kanto starter, and that hasn’t changed. Hariyama knows Surf, so beware of putting a Fire-type against it, but you’re probably becoming pretty efficient at putting your Rival down by now!
After making your Rival cry (seriously, he cries and blames sand in his eyes!), heal your Pokemon and head to the beach for a Diving Tour; you’ll also be given HM08 – Dive, which you need for the following area.
The Journey to Edashore Town
Your next destination is Edashore Town. It’s not hard to get there, but there are a ton of trainers. You’ll need to use Dive, and there’s a short section comprised of travelling both above and below Water.
When you’re on the surface, the darkened areas are where you can Dive, and if you have multiple choices, the smaller patches are the ones you want to take. Eventually, you’ll make it to Edashore Reach. From there, you need to travel through Cosmic Caverns.
Cosmic Caverns
You’ll need to come back here a little later, but it’s an otherwise unremarkable area that should be easy to wander through. Remember to use your Repels if you have them.
The Bulletproof Blissey
A Nurse will offer to restore your Pokemon after a battle, but this is a fight you might not want to take!
She has a single Pokemon, a LV43 Blissey. Blissey has a ton of HP and is holding Leftovers. It also knows Wish, which restores 50% of its health and uses it A LOT. Being Normal-type, Blissey is only weak against Fighting. You’ll chip it down eventually with other attacks, but this is a long fight.
Whether you fight the Nurse or not, the quickest way through Cosmic Caverns is to head directly East when you see her.
Edashore Town
The Clefairy Conundrum
Wow, Edashore Town sure is a strange place! You must help the town elder recover a lost Clefairy, so it’s a trip back to Cosmic Caverns. The Clefairy is behind the door near the blue crystals.
If the Braille puzzle didn’t stump you, this one might. You need to convince Clefairy to come back with you but to do so, you need to approach it multiple times from specific directions. Failure resets the room and kicks you back out the door.
After you startle Clefairy for the first time, you need to approach the Clefairy from the North, wait for it to move, then approach from the South, South once again, and finally North.
Clefairy will retreat to the South East corner of the room, and speaking to it here completes the puzzle.
When you return to Edashore town, you’re given a Master Ball, a fitting reward! When you’re ready, head East to Gyarados Bridge. There are plenty of trainers here for some easy EXP, and Astail City, your next destination, is on the other side.
Atsail City
It makes a pleasant change for a City to have an open Gym when you arrive! Head straight there if you wish.
Atsail City Gym
This Gym specialises in Water-types, and you will need both Surf and Dive to get around.
Gym Leader Marina – Water-type
- Qwilfish (Water/Poison) – LV46
- Gyarados (Water/Flying) – LV48 (Mega!)
- Jellicent (Water/Ghost) – LV46
- Kingdra (Water/Dragon) – LV46
- Pelliper (Water/Flying) – LV46
Beware of relying on Electric-types in this Gym as Mega Evolved Gyarados is extremely fast and knows Earthquake. Still, it’s incredibly weak to Electric if you manage to land a hit. Kingdra is only weak to Dragon and Fairy, but you should be able to take it down with regular attacks, as it doesn’t have a ton of HP.
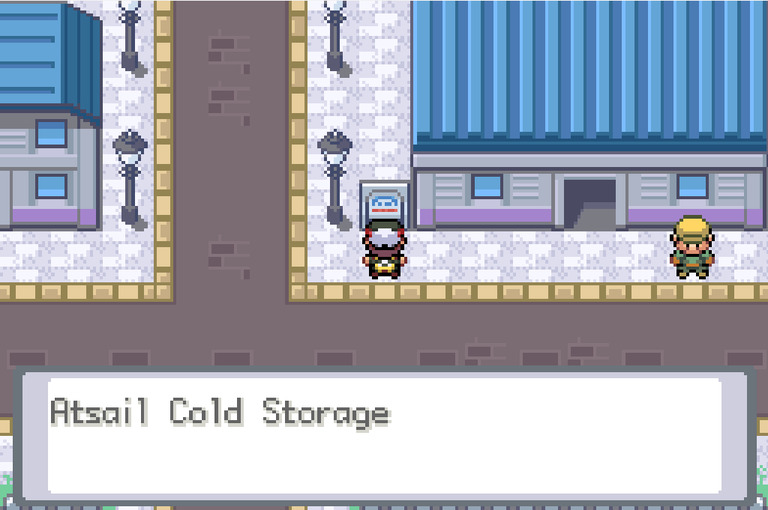
After your battle, head to Atsail Laboratory just South of the Pokemon Center. Your Rival will tell you that the New Elders are up to no good again and to go to Atsail Cold Storage.
Atsail Cold Storage
As the name suggests, most trainers here have Ice Pokemon. Battle your way through to your Rival, who will tell you that you need a Key to move a truck, and it will be like ‘finding a needle in a haystack’. This is a clue.
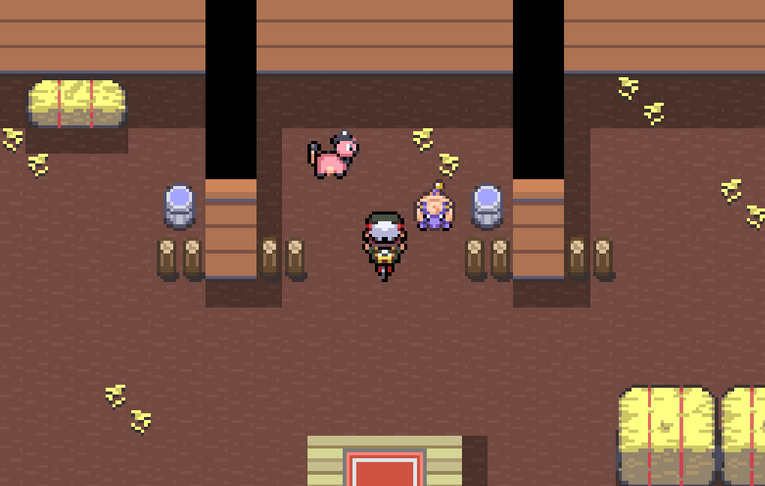
Leave the building and head North to Loamas Fields. There’s a barn with three haystacks (pictured); you simply need to check each haystack until you find the Key. Once you have it, the truck in Cold Storage can be moved, and you can take the ladder down into the basement.
It’s hard to see down here, but fumbling around in the dark will eventually trigger a cutscene where the Elder Knights are planning their next move. You’ll also catch a glimpse of their boss, Morgana.
When you leave Cold Storage, your friends will be waiting for you outside. They offer fast travel to Apex Temple; just note there is a savage battle immediately after doing so. Look at the Pokemon’s levels below, and if you don’t think you can beat them, train before moving along.
Apex Temple
You’re in Apex Temple to figure out exactly what the New Elders are up to. Fortunately (or unfortunately), Morgana ambushes you and is quite content in spilling the beans, as she has no intention of letting you escape.
You’re challenged to a battle by Morgana. Her Pokemon are nasty, and they cover a wide range of types.
Morgana
- Mismagius (Ghost) – LV47
- Houndoom (Dark/Fire) – LV47
- Drapion (Poison/Dark) – LV47
- Gengar (Ghost/Poison) – LV49 (Mega!)
- Sigilyph (Psychic/Flying) – LV47
Any Mega Evolved Pokemon is scary, but Gengar has always been a glass cannon. It hits hard but can’t take much punishment. After your battle, talk to Marina, and she will reveal a passageway. This is a mysterious place, but the layout is actually quite linear. You’re looking for three giant statues of the Regi Pokemon around the area.
Each time you interact with one, you’ll be thrust into a battle with a ghostly version of the Pokemon. These fights are surprisingly easy, considering you’re battling Legendary Pokemon! As they are all story battles, you cannot catch the Pokemon you’re fighting, even with your Master Ball.
After you’ve finished the third battle, head directly South. There’s a small room with a ladder, and going up the ladder will take you to an almost identical room. Keep going to the adjacent ladder; you’ll be free after scaling a few floors.
Heal up if you need to. You’re tantalisingly close to earning your 8th and final Gym badge now, so head North to Loamas Town.
Loamas Town
Need a Decent Bug-type Move?
Bug-type attacks are surprisingly good in Pokemon Gaia; sooner or later, HM01-Cut simply doesn’t hurt enough. If you’re looking for an upgrade, you can earn an X-Scissor TM for doing a little Mareep wrangling.

Simply speak to the man in this hut; he will give you some Oran Berries. Give the 5 Mareeps nearby a single berry each and return for your TM.
I love towns where the Gym is open and ready to be thrashed! The final Gym leader in Pokemon Gaia is Richter, a Ground-type specialist. As there’s nothing in your way in Loamas Town, feel free to head straight there. This is what you’re up against.
Gym Leader Richter – Ground-type
- Hippowdon (Ground) – LV50
- Dugtrio (Ground) – LV50
- Excadrill (Ground/Steel) – LV50
- Garchomp (Dragon/Ground) – LV52 (Mega!)
- Gastrodon (Water/Ground) – LV50
Your biggest problem in this Gym is Richter’s Mega Garchomp. It’s weak to Ice, Dragon and Fairy, but you won’t be beating it in a hurry if you’ve not got anything like that. It also knows Earthquake, and thanks to STAB, it hits incredibly hard.
If you come out of this fight victorious, you have all 8 badges now! You still have a few loose ends to take care of, namely the Elder Knights and Morgana, so head West towards Ikos Town.
Ikos Town

Just before you arrive in Ikos Town, your Rival stops you, heals your squad and requests a battle. You’ve beaten him all across Orbtus at this point, so show him you’re still the best. This is his line-up:
Rival – 5th Encounter
- Hariyama (Fighting) – LV49
- Flareon (Fire) – LV49
- Starter – LV51
- Gigalith (Rock) – LV49
- Rotom (Electric/Ghost) – LV49
- Altaria (Dragon/Flying) – LV51 (Mega!)
Surprise! Your Rivals Altaria now Mega Evolves. Aside from that, you’re probably getting good at beating him by now. Mega Altaria has the same weaknesses as before and will still go down fast to Super Effective attacks.
You only have one thing to do in Ikos town, and that is to speak to Herschel. His house is the elevated one up the flight of steps. Herschel isn’t cooperative and won’t help you, regardless of the situation. You still have a job to do, so head West to Ignis Valley.
Ignis Valley
This place is a little confusing so make sure you’re stocked up on Repels and are ready to fight. You need a Pokemon with ‘Strength’ to get through this area, and every time you need to move a boulder, that marks the direction you need to go.
Save frequently in Ignis Valley, as a sudden turn West near the end of the route will force you into a battle with Morgana again. She has a dangerous roster as before:
Morgana
- Mismagius (Ghost) – LV52
- Houndoom (Dark/Fire) – LV52
- Drapion (Poison/Dark) – LV52
- Gengar (Ghost/Poison) – LV54 (Mega!)
- Sigilyph (Psychic/Flying) – LV52
- Salamence (Dragon/Flying) – LV52
The most dangerous Pokemon in Morgana’s team is her new arrival, Salamence. Unfortunately for you, it knows Molten Raze. Stats on the move aren’t readily available, but it functions much like Hyper Beam. It hits insanely hard but also takes a turn to recharge.
After your battle, Morgana explains that she was the lady you gave the book to at the beginning of the game. The book is what she needed to awaken the Regis, and YOU made it possible. Morgana uses Molten Raze on the Tablet, which transports her to the Chamber of Gaia. After this, you’ll automatically be transported to Herschel’s house.
You can’t go after Morgana immediately, but you can at least prepare. You need to find three more Tablets; as luck may have, you’ve visited them already.
Abra Kadabra, ALAKAZAM!!
Talk to Herschels Alakazam, and it will teleport you to each of the three Tablets. Talking to the Alakazam in these areas will take you back to Herschels House. As explained in the cutscene with Morgana, one of her trusted knights is guarding each one and must be defeated. Each Knight has a team similar to when you initially fought them. Their Pokemon are as follows:
Location: Relicanth Tablet
Elder Knight Eunice
- Aurorus (Rock/Ice) – LV52
- Gastrodon (Water/Ground) – LV52
- Abomasnow (Grass/Ice) – LV54 (Mega!)
- Frosslass (Ice/Ghost) – LV52
- Noctowl (Normal/Flying) – LV52
Location: Tangrowth Tablet
Elder Knight Enoch
- Tyrantrum (Rock/Dragon) – LV52
- Golurk (Ground/Ghost) – LV52
- Diggersby (Normal/Ground) – LV52
- Machamp (Fighting) – LV52
- Aerodactyl (Rock/Flying) – LV54 (Mega!)
Location: Lileep Tablet
Elder Knight Ezekiel
- Skarmory (Steel/Flying) – LV52
- Cradily (Rock/Grass)- LV52
- Claydol (Ground/Psychic)- LV52
- Aggron (Steel/Rock) – LV54 (Mega!)
- Aegislash (Steel/Ghost) – LV52
There’s no specific Pokemon to watch out for in these battles, and whatever you used to beat their teams the first time can be used here too. Battle the Elder Knights in whatever order you wish and once you’ve dealt with them, make sure you interact with each glowing Tablet. Once this is done, talk to Herschel.
It seems Herschel is a bit of a coward and has no problem sending a child to defeat the leader of a crazy cult. That being the case, it’s time to fight Morgana once again. Talk to Herschel when you’re ready.
Elder Sage Morgana

Your final showdown with Morgana is brutal because you have to beat her twice in a row, and you cannot heal in between. Because of this, do everything you can to keep your Pokemon alive and play as safely as possible. Morgana has the same line-up as before, but everything is three levels higher. Fortunately, this time around, her Salamence is missing. This is her team:
- Mismagius (Ghost) – LV55
- Houndoom (Dark/Fire) – LV55
- Drapion (Poison/Dark) – LV55
- Gengar (Ghost/Poison) – LV57 (Mega!)
- Sigilyph (Psychic/Flying) – LV55
When you defeat Morgana, in a disturbingly dark twist, she’s not done and intends to kill you! The Regis are under Morgana’s control, and before she brings about the end of civilisation, she wants to test them against you. This is what you’re up against:
- Regirock (Rock) – LV55
- Regice (Ice) – LV55
- Registeel (Steel) – LV55
- Regigigas (Normal) – LV57
Fortunately, even though they look intimidating, the Regis aren’t nearly as strong as they’ve been hyped up to be. Your mileage may vary, but I found Morgana’s first team much more dangerous. Regigigas’s only weakness is Fighting-types, but at this point, you should have plenty of hard-hitting attacks that will work.
When you defeat Morgana against all the odds, Herschel grows a spine and finally comes to help. Morgana is dragged away by the Orbtus police, and with that, the threat of the New Elders is over!
I’ve been a bit mean to Herschel, but from here on out, he means business. He tells you he will be waiting to face you at the Pokemon League and gives you HM07 – Waterfall. After your conversation, you can Surf North to face the horrors of Victory Falls. There are no shops for a while, so stock up on everything.
Victory Falls and Victory Road
Victory Road is the same as in all the other Pokemon games, A cave full of random encounters and strong Trainers. It’s surrounded by a place called Victory Falls, an outdoor area which functions much the same, but you’ll need Surf and Waterfall to navigate it.
Victory Road can be a nightmare to figure out in the mainline games, but in Pokemon Gaia, the layout is much more straightforward. The difficulty comes from the battles and encounters instead of getting lost; this is a welcome change!
Your best friend, the Nurse with her Blissey is back and offers the same healing service if you can beat her. This is her team:
- Blissey (Normal) – LV49
- Audino (Normal) – LV49
- Clefable (Fairy) – LV49
- Wigglytuff (Normal/Fairy) – LV49
Final Showdown with Your Rival
Moments before you reach the Elite Four, your Rival appears for one last-ditch attempt at victory. Make sure that doesn’t happen! His last team is this:
Rival – Final Encounter
- Hariyama (Fighting) – LV53
- Rotom (Electric/Ghost) – LV53
- Flareon (Fire) – LV53
- Gigalith (Rock) – LV53
- Starter – LV55
- Altaria (Dragon/Flying) – LV53 (Mega!)
All I can say is, gone are the days when you didn’t have a powerful counter to your Rivals Starter, and he’s so much easier because of it. Flareon likes to spam Sand Attack, which is an annoyance but not a threat. Mega Altaria will die quickly to Ice attacks; even Rock attacks work well. This Pokemon knows Sing but doesn’t have much to follow up with.
Once you’ve dealt with your Rival for the last time, ascending the final waterfall takes you to the entrance of the Pokemon League.
Pokemon League
In this iteration of the Pokemon, you can choose what order to tackle the Elite Four in. If any member of the Elite Four defeats you, you’ll need to fight them all again. This is the Elite Four’s Roster:
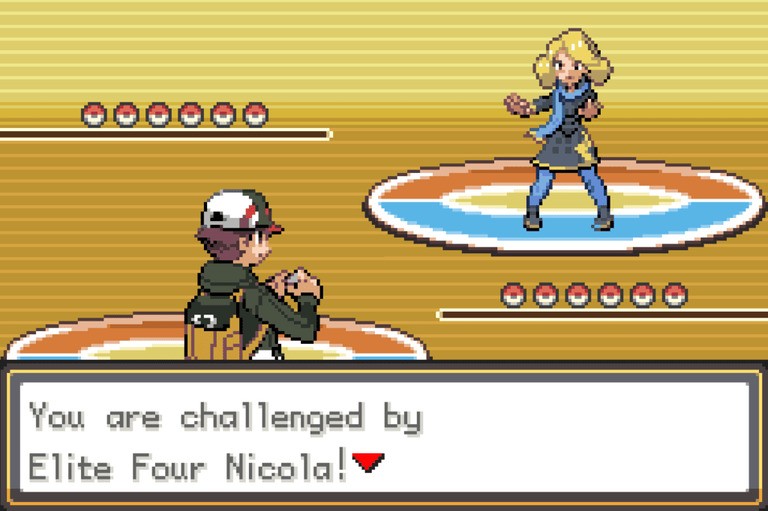
Elite Four Nicola – Electric-type
- Galvantula (Bug/Electric) – LV56
- Magnezone (Electric/Steel) – LV56
- Lanturn (Water/Electric) – LV56
- Electivire (Electric) – LV56
- Eelektross (Electric) – LV56
- Manectric (Electric) – LV58 (Mega!)
Ground moves work great against Nicola and even counter her Mega Manectric. Oddly enough, the only Pokemon that might give you grief is Eelektross, as there isn’t a single type that is super effective against it. It’s also immune to Ground and resistant to Electric, Flying and Steel.
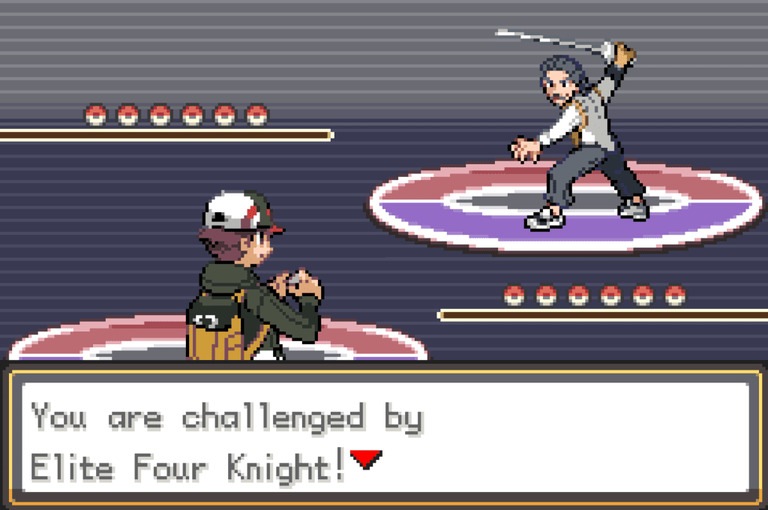
Elite Four Knight – Dark-type
- Bisharp (Dark/Steel) – LV56
- Sharpedo (Water/Dark) – LV56
- Weavile (Dark/Ice) – LV56
- Honchkrow (Dark/Flying) – LV56
- Malamar (Dark/Psychic) – LV56
- Absol (Dark) – LV58 (Mega!)
Fairy moves are fantastic against Knight and will be Super Effective against everything but his Bisharp. Fighting is a solid backup here as well. Be careful using Electric-types against his Sharpedo as it’s speedy and knows Earthquake. Honestly, Mega Absol looks intimidating, but it loses to Fairy and Fighting all the same.
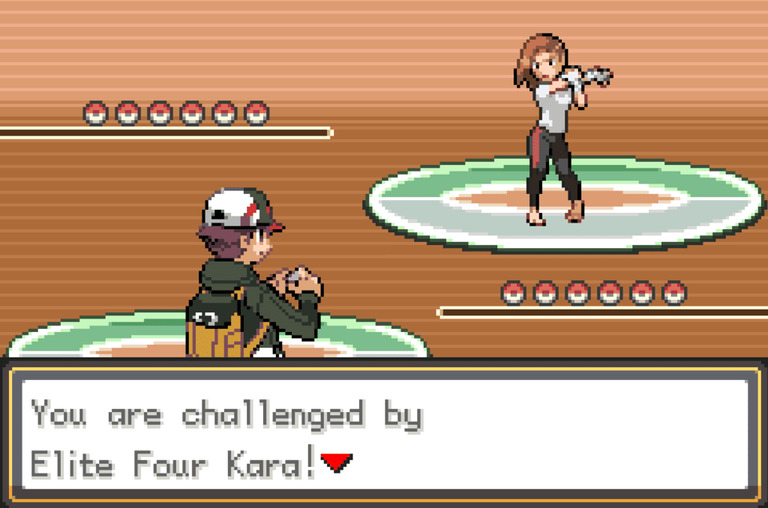
Elite Four Kara – Fighting-type
- Mienshao (Fighting) – LV56
- Hawlucha (Fighting/Flying) – LV56
- Medicham (Fighting/Psychic) – LV56
- Blaziken (Fire/Fighting) – LV58 (Mega!)
- Scrafty (Dark/Fighting) – LV56
- Lucario (Fighting/Steel) – LV56
Kara has one of the most formidable Pokemon in the game, her Mega Blaziken. Mega Blaziken has the hidden ability ‘Speed Boost’, which increases its speed every turn. If you can’t deal with it fast, it will quickly spiral out of control and can sweep your entire team!
Flying works great against Kara’s team apart from her Lucario, which is weak to Fire, Fighting and Ground. I had to try this a couple of times, but once the Blaziken is out, you’ve won the fight.

Elite Four Lief – Grass-type
- Ludicolo (Water/Grass) – LV56
- Ferrothorn (Grass/Steel) – LV56
- Whimsicott (Grass/Fairy) – LV56
- Amoonguss (Grass/Poison) – LV56
- Trevenant (Ghost/Grass) – LV56
- Sceptile (Grass) – LV68 (Mega!)
A combination of Fire and Flying will make short work of Lief’s team. Fortunately, I had Charizard on my team, which killed everything in a single hit. Any Fire Pokemon should be fine, though and Lief’s only counter to that is Ludicolo, where you’d want to use Flying.
The Final Showdown
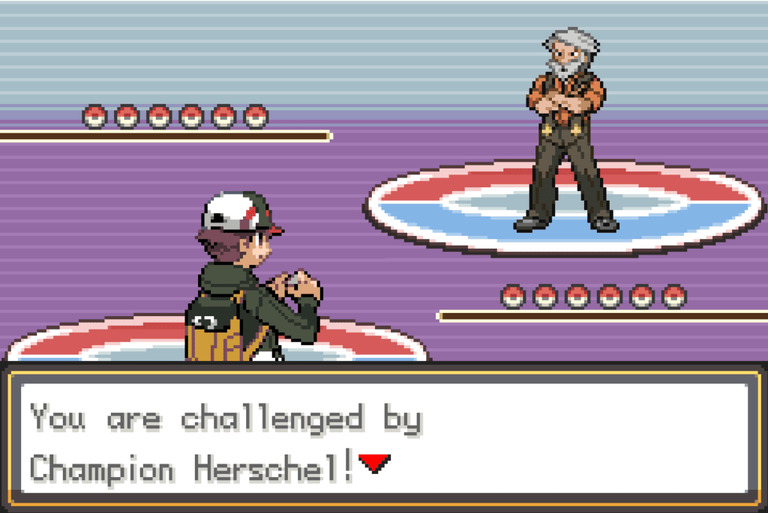
The final fight in Pokemon Gaia is against Herschel. As you’d expect, he’s a dangerous opponent. His team is as follows:
Herschel – Orbtus League Champion
- Wailord (Water) – LV58
- Mamoswine (Ice/Ground) – LV58
- Salamance (Dragon/Flying) – Lv60 (Mega!)
- Yanmega (Bug/Flying) – LV58
- Tangrowth (Grass) – LV58
- Alakazam (Psychic) – LV58
The biggest threat here is Mega Salamence. It knows Earthquake and hits ridiculously hard even without a type advantage. For my team, at least, this single attack gave me so many problems I had to spend a ton of Full Restores to stay alive.
Remember, Earthquake only has 10PP, and you can heal as much as you want without penalty. It’s not graceful, but you can exhaust Salamence’s Earthquake if you have to!
Salamence is very weak against Ice attacks, so if you have one, it’ll make this fight far more manageable. For everything else, it’s all about relying on type advantages. Like Salamence, Mamoswine also knows Earthquake, so keep that one in mind if it will cause trouble.
If you’ve got the grit to soldier your way through the Elite Four and defeat Herschel, you’ve rightly earned the title of Orbtus League Champion.
In the version of Pokemon Gaia I was using, the Hall of Fame was bugged, and one of my Pokemon registered as a Magnezone, but hopefully, that won’t happen to you! Sit back, relax and enjoy the credit crawl, champion.
Remember that Deadly Trainer Behind the Wall in Aerous City?
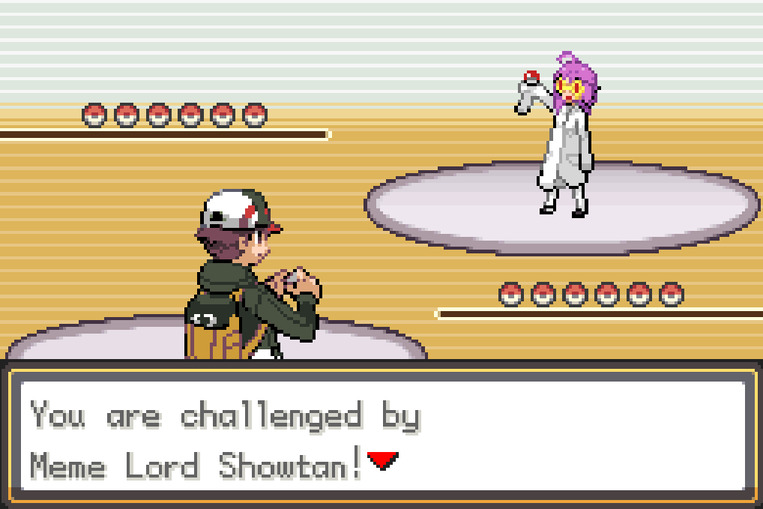
I’m almost positive this Trainer is part of an in-joke, but I love that it exists! Since you’re the Orbtus League Champion now, why don’t you take them on? The code is 1104.
Meme Lord Showtan
- Weedle (Bug/Poison) – LV60
- Togekiss (Fairy/Flying – LV60
- Shuckle (Bug/Rock) – LV60
- Sigilyph (Psychic/Flying) – LV60
- Slowbro (Water/Psychic) – LV60
- Drapion (Poison/Dark) – LV60
I’m not sure if it’s meant to be like this, but every Pokemon in this fight seemed more focused on powering themselves up than actually attacking. If you’ve beaten Herschel and this Trainer behaves the same way against you, it’s an easy win.