Here are a full guide for Princess Trainer walkthrough Gold Edition game. All the information you need to know about the princess trainer.
Princess Trainer Walkthrough Guide
In this game players control Genie, who needed to approve the wicked Jafar’s three wishes and ended up being a human. With Aladdin out of the picture, Jafar wishes to wed Jasmine however needs her made submissive and servile. Genie, who lost his memory after the third desire from Jafar, begins working for him.
Princess Trainer Quests
Notes: (basically a dump to sort later)
- The moon icon in the bottom-right corner forces the day to end.
- Before ending the day, be sure you’ve sent your girls to work if they have energy.
- When returning from work, it doesn’t matter if you send the girls to their rooms or ask about their day. Only immediate dialogue changes.
- You can only be on one quest at a time.
- Whenever I say something only changes dialogue, that means it only affects the next few lines of text and has no bearing on the game in the long run. It doesn’t change any flags, or add stats, or affect challenges, etc. It’s just for flavor.
New Game Intro Scene:
- Genie / Old Man: “What question? What is going on here?”
(What you say only changes dialogue.)
- Genie / Old Man: “That’s not very much…”
“I will need 30 gold coins.” (This rewards +10 G.)
After Completion:
- Jasmine may now ‘Sell fruits on the market’ for Balsam at the Market Place. This job pays between 10 G. to 30 G. 80% of the time, with a slight variation 20% of the time. Once ‘Quest 20: A Curious Case of Blue Balls’ is completed, the pay is increased to 10 G. to 40 G. 100% of the time.
Quest 1: Food for the Poor
Requires: 10+ G.
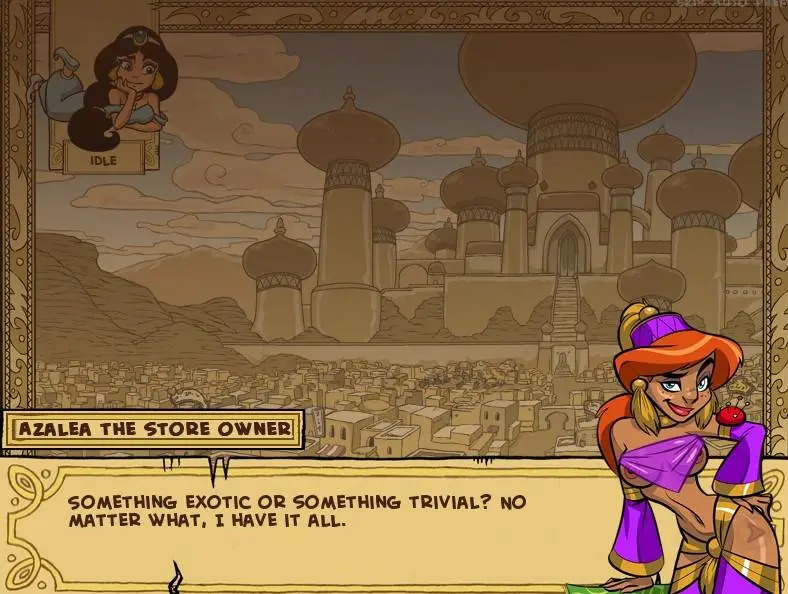
- Wardrobe Store / Azalea the Store Owner
“Buy Clothes for Jasmine”
“Peasant Robe” (Lose -10 G.)
- Cheapside / Crocus the Homeless
Quest: “Food for the Poor” (Option only appears if you have the Peasant Robe)
“Alright, you lazy bum.”
- Market Square / Balsam the Merchant
Talk to Balsam
Sell Fruits on the Market Square (This pays a random amount between +10-40 G. each time.)
- [Evening Menu] / ‘Call it a Day.’ – Sleep once.
- Repeat Step #3 until you have 50 G.
- Market Square / Balsam the Merchant
Talk to Balsam
“Yes please.” (This option only appears if you have 50 G.)
- Cheapside / Crocus the Homeless
Give Fruits to the Homeless Crocus
(The choice about showing Jasmine’s face only changes the dialogue.)
After Completion:
- You may return to Crocus and ‘Make Jasmine Clean Houses.’ This job pays between 20 G. to 60 G. 80% of the time, with a slight variation 20% of the time. This task also counts towards Challenge #10.
- ‘Quest #2: Family Feud’ is now available.
Quest 2: Family Feud
Requires: ‘Quest #1: Food for the Poor’ Completed
- Market Square / Balsam the Merchant
Quest: “Family Feud”
(The choice regarding if you know the brother only changes the dialogue.)
“I Promise.”
(Whether or not you open it only changes dialogue.)
- The Blue Bull / Maslab the Inn Keeper
Talk to Maslab
(Telling Maslab who the box is from, and/or what you think is in it, only changes dialogue.)
(When Maslab asks if you want to have fun, your reply only changes dialogue.)
- Select ‘Visit the Tavern’ from the [Evening Menu].
(When asked if you’re ready, your reply only changes dialogue.)
- Market Square / Balsam the Merchant
Talk about Last Night
(When Balsam asks if you know why, your reply only changes dialogue.)
(Your thoughts on Maslab going too far only change dialogue.)
“I would rather not…” (Balsam gives you +25 G.)
(Demanding a reward nets you an “an orange” but oranges don’t exist in the game. It’s flavor dialogue.)
- Select ‘Go the the Market Square’ from the [Evening Menu].
“Will I get paid for this?” (Balsam gives you +7 G.)
Story fork. Choose either Fork #1 or Fork #2.
Fork #1 Stick Parchment to the Door and Leave. (No reward)
The Blue Bull / Maslab the Inn Keeper
(Your reply to Iris only changes dialogue.)
(When asked if you know what happened last night, your reply only changes dialogue.)
Fork #2 Enter the Tavern and Confess. (Reward: Maslab Friendship +1)
(When asked to help Maslab, your reply only changes dialogue)
(When probed about marrying Iris, your reply only changes dialogue. Sadly.)
After Completion:
- You may now explore the city in the evening by selecting ‘Take a Walk Outside’ from the [Evening Menu].
- You may now exercize in the evening at the Market Square. Also affects Challenge #6 and Challenge #7
- ‘Play Dice with Maslab’ in the evening at The Blue Bull. You play 3 rounds for 20 G. each. You gain or lose 20 G. depending on who rolls highest. (Reward: Maslab Friendship +1) The options to ‘Play Dice with Maslab’ and ‘Arm-wrestle with Maslab’ disappear after completing ‘Quest #15: The Nightmare Job’.
- Jafar’s Slave-Girl Acadamy [JSGA] is now open for Obedience Level training.
- Lola’s introduction can be viewed by visiting the Azalea’s Wardrobe Store.
- (Your reaction to Lola during this scene only changes immediate dialogue.)
- ‘Quest #3: Serving the People’ is now available.
Quest 3: Serving the People
Requires: ‘Quest #2: Family Feud’ Completed, appr. 300 G.
- Jafar’s Slave-Girl Acadamy [JSGA] / Rose the Teacher
“Make Jasmine Take Classes”
“Obedience for Beginners” (Lose -50 G., 20% chance of failing)
[Evening Menu] / “Call it a Day” – Sleep once.
- Repeat Step #1 until Jasmine is at Obedience Level 3 (‘Disobedient’).
You may check Jasmine’s Obedience Level in the ‘Check Status’ menu.
It will take at least three classes. Total classes will vary since there’s a 20% failure rate.
- The Blue Bull / Maslab the Inn Keeper
Quest: “Serving the People”
(Your opinion of Jasmine’s cuteness only changes dialogue.)
“Sure. Tonight then.”
- Select ‘Take Jasmine to Mislab’ from the [Evening Menu]
(Your response to her tantrum about Iris only changes dialogues.)
- The Blue Bull / Maslab the Inn Keeper
Take Waitress Training
- The Blue Bull / Maslab the Inn Keeper
Take Waitress Training Again
- The Blue Bull / Maslab the Inn Keeper
Finish Waitress Training
After Completion:
- You may now ‘Order Jasmine to Serve Drinks Here’ at The Blue Bull. This job requires a Tavern Wench Outfit, which can be bought for -70 G. at Azalea’s Wardrobe Store. This job pays between 50 G. to 90 G. 80% of the time, with a slight variation 20% of the time.
- If you haven’t already, you may meet Lola for the first time while doing this.
- (Your reaction to Lola here doesn’t matter).
- You may ‘Order Some Wine’ and spend the evening at The Blue Bull (requires 50 G.). Iris is there rougly 40% of the time. Meeting her repeatedly leads to ‘Quest #5: A Friend in Need’. The option to order wine disappears after completing ‘Quest #15: The Nightmare Job’.
- ‘Quest #4: The Red Phoenix Rising’ is now available.
Quest 4: The Red Phoenix Rising
Requires: ‘Quest #3: Serving the People’ Completed, 310+ G.
- (Evening) Market Square
Do Some Exercises
- Repeat Step #1 every night without missing a single night for 10 nights.
You will complete ‘Challenge #7: Eat, Sleep, Lift, Repeat.’ (Exercise 10 nights in a row)
You will also have the required Strength 9+ to beat Maslab for the quest.
- (Evening) The Blue Bull / Maslab the Inn Keeper
Play Dice with Maslab (Outcome varies from -60 G. to +60 G. Reward: Maslab Friendship +1)
- Repeat Step #3 three times over three nights for the required Maslab Friendship Level 3.
(Only two times needed if you chose Maslab during the fork in ‘Quest #2: Family Feud’)
- (Evening) The Blue Bull / Maslab the Inn Keeper
Arm-Wrestle with Maslab and win (Option hidden until Maslab Friendship 3, and you have 50 G.)
(You must win to advance the quest. Requires Strength 9+ to win.)
(Like playing dice, this option disappears after completing ‘Quest #17: Blood Oath’)
“Yes Please!” (Reward: The Red Phoenix password)
- (Evening) The Red Phoenix / Fat Lily
(Knock on the Door)
“Support Akabur”
Quest: “The Red Phoenix Rising”
- (Send Jasmine to work or class. She can’t be around for this step or she interferes.)
Palace / Jafar
- [Evening Menu] / ‘Call it a Day.’ – Sleep three times. (Jafar says 2 days, but that’s wrong.)
- Palace / Jafar
Pick up the Permit
Pay 100 Gold Coins (Lose -100 G., Reward: Permit to Re-open The Red Phoenix)
- (Evening) The Red Phoenix / Fat Lily
(Knock on the Door)
“Support Akabur.”
After Completion:
- You may now visit The Red Phoenix during the daytime as well as night.
- ‘Quest 9: Room 4 1 More’ is now available.
Quest 5: A Friend in Need
Requires: ‘Quest #11: No Dancing Allowed’ Completed, appr. 1000 G.
- (Evening) The Blue Bull / Maslab the Inn Keeper
Order Some Wine
Yes.
Repeat Step #1 as you work your way through the next 4 dates with Iris, who only shows up about 40% of the time. Unless specifically mention, none of your choices change anything significant on these dates. For save-scummers, save/reload from the [Evening Menu] before choosing ‘Take a Walk Outside.’ The game decides if Iris will be at The Blue Bull when you choose ‘Take a Walk Outside.’
- Discussing Jasper’s name, and groping.
- Greeting with groping, Iris has a new top.
- Naked-under-the-cloak walk around town. Who you meet depends on where you go.
(Your choices don’t matter except the last one: Do not tell her “You have a beautiful body.”)
- ‘Quest #5: A Friend in Need…’ (Option hidden unless ‘Quest #11: No Dancing Allowed’ is completed)
- Wardrobe Store / Azalea the Store Owner
Give Azalea Iris’s Dress Designs
Pick whichever color you want to see Iris in. This choice is strictly cosmetic and doesn’t affect the story.
- Market Square / Balsam the Merchant
Buy the Materials
- [Evening Menu] / ‘Call it a Day.’ – Sleep two times.
- Market Square / Balsam the Merchant
Pick Up the Materials
“Yes please.” (Lose -200 G., Reward: Dress Materials for Azalea)
- Wardrobe Store / Azalea the Store Owner
Deliver the Materials
- [Evening Menu] / ‘Call it a Day.’ – Sleep three times.
- Wardrobe Store / Azalea the Store Owner
Pick Up the Dress
(Your response regarding who the dress is for only changes dialogue.)
“Yes please.” (Lose -400 G., Reward: A Whore’s Dress)
- (Evening) The Blue Bull / Maslab the Inn Keeper
Order Some Wine
Yes.
(Repeat Step #9 until you encounter Iris. Same rules as Step #1)
After Completion:
- Note that at the end of this quest, the dialogue mentions your relationship level with Iris. This is flavor text. Technically, she does have relationship points (‘mdaughterfriendship’ in dev console), but these track which of the 18 ‘Evening dates’ is next, not how much she likes you. It’s basically a progress marker for the date events that span over multiple quests (5, 6, & 14).
- ‘Quest #6: The Dream Job’ is now available.
Quest 6: The Dream Job
Requires: ‘Quest #5: A Friend In Need…’ Completed.
- (This step picks up where ‘Quest #5: A Friend In Need…’ left off, resuming evening dates with Iris.)
(Evening) The Blue Bull / Maslab the Inn Keeper
Order Some Wine
Yes (Repeat until you get Iris)
Quest: “The Dream Job”
(All of the choices in this scene only change dialogue.)
- Market Square / Balsam the Merchant
Talk to Balsam (Reward: Balsam’s Written Permission for Iris to be a Whore)
- (Evening) The Blue Bull / Maslab the Inn Keeper
Order Some Wine
Yes (Repeat until you get Iris)
(In this step, all of the choices only change dialogue.)
After Completion:
- Allows the progression of Iris’ date events to continute towards ‘Quest #14: Iris Trainer’.
Quest 6: Pleasing the Mother
Requires: ‘Quest #4: The Red Phoenix Rising’ Complete, The Blue Bull must be open (Not between Quests 15, 16, and 17), 100 G.
- Wardrobe Store / Azalea the Store Owner
Meet Lola for the first time. Probably already done. Choices don’t matter.
- (Day or Evening) The Red Phoenix / Fat Lily
“Ask for Available Whores”
“Lola” (Option only available 50% of the time. 5 days must have passed since completing ‘Quest #4: The Red Phoenix Rising’.)
“Yes please.”
“Yes.”
“Ask for Available Whores” (again)
“Quest #7: Pleasing the Mother” (Option only appears after soliciting sex from Lola)
(Reply to Lola saying she can make it worth your while only affects dialogue)
“I will do it!”
(Your reply to Lily’s request only affects dialogue.)
- Market Square / Balsam the Merchant
“Buy something nice for Lily.”
“Yes please.” (Lose -50 G., Reward: Something Nice)
- The Blue Bull / Maslab the Inn Keeper
“Buy something delicious.”
::Try to win Lily’s favor.
- (Evening) The Blue Bull / Maslab the Inn Keeper
“Pick up the dish.”
“Yes please.” (Lose -50 G., Reward: Something Delicious)
- (Evening) The Red Phoenix / Fat Lily
“Start the date with Lily.”
After Completion:
- ‘Quest #8: Lola’s New Dress’ is now available.
Quest 7: Lola’s New Dress
Requires: ‘Quest #7: Pleasing the Mother’ Completed, ‘Quest #9: Room 4 1 More’ Completed, 950 G.
- The Blue Bull / Maslab the Inn Keeper
“Buy something delicious.”
- (Evening) The Blue Bull / Maslab the Inn Keeper
“Pick up the dish.”
“Yes please.” (Lose -50 G., Reward: Something Delicious)
- The Red Phoenix / Fat Lily
“Take Lola out.” (Requires ‘Something Delicious’, and 100 G. in your wallet.)
- “Market Square” (The 2 items gained by going to Market Square are for Challenge #10)
(Your first reply to her request to buy her stuff only changes dialogue.)
“Buy a ball-candy on a stick for 30 gold.” (Lose -30 G., Reward: ‘Lolipop’ wardrobe item for Lola)
“Buy a hairband for 70 gold coins” (Lose 70 G., Reward: ‘Headband’ wardrobe item for Lola)
- The Blue Bull / Maslab the Inn Keeper
“Buy something delicious.”
- (Evening) The Blue Bull / Maslab the Inn Keeper
“Pick up the dish.”
“Yes please.” (Lose -50 G., Reward: Something Delicious)
- The Red Phoenix / Fat Lily
“Take Lola out.” (Requires ‘Something Delicious’, and 100 G. in your wallet.)
(Choose your destination. Except for Market Square, the choices don’t change anything significant.)
- “Market Square” (This option should be hidden since you went there in Step #3)
- “Tavern”
(Your tag-team molestation of Iris only changes dialogue.)
- “Brothel” (Lola vetoes your decision)
- “Azalea’s Store”
(All of the choices in this scene only affect dialogue.)
- “Cheapside (Lose -100 G.)
“Chase after the thief.”
“Try to take them on.” (Requires Strength +9 to succeed. Reward: +100 G.)
- “JSGA”
(All of the choices in this scene only affect dialogue.)
- The Blue Bull / Maslab the Inn Keeper
“Buy something delicious.”
- (Evening) The Blue Bull / Maslab the Inn Keeper
“Pick up the dish.”
“Yes please.” (Lose -50 G., Reward: Something Delicious)
- The Red Phoenix / Fat Lily
“Take Lola out.” (Requires ‘Something Delicious’, and 100 G. in your wallet.)
(Choose your destination. See Step #6 for details.)
- The Blue Bull / Maslab the Inn Keeper
“Buy something delicious.”
- (Evening) The Blue Bull / Maslab the Inn Keeper
“Pick up the dish.”
“Yes please.” (Lose -50 G., Reward: Something Delicious)
- The Red Phoenix / Fat Lily
“Take Lola out.” (Requires ‘Something Delicious’, and 100 G. in your wallet.)
(Your response to Lola’s request for a night date only changes dialogue)
- (Evening) The Red Phoenix / Fat Lily
“See Lola (Night Dates).” (Requires 200 G. in your wallet.)
(Pick whatever. Where you go and what choices you make don’t change anything significant.)
- (Evening) The Red Phoenix / Fat Lily (again)
“See Lola (Night Dates).” (Requires 200 G. in your wallet.)
(Pick whatever. Where you go and what choices you make don’t change anything significant.)
(Once you get back to your house with Lola, the choices still don’t change anything)
- The Red Phoenix / Fat Lily
Quest 8: Lola’s New Dress
“Of course!”
(The next 2 responses to Lola only change dialogue.)
- Wardrobe Store / Azalea the Store Owner
“Order a dress for Lola.”
- [Evening Menu] / ‘Call it a Day.’ – Sleep three times.
- Wardrobe Store / Azalea the Store Owner
“Pick up Lola’s dress.”
“Yes Please.” (Lose -600 G., Reward: Lola’s Whore Dress)
- The Red Phoenix / Fat Lily
“Ask for available whores.”
“Give dress to Lola.”
(Your response to her thanks only changes dialogue)
After Completion:
- ‘Quest #19: Pleasing the mother. Again.’ is now available.
- Lola can now work at The Red Phoenix.
Quest 9: Room 4 1 More
Requires: ‘Quest #4: The Red Phoenix Rising’ Completed
- Cheapside / Crocus the Homeless
Quest: “Room 4 1 More”
“I am.”
- [Evening Menu] / ‘Call it a Day.’ – Sleep once.
- Cheapside / Crocus the Homeless
- Palace / Jafar
Discuss the House Remodeling
- [Evening Menu] / ‘Call it a Day.’ – Sleep two times.
- Palace / Jafar
Pick Up the Permit
Pay 100 Gold Coins (Lose -100 G., Reward: Permit to Remodel House)
- Cheapside / Crocus the Homeless
“I have the permit!”
“Yes” (Lose -500 G.)
After Completion:
- Your house is remodeled. Rooms are added for Lola (‘Quest #19: Pleasing the mother. Again.’) and Iris (‘Quest #17: The Blood-oath’).
Quest 10: Investments that Bear Fruit
note – this was available during quest #3.
Requires: ‘Quest #2: Family Feud’ Completed, 700 G., must keep money above 200 G. until thief is caught,
- Market Square / Balsam the Merchant
“Quest #10: Investments that Bear Fruit”
“Sure” (Requires you to have 200 G. in your wallet)
“Yes, I got it.”
- [Evening Menu] / ‘Call it a Day.’ – Sleep once.
- Market Square / Balsam the Merchant
“Pose as a rich customer” (Day 1 of 5: Nothing happens.)
- [Evening Menu] / ‘Call it a Day.’ – Sleep once.
- Market Square / Balsam the Merchant
“Pose as a rich customer” (Day 2 of 5: Someone watching?)
- [Evening Menu] / ‘Call it a Day.’ – Sleep once.
- Market Square / Balsam the Merchant
“Pose as a rich customer” (Day 3 of 5: Definitely someone watching.)
- [Evening Menu] / ‘Call it a Day.’ – Sleep once.
- [Evening Menu] / ‘Call it a Day.’ – Sleep once again. (Day 4 of 5: Do NOT visit Market Square/Balsam)
- Market Square / Balsam the Merchant
“Pose as a rich customer” (Day 5 of 5: Wallet is stolen.)
If your strength is less than 8: (Lose -200 G.)
If your strength is 8 or higher: You retrieve your stolen money.
- Market Square / Balsam the Merchant
“Buy a fruit stand”
“Yes please.” (Lose -500 G., Reward: Fruit Stand)
After Completion:
- You may now return to Balsam daily to ‘Collect from your fruit stand’ the profits (Random amount between 10 G. and 30 G.)
- ‘Quest 20: A Curious Case of Blue Balls’ is now available.
Quest 11: No Dancing Allowed
Requires: ‘Quest #4: The Red Phoenix Rising’ Completed, appr. 600 G.
- (Skip Step #1 and Step #2 if Jasmine is at Obedience Level 5 (‘Somewhat Disciplined’) or higher)
Jafar’s Slave-Girl Acadamy [JSGA] / Rose the Teacher
Make Jasmine Take Classes
Advanced Obedience Class (-100 G., 20% chance of failing)
- Repeat Step #1 until Jasmine is at Obedience Level 5 (‘Somewhat Disciplined’).
You may check Jasmine’s Obedience Level in the ‘Check Status’ menu.
Total classes will vary based on any earlier classes taken, also there’s a 20% failure rate.
- (Skip Step #3 and Step #4 if Jasmine is at Moral Standards 7 (‘Decent’) or lower)
Jafar’s Slave-Girl Acadamy [JSGA] / Rose the Teacher
Make Jasmine Take Classes
Morality Class for Beginners (-50 G., 20% chance of failing)
- Repeat Step #3 until Jasmine is at Moral Standards 7 (‘Decent’).
You may check Jasmine’s Moral Standards in the ‘Check Status’ menu.
Total classes will vary based on any earlier classes taken, also there’s a 20% failure rate.
- The Blue Bull / Maslab the Inn Keeper
Quest: “No Dancing Allowed” (Option hidden unless you have Obedience Level 5+ and Moral Standards 7-)
“What? Why not?”
- Palace / Jafar
Discuss Dancing Job with Jafar
- [Evening Menu] / ‘Call it a Day.’ – Sleep once.
- Palace / Jafar
Pick Up the Dancing Permit
Pay 100 Gold Coins (Lose -100 G., Reward: Documented Permission for Jasmine to Dance)
- The Blue Bull / Maslab the Inn Keeper
Give Maslab the Dancing Permit
- Wardrobe Store / Azalea the Store Owner
“Buy Clothes for Jasmine”
“Dancer Girl Outfit” (Lose -150 G.)
- The Blue Bull / Maslab the Inn Keeper
Bring Jasmine to Maslab
After Completion:
- You man now ‘Order Jasmine to Work as a Dancer’ at The Blue Bull. In order for her to obey your order, she must have Obedience Level 6 (‘Somewhat Obedient’) and Moral Standards 5 (‘Naughty’). This job pays between 70 G. to 90 G. 80% of the time, with a slight variation 20% of the time.
- ‘Quest #5: A Friend in Need…’ is now available.
- ‘Quest #12: To each his own…Permit’ is now available. (Requires Obedience Level 8 (‘Obedient’) and Moral Standards 2 (‘Immoral’)).
Quest 12: To each his own…Permit
Requires: ‘Quest #11: No Dancing Allowed’ Completed, appr. 1200 G.
- Wardrobe Store / Azalea the Store Owner
“Buy Clothes for for Jasmine”
“Whore Dress” (Lose 200 G.)
- Jafar’s Slave-Girl Acadamy [JSGA] / Rose the Teacher
“Make Jasmine Take Classes”
(If Obedience Level 5 or 6)
“Advanced Obedience Class” (Lose -100 G., 20% chance of failing)
(If Obedience Level 7 or higher)
“Obedience for Experts” (Lose -150 G., 30% chance of failing)
[Evening Menu] / “Call it a Day” – Sleep once.
- Repeat Step #2 until Jasmine is at Obedience Level 8 (‘Obedient’).
You may check Jasmine’s Obedience Level in the ‘Check Status’ menu.
- Jafar’s Slave-Girl Acadamy [JSGA] / Rose the Teacher
“Make Jasmine Take Classes”
(If Moral Standards Level 4 or 5)
“Advanced Morality Class” (Lose -100 G., 20% chance of failing)
(If Moral Standards Level 3 or lower)
“Morality for Experts” (Lose -150 G., 30% chance of failing)
[Evening Menu] / “Call it a Day” – Sleep once.
- Repeat Step #4 until Jasmine is at Moral Standards 2 (‘Immoral’).
You may check Jasmine’s Moral Standards Level in the ‘Check Status’ menu.
- The Red Phoenix / Fat Lily
“Make Jasmin work here as a whore.” (Requires Whore Dress, Obedience Level 8 (‘Obedient’), Moral Standards 2 (‘Immoral’))
“What? Why not?!”
(How you answer Lily about who Jasmine is only changes dialogue)
- Palace / Jafar
“Discuss the whore job with Jafar”
- [Evening Menu] / “Call it a Day” – sleep two times.
- Palace / Jafar
“Pick up the whoring permit.”
“Pay 200 G.” (Lose -200 G., Reward: Whoring Permit)
- The Red Phoenix / Fat Lily
“Give Lily the papers”
After Completion:
- You can now ‘Make Jasmine work here as a whore’ at The Red Phoenix. This job pays between 170 G. to 190 G. 65% of the time, with a slight variation 35% of the time.
- You may solicit Jasmin’s whore services (optionally, with Iris if ‘Quest #17: The Blood-oath’ is completed) at The Red Phoenix when she’s working.
- If you hadn’t trained Jasmine more than necessary, she now has the necessary Obedience Level and Moral Standards to ‘Work as a dancer’ at the Blue Bull. This job pays between 70 G. to 90 G. 80% of the time, with a slight variation 20% of the time.
Quest 13: The Favorite Customer
Requires: ‘Quest #19: Pleasing the mother. Again.’ OR ‘Quest #17: The Blood-oath’ Completed (Either Iris or Lola lives with you), appr. 2000 G.
- Wardrobe Store / Azalea the Store Owner
“Quest #13: The Favorite Customer”
“You insane? 1000 gold coins is a lot!”
“Well, alright…”
- Wardrobe Store / Azalea the Store Owner
“Pay for the repairs.” (Lose -1000 G.)
(The rest of the choices in the conversation don’t matter)
Due to a bug, you lose -200 G. at the end of this conversation.
- [Evening Menu] / ‘Call it a Day.’ – Sleep once.
- Wardrobe Store / Azalea the Store Owner
“Store Overview”
“Take a new task”
Your goal is gather 51 Development Points to complete all upgrades on Azalea’s Store. You may complete 1 task each day. There are 9 possible tasks, with 1 chosen at random daily. Your choices (especially who you choose to help) will affect the number of Development Points you receive for completing the task. Any task the Old Man/Genie completes is worth “DP +1”, regardess of if the game says “+2” or “-1”. It’s always “+1” (bug). If you don’t have both girls living with you, it will just take a few more days to complete.
- She asks for a gift of 200 G. “I’ll give you 200.”(Lose -200 G., Reward: DP +3)
- Front of store turned into playground. “Iris should do it!” (DP +3. If Lola: DP -1)
- Buy materials from market. “Lola should do it!” (DP +3. If Iris: DP -1)
- Advertise store. “Lola/Iris should do it!” (DP +3 for either girl))
- Fix roof. “Iris should do it!” (DP +3. If Lola: DP -1)
- Cleaning. “Lola should do it!” (DP +3. If Iris: DP -1)
- Extra help around the store. “Iris should do it!” (DP +3. If Lola: DP -1)
- Store needs a man’s touch. “Iris should do it!” (DP +3. If Lola: DP -1
- (There’s a 1 in 9 chance of no tasks being available. This is the that 1.)
[Evening Menu] / ‘Call it a Day.’ – Sleep once.
- Complete Step #4 until you have 51 or more development points.
- Wardrobe Store / Azalea the Store Owner
“Store Overview”
“Develop Store”
“Yes” (Lose -6 DP)
(Your reply to her thanks only changes dialogue.)
(What you think you were going to do only changes dialogue.)
(Admitting if you fell asleep only changes dialogue.)
NOTE: Make a backup save of your game here. To complete Challenge #11 & #12, and get CG #15-20 in a single game, you will need to reload the save and take a differnt route after getting the challenges/CGs for the 1st route. For the rest of this quest, some choices will be worth Morality points for Azalea. She starts at 0. Choices that subtract Morality will turn her into a whore, while choices that add morality make her slightly less of a whore.
(When Azalea says she’s bee thinking about her mother)
“Your mother might have been a whore.” (Azalea Morality -1)
“Giving naked massages is normal.\” (Azalea Morality +1)
- Wardrobe Store / Azalea the Store Owner
“Store Overview”
“Develop Store”
“Yes” (Lose -9 DP)
(Response to Azalea getting the table only changes dialogue)
(Your response to her grabbing you only changes dialogue)
(Your comment on her advanced technique only changes dialogue)
(Your thoughts on Azalea’s source of learning only changes dialogue)
(Whether you commit to helping her or not only changes dialogue)
(On the subject of her mother being a whore) (these numbers look backwards, but they are correct)
“*Sigh!* Maybe you’re right, girl.” (Azalea Morality -1)
“Massages? You mean handjobs?” (Azalea Morality +1)
- Wardrobe Store / Azalea the Store Owner
“Store Overview”
“Develop Store”
“Yes” (Lose -12 DP)
(Your thoughts on her progress only affects dialogue.)
(What you ask her to do with your cock only affects dialogue.)
(Her consideration of massaging other customers)
“Why not? Go for it!” (Azalea Morality -1)
“No way! Only me!” (Azalea Morality +1)
- Wardrobe Store / Azalea the Store Owner
“Store Overview”
“Develop Store”
“Yes” (Lose -12 DP)
(Your presumption about the outcome of the count only affects dialogue)
(Your business advice only changes dialogue)
(Your assessment of the risk factor only changes dialogue.)
(Whether or not you should interfere)
“No… Not yet…” (Azalea Morality -1)
(Whether you help her get up or not only changes dialogue)
“It’s now or never!” (Azalea Morality +1)
(Your opinion on the show only changes dialogue)
- Wardrobe Store / Azalea the Store Owner
“Store Overview”
“Develop Store”
“Yes” (Lose -12 DP)
(Your thoughts on Azalea’s plan only change dialogue)
(Your level of surprise at her obsession only changes dialogue)
(How you handle Azalea’s hesitation only changes dialogue)
(Your task as business partner only changes dialogue)
(Your diligence in protecting Azalea only changes dialogue)
(When asked a favor by a customer, your decision will affect Azalea’s personality for the rest of the game. If you allow the customers to do what they want, she will be a full-blown slut. Otherwise, she’ll only have sex with you for the rest of the game.)
“Route A: This is a show, not a brothel, you perverts.” (Azalea Morality +1)
(Azalea will veto this choice if her Morality is in the negatives.)
“Route B: Just form a line. I’m almost done here.” (Azalea Morality -1)
(Azalea will veto this choice if her Morality is in the positives.)
After Completion:
- “Challenge #11: My Seamstress WAIFU.” completed if you followed Azalea’s Route A (the loyal business partner route).
- “Challenge #12: Like Mother, Like Daughter” completed if you followed Azalea’s Route B (the whore route route).
- Azalea has a new outfit based on which route you chose.
- You may still complete store tasks for Azalea, and exchange Development Points for ‘massages’ from Azalea for 10 DP (Route B) or 12 DP (Route A). None of the choices change anything except dialogue. There is four Gallery CGs available by doing this step, 2 different ones for Route A and Route B.
Quest 14: Iris Trainer
Requires: ‘Quest #6: The Dream Job’ Completed, 700 G.
- (This step picks up where ‘Quest #6: The Dream Job’ left off, resuming evening dates with Iris. Use the same method as before, visiting The Blue Bull each night to trigger the events. As usual, none of the choices change anything except dialogue. )
(Evening) The Blue Bull / Maslab the Inn Keeper
Order Some Wine
Yes
Repeat each evening until the following scene occurs:
(Instead of Iris, Maslab will greet you with “Look what the sand lizard dragged in.”)
(Except the quest trigger below, all of the choices here only affect dialogue. Even if If you see text like ‘>Your relationship improved,’ it is flavor text only and doesn’t actually change anything.)
Quest #14: “Iris Trainer”
- Jafar’s Slave-Girl Acadamy [JSGA] / Rose the Teacher: 600 G., available immediately.
Talk to Rose
(Donate 600 Gold Coins) (Lose -600 G., Reward: Brass Bells)
Alternatives to paying 600 G.:
Market Square / Balsam the Merchant: 300 G., but shipping takes 8 days.
Wardrobe Store / Azalea the Store Owner: 250 G., but shipping takes 15 days.
Market Square / Balsam the Merchant: 200 G., but shipping takes 22 days.
- (Again, we resume dates with Iris, only now she is at The Blue Bull every evening. Choices begin to matter because the Training Iris Minigame starts here at Date 9. Dates 1 through 8 were completed during Quest #5 and Quest #6, and Step #1.)
(Evening) The Blue Bull / Maslab the Inn Keeper
Order Some Wine
Yes
Date 09. A walk through Cheapside, and an introduction to the bells.
(Give her butt a squeeze) (Motivation +10)
“I’m not asking. Make them ring, girl!” (Motivation +10)
“I’m still not hearing any bells, girl!” (Motivation +10)
“……………………..” (No change.)
(Home assignments only change some flavor dialogue within her training. Pick any.)
After Completion:
- ‘Quest #15: The Nightmare Job’ is now available.
Quest 15: The Nightmare Job
Requires: ‘Quest #14: Iris Trainer’ Completed, ‘Quest #9: Room 4 1 More’ Completed, 300 G.
- (Iris Trainer Minigame begins. During Iris Trainer, Iris is always available at The Blue Bull in the evening.)
(Evening) The Blue Bull / Maslab the Inn Keeper
Order Some Wine
Yes
Yes we are, girl. (Motivation +10)
(Call her a whore) (Motivation +5, Stress -5)
Pep Talk (Motivation +15)
(If Iris’ Stress becomes 70% or higher, choose “Day Off” (Stress -90, Motivation -10))
Start the Lesson
- Repeat Step #1 every evening, going down the list of locations below when prompted to choose.
- Location: Cheapside (1/3: Nude under cloak
(The 3 choices for introducing Iris to the man in tattered clothes only change dialogue.)
(Home assignments only change some flavor dialogue within her training. Pick any.)
- Location: Cheapside (2/3: Nude with extra bells
“Sure… You can wear a veil…” (Stress -10)
(What you tell Iris scream only changes dialogue.)
(The fight scene’s choices only change dialogue.)
(Whether to kiss Iris back or not only changes dialogue.)
(Home assignments only change some flavor dialogue within her training. Pick any.)
- Location: Market Square (1/3: Nude make-believe
(Home assignments only change some flavor dialogue within her training. Pick any.)
- Location: Market Square (2/3: Flashing the city guard
(Home assignments only change some flavor dialogue within her training. Pick any.)
- Location: Market Square (3/3: Table dancing
(Home assignments only change some flavor dialogue within her training. Pick any.)
- Location: Tavern Vicinity (1/3: Does your father know?
(Home assignments only change some flavor dialogue within her training. Pick any.)
- Location: Tavern Vicinity (2/3: Iris is in a bad mood.
(Your response to her hesitation doesn’t matter, since no other locations are available.)
(Your thoughts on Fatima’s appearance only affect dialogue)
(Home assignments only change some flavor dialogue within her training. Pick any.)
- Location: Tavern Vicinity (3/3
(None of the choices in this training session matter)
(Home assignments only change some flavor dialogue within her training. Pick any.)
- (Evening) The Blue Bull / Maslab the Inn Keeper
Order Some Wine
Yes
“Time for your graduation exam.”
(The next 2 choices in this step only change dialogue.)
- (Evening) The Blue Bull / Maslab the Inn Keeper
Order Some Wine
Yes
Quest #15: “The Nightmare Job”
“Yes! Yes! Time to fuck!” (Requires 300 G.)
(The decision to pull out or not only changes dialogue.)
- [Evening Menu] / ‘Call it a Day.’ – Sleep two times.
- [Evening Menu]
(Your decision to allow Iris in or not only changes dialogue. She stays either way.)
After Completion:
- ‘Quest #16: Fixing Everything’ is now available.
- The Blue Bull tavern is temporaly closed while the situation with Iris is resolved.
- Arm-wrestling, Dice, and Ordering Wine at The Blue Bull are permentantly unavailable.
- Iris now lives with you temporarily.
Quest 16: Fixing Everything
Requires: ‘Quest #15: The Nightmare Job’ Completed, Iris living with you, 500 G.
- [Evening Menu]
“Iris’ Room”
“Quest #16: “Fixing Everything”
“Tell me about this plan of yours.”
- Palace / Jafar
“Ask Jafar for ‘The Sword of Grayskull’”
- [Evening Menu]
“Iris’ Room”
“Talk to Iris”
“Jasmine’s Room”
“Talk to Jasmine”
- [Evening Menu] / ‘Call it a Day.’ – Sleep five times.
- [Evening Menu]
“Iris’ Room”
“Talk to Iris”
- Wardrobe Store / Azalea the Store Owner
“Buy Clothes for Iris”
“Slave Girl Outfit” (Lose -500 G.)
- [Evening Menu]
“Iris’ Room”
“Talk to Iris”
(Decision about fetching Jasmine only effects dialogue.)
(Whether or not you protect Jasmine only affects dialogue.)
(Your opinion on Iris’ slave girl outfit only affects dialogue.)
(Tits or droids, it only changes dialogue.)
After Completion:
- ‘Quest #17: The Blood-oath’ is now available.
- A “Pulled down top” has been added to Jasmine’s wardrobe.”
- “The messy pants” have been added to Jasmine’s Wardrobe.”
- A Slave Girl outfit has been added to Iris’ wardrobe.”
Quest 17: The Blood-oath
Requires: ‘Quest #16: Fixing Everything’ Completed.
- [Evening Menu]
“Iris’ Room”
“Quest #17: The Blood Oath”
“Yes… That’s the plan…”
(None of the 6 choices after this affect anything other than dialgue)
After Completion:
- Iris now lives with you permenantly. Her room is accessable from the [Evening Menu].
- You may solicit Iris’ whore services at The Red Phoenix when she’s working there. You can schedule her to work from her room in the Evening Menu. If Jasmine is also working at the time (Requires ‘Quest #12: To each his own … Permit’ Completed), you can solicit both of them at the same time.
- ‘Quest #13: The Favorite Customer’ is now available. (Unlocks when either Lola or Iris move in)
- Clothing for Iris is now sold by at Azalea’s Wardrobe Store.
- The Blue Bull is once again open for business, however Arm-wrestling, Dice, and Ordering Wine are still unavailable.
Quest 18: The Broken Toy
Requires: ‘Quest #19: Pleasing the mother. Again.’ Completed, 3300 G.
- [Evening Menu] (This scene only appears the first time you visit her room.)
“Lola’s Room”
(Your response to her being damaged only changes dialogue)
- [Evening Menu]
“Lola’s Room”
“Do Naughty Things”
(Any choice other than “Wait, I’ve changed my mind!”)
(The rest of the choices in this sex scene only change dialogue)
- [Evening Menu]
“Lola’s Room”
“Do Naughty Things” (again)
“Shut up, undress and spread your legs!”
(The rest of the choices in this sex scene only change dialogue)
- [Daytime Menu] (Your House)
“Quest #18: The Broken Toy”
“Maybe I should ask around…”
- Jafar’s Slave-Girl Acadamy [JSGA] / Rose the Teacher
“Talk to Rose”
- [Daytime Menu] (Your House)
“Take Lola to the ‘JSGA’”
(Choices for the rest of this step only affect dialogue)
- [Evening Menu]
(Choices for the rest of this step only affect dialogue)
- Jafar’s Slave-Girl Acadamy [JSGA] / Rose the Teacher
“Talk to Rose”
“Sure, here’s the gold.” (500 g.)” (Lose -500 G., Reward: Lola’s JSGA Uniform)
- Jafar’s Slave-Girl Acadamy [JSGA] / Rose the Teacher
“Make Lola take classes (200g.)” (Lose -200 G.)
[Evening Menu]
“Call it a Day” – Sleep once.
- Repeat Step #9 seven times. Lola’s mood after each class will follow this sequence:
- “Lola seems perfectly happy.”
- “Lola seems happy.”
- “Lola seems to be concerned about something.”
- “Lola seems to be worrying about something.”
- “Lola seems to be a little upset about something.”
- “Lola seems very upset about something.”
- “… … …”
“Grab Lola and shove her inside her room”
(Slap Lola 6 times. Where you slap her only changes dialogue.)
(What you think the catalyst is only changes dialogue.)
- Jafar’s Slave-Girl Acadamy [JSGA] / Rose the Teacher
“Talk to Rose”
- Jafar’s Slave-Girl Acadamy [JSGA] / Rose the Teacher
“Make Lola take classes (200g.)” (Lose -200 G.)
[Evening Menu]
“Call it a Day” – Sleep once.
- Repeat Step #12 six times.
(On the eve of the 7th class, Rose will tell you she’s cured.)
After Completion:
- Lola is now available for sex.
- ‘Daytime Event #1: The Makeover’ is now available.
Quest 19: Pleasing the mother. Again.
Requires: ‘Quest #8: Lola’s New Dress’ Completed, 400 G.
- (Evening) The Red Phoenix / Fat Lily
“Ask for available whores.”
“Lola.”
“Yes.” (Requires 500 G. to choose, but doesn’t take your money.)
(Your opinion of her outfit only changes dialogue.)
- [Evening Menu] / ‘Call it a Day.’ – Sleep four times.
(There’s knocking on your door on the 4th night)
“Ignore the knocking.”
“Go to the door and let her in.”
(For the rest of the scene in your house, the choices only change dialogue.)
- The Red Phoenix / Fat Lily
“Quest #19: Pleasing the mother. Again.”
“What? What did I do?”
(The rest of the choices from the brothel only change dialogue)
- [Evening Menu]
“Iris’ Room”
“Talk to Iris”
“Talk to Iris” (again)
- Wardrobe Store / Azalea the Store Owner
“Buy a Cleaning Wench Outfit”
- [Evening Menu] / ‘Call it a Day.’ – Sleep four times.
- Wardrobe Store / Azalea the Store Owner
“Pick up the Cleaning Wench Outfit”
“Buy the dress for 400 gold.” (Lose -400 G., Reward: Cleaning Wench Outfit)
- [Daytime Menu] (Your House)
“Take Jasmine and Iris to the Cheapside”
(All of the choices for rest of this step only change dialog)
- [Evening Menu] / ‘Call it a Day.’ – Sleep once.
- [Evening Menu]
“Iris’ Room”
“Talk to Iris”
(All of the choices after this only change dialog.)
- The Red Phoenix / Fat Lily
“Pick up Lola”
After Completion:
- Lola now lives with you permenantly. Her room is accessable from the [Evening Menu].
- Clothing for Lola is now sold by at Azalea’s Wardrobe Store.
- ‘Quest #18: The Broken Toy’ is now available.
- A “Cleaning Wench Outfit” has been added to your wardrobe.
- ‘Quest #13: The Favorite Customer’ is now available. (Unlocks when either Lola or Iris move in)
Quest 20: A Curious Case of Blue Balls
Requires: Fruit Stand purchased, gold needed heavily varies on Jasmine’s training level.
- Jafar’s Slave-Girl Acadamy [JSGA] / Rose the Teacher
“Make Jasmine Take Classes”
(If Obedience Level 0-3)
“Obedience for Beginners” (Lose -50 G., 20% chance of failing)
(If Obedience Level 4 or 5)
“Advanced Obedience Class” (Lose -100 G., 20% chance of failing)
[Evening Menu] / “Call it a Day” – Sleep once.
- Repeat Step #1 until Jasmine is at Obedience Level 6 (‘Somewhat Obedient’).
You may check Jasmine’s Obedience Level in the ‘Check Status’ menu.
- Jafar’s Slave-Girl Acadamy [JSGA] / Rose the Teacher
“Make Jasmine Take Classes”
(If Moral Standards Level 7-10)
“Morality for Beginners” (Lose -50 G., 20% chance of failing)
[Evening Menu] / “Call it a Day” – Sleep once.
- Repeat Step #3 until Jasmine is at Moral Standards 6 (‘Frivolous’).
You may check Jasmine’s Moral Standards Level in the ‘Check Status’ menu.
- Market Square / Balsam the Merchant
“Quest #20: A Curious Case of Blue Balls” (Requires Morality Standard 6, Obedience Level 6, Jasmine not working/training)
“I have nothing to do anyway…” (You earn +100 G.)
(Your selling tactic only changes dialogue)
- Market Square / Balsam the Merchant
“Talk to Balsam”
“Sure thing, friend.” (You earn +100 G.)
(Your opinion on Balsam’s outfit only changes dialogue).
- Market Square / Balsam the Merchant
“Talk to Balsam”
“Sure, sure, go do your thing…” (You earn +47 G. + Jasmine’s pay )
- Market Square / Balsam the Merchant
“Talk to Balsam”
After Completion:
- When you order her to ‘Sell fruits on the market’, Jasmine now earns between 20 G. to 80 G. 100% of the time.
Princess Trainer Statistics
Statistics affecting Jasmin and the Genie / Old Man.
Obedience Level
- Obedience Level is raised only at Jafar’s Slave-Girl Acadamy [JSGA] which is available after ‘Quest #2: Family Feud’. Each class can award Obedience Level +1 if a random roll is passed. The Beginner and Advanced classes have a 20% chance of failure. The Expert class has a 30% chance of failure.
- (‘Obedience for Beginners’ begins)
- 0: Rebellious
- 1: Headstrong
- 2: Insolent
- 3: Disobedient
- (‘Advanced Obedience Class’ begins)
- 4: Undisciplined
- 5: Somewhat Disciplined
- 6: Somewhat Obedient
- (‘Obedience for Experts’ begins)
- 7: Disciplined
- 8: Obedient
- 9: Very Obedient
- 10: Fully Obedient and Loyal
Moral Standards
- Moral Standards are lowered only at Jafar’s Slave-Girl Acadamy [JSGA] which is available after ‘Quest #2: Family Feud’. Each class can lower Moral Standards by 1 if a random roll is passed. The Beginner and Advanced classes have a 20%??? chance of failure. The Expert class has a 40%??? chance of failure.
- (‘Morality for Beginners’ begins)
- 10: Pure
- 9: Righteous
- 8: Honorable
- 7: Decent
- (‘Advanced Morality Class’ begins)
- 6: Frivolous
- 5: Naughty
- 4: Perverse
- (‘Morality for Experts’ begins)
- 3: Wicked
- 2: Immoral
- 1: Shameless (Note: After reaching this, a choice will come up in a dream. Your reply doesn’t matter.)
- 0: Completely Shameless
Strength
- Exercise in the evening at the Market Square after Quest #2 is complete. Affects Challenge #6 and Challenge #7.
- If you don’t exercise for 7 days, your Strength goes down by 1 point.
Wardrobe
This section is incomplete.
Jasmine’s Wardrobe
“Lolita hairdo (black)” – Reward from ‘Daytime Event #01: The Makeover.’
“Lolita hairdo (blonde)” – Reward from ‘Daytime Event #01: The Makeover.’
“Wedding Dress (Jasmine)” – Reward from ‘Challenge #08: Second Chances.’
“Slut Tablet (Jasmine)” – Reward from ‘Challenge #12: Like Mother, Like Daughter.’
“The Space Princess Outfit (Jasmine)” – Reward from ‘Challenge #14: I think I’m ready.’
Iris’ Wardrobe
“Green Courtesan Outfit (Iris)” – Reward from ‘Challenge #03: Life of the Rich and Infamous.’
“Nipple Piercing (Iris)” – Reward from ‘Challenge #05: Local Weirdo.’
“Ball gag (Iris/Lola)” – Reward from ‘Challenge #11: My Seamstress WAIFU.’
Lola’s Wardrobe
“Street Whore Outfit (Lola)” – Reward from ‘Challenge #01: The Kind Master.’
“Slave Girl Outfit. (Lola)” – Reward from ‘Challenge #07: Eat, Sleep, Lift, Repeat.’
“Retro Girl Outfit (Lola)” – Reward from ‘Challenge #09: Bad Parenting.’
“Ball gag (Iris/Lola)” – Reward from ‘Challenge #11: My Seamstress WAIFU.’
Other
“Slave Girl Outfit (Rose)” – Reward from ‘Challenge #02: Rose the WAIFU.’
“Pregnancy Potion (Jasmine/Lola/Iris)” – Reward from ‘Challenge #04: The Citizen of Agrabah.’
“Lactation Potion (Jasmine/Lola/Iris)” – Reward from ‘Challenge #06: I just don’t feel like it.’
“An assortment of paper bags (Lola/Iris/Jasmine)” – Reward from ‘Challenge #10: Keep Calm and Clean.’
Jasmine’s Obedience Tests
Jasmine’s Obedience Tests can be found on the [Evening Menu]. The choices you make during these scenes only change immediate dialogue and scenes. They have no affect on the story.
Obedience Level Test #01: “Feed me fruits…”
Requirements:
(01/03) (none)
(02/03) Obedience Level 03
(03/03) Obedience Level 06, Moral Standard 7
Obedience Level Test #02: “Dance for me…”
Requirements:
(01/04) (none)
(02/04) Obedience Level 03
(03/04) Obedience Level 03
(04/04) Obedience Level 06, Moral Standard 07
Obedience Level Test #03: “Give me a handjob…”
Requirements:
(01/03) Obedience Level 03
(02/03) Obedience Level 06, Moral Standard 04
(03/03) Obedience Level 10, Moral Standard 04
Obedience Level Test #04: “Give me a blowjob…”
Requirements:
(01/03) Obedience Level 06
(02/03) Obedience Level 06, Moral Standard 04
(03/03) Obedience Level 10, Moral Standard 04
Obedience Level Test #06: “Let’s have sex…”
Requirements:
(01/03) (none)
(02/03) Obedience Level 10, Moral Standard 04
(03/03) Obedience Level 10, Moral Standard 00
Extras / CG Gallery
The CG Gallery can be found on the game’s main menu, under the ‘Extras’ sub-menu. There are no in-game notifications when you unlock an image for the CG Gallery.
CG Gallery Page 1 of 5:
CG #01: “Quest #16: Fixing Everything” – A Night at the Palace.
CG #02: (Bug: There is no event that grants CG #02 in the game’s script.)
CG #03: Jasmine’s Obedience Test #2: “Dance for me…” (Step 04/04)
CG #04: Jasmine’s Obedience Test #1: “Feed me fruits…” (Step 03/03)
CG #05: Jasmine’s Obedience Test #3: “Give me a handjob…” (Step 03/03)
CG #06: Jasmine’s Obedience Test #4: “Give me a blowjob…” (Step 03/03)
CG Gallery Page 2 of 5:
CG #07: Jasmine’s Obedience Test #5: “Let’s have sex…” (Step 03/03)
CG #08: Sex with Jasmine at the brothel.
CG #09: “Quest #19: Pleasing the mother. Again.” – Iris running with the painting.
CG #10: “Quest #18: The Broken Toy” – Lola faking it.
CG #11: During sex in Lola’s Room, started with her tits.
CG #12: “Quest #14: Iris Trainer” – The dice game.
CG Gallery Page 3 of 5:
CG #13: “Quest #15: The Nightmare Job” – Getting caught with Iris.
CG #14: Had sex with Iris in Iris’ Room 5 times.
CG #15: “Quest #13: The Favorite Customer” – Complete ‘Route A’ (the loyal business partner route).
CG #16: “Quest #13: The Favorite Customer” – Complete ‘Route A’ (the loyal business partner route).
CG #17: Had sex with Azalea after completing ‘Quest #13’ / ‘Route A’
CG #18: “Quest #13: The Favorite Customer” – Complete ‘Route B’ (the whore route).
CG Gallery Page 4 of 5:
CG #19: “Quest #13: The Favorite Customer” – Complete ‘Route B’ (the whore route).
CG #20: Had sex with Azalea after completing ‘Quest #13’ / ‘Route B’.
CG #21: Sex with Iris and Lola on the last day of the story (before Jasmine’s Parade).
CG #22: Jasmine’s Parade (Game Ending) with Jasmine nude.
CG #23: Jasmine’s Parade (Game Ending) with Jasmine in her wedding dress.
CG #24: Threesome with Jasmine and Iris at the brothel.
CG Gallery Page 5 of 5:
CG #25: Foursome with Dahlia, Iris, and Jasmine at the brothel.
CG #26: Sex with Iris at the brothel.
CG #27: Threesome with Dahlia and any other girl at the brothel.
CG #28: (Bug: There is no event that grants CG #28 in the game’s script.)
CG #29: Scene with Iago after Jasmine’s Parade (Game Ending).
CG #30: Threesome with Jasmine and Dahlia at the brothel.
Extras / Challenges
The challenges are the same as achievements. In order to get all of them, you will either need to complete the game twice, or save before starting the later parts of ‘Quest #13: The Favorite Customer’ and then reload the save to do the 2nd route (due to Challenge #11 & #12).
Challenge #01: “The Kind Master.”
Goal: Donate 300 coins to the Homeless Crocus.
Progress: Currently donated: 300/300 Gold coins.
Reward: Street Whore Outfit (Lola).
Challenge #02: “Rose the WAIFU.”
Goal: Stalk Rose the Teacher.
Progress: 10 days out of 10.
Reward: Slave Girl Outfit (Rose).
Challenge #03: “Life of the Rich and Infamous.”
Goal: Save up some gold for the rainy day.
Progress: Have 5000 out of 5000 gold.
Reward: Green Courtesan Outfit (Iris).
Challenge #04: “The Citizen of Agrabah.”
Goal: Reach a certain number on the calendar.
Progress: Day 100 out of 100.
Reward: Pregnancy Potion (Jasmine/Lola/Iris).
Challenge #05: “Local Weirdo.”
Goal: Visit the city tavern several times during one day.
Progress: 10 visits out of 10.
Reward: Nipple Piercing (Iris).
Challenge #06: “I just don’t feel like it.”
Goal: Skip a lot of workout sessions in a row.
Progress: Number of missed opportunities 30 out of 30.
Reward: Lactation Potion (Jasmine/Lola/Iris).
Challenge #07: “Eat, Sleep, Lift, Repeat.”
Goal: Train every night for several days in a row.
Progress: 10 days out of 10 days.
Reward: Slave Girl Outfit. (Lola)
Challenge #08: “Second Chances.”
Goal: Beat the game at least once.
Progress: Completed.
Reward: Wedding Dress (Jasmine).
Challenge #09: “Bad Parenting.”
Goal: Send Lola to sleep drunk.
Progress: 7 times out of 7.
Reward: Retro Girl Outfit (Lola).
Challenge #10: “Keep Calm and Clean.”
Goal: Make Jasmine clean enough houses at the Cheapside.
Progress: 20 out of 20.
Reward: An assortment of paper bags (Lola/Iris/Jasmine). 2000 Gold coins.
Challenge #11: “My Seamstress WAIFU.”
Goal: Complete Azalea’s ‘Route A’ (the loyal business partner route).
Progress: Completed.
Reward: Ball gag (Iris/Lola).
Challenge #12: “Like Mother, Like Daughter.”
Goal: Complete Azalea’s ‘Route B’ (the whore route).
Progress: Completed.
Reward: Slut Tablet (Jasmine).
Challenge #13: “The Early Bird.”
Goal: Go to bed early for several days in a row.
Progress: 14 out of 14.
Reward: 500 Gold coins.
Challenge #14: “I think I’m ready.”
Goal: Complete all the in-game quests.
Progress: Completed.
Reward: The Space Princess Outfit (Jasmine).
Challenge #15: “Princess Trainer 2 When?”
Goal: Complete all the challenges.
Progress: Masterfully completed.
Reward: Extended ending scene.
Princess Trainer Daytime Events
Daytime Events available from the [Day Menu].
Daytime Event #01: “The Makeover.”
Requirements:
‘Quest #18: The Broken Toy’ Completed
Jasmin not working/training.
Lola not working.
Reward: “Lolita Hairdo (black),” “Lolita Hairdo (blond)”
Daytime Event #02: “She only looks like her.”
Requirements:
Jasmin not working/training.
Must have bought Jasmine’s ‘Slave Girl Outfit.’
Obedience Level: 5
Moral Standard: 5
Daytime Event #03: “What if it really is her?”
Requirements:
Jasmin not working/training.
‘Daytime Event 02’ Completed.
Obedience Level: 8
Moral Standard: 4
Daytime Event #04: “Yup! That’s our princess.”
Requirements:
Jasmin not working/training.
‘Daytime Event 03’ Completed.
Obedience Level: 10
Moral Standard: 0
Daytime Event #05: “Market square exploits, Part 1.”
Requirements:
Jasmin not working/training.
Must have bought Jasmine’s ‘Slave Girl Outfit.’
Obedience Level: 5
Moral Standard: 5
Daytime Event #06: “Market square exploits. Part 2.”
Requirements:
Jasmin not working/training.
‘Daytime Event 05’ Completed.
Obedience Level: 8
Moral Standard: 4
Daytime Event #07: “Tits on a platter, Part 1.”
Requirements:
Jasmin not working/training.
Obedience Level: 8
Moral Standard: 4
Reward: 200 G.
Daytime Event #08: “Tits on a platter, Part 2.”
Requirements:
Jasmin not working/training.
‘Daytime Event 07’ Completed.
Obedience Level: 10
Moral Standard: 2
Reward: 400 G.
Daytime Event #09: “Tits on a platter, Part 3.”
Requirements:
Jasmin not working/training.
‘Daytime Event 08’ Completed.
Obedience Level: 10
Moral Standard: 1
Reward: 1000 G.
Princess Trainer Console Commands
* ‘gold’: Gold
* ‘obedience’: Jasmine’s Obedience Level
* ‘courage’: Jasmine’s Moral Standard
* ‘maslabfriendship’: Maslab Friendship Level
* ‘i_motivation’: Training Iris Minigame – Motivation
* ‘i_stress’: Training Iris Minigame – Stress
* ‘dp’: Azalea Store Minigame – Development Points
* ‘a_morals’: Azalea Store Minigame – Azalea Morality Points
About the Princess Trainer: Gold Edition
Akabur’s Princess Trainer: Gold Edition is an adult training video game based upon Disney’s Aladdin. It is set after Witch Trainer, occurring in the Harry Potter universe, which in turn happens just after Magic Shop events.
In this game players control Genie, who needed to approve the wicked Jafar’s three wishes and ended up being a human. With Aladdin out of the picture, Jafar wishes to wed Jasmine however needs her made submissive and servile. Genie, who lost his memory after the third desire from Jafar, begins working for him.
Genie gets to manage Jasmine and slowly turn her into a sex slave. He needs to train her ending up being more obedient and having less pity. Whilst doing this he meets Rose where Jasmine gets her obedience classes, and Azaela from the local clothing shop where he purchases outfits for several women.
The game likewise includes a whorehouse, one of the many kinds of tasks Jasmine needs to work to earn Genie some money. Lola, the ruined daughter of the brothel madame eventually winds up at Genie’s home, similar to Iris, daughter of Maslab, regional bartender.
Lola, a woman who matured at the brothel still imitates a ruined brat. She wishes to end up being a prostitute but her adoption mother wants a much better life for her. So, she leaves her home and signs up with Genie, who she constantly calls ‘old man’. It ends up she has hypoactive libido disorder (HSDD), meaning: having no libido whatsoever. Through quests Genie helps her with overcoming HSDD. Iris, daughter to Maslab, as some daddy concerns. She wants to become a prostitute to thwart her dad, who does not allow her to do any sexual activity, like dancing on the tables in his tavern or being searched by the consumers. Saying she wants to be dealt with as a ‘regular’ girl, she does some pretty ‘unusual’ things, like walking on the street naked, ending up being a woman of the street, wanting to be hit and chocked during sex, amongst others. She eventually begins living with Genie and works at both her dad’s tavern and the brothel.
After training Jasmine fully, Genie turns her in to Javar. He gets some flashbacks and gets his memory back. Javar however, took Jasmin with him on their wedding and used her as a sex servant in front of the majority of people of Agrabah. Jasmine gets scolded by the individuals and nobody has any trust in her whatsoever any longer as a princess. Javar’s strategy succeeded. Genie returns house and fulfills Iris and Lola. He discusses his past memories with Iris and they both choose they’ll be doing something about this, helping out Jasmine. In a prolonged ending it’s revealed that they meet Iago, Jafar’s parrot. A long time in the future Genie and Iris are utilizing the whorehouse as a staging ground. Together with Maslab and his bro, Lola and some others they are making their strategies to help Jasmine. They are greeted by their lastest member, Aladdin. The video game ends with this cliffhanger.
Gameplay mainly consists of sending out Jasmine on tasks to earn money, so you can train her to become the slave Jafar wants. Every day is divided in three minutes, morning, afternoon and evening, with various things being available and occurring in certain areas on the correct time. Lola and Iris are slowly opened by finishing missions for the whorehouse madame and Maslab respectively. The game features many missions to open certain parts of the video game, increasing money made by tasks, advancing the story, et cetera. The game likewise includes many obstacles for which the objectives are partly hidden. They reveal what must be done, but not the number of times. For example, enter the tavern 0 out of??? days. These difficulties unlock mostly clothing items for particular characters, like lactating breasts or slave clothing. Finishing all difficulties grants access to the extended ending, leading to a cliffhanger hinting to a follow up.
The Gold Edition, the only readily available version, simply means that it includes ingame cheats to make the video game easier and quicker.