A complete mine map to help people navigate. Totem offerings, challenge guides, hidden location overviews and smaller maps showing where resources are most common! You’ll find all the information you need in this Roots of Pacha Maps, Secret Locations & Challenges guide!
We know that there are people who have a hard time finishing the Roots of Pacha game. If you are one of those who find it difficult to finish the game, let’s take you to our Roots of Pacha guide.
Roots of Pacha Maps, Secret Locations & Challenges
Welcome to our Roots of Pacha Maps, Secret Locations & Challenges Guide! A complete mine map to help people navigate. Totem offerings, challenge guides, hidden location overviews and smaller maps showing where resources are most common! You’ll find all the information you need in this Roots of Pacha Maps, Secret Locations & Challenges guide!
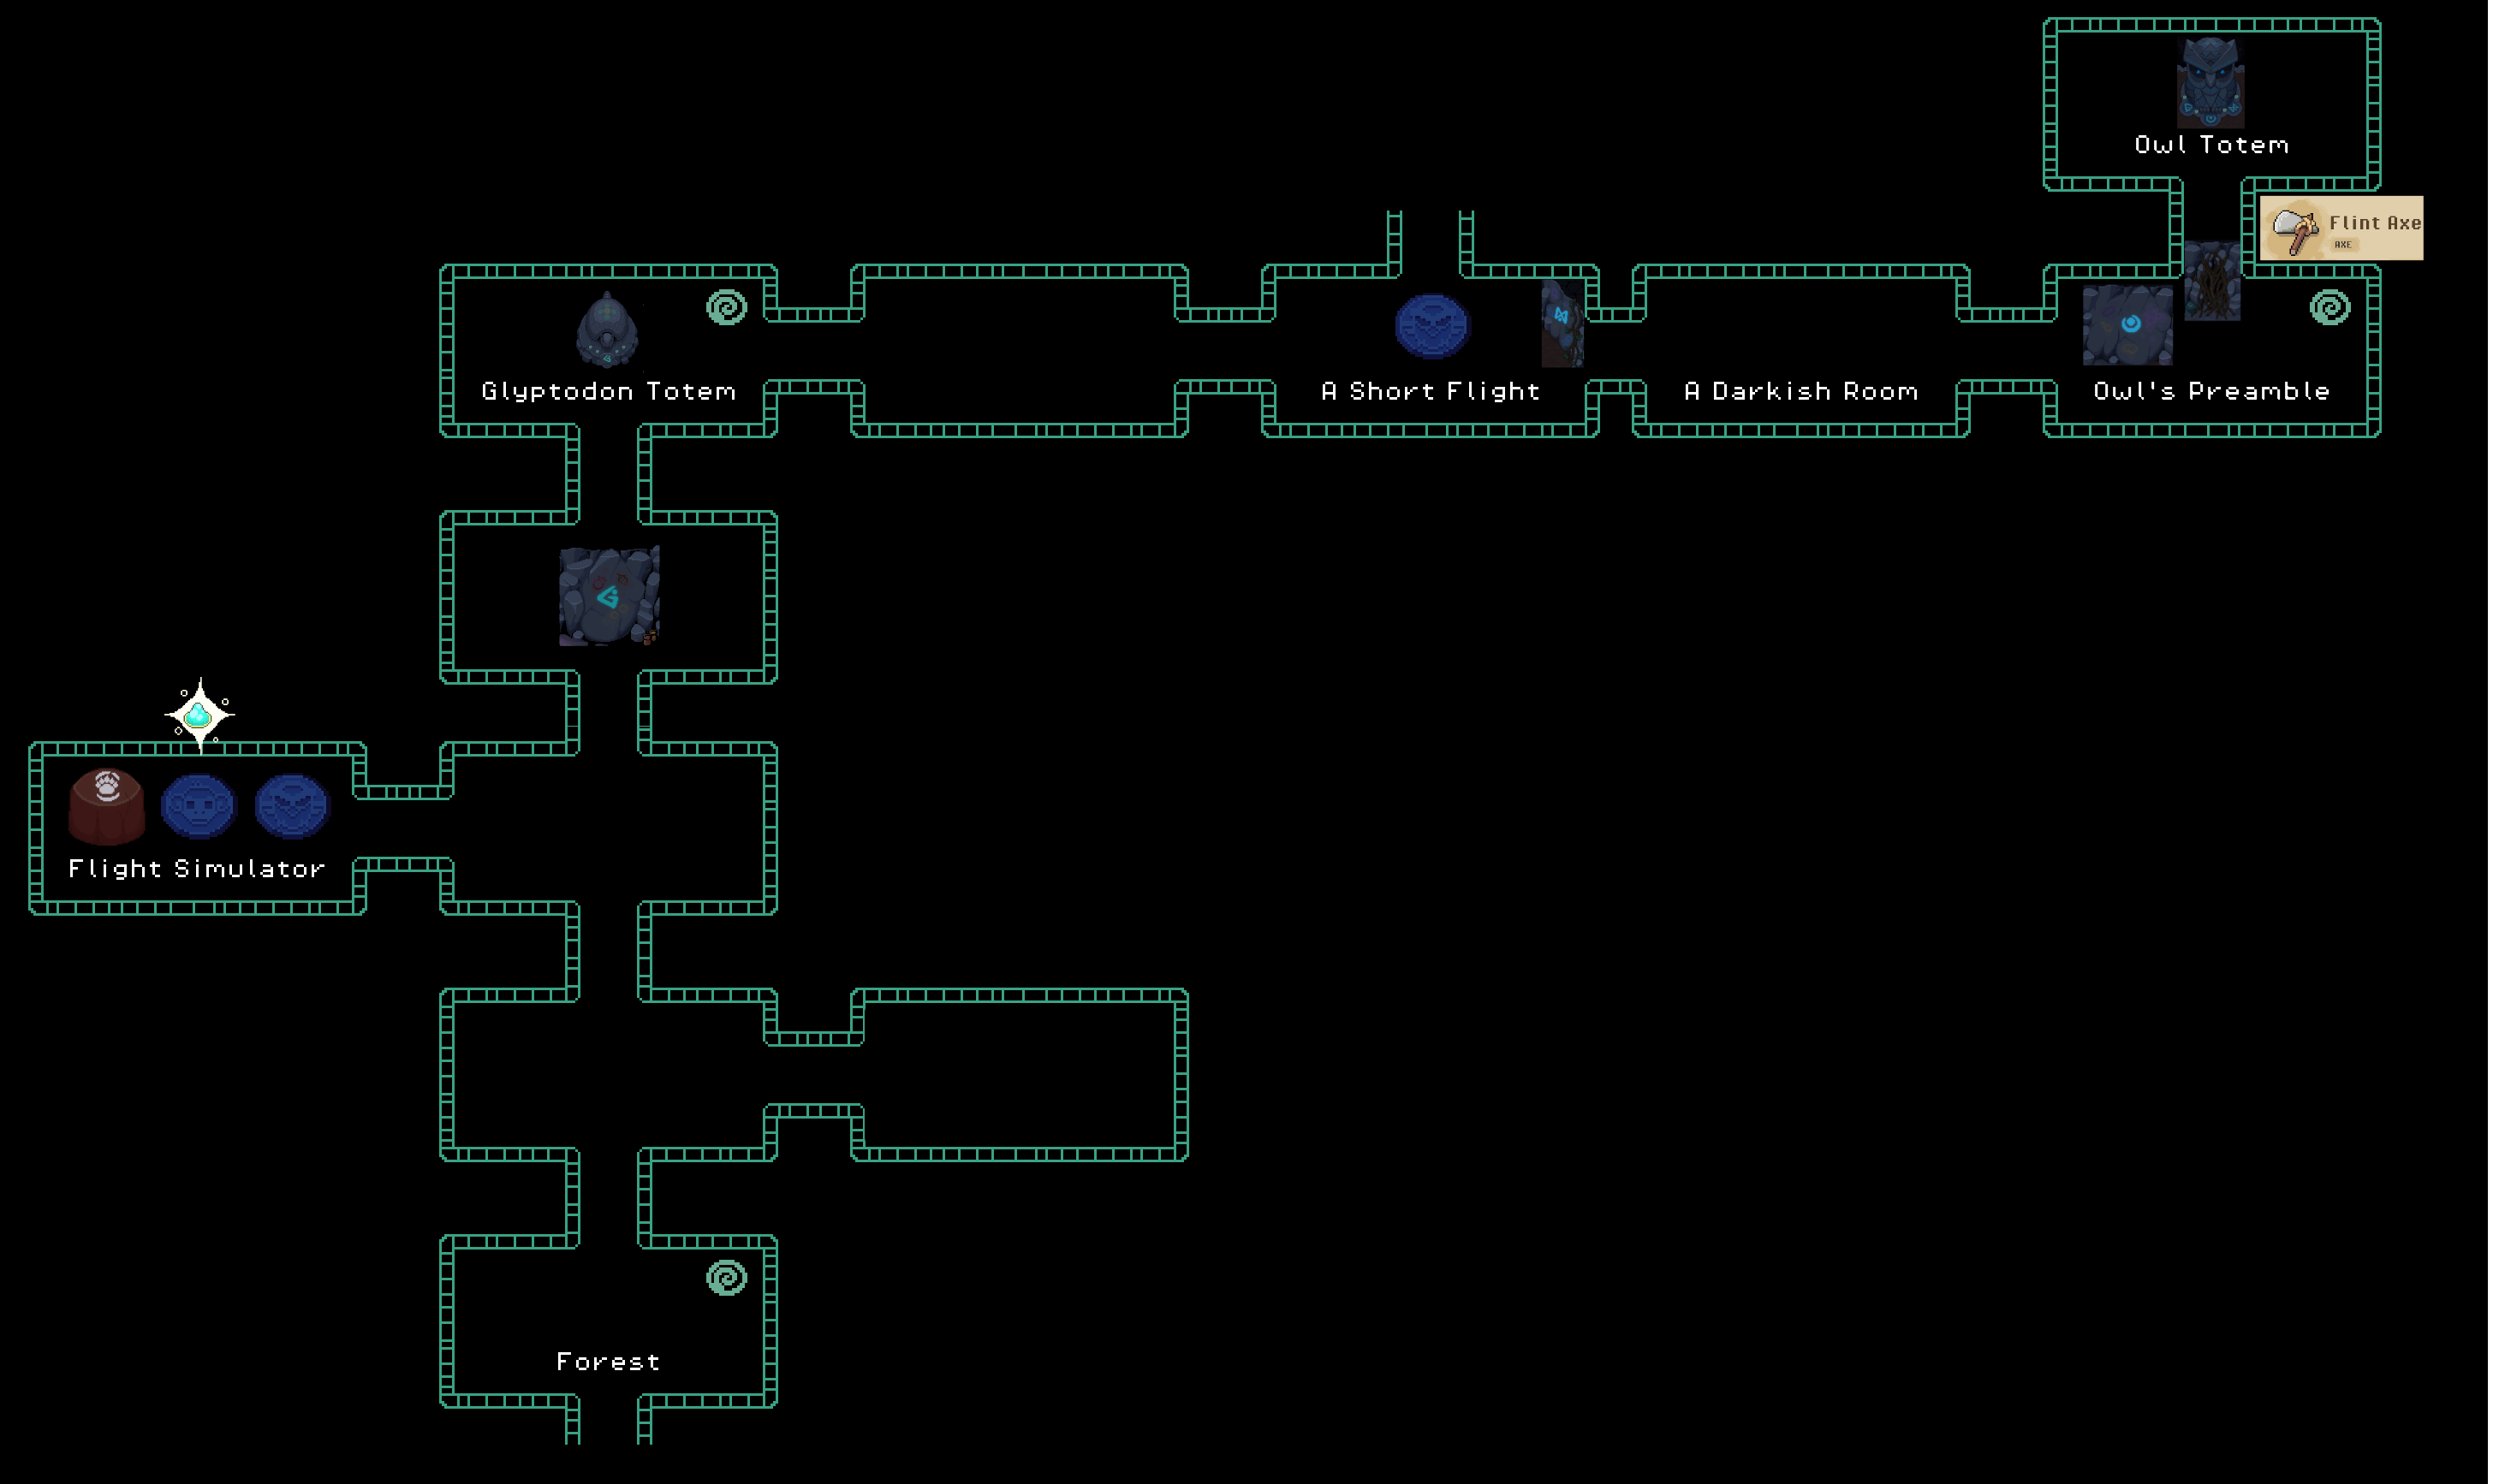
Map Overview – Complete
New Map, with:
- Totem Location (duh)
- Wall Mural Locations
- Totem Power Locations
- Tool-Gated Progression Location (and which Tool is needed)

Forest Tunnel

Soaking Caverns

Wild Grotto

Rocky Burrow

Pacha’s Hollow

Owl Challenge
Northwest Island:

Northeast Island:

Southest Island:

Southwest Island:

Middle Island: (needs to be turned one more time on this picture

Monkey Challenge


Play the Blue Instrument and follow the path west

Play the Red Instrument and follow the path north, then east

Play the Blue Instrument and follow the path north

Play the Green Instrument and follow the path southwest, then north

Play the Blue Instrument and follow the path west

Play the Yellow Instrument and follow the path east, east, then north

Play the Green Instrument and follow the path west, then north

Bear Challenge


- Looks like a River
- Looks like some Bears having Fun
- Looks like some Pomegrenate and Roots
- Looks like a Starry Night
Totem Offerings
Here an Overview for the Offerings with examples

1 Item :
Tree Produce:
- Pine Cone, Pomegrenate

3 Items :
Tree Produce:
- Pine Cone, Pomegrenate
Root:
- Carrot, Potato
Fish:
- Porcupine, Hammer

3 Items :
Flour:
- Quinoa Flour, Wheat Flour
Juice:
- Tomato Juice, Grape Juice
Fermented Fish:
- Fermented Porcupine, Fermented Hammer

3 Items :
Honey:
- Wild Honey, Sunflower Honey
Wine:
- Grape Wine, Strawberry Wine
Cheese:
- Almond Cheese, Goat Cheese

1 Item :
Alfalfa only :

All Year round next to Junglefowl, after you completed 10 Prophecies
Final Challenge

Foreword:
The Mirrors could be turned earlier for less backtracking, but i’m explaining one step after another in this guide 🙂
Use the western Owl Platform >
Fly Southwest and play the Red Instrument

Fly back to the Start >
Head south with the use of the Monkey Platform >
Destroy the Rocks to make a clear Path to fly through from West to East >
Discover the first Hint

Go back north to the start and use the western Owl Platform again >
Head south and fly through the now cleared Field >
Play the Green Instrument

Head all the Way back to the Start again >
Use the eastern Monkey Platform >
Use the eastern Owl Platform >
Land where Beacon begins >
Turn your first Mirror

Follow the Path North >
Use Owl Platform >
Land South and play the Yellow Instrument

Fly North and use the Monkey Platform >
Discover the 2nd Hint

Go back and use the Owl Platform to go back to the southern Platform >
Play the Blue Instrument

Turn all Mirrors in the Room and South of the Room


Fly and land West >
Discover the 3rd Hint >
Turn the Mirror

Head two times South with the use of the Monkey Platforms >
Turn the Mirror

First Beacon done
Continue South with the use of another Monkey Platform >
Follow the Path >
Discover the 4th and final Hint

Play the Yellow Instrument

Turn the Mirror

Head east with the use of the Monkey Platform >
Play the Red Instrument

- Head North with the use of the Monkey Platform back to the Start >
- Use the Western Owl Platform >
- Land at the Northwest Owl Platform >
- Turn the Mirror

Fly back to the Start >
Turn the Final Mirror

Second Beacon done
The Riddle
With all Hints were getting following Information:
From Youngest to Oldest
- Donto/Glop
- To
- Don
- Glyp
- Dynto
- Dot/Dante

Donto – Glop – To – Don
Are the Youngest
Dark Rooms
Below the Order of the Appearance of the Dark Rooms and how to navigate them
A Very Dark Room

Secrets
Hidden Owl Platform in “Glyptodon’s Den” which brings you to the Room west of it

Reward:

West of the Teleport: Cloud’s Garden
Behind a Bear Wall

Reward:

East of the Teleport: No Man’s Rock
Behind a Bear Wall


In the Room: Flight Simulator
Behind a Bear Wall
Reward:

South of the Teleport: Stomp your Feet
In a Hidden Wallpath on the northern Roomside

Reward:

2 Rooms west of Teleport: Beach
In the Dark Monkey Platform juncition
Hidden Monkey Platform in the Dark:

Reward:

Ores and Where to Find them
A little Overview, where specific Ore Nodes start to Spawn and are commonly found.


Gem Nodes start appearing in the same Rooms as Copper
Silver/Gold Nodes start appearing at “Pacha’s Pair of Rocks”

The “Flight Simulator” Room is a “Bonus Room” it combines all Totems and has a Spawn of Pure Gem + Silver/Gold Nodes
