Welcome to our Seed of the Dead Sweet Home Enemies List guide. You might a unstoppable killing machine, with a team of 4 cute girls backing you up, but it never hurts to do some research on what your fighting.
All Enemies in Seed of the Dead Sweet Home
This guide is for all survivors, but will be required reading of All Hometown patrols, lookouts and fireteams.
Please note: This guide is based on Normal difficulty. As such, your tactics will very depending if your fighting at a higher difficulty.
In addition, there may still be Z we don’t know about, and your tactics must change as such. (Meaning bosses, and later enemies)
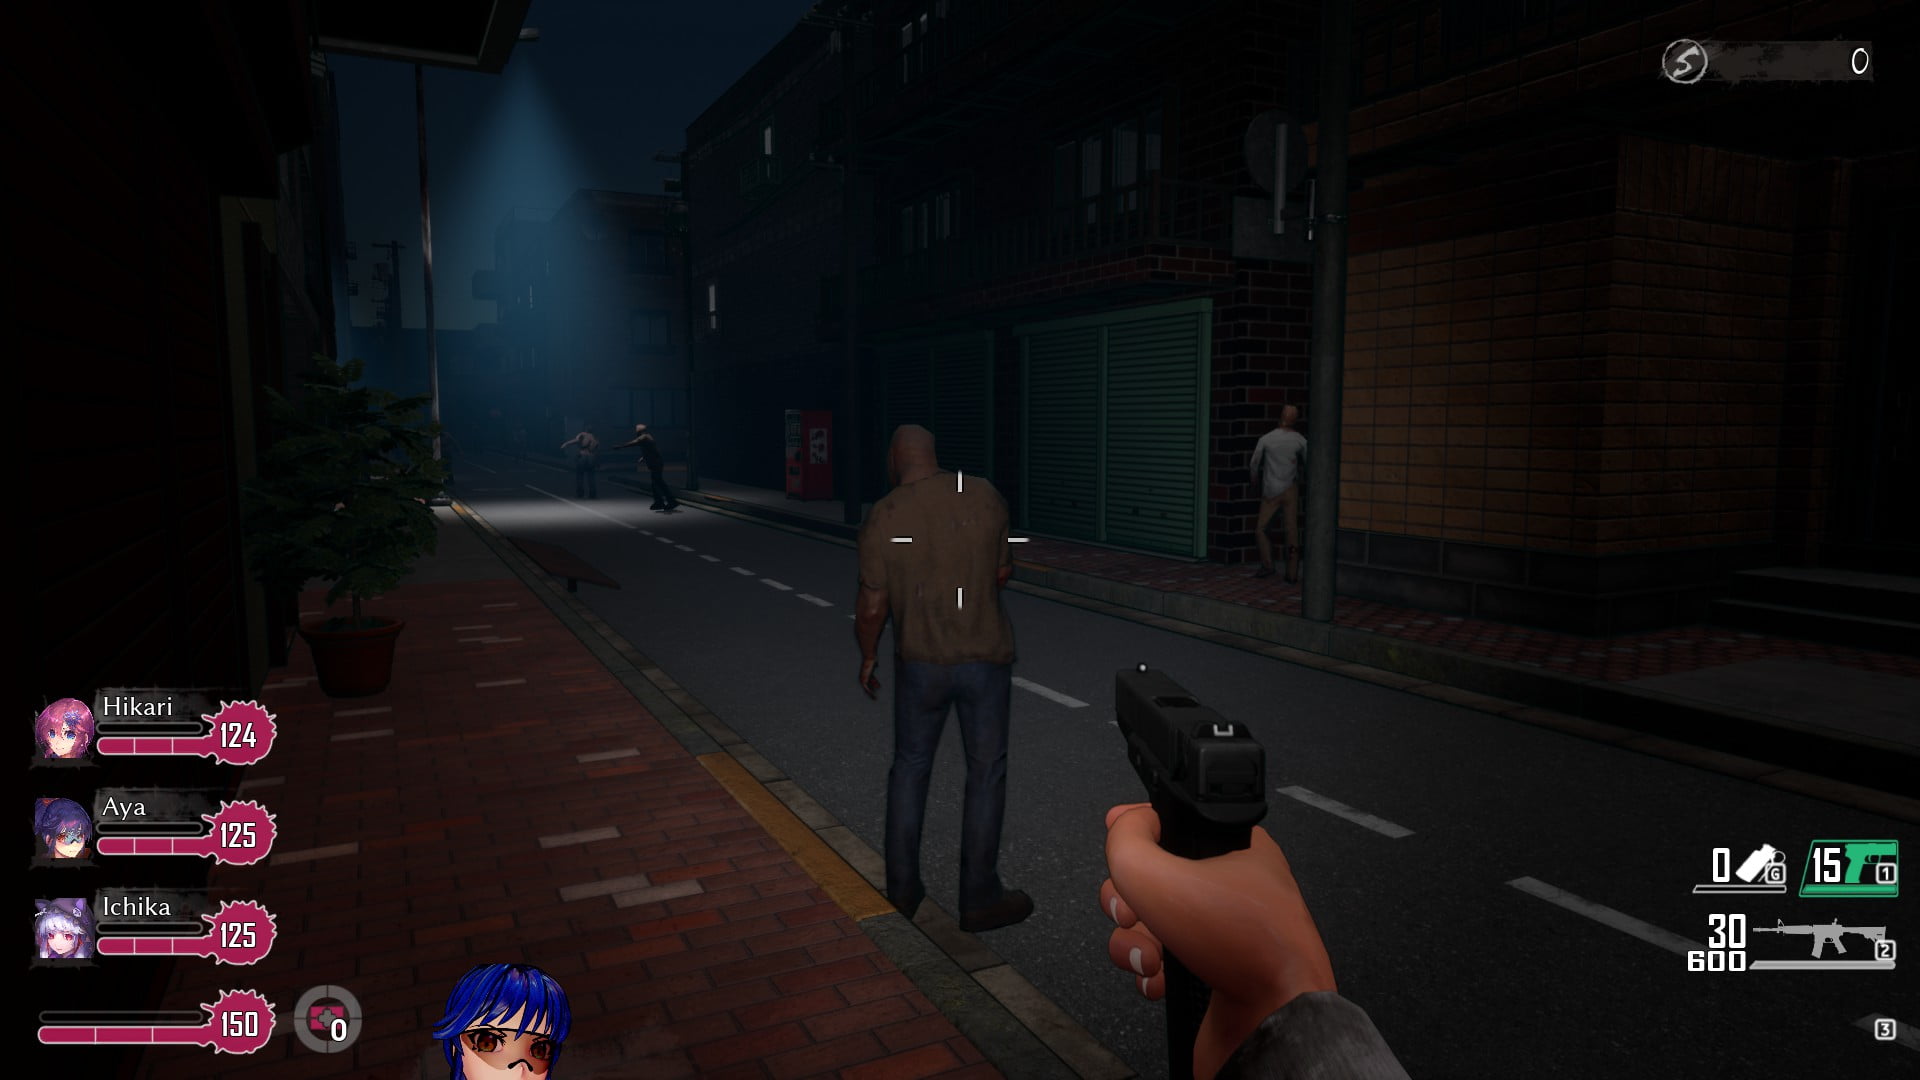
If all else fails, distance is your friend. If you take your enemy out before they can even hurt any of your team or just weaken them it will be a whole lot easier.
WARNING: Spoilers on enemy attacks
Please Note: This was done on the R18 patch of the game, but contains no R18 content.
HEP=Hometown Engagement Procedures
Catagories and Explainations
Rarity:
- Common: You will meet these enemies every level at every turn,
- Uncommon: You will meet these enemies every level, but not as much as common
- Rare: You will most likely meet them once or twice per level
- Exotic: They don’t appear every level
- Unique: It only has been seen once or twice, approach with caution
Risk Level:
- Cannon Fodder: You shouldn’t even blink at the sight of them
- Low: They only pose a risk if you ignore them, even then, they don’t do much
- Medium: They pose quite the danger to you team, keep a look out for them
- High: They can and will reek havoc on your team, even if your expecting them
- Dangerous: Even if you engage them first and are ready, they will mess you up
Risk to:
- Represents which team member you should pay attention to while they engage you
- Player: The Player themselves
- The Team: Your team, excluding yourself
- Everyone: Doesn’t matter who it is.
- Character name: This particular person has a increased risk to said enemy
Why?
A explaination on why said enemy is the biggest risk to someone.
Tactic:
How I engage them
Weapon:
- What class of weapon you should use
- PDW: V014, AP5, SMG90, Battlehawk, Backup Pistol
- Assault: KA47, AR4, N90, Phantom,
- Close Quarters: Shot12, Moss500, MAS12
- Heavy: Grenade Launcher, Rocket Launcher, FlameThrower, Grenade and Sub-types
- Sniper: SKS, CM200, Pulserifle
- Melee: Denma, Katana, Chainsaw, AscSword
(Note: If you disagree with the catagories I put weapons in, please KINDLY inform me. Toxicity will be ignored)
(Also, the Battlehawk is in the PDW catagory as it does one tap and have range like a sniper, but the lack of a scope and the kick hurts it’s accuracy greatly. Making it only effective at mid to close-range)
Z
Rarity: Common
Risk Level: Cannon Fodder
Risk To: Aya
Why?: Aya has a habit of charging enemies when she spots them.
This is an issue as she can often attract a bunch of them to her location, causing them to all pile onto her. Z’s are most powerful in numbers, just like real zombies. In addition, if they surround her, she will be unable to clear them quick enough to avoid taking heavy damage.
Tactic: Use a sniper rifle or Assault weapon to pick one off from a distance. Expect that when you kill one, those around will agro and charge you. Engage them as they get close.
BUT
If Aya decides to push a Z and agros a bunch of them, move up quickly to assist her. Moving up will allow you to use a grenade, PDW or Close Quarters weapon effectively and brings the rest of team into engagement range.
Weapon: Sniper, Assault, PDW, Melee
(Note, it’s over kill to use heavy weapons single Zs)
It’s a shame that we cannot save them, but we have to do what we have to do -Hikari
I wish it wasn’t this way. Maybe someday we can progress the Vaccine more. -Aya
Do I really have to comment of this? Ugggh, fine. I enjoy killing them the most. Now get out of my way you monkey. -Kirara
Z Horde
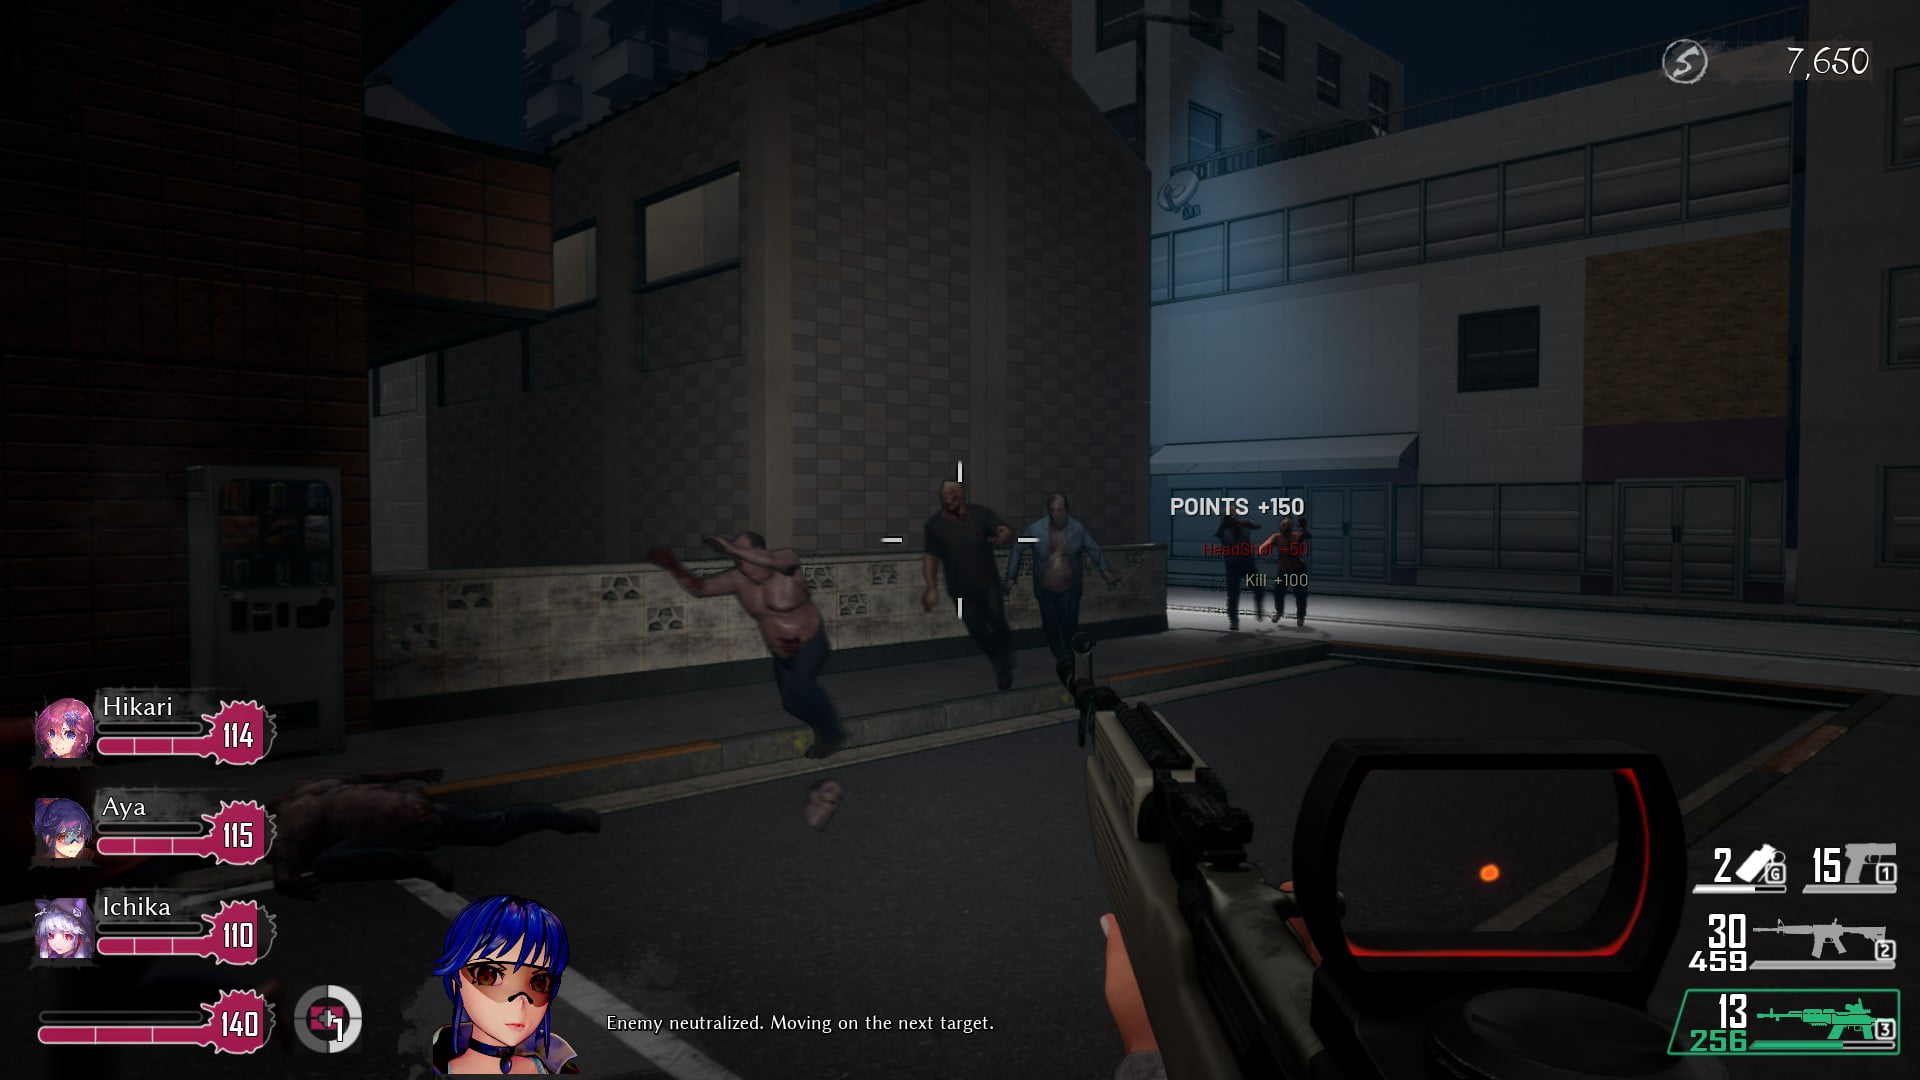
Rarity: Rare to Exotic (I have a hard time telling which one it really is)
Risk Level: Medium
Risk to: Everyone
Why?: The sheer number of Zs that charge you can quickly overpower even a preped team.
The tend to pile onto a target and surround them, making nearly impossible to disengage or reach a ally in distress. Plus they can do massive damage.
Tactic: There is a loading screen tip that advises you to form up when you hear the warning call of a approaching horde. This is best way to deal with them. Stay close, and keep your head on a swivel to see if any Zs are flanking you or overwhelming a teammate.
Weapon: Close Quarters, PDW, Assault, Heavy
Note: I believe there are set points on a map that trigger a horde. The trigger will engage if you attack a enemy in it. When this happens, all spawned in enemies will be agroed and will charge to your location. In addition there is a set amount that will charge too, and if the spawned enemies are below this amount, it will try to spawn more just outside of your sight.
Also, most often Mutants will spawn with a horde. Keep an eye out for them, as often they will spawn behind your team.
Guns up team, we have company -Aya
Time for you boys to meet the same fate my father did -Kirara
Creaper
Rarity: Uncommon
Risk Level: Low
Risk to: The Team
Why?: The creaper’s lunge attack can pin an unsuspecting teammate, rendering them unable to escape without outside help. In addition, they cannot pin the player, but if they lunge though you, they will damage you, and if a teammate is behind you, pin them as well. They also tend to attack teammates falling behind.
Tactic: Stay alert to your teammate’s calls. If they say something along the lines of, “No, get off of me!” or “So powerful” spin around and locate said teammate quickly. They will be highlighted. Then mag dump into the Creaper, aiming for the head.
If they haven’t pinned an ally, aim for the mouth of the Creaper, while avoiding crossing the line of fire of your teammates.
Weapon: Any will do, but PDW do the best against them.
Just like the ones from the before time. Non-consensual and ugly as! -Kirara
My god Kirara, can you not curse on official guides. -Training guide writer Trainman
Creaper? Like the one from minecr—- oh. They’re not. 🙁 -Ichika
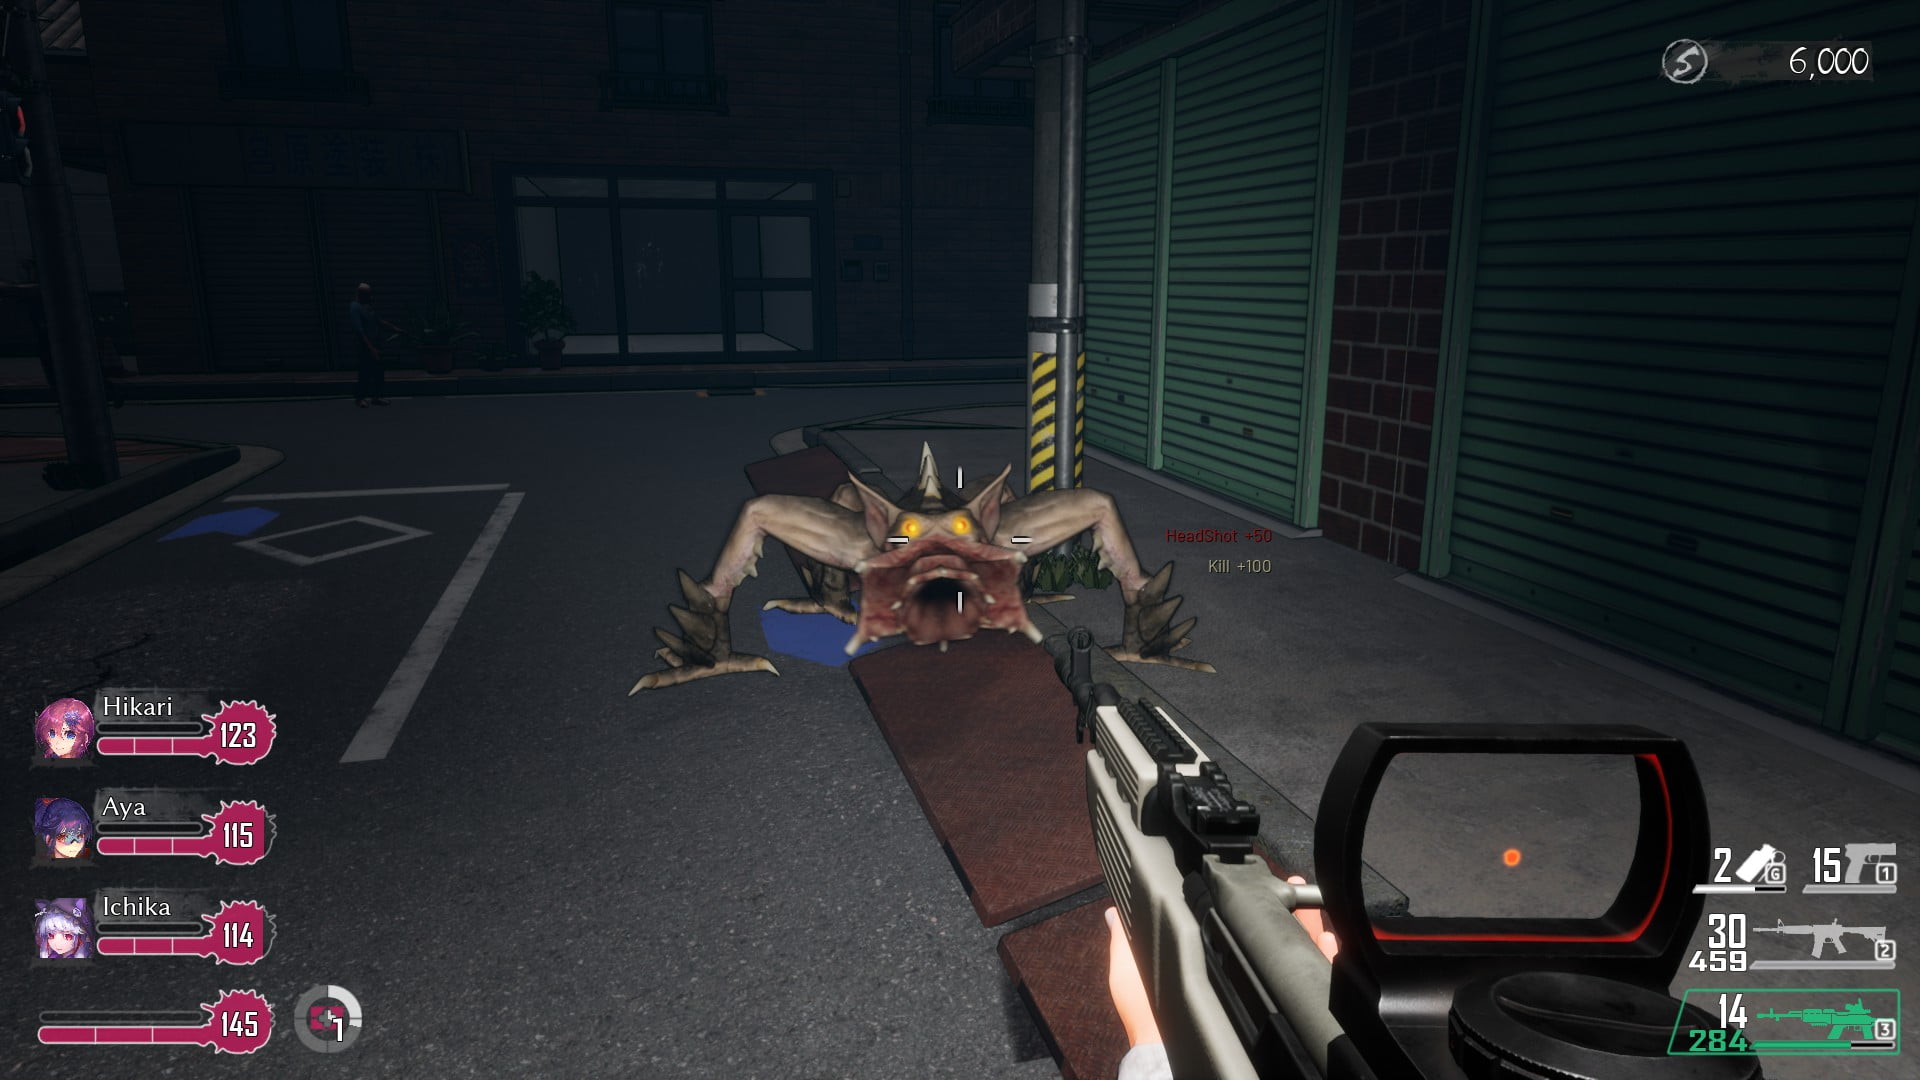
Worm
Rarity: Uncommon
Risk Level: Medium
Risk to: Everyone
Why?: Worms are quite easy to take out when you have a direct line of sight.
The issue is then they aren’t. Because they can spawn smaller babies out of the their mouth, they are content to just sit around a corner, sending them your way. Since the babies explode they will do major damage to the player and teammates alike. And if your teammates have no line of sight to them, they will not react at all to it. This is also why they are rated Medium Risk Level
Tactic: If out in the open, just shoot. Doesn’t get as plain as that. The mouth is considered it’s head, aim for it. After it’s dead, take care of it’s children.
If it’s behind a wall, you still don’t need to charge it if there is a bigger risk to yourself or your teammates. But, if it’s just Zs or you have taken care of the rest, push around the corner and dispatch it.
Weapons: Assault, PDW, Sniper
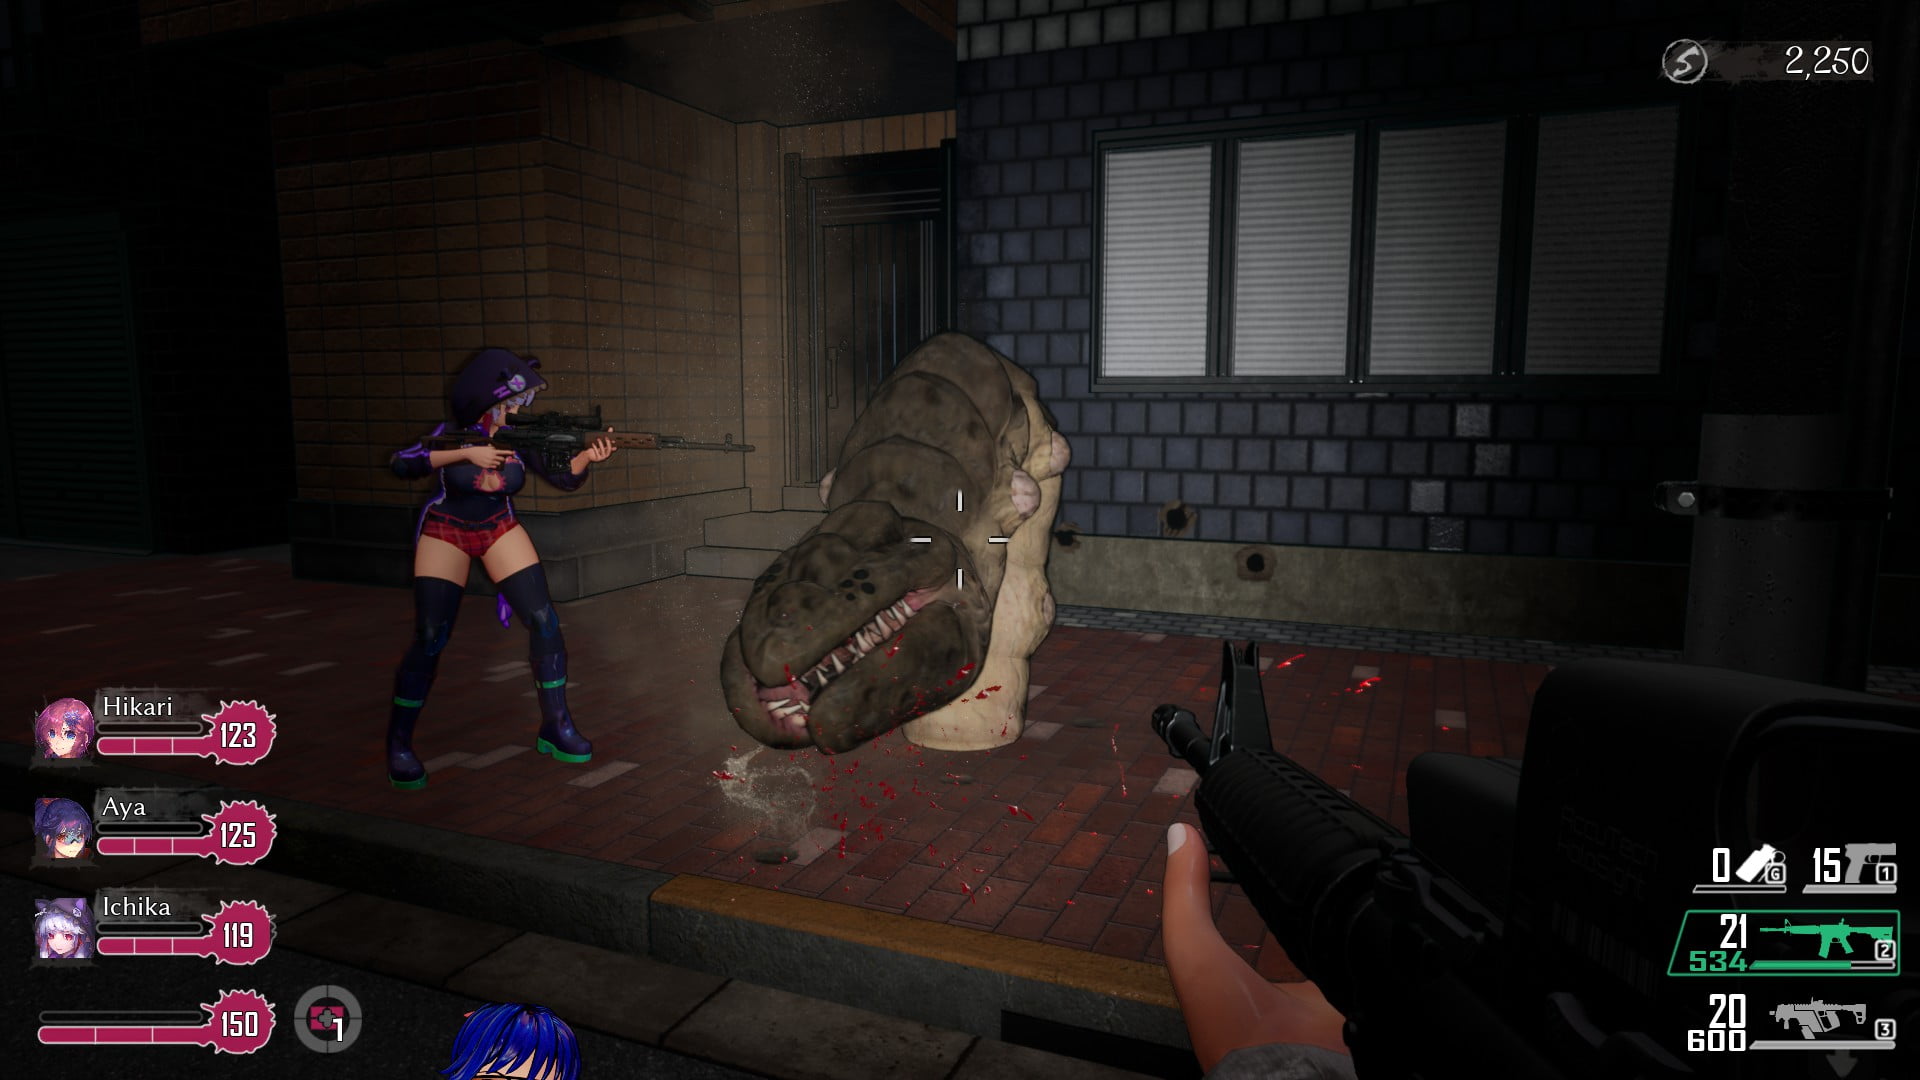
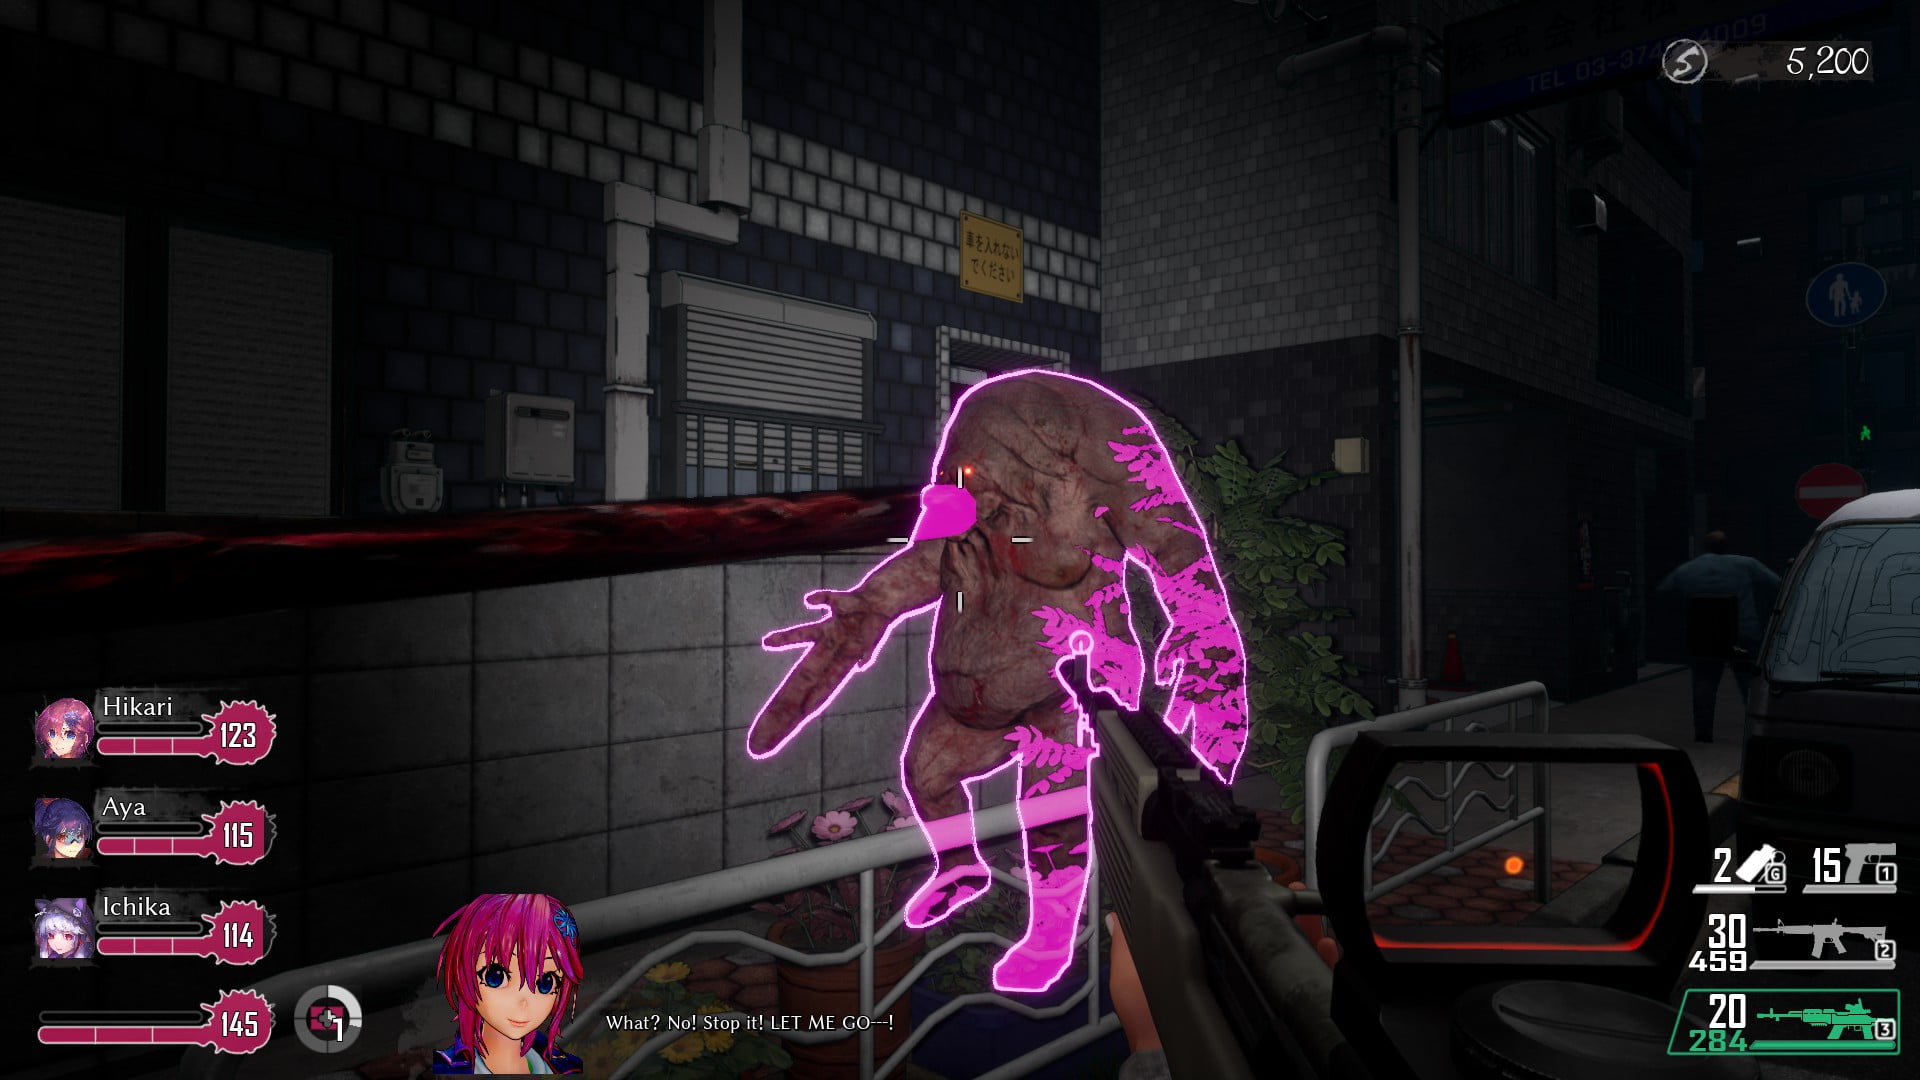
Butcher
Rarity: Uncommon
Risk level: Low
Risk To: Everyone
Why?: They are basically a stronger Z, but not by much. They do have a grab attack like all Mutants do, and can grab both the player and a teammate.
Tactic: Keep away from it and shoot if from a distance. Don’t let it grab you.
If it grabs a teammate, quickly close and mag dump into it’s head.
Weapon: PDW, Assault, Sniper, Close Quarters
Watch out for this one. He is quite aggressive and seems to never tire -Hikari
TehepreoMan
(Note: This is an example of the outline/highlight you should be looking for when an enemy has grabbed a ally)
Rarity: Uncommon
Risk Level: High
Risk To: The Team
Why?: This guy’s grab is nothing to scoff at. With a long reach, it’s basically a smoker from Left 4 Dead. He will stick in the backlines, attacking from a distance. Once he grabs a teammate, they are left to his whims. They will begin dragging them in, and once he completes his grab, he will start doing quite a bit of damage to the the teammate. This, in it’s self is not enough to warrant his risk level. It’s the fact that his grab is his main attack. If it connects with a teammate, they will always need help. Finally, if it’s attack connects and your running R18 version, you will see more of said teammate (And as horny as I am, I don’t wanna see my heroines being touched by that)
They also, (like most mutants) attack from behind, making the last person a major target.
Tactic: His attack is very audible on the battlefield. It sounds like a smaller dog’s growl. Listen for this sound. Also, pay attention to your teammates. If they say something along the lines of, “It’s so slimey. Gross!”, begin searching for them ASAP. If you spot one in the field of battle, put yourself between your teammates and the TeheproeMan. His attacks cannot grab you and stop at you.
Then aim for the tongue, it very quickly dispatches them. Make them the priority target, even if a Tintan appears, as it only takes one attack to hit to be down a teammate.
Weapons: PDW, Assault, Sniper, Heavy, Close-Quarters
He does what? Gross. Who the hell even has a tongue that long -Aya
ZBBA
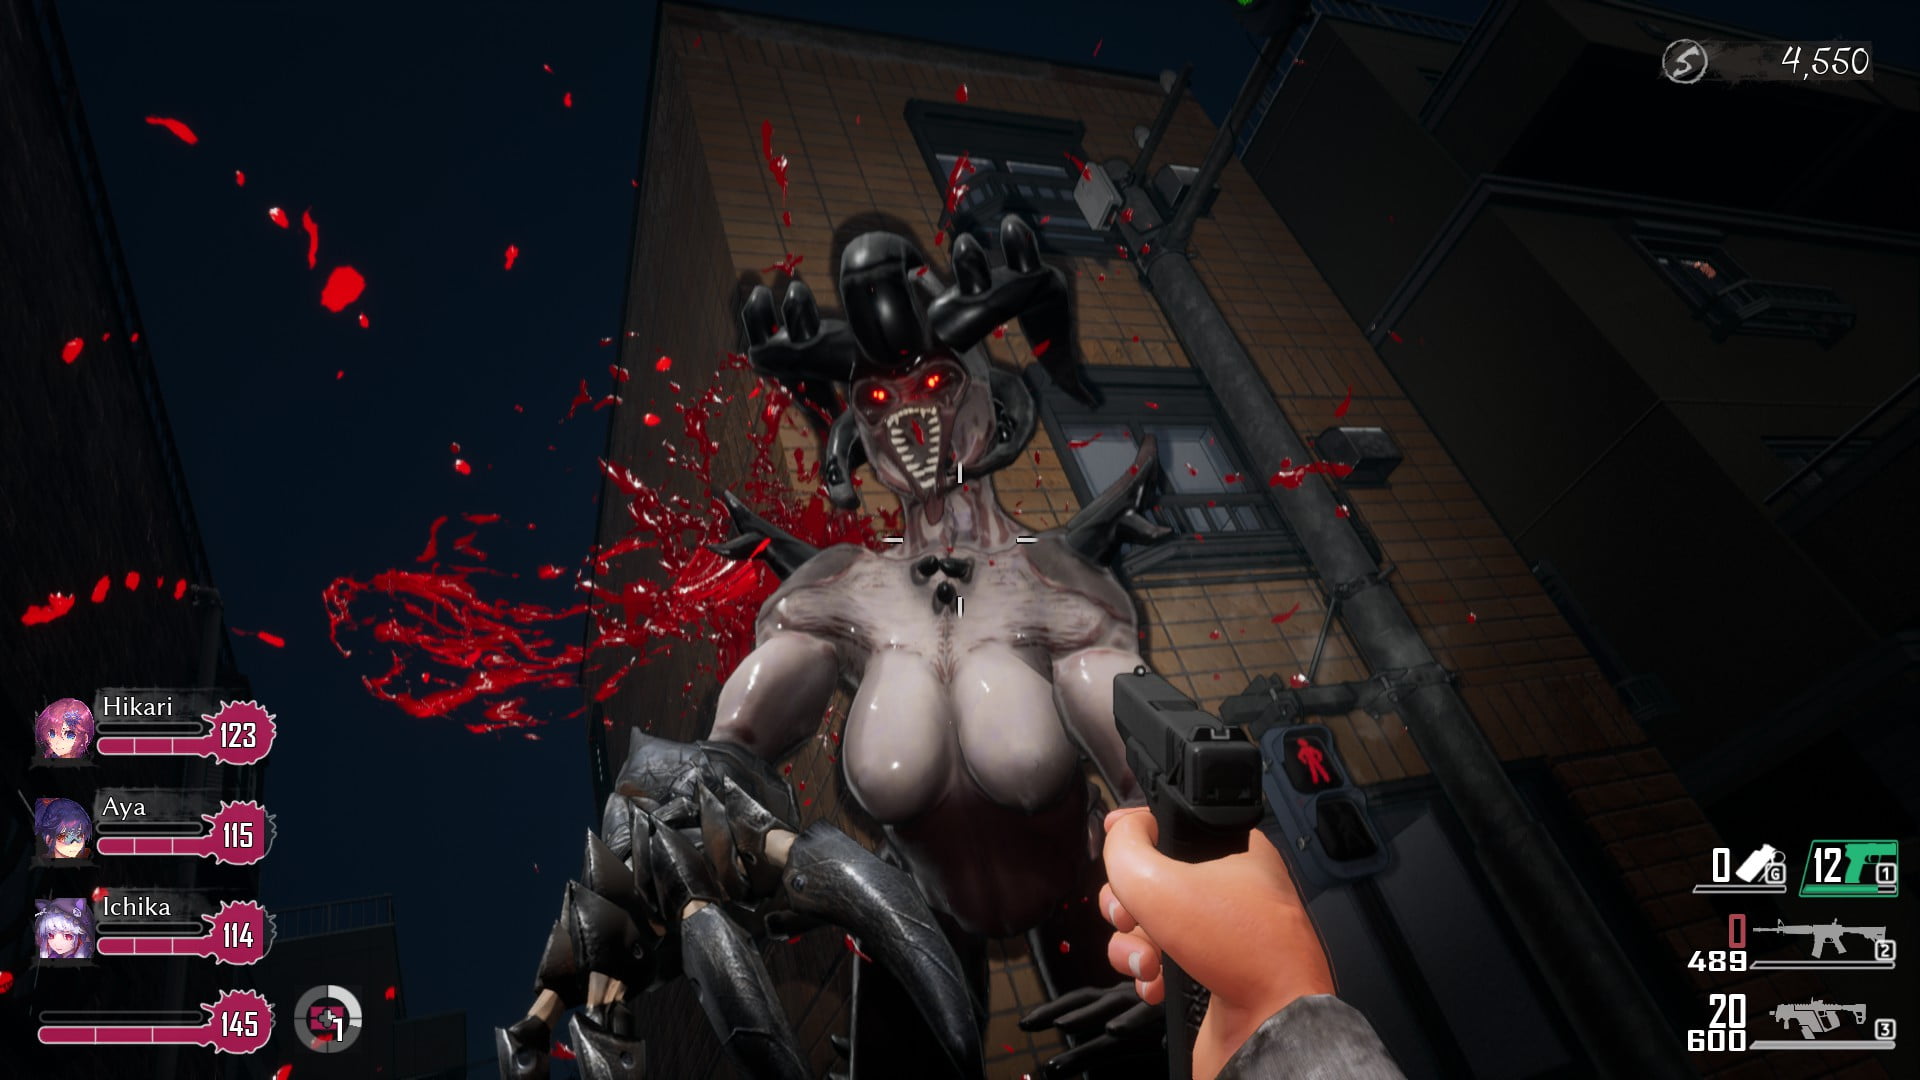
Rarity: Rare
Risk Level: Medium
Risk To: The Player
Why?: ZBBA is a female Z. A powerful female Z. According to the in game loading screen tips, they actively search out human males to mount and rape. In game however, this doesn’t seem to be the case in game, as she will just attack who ever is closest to her. Either way, she is a medium risk to the player because of her grab. She cannot grab any teammates, but she can grab you. When she does, she mounts you and will begin raping you. Your unable to move and are forced to the Backup Pistol. She does about 10 damage every time she “goes down” ( ͡° ͜ʖ ͡°). While you team is grouped together, she isn’t much threat. But, throw in any other mutants, and the risk spikes massively. Mainly because if you need to assist a teammate, you will have to kill her first. Which is quite the task if she is full health.
Tactic: Upon seeing a ZBBA, quickly fall back into a protective circle with your team. This is case her to either,
A) Change Targets
or
B) Be put in the crossfire of your teammates.
She also moves fast, so be ready for that. Weapons with a high rate of fire and large magazine work well.
With your team behind you, she isn’t as much of a threat. But be warned, don’t let the horny effect you. You have CG’s with the girls, masterbate to that. She’s crazy.
Never stick your in Crazy
Weapon: PDW, Assault, Close Quarters
She has better luck with guys than Ickika -Kirara
I’m beginning to think it was a mistake asking you to comment, Kirara – Training guide writer Trainman
Tintan
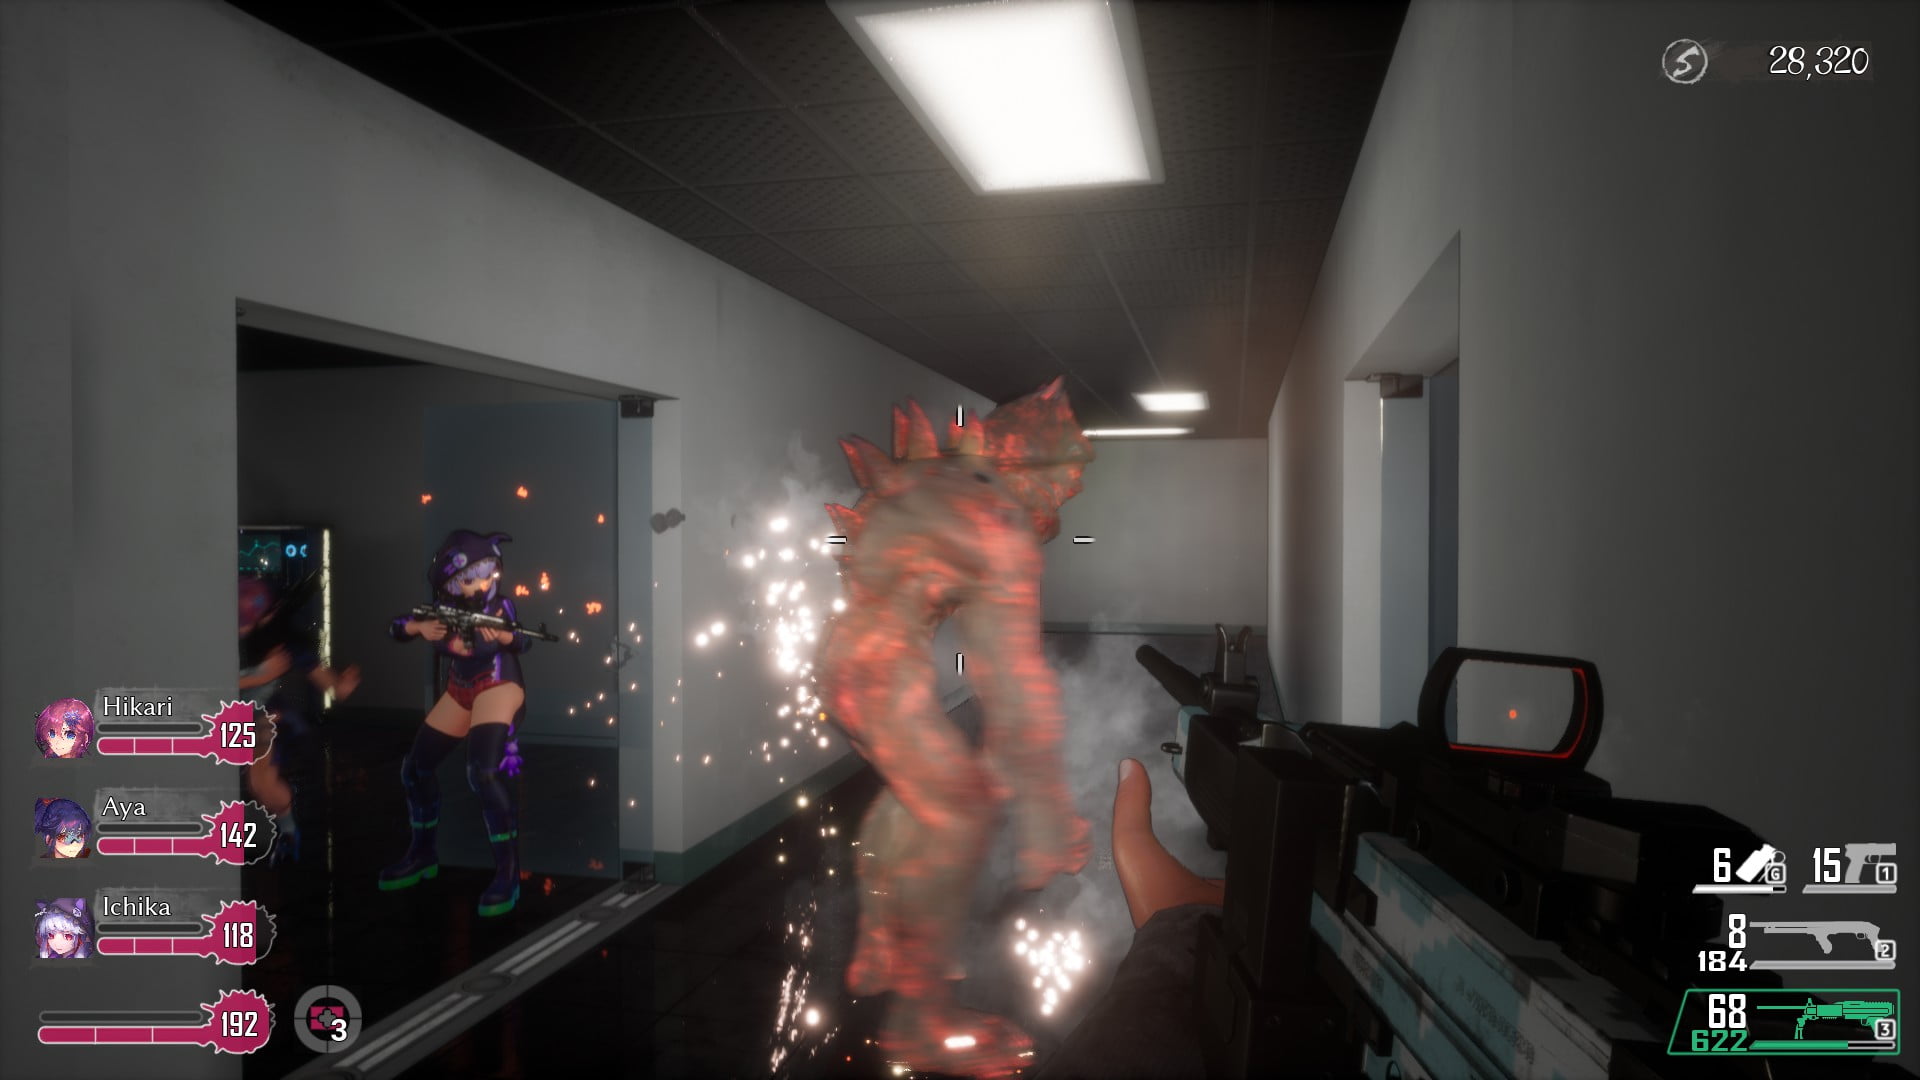
Rarity: Unique
Risk Level: Dangerous
Risk to: Everyone
Why?: This guy can be considered a midboss of sorts. Incredibly high health combined with some quite high damage can quickly demolish your team. He also ONLY attacks one person at a time, making hard to give relief to someone being attacked by him. Then once you do enough damage to him, he will become enraged. Causing his damage to spike even higher.
Tactics: This guy is your highest priority in a fight. Mag-dump your highest damage gun into him and if said gun is either Close Quarters or Heavy, reload, don’t switch. Keep doing this until he goes down. In addition, if you have a shotgun or melee, get right up in his face and keep firing. He must go down ASAP!
Weapons: Melee, Heavy, Close Quarters
Few teams have survived an encounter with this enemy. This enemy is believed to be largest reason why a lot of survivors died before the vaccine was developed. And even after that, a few of our teams that have gone missing are believed to have been killed by them. Call for immediate assistance if spotted. -Aya
Tintan Juvenile
Rarity: Unique
Risk Level: High
Risk to: Everyone
Why?: A weaker version of the Tintan, he is smaller and more green in color. Still, he is a Tintan, and he comes with higher health than your normal butcher. Fail to notice this guy and he will take your team for a loop. He also has the same agro power as a adult version, boosting his damage. So watch out when you engage this guy.
Tactics: Due to his lower health, tactics related to engaging a butcher apply here. If you don’t remember, it was basically shoot the ugly thing till it goes down. You should also watch your teammates, as if he gets close, he can and will do massive damage.
Weapons: Assault, PDW, Close-Quarters
Note: It’s unknown if these are Juveniles of Tintans or just a evolutional cousin. If you can even consider Z’s having a evolution. Personally though, a Juvenile Tintan was the orignal idea that popped into my head when I first engaged them, so that was the name I gave them.
Just rumors around this one to be honest. Aya didn’t want to comment until we knew more, and Hikari couldn’t spare the time for comment. And no, I’m not asking Kirara again.
-Training Guide writer Trainman
You forget that this is a piece of paper dumbass. I comment when I want, where ever I want
-Kirara