Slasher’s Keep Tips and Tricks for Beginners
The premise of the game is simple: You have to fight your way through a dungeon, Slasher’s Keep, with the floors getting more and more difficult the further you progress.
When you die, you lose 25% of your gold, levels and stats. All your carried equipment is lost, your level progress is reset to zero and you have restart your conquest again, from the beginning of the Keep.
These penalties seem large on the first glance and may demotivate a first time player.
But it shouldn’t! Because in reality, this small reset is the main component to become truly unstoppable!
With simple strategies and risk-management, these penalties can easily be turned into continuous growth.
And this guide aims to provide these strategies. Includes tips and tricks.
Table Of Contents
I. The Basics
- Getting Started!
- Your Inventory
-Combat
-Levelling Up
- The Keep: Layout and Interactables
-Room Types
-Interactables
-Shrines
- Keys
- Equipment, Potions, Trinkets
-Equipment
-Usable Items
-Crafting Components - Annoying enemies and how to deal with them!
-Ranged Opponents
-Floating Skulls
-Casters
II. Your Strategy
- Death, the gameplay loop
2.The Item Chute, or how to die
3.Levelling Up 2.0
(Coming soon, WIP)
4.The Shopkeeper
5.The Smithy - First Area Boss + Difficulty Spike
I. The Basics
While the game explains its simple controls rather well, most things have to be discovered on your own. Or with a guide.
1.Getting Started!
You start the game in your cell, on the first floor of the dungeon. To exit the cell, simply walk against the door.
In front of you, you will see a wooden chest.
The first time you open it, it will contain a random melee wepon with terrible stats and (most of the time) a random base piece of armor.
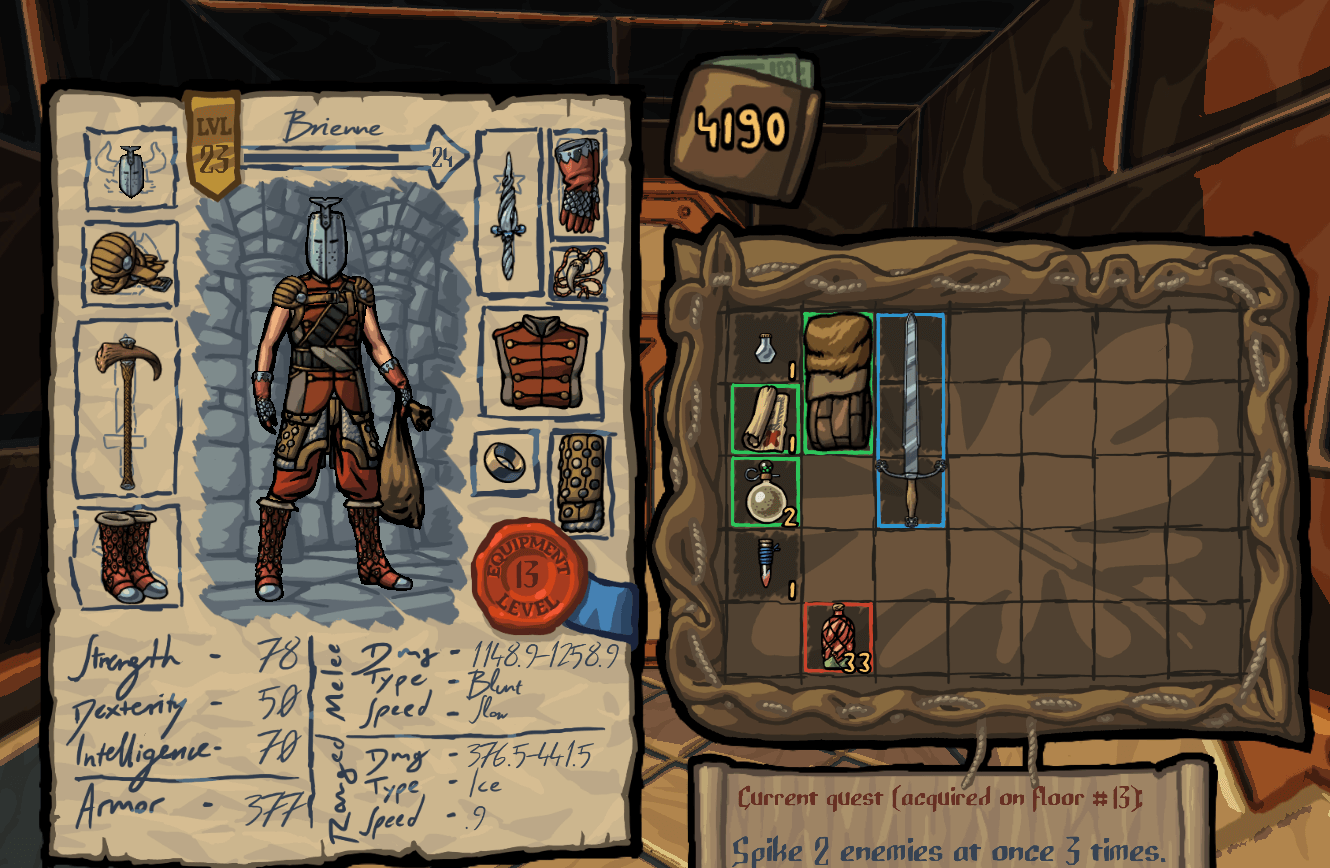
-The Inventory
To equip and manage your loot, press Tab. Your unequipeed loot is in the right window, to equip it simply click and drag the piece in its according slot in the left character inventory. To assign an Item to your quick bar (bottom of the screen), hover over the Item and press the number key you want to assign It to.
Most of the things in the Inventory window are self explanatory, just hover over the corresponding Items or stats.
-Combat:
Now that you have a weapon equipped, exit your cell room.
Slasher’s Keep is a hard game, so you should fight enemies one-on-one, at least in the beginning.
There are 2 basic main ways you can fight:
-Fight the enemies up close, parry their swings by pointing your weapon in the direction of their attack while holding RMB and swing at them when you dont parry. Simple enough.
-Kiting: My favourite method. You can charge up your attack by pressing and holding left-click.
If you press shift, you character sprints, also they can sprint endlessly since there is no stamina limit.
You can use this combo to charge an attack, sprint to an enemy, smash them in the face, sprint away, repeat. A sprinting attack gives huge bonus damage, as does a face hit.
This tactic works wonderfully with a slow and heavy weapon like a mace, since you will have more than enough time to charge up every hit.
Advanced tactics:
-Inventory sack: By pressing “F” you can swing your inventory sack at the enemy. This knocks them back and interrupts their attack.
There are many spike pillars/walls and dropoffs everywhere in the game. If you lure the enemy close to one, you can parry their attacks and then push (there is no contact damage, you can also push them slightly by walking into them.) them into the spikes/the abyss/the trap for an instant kill. This is very powerful, especially in the late game where enemies become more annoying and tanky.

-Wands: Magic wands are your ranged weapon. However, they are never a main weapon.
The ammo they consume is too much compared to their killing power, so you should use them wisely.
For example, you can use your wand to lure enemies out of a room, If you fear being swarmed. This allows you to fight them one-on-one.
Alternatively, you can use wands to kill fragile, but annoying enemies. Which enemies? You will know what I mean when you see them 🙂
But be careful! If you use your last shot with a wand, it will break! There is a perk that prevents this however, Wandslinger.
-Levelling Up
With every enemy slain and secret discovered you gain EXP. EXP scales with your level, so make sure to slay every fiend you come across!. Below your quick bar, is your XP meter. Once it fills up, you level up.
You gain:
-Every level up: 4 stat points you can spend by pressing “tab” and assigning them to the 3 main stats (If you have some available, there will be a juggling scroll left of your quick bar)

-Every second level up: A skill point you can use to permanently lock in a skill. You open your skills by pressing “B”. (If you have one available, there is a juggling book on the right side of the quick bar)
How to get get skills to invest points into?
You get a random non-permanent skill on every second level up where you dont get a skill point. However only on levels you havent reached before. Also there are often bound skills to weapons, armor or equipment.
This is very important to do. Since you can lose your equipment on death and you will lose all non-permanent skills on death, you should lock in the skills you want to level, or rare skills like “Deflect”, or “Golden tongue”. But you will figure this out yourself.
Just remember, Locking in a skill is not always better than investing a point in an already locked skill. Skill levels make the ability stronger and a powerful ability should be invested into.

2.The Keep: Layout And Interactables
-Dungeon Layout
Here, I will briefly describe all relevant room types in the game.
-Basic Room
A basic Room. almost always contains some enemies, but it doesn’t seal the doors when you enter it.
You can see which rooms will be seales if you look at the top of the doorway before entering (see challenge rooms)
-Challenge Room
A room with enemies like the basic room, however this room seals itself shut once you enter and doesn’t open until you kill all opponents. You can see is a room is a challenge room or not by observing the ceiling in the doorway before you enter.

-Ladder Room
Small room that contains a ladder that leaads to the next level. Is often locked by a gate that requires a silver key. Is markes by a green arrow pointing upwards on the minimap.

-Secret Room(s)
Only available once you press a red button (marked on the map as a red button, thank god), operating a pulling mechanism(not on minimap), or lighting all torches (appear on minimap, only found in second area). There will be a message “you hear the sound of machinery” and if it was a hidden door a tunnel icon will appear on the map where the door to the secret area opened, otherwise you have to search for the activated secret.


-Spike Roof Room
You will encounter this room only in the second area. I was nervous the first time I saw it and didn’t know what to do, so I wanted to include it here. The floor of these rooms is a pressure plate. While you are in the room, the spiky roof descends to impale you, slowly. This room is basically on a timer.

-Shrine Room
A room with a shrine. More on that later.

-Smithy
A room with a smithy. More on that later. Also, there is always a small chest in the smithy with two crafting components. Be sure to open It! Marked on the map with an anvil.

-Shop
A small room with the shopkeeper. Can’t be robbed, damaged, only interacted. More on that later. Marked on the map with a coin Icon.

-Interactables
Many Items in the dungeon can be interacted with, or destroyed. You can interact with an item if you see two clockworks symbol.
-Food
You will find food in the Keep, more on the first levels, less on the higher. Eating Food regenerates a percentage of your health, while drinking restores a portion of your wands charge. Maggots count as good food, spiders as spoiled.
Be careful to not eat spoiled food! It reduces your HP!
-Pots
Pots are everywhere in this game. They can contain: Nothing, a Potion, a ring/amulet, money, usable items. You should break every pot you see.

-Potion crate
A tall crate with a potion symbol on it. Smash it with your weapon to get the potions and food inside!

-Explosive Barrel
Red barrels will catch fire if you (or an exploding enemy) hit them and blow up after a short delay (faster if hit harder).

-Spilled Oil
Spilled oil slows you down and catches fire if you or the enemy hit it with fire (Burning counts).

-Treasure chests
Interact to open. Contains the best loot, stats determined by floor.

-Orbs
There are 4 kinds of one-time usable orbs: An red orb that restores all HP, an silver orb that grants you a long period of invulnerability, an Orb with crystals in it that completely restores your wands charge and a purple orb that gives you a big portion of EXP.


-Questgiver
While you explore the keep, you might hear a voice repeating a prayer. This means there is an quest nearby. Follow the voice and you will find a stone/metal face. This is the questgiver. If you interact with him, you will receive a challenge that grants a reward once completed. The reward is either an equipment piece, component, or a random non-permanent skill. If you die without fulfilling the quest, the quest is removed, but you can take another. You can only have one quest active.


-Trap Switch
Every room with an active trap that spits black fireballs, there is a way to switch it off. In the fist area it is a fusebox, where you have to smash the lock, then activate the switch inside.


-Item chute
One of the most importnt interactables. The items you drop in it all spawn in the chest outside your starting cell. This is one of the main ways to save progress. It is marked on the minimap as a chute.

-Save point
A pilar with a book on it. You can use it to save your progress in the middle of the dungeon and save scum. Maked on the minimap as a floppy disk.

-Shrines
There are two types of shrines that you can find in the game.
-Item sacrifice shrine
If you drop an Item on it with “green” or higher rarity, it will exchange the item for another item of the same, or lower, rarity. It often drops consumable items, however Equipment and crafting components are also possible. If you drop a “grey”/common item on it you will receive damage and will be granted nothing.

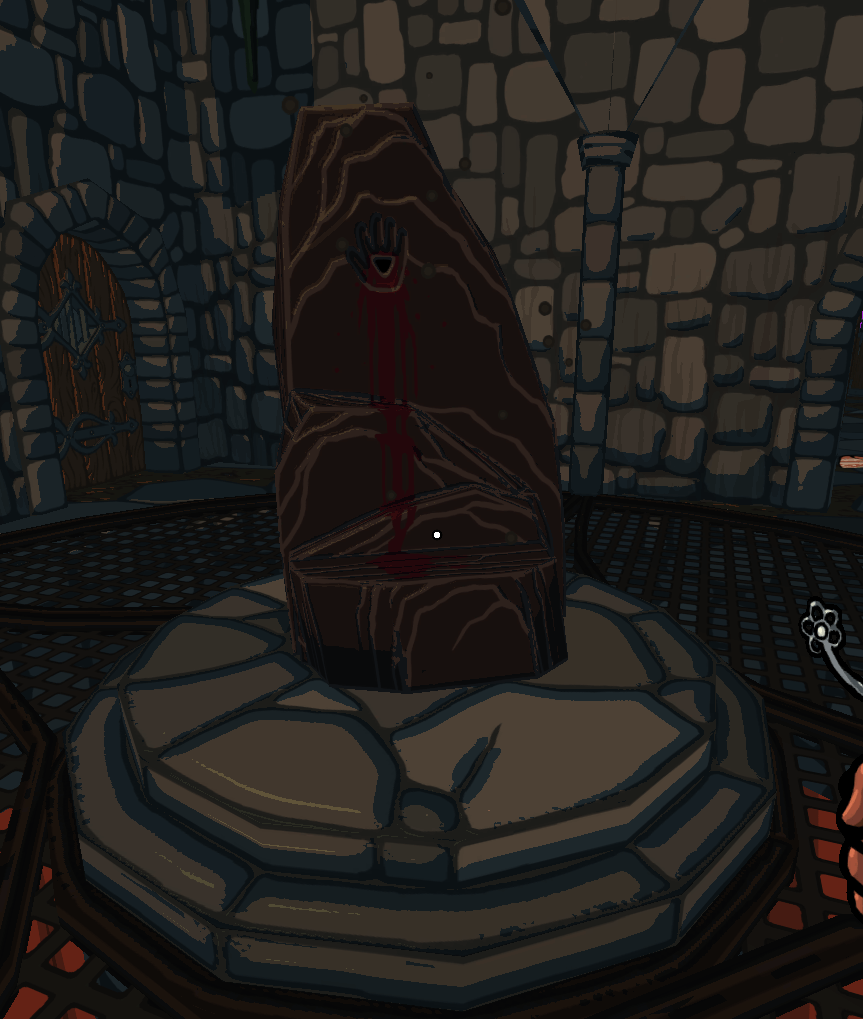
-Blood sacrifice shrine
I havent figured out how this works, yet. The first time ive used it, it gave me a random non-permanent skill for max HP. However the next time I used it, It just took away 15% of my max HP. Would appreciate If someone knew the details, will update this then.
-Keys
There are two (technically) types of keys you will encounter.
-Silver key
You often need to open the locked gate to the next level with this key. It spawns randomly:
-Loot from the Armored Goblin miniboss.
-On a random enemy in the dungeon.
-Has to be reached by solving a (platforming) puzzle.
The silver key is markes as a silver key on the minimap once youve been in the room it is in.
-Copper key
Unlocks closed optional gates, that contain loot and give XP upon discovery. Dropped by a random enemy and is not marked on the minimap.
3. Equipment, Potions, Trinkets
One of the main ways your strength scales in this game, is equipment. You should always try to keep yours up to date. A rough estimate on the quality of your loadout is the “Equipment level” symbol on your character sheet.

For example a level 11 “Equipment level” means that your Loot has the combined quality of an expected floor 11 loadout.
This also is an indicator that the current floor is too hard for your current abilities! You should think carefully about going to the 6-th floor for example if your “Equipment level” is just at level 4!
-Equipment
Your equipment decides your strength and survivability.
This game hugely favors offense over defense, so you should adjust your priorities accordingly.
This means the most important piece is of course your melee weapon. You can always avoid getting hit, but defeating your opponents is a must. Every weapon type is balanced, but there are cases where some are better than others.
-Maces: They are slow, but hit hard. If you kite your enemies and always charge up your weapon, this is for you. (Special Skill “Mace Knockback” which surprisingly knocks enemies back)

-Swords and daggers: Quick, but weaker weapons for quick slashes inbetween parries, or quick power attacks. Also can decapitate. (Special skill “Lunge” which grants a huge damage bonus when using the lunge power attack, “Sword Speed” which grants faster sword swing speed )

-Axes: A mix between both extremes. Can also decapitate. (Special skill “Whirlwind strike” which allows a heavy rotating attack with the axe for bonus damage.)
You dont have to specialize in a particular weapon, however it would be a waste to use maces when you invested heavily into lunge, for example.
-Usable Items
“Potion seller! I require only your strongest potions!”
There are many usable items in the game. To know and use them efficiently is the key to sucess.
-Health potions: Found in Pots and potion crates, sold by shops, dropped by enemies, received from shrines, found in treasure chests. Consume it to recover HP instantly. The higher your level, the better the Health Potions that are dropped.

-Invulnerability potions: Self-explanatory. You should always have one bound to your quick bar, as a last measure rescue. Dropped by everything that drops Health potions.

-Wand ammunition: Purple crystals. Like Health potions, they scale with your level. The higher your level, the higher the likelihood for a good ammunition drop. Dropped by everything that drops health potions and sold in shops.

-Crudely drawn map: Reveals notable locations (like Shops) you havent discovered on your current floor when used.

-Skill potions: Rarely drop from enemies and sometimes found in potion crates. Gives a permanent skill increase.
-Bombs and other throwable Items: You can bind bombs to a hotkey and throw them into a group of enemies where they will explode with a delay. The damage of bombs and similar weapons scales with the floor you are on. So they are always an effective tool.


-Weapon oils: Give your hits a special effect for a limited amount of hits.
-Enchantment scrolls: Rare drop from treasure chests and enemies. They provide additional permanent Stats/Skills on the item they are used on. Click on it from your inventory to activate it, then click on the Item you want to enchant. Tip: Find a good ring, then dump all your enchantment scrolls onto it. Rings don’t scale as severely into infinity as other equipment does, so you will get an amazing powerful ring over time (as long as you don’t lose it).
-Crafting Components
Crafting components are used to create custom weapons. They can be found randomly almost in everything that drops something, also in the shop. Your first playthrough crafting will almost certainly be never worth it/possible, so dont worry too much about them on the first playthrough.
If you want to craft anyway, gather components with powerful effects (Plain components are a waste) and use them once you can fill all your slots for maximum effect (Also, number of maximum component slots can be increased by the “artisan” skill).
There is also the skill “Scavenger” that allows you to destroy corpses for a chance of a component and the skill “Master Disassembler” that allows to disassemble melee weapons at the smithy for a chance of good components. Lock and level them for long term benefits.


4.Annoying Enemies and How to Deal with them!
Some enemies are a constant source of frustration. Nothing makes your blood boil like getting 2-shotted by a caster in the deeper levels, just because your weapon does not deal enough damage to interrupt his shot 😛
-Ranged opponents
Casters and moths. They are one of the biggest burdens for a new player, mostly because one does not yet have the experience, or tools to effectively deal with them.
Introducing: Deflect!

I dont understand why this is an ability and not something you can always do. This allows you to block and reflect all projectiles and makes fighting against ranged enemies much safer and less frustrating. A godlike skill!
How do you obtain this skill? Look for equipment enchanted with it, check out shops, hope you roll it as a random skill on level up. But once you have it, you must lock it in with a skillpoint. The first level alone is all you need.
Alternatively if you are unlucky in your search for “Deflect”: If you see too many enemies combined with a ranged unit, lure them out by shooting them from outside the door with a wand. they will aggro and run outside the room and you can deal with them without being harassed by the shooters.
-Floating Skulls

There are 4 types of those:
-Ones that ram you every once in a while, just dodge and smash them
-Ones that shoot you twice with a fireball and then try to smash you, just dodge and smash them
-Skulls that shoot purple spells and never try to ram you
-Skulls that drop blobs of acid
What to do about the last two? Shoot them? What if you dont have enough ammo?
If they float in an unreachable position, there will always be a “charging station” where the skulls periodically float to refill their acid/dark energy.

If you smash the acid orb/dark crystal, the skulls will be defenseless after they use up their remaining charges. They will then float to the broken “recharge station” and you can smash them with no danger! EZ!

-Casters

There are 5 types of casters:
-Green purely ranged caster
-Blue Healing caster
-Blue Buffing caster
-Blue Fire summoner
-Blue Ice beam caster
Out of these, the healing caster is the most dangerous one. While he heals other enemies, they are practically immune to everything that does not kill them in one hit.
So you should do one of this:
-Rush him and give him a charged mace to the face
-Lure the other enemies out of the room by using a wand, so he has noone to heal.
-Use spikes, dropoffs, traps, explosive barrels to kill them instantly, negating the healing advantage
The other casters can be dodged with some practice, the key is to continually move.
II. Your Strategy
The game is 50% skill, 50% stats. The gameplay loop is designed around death, even permadeath mode allows you to return to the first floor, otherwise it would be impossible to reach the goal. So it’s not your fault if you are getting curbstomped by the higher floors. Its supposed to be like this.
But then where is the strategy? You can also decide when you die.
1.Death, The Gameplay Loop
With each death, you lose 25% of all stats, money, levels and also completely lose your items and accumulated XP to the next level. You also lose all your unsassigned statpoints, so don’t try this.
Sounds rough. What do you get to keep?
-75% of your stats, money, levels
-Items you threw into an item chute before you died (more on that in the next point)
-Your permanent skills
Invested skillpoints never disappear, which allows you to continually develop your build even if you die.
“So what”, you might ask. “Ive seen the skills! They are small percentages, how is “+0.4% life steal on hit” going to help me survive the floor where everything one-shots you!”
This is not entierly wrong. That’s why skill manageent is one of the most important aspects of growth in this game.
You have to look for good skills on equipment, on level ups, as quest rewards and quickly lock them in to secure them.
Lets look at what 4 skill points (8 level ups) can accomplish when used on great skills:
Skill point 1: “Golden Tongue”, First item bought in a shop is free, resets every floor.
Skill point 2: “Deflect”, You can block all incoming projectiles with the parry button.
Skill Point 3: “Improved Sack Smack”: Your sack smack knockback is much stronger and deals damage.
Skill point 4: “Pyromastery”: Every fifth hit, you deal 600% of your current extra fire damage, also set foes on fire if you have the skill “Pyromancer”.


With only 4 skill points, you have the following:
-You can spend all your money on potions/ammo, since shops often only have one piece of equipment you want to buy.
-Ranged enemies become a joke
-You can more easily one shot annoying enemies by smacking them across the room into spikes
-Fire damage is now actually good
Of course this is an ideal situation and most of the time you can count yourself lucky if you run across one of these skills early on. But these are only an example. Skills are powerful and with the right skill combination the game becomes much easier.
2.The Item Chute, or How to Die

The Item Chute.
It starts to appear on the second floor and on every floor thereafter.
It is the main component to your long term sucess and enjoyment of this game.
What does it do?
When you interact with it, it pulls up your inventory. You can then right-click on items, they are then thrown in the chute.
Everything you throw in the chute will spawn in your starting chest. The chest in front of your initial cell. Amazing!

What is the optimal way to use it?
It depends. There is rarely an optimal way when it comes to risk-reward calculation.
Personally, I like to play it safe. Once I reach a point where enemies drop me in one or two hits and I cant reliably kill the in one or two hits in return, I drop all my stuff in the chute and let myself be defeated.
However, there are several aspects that should be considered when you want to chute yourself back “optimally”
-If you are close to a level up, you should kill the last few enemies you need to gain a level. Why? You lose all your EXP progress on death. It hurts more to lose 97% than 2%.
-If enemies kill you in one hit anyway, drop all your stuff in the chute and only keep your backup weapon. This way you can still continue the dungeon for a short while and maybe find some goodies, while only losing a weapon you dont need anyway.
-DON’T FORGET TO UNQUIP AND DROP YOUR EQUIPPED STUFF IN THE CHUTE
3.Levelling Up 2.0
So again, what do you lose on death?
-25% of your money, stats, levels-All your Items-All your accumulated EXP progress
By cleverly using the chute to cut your losses you can already eliminate 2 large penalties to death.
What about the 25% loss of the aforementioned progress?
Levelling up. More than you lost.
How?

Remember the first few floors? The enemies took 3-4 hits to kill, you were slow, careful.
Now you return. Your Flame infused Dagger slays enemies in one hit. Their blows are deflected by your powerful armor, with laughabel damage numbers like 0.1 appearing when they swing at you.
“So what?” Like I said in the beginning of this guide, EXP scales with your level.
This means, that a ghoul struggled to kill at level one, will give you (almost) the same progress to your level gain now that you slay him in one quick swing.
Your level even grows faster that way.
The second enemy you kill activates a kill streak timer, with every following kill increasing the EXP multiplier and resetting, but also reducing, the timer. This scales up to a 3x multiplier on your eleventh kill.
So instead of being sad that you died, you should take your sword/dagger you thrown into the chute and start sprinting around the Floor decapitating enemies without even stopping to rack up that killstreak! It is incredibly satisfying, trust me.
So effectively, what do we lose on death?
Effectively? Nothing. The level gain you recieve while rampaging through the previous levels will always outweigh the penalty of death. Combined with the permanent skill points you get every second level, one can even say that you gained more than you lost by dying, ironically. So no frustrations. The only time you truly los, is when you get too cocky and die without saving your stuff at the chute. But the only solution for that is ALT+F4 to git gud.