STAR WARS: Squadrons HOTAS Deadzone FIX
Step By Step Guide
Quick fix. Lots of steps, but takes less than 10 minutes. This works because we remap the pitch and roll axis in game to virtual rotary axes that don’t have the 20% deadzone imposed on them by squadrons.
1) Plug in your HOTAS
2) Download VJoy here: http://www.xedocproject.com/headsoft_vjoy_1_2.exe
3) Install VJoy
4) Download Joystick Curves here: http://www.xedocproject.com/joystickcurves/setup.exe
5) Install Joystick Curves
6) Open Squadrons, set to run in a window, and make the window about half the width of your screen. Also make sure “invert flight” is turned off in control options
7) Close Squadrons
8) Open Joystick curves
9) Select your physical joystick device in the physical dropdown
10) Select physical axis of pitch
11) Select virtual joystick 1 in the virtual dropdown
12) Select virtual axis of rotary 2
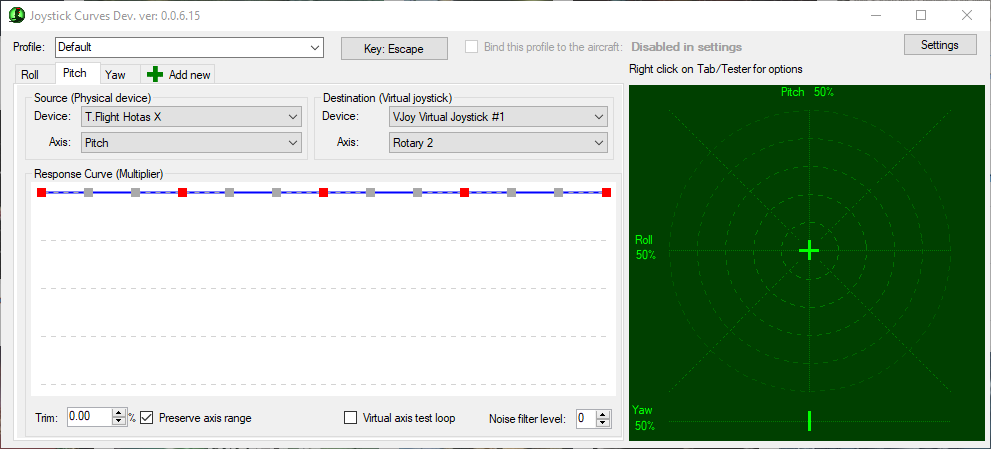
13) Click add new tab and repeat steps 9-12 selecting a physical axis of roll and virtual axis of rotary 1

14) Right click in the big green grid and under virtual pitch select rotary 2 and under virtual roll select rotary 1
15) Move your joystick around and you should see the crosshairs move around correctly
16) Open squadrons
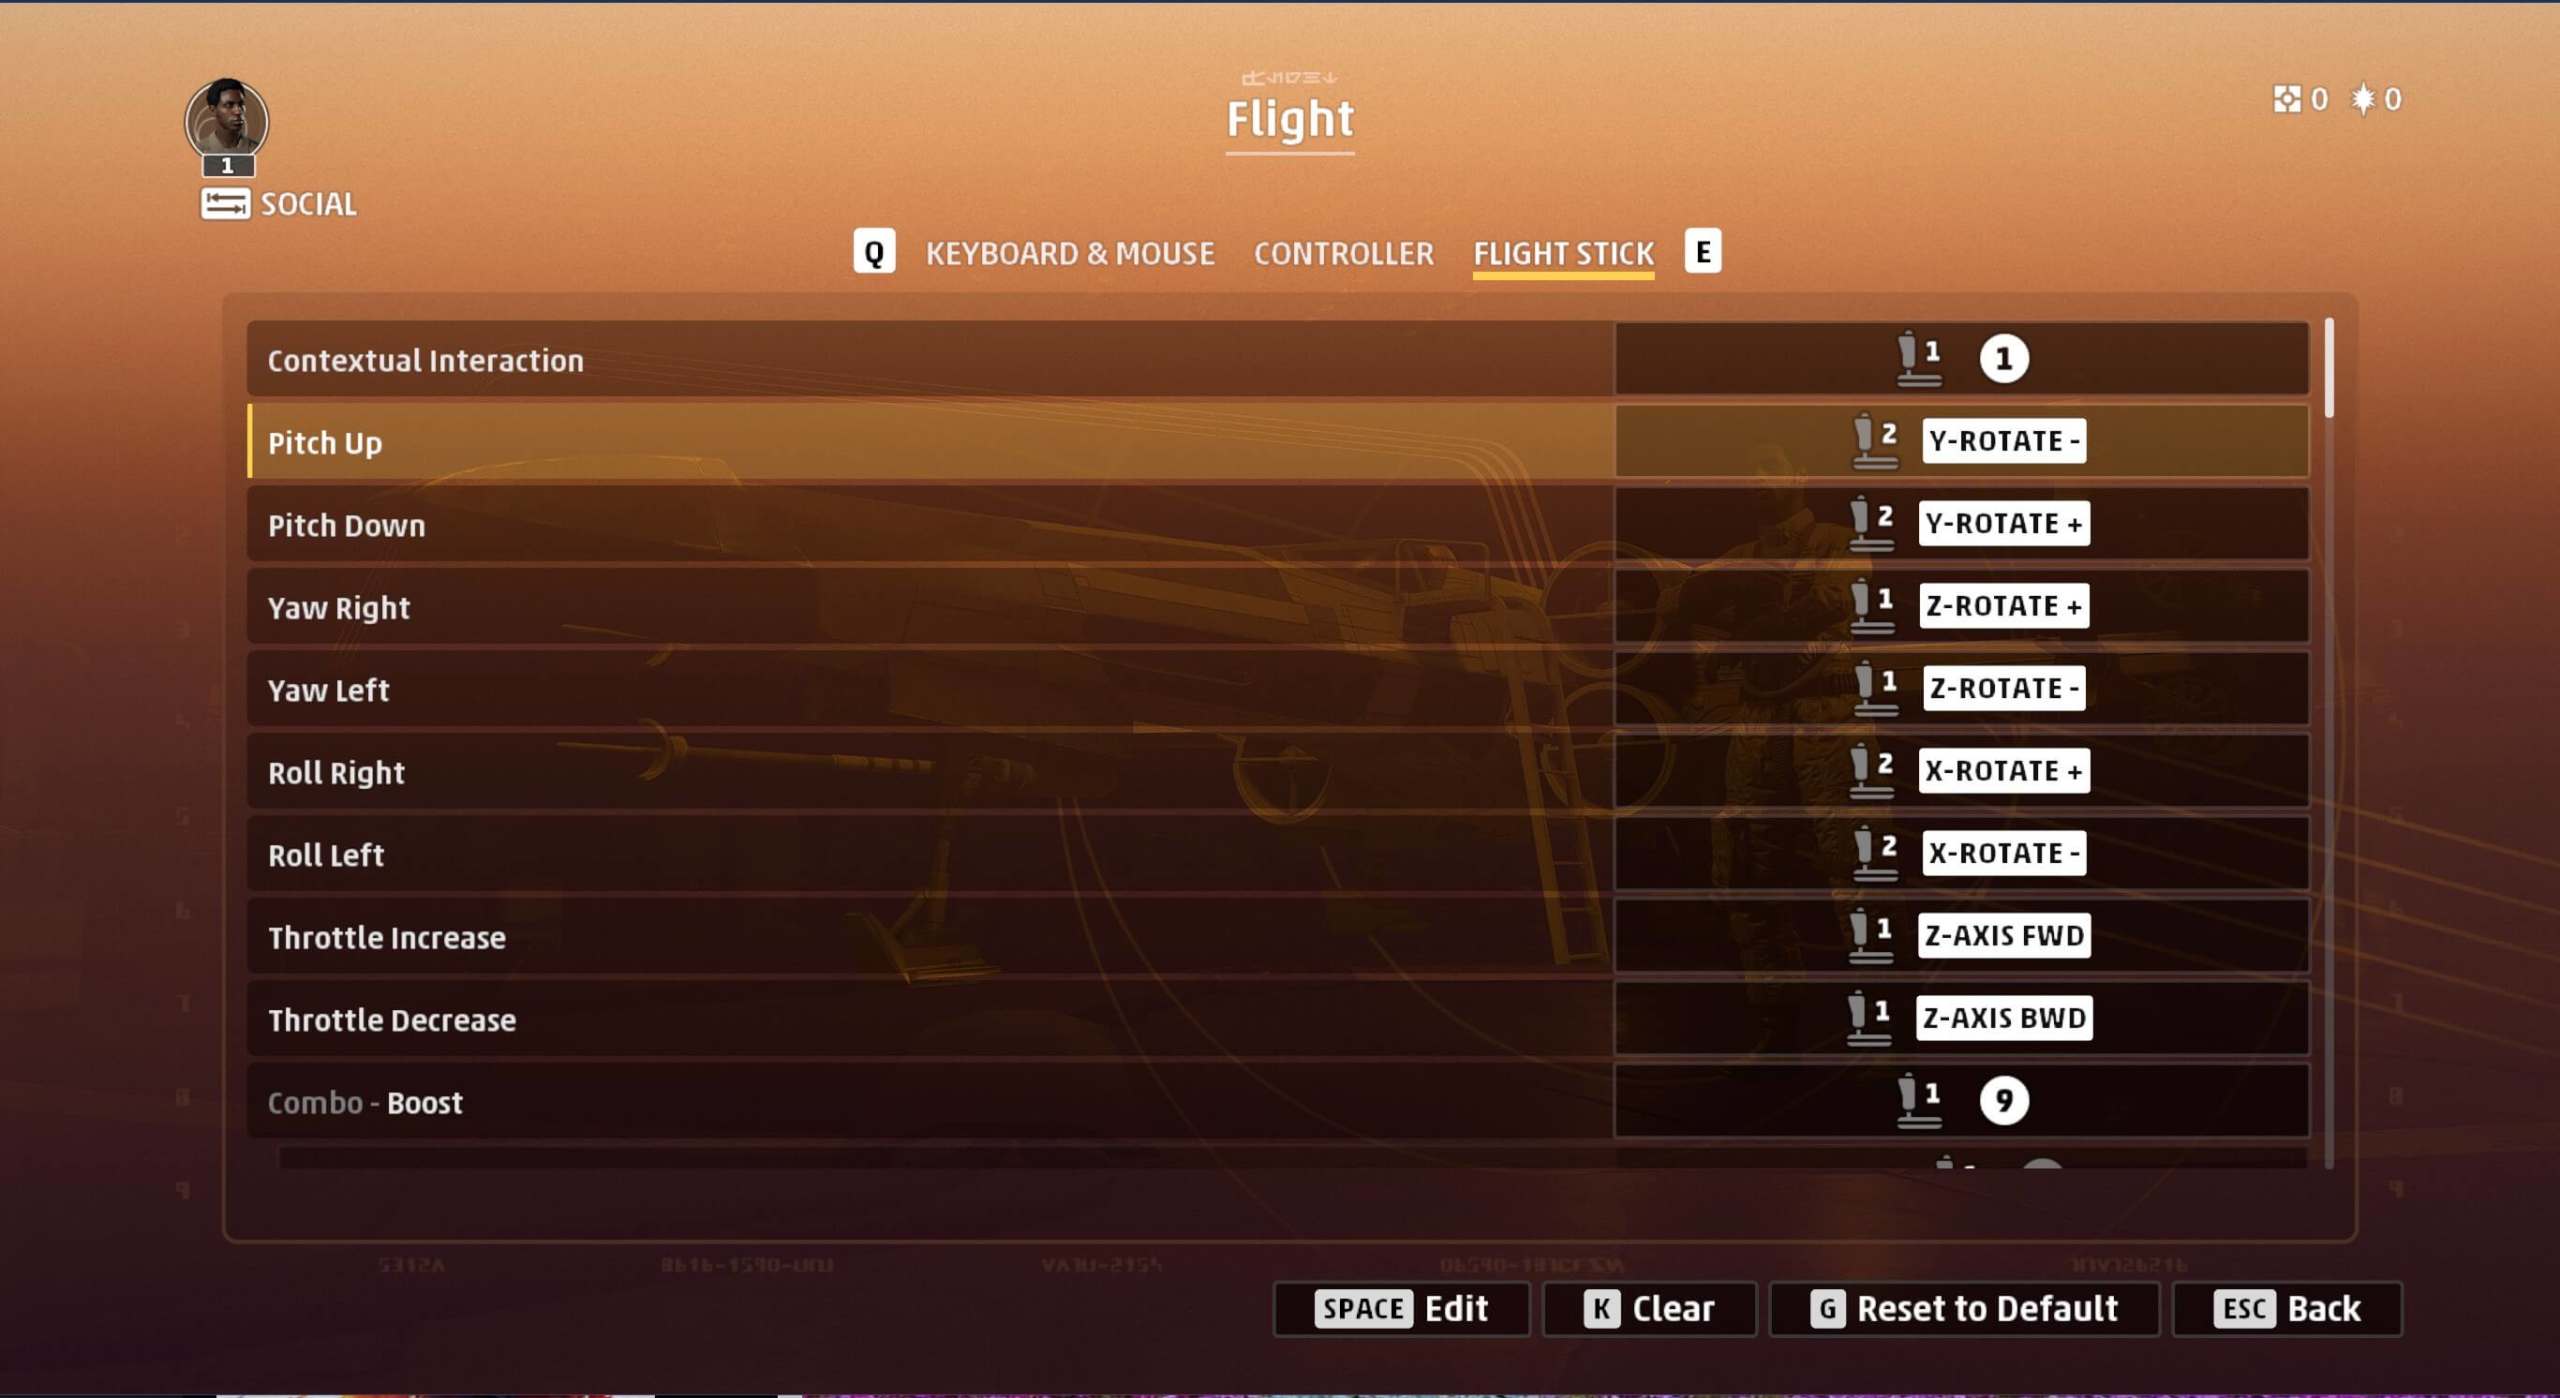
17) In controls, click remap and flight, and select pitch down to remap your first binding
18) Switch to Joystick Curves and click and hold the up arrow next to trim in the lower left of the window. You should see x or y “-rotate+” maps to pitch down, then you can release your mouse.
19) Set trim to 0%
20) Switch back to squadrons and select pitch up.
21) Switch to Joystick Curves and click and hold the down arrow next to trim in the lower left of the window. You should see x or y “-rotate-” maps to pitch down, then you can release your mouse.
22) Set trim to 0% and click the roll tab
23) Repeat steps 17-21 for roll right and roll left. If you do it right, you should see roll right map to x or y “-rotate+” and roll left map to x or y “-rotate-“
24) Set trim to 0%. For this last time, you MUST use the up and down arrow keys on the joystick curve software to get back to 0%
Your mappings should now look like this:
25) You’ll need to run Joystick Curves every time you run the game, but if you save these settings when you close Joystick curves the first time, you won’t have to do any of this work again.