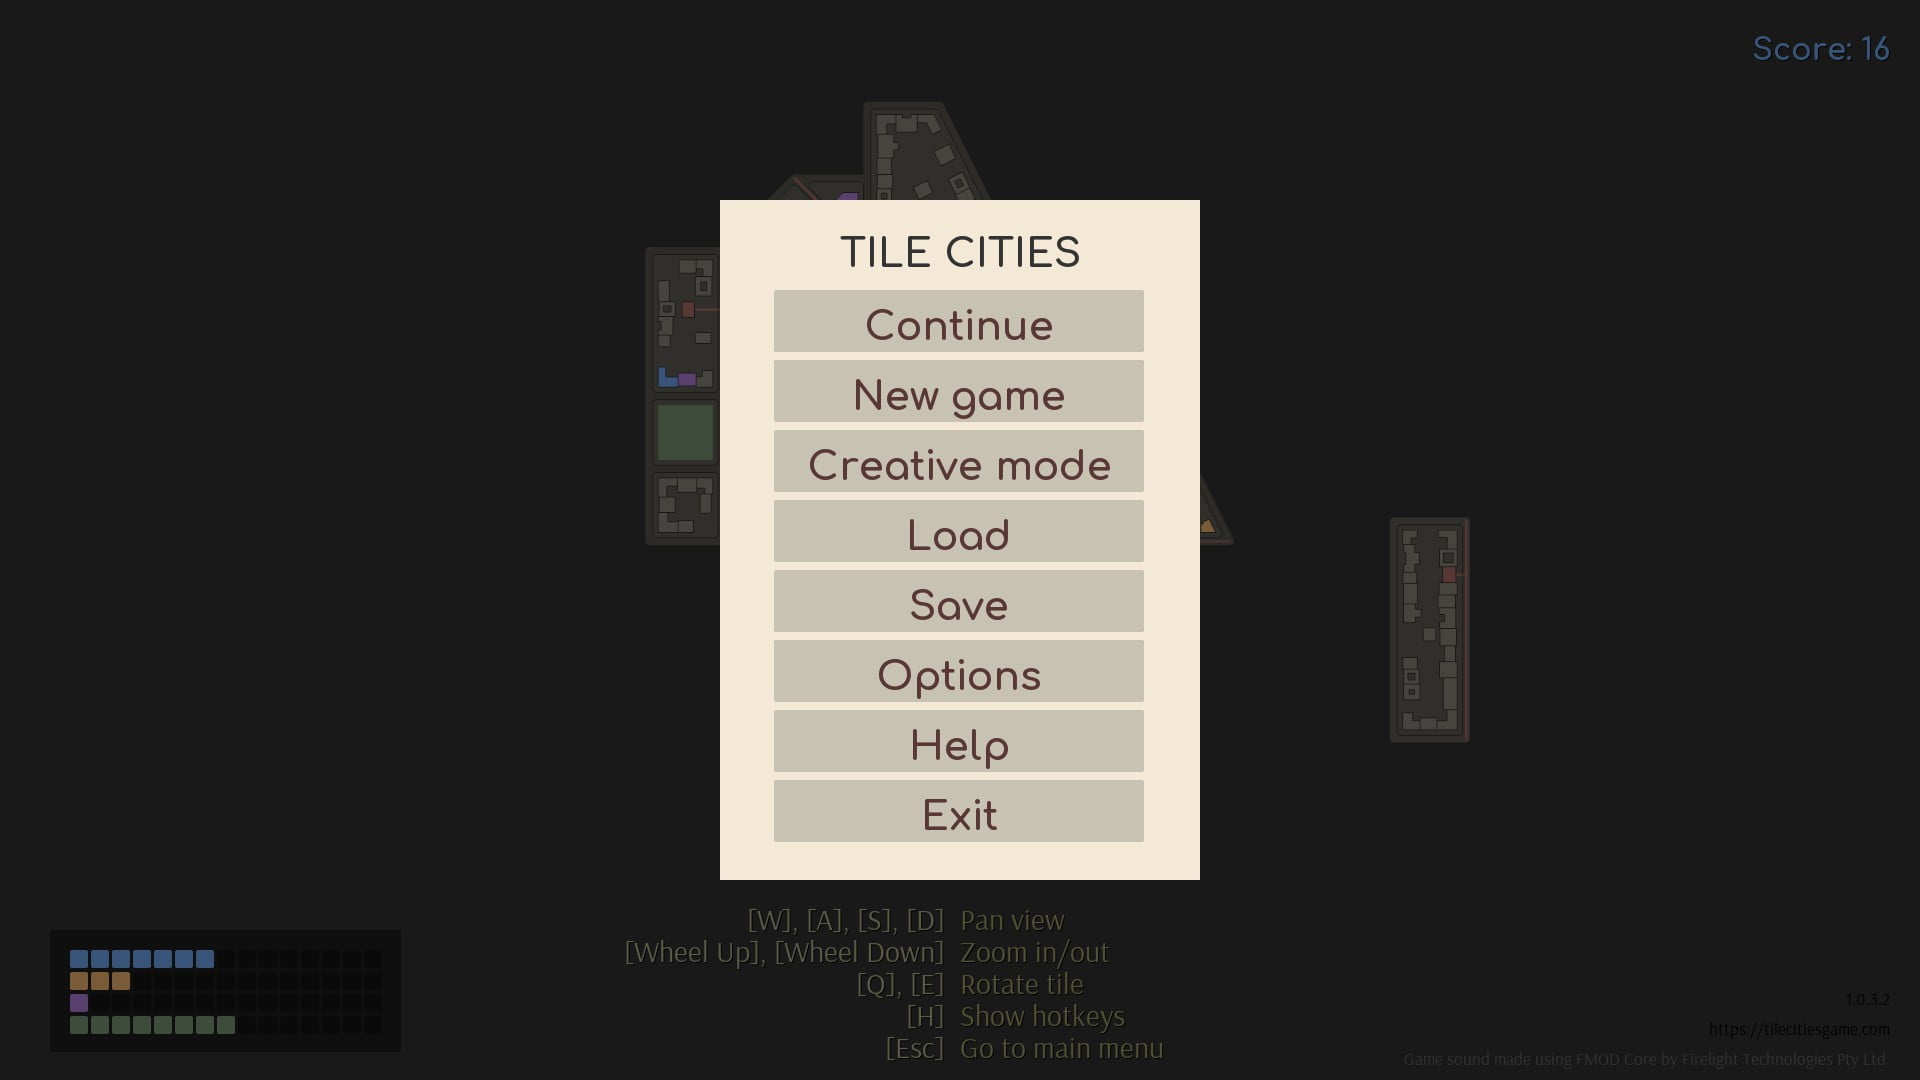
Welcome to our Tile Cities Strategy and Achievements Guide. This guide will show you how to get various achievements and strategies for building huge cities.
Tile Cities Strategy and Achievements Guide
How to get various achievements and strategies to build great cities? Read on for the answer!
Basics
The first thing you should do if you aren’t sure is to read the in-game help, under Main Menu >> Help.
The help screen is:

The help screen text is:
- “You need to build the biggest town possible while balancing demands.
- The demand meters are shown in the bottom left corner of the screen.
- Each new tile (except park) generates + 1 demand of each color it doesn’t have.
- Colored buildings and parks fulfill respective demand for all blocks(tiles) it shares a road with.
- If a shared road has a tram line connected to a red building (depot) the demand points fulfilled are doubled.
- When a new tile snaps to place the colored circles show how many demand points will be fulfilled if you add the tile.
- Additionally you can see a preview of future demand values when the tile is snapped.
- If a new tile perfectly fits in place, it doesn’t generate new demand and gives 10 score points instead of 1.”
The help mentions a few ideas that need explanation.

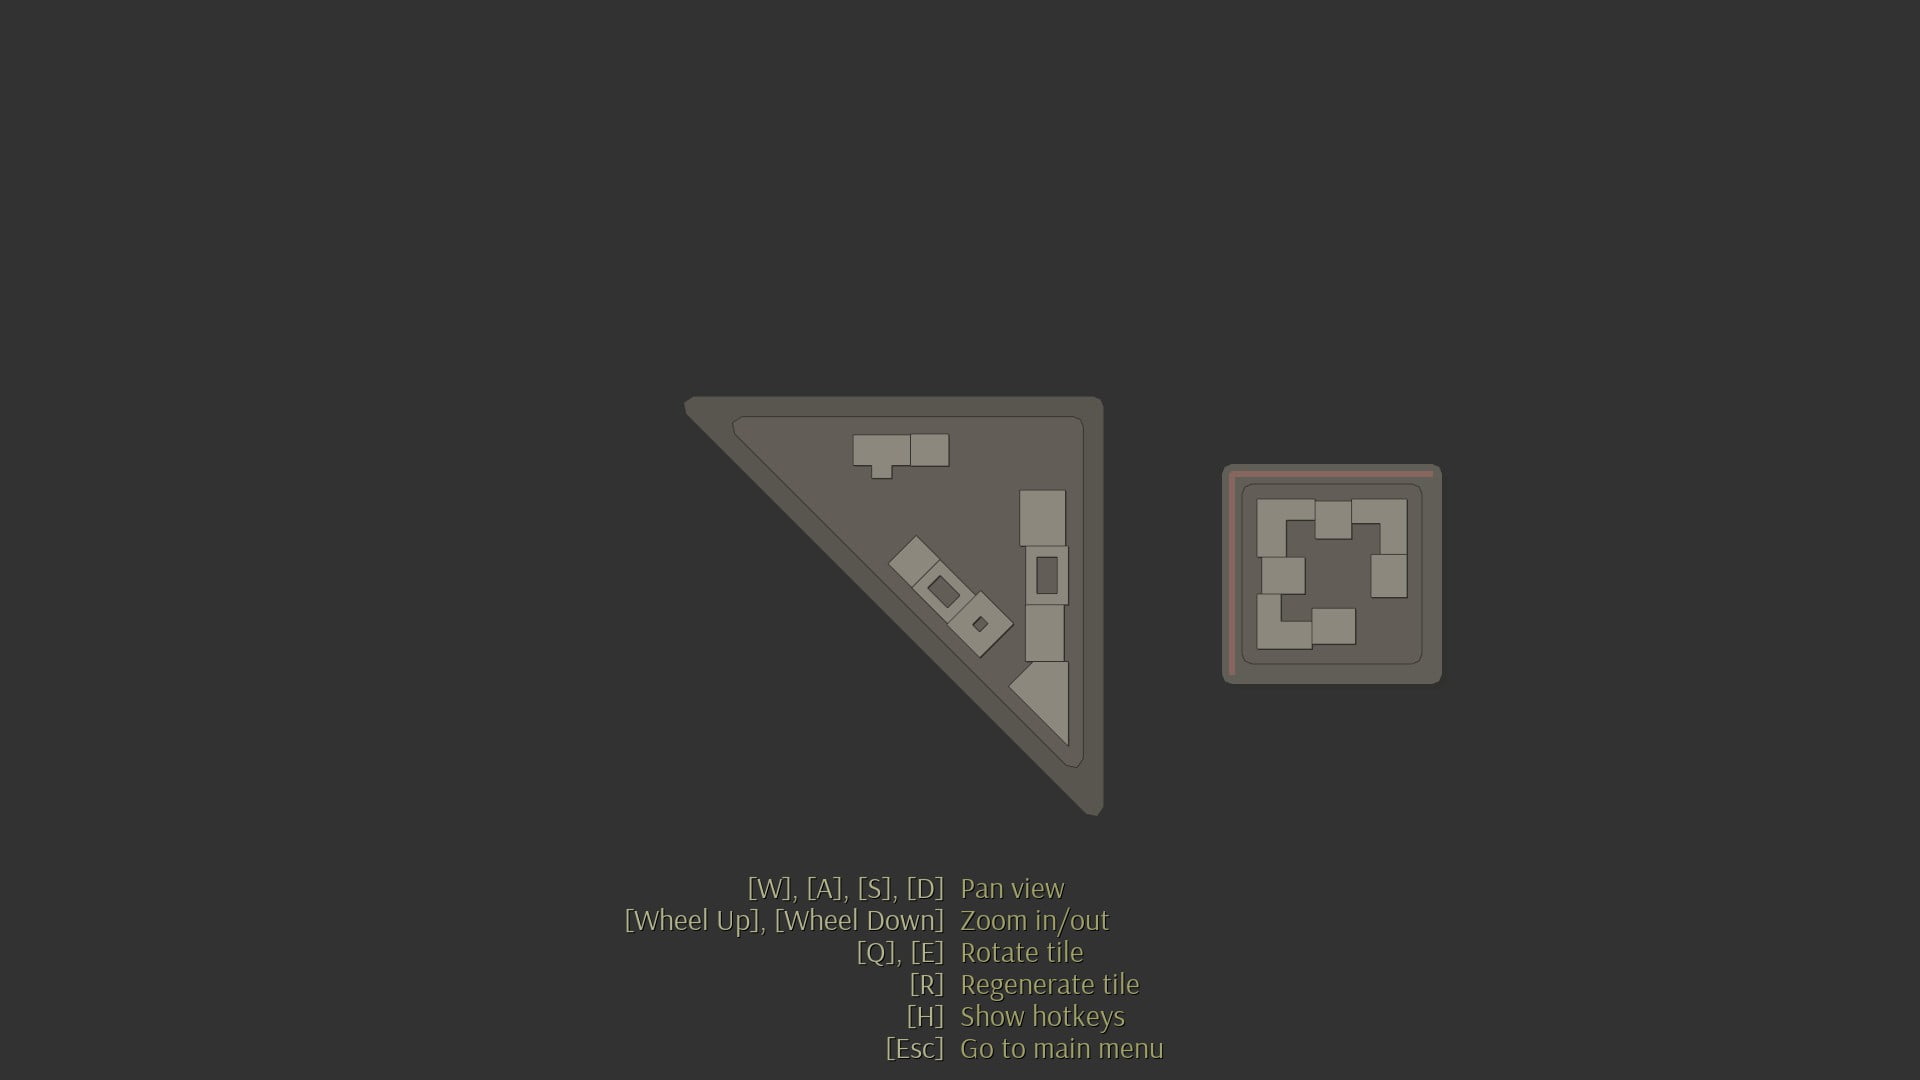
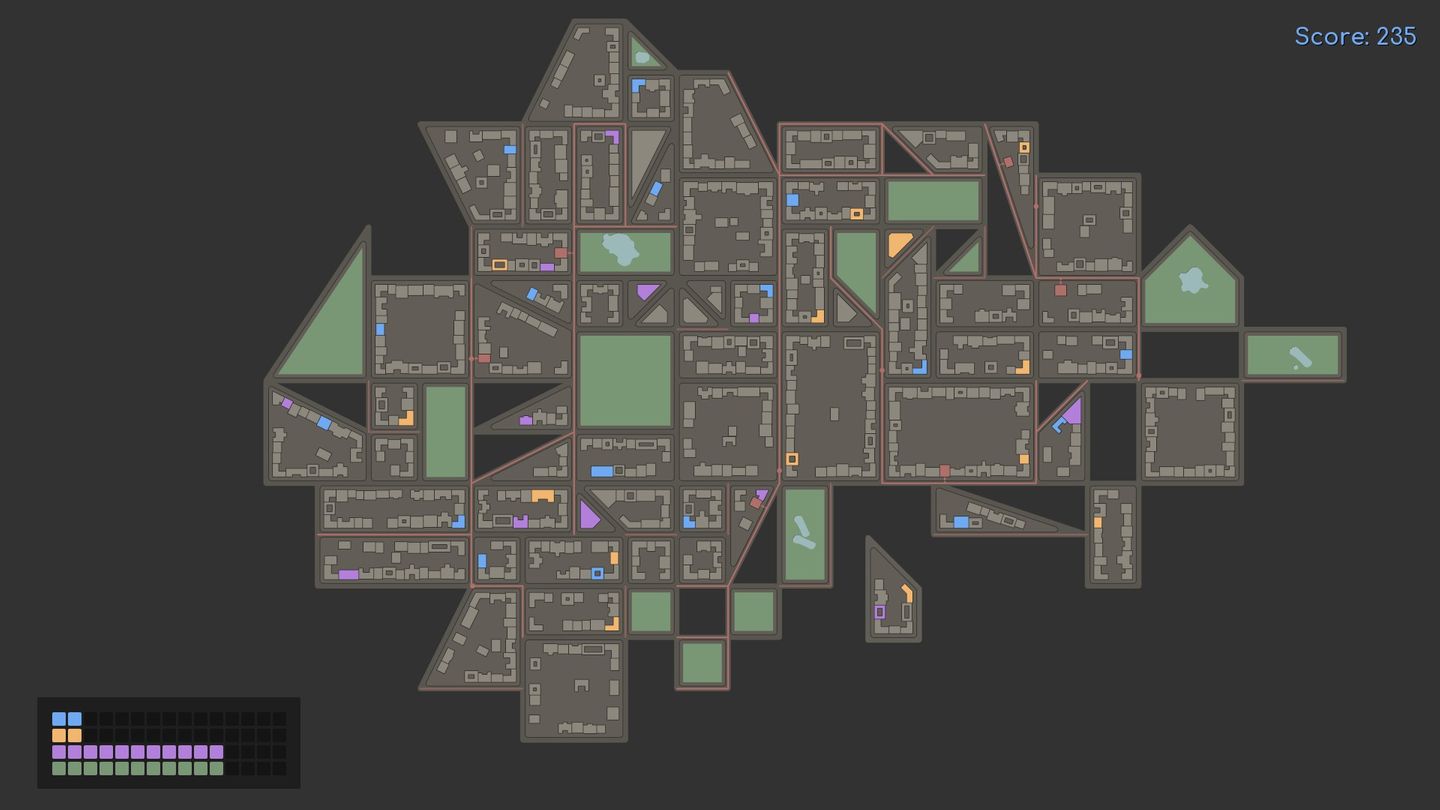
Park tiles are the (almost) entirely green tiles (1), they never have other coloured buildings on them or tram depots. Most grey tiles will have either none (2) or one coloured buildings on them (3), although some can have two (4) and may also have tram depots (5).
All sides of a tile are considered roads and a red line in the road is a tram line. Tram lines connected to a depot (5) become brighter red and red circles denoting trams move along them (6). The trams are purely decorative and just show which tram lines are active. Active tram lines can have multiple depots but this makes no difference, and there is no limit to how long an active tram line can be. Inactive tram lines are a darker red (7).
Notice that the small triangle tile with a purple building near (6) shares no roads with any other tiles although the tram line is connected. Placing tiles like this is an important technique.
Tiles are selected randomly without any preview. Although there are a large number of different shapes you will encounter, some are far more common than others. All tiles fit within a 3×3 square and all are convex (they have no holes or divots in them, unlike Tetris pieces). Generally speaking, larger pieces are rarer than smaller ones.
I won’t detail all the different piece shapes here – my advice is to simply play the game for a bit and have fun building a few cities. Alternatively, in Creative Mode you can use the [R] key to change the shape of the current tile, allowing you to see the various shapes available.
Game Modes – Tile Cities Strategy and Achievements Guide
The game has two modes and three difficulty settings. Creative Mode allows for free play and the creation of cities of any size or shape, whereas the default mode requires you to manage demand for the four services and has three difficulty settings: Normal, Harder and Even Harder.
Creative mode has no demand meter in the bottom left and has the “[R] Regenerate tile” hotkey which allows you to swap the current tile for another, random tile. All other commands and game mechanics remain the same, allowing you to build the city of your dreams.
Harder difficulty works the same as Normal difficulty except the demand meter in the bottom left has only 10 columns, instead of the 15 columns that Normal difficulty has. This makes it significantly harder to avoid defeat.
Even Harder difficulty has only 5 columns in the demand meter, making it very likely that a short run of bad tiles will end your game. Good luck!
Achievements
The game has 9 achievements. There are 4 score achievements.


There are two achievements for placing a piece perfectly.


Making a hole and then filling it completely will get the first of these achievements. All sides of the hole as park tiles will get the second of these.

To get this achievement, simply lose and at the game over screen select “Continue in Creative Mode”.

To get this achievement you must build a single tram line with at least 10 depots connected to it.

It is not clear what “any decent size” means and this has a 0% achievement rate. So this is either very difficult or is glitched.
Strategy – Tile Cities Strategy and Achievements Guide
The fundamental challenge of Tile Cities is to meet the demand of each tile placed so that in the long-term the demand created by placing tiles is balanced by the demand that they meet. Each non-park tile generates 4 demand, and park tiles occur roughly 20% of the time. This means each tile generates about 3 demand, on average.
Now, if a piece has a coloured building on it and we put it next to 3 other pieces we can just meet our 3 demand requirements. But it’s unrealistic to be doing that regularly. Tram lines help, but it’s hard to get things lined up the way we need to.
The solution is actually to focus on making and then filling holes. Every hole filled “satisfies” 4 demand (because it generates no new demand), plus any demand met by coloured buildings. With careful placement we average a perfect placement almost every 2nd tile for the most common shapes. This level of efficiency is really only possible once our city gets big enough, but using perfect placement techniques are essential to getting that far.
The most common pieces tend to be the smaller ones, particularly 1×1 squares and triangles, 2×1 rectangles and triangles, and 2×1 rectangles with a corner missing (trapeziums/trapezoids). Since these are the most common these are also the shapes of holes that we need to focus on, particularly when starting a city.
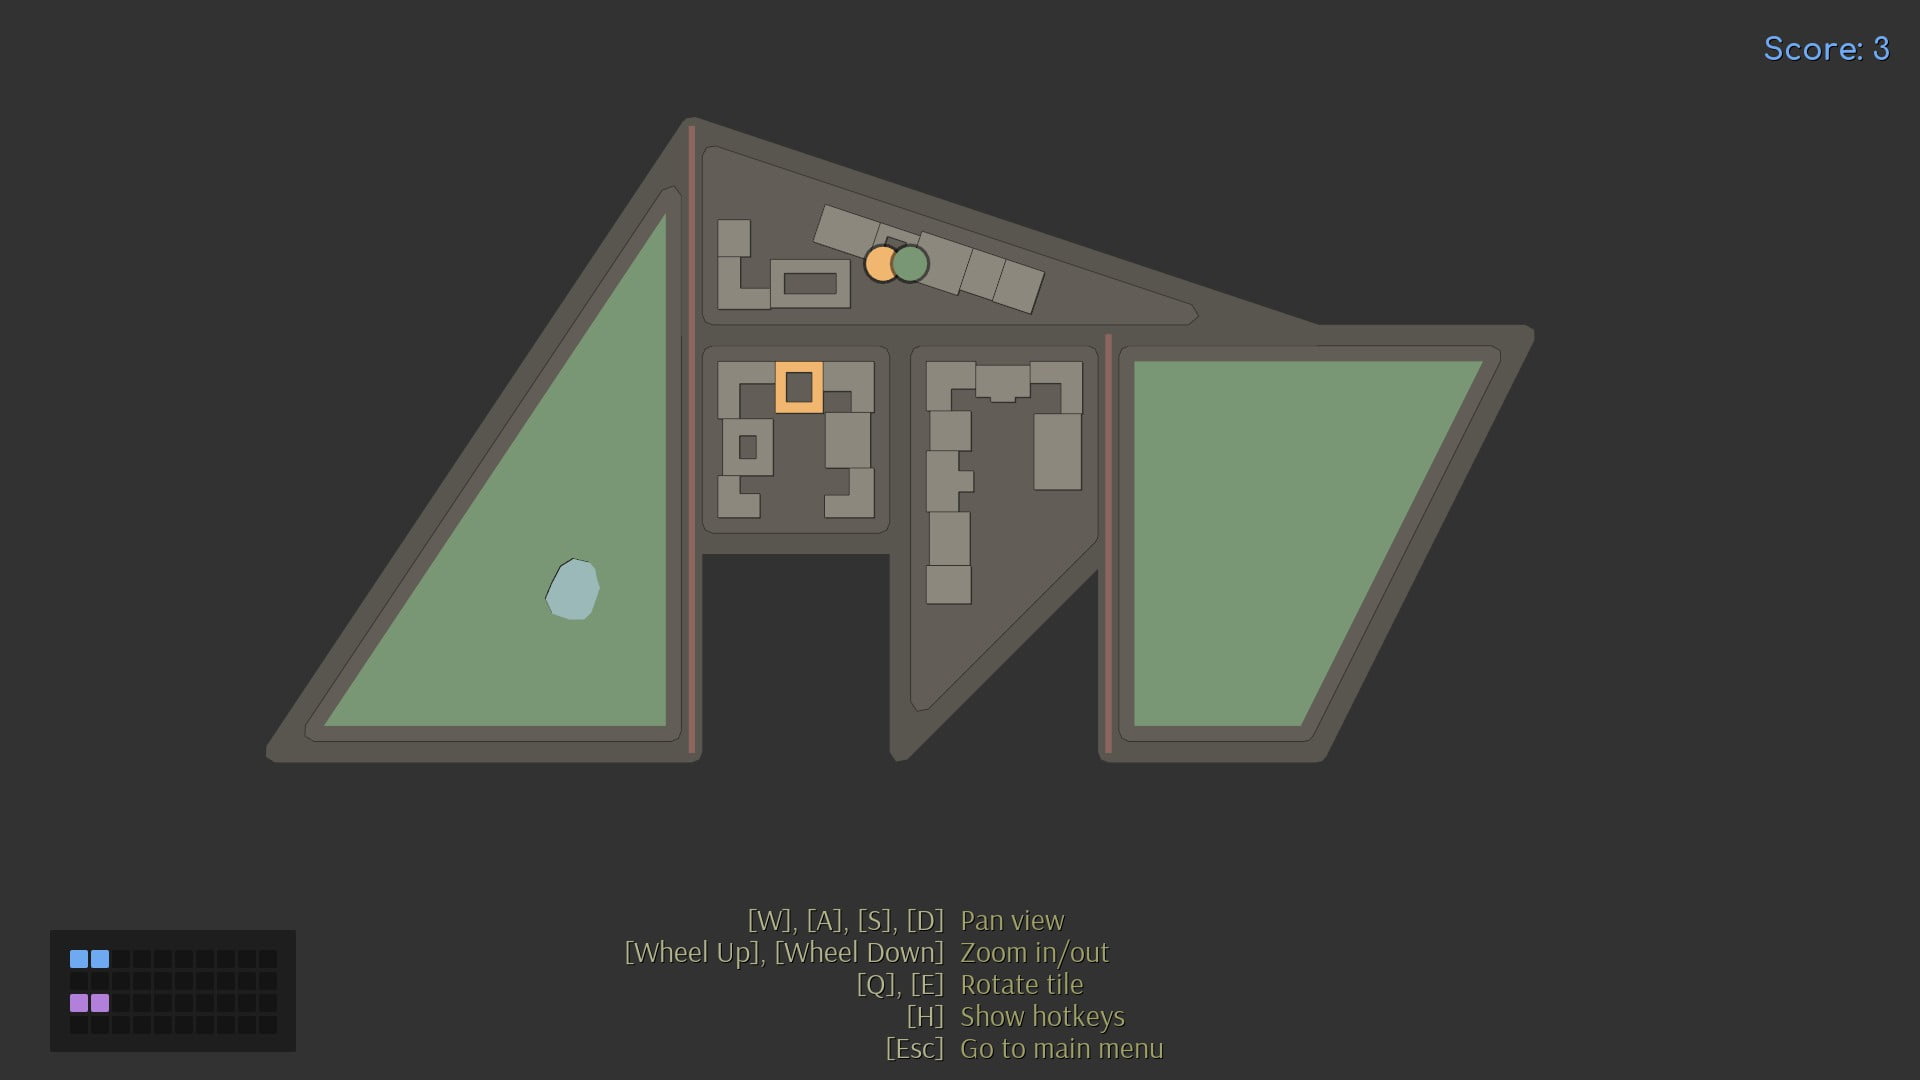
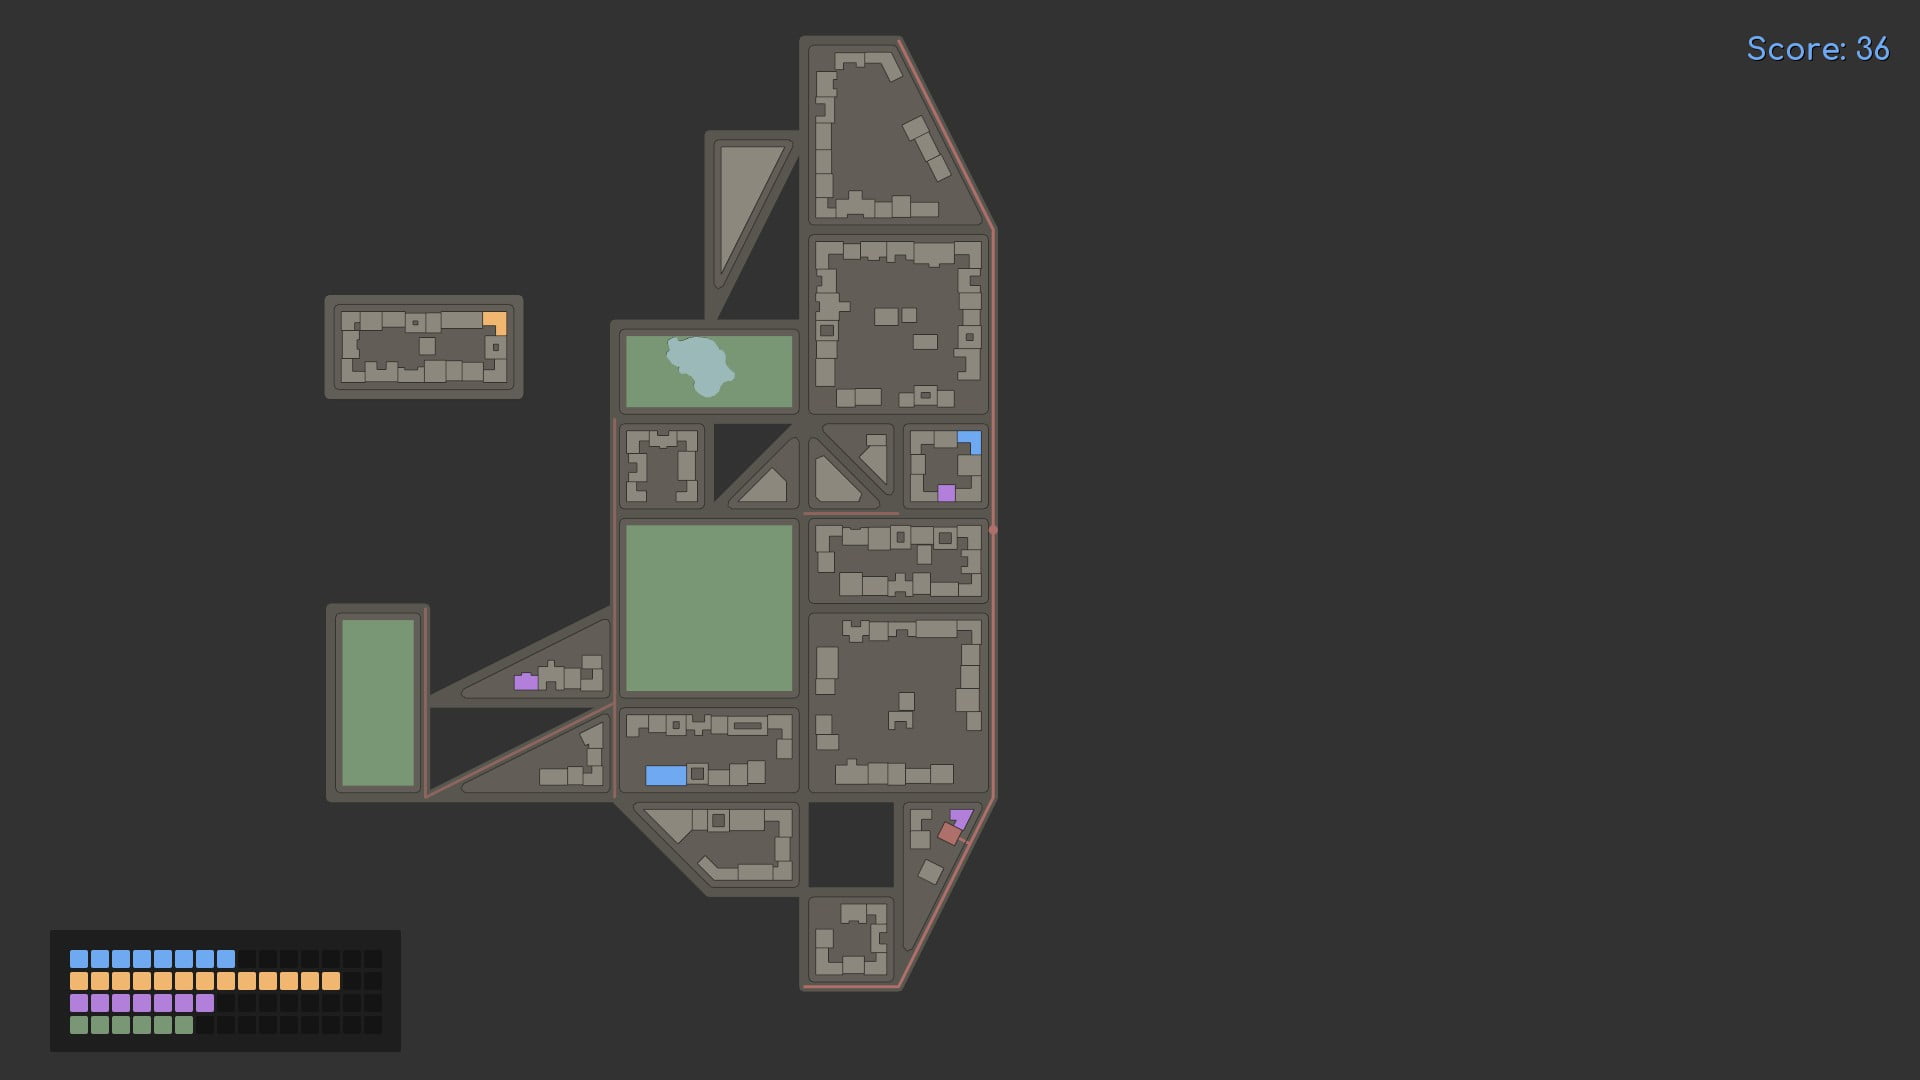
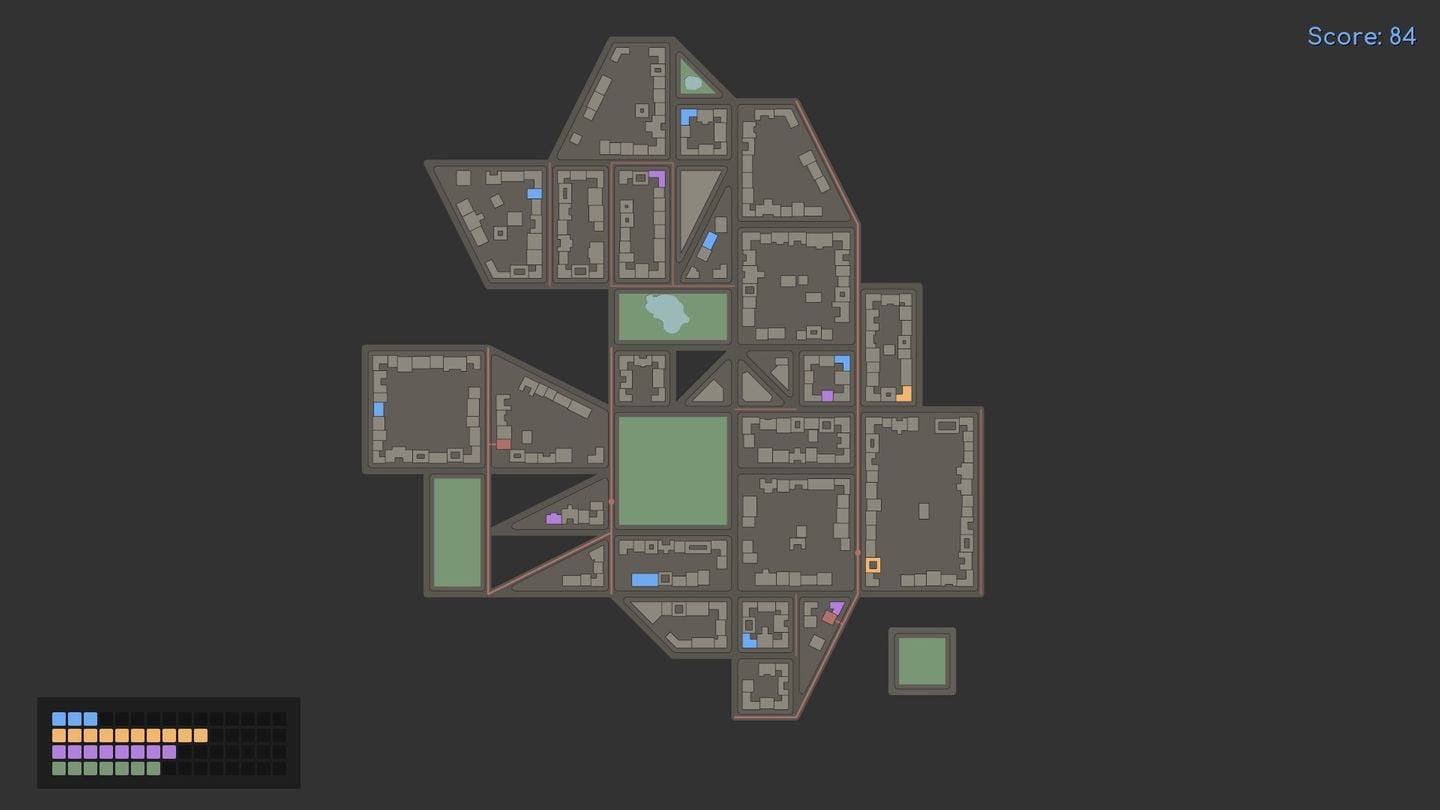
Let’s see how this works in practice by building a city up to a score of 400. Here’s our starting layout.
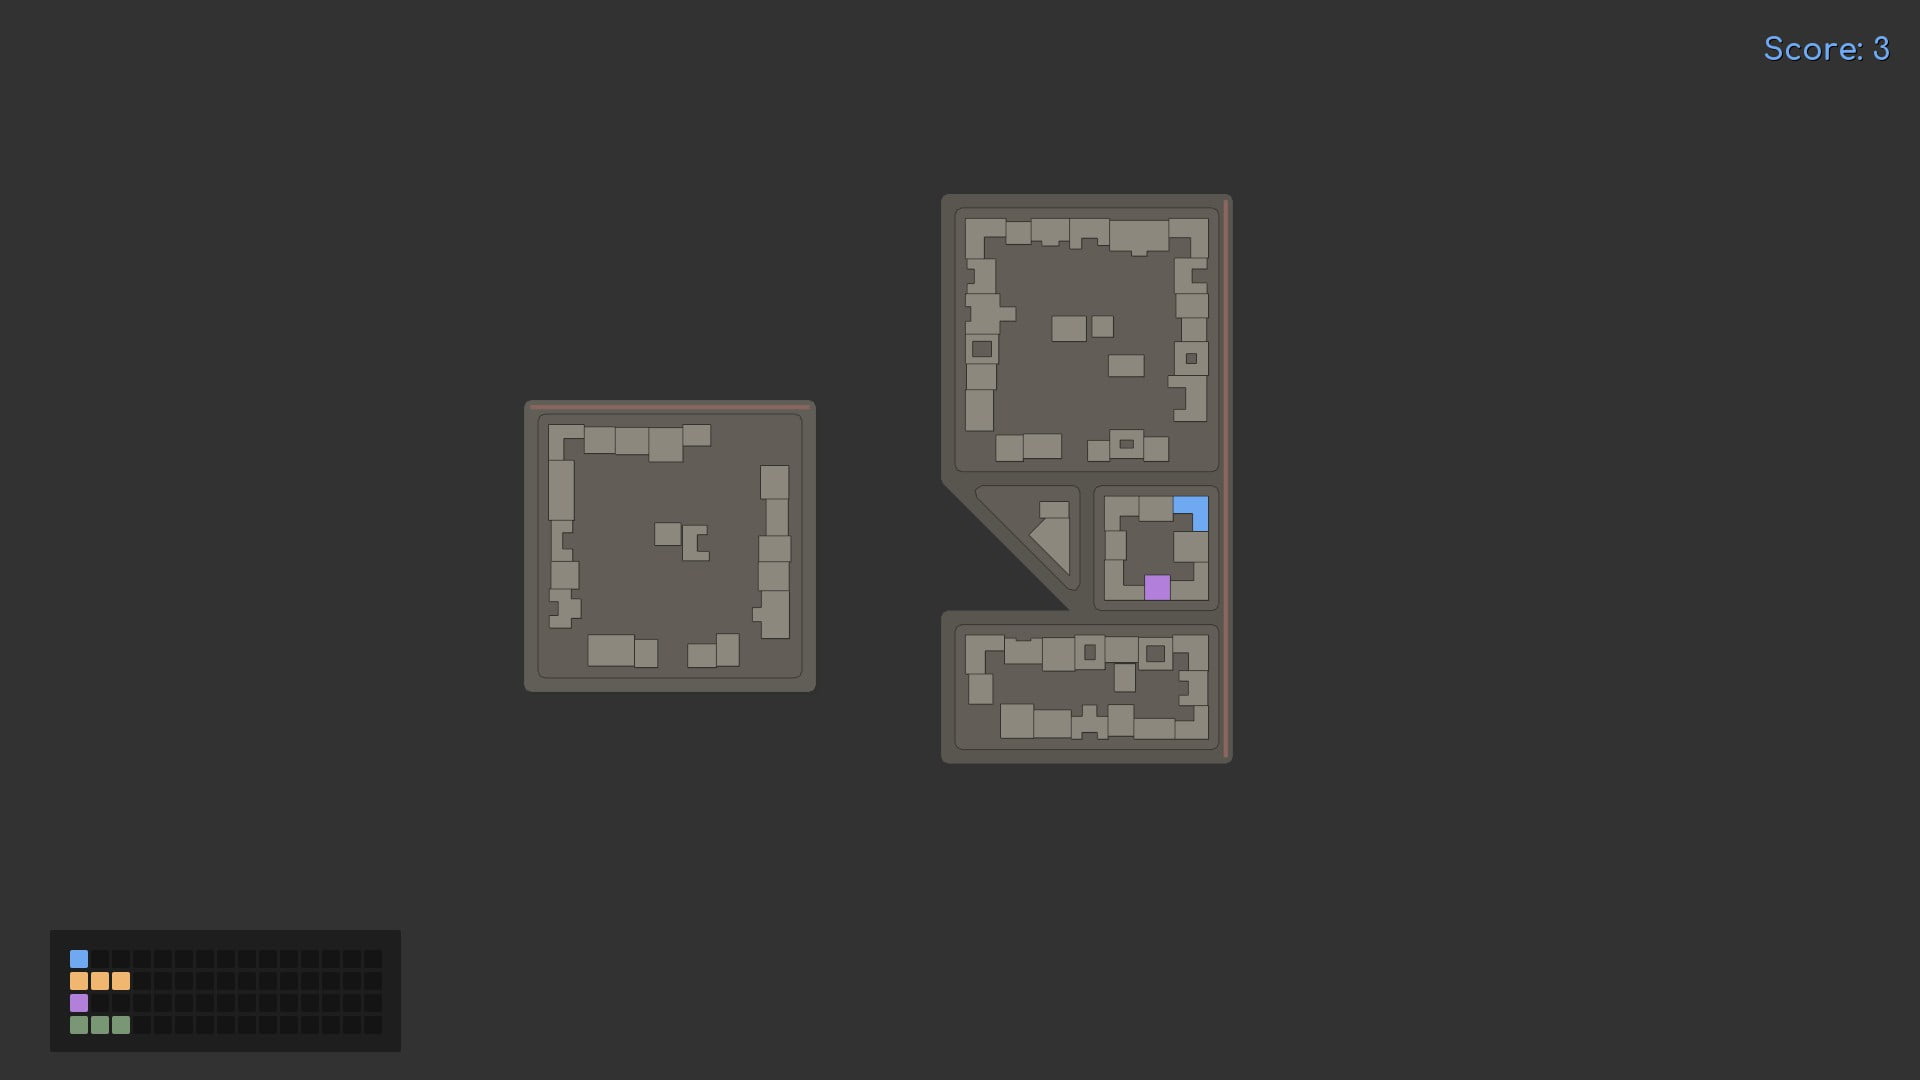
We’ve been fortunate and got three tram lines that line up nicely. We’ve also started to make a hole.
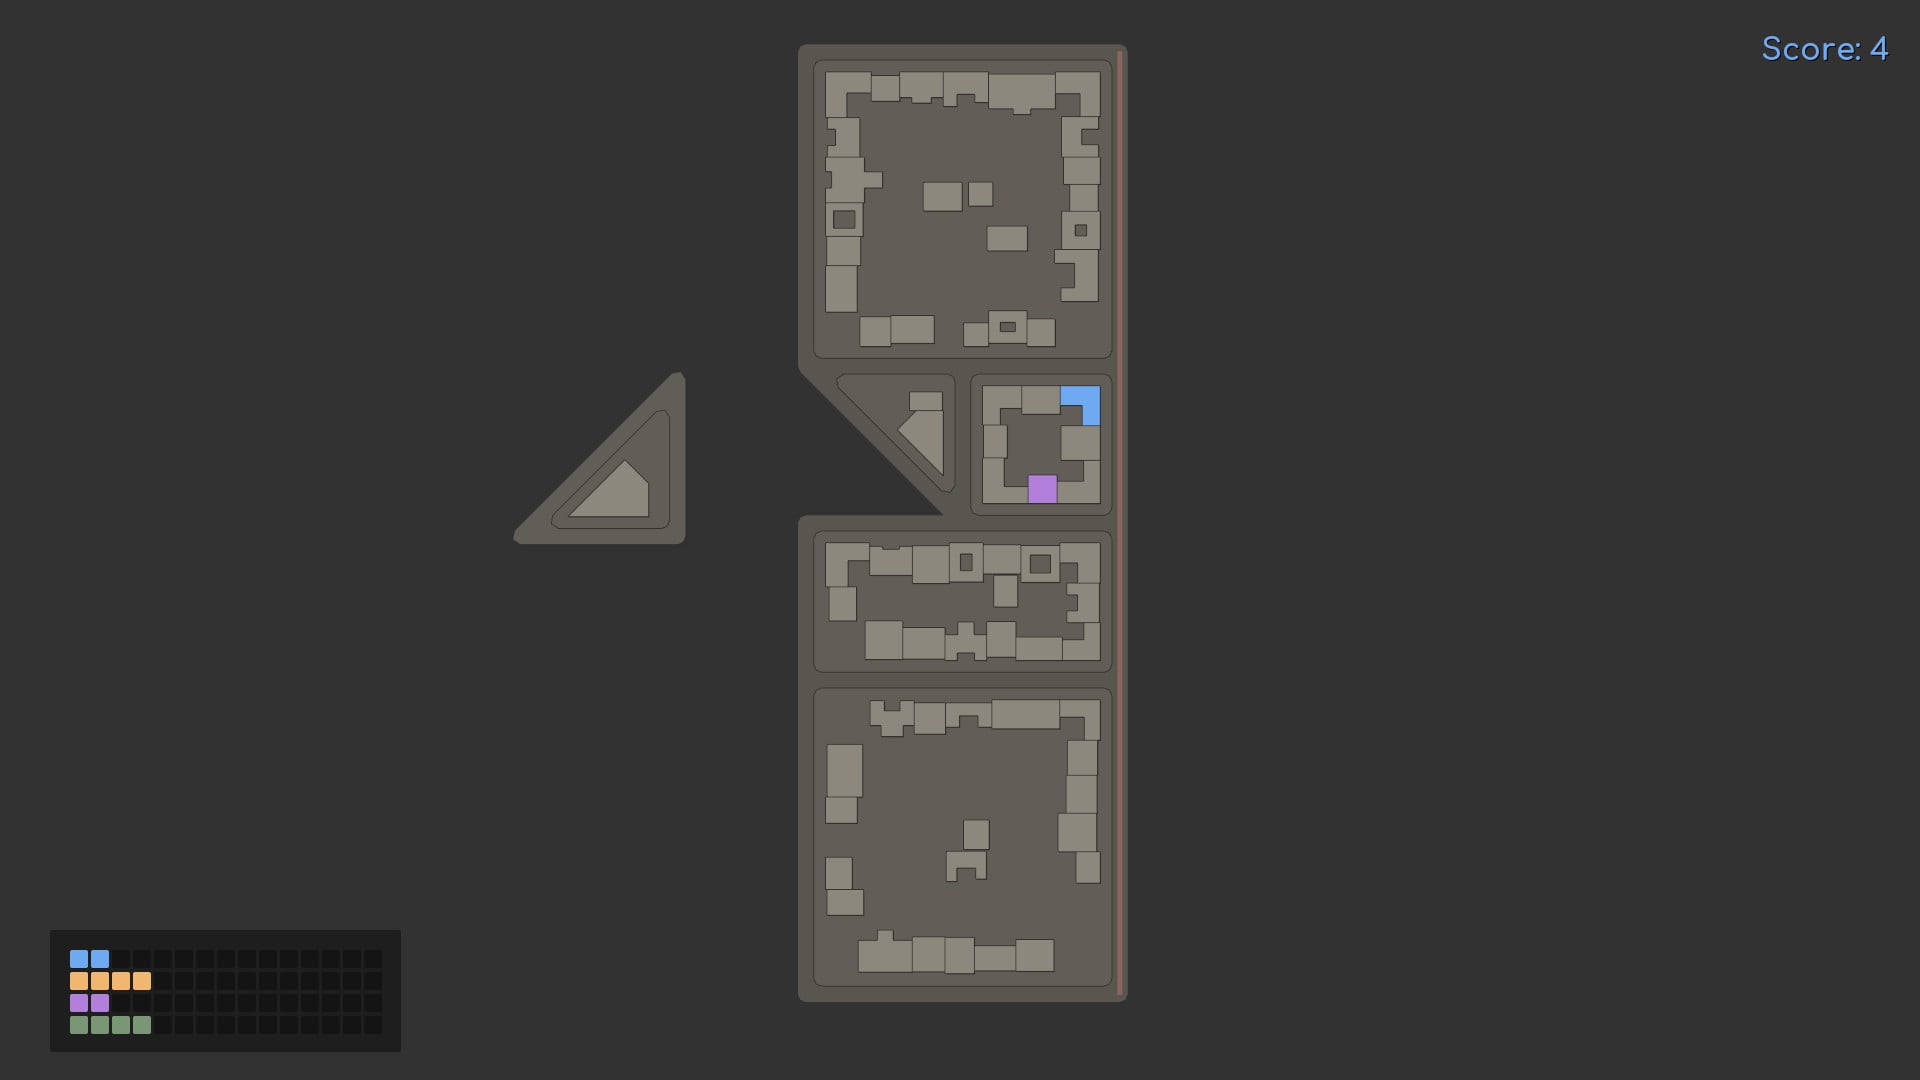
We’ve continued the tram line and now we’ve got a triangle. It would be tempting to put it into the slot but that wouldn’t actually help us much. Better to use it to make a hole for the next 1×1 triangle.
We’ve made a couple of holes and started another tram line. We’ve also managed to activate our first tram line. This has set us up for some effective plays later.
It might be tempting to fill the slot at the bottom with this tile but better to make another hole. Especially since our demands aren’t too high.
Park tiles are useful for making holes as they don’t increase demand and so it costs us little to place them without any adjacent tiles.
We have continued to make holes, even using a 1×1 to make a hole rather than fill one. At the top you can see the technique of using a single triangle piece to make a matching hole. This is a very efficient way of making holes.
Also, the yellow demand is uncomfortably high and this is the first yellow building we’ve gotten. Thankfully our active tram line is set up nicely and since this piece has a length of 2 we can make sure it is adjacent to two other tiles.
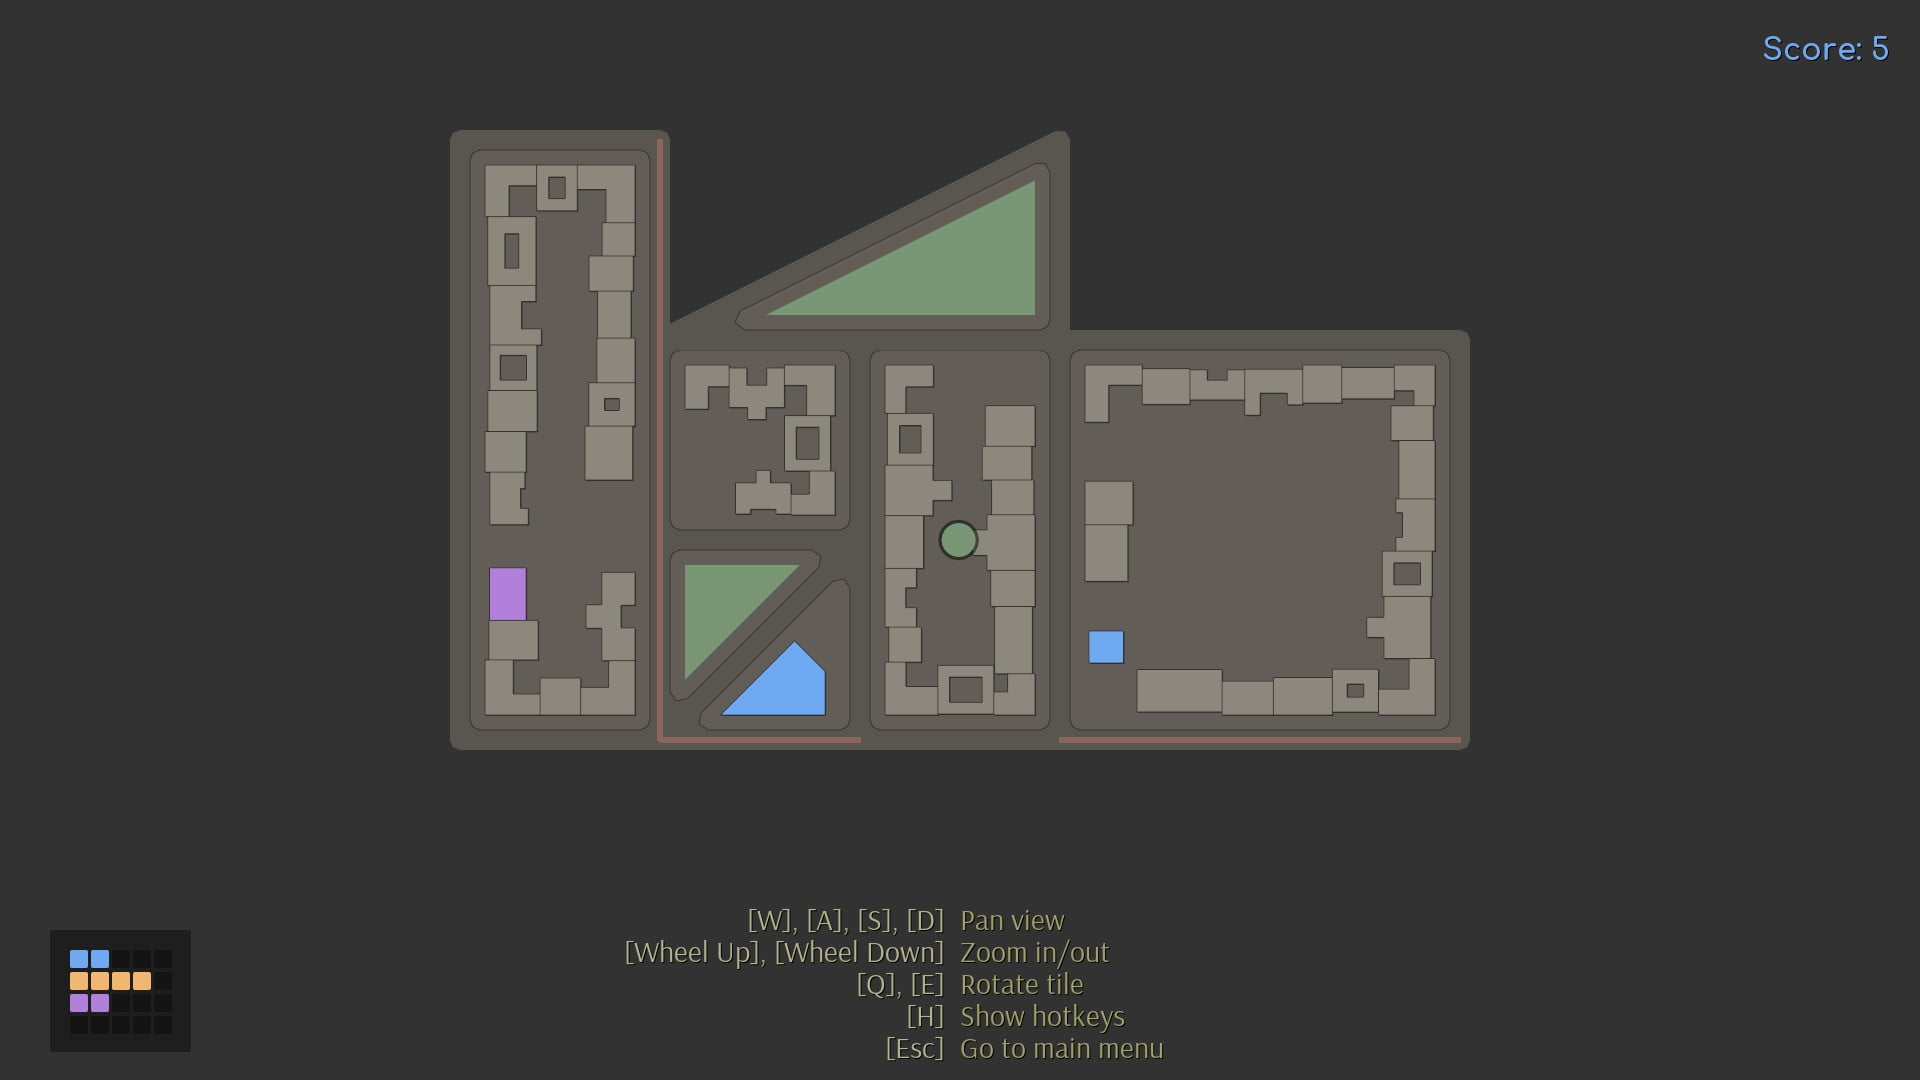
We’re working on a 2×1 hole at the top left and we’ve managed to activate our 2nd tram line. Large pieces like the one on the left can be hard to place early on.
Our score is now over 50 points and we’ve had another couple of difficult large pieces. Some lucky blue buildings have reduced that demand but our yellow demand is still worryingly high.
With a 1×1 triangle piece it is tempting to fill the hole we have but park tiles really should be used to make more holes. In this case we have no 1×1 square hole so we use this tile to make one at the top.
Just in time we get another yellow building and our active tram line is still ideal.
We’ve filled in some holes and had to deal with another hard to place large tile. Luckily our current tile is a park so we can use it to start making more holes.
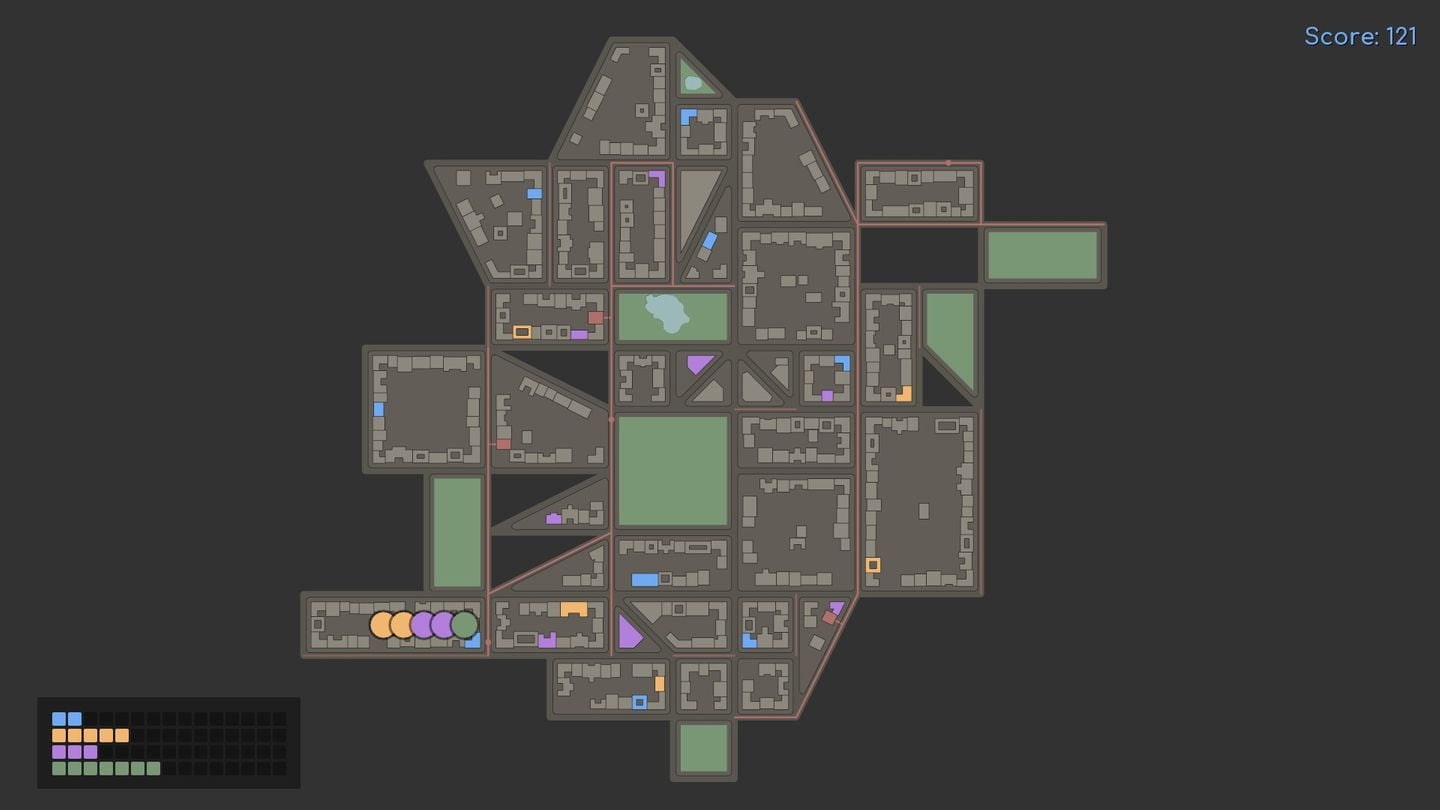
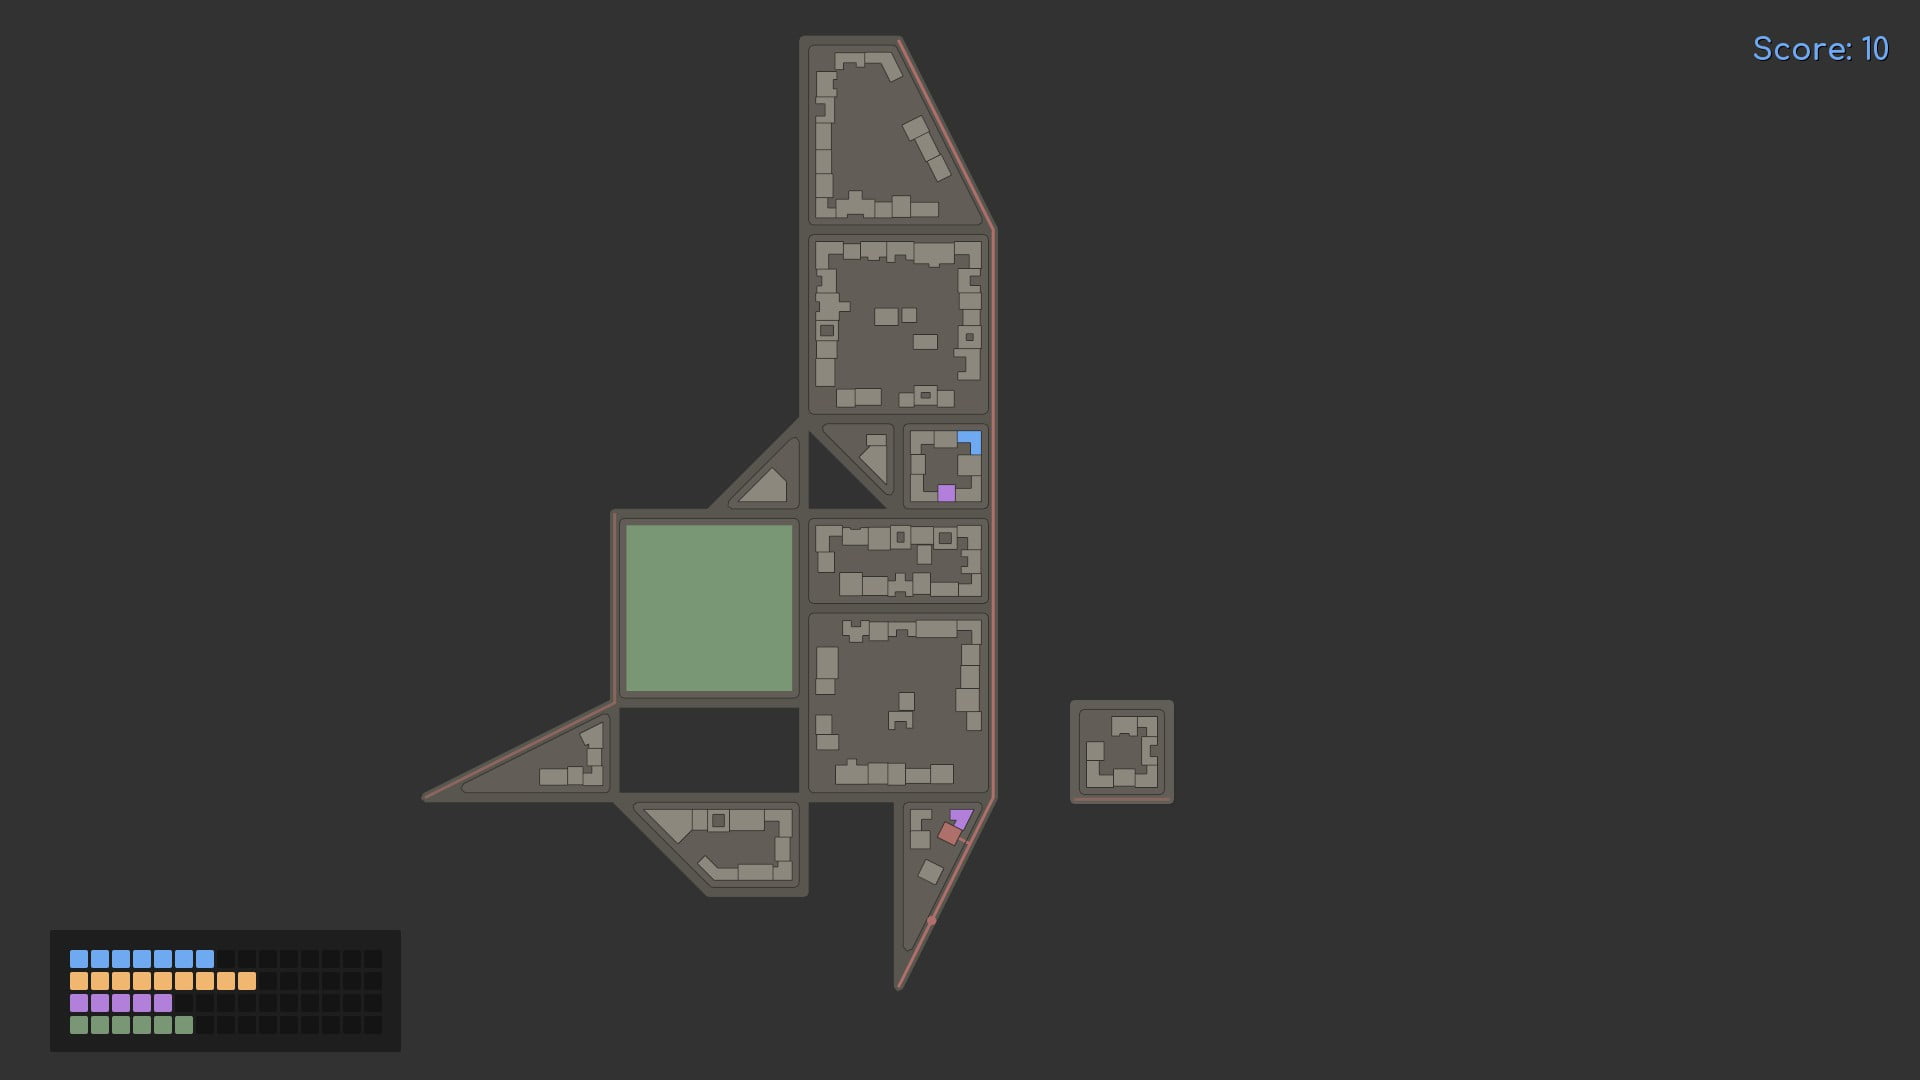
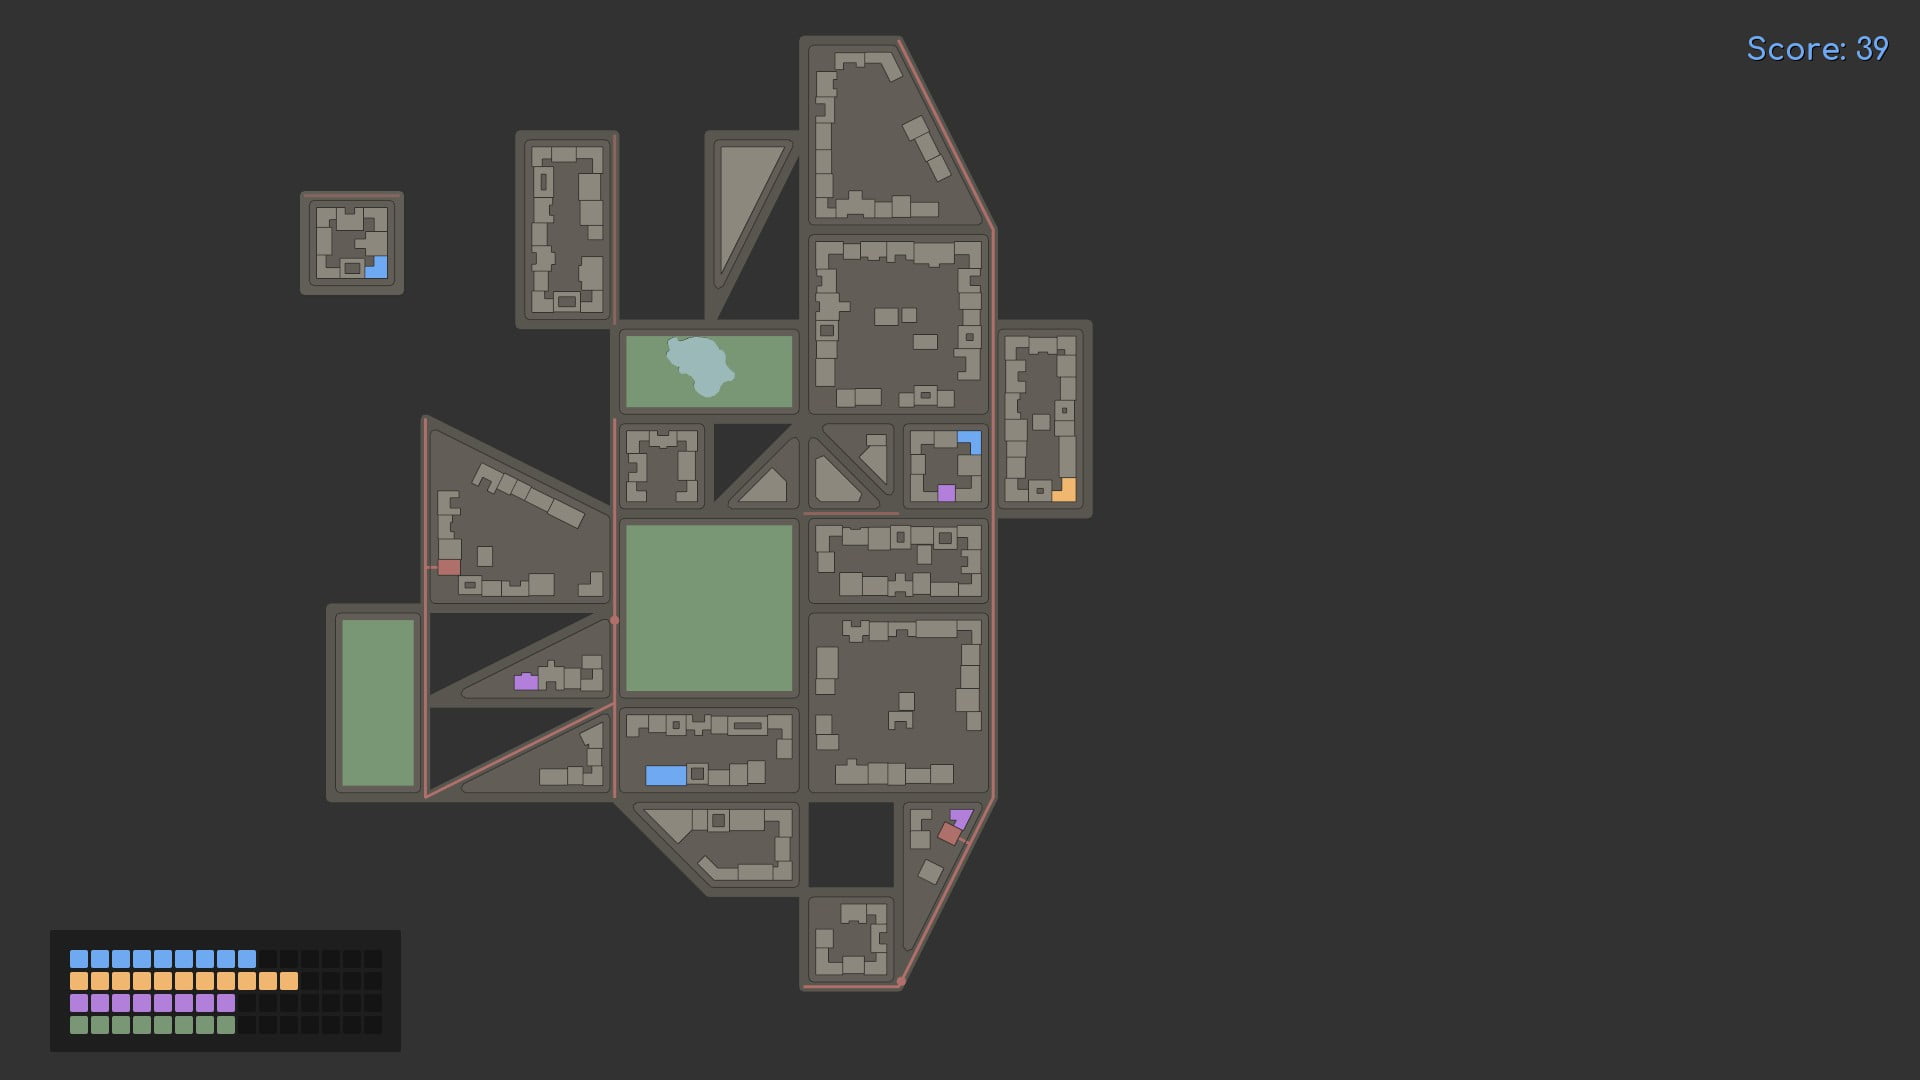
Our score has now tipped past 100. We’ve been making and filling in holes and been lucky enough to extend our tram lines too.
The current tile is a 3×1 rectangle and these can be handy but no wonderful position stands out so we take the opportunity to reduce our demand.
We continue making and filling holes and this has dramatically reduced our demand. We’ve had some big tiles too but we’ve made the best of it. The current tile is a 3×2 triangle and these are generally too rare to bother making a hole for at this stage.

We branch out into making 3×1 triangle holes too (of both orientations). We are also beginning to make some setups where we specialise in a particular shaped hole in a location.
On the right we are starting to concentrate on 2×1 rectangles – making holes and filling them. At the bottom we’re concentrating on 1×1 squares.
Our plans have changed slightly. Another big piece has been used at the bottom and the bottom right is set up to do 2×1 trapeziums (see we’ve used a piece to almost make a hole). We’re also set up to do the mirror 2×1 trapeziums at the top.
Our only concern is the high purple demand. We need to make sure we meet this demand in the short-term even if this means interfering with our other plans.
Things have progressed nicely although some awkward pieces have gotten in the way. At the top our setup for 2×1 trapeziums has already paid off and in the bottom right our other setup has two holes at the cost of 2 non-park tiles.
Our 2×1 rectangle setup (to the right) is more ad-hoc and our 1×1 square setup (at the bottom) has been interrupted by some difficult pieces. This has allowed us to keep our demand low though.
At the top left is the beginning of a setup for 2×2 trapeziums (note the slot is almost a hole).
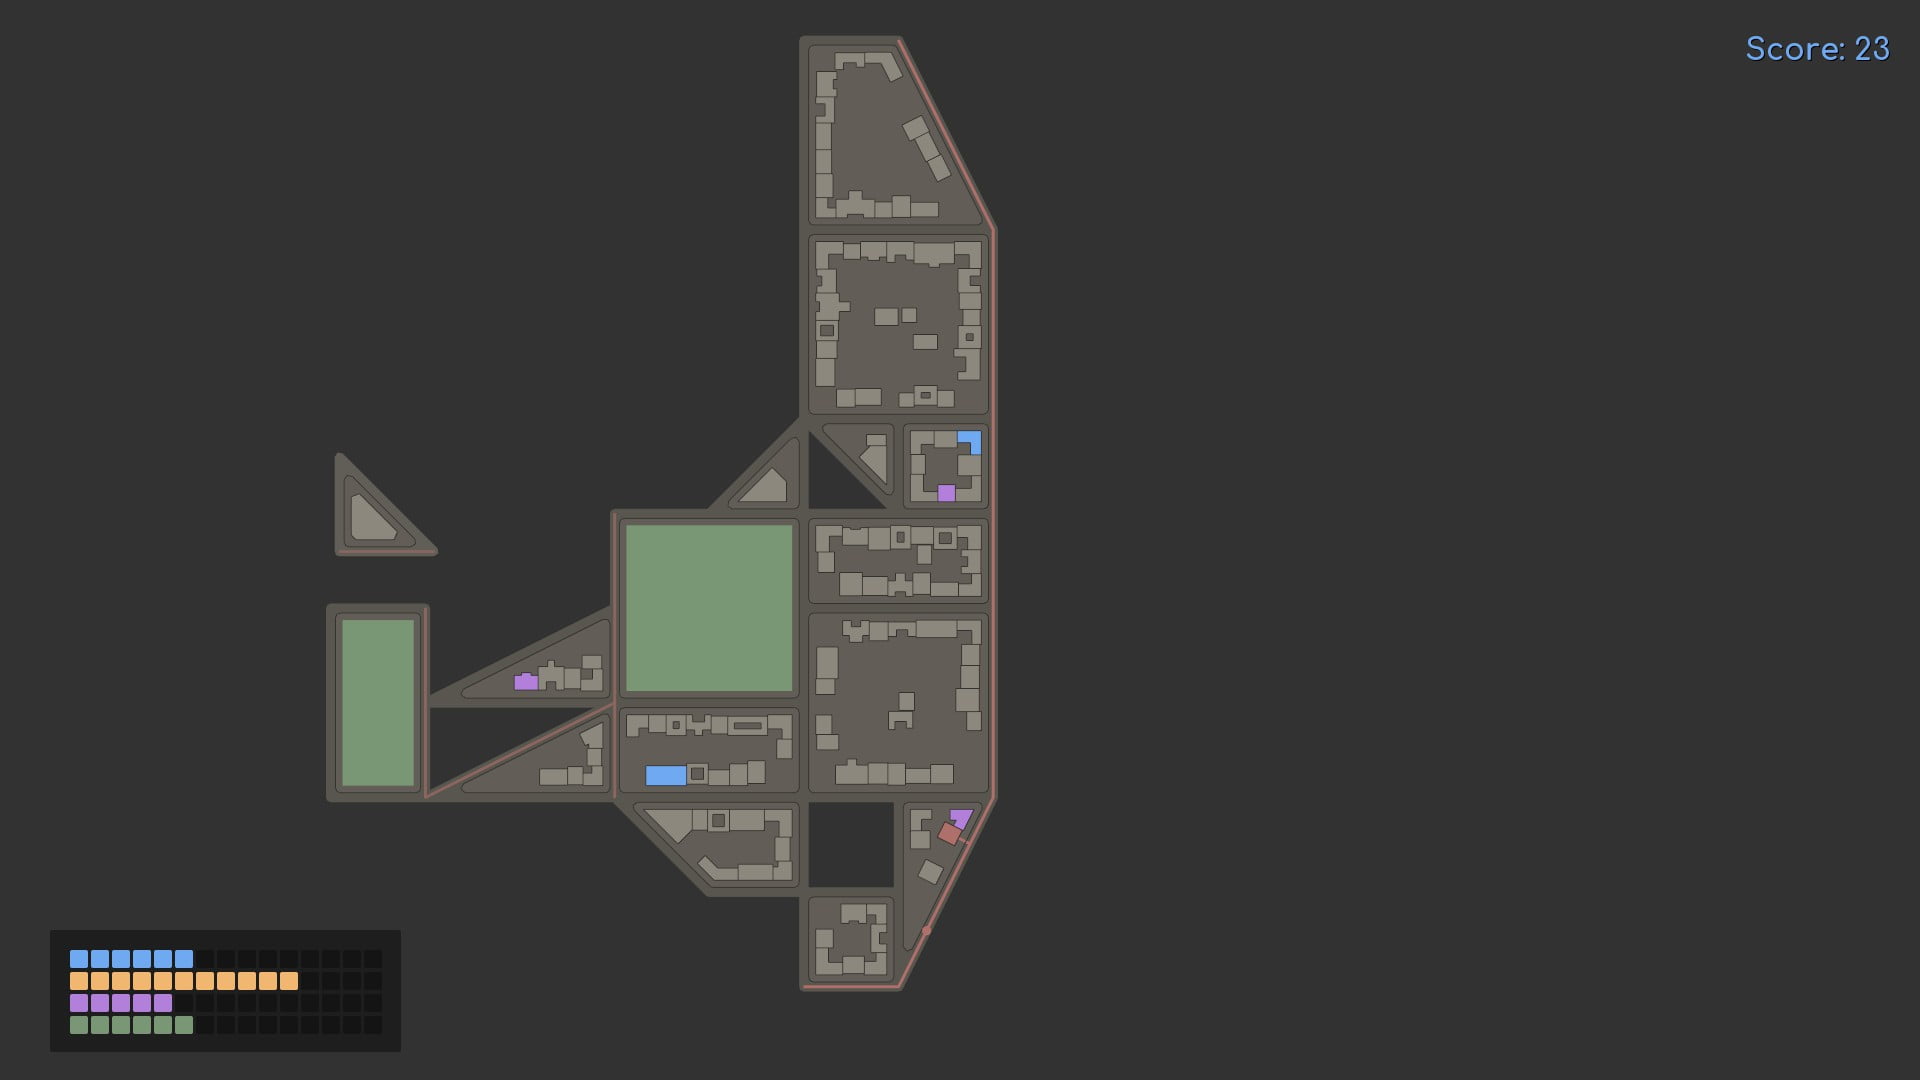
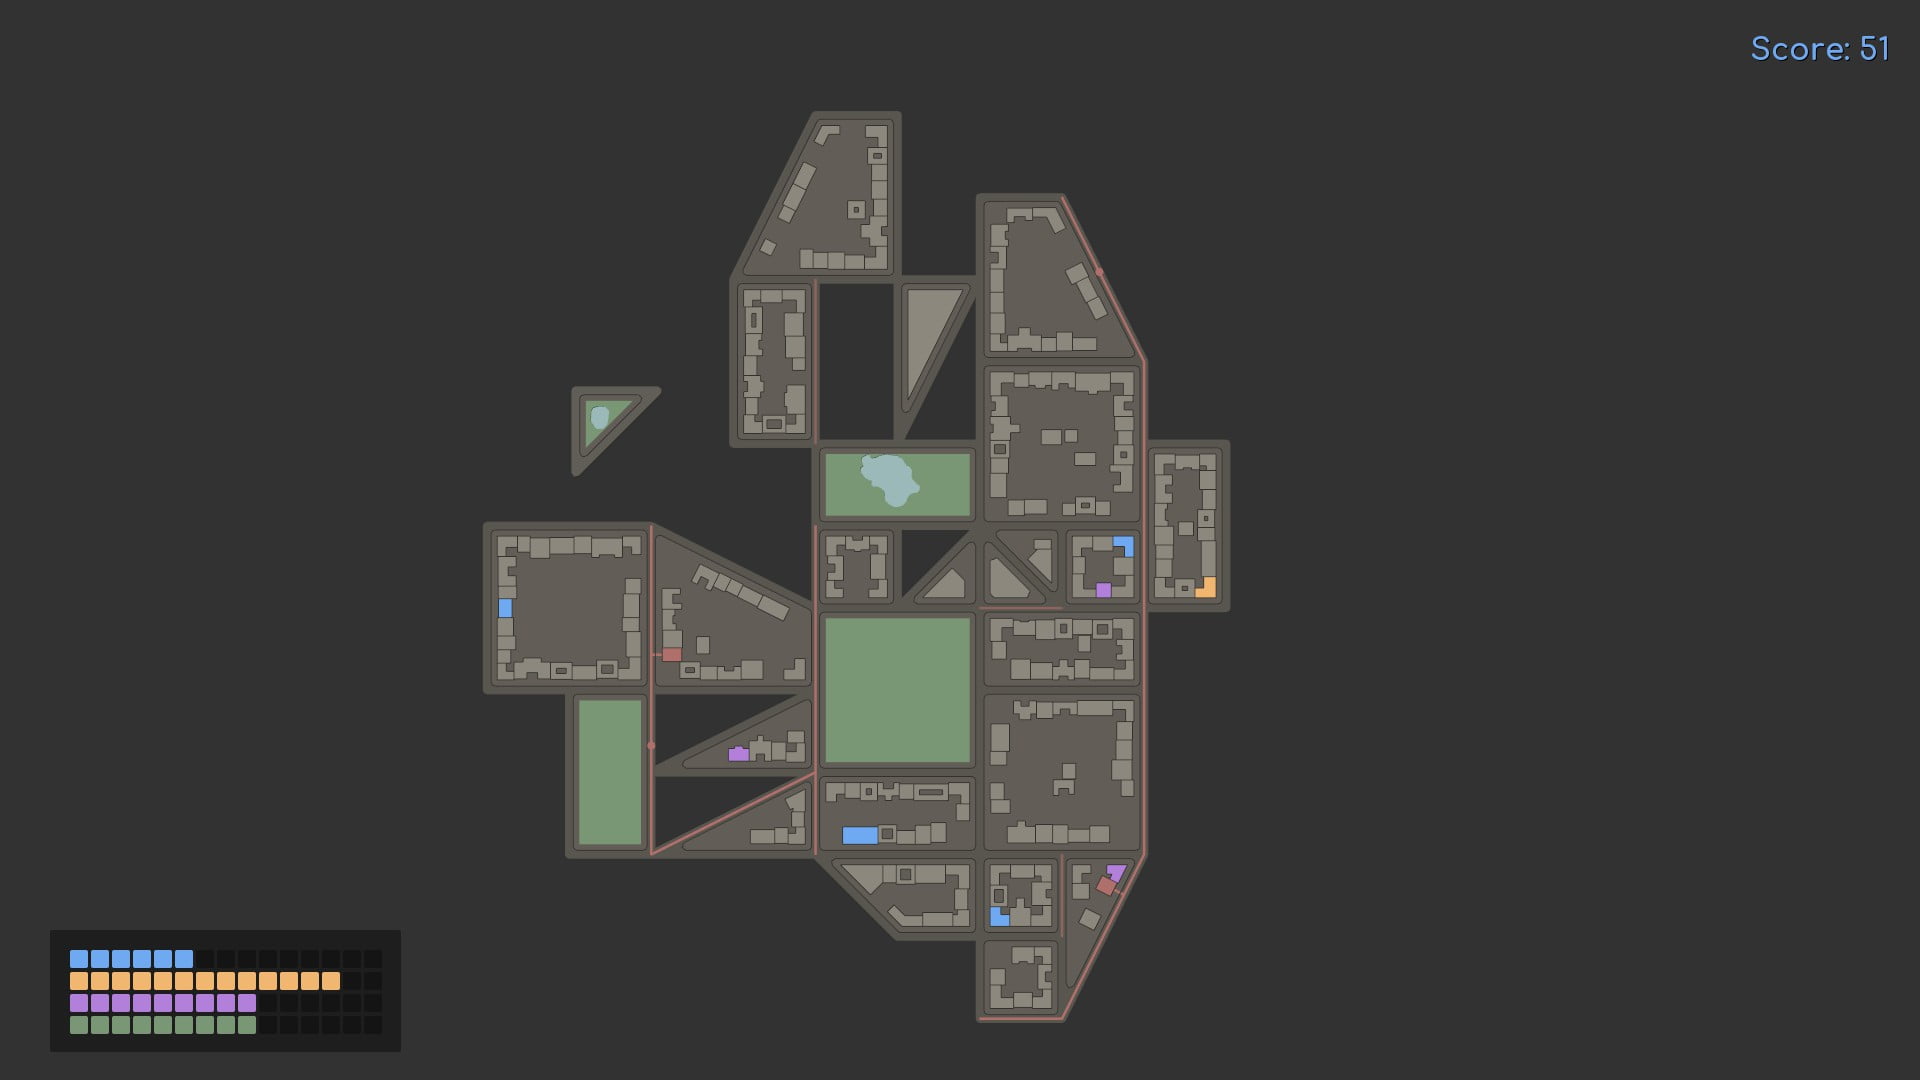
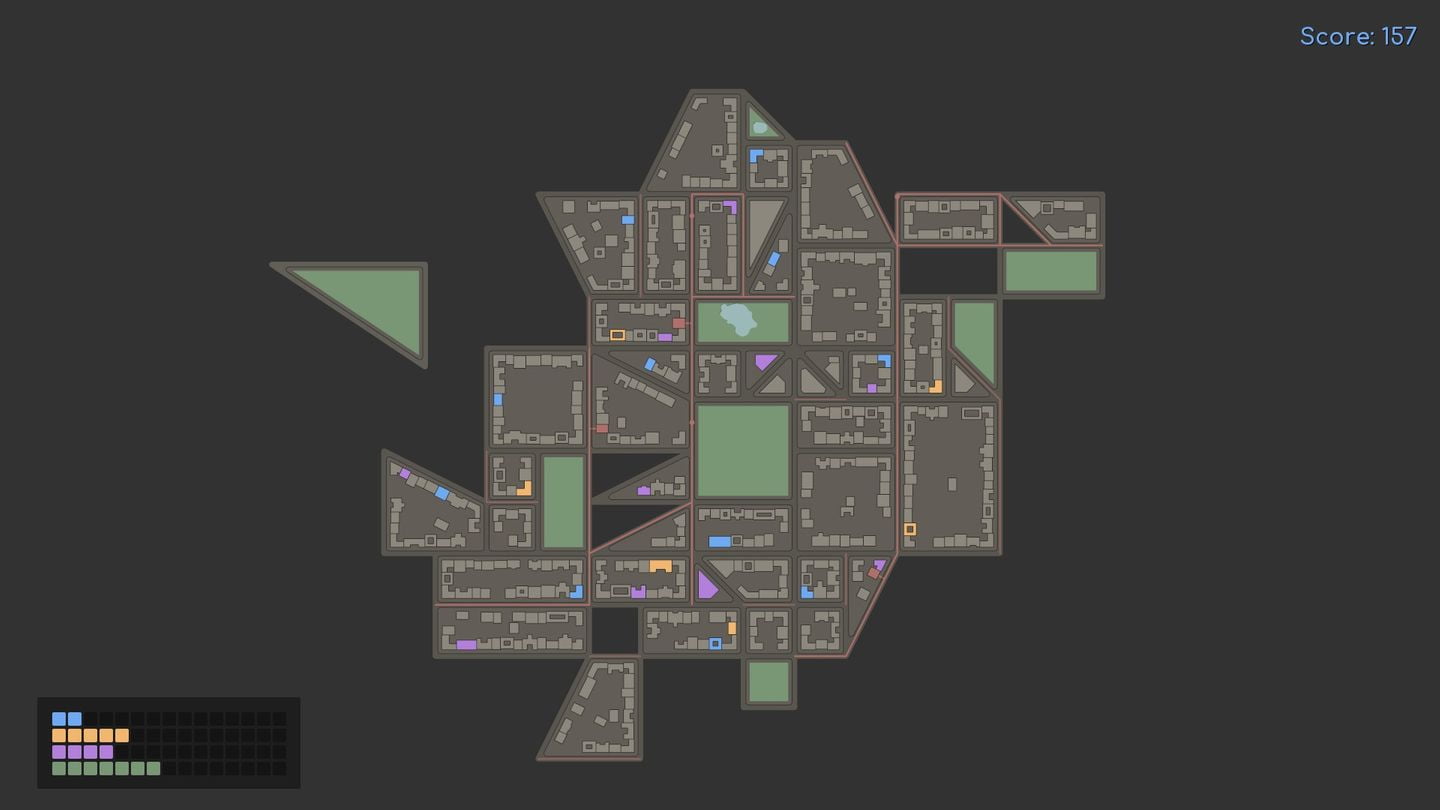
At this point we are far beyond caring about tram lines. In fact we haven’t needed to pay attention to them for a long time as they are now essentially irrelevant. To keep our demand low we usually just need to be careful when selecting which hole to fill.
And that’s basically it. By continuing this process, and making set ups for all the common pieces types we can continue this indefinitely.
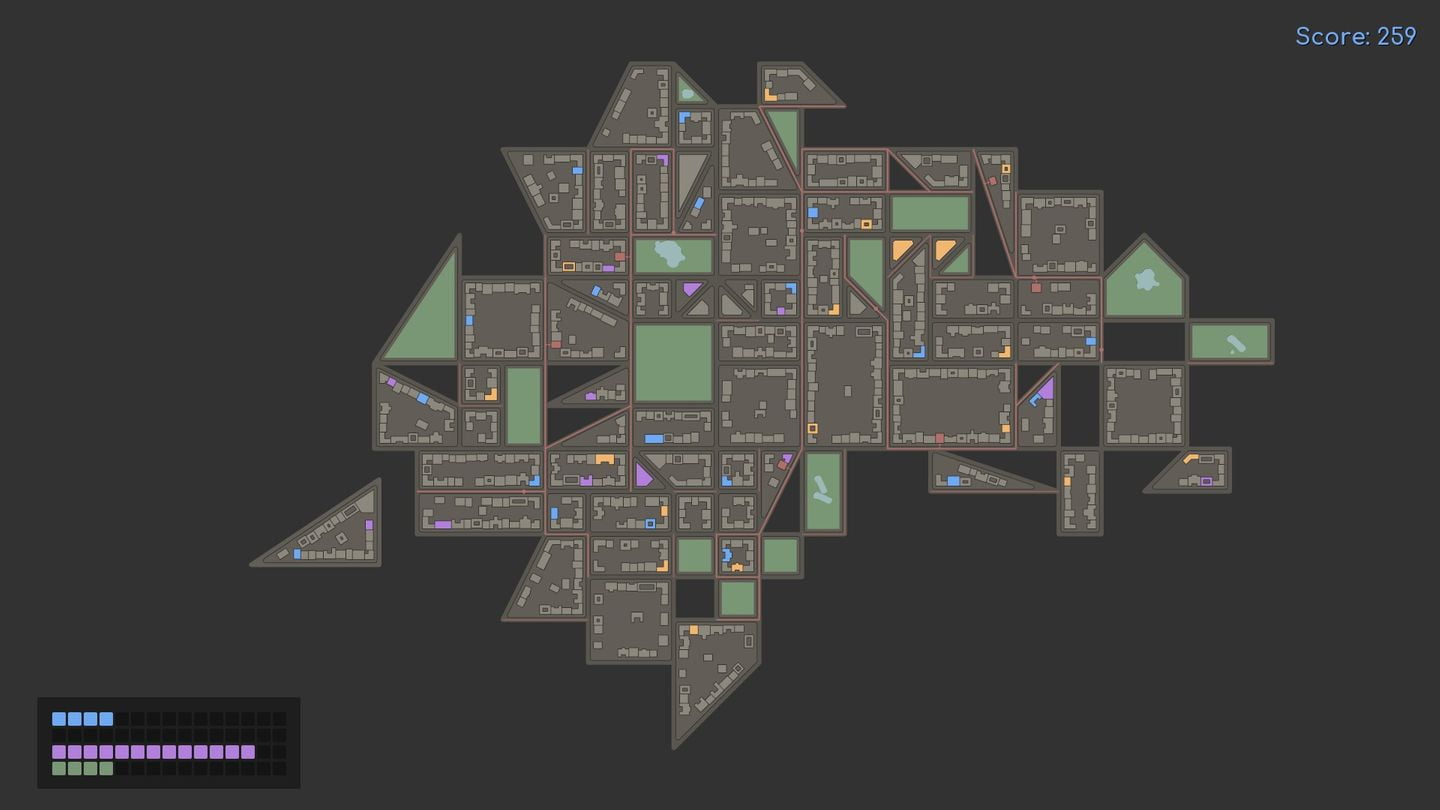
Anatomy of a Huge City
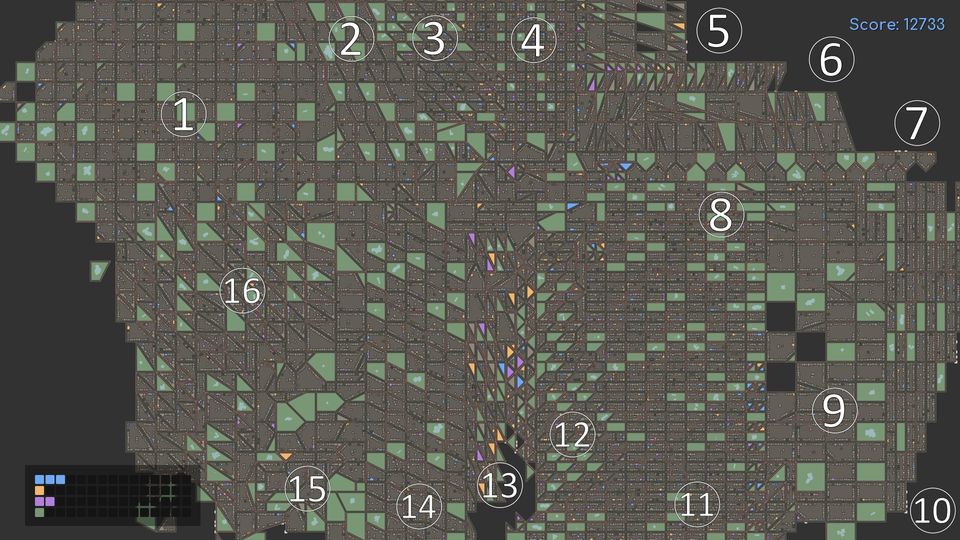
Here we have a really big city. It takes up about another half a screen and my graphics card is starting to struggle. I’ve labelled the various setups in use.
- 2×2 squares. I also use those tiles that are 2×2 squares missing a corner and fill them in with a 1×1 triangle
- 2×2 trapeziums. This extends up and left and is still in use.
- 2×1 trapeziums. This also extends up and left and is also in use. Notice that these two areas use the same tiling pattern to make and fill holes.
- 1×1 squares. By working in a diagonal pattern you can average a little under one hole filled every two tiles.
- 2×1 triangles and 3×1 triangles. I also mix 3×2 trapeziums because these are fairly rare. The stacks continue up and if necessary I have space to start new stacks to the right.
- To the left here are 2×1 triangles and 3×1 trapeziums. 3×1 trapeziums are fairly rare so they don’t need much space and it’s easier to fill the holes with 2×1 triangles which are much more common.
- To the left are an ugly mix of 3×1 triangles and 3×2 trapeziums. Fortunately neither are common enough for this to be a problem.
- Above here are the house-shaped pentagons, extending to the right. These fill inefficiently (at 4 tiles to make a hole the way I’m doing here) but they are also rare enough it doesn’t really matter.
- Here is a combination of 3×3 squares and 3×2 rectangles. Also included are 3×2 trapeziums with triangles to fill them to these sizes. It’s not perfect but it works ok.
- 3×1 rectangles. Notice the diagonal arrangement. From this arrangement it takes 2 tiles to create a hole, and from then you can alternate making and then filling holes until you reach the edge.
- 2×1 rectangles. This is a massive number of tiles and stretches about a quarter screen further down. Worth doing well and setting aside space for given how common these are. Again, use a diagonal arrangement for efficiency.
- 2×1 trapeziums. Mirror image of the tiles at (3) and stacked using the same pattern. This is interrupted by 2×1 rectangles at the bottom but I continue it again off-screen.
- Above here on the right are 2×1 isosceles triangles. To their left are 2×1 right triangles (mirrors of those at (5)). Notice on their left is a single (short) column of 3×1 trapeziums.
- 3×2 trapeziums – the mirror of those at (2) and stacked using the same pattern but this time in columns rather than rows. The row arrangement would be more efficient given that they are extending downward.
- An ugly mess of all those shapes that occur very rarely. If I’ve got nowhere else to put something then I shove it here and then fill the gaps eventually.
- 2×2 triangles and 3×2 trapeziums that they fit with. Also both kinds of 3×2 triangles. These should really be separated out into a few different setups to make it easier to track
Notice that demand is incredibly low. The main danger here is that because it is so low I get out of the habit of even paying attention to it. These patterns can all be extended indefinitely and I can see no reason why this city need ever end.