Tribes of Midgard Hunter Guide
Welcome to our Tribes of Midgard Hunter Guide. A guide explaining how to make Hunter viable in your random matchmaking. Hunter as it is right now is still severely under powered compared to Seer and Warden. Regardless, this guide aims to show you have to have fun and be useful with a very niche class.
Hunter Guide – Bow – Co-op
Why Hunter? – Tribes of Midgard Hunter Guide
No one can deny that Seer and Warden are S tier for a successful coop run in Tribes of Midgard. I aim to simply show you that a weaker class and “weaker” weapon type can be viable and enjoyable if you prefer a more nuanced, kiting type of combat.
Strengths
- Decoy: Hunter’s bread and butter. Activating a decoy with your roll will basically make you immune to damage for a short while. Roll whenever you can while kiting large groups of enemies or elites. This will cause them to switch aggro to your decoy so long as your decoy is closer to the enemies than you are. Extremely underrated skill. This will allow you to solo every mob and every type of camp in the early game with just a villager bow II so long as you are smart about your positioning. This includes werewolfs and Linnorms. The key part here is that you can solo while remaining very high on HP and not waste health potions.
- Plants/Animals Bountiful Harvest: The extra resources from your Bountiful Grasp skill is huge early game for getting your team geared up. Once you get yourself geared up with a Norn bow and some armor, prioritize gathering key ingredients required for elemental weapons, potions, etc. It is YOUR job to make sure the team doesn’t have to waste souls on any rare plants for their equipment. Visit the land of pools and ash beaches frequently and store what you get in the war chest whenever you recall home.
- Foreshadow: Good throughout the game to help your team uncover shrines and speed through the map without wasting time looking.
- Bows: Disregarded by more veteran players and seemingly underwhelming for new players trying them for the first time. They are a more nuanced weapon that requires some getting used to but can be very powerful in the right hands. Your huge range advantage allows you to be consistent DPS on Jotunns and Fenrir. While the rest of your team is cycling in and out between Jotunn and Fenrir AOE attacks, you can lay down fire to keep up the damage from a safe distance.
- Armorless: Finding a “nothing to hide” early on can allow you to run most of the game without needing armor since your decoy and range kiting will keep you safe. If you don’t find this rune, you can rely on raider’s or even villager’s armor for almost the entire game. The highest I ever upgrade to is Feral by the time Fenrir’s Lair is open. If you’re taking too much damage it means you are not kiting correctly. This saves much needed resources for the rest of your team who will be tanking hits.
- Arm of Ullr and Far Fetched: These runes are easy to come by and add a lot of damage to your bows. Keep some of your special arrows to burst down bosses and elites. By mid to late game, having multiples of these runes will allow you to become a DPS monster rivaled only by Berserker.
- Dark + Bow Efficiency/Damage: These skill upgrades will allow you to be the most consistent Fenrir DPS on your team. Hopefully by the time you have the Lair unlocked you will be able to buy the legendary bow (not required) for the Fenrir fight. If not, simply use the Norn III and be a healer for your team.
Weaknesses
- Not Seer or Warden
- Bow Durability: Bows struggle with durability. Luckily, they are cheaper than other weapons to create. Craft multiple Villager II bows instead of wasting souls on repairing if needed. It only costs 1 wolf tooth to upgrade from Villager I. By late game souls should be no problem and you can repair your Norn II/III when needed.
- Lackluster Skills: Other than resource gathering, bow damage, and decoy, the hunter has a very empty tree. The good thing is you don’t have to worry about picking between multiple good skill lines. Hahaa….. shiiiiii
- It’s Hunter: If you pick Hunter and don’t capitalize early-mid game on your strengths you will be wishing you picked something else. The strength of the Hunter is gathering resources and clearing camps SAFELY. You will be getting souls very quickly. Don’t die. If one or two of your teammates have already picked hunter, don’t bother picking hunter as well. Each lobby could use one MAYBE two hunters max. Any more than that and it will be pointless.
- Skill Curve: Playing on controller or using the bows for the first time will make the aim seem very difficult. Instead of simply holding attack to spam enemies you will have to pay attention closely and kite carefully.
I prefer Hunter over Ranger simply for the fact that Hunter has decoy early game to deal with groups of fast mobs or single target elites. Camps early and mid game are doable and nearly stress free with decoy compared to Ranger.
Decoy/Bow Example – Tribes of Midgard Hunter Guide
How to effectively use Hunter’s decoy when combined with the bow to clear enemies and camps with minimal damage taken.
Disclaimer: This is on a solo run so the enemies are a bit weaker. However, the principle of it remains the same and can be used for any types of camps or groups of enemies.
Also note that Decoy has a 40% chance of occuring. I got fairly lucky with the Linnorms but it’s a high enough chance that you should be able to rely on it as shown by the camp clear after.
Skill/Rune Progression – Tribes of Midgard Hunter Guide
Important Skills
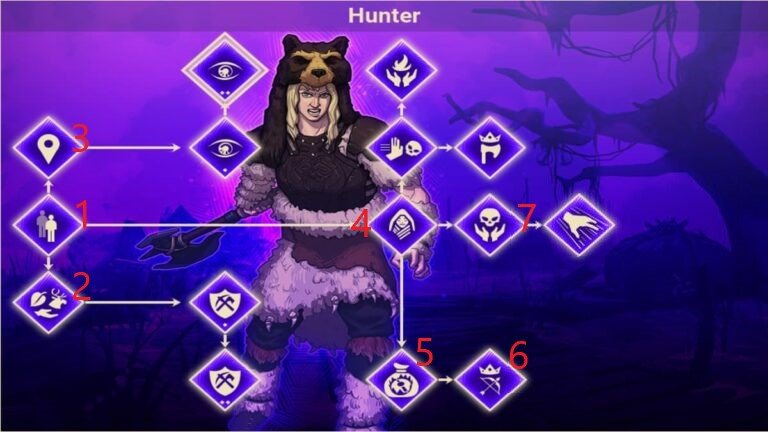
Skaði’s Spirit: Rolls have 40% chance to spawn a decoy that will draw aggro to nearby enemies
Bountiful Grasp: Double harvesting amount from plants and animals. Animals include: pigs, deer, boars, birds. Not sure if it applies to wolves. Trees do not count as plants.
Foreshadow: Detect nearby points of interests i.e. shrines.
Recall Totem: Places a totem on the ground from your inventory. You can return to the totem upon your death.
If you don’t find the land of pools early on, grab Foreshadow first so that you may quickly find shrines and other objectives.
I personally don’t bother with the fog of war but you are welcome to put one point into it early if you desire. I prefer to rush to bow damage to make sure my damage scales well with the day progression.
The last few points are up to you. If you have extra resources and your are leveling fast then you can go for axe damage. Carry an elemental axe as a side weapon if needed.
Runes
These are the desired runes you want. Of course other runes can work but I generally strive to get at least these 3 by the time Fenrir rolls around. If you run the archer starter kit you should start with Arm of Ullr already.
Far Fetched: Increase damage to distant enemies by 20%
Arm of Ullr: Increase damage dealt by special Arrows by 20%
Seidr Weaver: Combo attacks have 30% chance to generate a projectile that seeks out enemies


Far Fetched, Arm of Ullr, Seidr Weaver
Game Progression – Tribes of Midgard Hunter Guide
I start with the “Archer Starter Kit.” This will give you the Arm of Ullr rune to start off with and 100 arrows to help with camps and Linnorms. Do not waste the arrows on regular mobs.
Day 1
Grab branches and flint and quickly make tools. Once done, set out on an unexplored road and look for the Land of Pools. Check your map frequently to see if your teammates find it first. Clear any small to medium camps along the way. You should unlock your decoy fairly quickly if your team upgrades the stations at home base. Focus on finding wolves, getting runes early on, and activating shrines.
Night 1 – Tribes of Midgard Hunter Guide
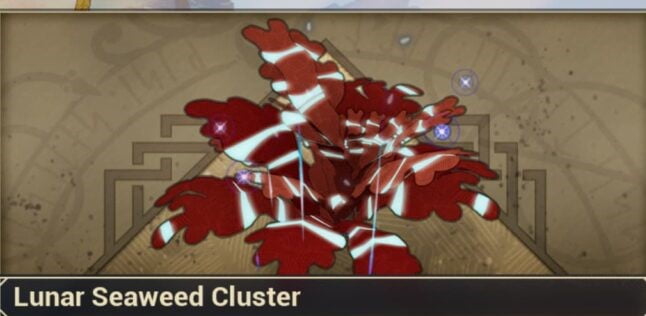
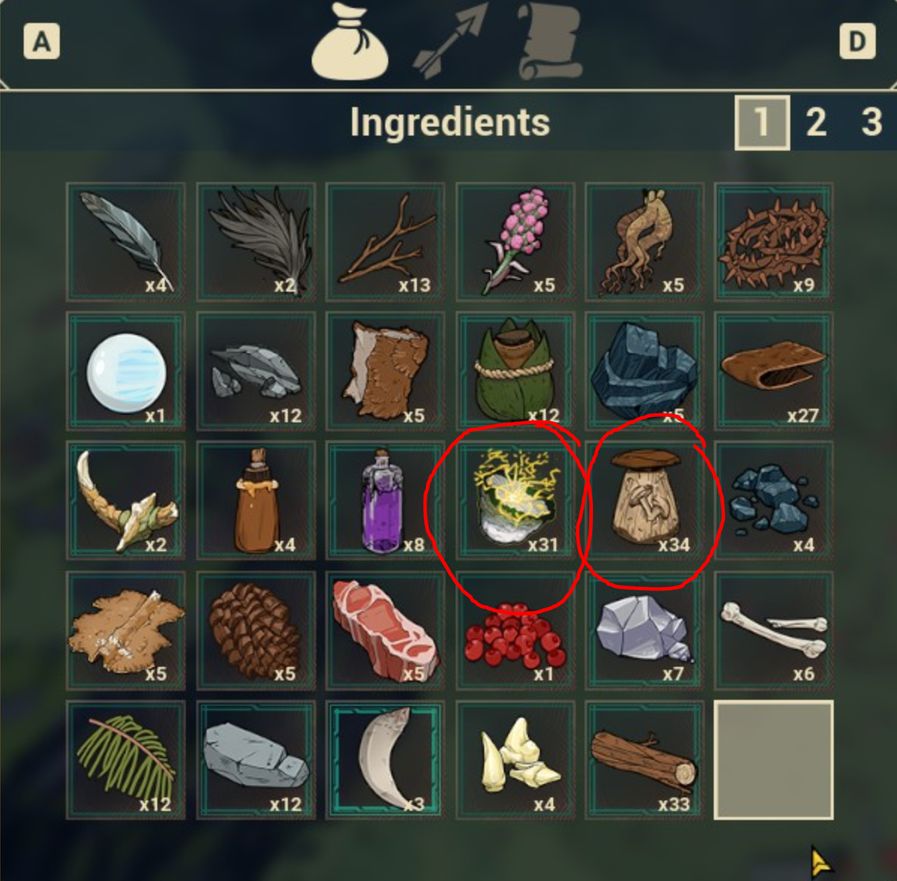
Your team should have found the Land of Pools by now. You should also be level 3 if you cleared camps and gathered resources along the way. Make Villager Bow II and villager armor. Take the closest shrine to pools and grab as many mushroom as you can. It is important to grab these at night otherwise you will only receive mushroom oil and no moon bolts.
Communicate with your team and tell them not to grab any mushrooms if you can. You want to get value out of your skill and double your pickups on these. Your team will need these for lightning axes. The mushroom oil will be useful for health potions. Don’t forget to also cut down Yews for the midnight oil.
Alternatively, if the Land of Pools hasn’t been discovered, go to an Ash Beach. Grab as much seaweed as you can for the starlit seaweed. This will be useful later for your team to make the iceproof epic armor. Again, make sure to only grab these at night to receive starlit seaweed.

This is after Night 1. There are enough mushrooms for pretty much everyone on your team to get a lightning axe or bow. After Night 2 you’ll have more than enough.
Day 2
Stay in the Land of Pools and look for Linnorms. Use your decoy to kite them and farm as many as you can. You should only need to kill 1 or 2 to make the Norn Bow. If you are lucky enough, you can get enough to grab Norn Bow II or hand off the rest to your team. Grab silver if you can for Raider armor.
Night 2
Repeat Night 1
Day 3
Spend this last day gearing up as much as you can. If you were able to find the resources you need, go ahead and start looking for and clearing as many camps as you can. Stay out finding shrines, ruins, and important locations. Work on the Quarry/Lumberyard whenever you can.
Night 3
Repeat Night 1, defend if needed.
Day/Night 4+
Rinse and repeat exploring, farming resources, souls, etc. Use whatever souls you have for station upgrades, buildings, bridge (if it’s been found.) Try to be self sufficient on your special arrows by clearing camps. Only use them for tricky situations or Jotunns. Use your Norn bow only to defend the base or take on bigger camps to conserve durability. Sell extra unneeded resources that you grab from animals/trees/plants for souls to be used elsewhere. Also sell extra arrows. You only need around 50 to help with elites.
Do not use your tripwires or jars unless needed.
Pre Fenrir
When your team has cleared the hideout and is getting ready for Fenrir, see if you can get one last upgrade for the Legendary Bow, Feral Armor, or Norn Bow III. This is how your inventory should look by the time you fight Fenrir:
-Norn Bow III/Legendary Bow (I usually have both)
-Feral Armor or Raider Armor
-Arm of Ullr (1-2) Far Fetched (1-3) Seidr Weaver (1-2 if you are lucky enough) Nothing to hide (1)*
-1 Stack of mana potions
-1 Repair potion or 1 Waystone potion (from ruins/hideout)
-Jars
-Tripwires
-Any left over special arrows
You will do much more damage than you would ever expect with a bow. I often find myself being the most consistent and highest dps during blood moons, jotunns, and bosses late game.
*optional only if you are skilled at playing armorless
Fenrir
Set up all your Jars and Tripwires before Fenrir comes out. Once he spawns, use all of them to get quick burst damage. Use your repair potion once your bow gets low on durability. Alternatively, recall home and repair if your waystone is off CD. You should take very little damage if any at all. Spam your mana potions to get your skills up for burst damage. If you have the Norn bow, use your piercing shot and save your healing aoe for when teammates need it.
Congrats you beat Fenrir and weren’t a completely useless hunter.
Jotunn Boss Fight Example (WIP)
Fenrir Boss Fight Example
This is about half way through the Fenrir fight with the legendary bow after I recalled once for a repair. I grab whatever left over special arrows I can and head over. I found plenty of runes in the form of Far Fetched and a Seidr Weaver as well as the Arm of Ullr I started with. Although it may seem like I was lucky, I had to pass on several copies of Arm of Ullr and Far Fetched leading up to the fight. It’s quite easy to get fully stacked ideal runes by this point.
Some of the damage is off screen but with the explosive arrows I’m hitting anywhere from 1200-2000 per hit depending on the element type. With no arrows I’m still hitting for about 400 per hit with an additional 200 from Seidr Weaver every so often compared to my allies’ 190-200 per hit. My right click (which I forget to use… I know, I know) hits for about 1000. Keep in mind I pretty much never stop hitting Fenrir the entire time while my allies are kiting away from his attacks. You are a very strong SAFE anchor of dps during this fight.
I’m still using Raider armor at this point and hadn’t upgraded since day 3.
At 2:36 you can see how much damage me and one other bow user are doing alone for a short bit to give you an idea about the DPS.
Hunter Buff Ideas
- Decoy activation is guaranteed but on CD. It is activated when aiming the bow similar to Ranger’s Ullr’s Step
- Bountiful grasp doubles the harvest of monster drops and trees as well. PLEASE this alone would make him meta for the Linnorm spikes, werewolf fangs, and big bones.
- Replace durable tools with durable bow OR add a skill after bountiful harvest that doubles resources from mining as well. Would also make hunter a meta resource gatherer.
- Recall Totem is consumable once per game. Upon death be revived at the location of the totem with no penalty to souls or materials.
- Trap Stacker also increases the damage of deployed traps.
- Sneak Activation. Very weak skill. Instead replace with an actual sneak passive. Deploying a decoy causes the hunter to enter stealth for 3 seconds. Shooting while in stealth causes bonus damage and reveals the hunter.
- Pushing Limits is replaced with a different passive. Decoy now explodes upon death dealing moderate damage.
- Sharp Eyes. Replace with a more rewarding scout passive. Crossing into a new biome/area reveals the location of the nearest shrine. Cannot be repeated.
Im hoping with buffs like these the hunter can be a resource gatherer early game, and become a stealth dps monster late game that focuses on playing around decoy. This hopefully also adds much needed AOE to the hunter’s kit as ranger has access to piercing shots.