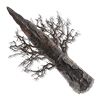
The Antediluvian Chisel is a crucial item used to upgrade your Umbral Lamp. One of the most important things in the game is to upgrade your Umbral Lamp to the maximum level as it is very useful for battling powerful enemies and in the World of Death Umbral. In this guide, you can check out all the known Antediluvian Chisel locations.
Where to Find Antediluvian Chisel in Lords of the Fallen
If you’re a big fan of Lords of the Fallen, you know how crucial the Antediluvian Chisels can be for your journey. These rare items are essential for your character’s progression, and in this guide, we’ll walk you through where to find them.

Antediluvian Chisel Locations
All the currently known Antediluvian Chisel locations are as follows:
1. Calrath Slums:
The first location you should explore for an Antediluvian Chisel is inside Calrath Slums. Start by heading to the slums vestige in the Alehouse, as marked in the fast travel menu. Once you’re there, follow the stairs leading down, and you’ll notice a hole in the wall. Carefully jump down onto the street below, but be wary of traps along the way.
Roll through the mines to avoid taking damage, and make your way up the road, while rolling to dodge the crossbow-wielding snake men. When you reach the top of the road, take a right into a square. Deal with any enemies following you, including the potential ravager. Once you’re prepared, enter the Umbral.
Inside the Umbral, you may encounter the eerie Easter Island head creature near the stairs. Deal with it or kite it away, and then proceed past it. In the square’s center, you’ll find a Soul Flay Creature on the wall, which holds the coveted Antediluvian Chisel.
2. The Fief:
After completing the main storyline in Calrath Lower City and defeating the Fire Giant Boss, return to Skyrest. Look for a note where one of the NPCs once stood. This note instructs you to go to the Abandoned Redcopse waypoint. On the left, you’ll find a bell door. Go through that cave, and you’ll face a frost Viking warrior mini-boss and some frost wolves.
On the wall near the boss, you’ll discover a creature you can Soul Flay. Doing so will grant you another Antediluvian Chisel.
3. The Manse:
To access The Manse, you’ll need to purchase the Pilgrim’s Perch Key. This will lead you through a hallowed Knight area. After defeating the boss, you can begin your ascent over the final remnants of the Pirch. Players can climb up and use an elevator to access The Manse.
Where to use Antediluvian Chisel?
Now that we’ve obtained the Antediluvian Chisel, what will we do with this crucial upgrade item? Of course, we’re going to enhance our Umbral Lantern, which is one of the most important things in the game. Take a look at the Umbral Lantern Upgrade Guide right here to upgrade your Umbral Lantern with the Antediluvian Chisel! In just a few simple steps, you’ll successfully upgrade your Umbral Lantern.