Welcome to our SIGNALIS Walkthrough & Guide. So that you don’t need to get stuck for 1 hours on a puzzle like I did, here’s a as-spoiler-free-as-possible walkthrough guide for SIGNALIS through what you can expect in your initial playthrough until more people get together to find out any other secrets.
We know that there are people who have a hard time finishing the SIGNALIS game. If you are one of those who find it difficult to finish the game, let’s take you to our SIGNALIS guide.
SIGNALIS Walkthrough & Guide
So that you don’t need to get stuck for 1 hours on a puzzle like I did, here’s a as-spoiler-free-as-possible walkthrough guide for SIGNALIS through what you can expect in your initial playthrough until more people get together to find out any other secrets.
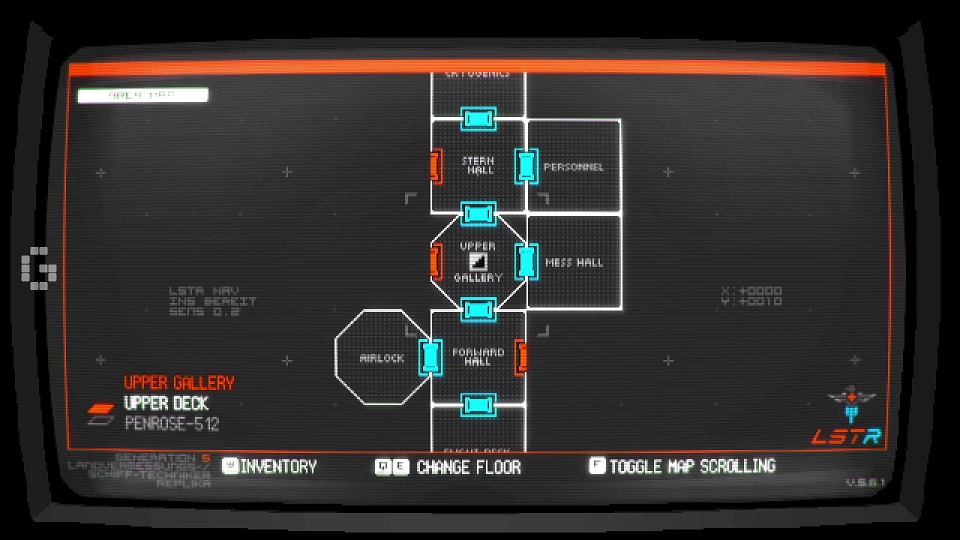
PENROSE-512 (CRASHED)
SIGNALIS Walkthrough & Guide
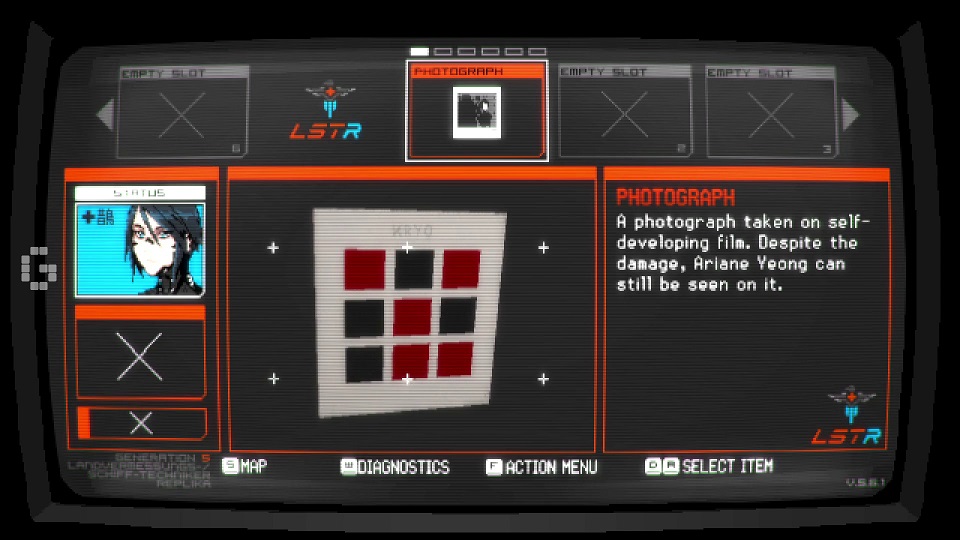
1. Obtain Photograph from Flight Deck. Inspect the back in your inventory.
2. Obtain Adhesive Tape from Mess Hall.
3. Obtain broken Airlock Key from Cryogenics after entering the code on the keypad from the Photograph.
4. Combine Adhesive Tape with Airlock Key to repair.
5. Use Airlock Key in Airlock Chamber.
6. Keep clicking until you arrive at an archway. You will automatically take shelter from the blizzard at the bottom of the pit. Crawl through the hole in the wall and pick up The King in Yellow for the game to start proper.
SIERPINSKI BASE: B1, B2
1. Obtain Receptionist Key at the counter at the upper right to open the door on your right.
2. Learn about Classroom 4B wall safe settings at the safe room. From the reception, go right, take the middle door, and it will be the first door on your right.
3. Go right, then north. You can learn about needing an Administrator Key to head into the mineshaft. Pick up the Protektor Key on the seats at the top left.
4. Return to the first corridor after the reception area and open the door on the left with the Protektor Key. The second drawer of the Observation Room will contain a Pistol and an Aperture Card.
5. Go past the safe room all the way to the north. The room will have a microfilm viewer to use the Aperture Card in for the code to the Classroom 4B safe. Classroom 4B is two doors to the right of the
6. safe room. The safe will contain the Classroom Card.
7. Go back to where you got the Protektor Key and open the north most door with the Classroom Card. No other way but down.
8. Head north, then west. Call for the elevator and pick up the Service Hatch Key inside. Going to other levels will require a Protektor Identification Card.
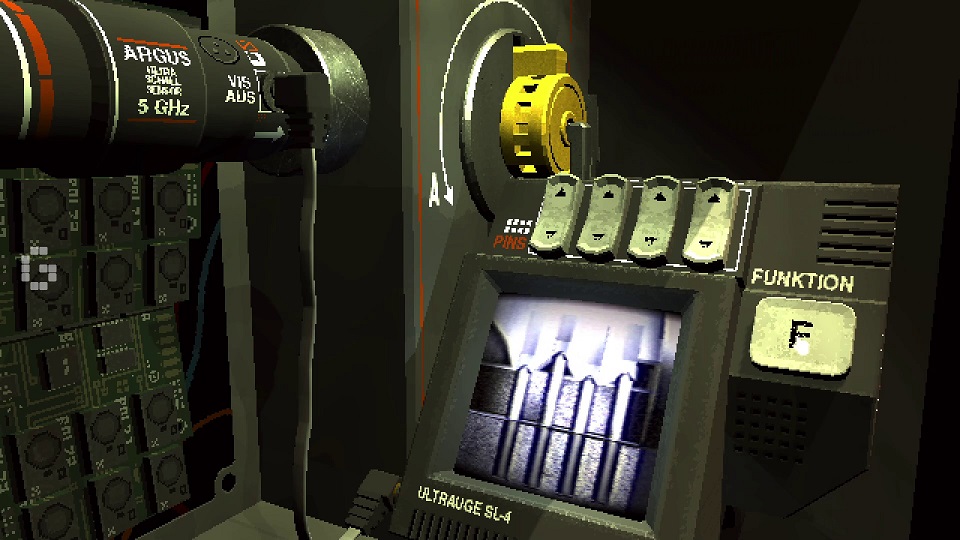
9. Returning to the A6 corridor, use the Service Hatch Key on the door panel. You need to pick the lock by getting the pins at the same level.
SIGNALIS Walkthrough & Guide
1. The Evidence Room right ahead contains a Butterfly Box that requires a key. The door on the left will be a safe room. The last upper door in the corridor has a Tree Safe and the East Wing Key.
2. Back in the corridor, head to the right most door to unlock it with the East Wing Key. When you start finding Repair Sprays, you can combine them with a Repair Patch for a Repair Spray+.
3. Make your way to the right most bottom door, then to the left bottom door. You need the Mensa Key in the room to open the right door in the preceding room.
4. Head down, then to the bottom left most door to get a Broken Key.
5. Return to the corridor, and take the right most upper door this time. The room contains a West Wing Key. Back in the corridor, the left most door can be unlocked to return you to the A6 corridor.
6. Return to the Elevator Lobby to unlock the door on the left with the West Wing Key.
7. Go left, then up twice to find another Broken Key. Combine the two Broken Key pieces to make the Butterfly Key.
8. Going left, then up through the Registry, will let you unlock the right door to return to the North Corridor.
9. The upper left door leads to the Interrogation Room, containing a note with the frequencies for the Protektor Safes.
10. Return to the Butterfly Box to retrieve the Plate of Eternity.
RADIO STATION
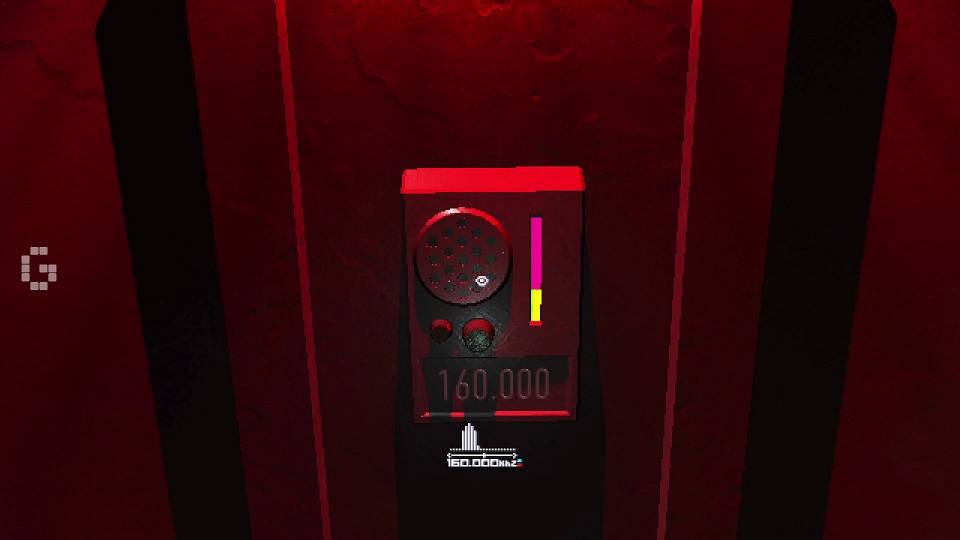
1. Head into the building on the right to pick up the REM-64 Radio Module on the table.
2. Tune the radio to the frequency on the door right outside the station.
SIERPINSKI BASE: B2, B3
1. You can now open the Tree Safe. Tune your radio to the right frequency and find the safe code in the transcription box in the inventory screen. The safe contains an Identification Card to grant you access to the Protektor Elevator. Once you insert the card, you need to pick a destination as you will be locked in unless you eject the card. The card will be automatically impounded at the 3rd floor.
2. Head right and up from here to a safe room to get a Shotgun on the table on the bottom of the screen. The room up from here has a machine to print a pattern on a Blank Key.
3. Head right into the North Corridor. The first upper door needs an Examination Key. The next door to the right has objects you can scan. The most important one is Object D, which gives you the pattern needed for the Blank Key. The next door on the right will be a dead end until you get the Incinerator Room Key.

1. Back into the East Corridor, take the right, then upper door from the South Corridor leads you to a TV with a built-in Video Cassette Player, requiring a Video Cassette.
2. Returning to the corridor, the door at the upper right will have the Sword Safe which requires a cipher.
3. Head back to the East Corridor, and left. You’ll find a door needing 5 Elemental Keys. The Sword Safe cipher is on a seat on the left. A = 1, N = 2, B = 3, H = 4, S = 5, R = 6, Z = 7, ??? = 8, K = 9, E = 0.

1. You can continue on to the West Corridor to your left. Unlock the uppermost door to return to the Elevator Lobby. The upper-left door in the corridor will contain a Socket Wrench Handle. The door below that has a Pump Room Key, which opens the door on the bottom right of the corridor.
2. The Pump Room puzzle solution is provided on a note on the table.
3. Return to the bathroom where you got the Pump Room Key and drop down once the water is drained. Directly opposite where you come out from is a safe room, which contains the Examination Room Key.
4. The upper left door of the Flooded Corridor is the Sleeping Ward with the Video Cassette. The attached room on the upper left will be where you find the Air Key, behind a vent.
5. Returning to the Flooded Corridor, the bottom right door will contain a Blank Key. Return to the upper level through the bottom left door.
6. Make your way back to the Examination Room to learn about combining Repair Patches with Repair Sprays, as well as the 10mm Socket, to combine with the wrench handle to make the 10mm Socket Wrench.
7. Using the Video Cassette will throw you into a brief sequence to acquire the Gold Key.
8. Now that you can open the Sword Safe, you can grab the Eidetic Module which works as a Photo Mode of sorts, and the Incinerator Room Key.
9. Return to the Morgue to access the Incinerator Room. The puzzle requires you to have the right combination of gases before you pull the lever. Follow the hint lights on the left of the panel; a lighted up arrow indicates too much, vice versa for a down arrow, and if there’s no light, you’ve got the right amount. Obtain the Fire Key when the hatch opens.
10. Get the Air Key with the 10mm Socket Wrench in hand.
11. Last but not least, print the pattern you got from the X-Ray Imaging onto the Blank Key. Note the orientation and number of columns. Once you’ve unlocked the gate, you can save and have a mini boss fight. You can only shoot into its weak spot from the front when it’s crouched.
SIERPINSKI BASE: B5, B6, B7, B8
Hopefully you’ve been reading the posters scattered about.
1. You can first proceed to the safe room through the bottom right door. This is the Protektor’s Office, with a Maintenance Key.
2. The Flood Overflow ladders are now accessible through the door on the left of the Elevator Lobby. Stop by B6, where you’ll need to find a Postbox Key, Owl Key, and Workshop Key to unlock the relevant doors. Move through the STORCH Dorm at the bottom left door, with the Workshop area all the way through to the south. South of the Workshop door is the ARAR Dorm, with a hole to drop down to B7. You can unlock the door right ahead of you.
3. Move to the first upper right door to obtain the Fuse. You can now return to the puzzle, where you’ll need to match the listed voltage on the right, to make the looping lifts functional.

SIGNALIS Walkthrough & Guide
1. The next door on the upper right is the Piano Hallway, with a locked room towards the lower right. It needs a Shutter Gate Handle.
2. Take the looping lift to B8 and enter the room on the left to find the Shutter Door Handle. Continuing through the doors northwards twice will take you to the FALKE Bedroom, with an Owl-like Box you can’t open yet.
3. The first bottom door in the Library Hallway has an orrery. If you have the Eidetic Module, you can photograph this to make a note for a puzzle later. The other bottom door is a dark room.
4. North from the dark room is the East Hallway, where you’ll need a Hummingbird Key for the door on the right. Head north twice to the ADLER Bedroom, where you can find the Flashlight Module. This takes a permanent slot in your inventory much like the Eidetic Module. The room north of the ADLER Bedroom needs an Eagle Key.
5. The upper left door from the East Hallway is the Mineshaft Access room, which needs an Administrator’s Key. The left most door is the overflow ladder back to the upper floors.
6. The door on the right of the connecting Cleaning Room of the STORCH Dorm is a dark room. Head north to pick up the locked Weapon Case and Adhesive Tape from the shooting range.
7. B7’s North Hallway’s northmost door leads to the Management Office with the Island Painting, needing the Island Key.
8. Using the Shutter Gate Handle will grant you access to a safe room and the Owl Key.
9. Backtracking to the B7 dark room left of the looping lifts, head north to find the Island Key and Hunter Key. The Hunter Key is for the Weapon Case to get you the 6-barrel Revolver (12mm ammo).
10. The Owl Key unlocks the B6 room, which leads you to the Broken Music Cassette. Fix it with the Adhesive Tape.
11. Using the Island Key on the Island Painting gets you the Workshop Key. Unlock the Workshop and slot in the fixed Music Cassette in the radio broadcasting unit and note its frequency band.
12. Return to the FALKE Bedroom and tune your radio to the frequency band. When the Owl Box opens, it will reveal the Hummingbird Key. The Hummingbird Room in turn gets you the Eagle Key. Don’t leave just yet, as the dark room to the right of the room has the Postbox Key at the very right end.
13. First return to the Postbox to get the Library Key. You need to interact with the machine to get the Astrolabe by reaching the book within.
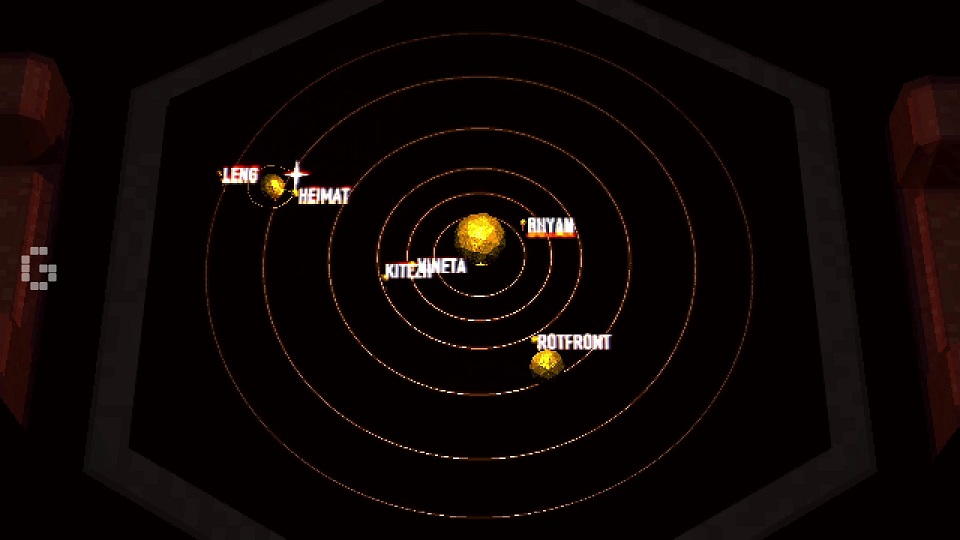
14. Now, go back to the Eagle Room with the Astrolabe. Fix it onto the mechanism of the Shrine Box on the table. The puzzle requires you to move the symbols representing the planets in relative position to the four-point star (Heimat). Completing the puzzle gets you the Administrator’s Key.
MINESHAFT
There is no map data.
1. Take the left tunnel, then the bottom right, then the south door to find the Mining Office. It’s a safe room containing a Flare Gun and Signal Flare Shells. The Flares can incinerate enemies, but is not guaranteed to light.
2. Proceed south, and down the mining elevator. Proceed through the upper left. From here, you can go to to the lower left path for a conversation and a hint about microwires, but otherwise you can head northwards to find an access shaft. Activating it will slowly open it and alert the nearby enemies, but you can head through once you can interact with it, and keep heading down.
NOWHERE
There is no map data.
1. North twice from here gets you to the Ancestral Shrine, which asks for offerings.
2. Go south, then left to find a keypad door with a Triangle symbol. The door south of here unlocks from the other side. Go right to emerge into a new room.
3. Pick up the Large Wooden Doll. A note at the very top talks about the death of some creature before the door opens. Head down the ladder.
4. The right door is the Classroom safe room. There is also an Asterisk keypad door. The door opposite the safe room needs a Rusted Key.
5. The north door will take you to a fleshy pulsing shaft downwards. The door north of here unlocks from the other side. Go right to find a device hooked up to a microphone. Turn on and tune your radio frequencies to find the keypad combinations for the associated patterns. Also pick up the Wedding Ring on the table.

1. Drop down the flesh shaft for now. You need to stall for a bit as you can’t defeat the creature on your own. When the sequence ends, you will be in a safe room with access to the Pentagon door.
2. Head right, then to the first upper door to unlock the shortcut to the Triangle door. Head back down, and all the way to the right from the safe room into the next room. The Regent Ring will be on the pedestal.
3. North of this pedestal room is a barbed room. Turn on your flashlight to see the wires. The Rusted Key will be on a pedestal towards the top of the room, while the Plate of Flesh will be in the middle.
4. Trace your steps back to the room where you found the Large Doll using the new shortcut. There will be a new door at the north, where you can get the Small Bottle of smelling salts on a seat to your left. You will now be able to acquire the Rifle which uses Nitro Express Rounds.
5. Go back to the Rusted Lock to unlock the door to pick up the Wooden Doll to combine with the Large Doll. Grenade Shells are Flare Gun ammo; combine it in the inventory to change its type. This room has the Diamond keypad door.
6. Through the Diamond door is another barbed room with the Plate of Sacrifice on the pedestal.
7. You can go through the Triangle door to find the Small Wooden Doll. You can now make the Combined Wooden Doll.
8. Head into the left, dark room to get the Serpent Ring on a chair towards the left.
9. Head back right into the right door, then to the door left of the corridor to find Incense to use at the Ancestral Shrine.
10. All the way to the right will be the door to use the Plates at, and further right still will unlock the shortcut to the flesh shaft.
11. Returning to the Ancestral Shrine with the Incense offering will get you the Plate of Love.
12. Before going through the Pentagon door, ensure you have the Completed Wooden Doll. The door at the bottom left will be where you can find the Plate of Balance. Use the Completed Wooden Doll on the scale so that you don’t get locked in.
13. With all three Rings in your inventory, you can proceed through the Asterisk door from the Classroom safe room. Keep going until you reach the room with the statue hands. The note on the left seat gives the answer hint which is basically: Regent on index finger, Wedding on ring finger, Serpent on little finger. Get the Plate of Knowledge.
PENROSE-512
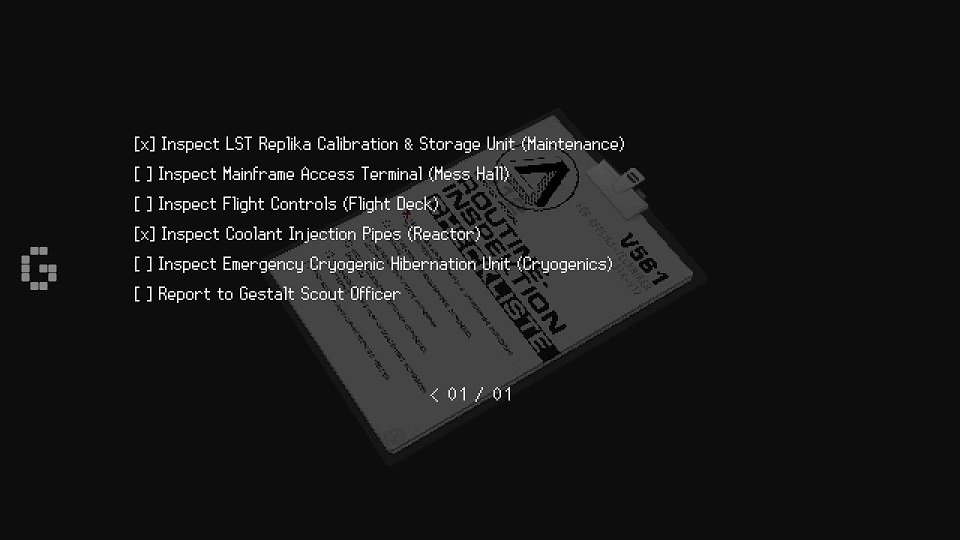
Your task is to ensure the ship is in working order.
1. You cannot complete this segment until you do everything else other than report to your officer.
2. The one choice you can make is whether or not to read a confidential document at the Mainframe Access Terminal (Mess Hall) room.
PENROSE-512? (CRASHED)
1. Wake up.
2. Head left, then north.
3. There’s no other way except south, then down.
SIERPINSKI BASE?
Something has changed. There is no map data.
1. Go up, right, up and right to find the safe room.
2. Go right, then right again. “You’ve been here before.” Use the same code for the Classroom 4A safe to get the Classroom Key.
3. Head north through a dark room, then north again to unlock the locked door with the Classroom Key. There’s nowhere to go but down.
ROTFRONT COLONY
The map returns.
1. The mural will be the last thing you do here. Start by going through the upper left door, then the first upper door to find a Submachine Gun and 8mm ammo. Go through the north door to find the Bedroom safe room.
2. The room all the way to the left of the corridor has a painting you need to dissolve to get a card. The upper left-most door takes you up a ladder and to an apartment corridor. You need a Room 0512 Key to open the first upper door you see.
3. The first bottom door is a dark room. Pick up the Developing Tank on the table towards the bottom. Take the door on the right and move up, then unlock the door on the left into another apartment room to pick up the Handwheel.

1. From the Moon Mural, go through the upper right door. Use the Handwheel to disperse the flames. Up the corridor and to the right is the Disinfection Room, with Acetone on the floor near the upper left. If you want, you can backtrack to the painting to get the Lovers Tarot. The door to the right of Disinfection is a broken meat grinder to go down a level. The door north of the Pipeworks is the garbage chute where you can get the Blue Diskette for the computer prior to the Bedroom safe room.
2. The Blue Diskette will unlock a transmission puzzle. You need to ensure you hear the same sound on both frequencies to know if a dish is online and able to transmit both ways. ( Ed. note: Until I’ve figured out what this puzzle does, this is where this ends.)
3. Head down through the broken meat grinder. Find the Tower Tarot on a tray on the right table as you proceed through the only open door. Further down to the Metro Platform, the safe room will be through the top right door at the Computer Store where the red eye screens can be seen. Patient Key for Room 0512 will be on the table.
4. Make your up, then up the ladder into an alley. Head south to unlock the door on the left into the Commercial Corridor. Not much you can do here yet as you don’t know the keypad combination into the back alley, though you should have the hint from the correspondence from the computer.
5. Unlock Room 0512 to find the Tarot Table. The book on the right gives the placement hint for the cards, required for the Moon Mural. Once the cards are placed, you can flick the switch at the top left of the screen.
6. Either from the dark apartment room (right, up, up) or from the handwheel apartment (right, up), move through the Hospital Hallway to a patient’s room. There is a box on the bed, and you likely only know two frequencies as per the antenna puzzle. I tuned it to 210 to get the Store Key and The Star Tarot.

1. Return to the Metro Platform and go all the way to the left this time. If you have the Store Key, you can unlock the Photo Store to get the Developer Fluid to combine with the Developing Tank for a photo. It’s for the Packing Room on the left of the store, to get the Sun Tarot. You can keep on going left and up the ladder to unlock the shortcut.
2. From the Computer Store safe room, head up the ladder twice to find another apartment. Go left, then the first upper door to a Butterfly Room with framed butterflies and the word “Pareidolia” as your hint. Find the pattern in the wings, in this case, AEON, to unlock the safe and pick up the Moon Tarot.
3. The upper left most door from the corridor takes you to the Dentist Room. Pick up the Red Diskette, with a shortcut exit via the Garbage Chute to the Pipeworks.
4. Use the Red Diskette to get the passcode for the Itou backyard in the Commercial Corridor. Move through the shop, then obtain the Death Tarot on the altar.
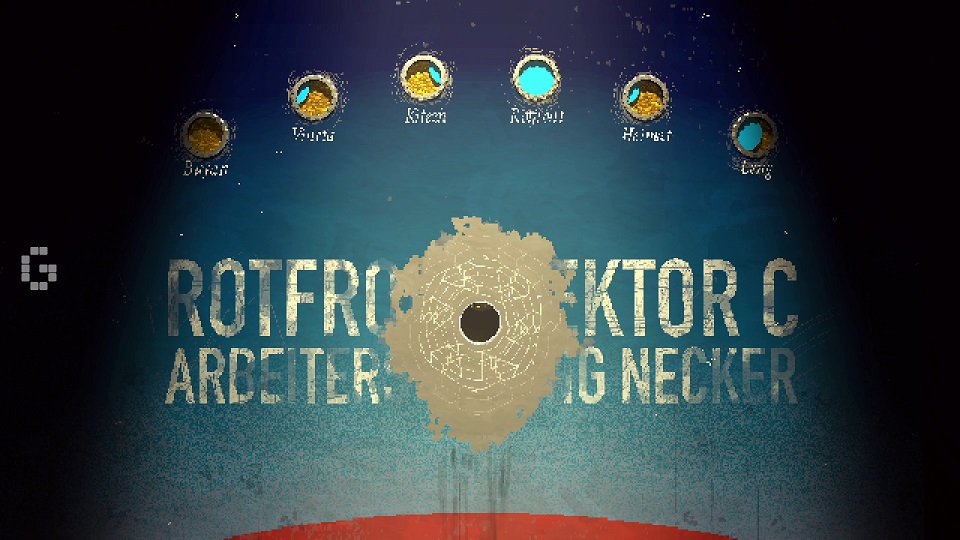
5. By this point, the Moon Mural room should have a mess on the floor. Pick up the Dial Ring to fix to the mural. Using the Tarot, turn the dials (yellow for moon, blue for none) and go through the peephole.
End
Weaken the enemy and pick up the spears to skewer through them when they fall to their knees. Spears will take up inventory slots. The screen will become incredibly glitchy, and will change scenes each time you skewer successfully. Attack patterns include throwing the actual spears, emitting damaging fields around spears where they drop, throwing out sonic waves (which also damages other enemies, not just you).
