Cockpit Settings
Time to introduce you to the standard cockpit we are used to in real life or flightsim.
I have seen a lot of creative cockpits around, and some works well and others, well not so much. In aviation we like to make everything standard. This makes it easy to jump between aircraft when you expect to find buttons and gauges at the same place. This also applies to helicopters. To make it simple, I’m only taking the basics here.
Cockpit Instruments
Basic T:
Whenever you are flying you need to have quick access to your altimeter and speed indicator. For flying at night Attitude indicator and vertical speed indicator are essential as well. Now, the standard system is based on the attitude indicator. Place the attitude in the middle of your front. Add altimeter to the right and speed to the left of the attitude. Add compass under it. Vertical speed indicator to the right of the compass (under altimeter)
With this setup you can safely fly at night.
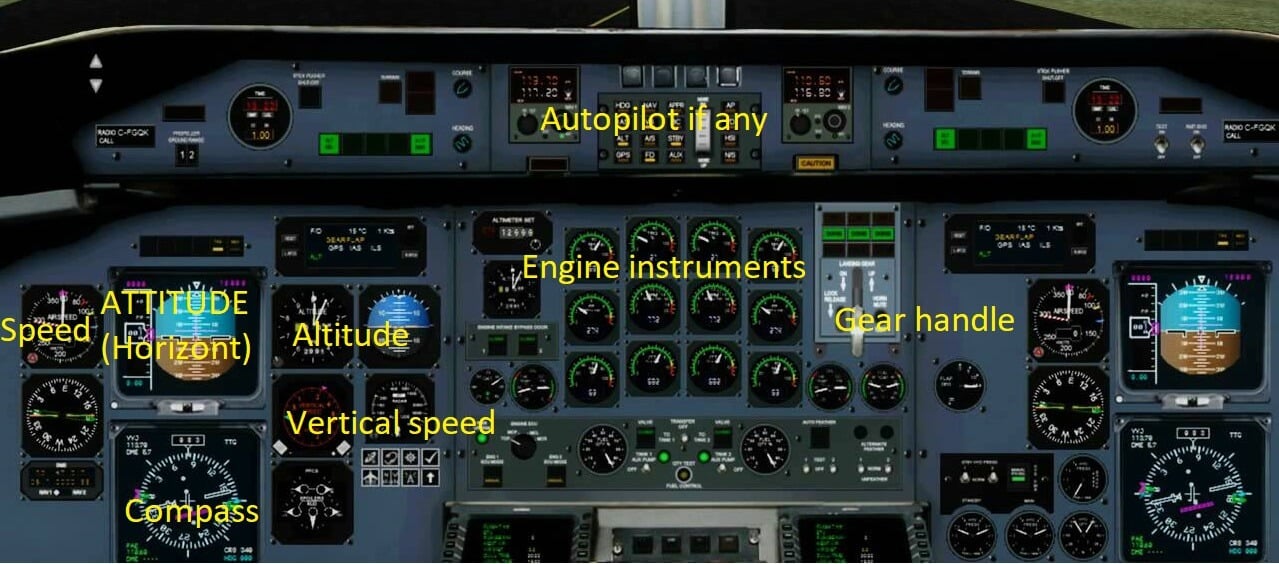
Now the rest. The engine gauges are normally placed in the middle except fighters and a few single pilot aircraft. The gear handle is also placed in the mid section so it is visible and quick access since its importance. Autopilot is placed above the other instruments. It is tight, but possible. Note that I have the same for the copilot’s seat.
Under i have a few examples of how to make this in stormworks:
Plane

Helicopter
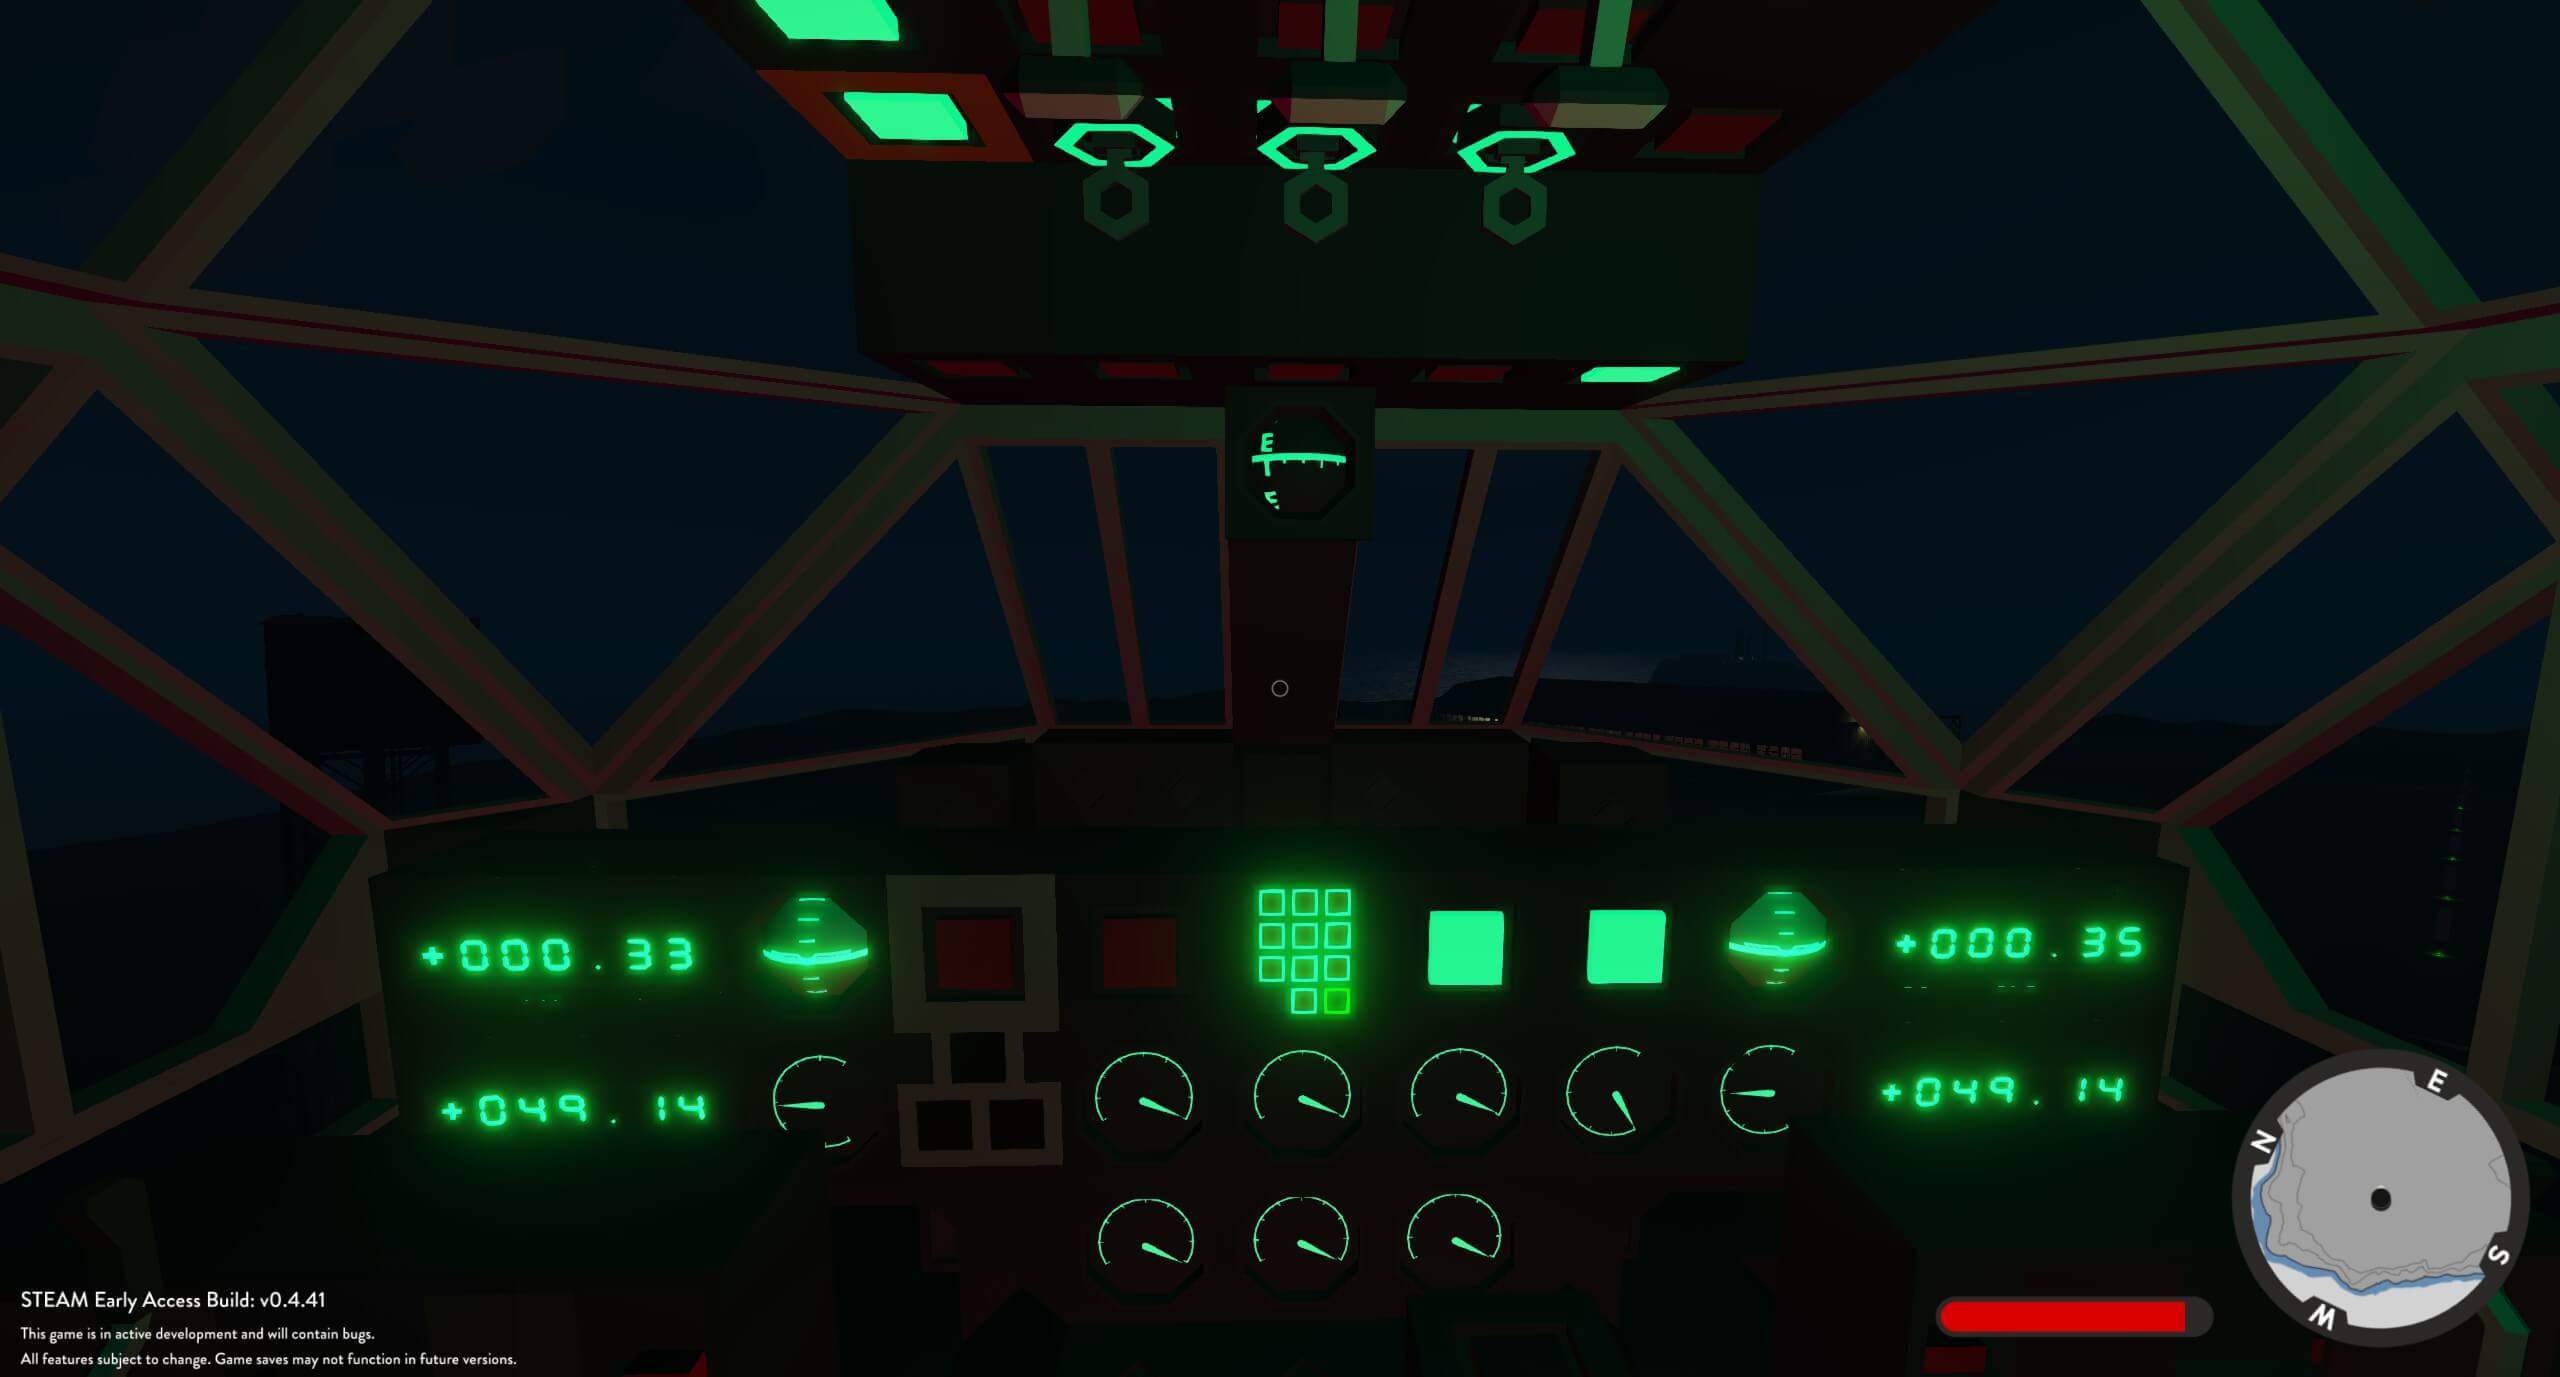
Here the altitude and speed is digital so to fit it I had to have the altimeter under the speedindicator.
Attitude: Shows the aircraft’s relative position to the horizont.
Altitude: Shows height
Vertical speed: Shows if the aircraft is climbing (gaining height) or descending (loosing height).