Hello from our Thronefall Durststein Frontline Tank Build guide. This guide will show you one way to complete Durststein emphasizing the player character as a main combatant while still protecting economy.
This guide is a Steam guide created by Beornik. You can find the author’s link under the guide!
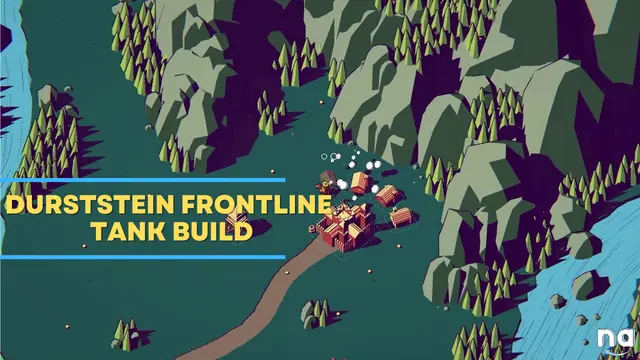
Thronefall Durststein Frontline Tank Build
Welcome to our Thronefall Durststein Frontline Tank Build guide. One way to complete Durststein emphasizing the player character as a main combatant while still protecting economy.
Build your Character
Weapon
- Heavy Sword (switch to the Light Spear for quest-specific challenges)
Perks
- Heavy Armor
- War Horse
- Melee Resistance
Modifiers
- Challenge the Snake God
- Challenge the Falcon God
- Challenge the Wasp God
Could add another (especially if shooting for Quest F – 12000pts).
This will build your character to be a major combatant in your fights. Trample damage from War Horse, coupled with being more resistant and durable will ensure you can survive getting hit and pulling aggro from your buildings. This capability will be improved later throughout the level.
Day One Setup
After building the castle, buy the following:
- The closest Gold Mine
- Spearmen from the Barracks
- The closest north farm and a field
You will have to use the Spearmen and yourself to stop the cavalry coming from the south. Easy peasy.
Early Eco Strategy
For the first several days of Durststein, the Farms to the north are very safe. The overall goal is to selectively get Gold Mines which will provide you with enough money by Day 4 to do the following:
- Buy up Farms and Fields (Improved Plow)
- Level up the Castle with Royal Training
In this early period, prioritize getting the stable income of 2 farms and some fields going as well, with leftover money. Your spears will help protect the south, where you can put a single wall and a tower to block the fast-movers.
Between these very light defenses, you, and the upgrades, things are starting to look pretty. Don’t be scared to use the arrows from your castle in this early period if you need to, though it shouldn’t be necessary.
By the top of Day 5, you should have 2 goldmines, 2 farms, Spearmen, several towers (2 at the north), a south-western wall, an upgraded castle giving you more potency in combat, and enough gold to upgrade even more.
At this point, with 20 knights and 5 exploders coming from the south, I used my 16 gold for the following:
- Upgrade both farms (4gp each), and add 2 fields
- Buy a tower right next to the castle
- But the southern wall
The wall and tower mainly give the exploders something to run into, don’t worry if they get broken. Remember, you are a frontline tank. Charge the enemy and run into them for more damage, and aggro them on you to slow them down!
Day 6 Into Mid Game
Day 6
Day 6 allows you to get the 3rd northern farm, make more upgrades, add a field. At this point I also buy a wall to the north, a tower upgrade, and buy the 3rd tower in the middle of the farms.
This strategy relies on you keeping the farms up so you can buy the last gold mine for another eco spike, while placing your Spearmen in places you can’t be to slow the enemy down. Using this strategy it’s common for your soldiers to lose a fight, and for you to have to run back to where they were defeated to clean up the mess.
Fortunately, your economy will still be protected if you choose your fights right, as the farms are protected by multiple towers and a wall.
Day 7
It’s very important now to get Magic Armor for 20gp from the castle, as your southwestern wall is about to be hit with exploders, giants, and some archers. On Day 7, you should also have enough to get a couple more fields to the north.
I never bother with the southwestern farm + fields, that area is too difficult to wall off. Instead, with the last 3 gold, I buy a single tower facing down at the exploder entrance, and place my Spearmen to the south in the pass to the bottom-right of the castle to protect against the fast-moving cavalry.
Magic Armor is what kicks this tanky build into high gear, massively increasing your damage output as long as you keep getting hit. Your perks, resistances, etc., should all start really coming into play here and your soldiers and defenses are there to stall in places you can’t fight on your own.
Using your own tankiness, you should be able to nearly solo the giants and archers without too much help from the tower and wall.
Remember to keep running into, in circles, all over the place on top of your enemies using this build, you will damage them just by moving. Your sword’s active ability is another area-of-effect attack, so you should be doing plenty of damage to keep up with these enemies.
Day 8
Upgrade 2 farms again. Buy the upgraded wall to the northeast of the farms (prioritize the farms — you NEED to keep the farms going. Handle the fights there before moving on to other places.
To the northwest, we’ve so far bought nothing. Buy a cheap wall and tower with your last 6 gold and call it a day. Those two defenses won’t hold forever, but it’ll be just enough for you to finish the fight near the farms and return to save the day.
Running this, I went into the night here with 0 gold.
Day 9 Into Late Game
Day 9
You should be at the Day where 3 groups of 35 cavalry are charging you from 3 different directions. Playing through this level as I made this guide, I had 33 gold to work with here.
Cavalry if left to their own devices will utterly destroy your economy, going out of their way to target it and the Castle.
- Upgrade your Barracks to get another group of Spears, place them to the southwest.
- Upgrade the wall there.
- Send 4 Spears to the Southeast/South (right below the castle) pass
- Upgrade the wall there also.
You should now have about 10 gold left if you haven’t made any massive eco losses. I used my last bit here to buy another upgraded tower to the northeast and buy some fields. This should be some of the last eco we buy.
You’ll take the fight to the north by yourself for PART OF IT. You can stay there for about half the battle’s worth of guys, then leave your upgraded walls and towers to handle it. As you come back to your castle, you may see that the southwestern gate has already gone down, and cavalry are coming in. This is okay, just aggro them by charging in, and do your best to keep them away from your farms, castle, etc. They’re fast, but you should be able to catch them and get them (or at least some of them) to chase you.
Your 4 Spears should be able to handle the fights to the south, or at least stall long enough for you to be able to return.
Doing this, I lost no economy buildings on this night.
Day 10
Upgrade the 3rd farm because there is no attack coming from the north here. After this, I had 32 gold left. Again, we’re basically maxed on economy now, so this is a case to prioritize defenses. The wave is also coming from the opposite direction, which has been a little neglected.
To remedy this:
- Buy 2 towers
- Upgrade both towers behind the wall (should be 5 gold each)
- Buy Fire Archers to the southwest, have them hold position behind the wall
- Buy Berserkers to the southwest, have them charge out at the catapults that are about to come
- Last 3 gold, buy southernmost tower
Remember, you are the fighter here. You’ll have to face tank a lot. I immediately rushed the catapults this night, and then go back to clean up the other stuff. The giants are important to take out next.
Always remember to try to aggro enemies off of structures, clump them up in a group around you, and then charge through them with your AoE attack, your trample damage, and your AoE Special Ability. Not to mention Magic Armor kicking in here, so everything attacking you is hurting itself.
This wave is actually pretty easy since everything is coming from the same side except the fast-movers to the north. Put half your spears up there, the other half to stall the exploders and other fast guys southward.
Day 11
Actually forgot to get the last gold mine here on Day 11, whoops. So I bought it real quick. It’ll give you your money back + 1. Feel free to find a better spot to put it somewhere else earlier on.
You’ll have to tank the 12 giants to the north on this wave, but don’t worry. We’re getting our first Ballista to help out. Upgrade one of those towers to the north to a Ballista.
Send your spears south to deal with the 35 fast movers, and if you’re worried throw down the Barricades to slow them down further.
With my remaining 17 gold, I bought the row of towers along the cliffside next to the Castle, and bought the wall south immediately south of the farms (just in case something breaks in from the south). This might be overkill, but we’re swimming in money right now.
But the final tower on the little precipice to the right of the castle, and you should be out of money.
From here, I send my Berserkers and fire archers to the north to help me with the giants. Note that because of the help from the Ballista, and your upgrades from earlier, you should be able to tank all 12 giants and charge directly into them without dying.
The Last Wave
I went into Day 12 with 47 gold on my hands.
- Bought final upgrade for Spearmen (up to 12)
- Upgraded the lone tower to the northwest once (5gp)
- Upgraded 2 ridgeline towers (5gp each)
- Spent final 16gp to upgrade the southwest Barracks and Archery Range
Split 12 spearmen across southeast and northwest where some real fast guys are. You can go half and half.
Berserkers and Fire Archers are going to have to stay to the southwestern wall.
This fight is long and staggered. The catapults to the southwest are important to kill, but don’t come out for a while, so you can spend your time switching between fights as needed. You want to move back and forth, killing a few, removing pressure from the walls which need to stay up. I started the early part of this wave southwest and northeast often.
The walls on the northwest and southeast (next to the castle) are likely to go down first, but if you are doing a good job alternating between fights, your defenses can otherwise take care of themselves for the most part.
If you’ve had a good run up to this point, it’s chill. Make sure to focus the catapults, giants, and exploders when you see them. Other enemies can be handled by defenses, except when there’s a LARGE mob piling up. That is a good opportunity to rush in with your tank build and wrack up AoE damage.