This is the most comprehensive FlipWitch – Forbidden Sex Hex guide to date. With this guide, you can become knowledgeable about everything in the game. To give a few examples: Key items, Magical items, Charms, Maps, and important points, Characteristics and locations of all enemies, Locations of all Elf Merchants in the game, Locations of Thimbles, and more are covered in this ultimate FlipWitch guide!
FlipWitch Guide
This section will cover keybindings and core game mechanics essential to playing and completing the game.
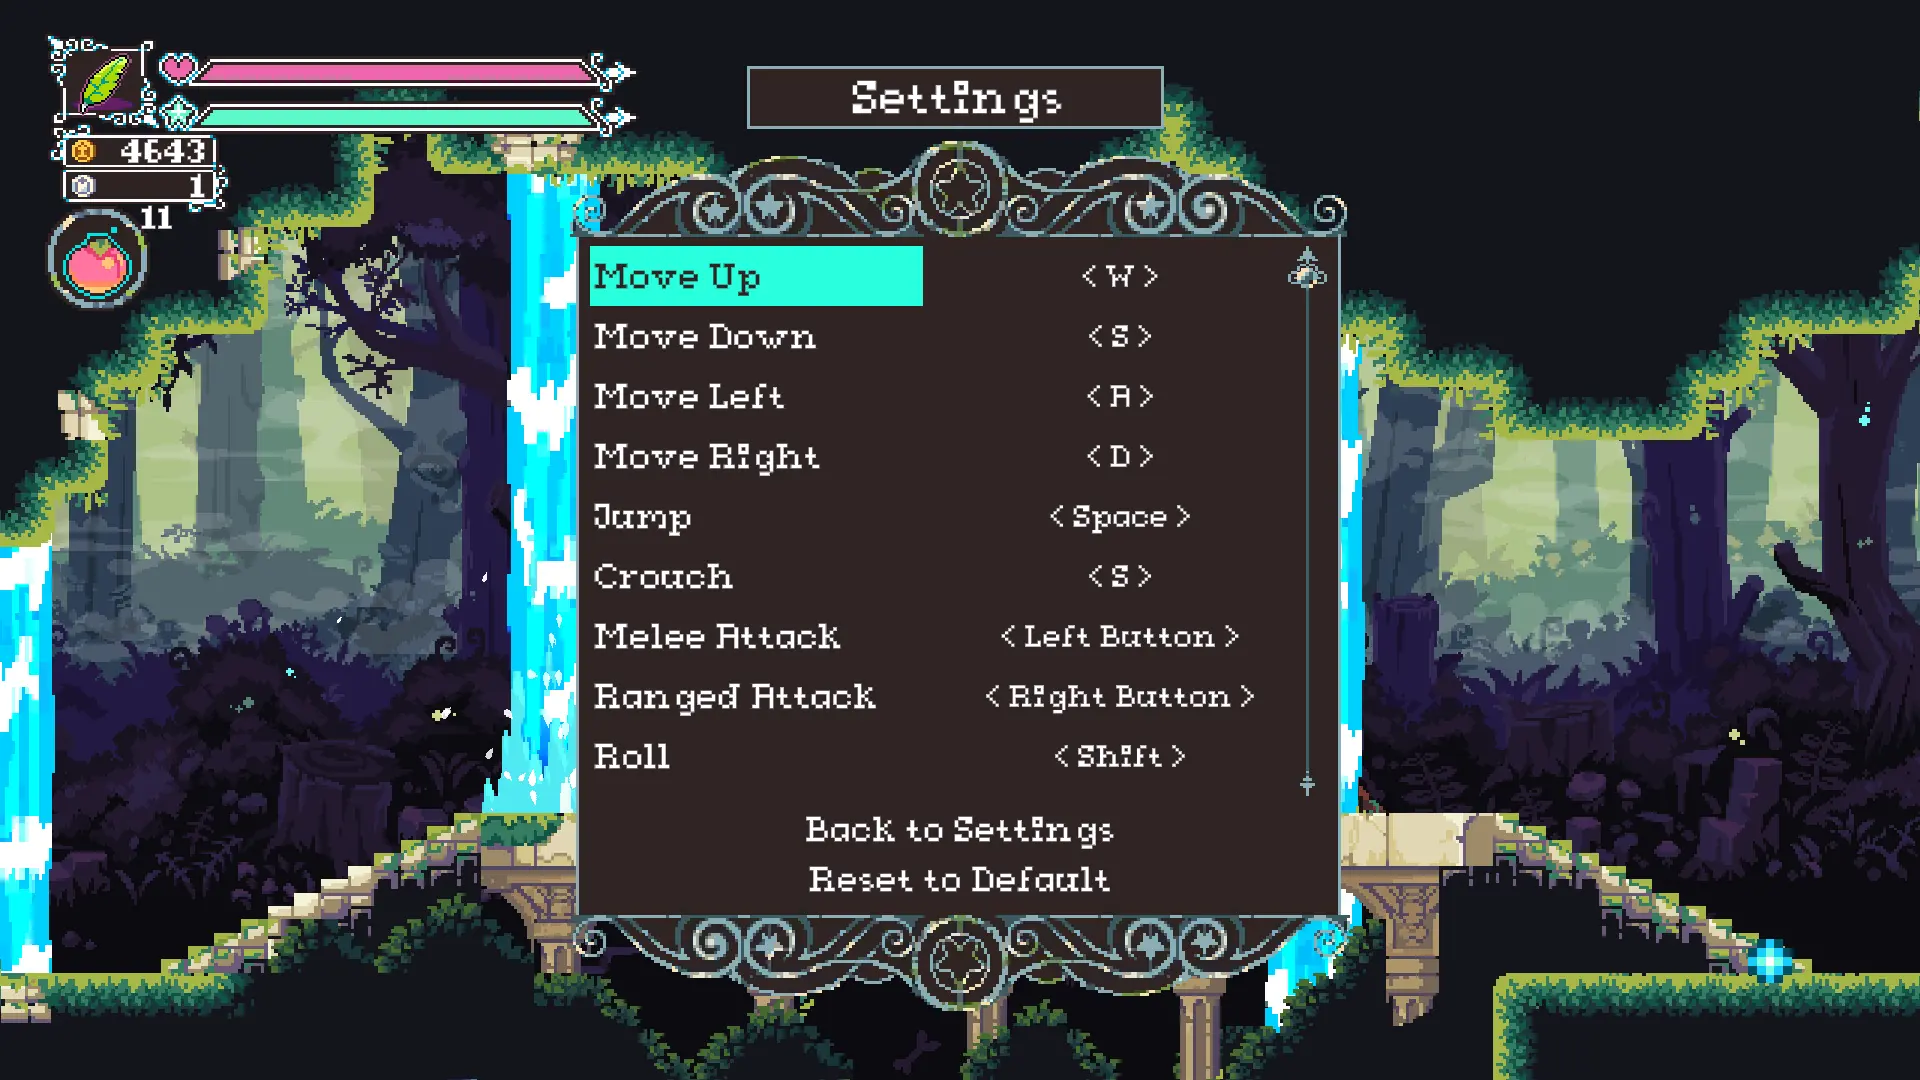
Controls
Default FlipWitch player key-bindings:
| Key | Action | Key | Action | Key | Action | Key | Action |
|---|---|---|---|---|---|---|---|
| W | Move Up | Q | Open Inventory | Left-click | Melee attack | Z | Cycle Magical Items |
| S | Move Down/Crouch | G | Heal | Right-click | Ranged attack | Esc | Sub-menu |
| A | Move Left | Space | Jump | Shift | Roll | ||
| D | Move Right | E | Interact | F | Flip |
Key-bindings
Note, is here is an option in the sub-menu, under “Controls” to view or change the default key-bindings of the player:
Players will unlock triple-jump, mid-air dashing and other such abilities at a later stage.
Core Game Mechanics
The core game mechanics that will be briefly discussed are:
- Flipping;
- Attacking;
- Dodging;
- Save/Restore points; and
- Fast-travel.
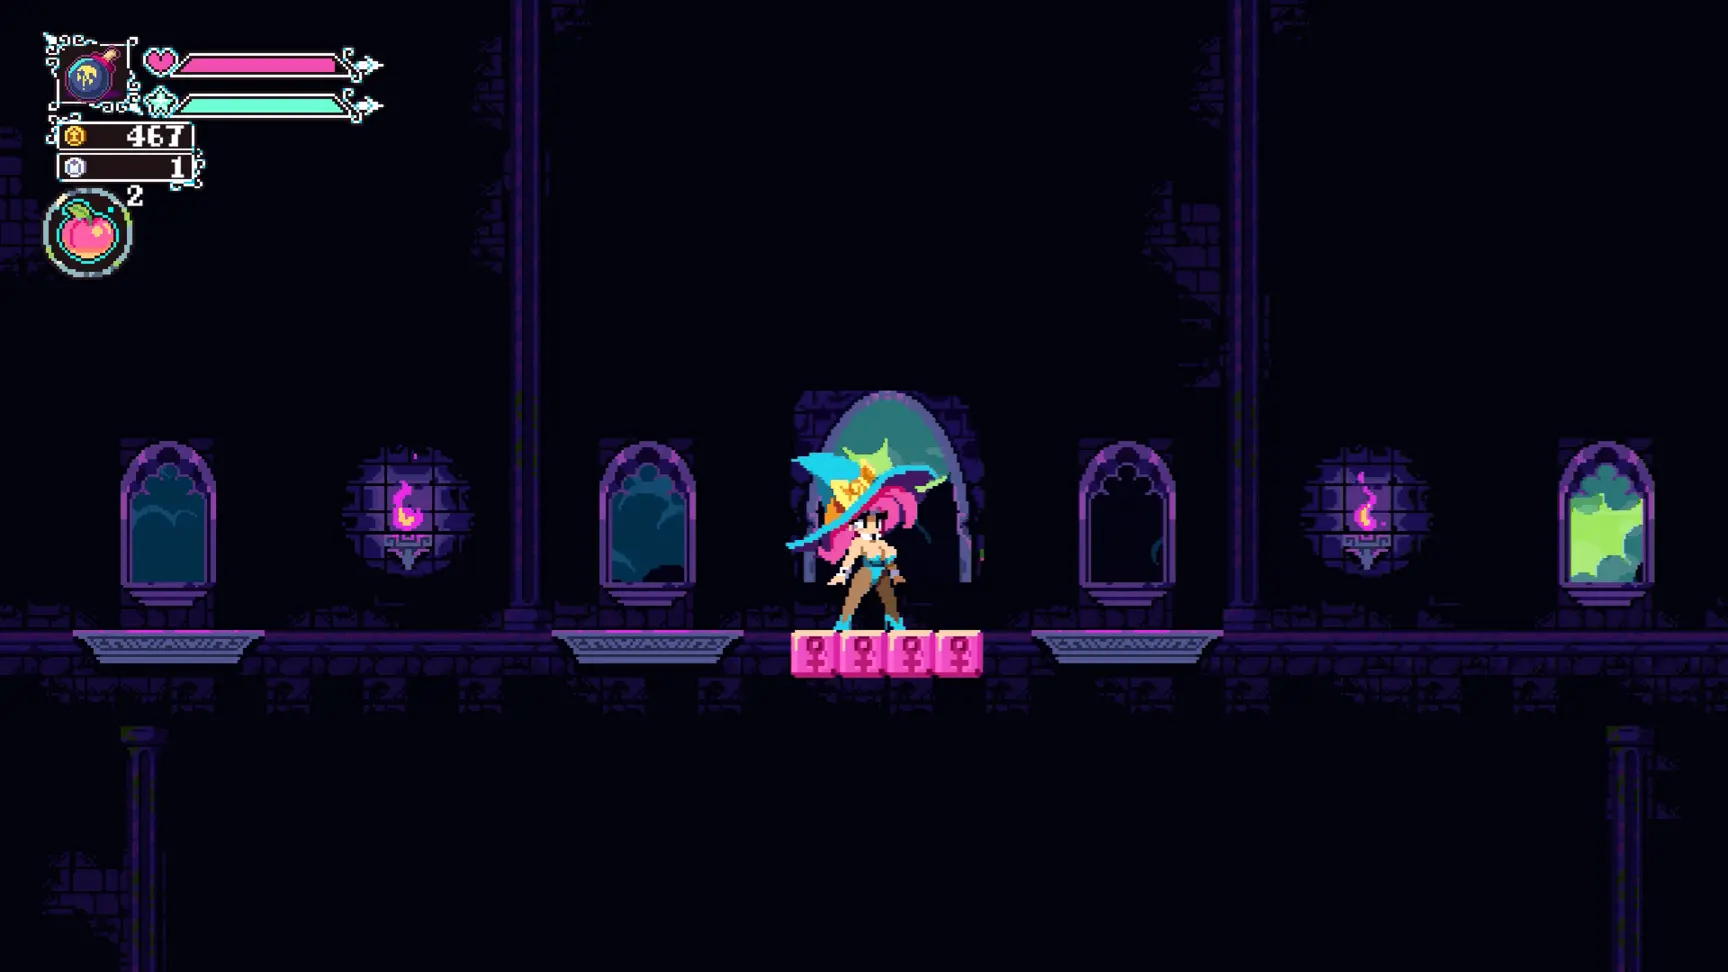
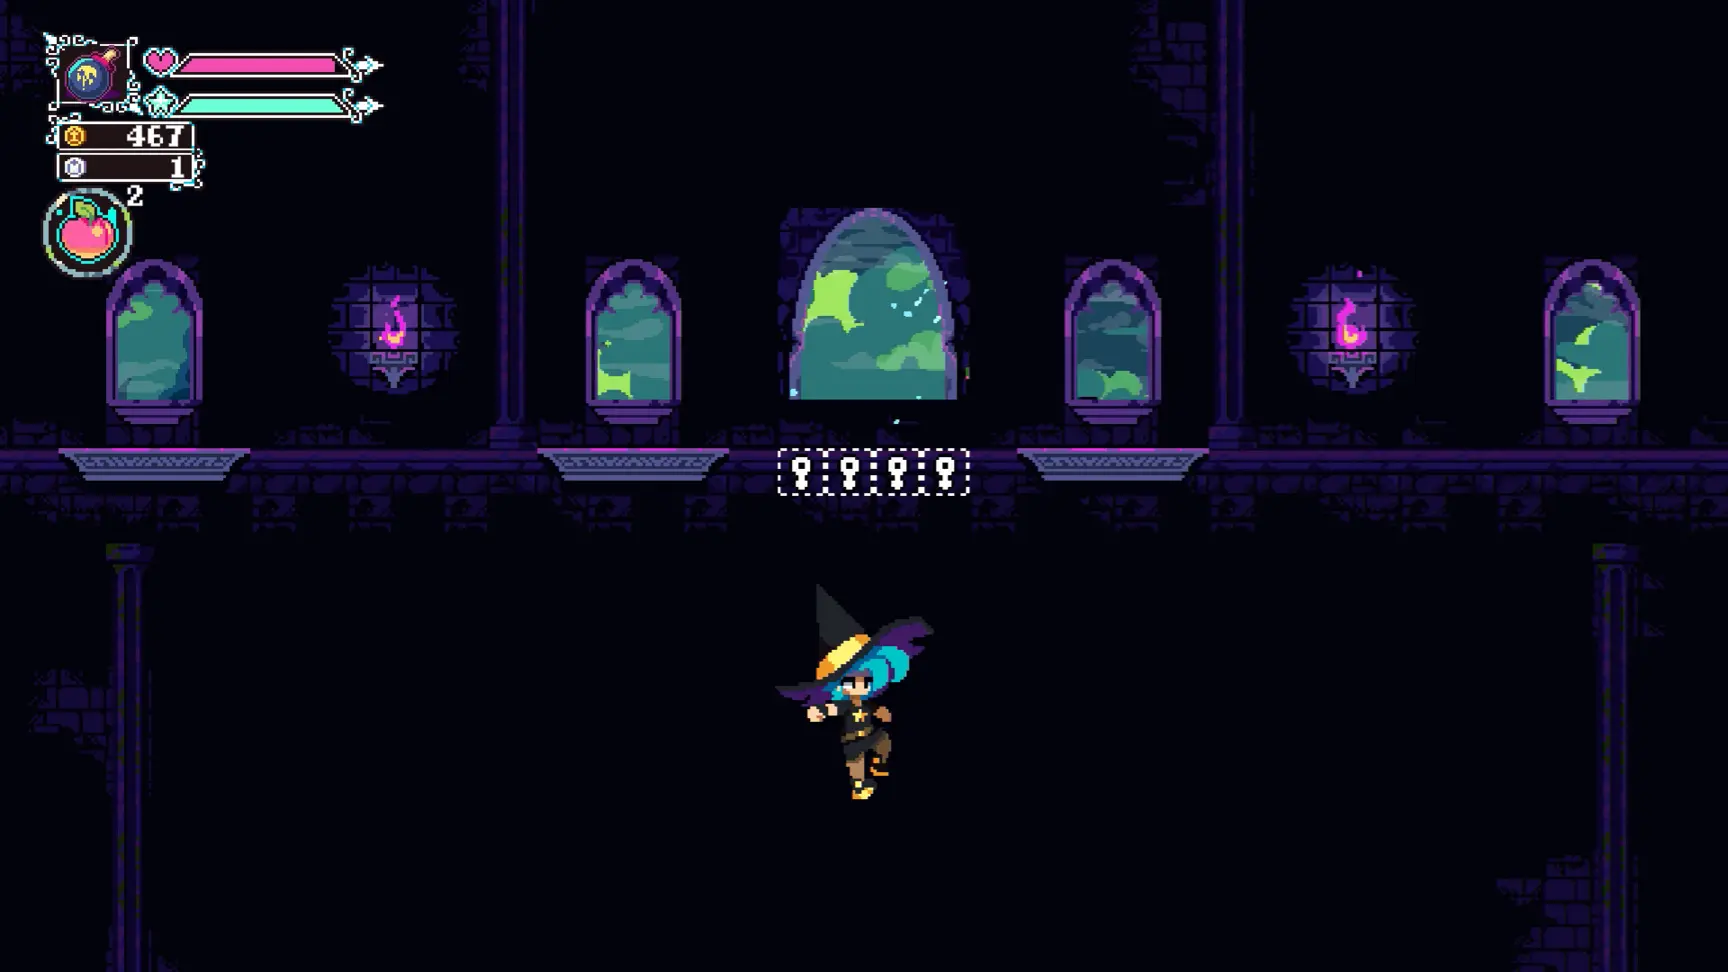
Flipping
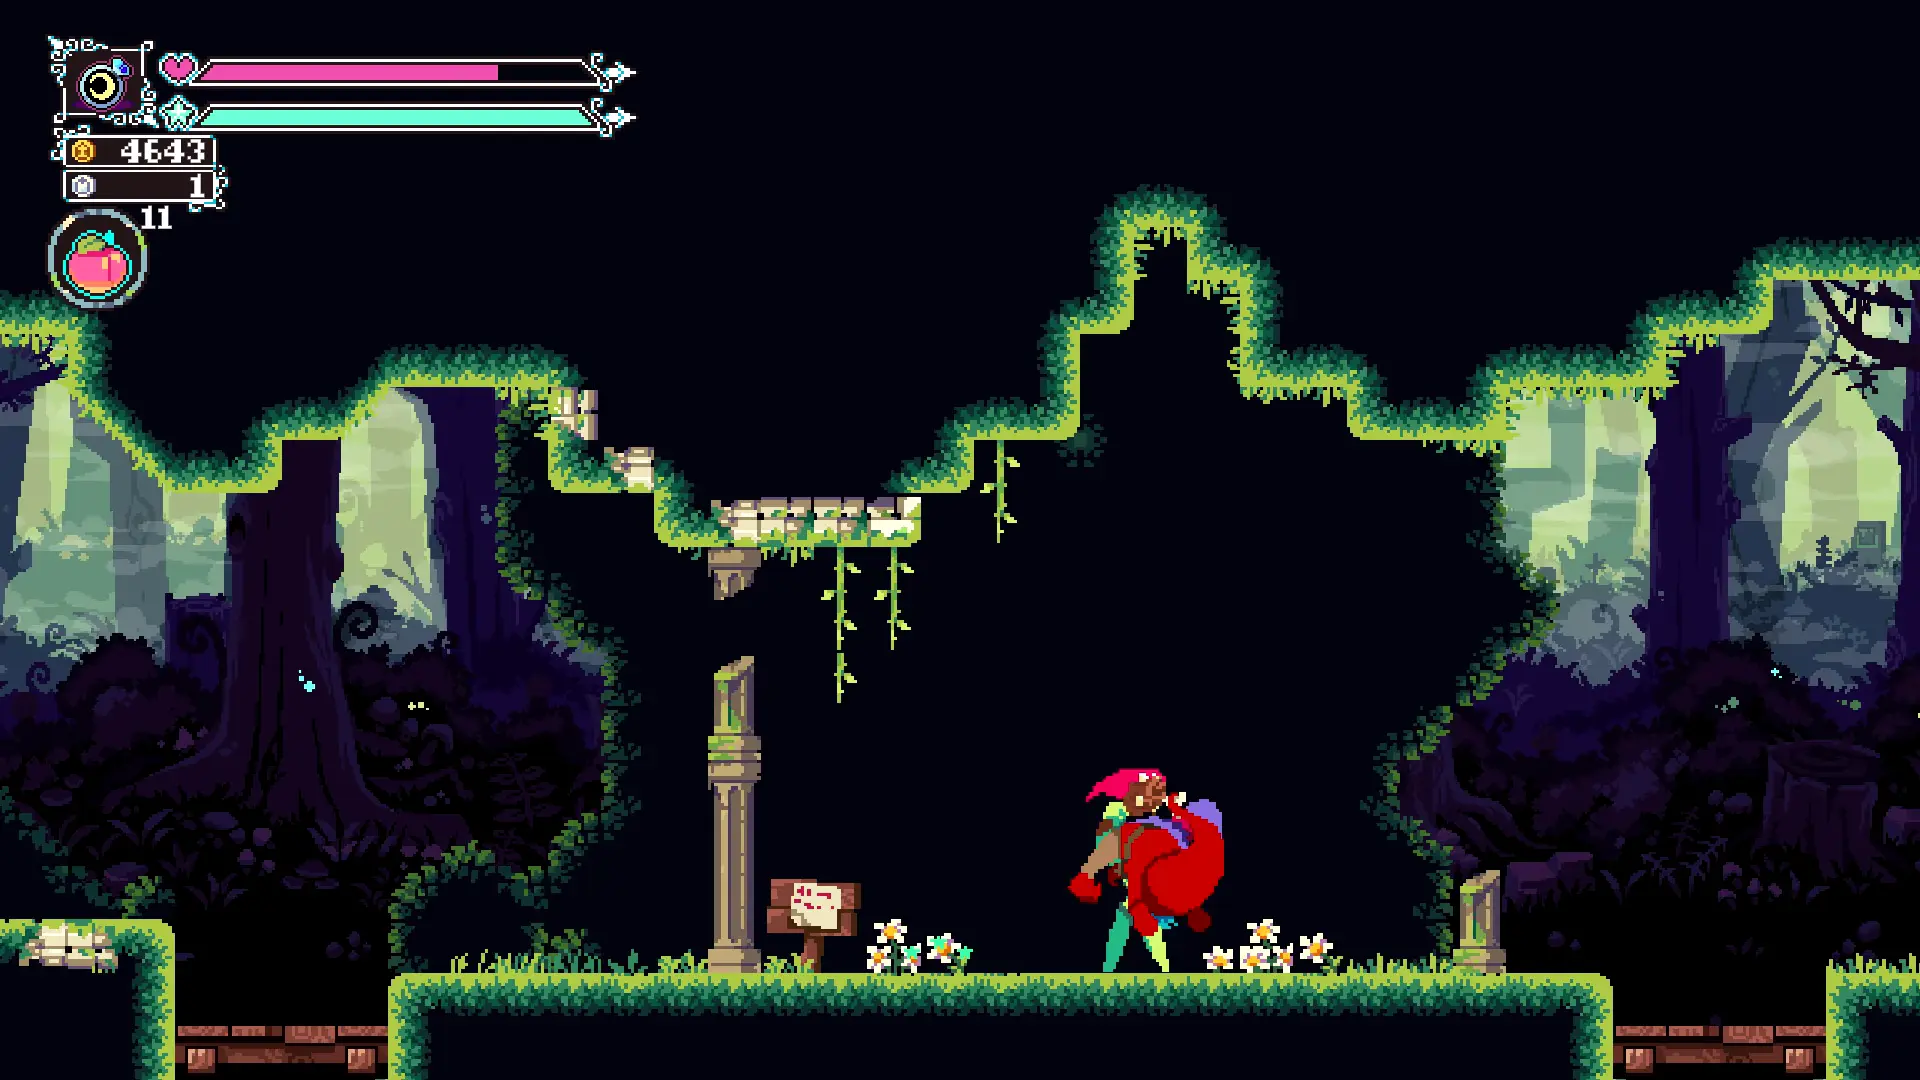
The first quest given to the player is to seek and obtain a magical bubble that Beatrix can infuse with magic. Once infused, this magical bubble enables the player to change from witch to wizard form and vice versa. Throughout the game, we’ll need to change forms in order to interact with the environment, successfully complete boss battles and quests.,
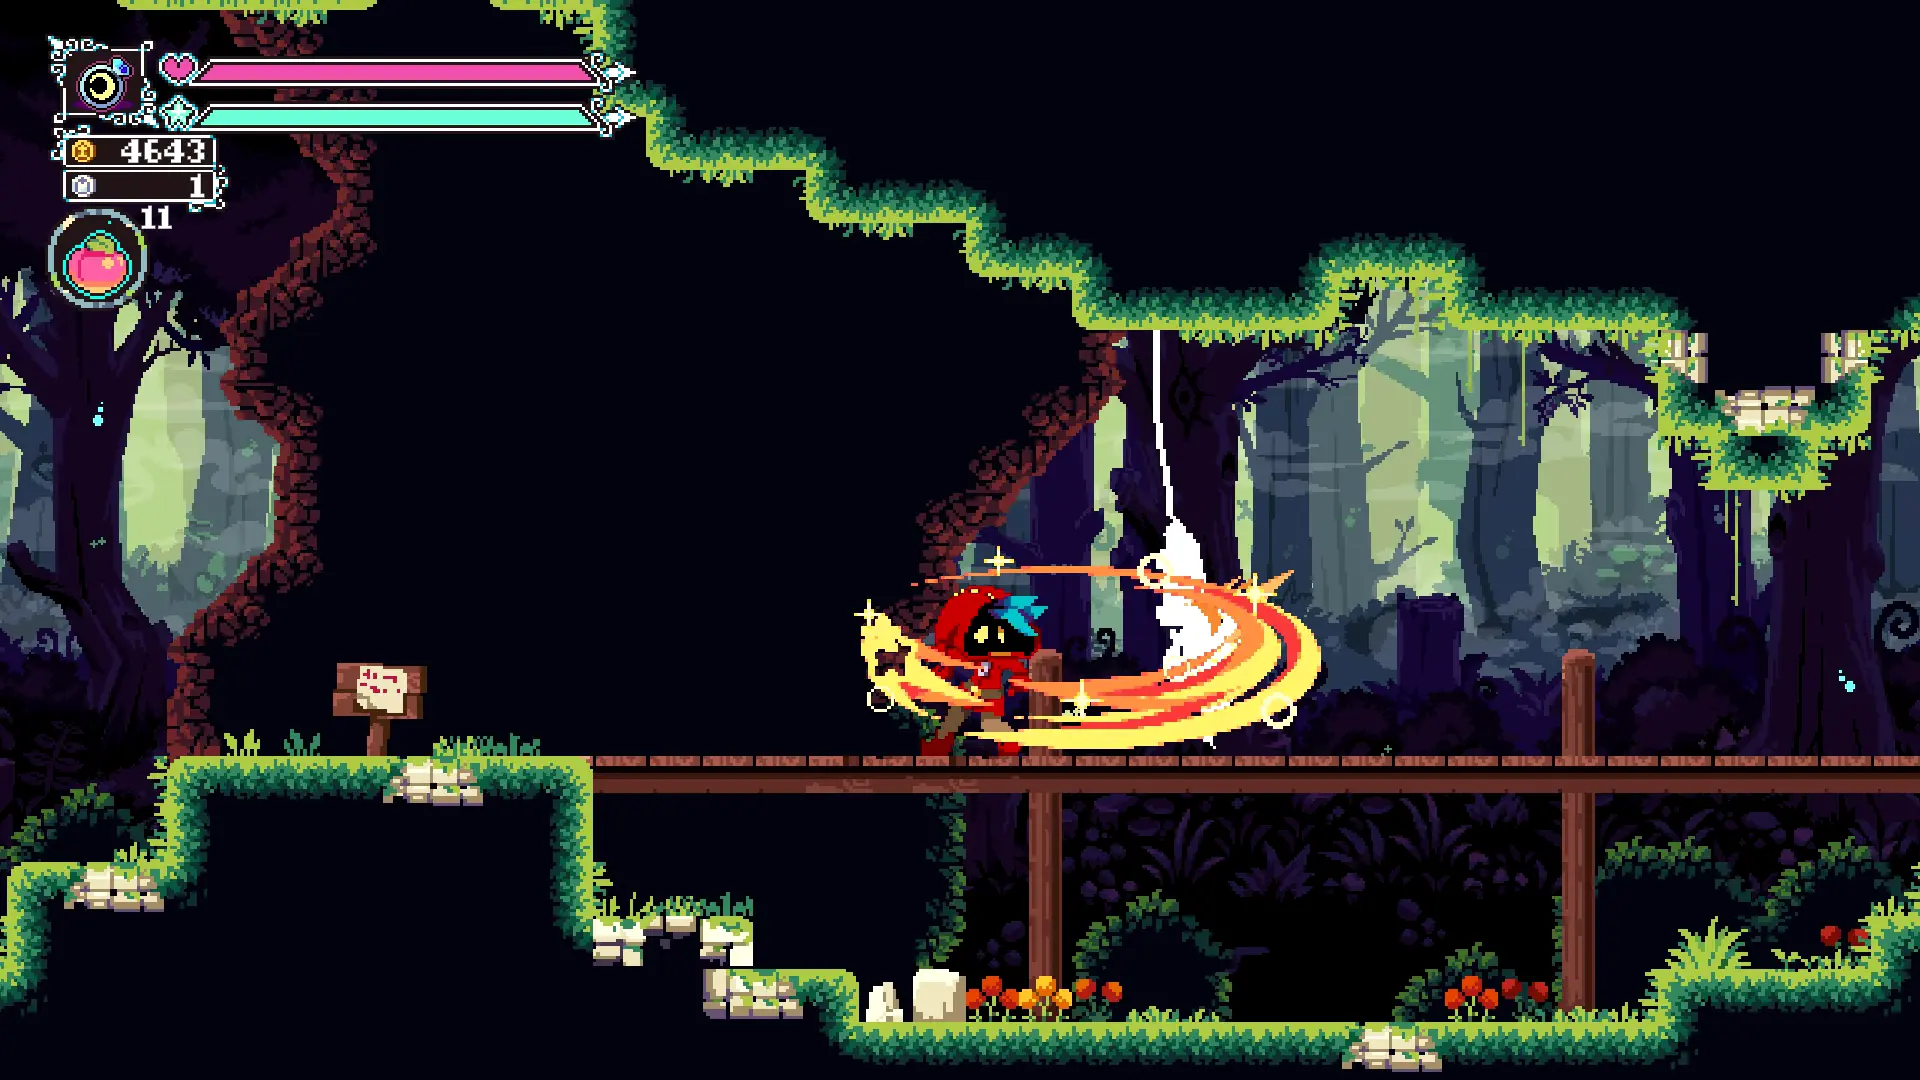
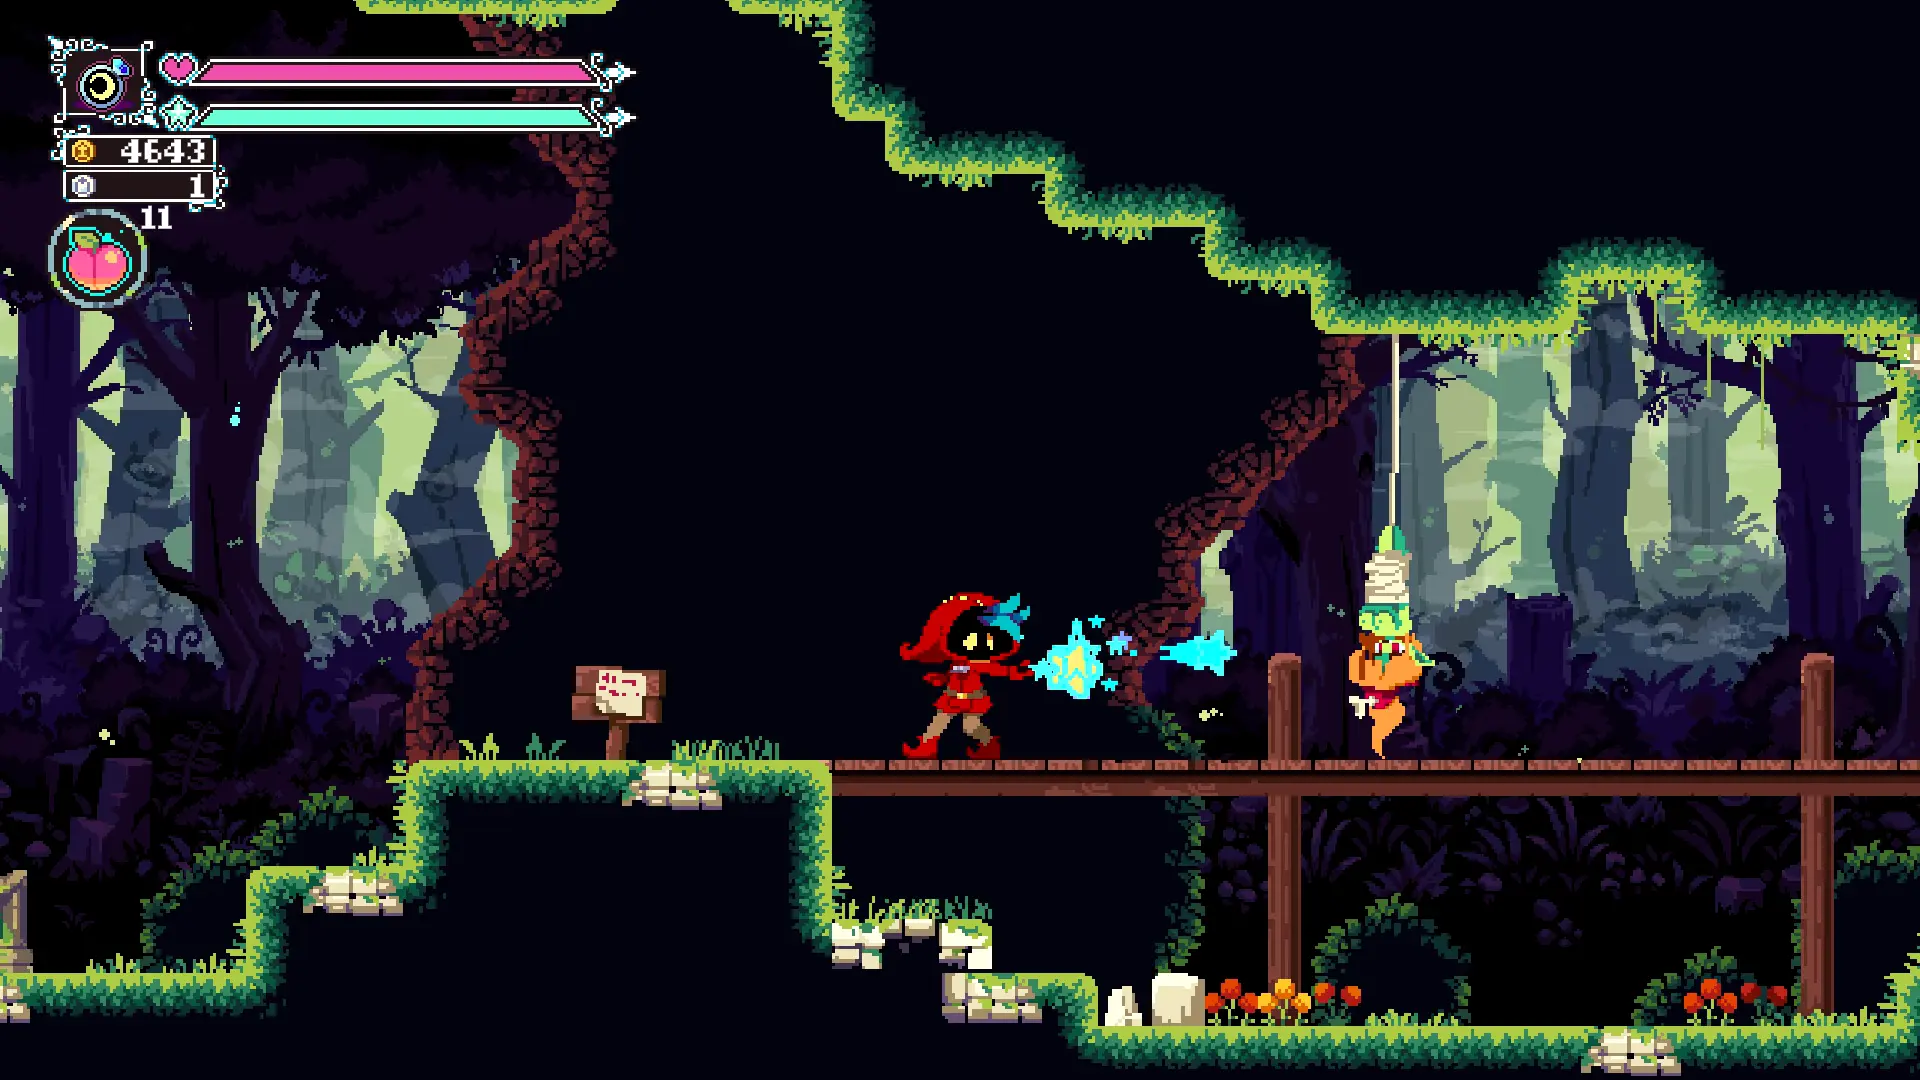
Attacking
Players have two types of attacks available to them: melee and ranged. Melee attacks are swipes from the player’s wand in the direction they are facing, while ranged attacks emit magical projectiles from the player’s wand in the direction the player is facing. Close consecutive melee attacks form a chain attack, with the last attack being an overhead strike. It is important to note that each melee attack will bring the player slightly forwards in the direction of that melee attack. Ranged attacks can be performed while in the standing or crouching position. Holding the ranged attack action key will charge a larger and more powerful ranged attack, which can be released by letting go of the ranged attack action key.
Dodging
There are four ways a player can avoid taking damage: rolling, crouching, mid-air dashing and temporary invulnerability.
Rolling is available to the player from game start. In order to successfully dodge with a roll, one must be in the roll state during an attack by an enemy NPC or collision with an object. Be careful when you roll however, as it is possible to end your roll at an NPC and take collision damage.
Crouching is similarly available to the player at game start. Pressing the move down action key will cause the player to crouch. Crouching lowers the player’s profile and can be used to avoid otherwise colliding projectiles, such as the Goblin Ranger’s arrows.
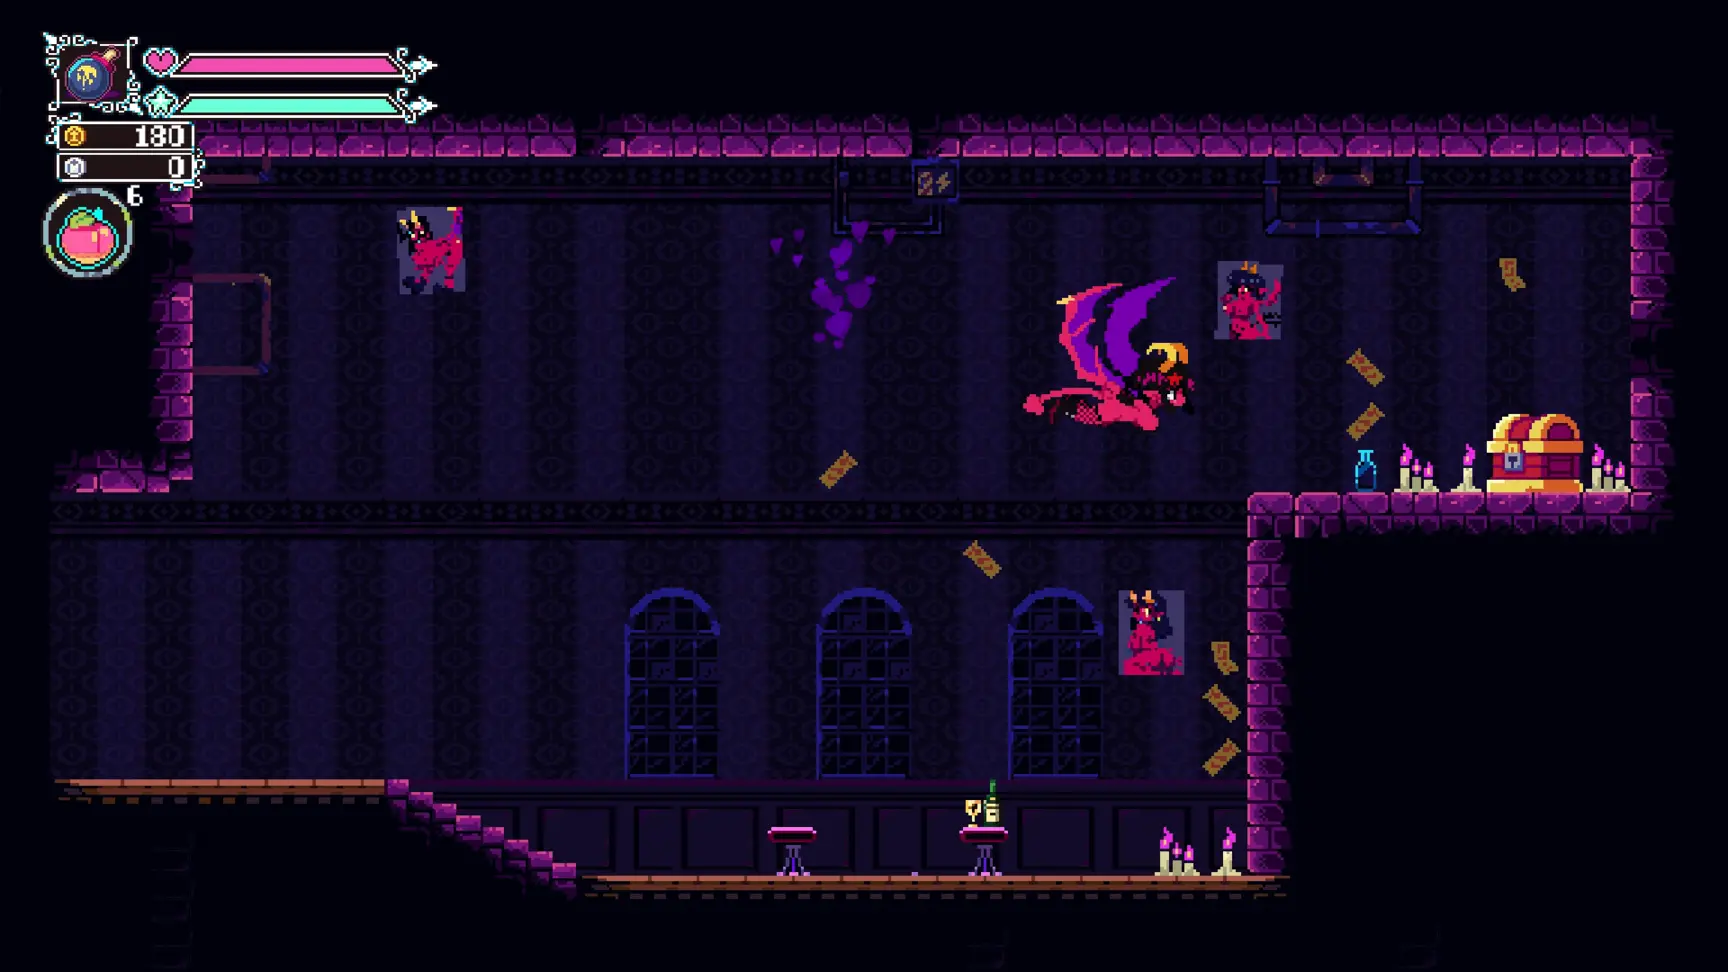
Mid-air dashing is an ability that is unlocked by the player, after obtaining the key item Demon wings [after defeating Sad Boy sub-boss. Mid-air dashing works very similarly to rolling, in that you must be in the dashing state to avoid taking damage.]
The last form of dodging is temporary invulnerability. Whenever the player takes damage they are granted temporary invulnerability for a brief period of 4 seconds. Although this is not technically dodging, we are still avoiding taking damage that we should have taken. It is useful to know this, as we can deliberately take weaker damage if we expect taking unavoidable stronger damage during battles. The brief period of invulnerability also allows us to reset or deal damage during this time. The player’s character “flashes” during the temporary invulnerability state.
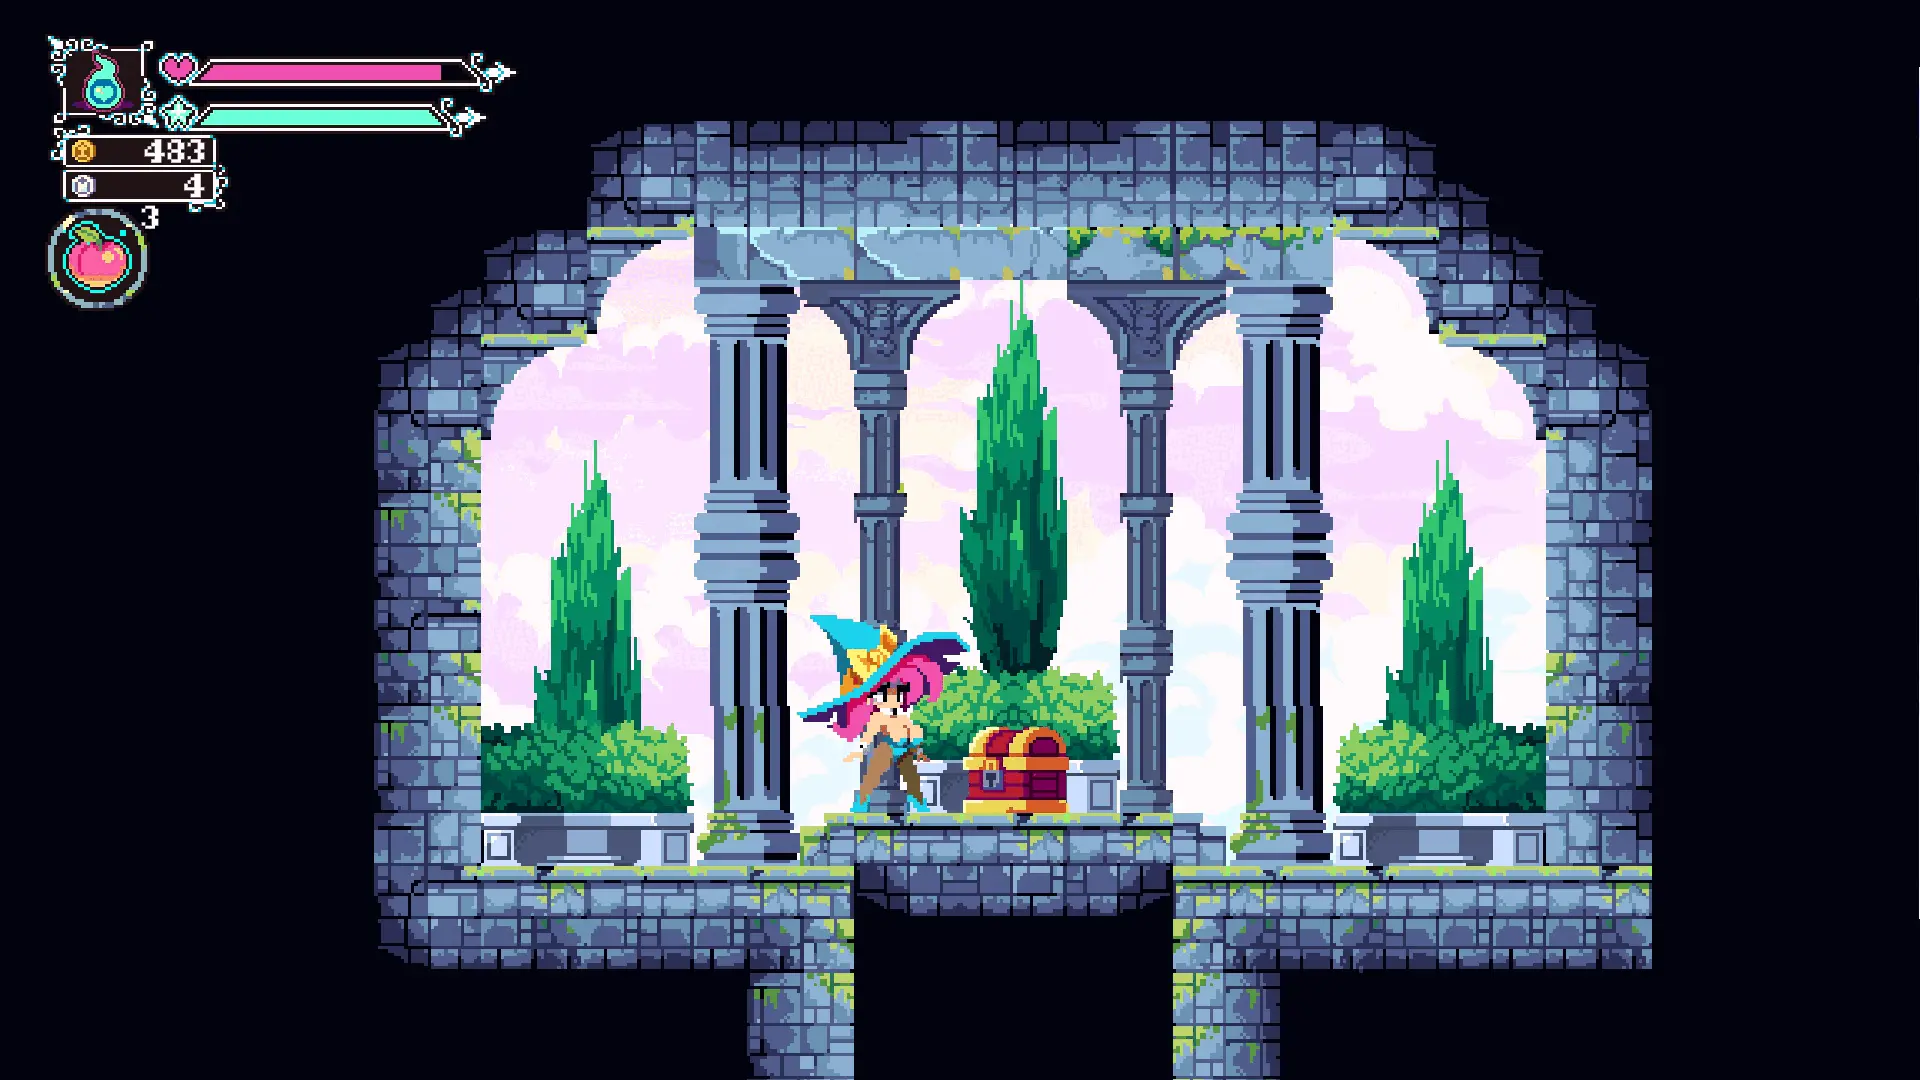
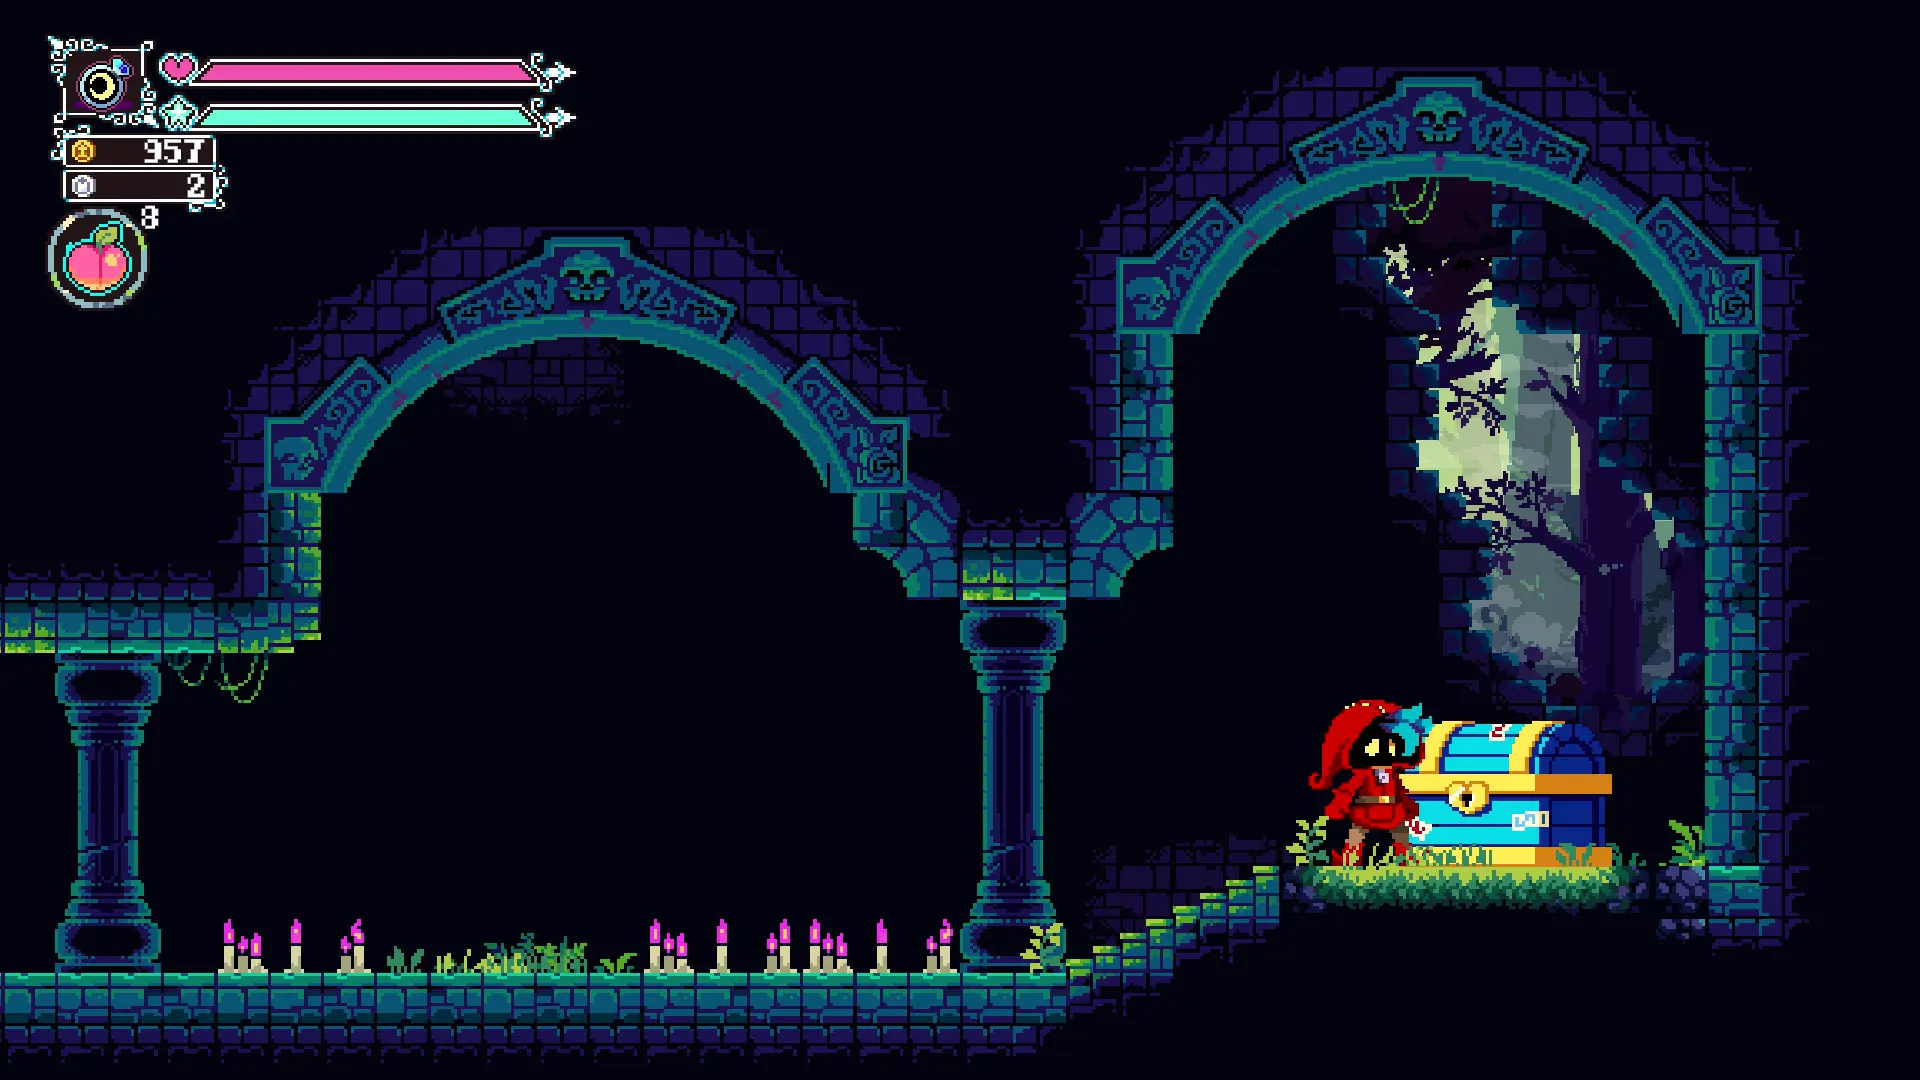
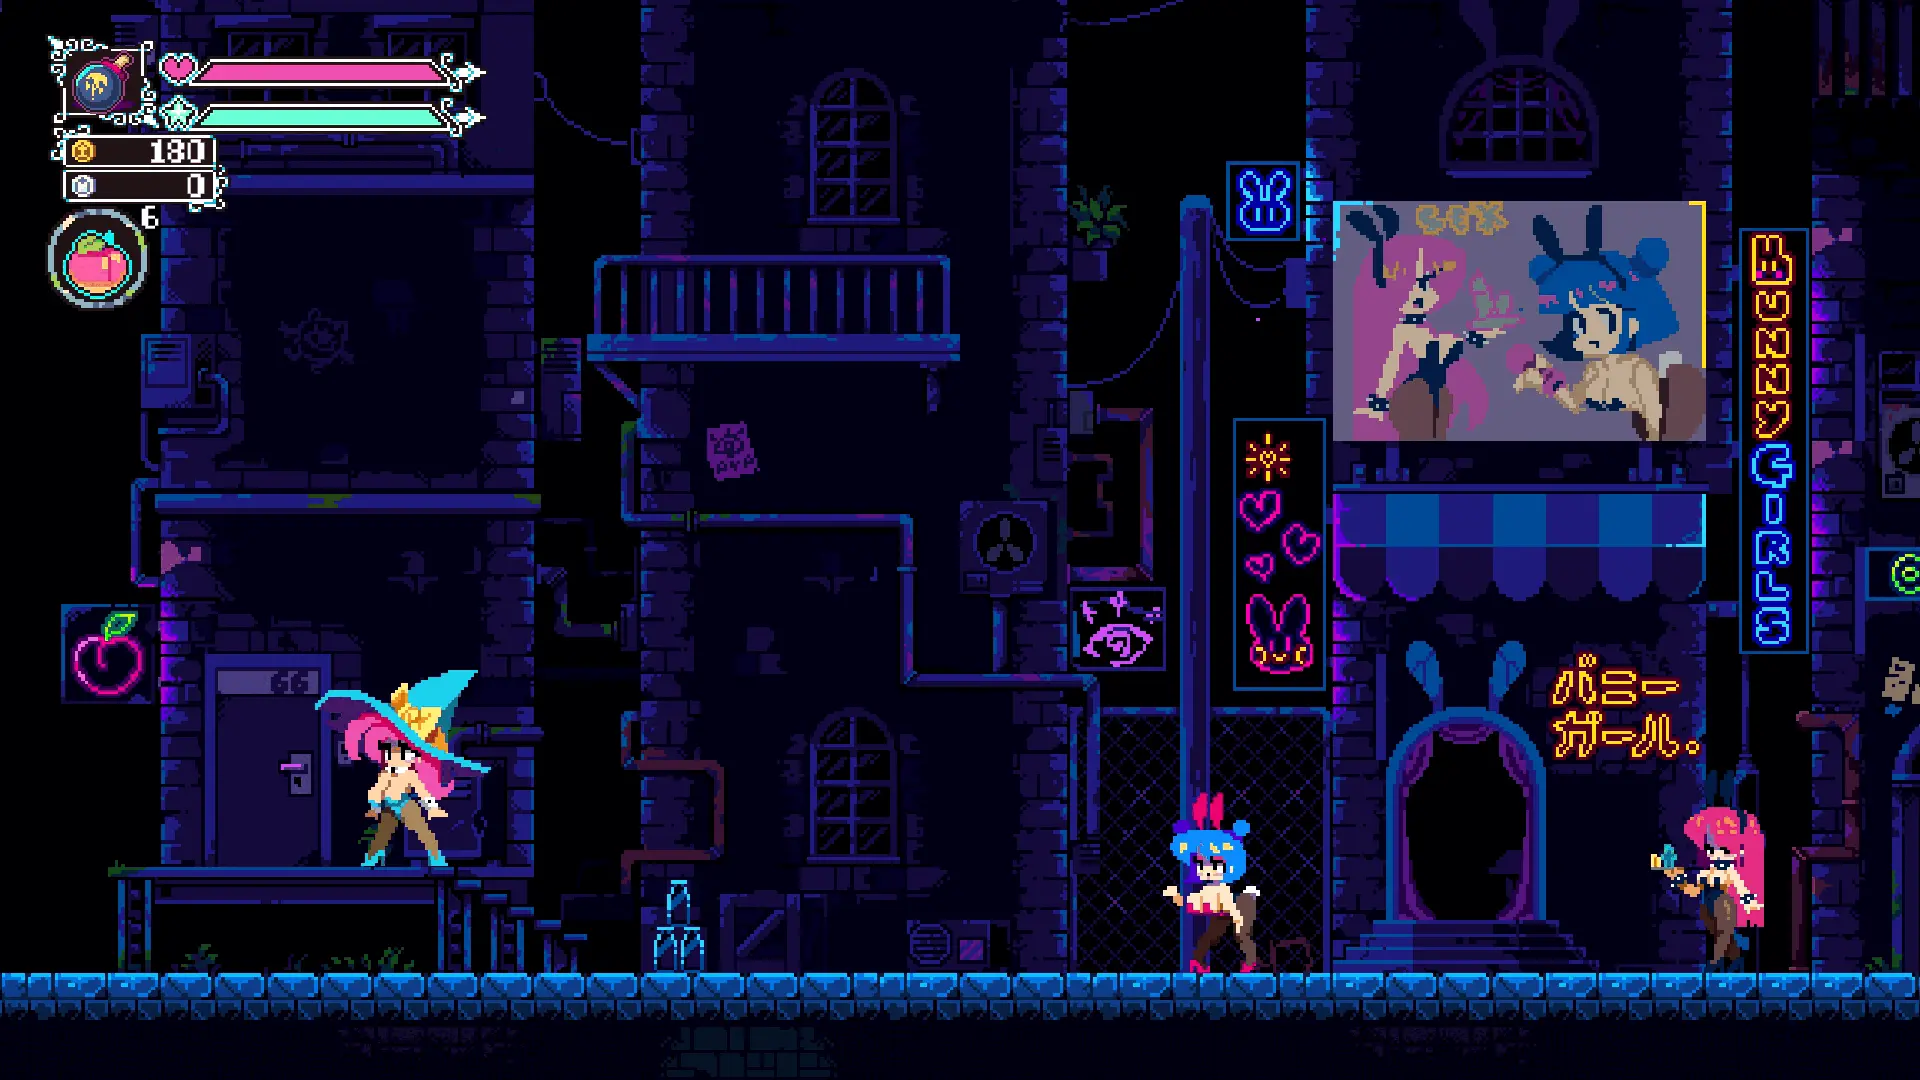
Save – Restore Points
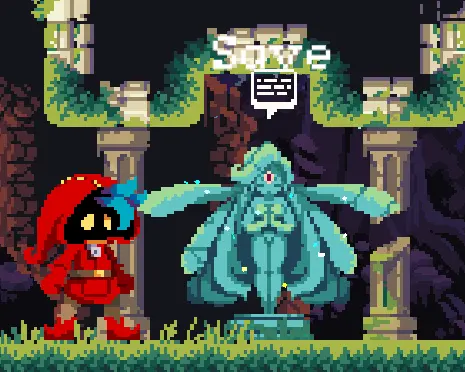
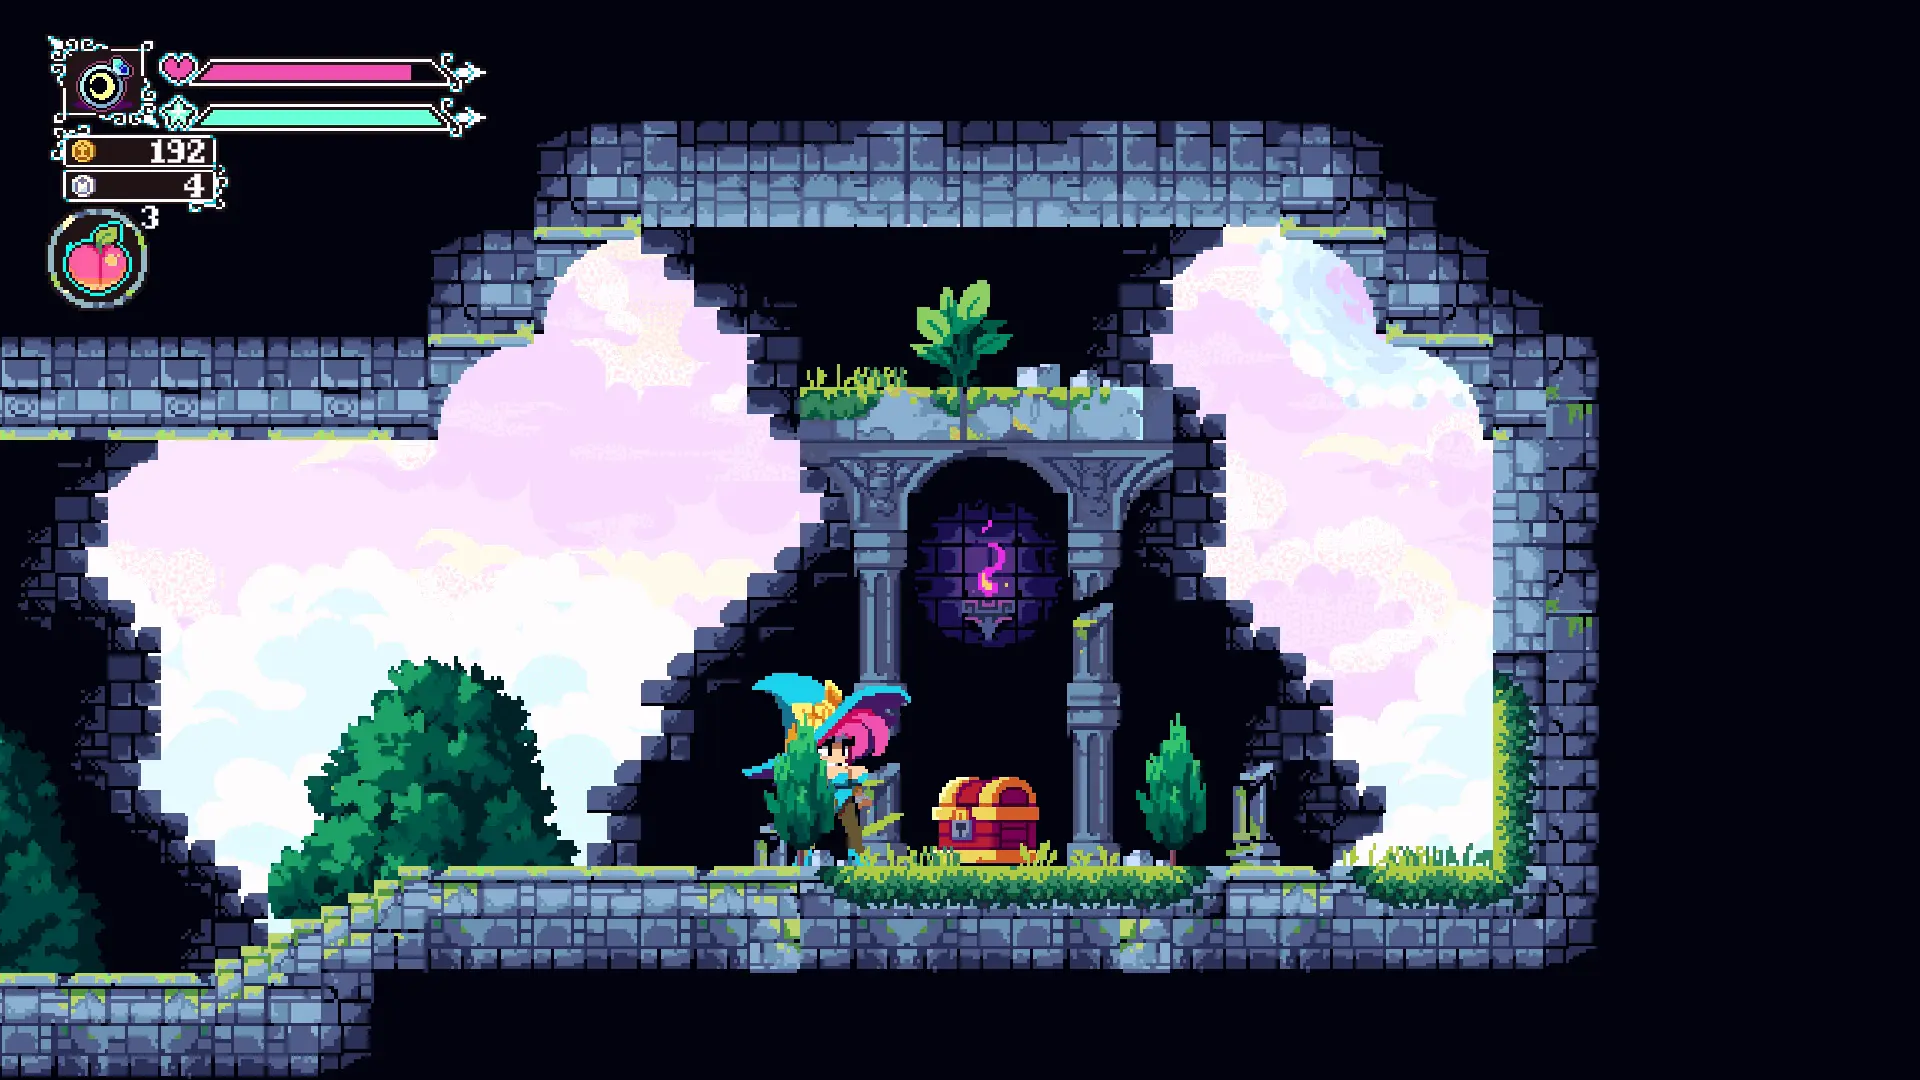
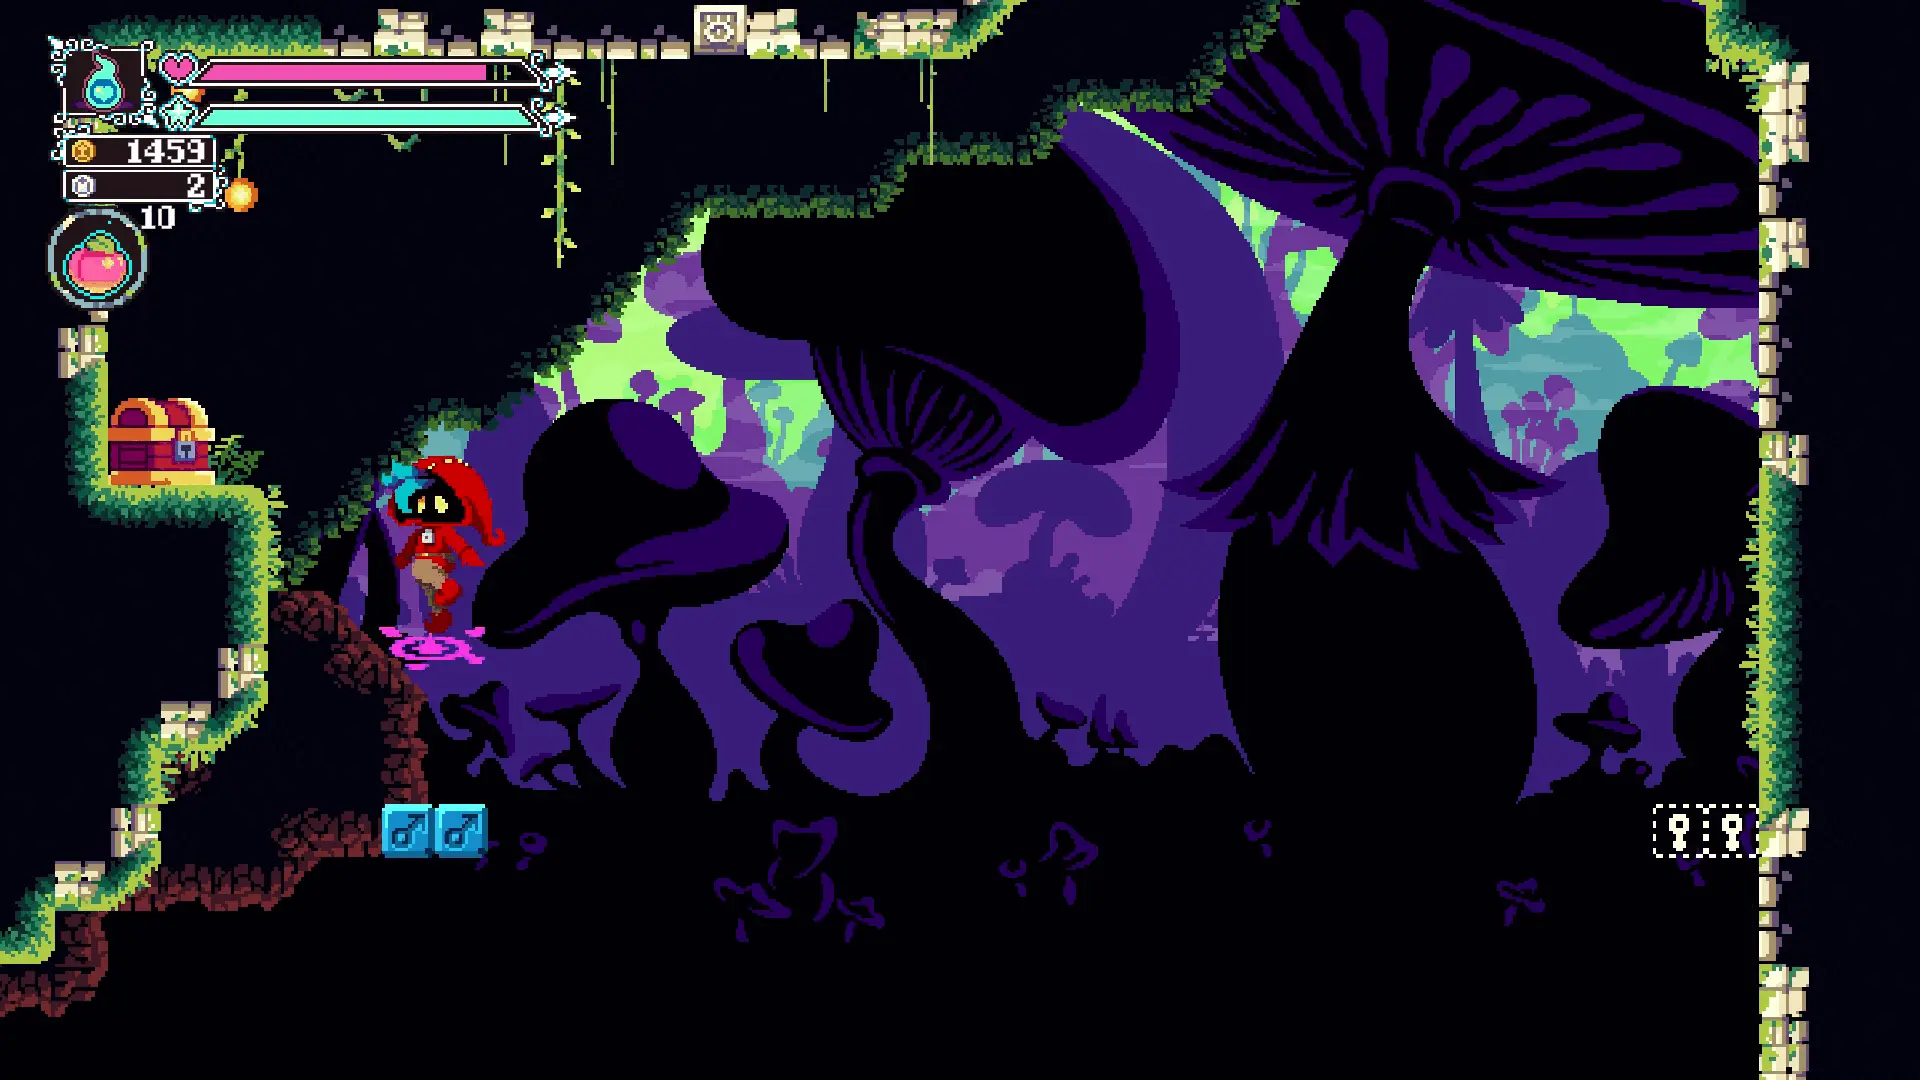
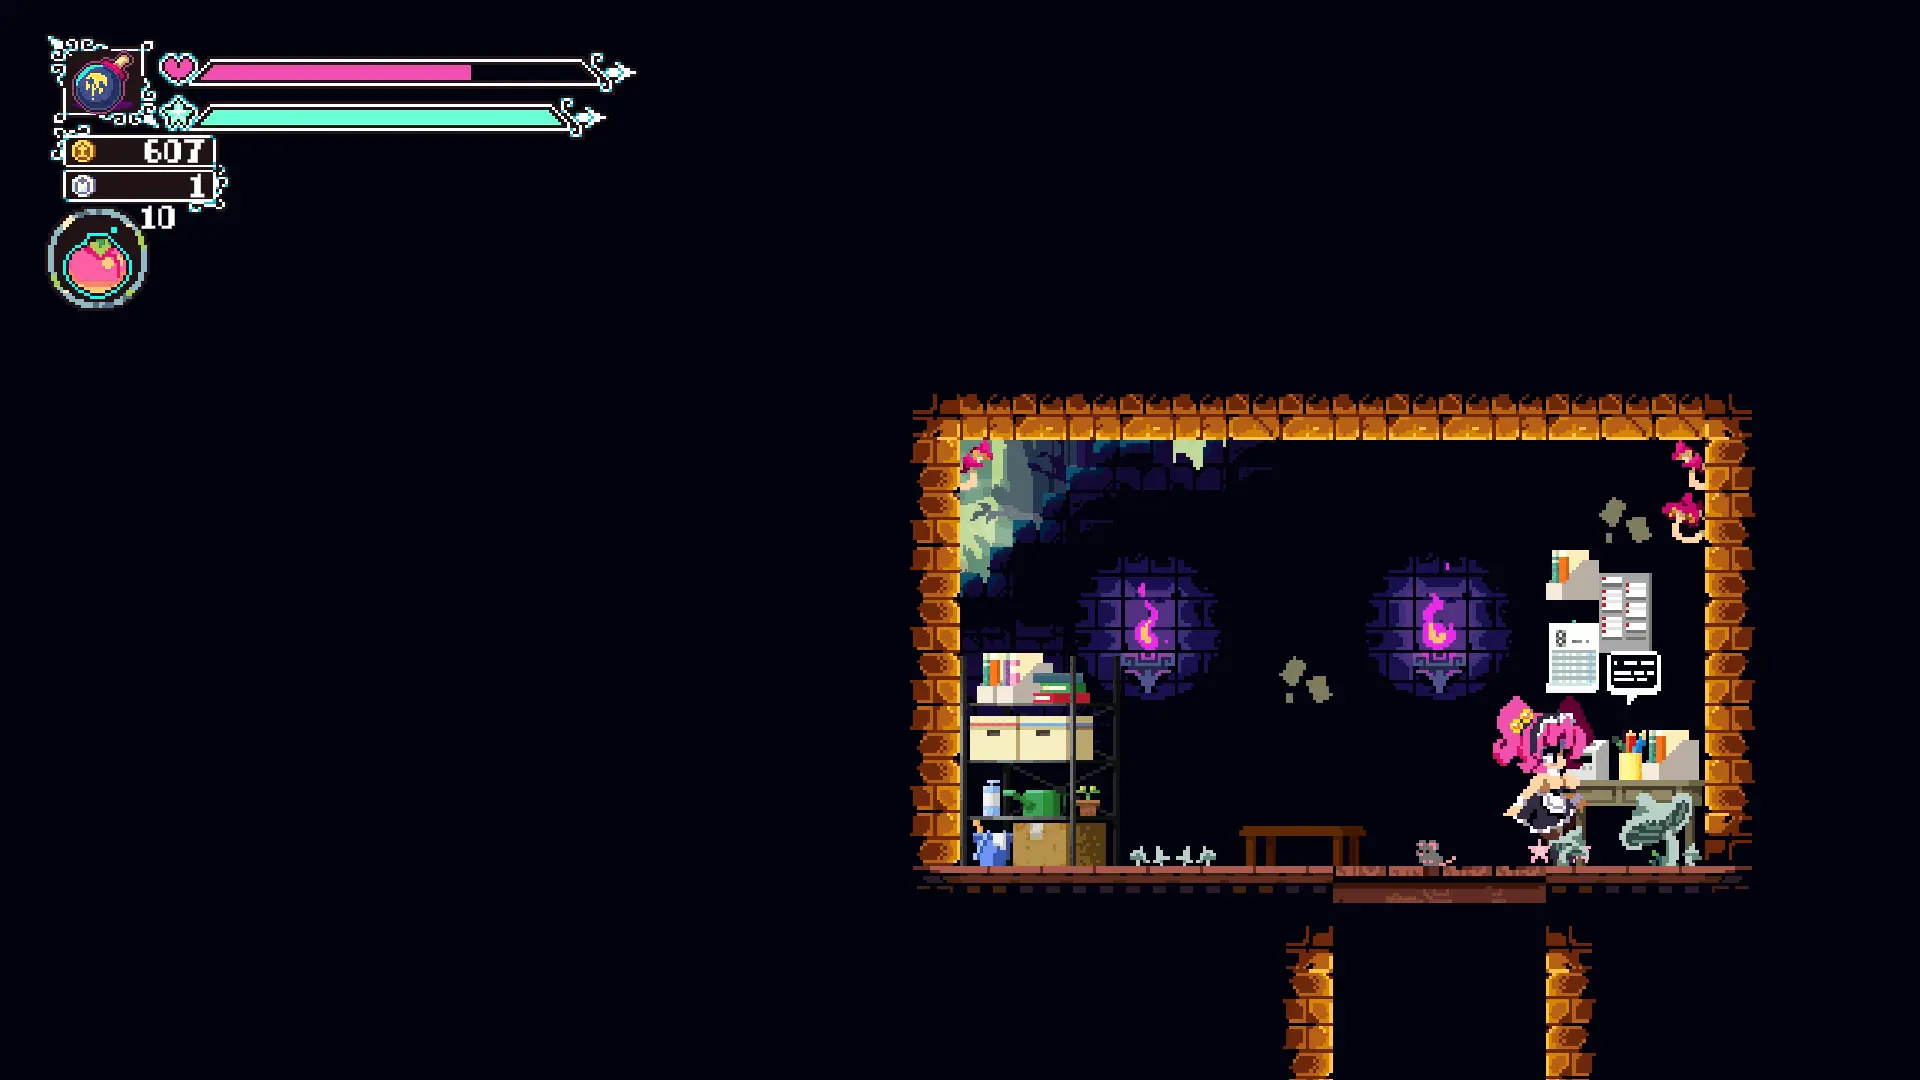
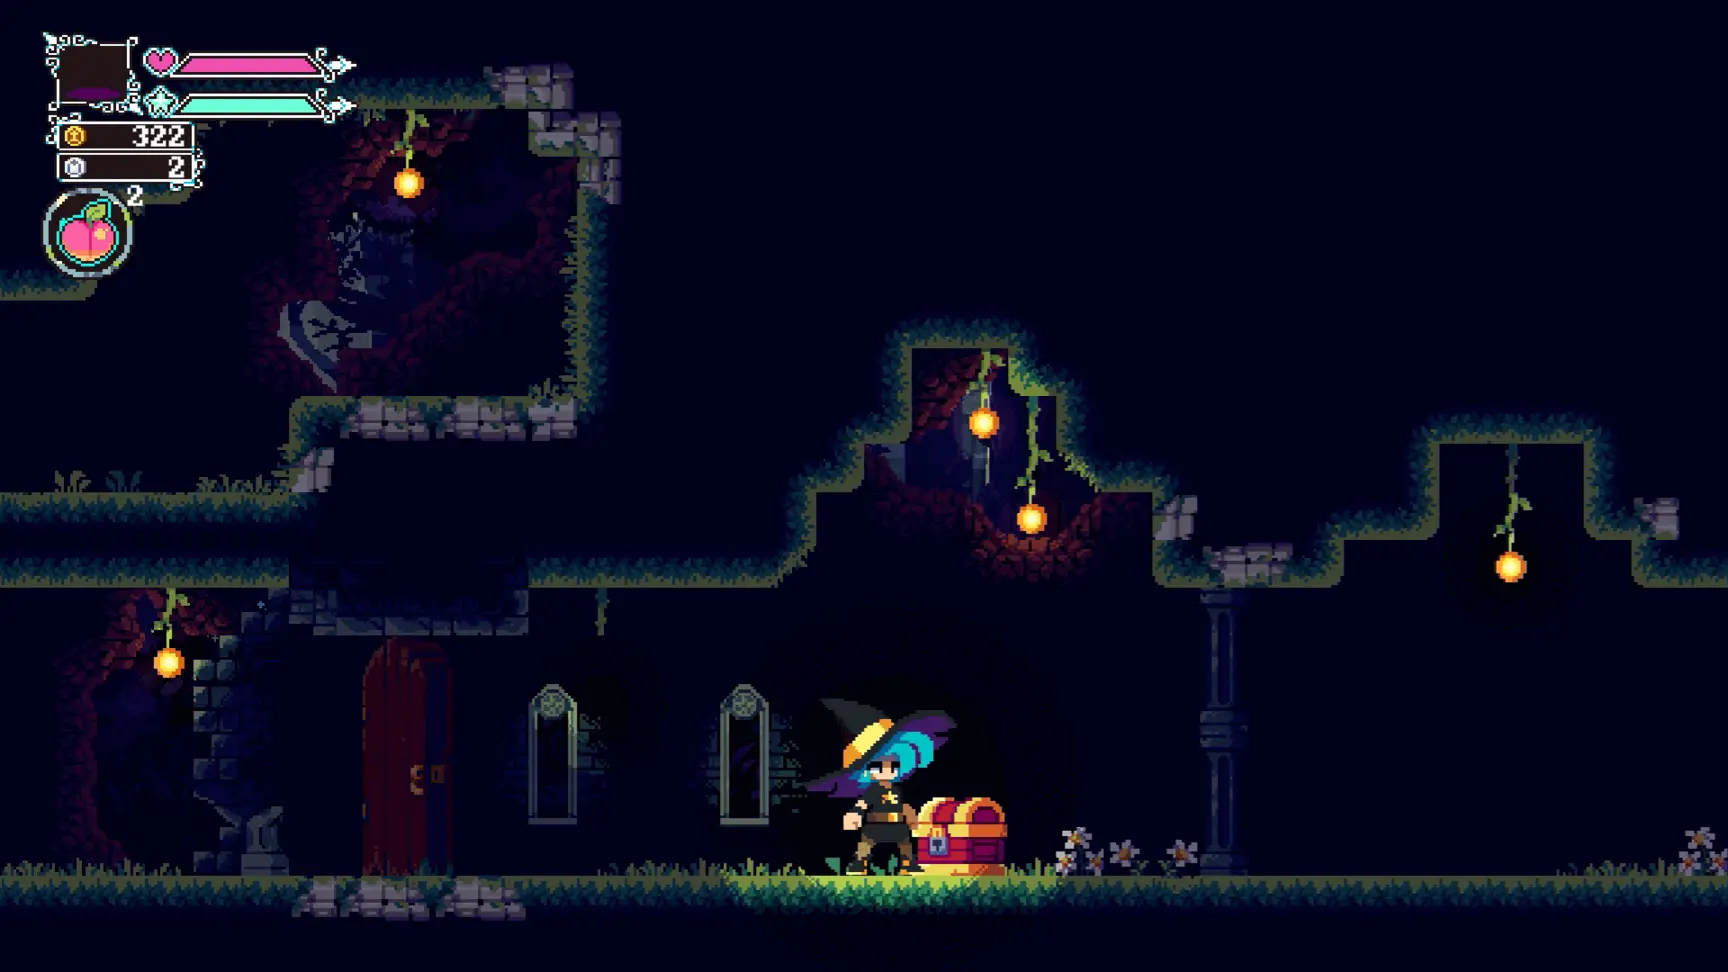
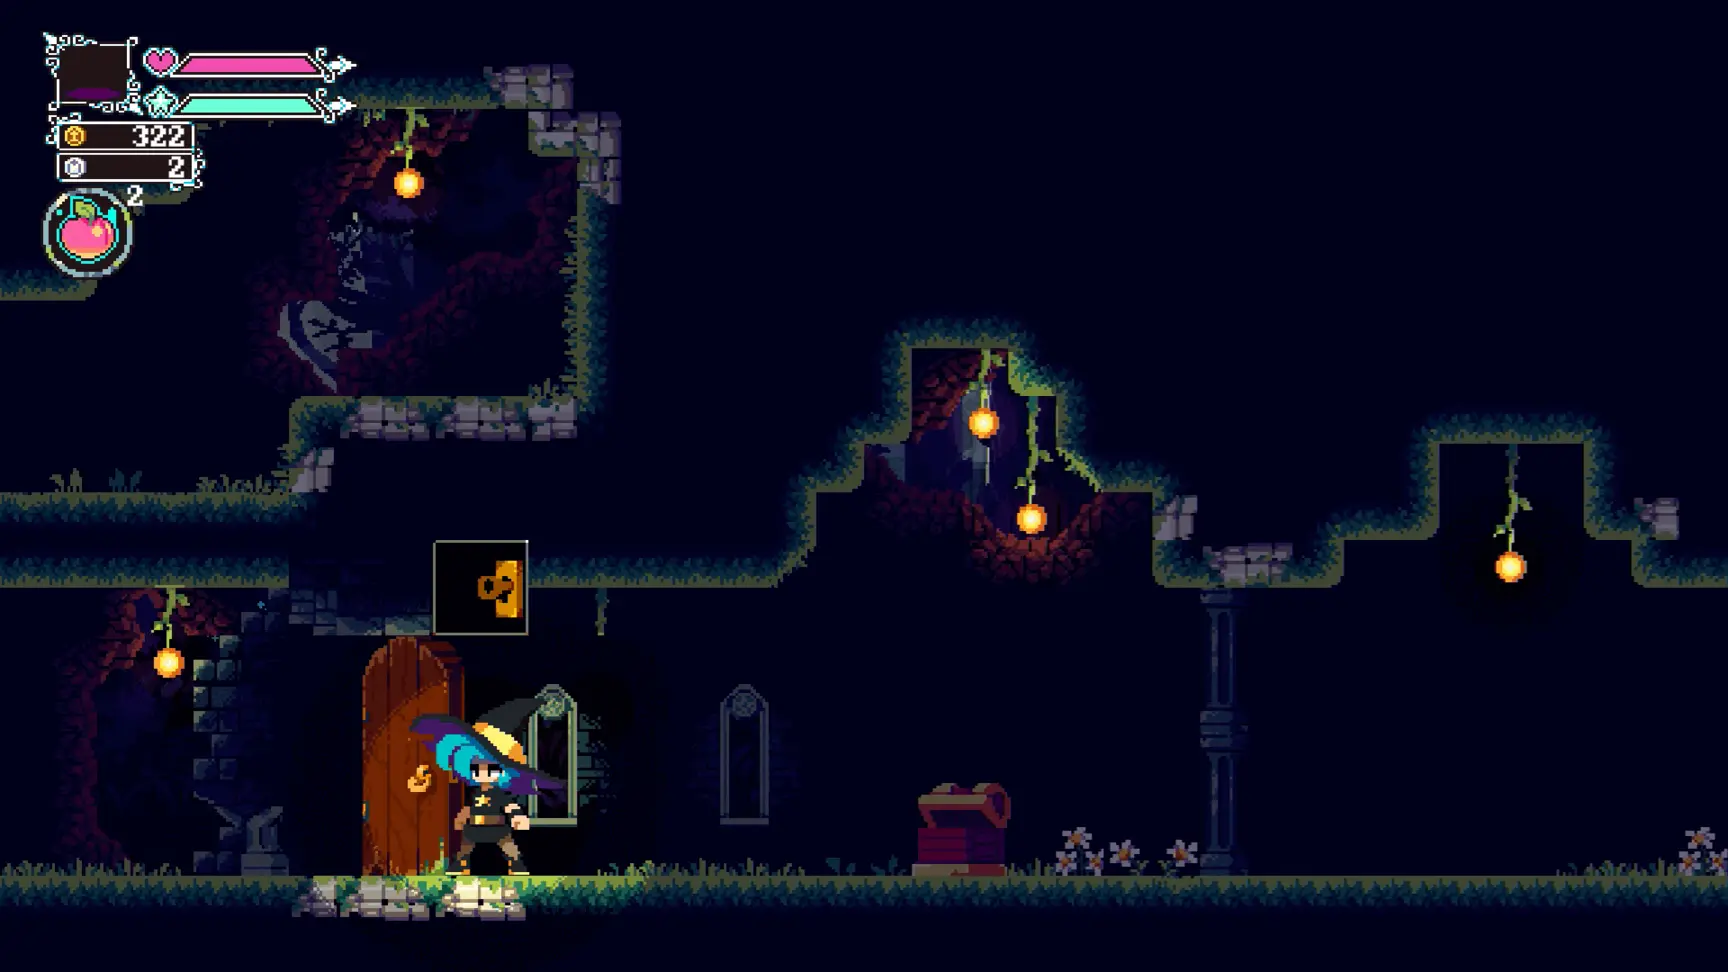
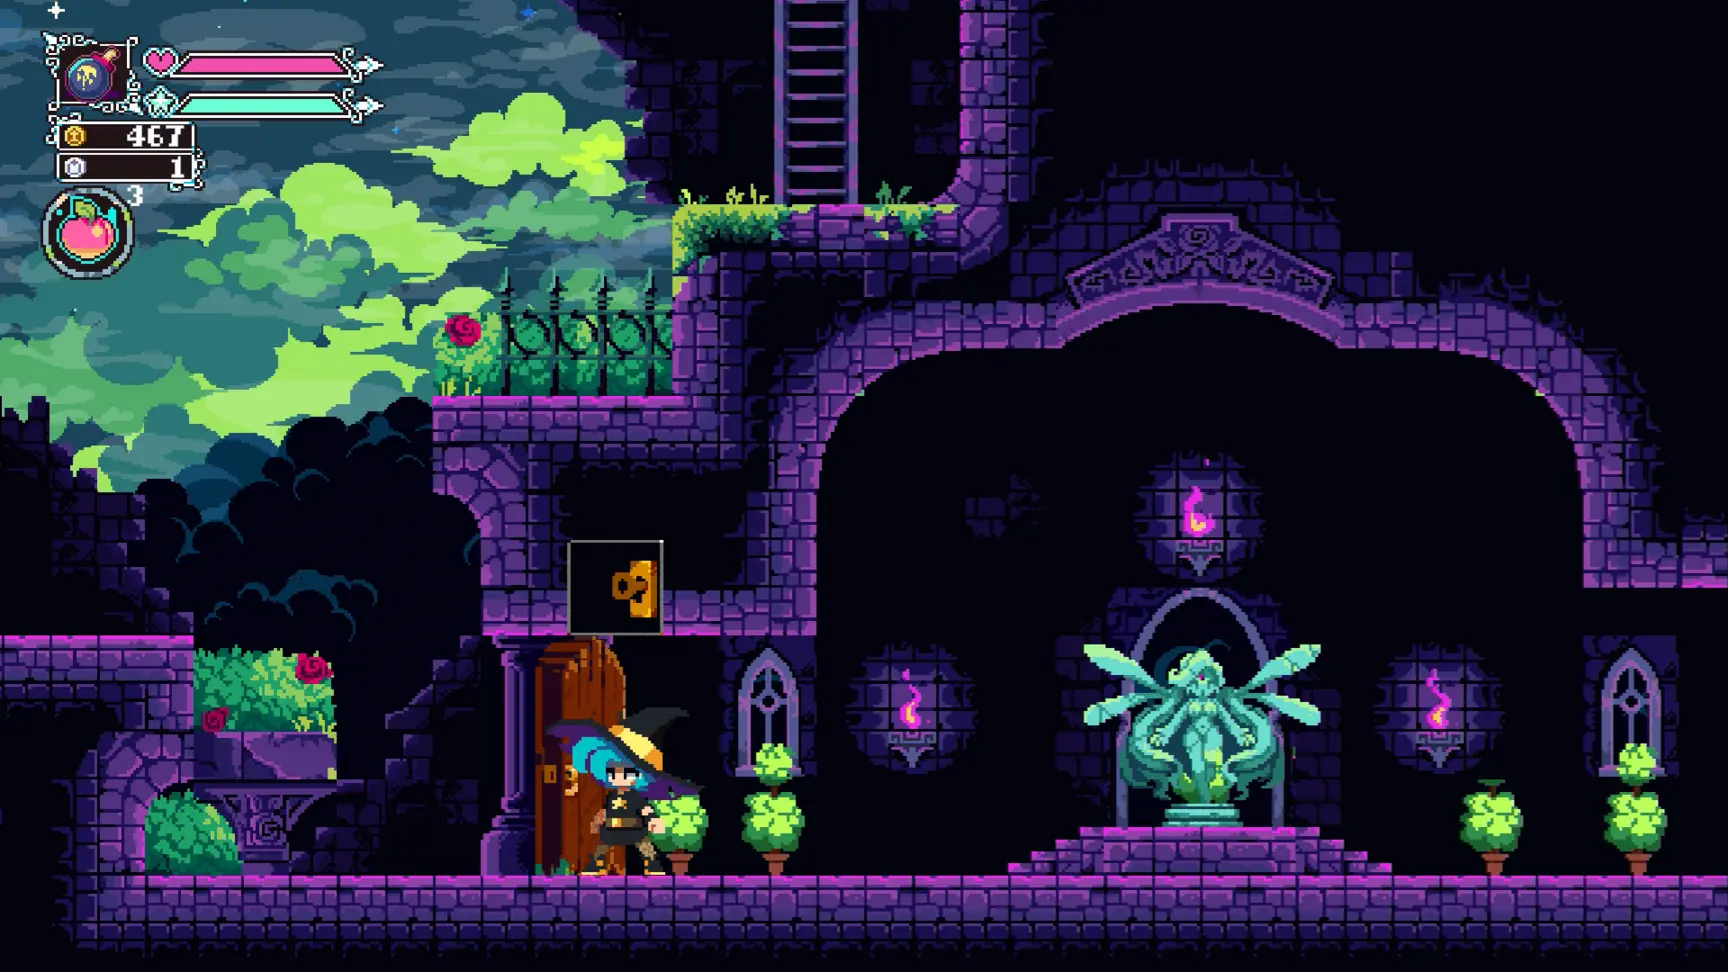
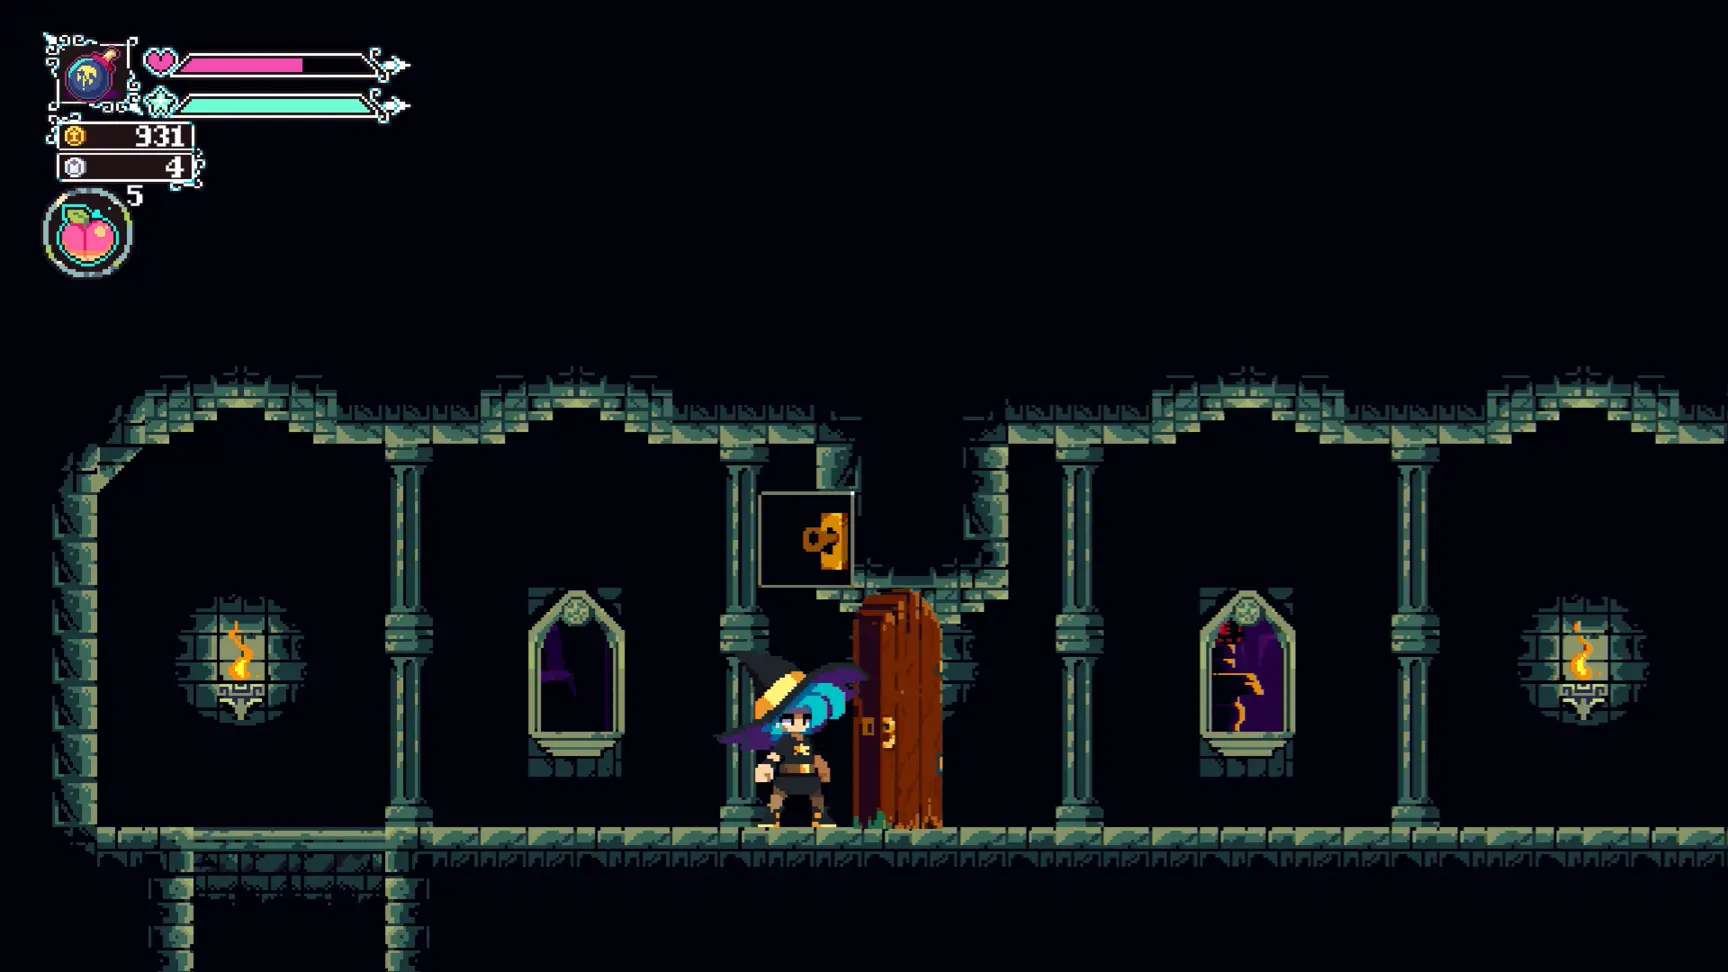
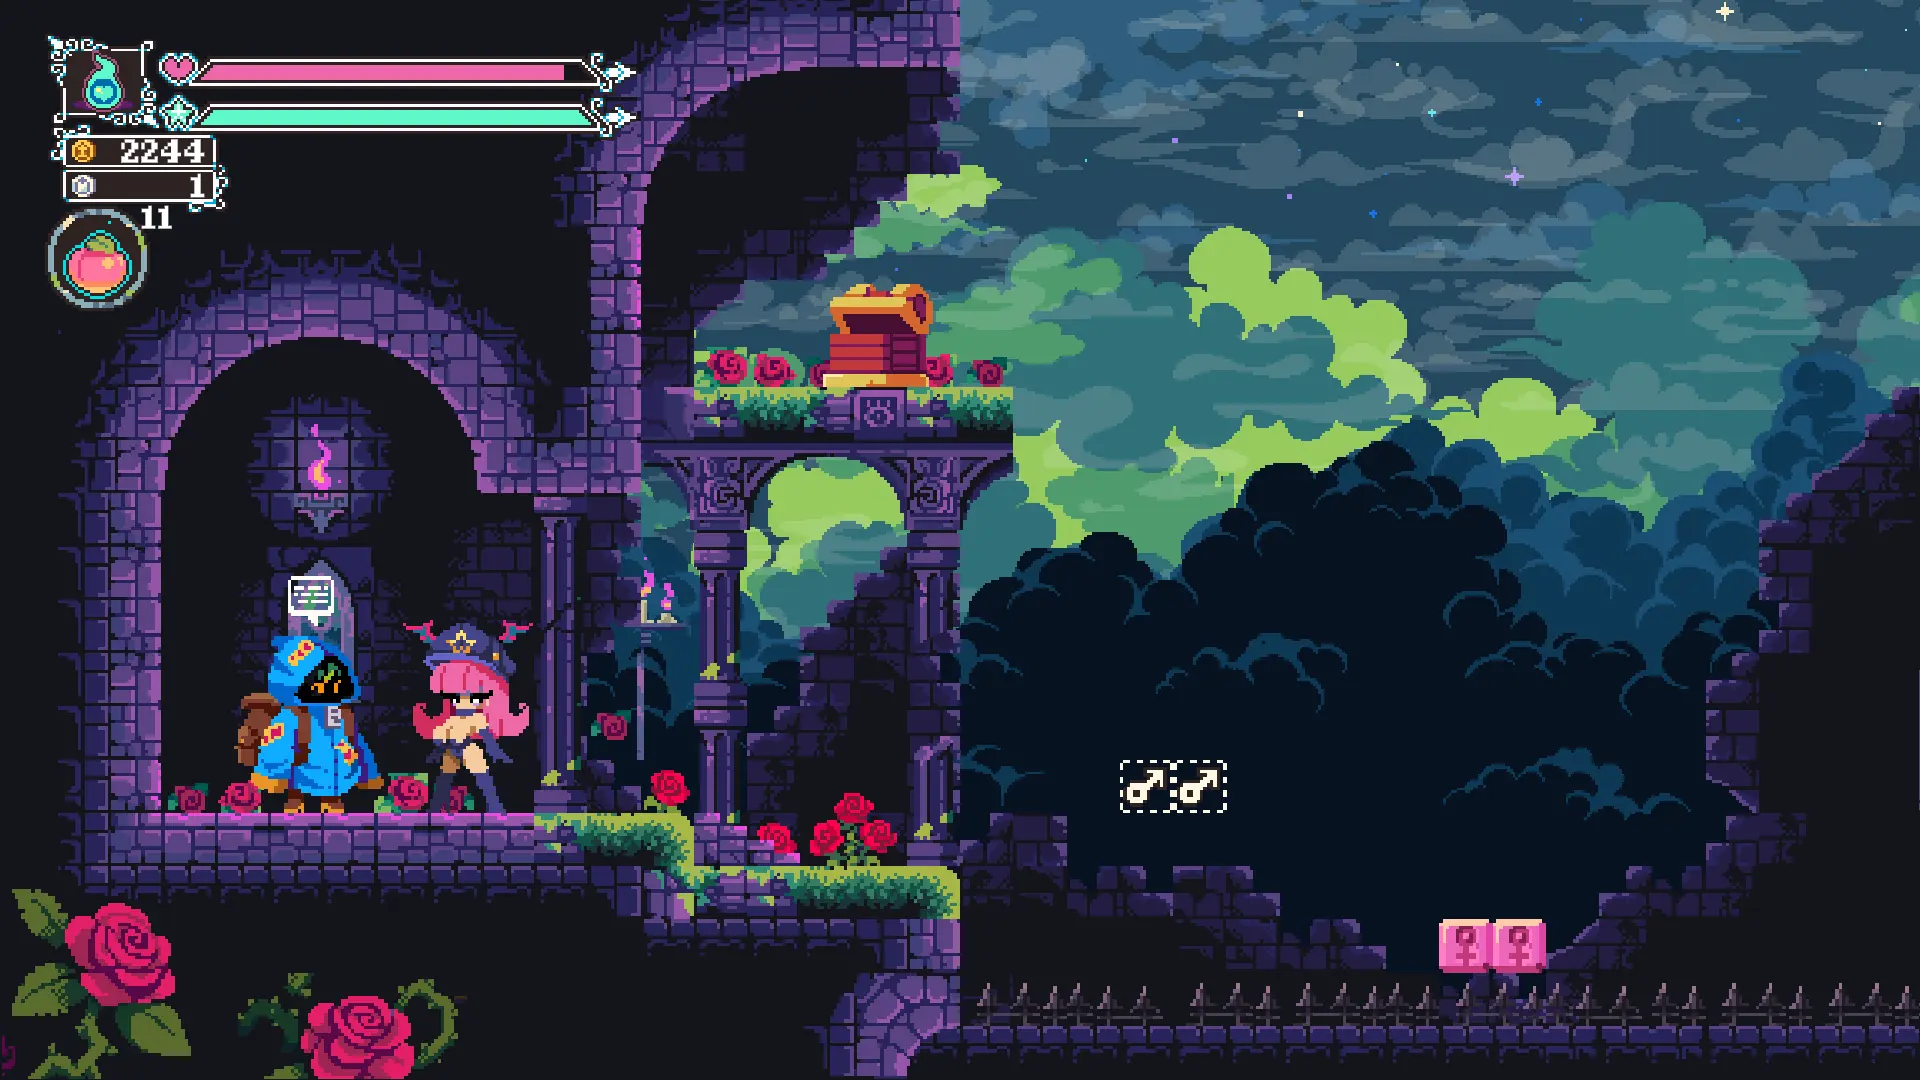
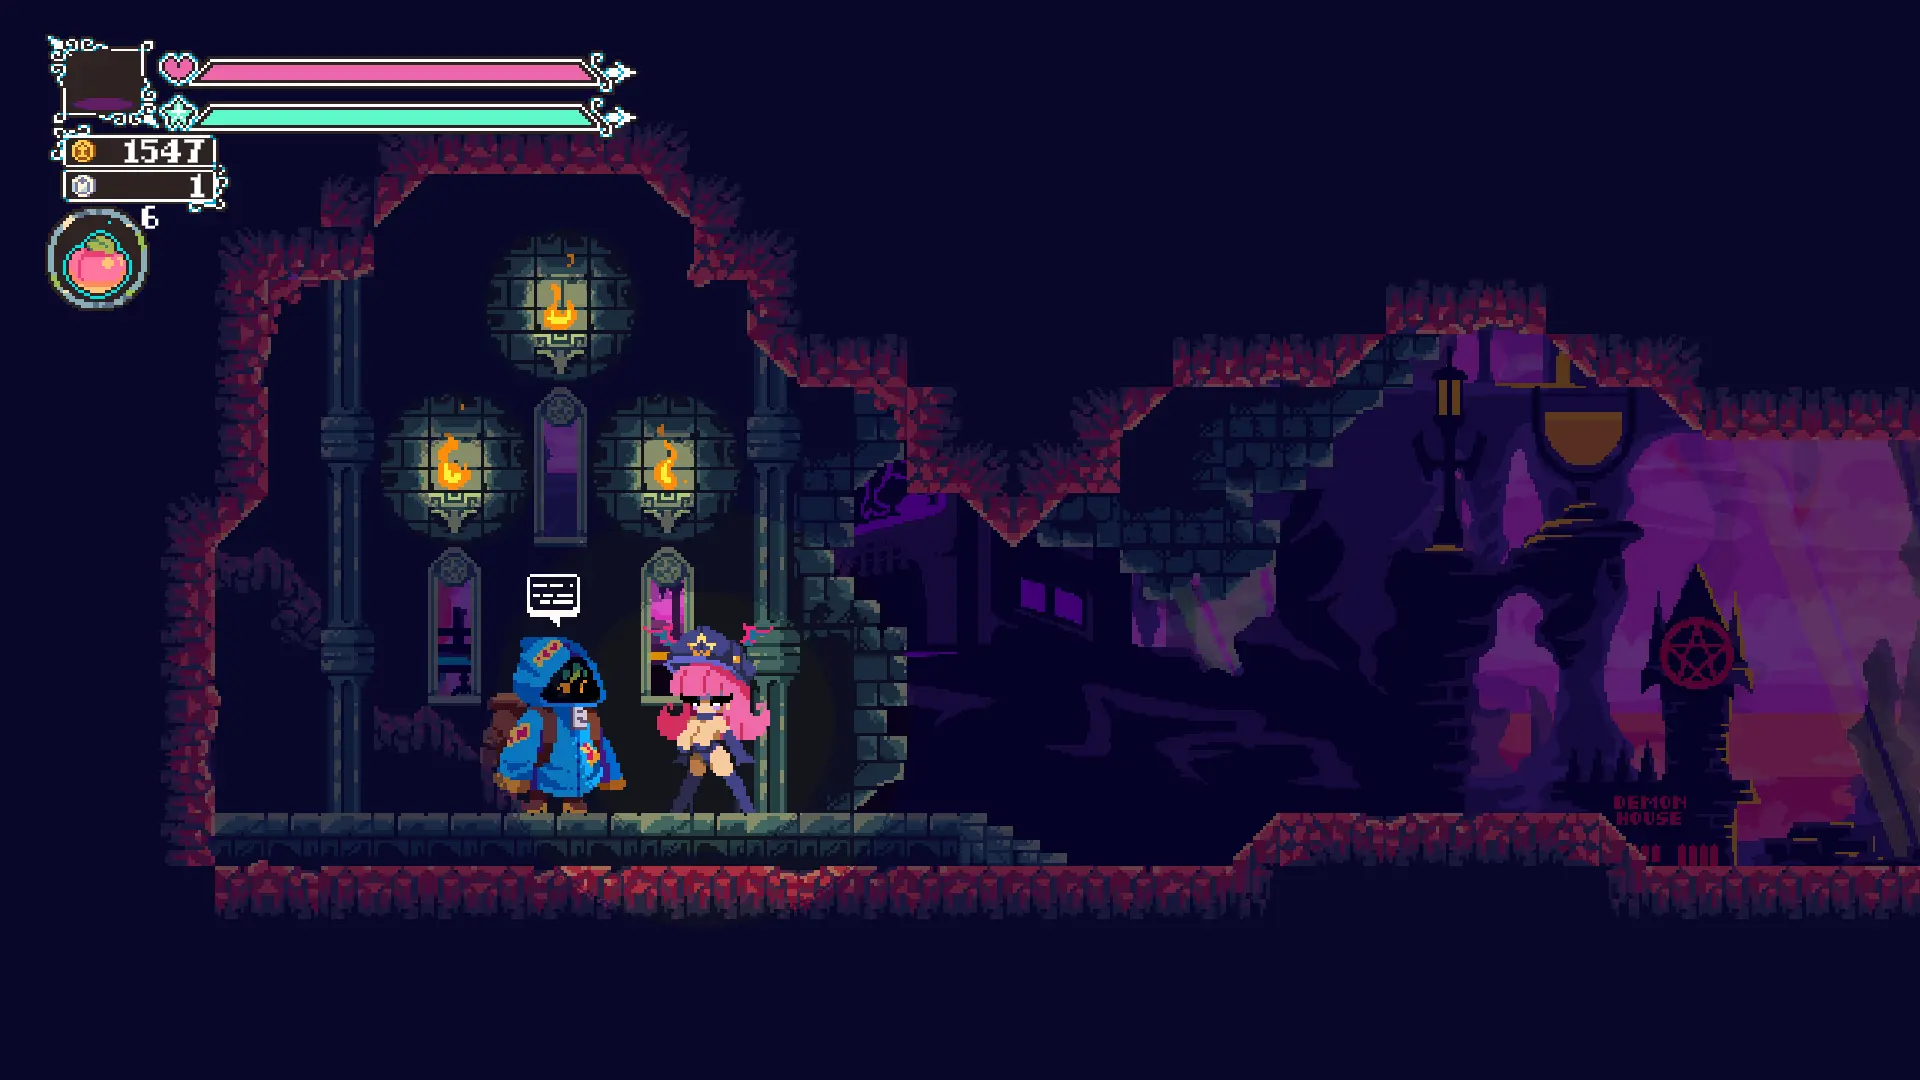
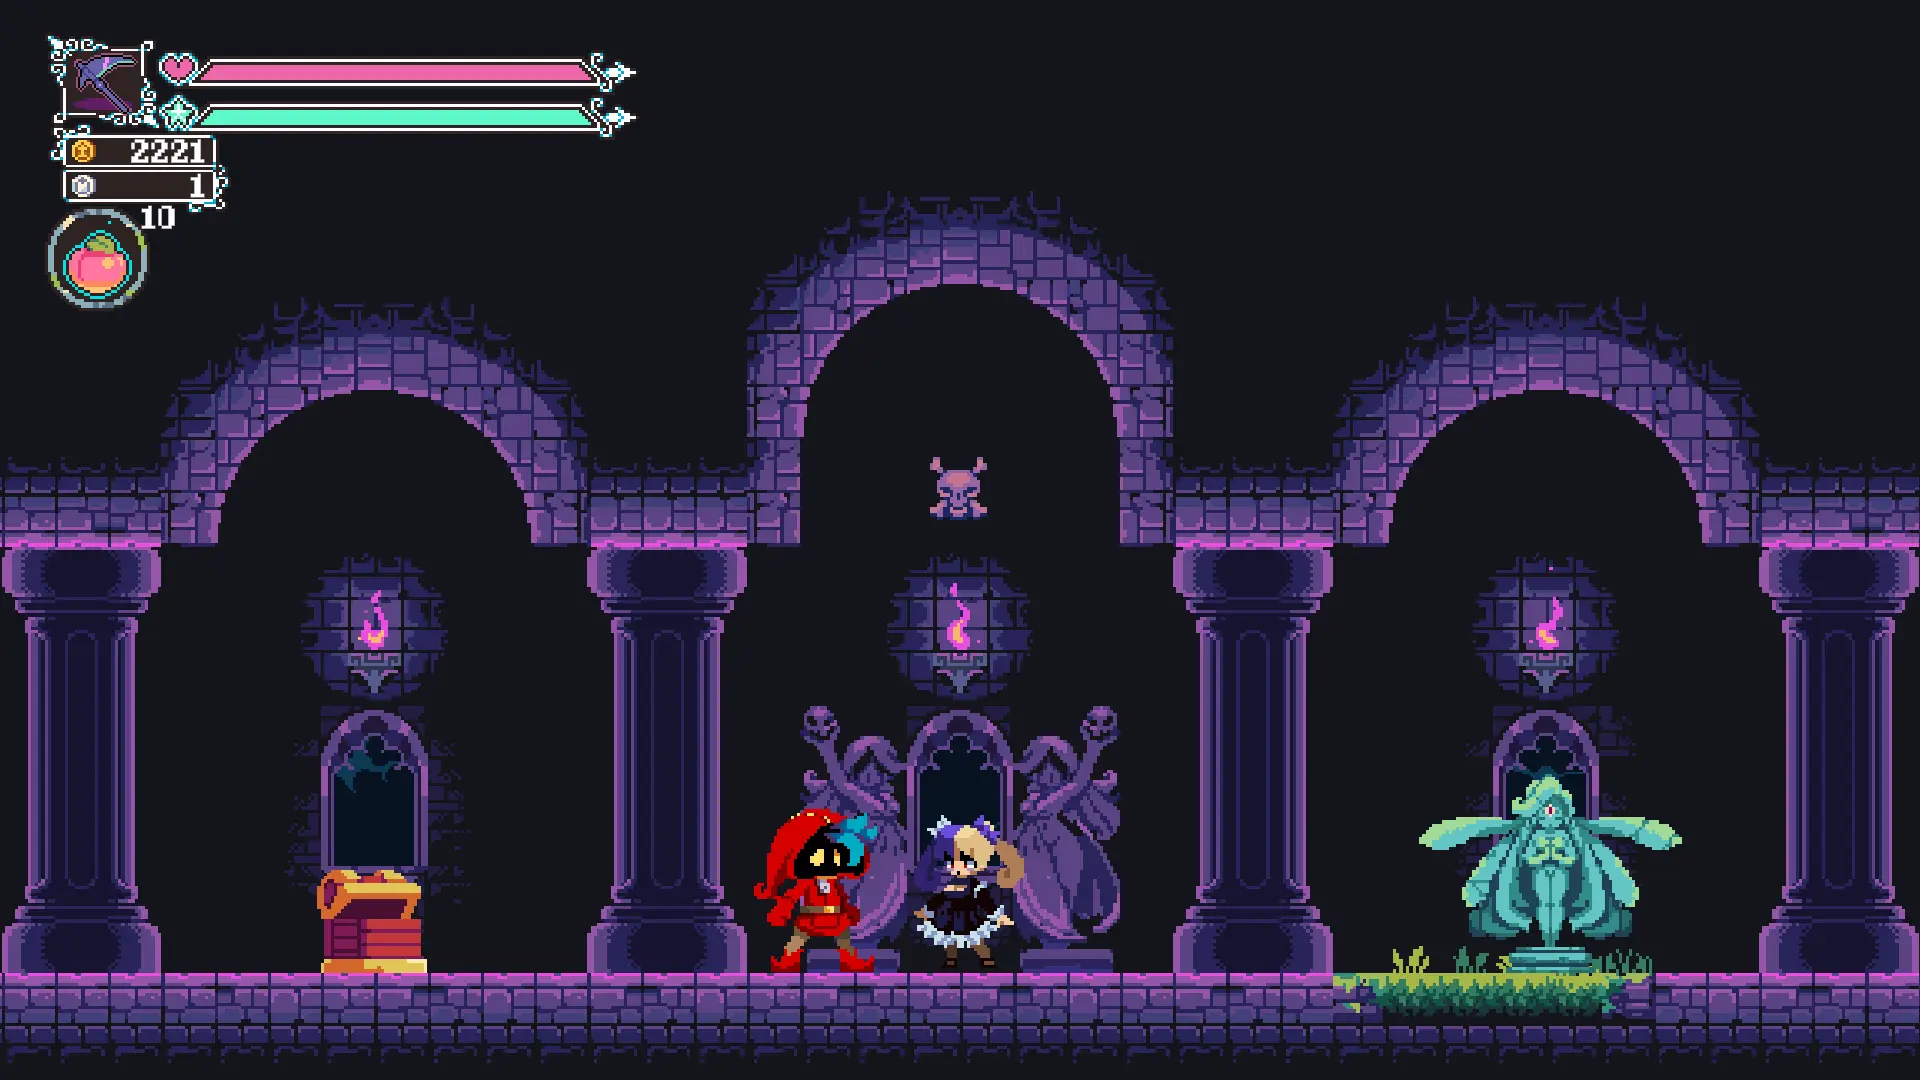
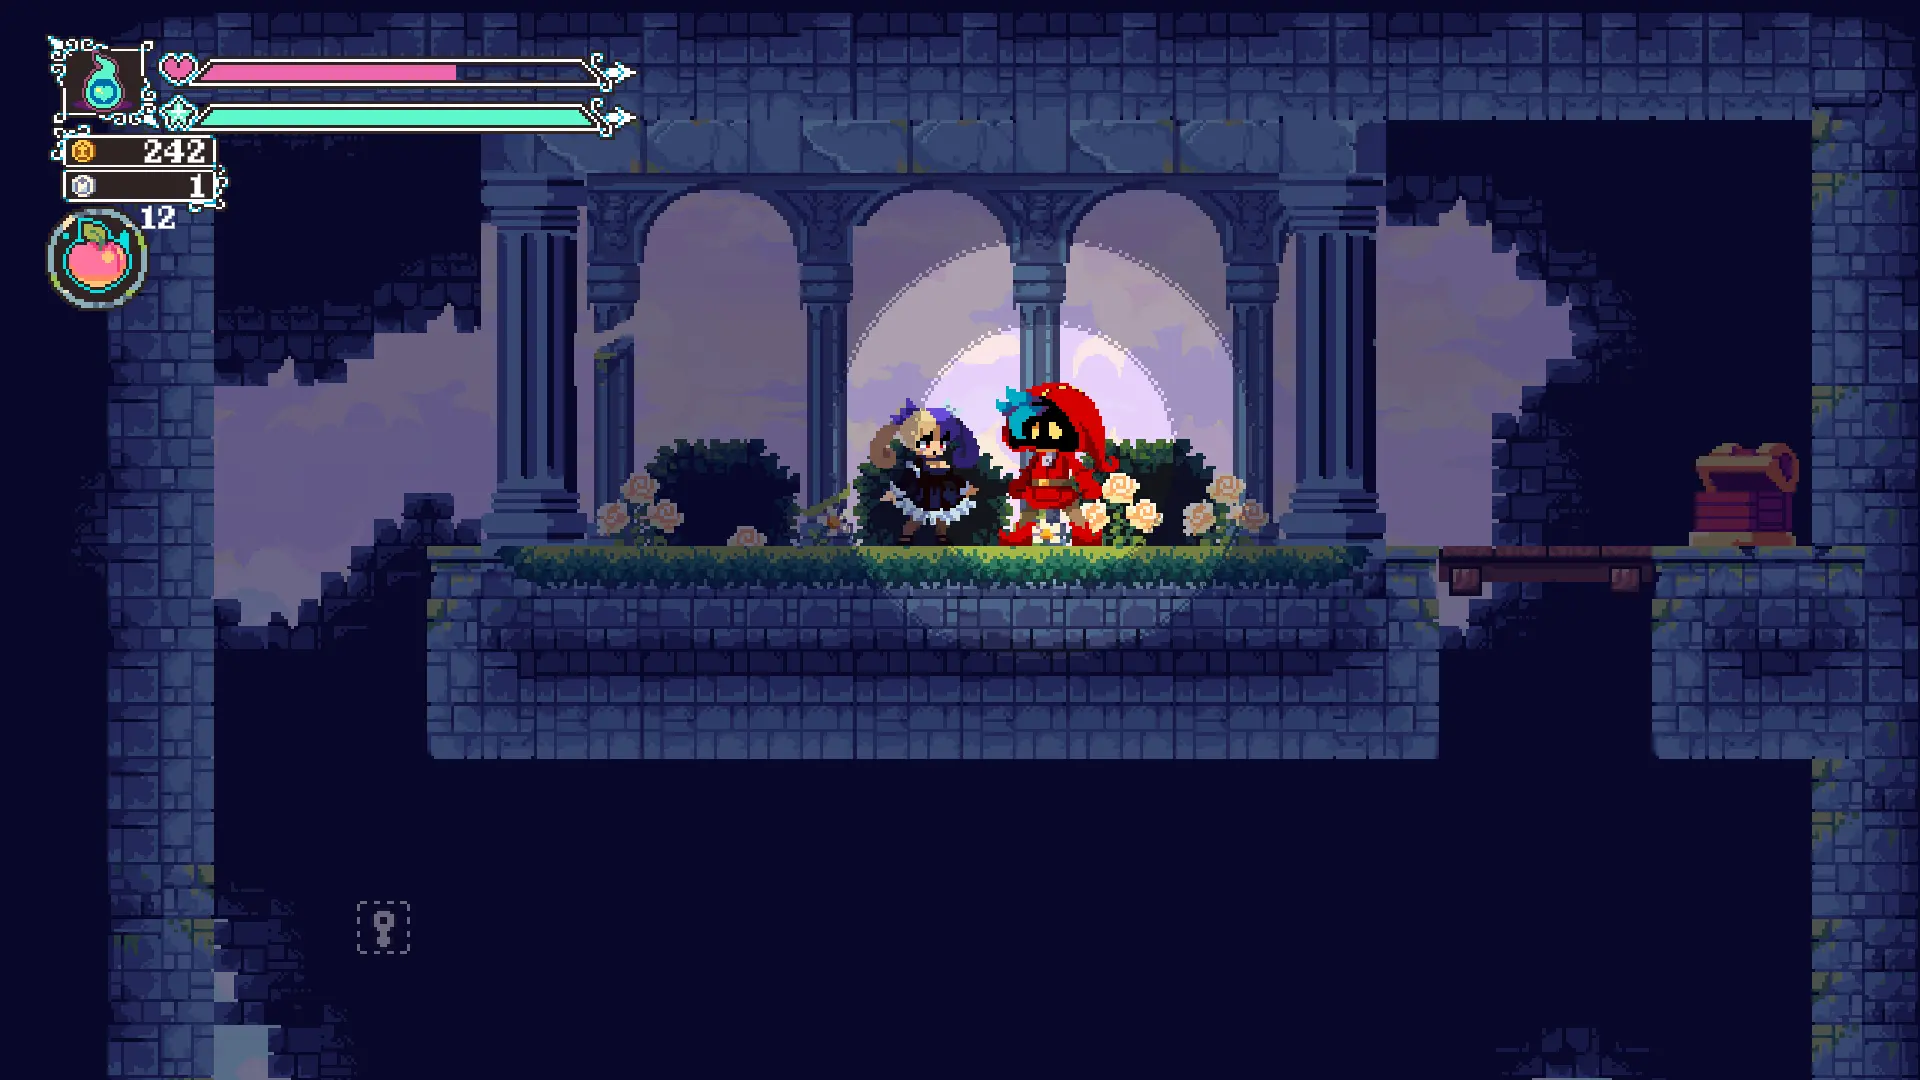
In FlipWitch the player will be able to find restore/save points throughout the world. These points heal the player’s character, restore their mana pool and replenish their Peachy Peach charges. It also acts as a save station in the event of the player’s defeat, reverting the game to its last saved state. The save/restore points can be activated by interacting with them, an example of such a station is shown below:
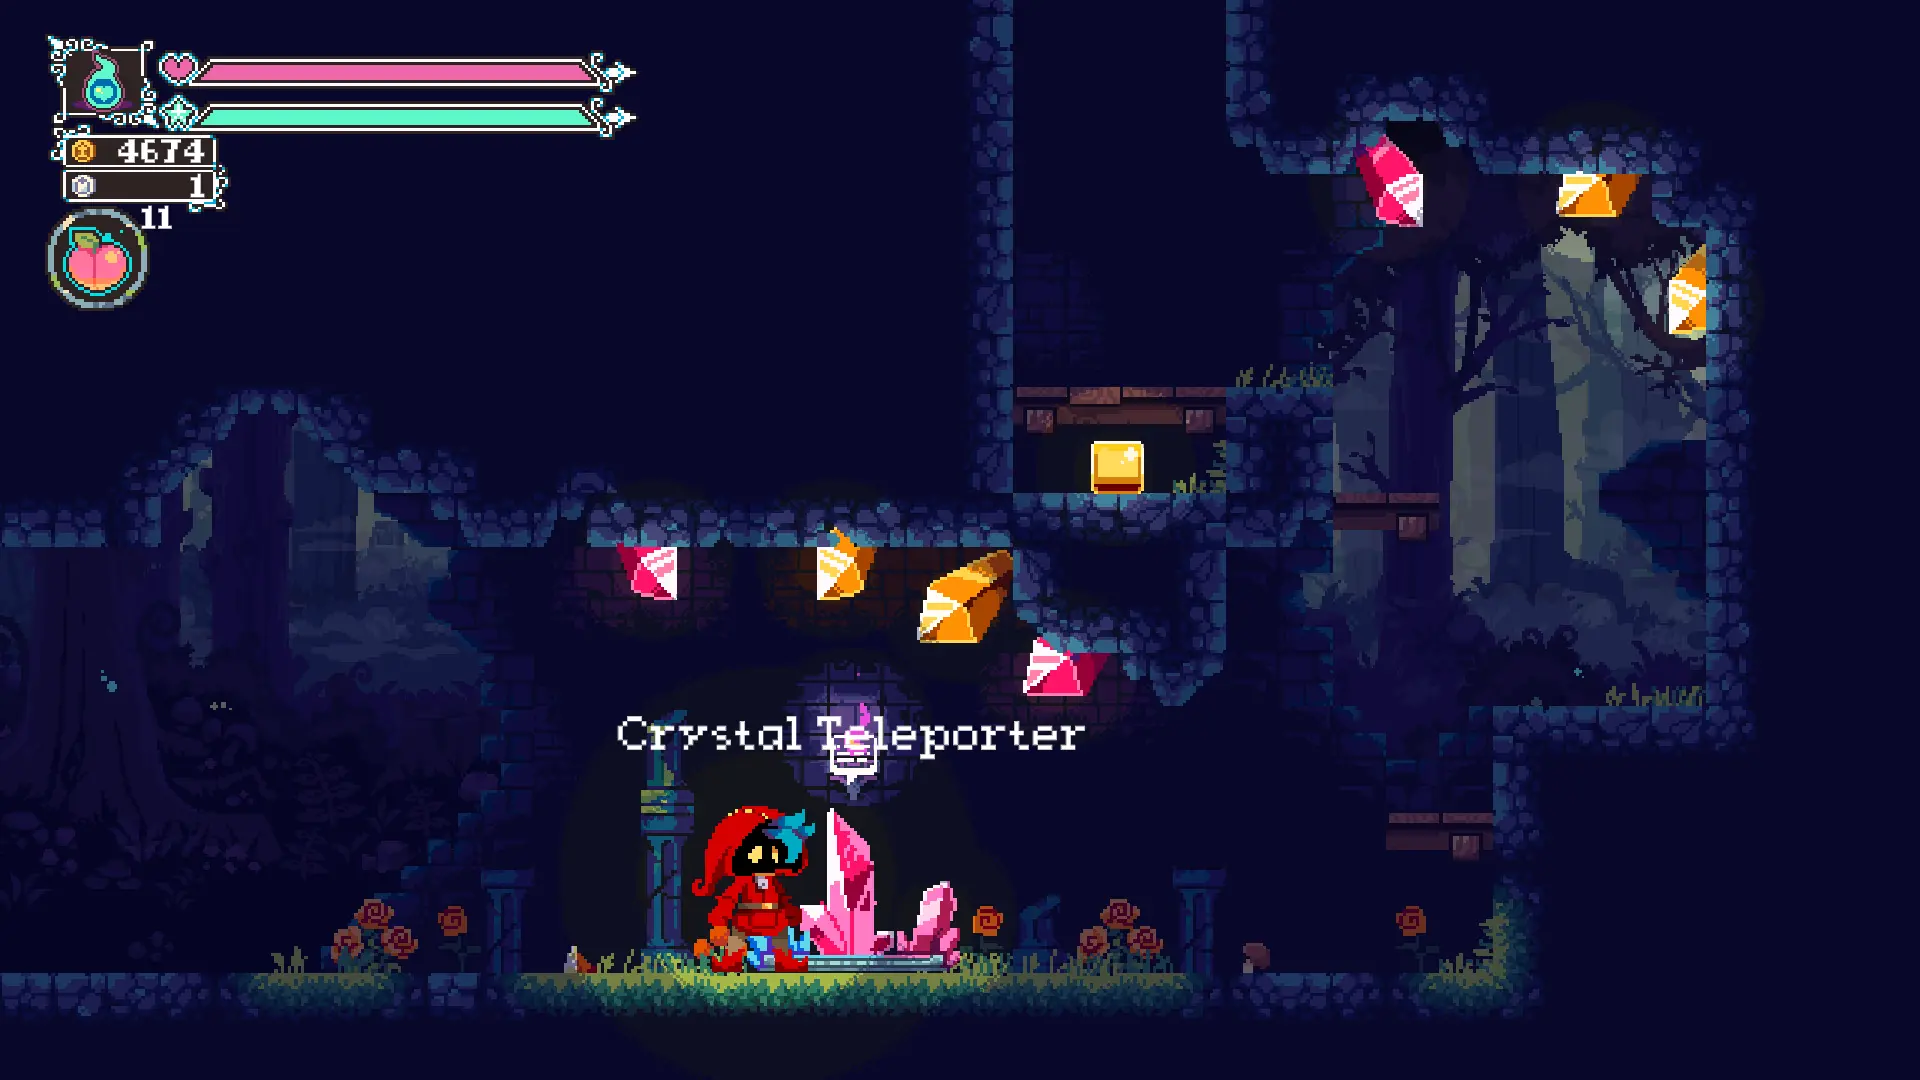
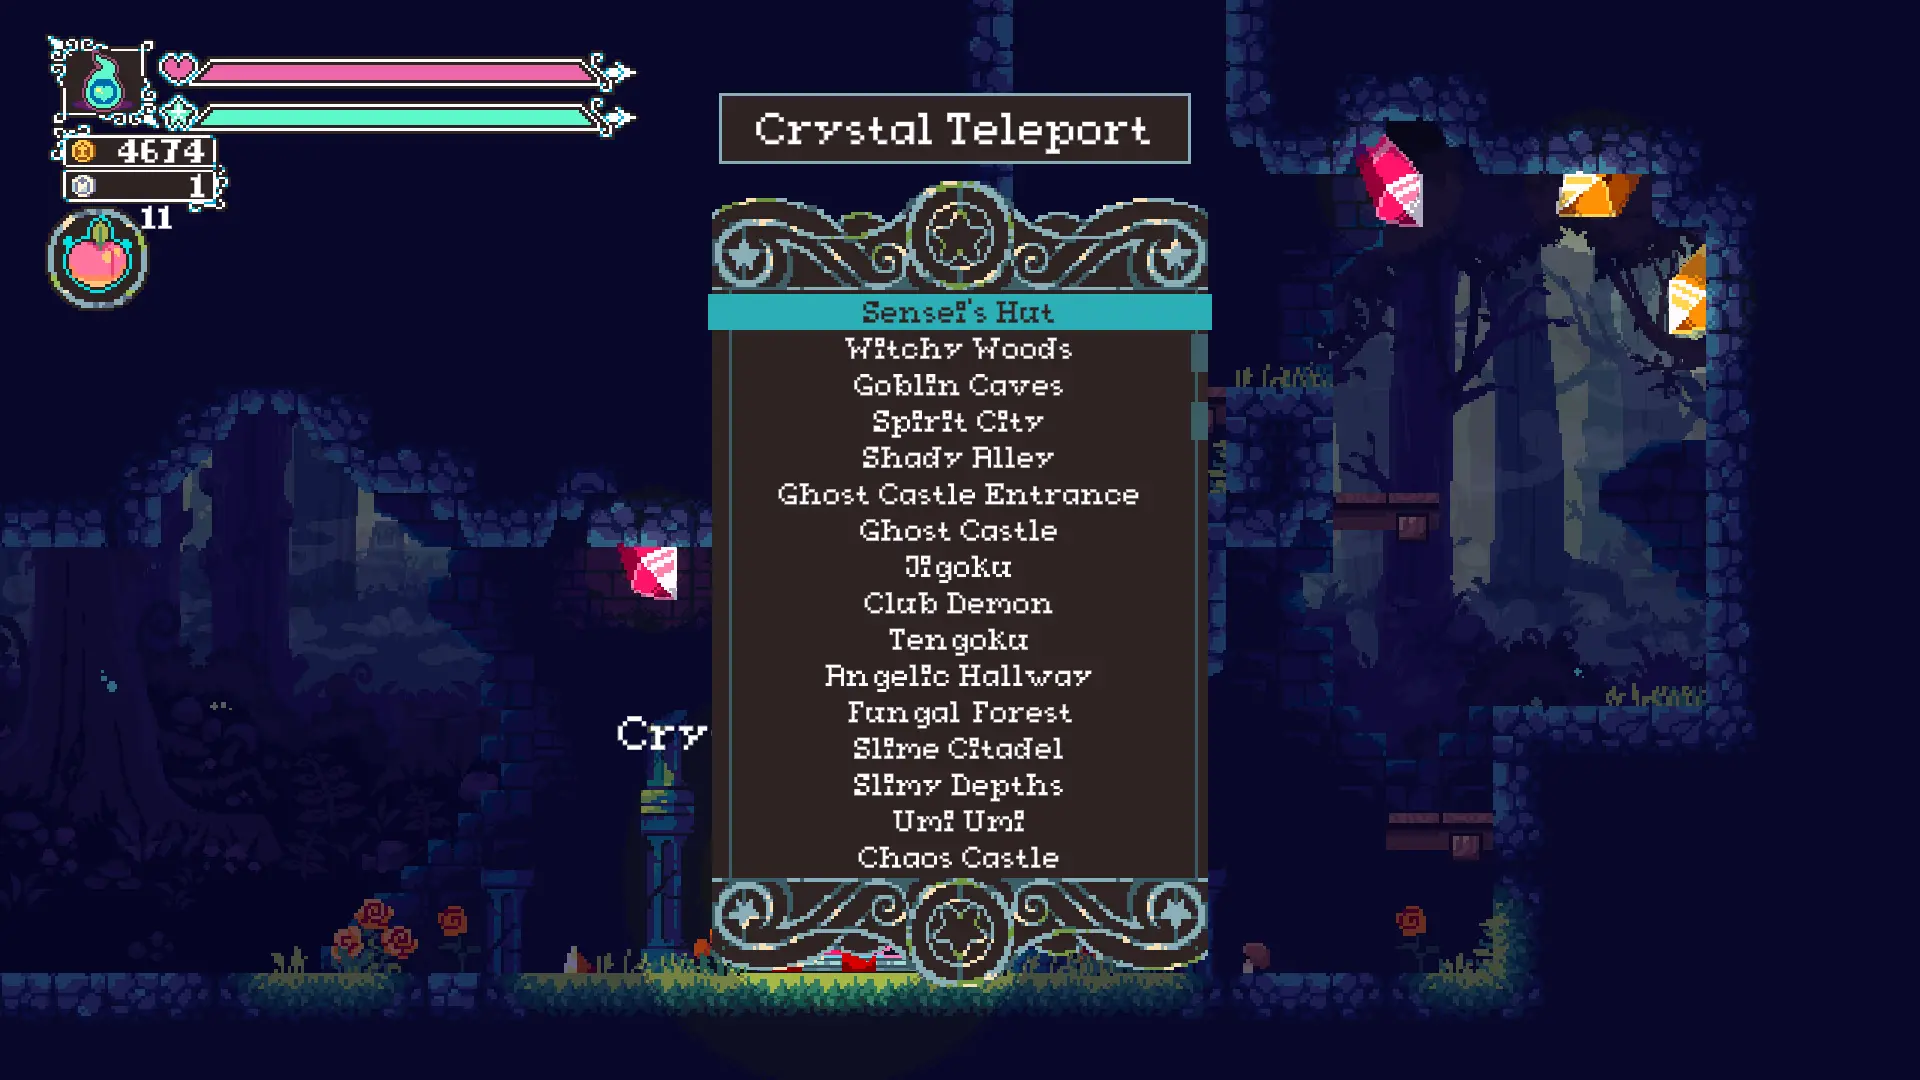
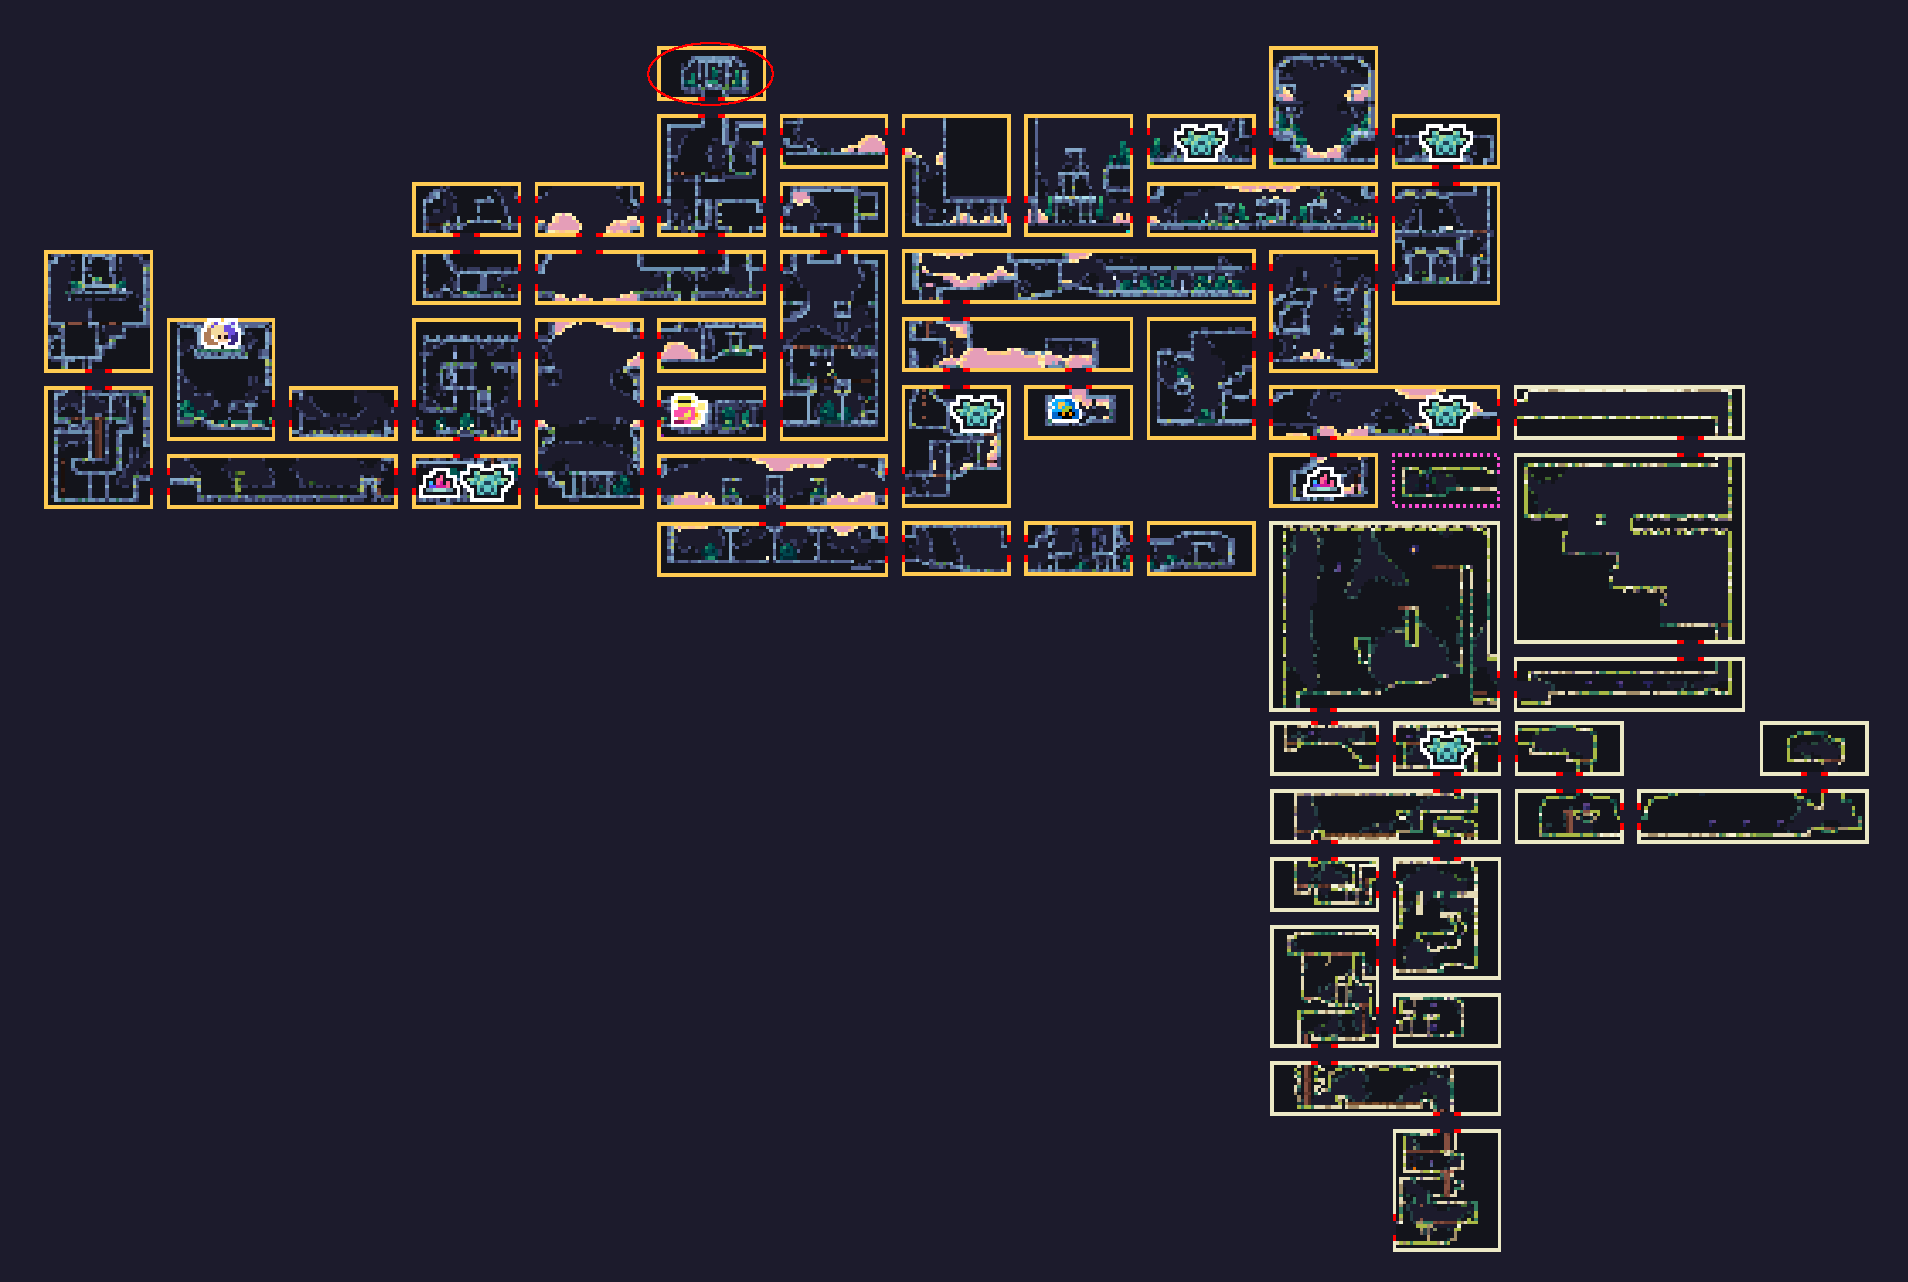
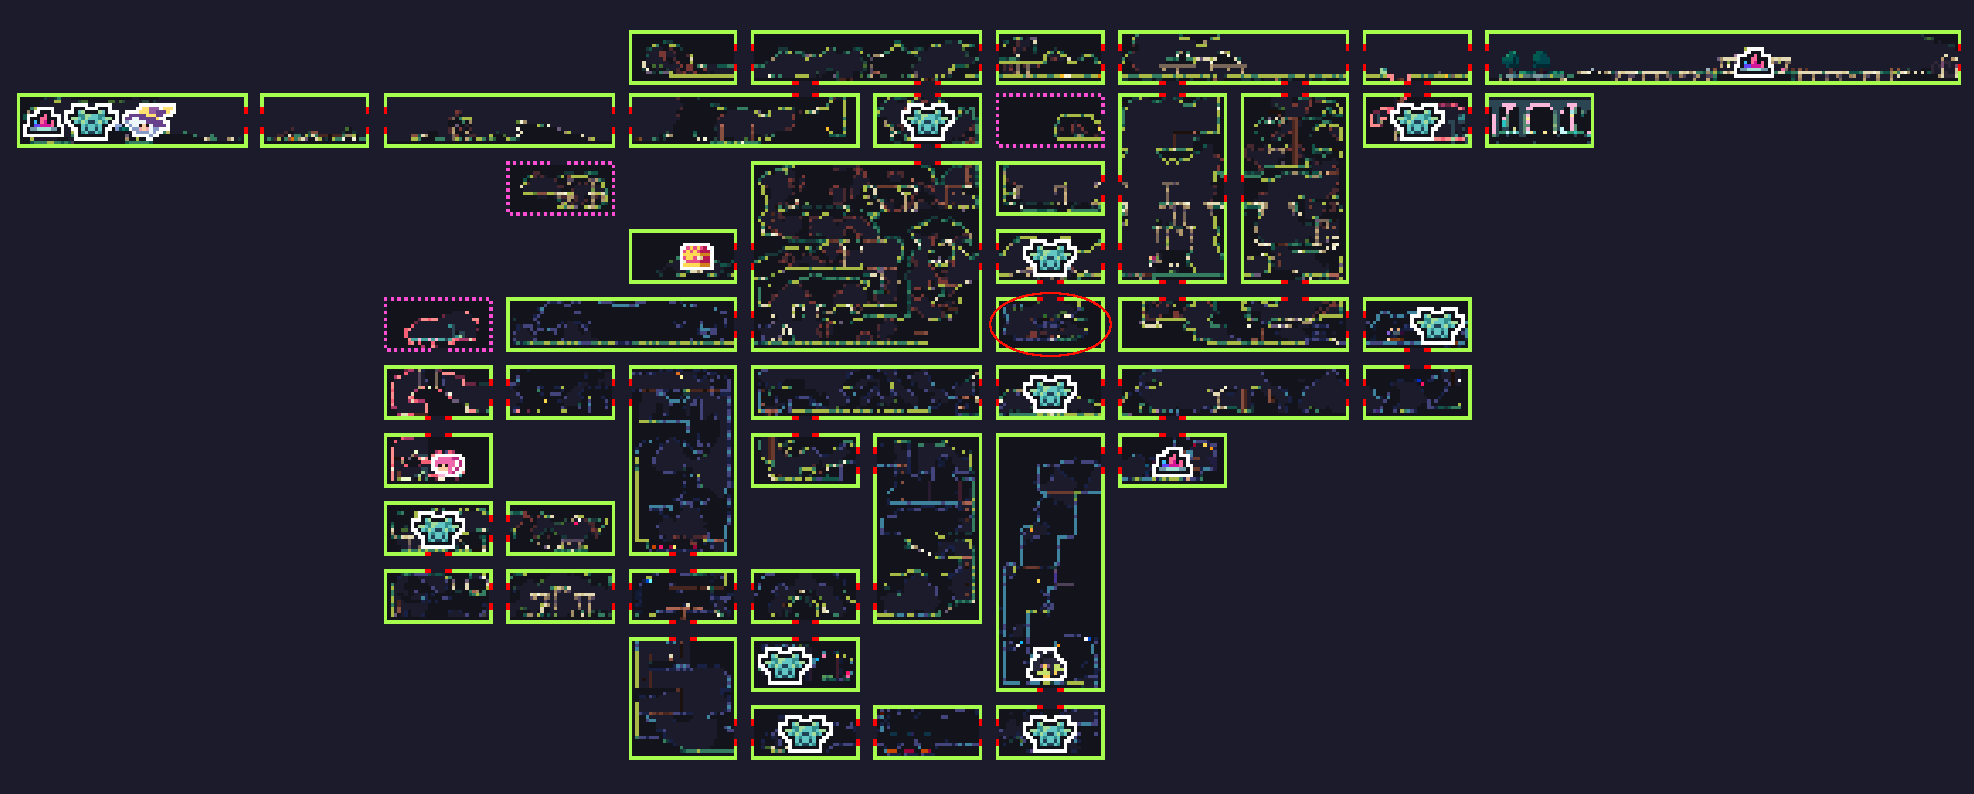
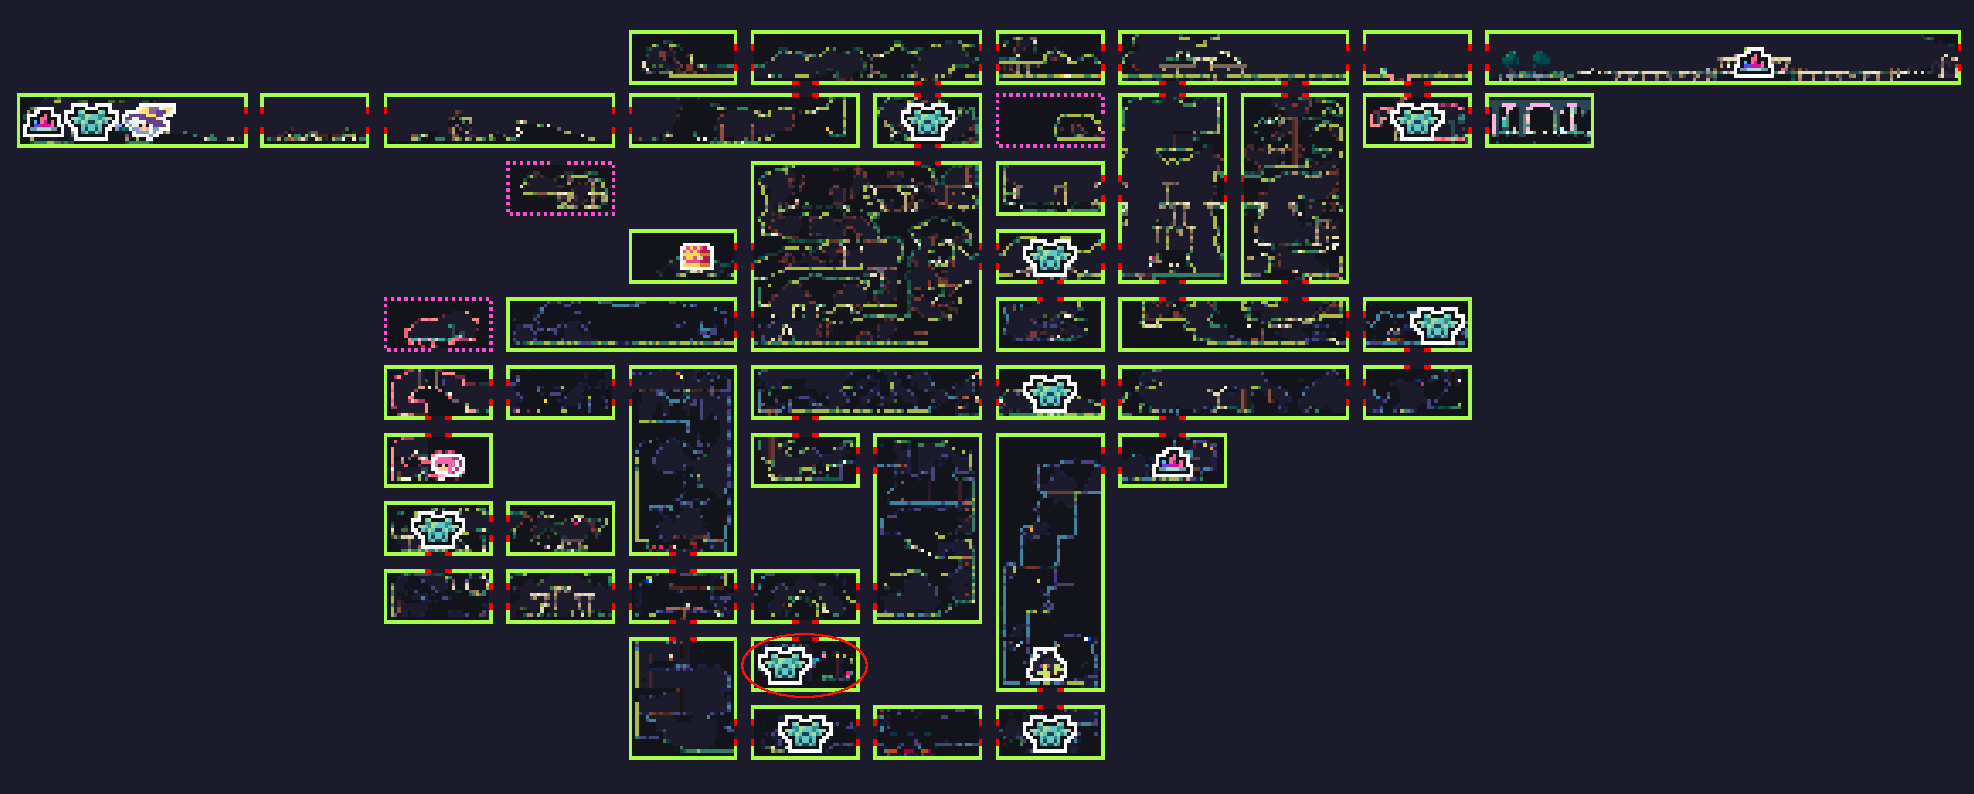
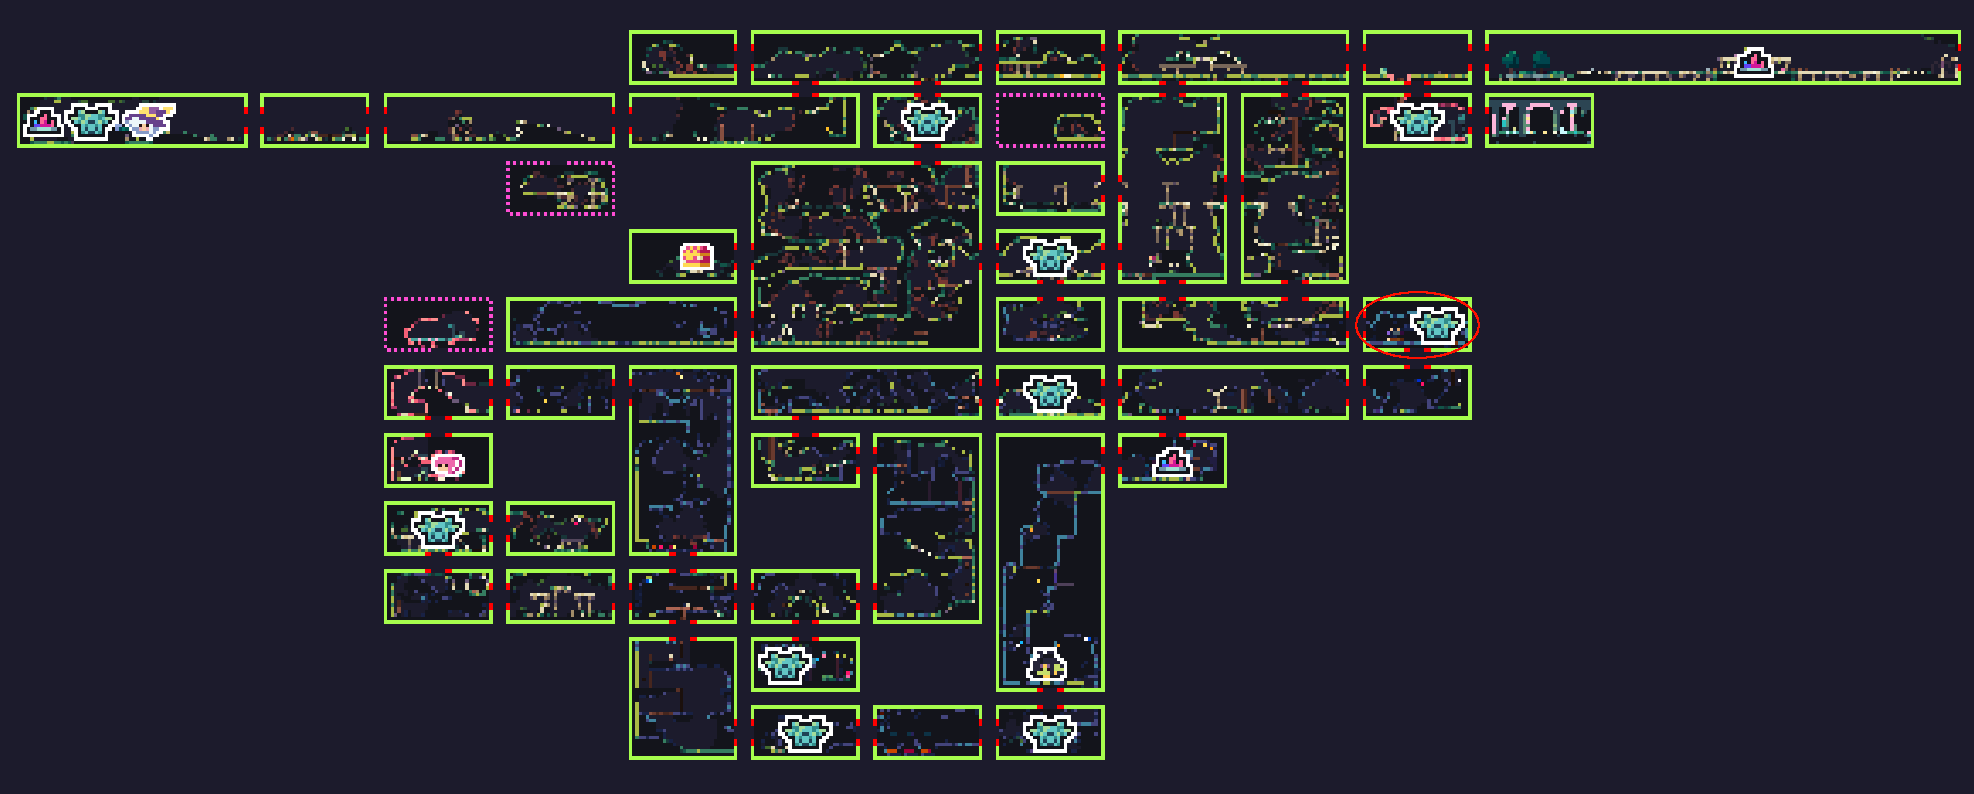
Fast Travel in FlipWitch
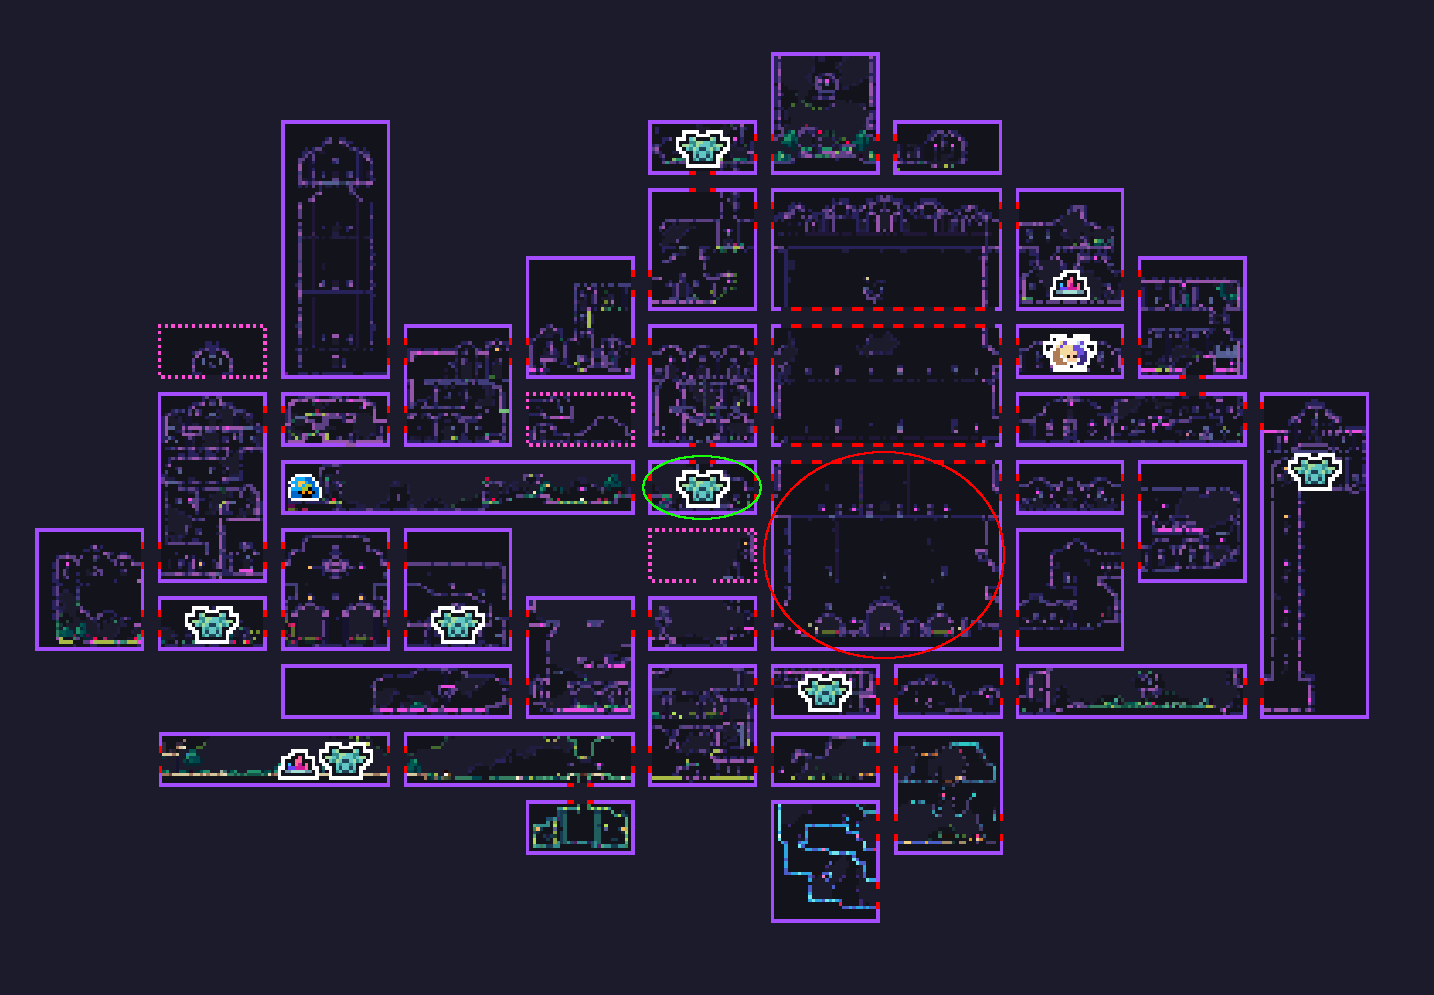
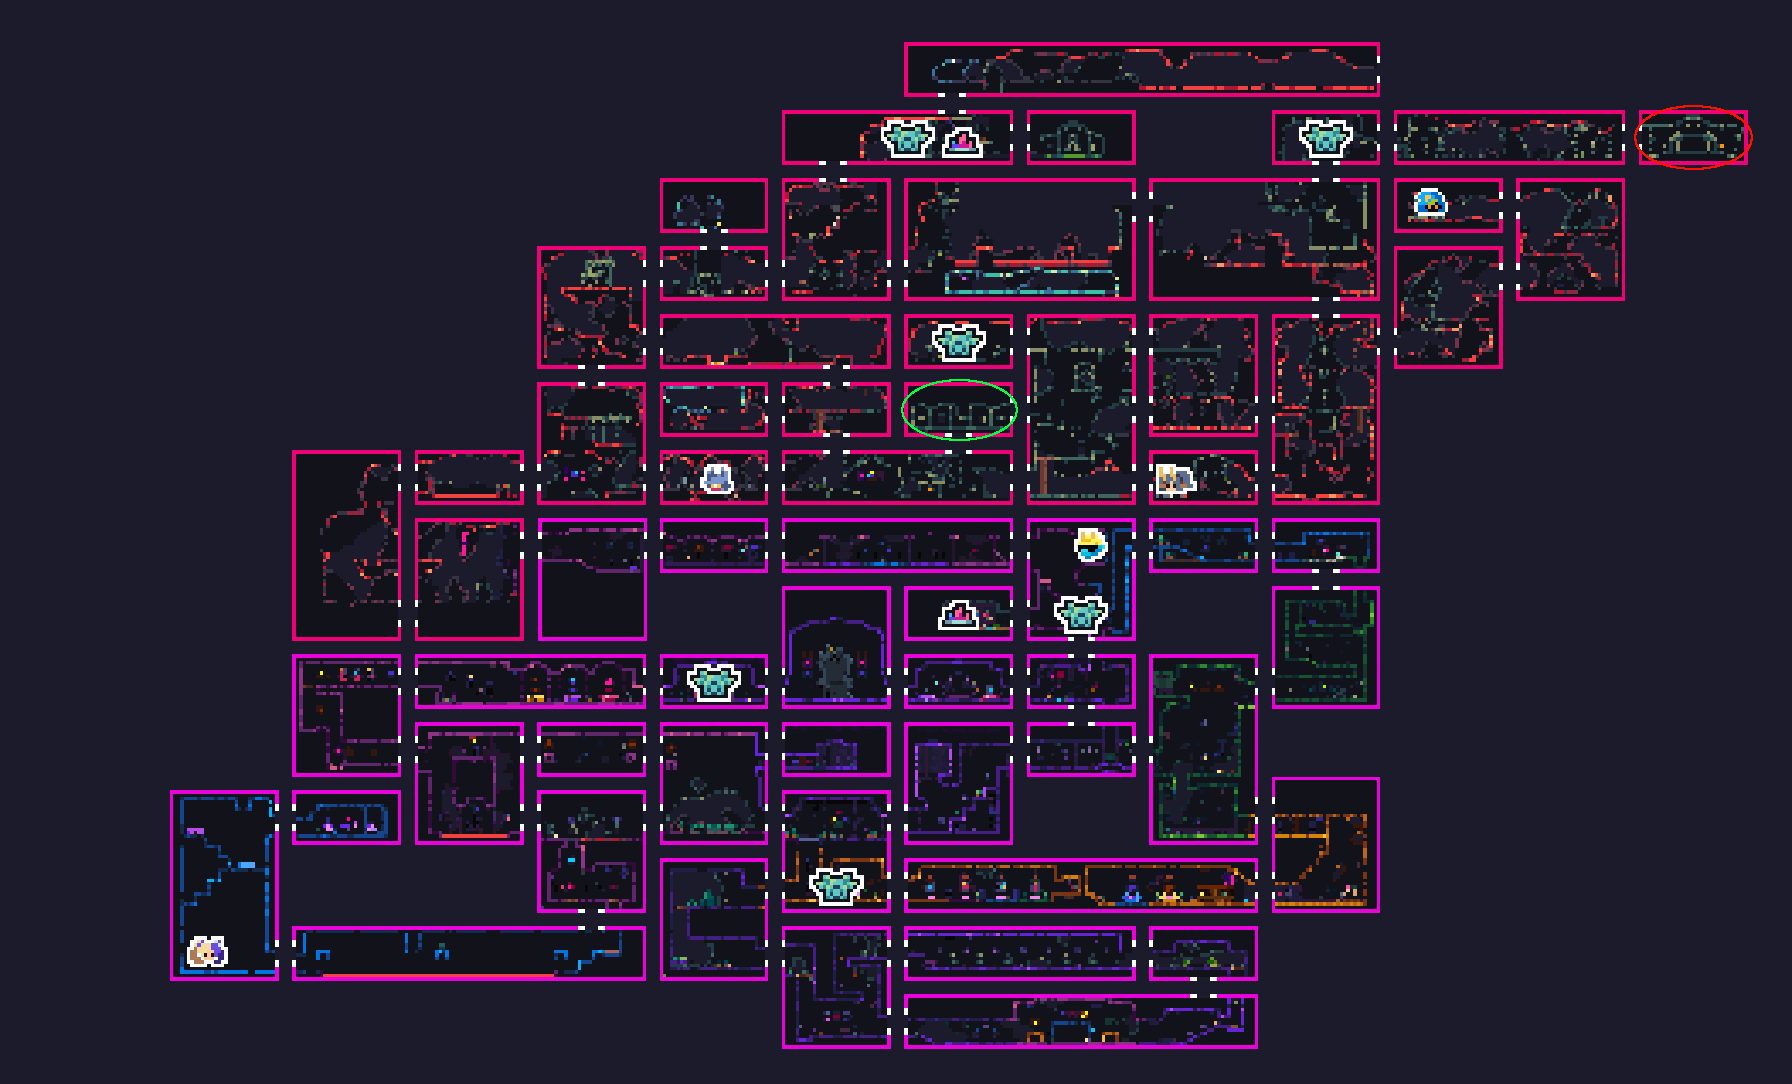
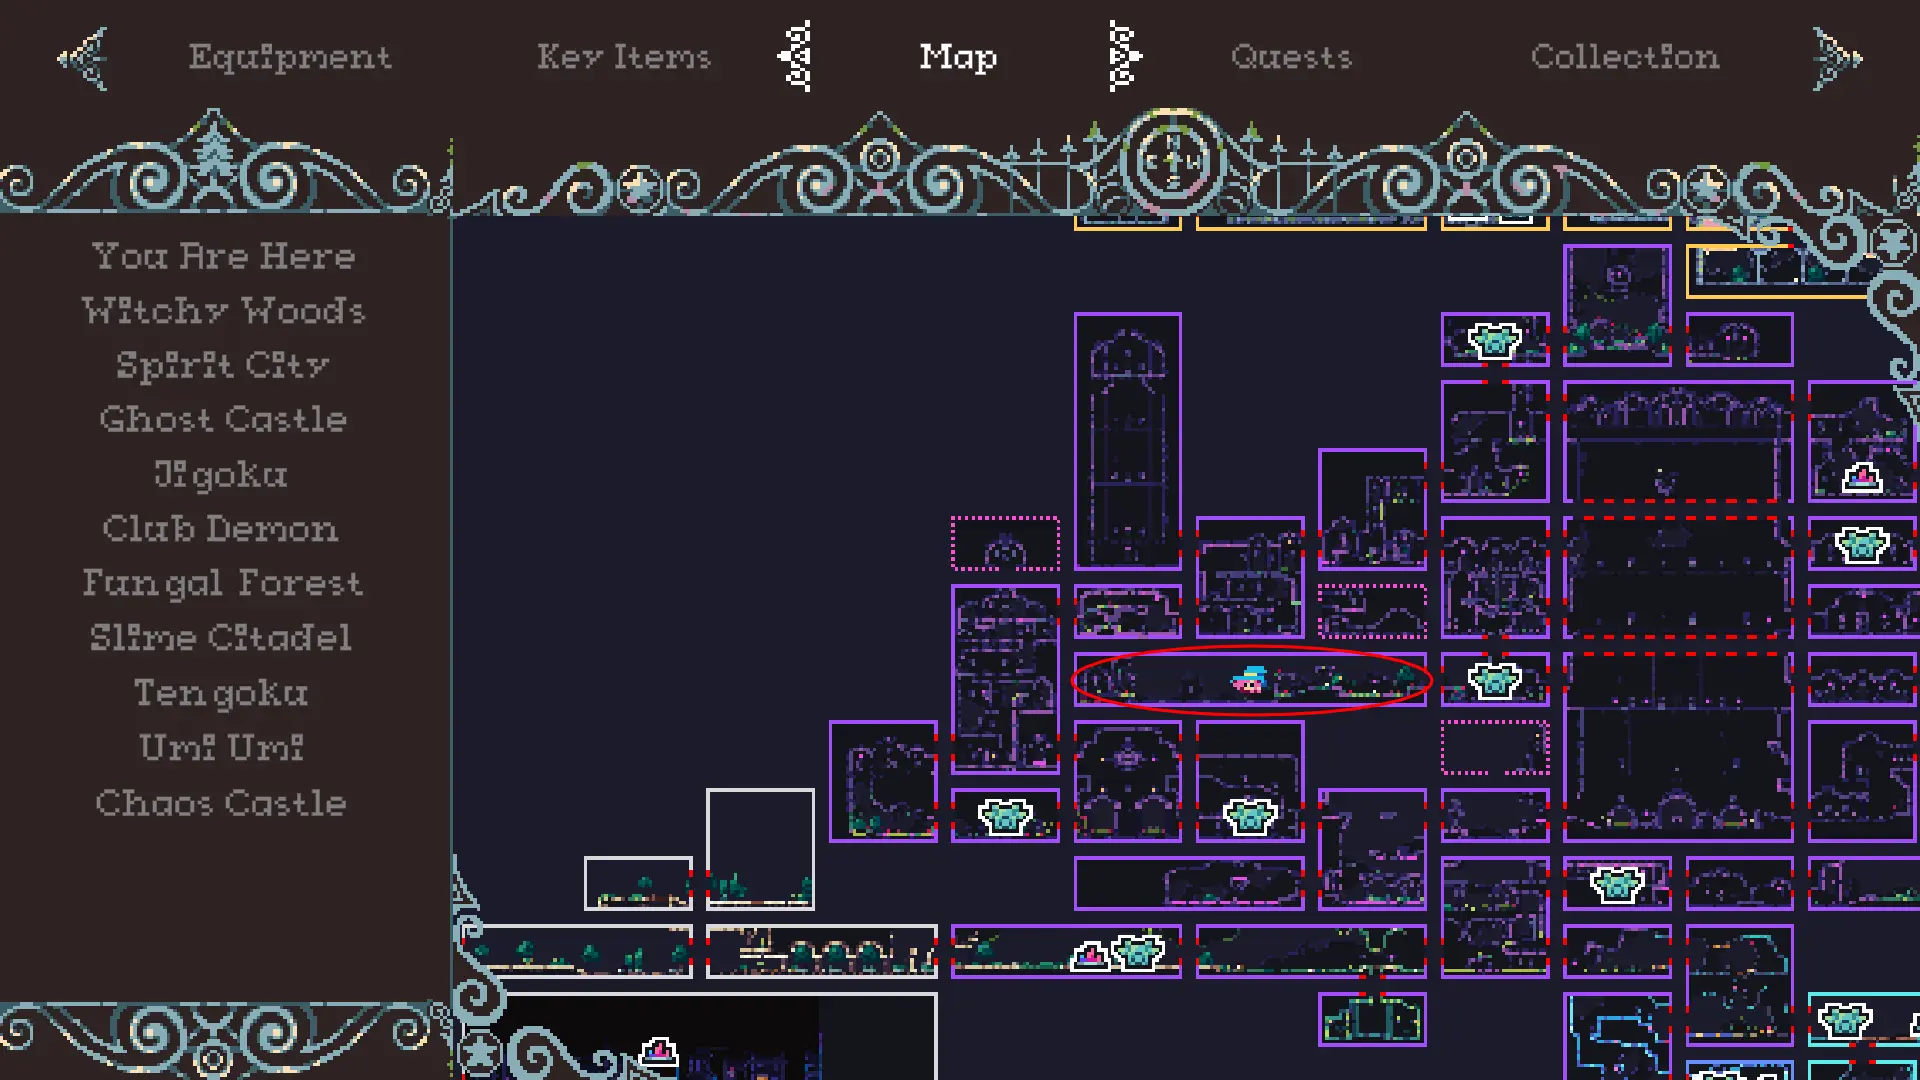
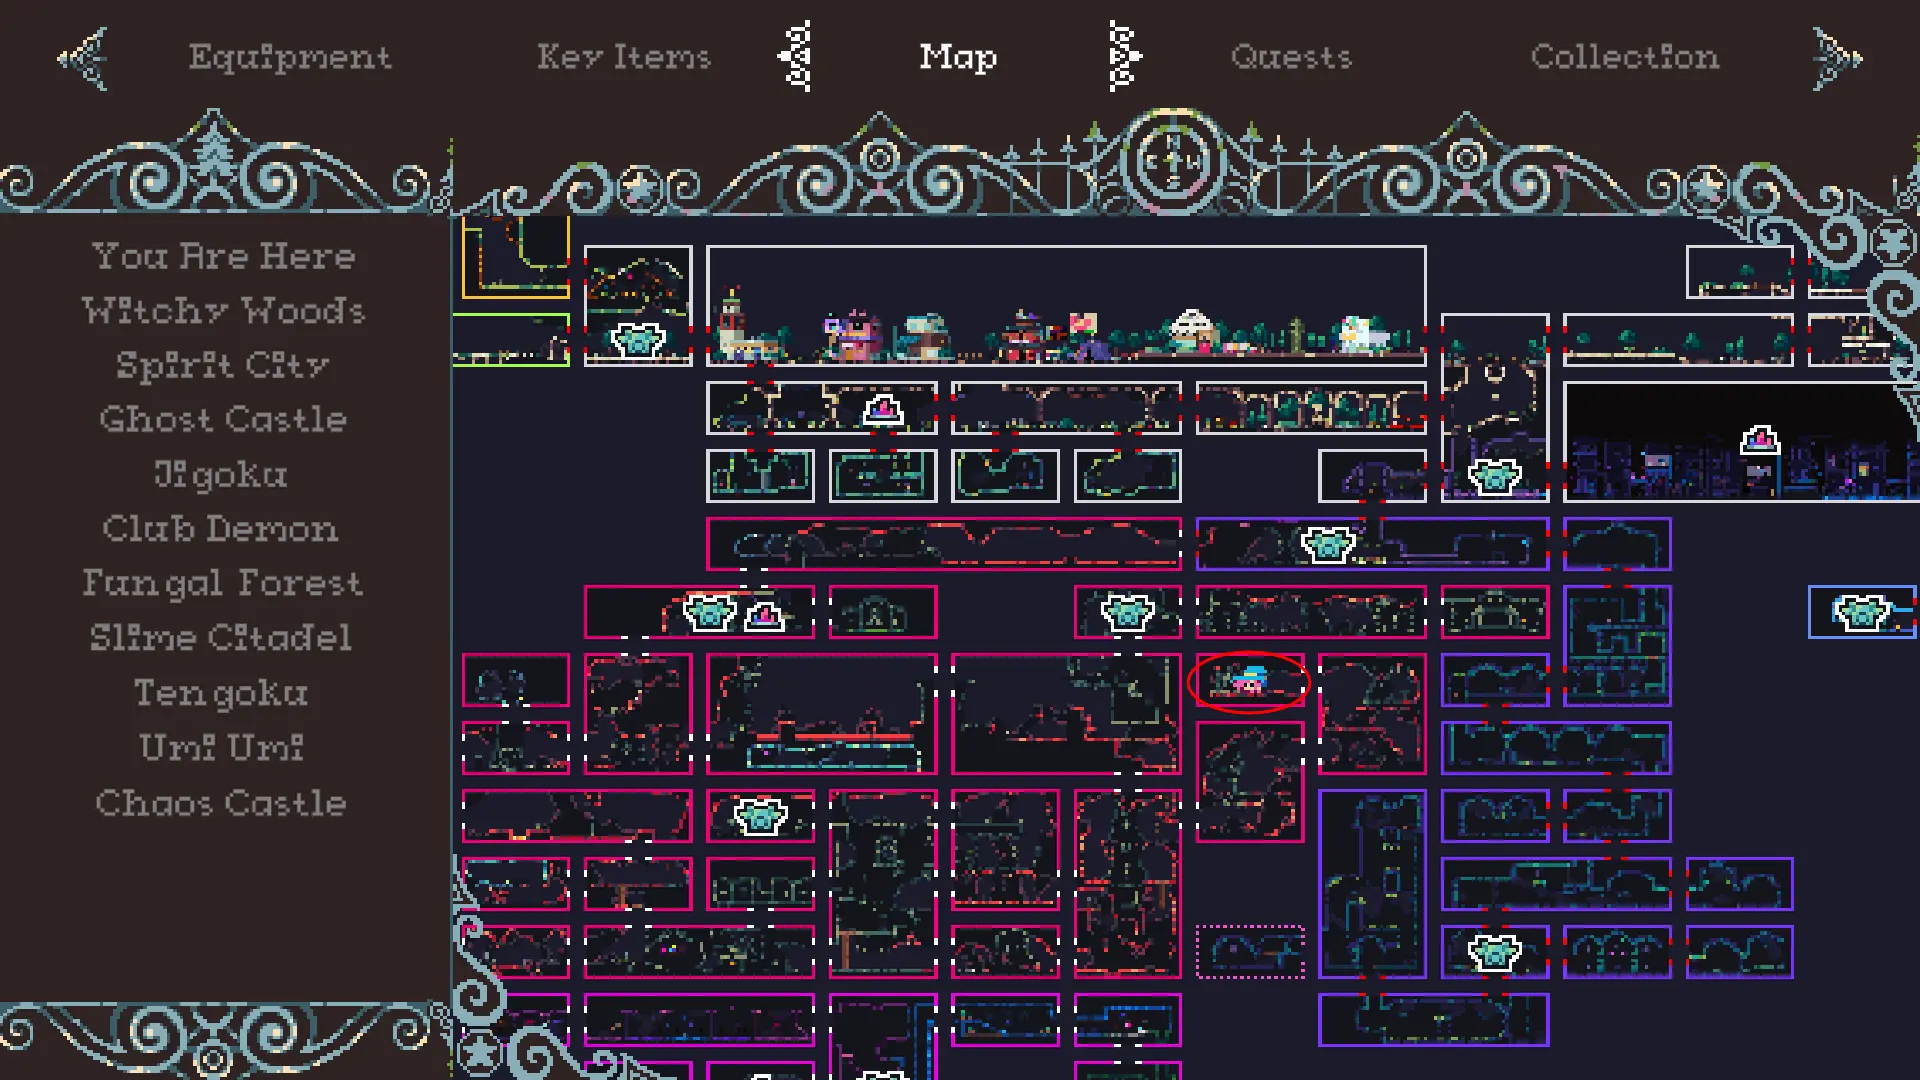
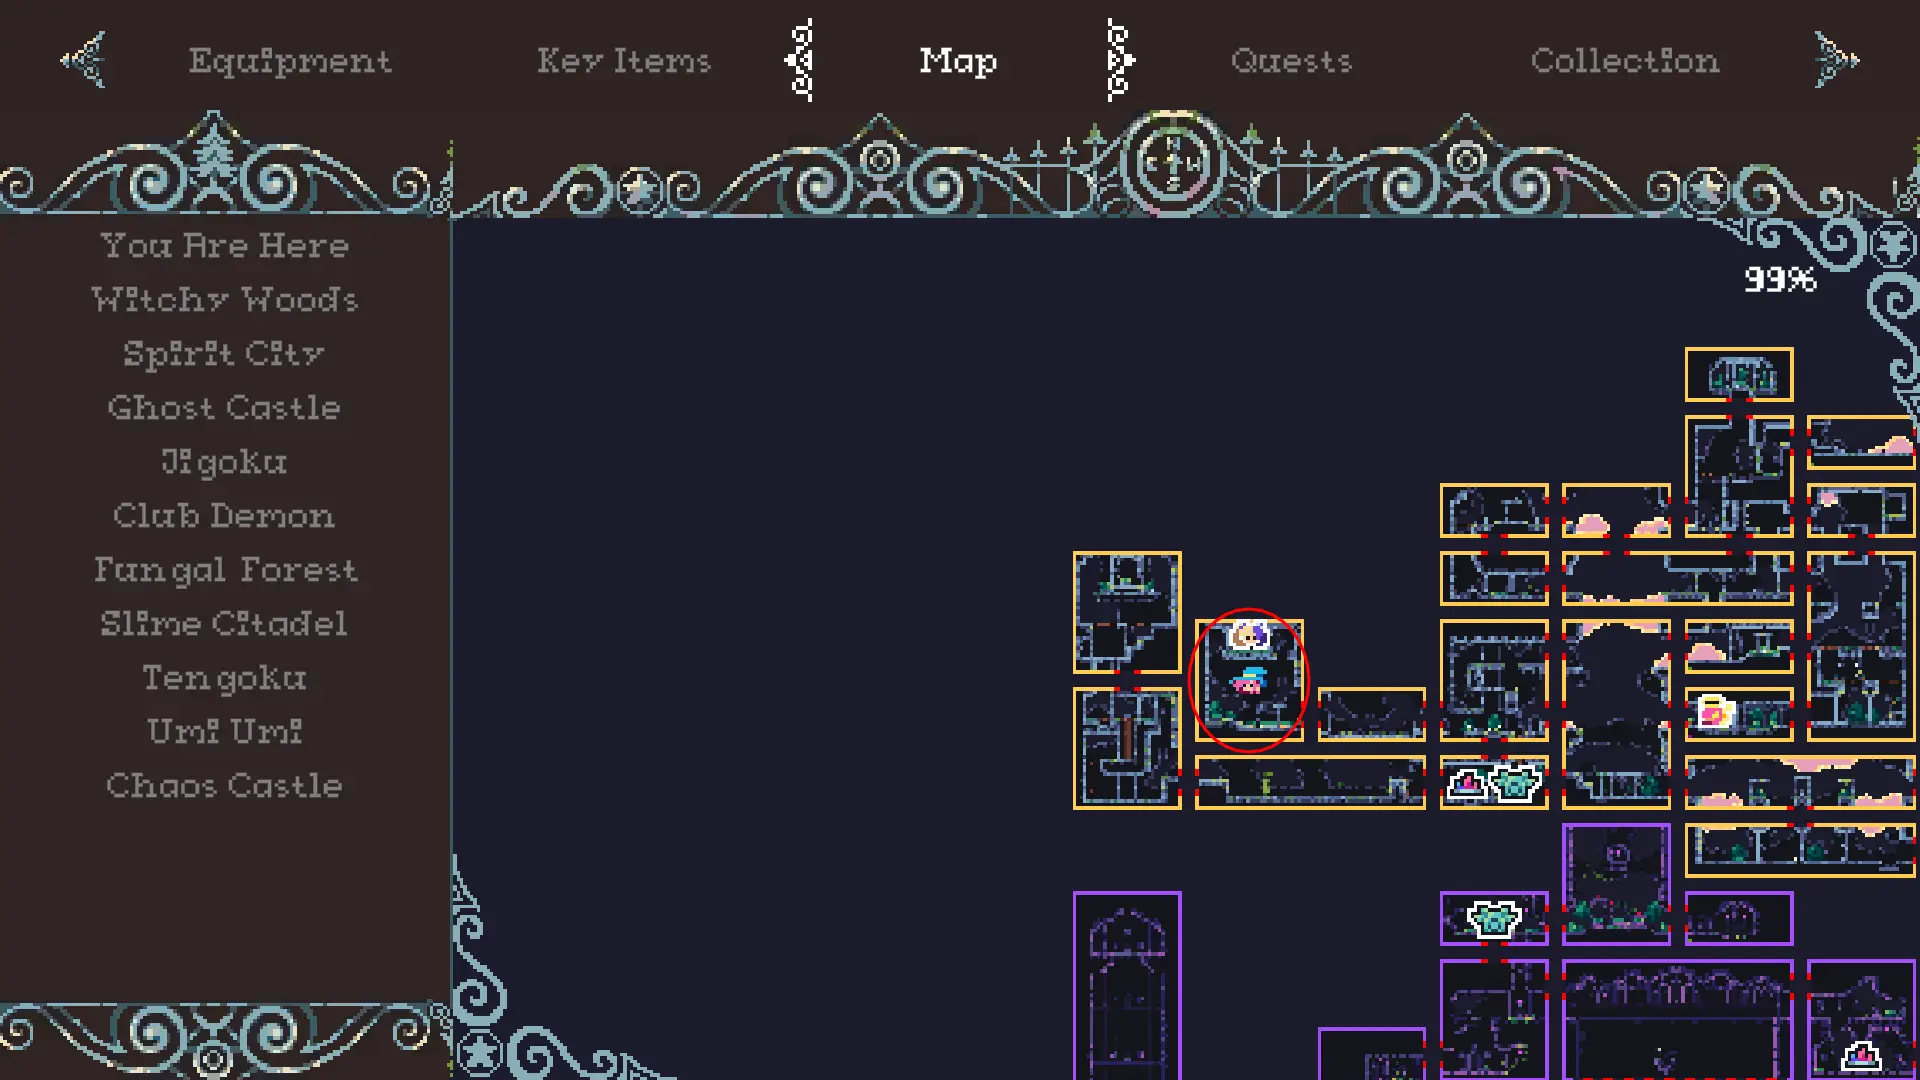
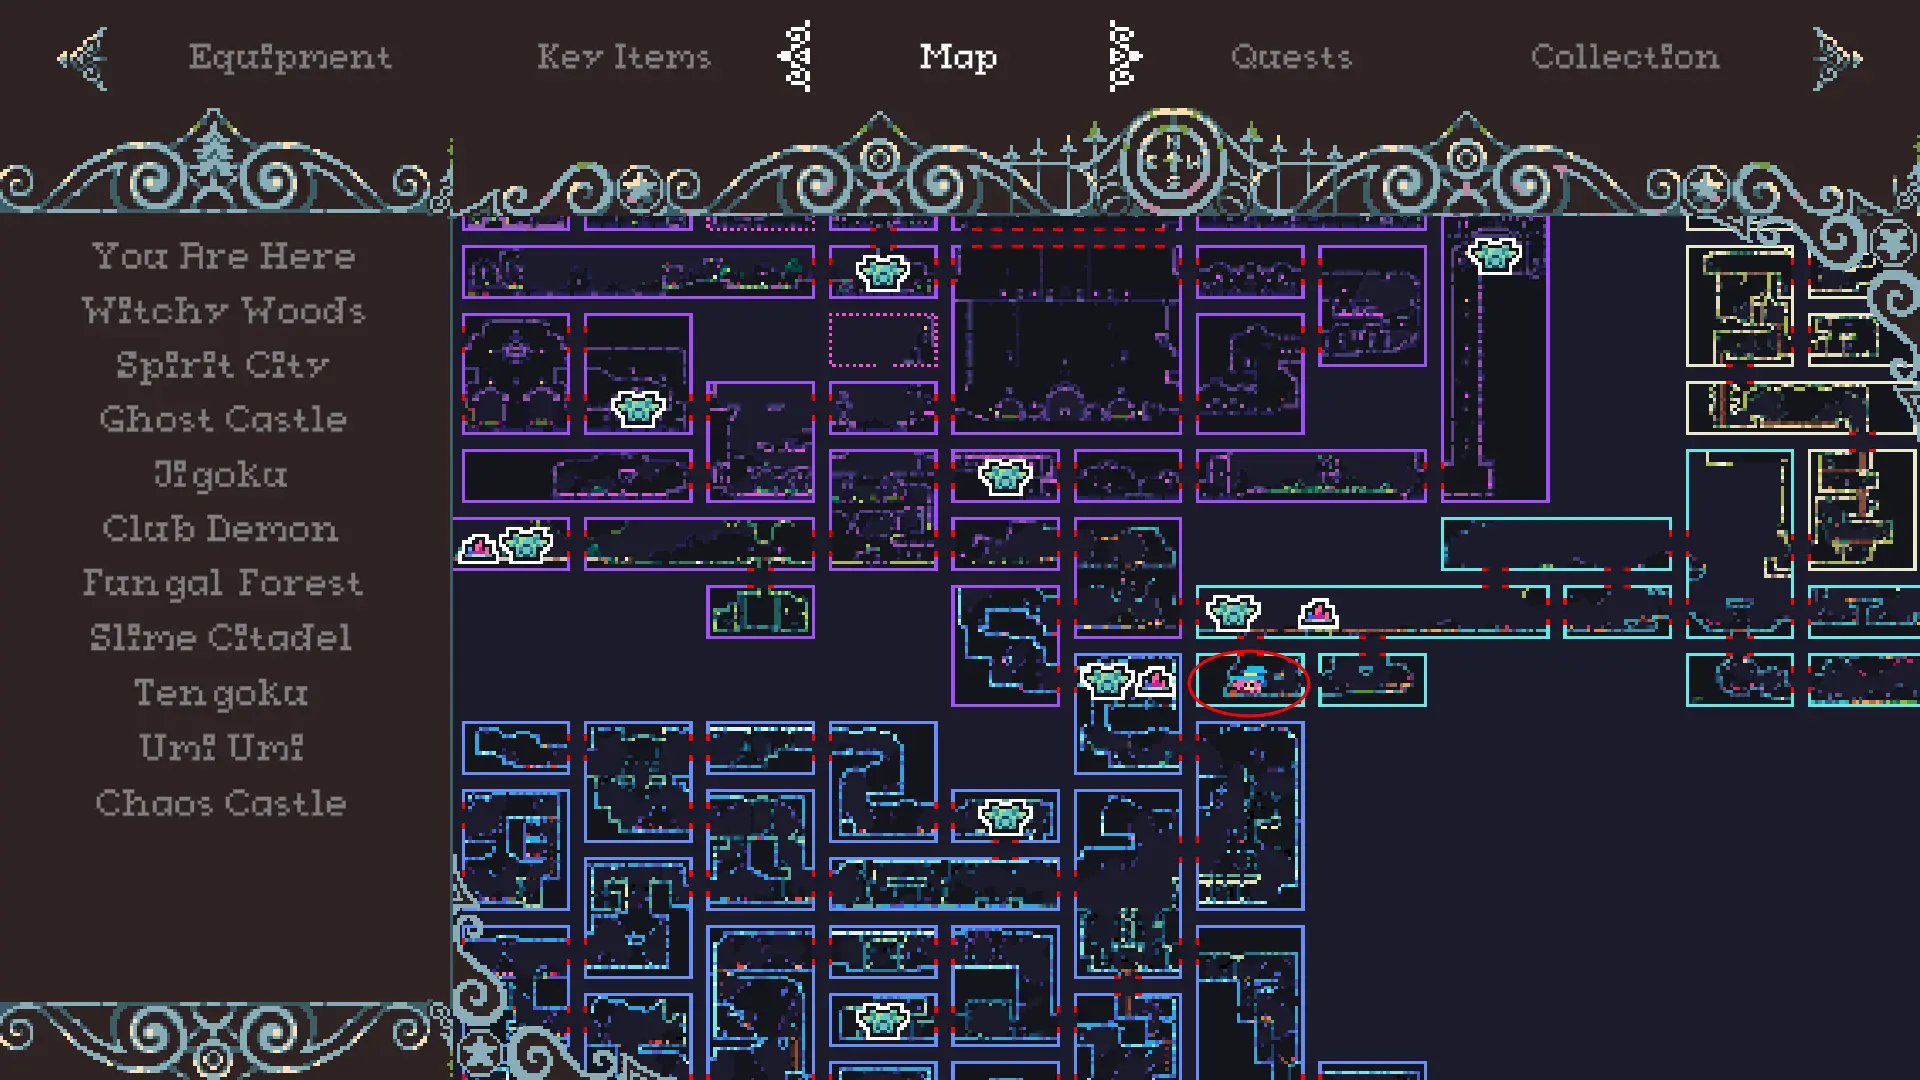
Unless the player wants to run everywhere, there are fast-travel points(crystal teleporters) that can be enabled and used by the player. [The player can use fast-travel points after obtaining the key item Goblin Crystal. The Goblin Crystal is obtained after defeating the Goblin Queen?] Once a fast-travel point has been unlocked, the player can then fast-travel to that location from any other enabled fast-travel point. A fast-travel point and all possible fast-travel points are shown below:
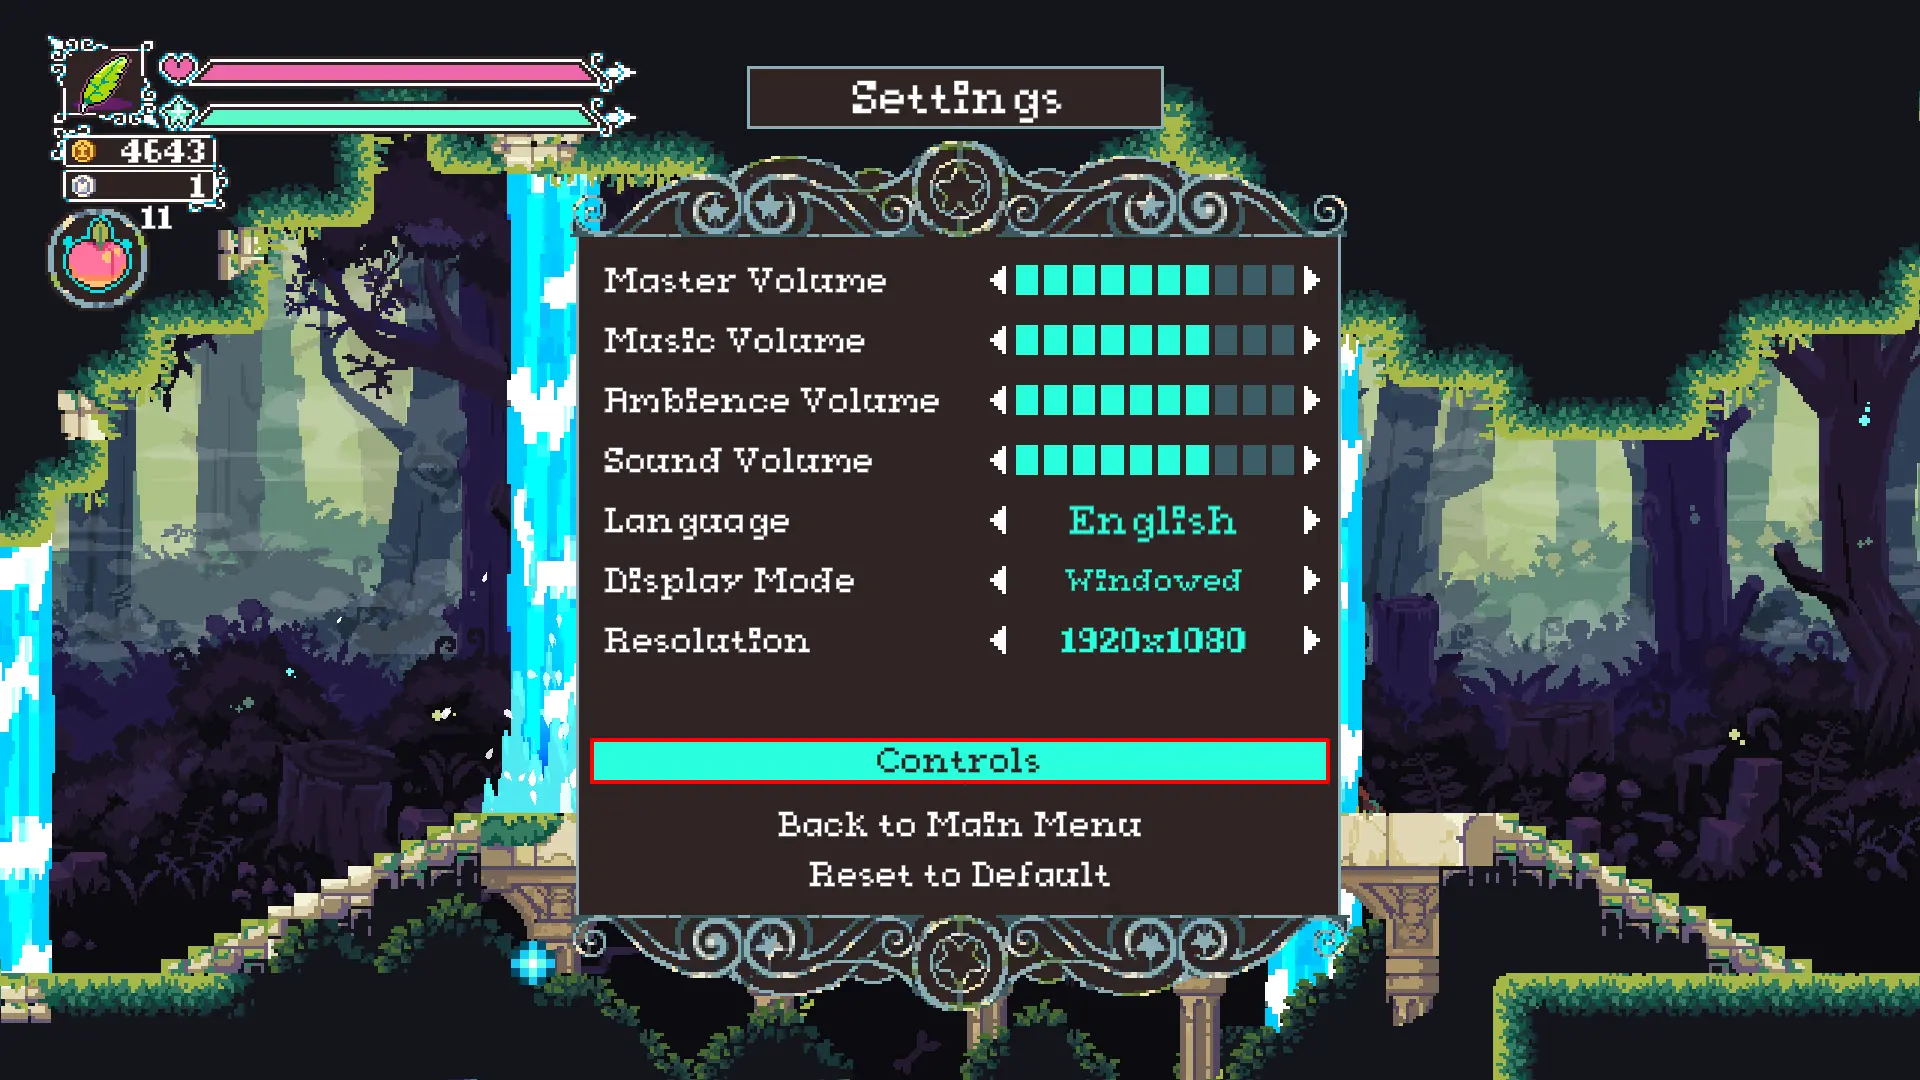
User Interface & HUD Settings
In this section, we will be discussing the user interface and layout used in the game. Starting with the in-game user interfaces, followed by all the inventory interfaces.
In-game Interfaces
The Main Menu
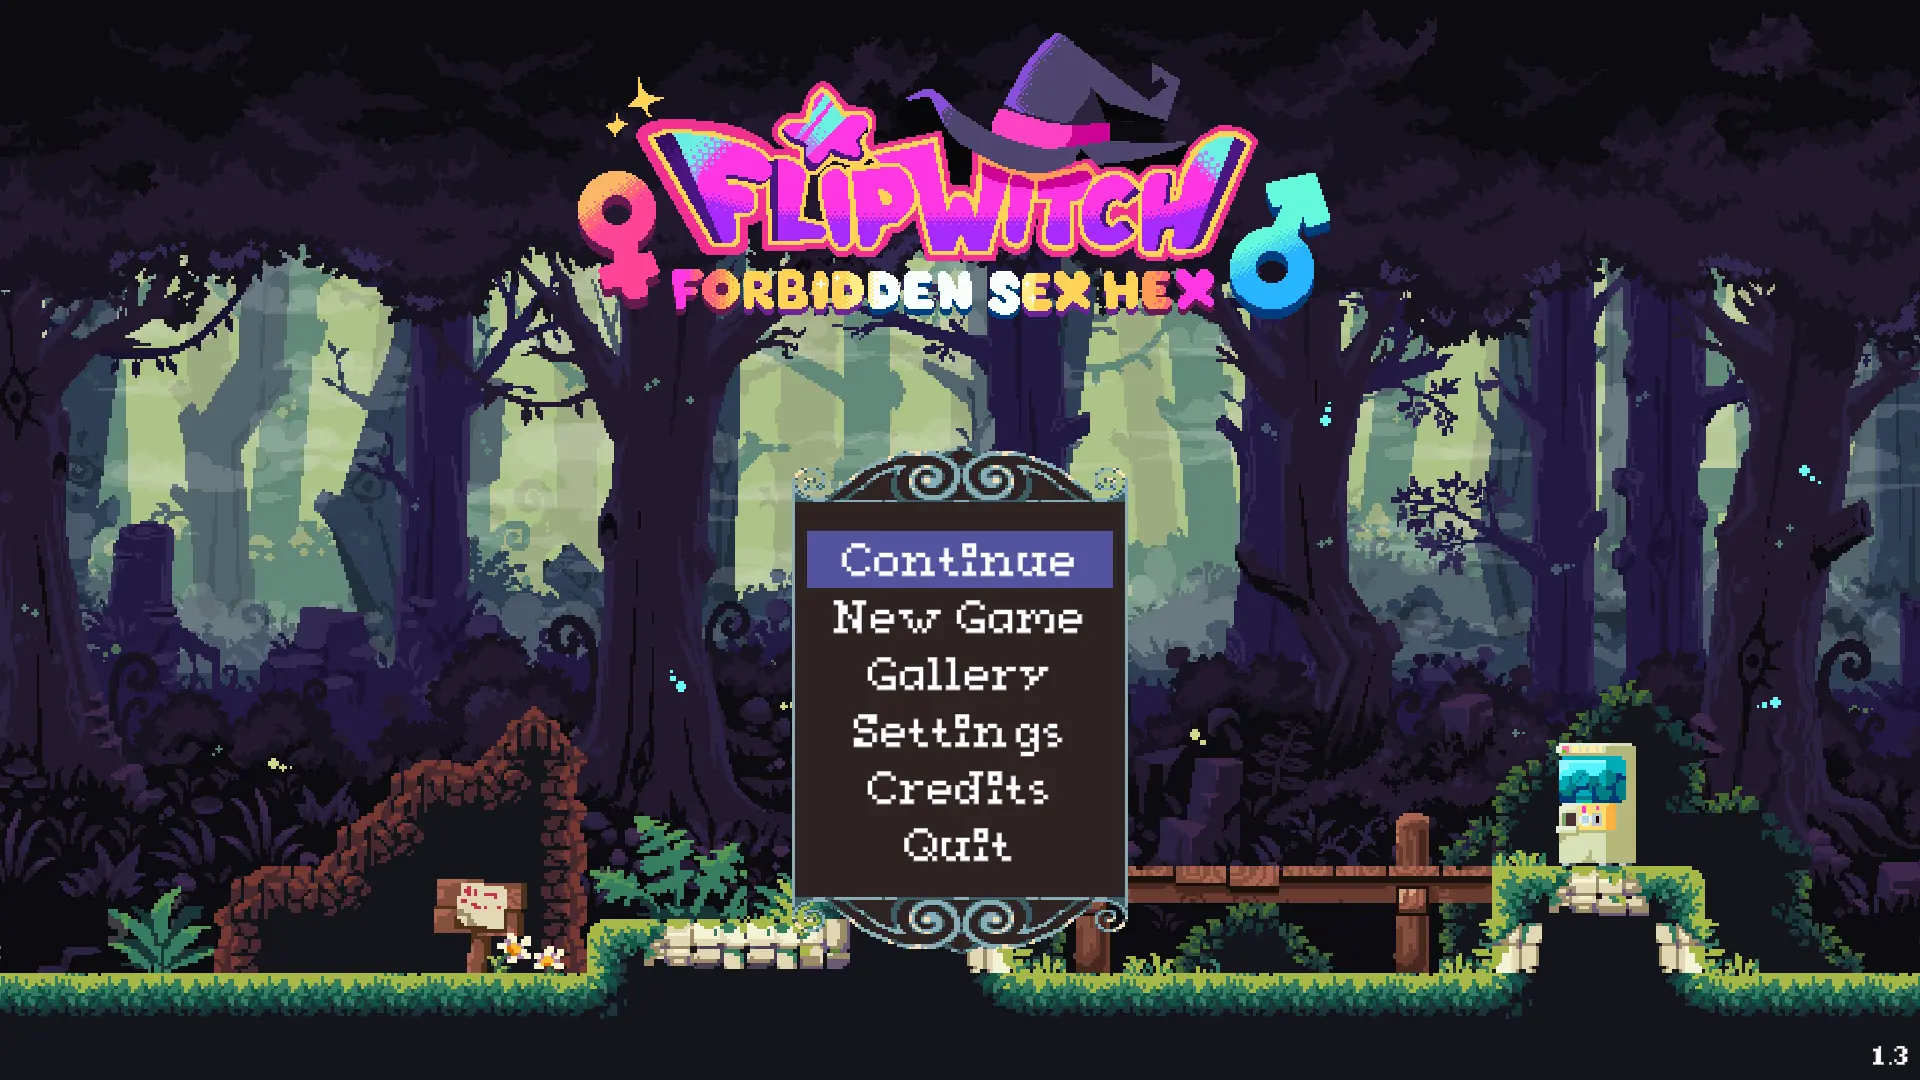
The main menu of the game is brought up upon launch. This main menu can be used to:
- Continue an existing game;
- Start a new game;
- View the gallery;
- Configure settings;
- View credits; and
- Quit the game.
The Sub-menu
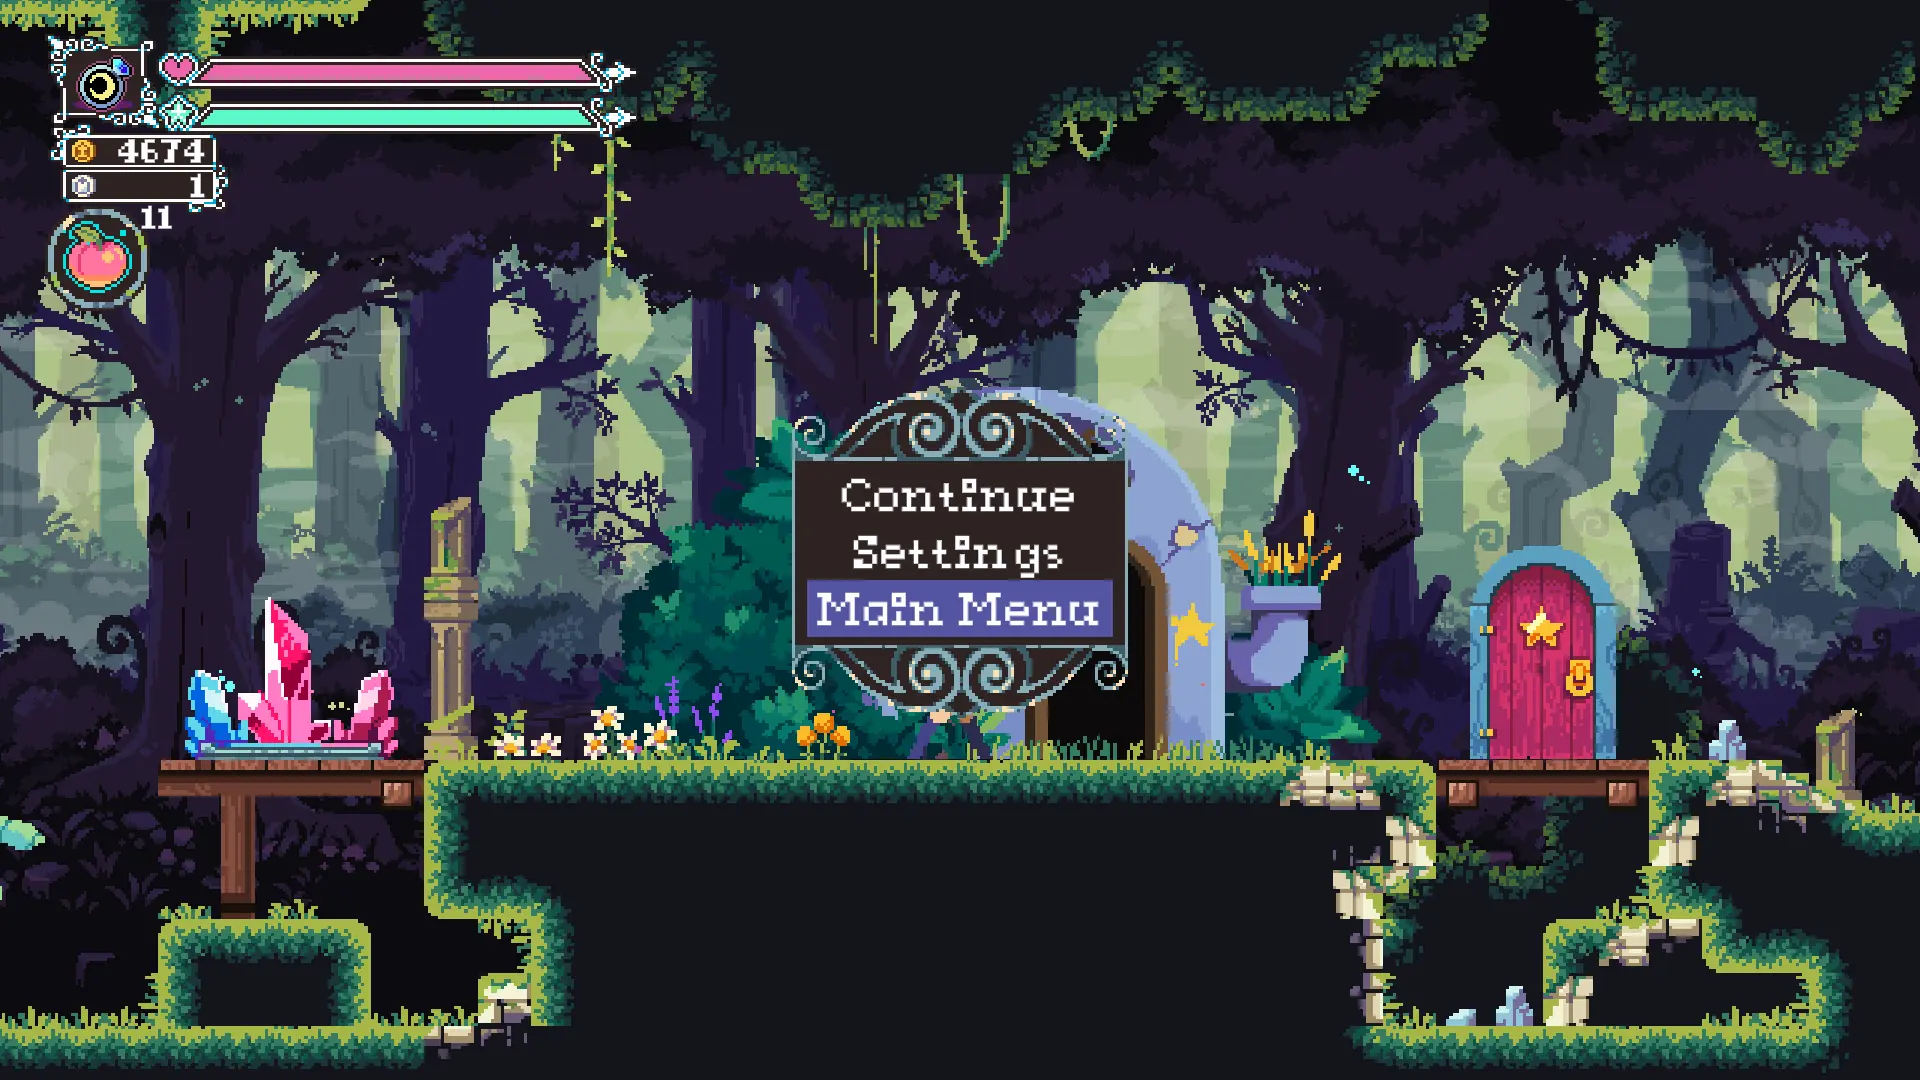
The sub-menu of the game can brought up by pressing the sub-menu action key, during a playthrough. The sub-menu can be used to:
- Pause the game;
- Resume the game;
- Access settings; and
- Return to main-menu.
In-game Interface
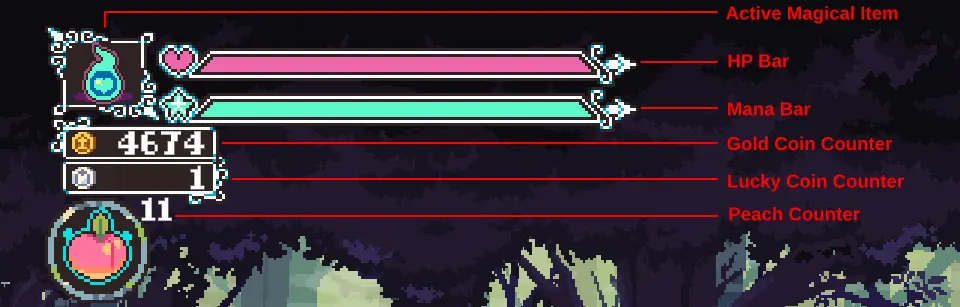
The main in-game interface can be found in the upper-most left corner of the game during playthrough.
Inventory Interface
Next, we will be going through the inventory interface. The inventory interface can be accessed by pressing the open inventory key and closed using the same key. It can only be accessed during a play through and is made up of the following sections:
- Equipment section;
- Key items section;
- Map section;
- Quest section; and
- Collection section.
The inventory menu and its sections can be navigated by using the movement keys of the player and the interact key to interact with sections that can be interacted with.
Equipment Section
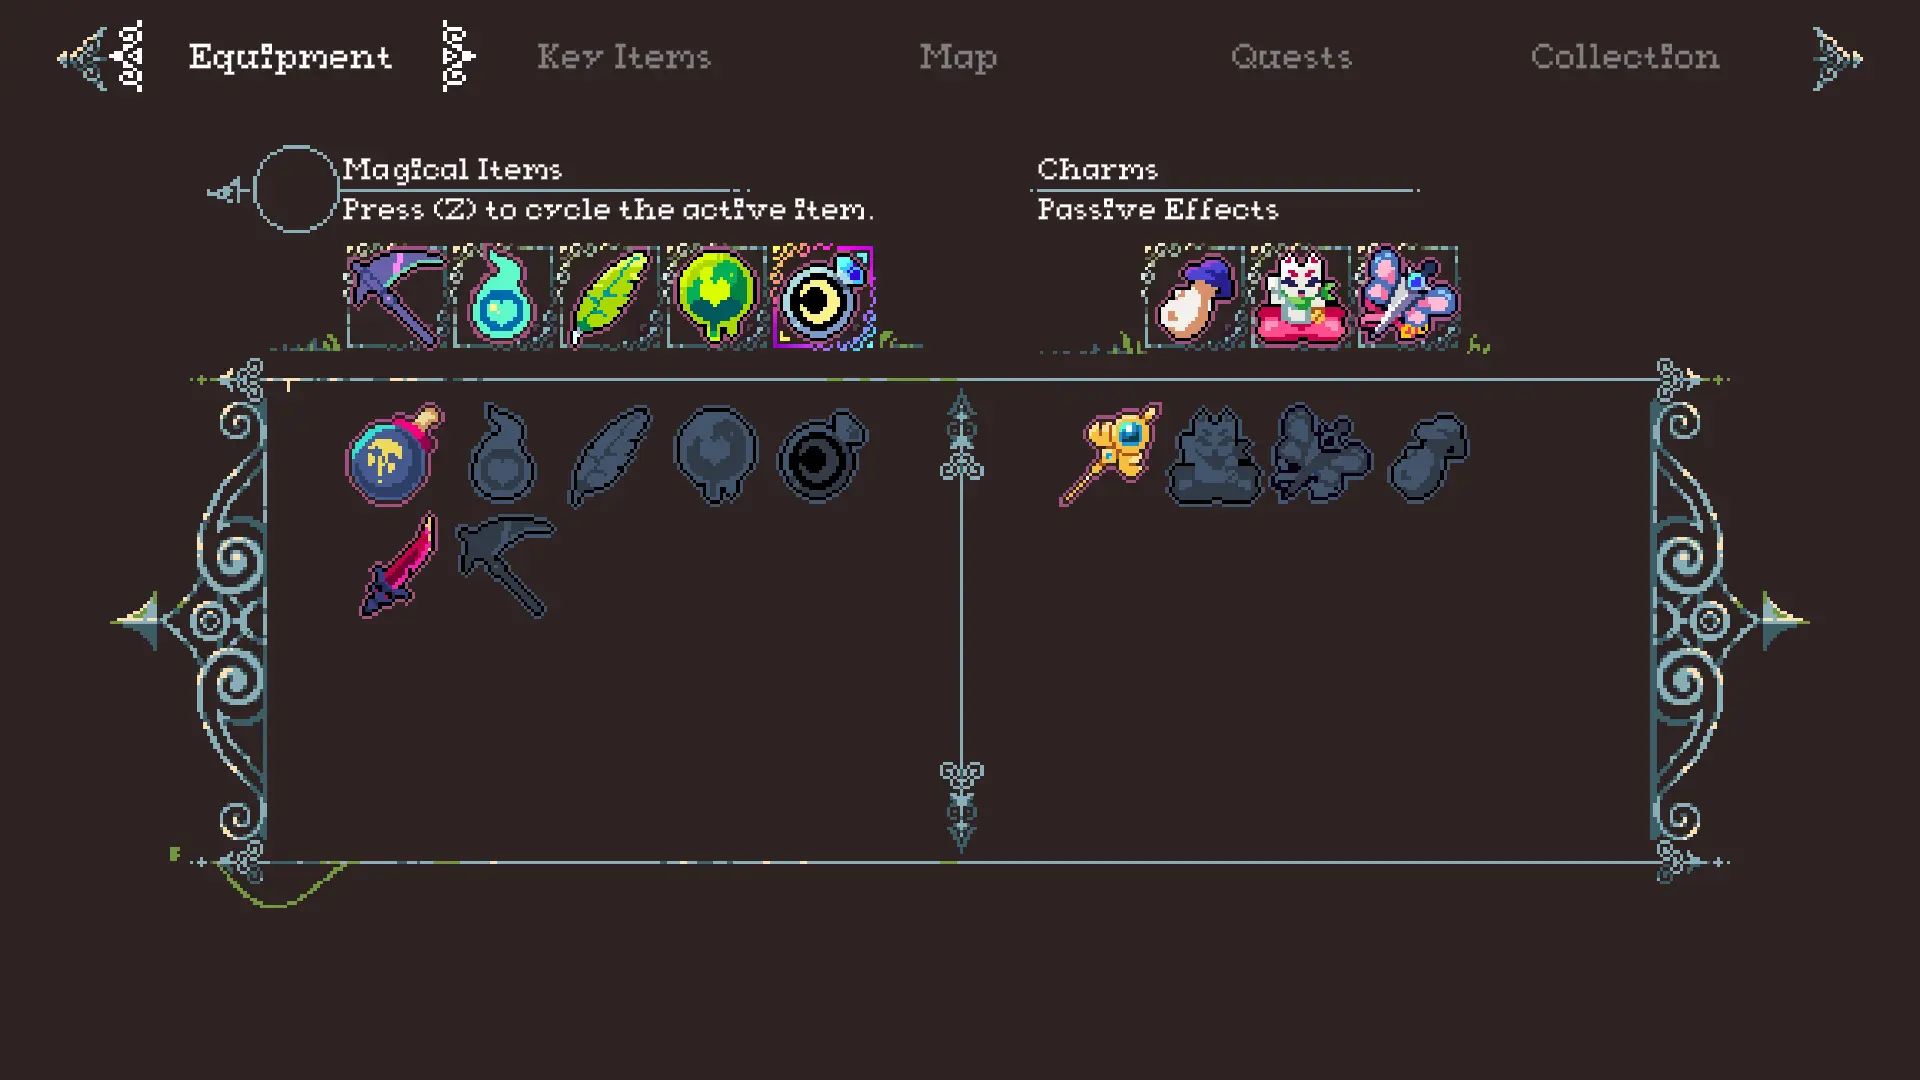
The equipment section is divided into two parts: one part being for magical items and the other for charms which provide passive effects. You can cycle magical items or charms by adding or removing them by using the interact action key.
Key Items Section
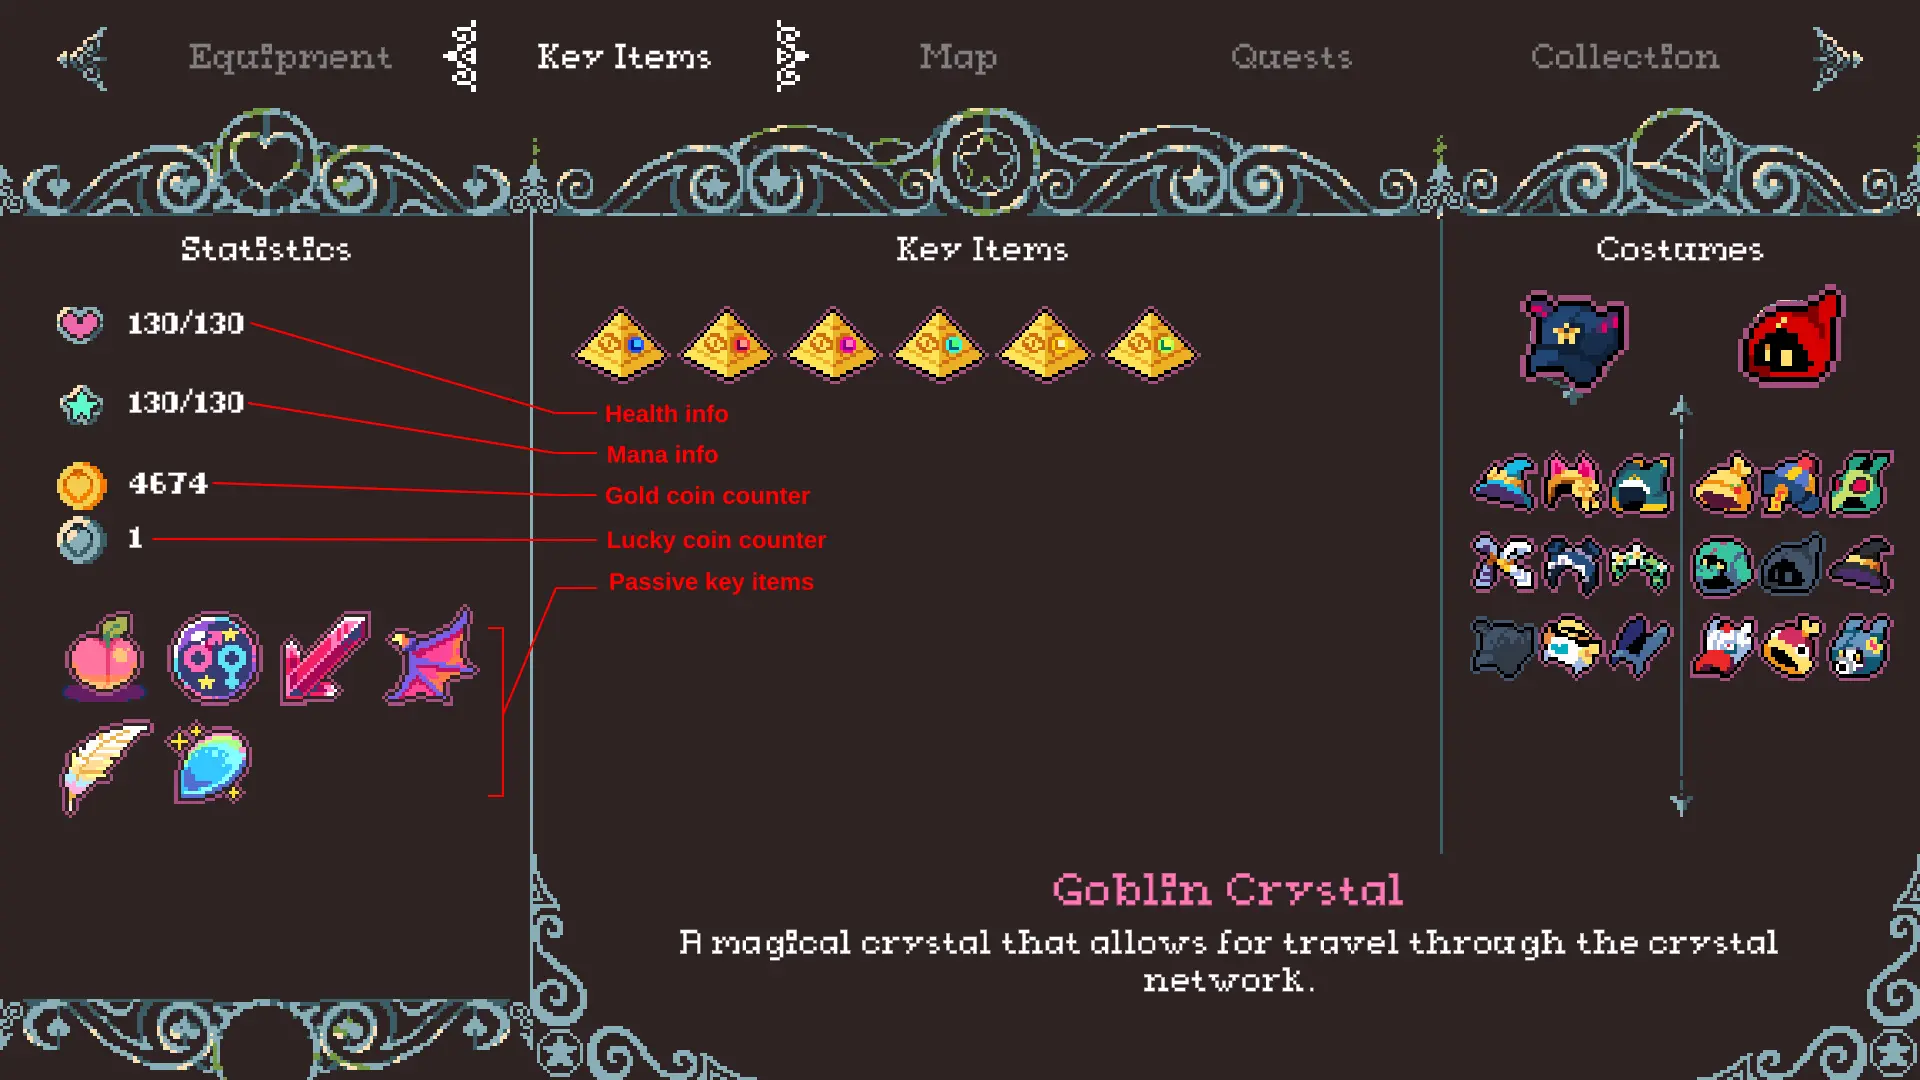
The key items section is divided into three parts: statistics, key items and costumes. The costumes part can be interacted with to dress and undress the witch and wizard form of the player. Explanation of parts:
- Statistics part: includes stats on health, mana, gold coins and lucky coins. It does however include passive key items, which provides the player with passive abilities;
- Key items part: holds items necessary to complete the main quest, as well as side quests that does not provide passive abilities; and
- Costumes part: holds the costumes for the witch and wizard forms, which the player currently has equipped, owned or obtained.
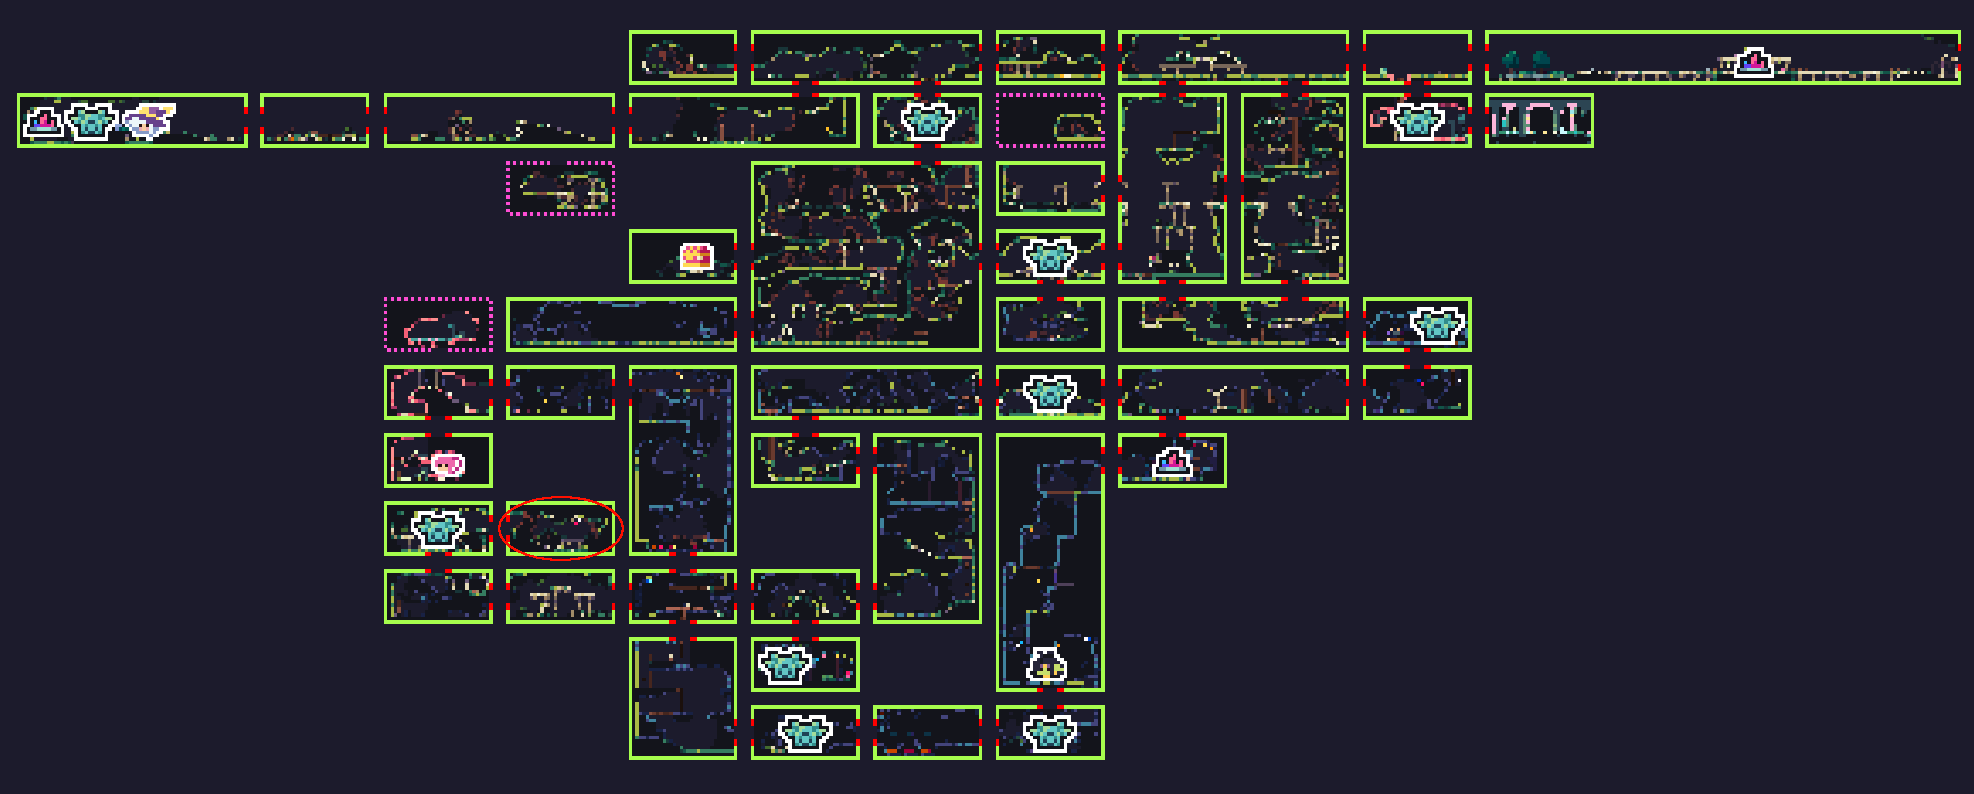
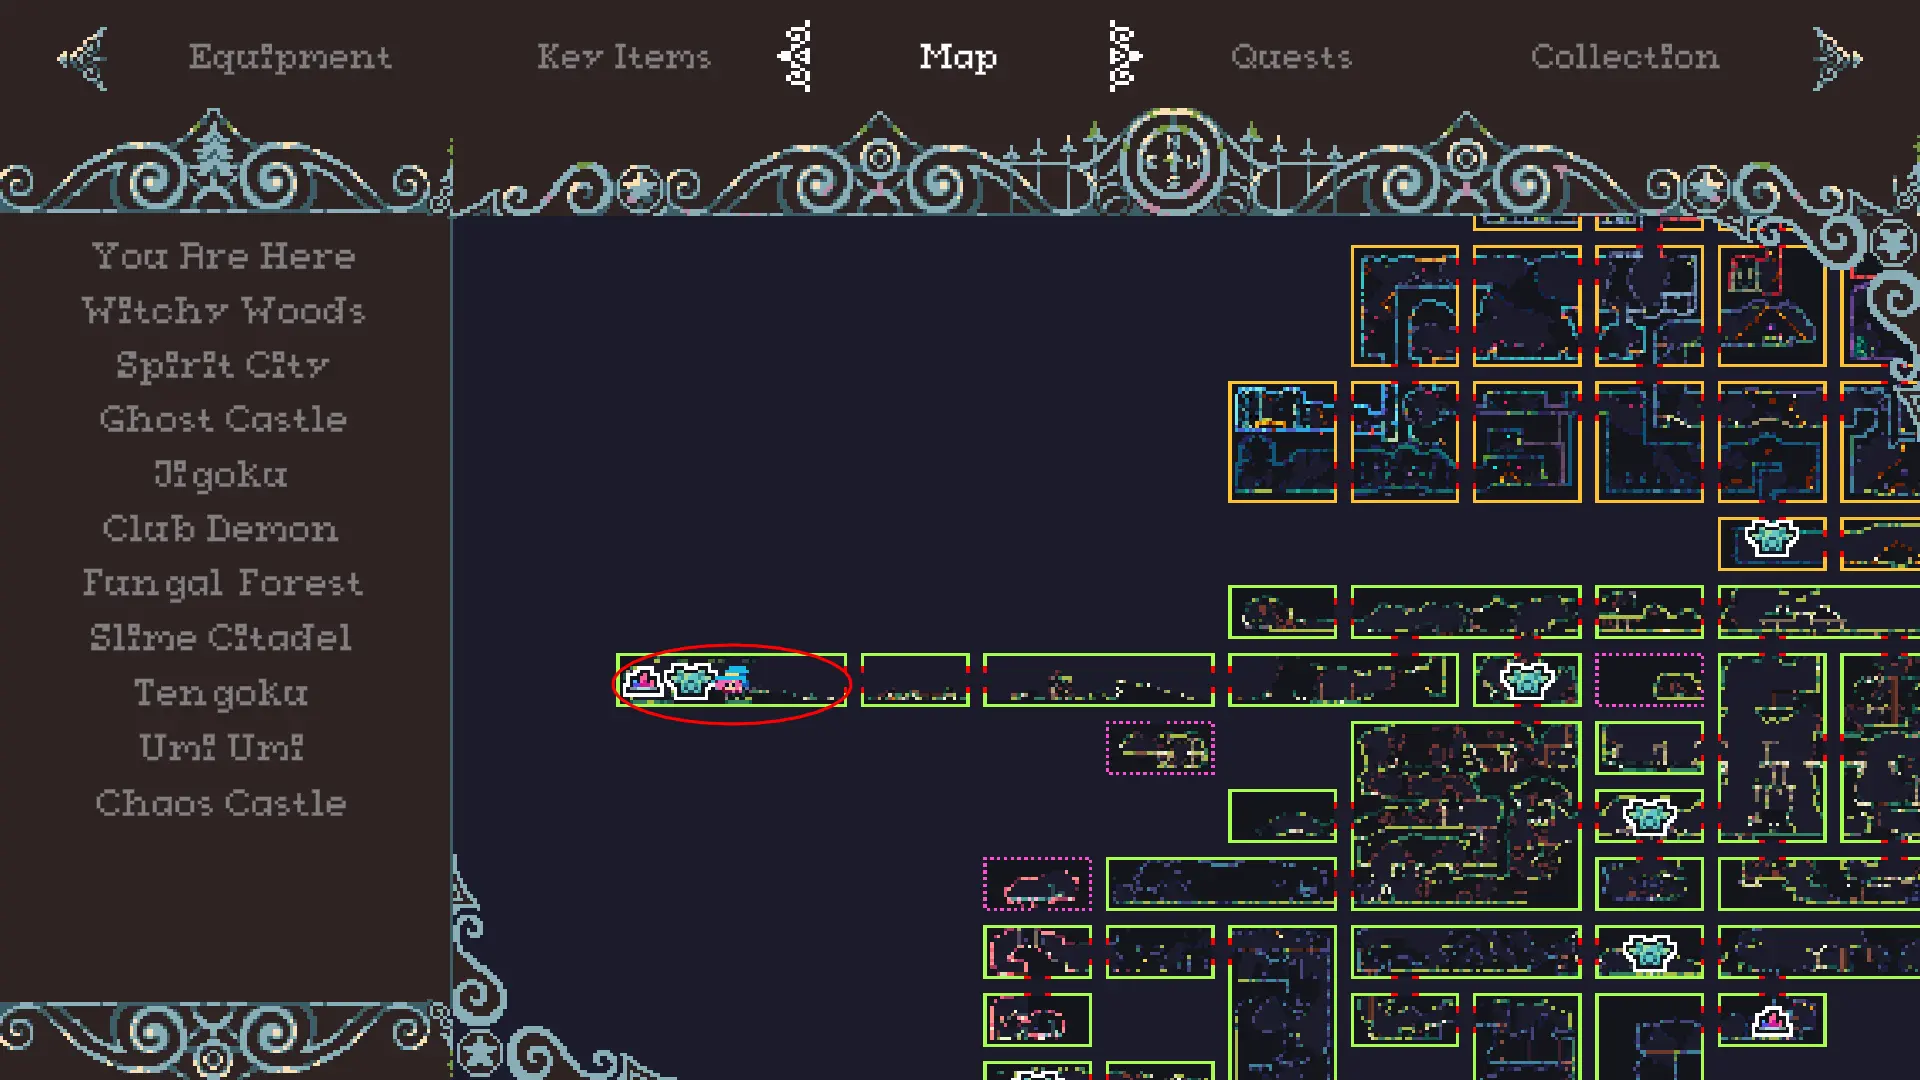
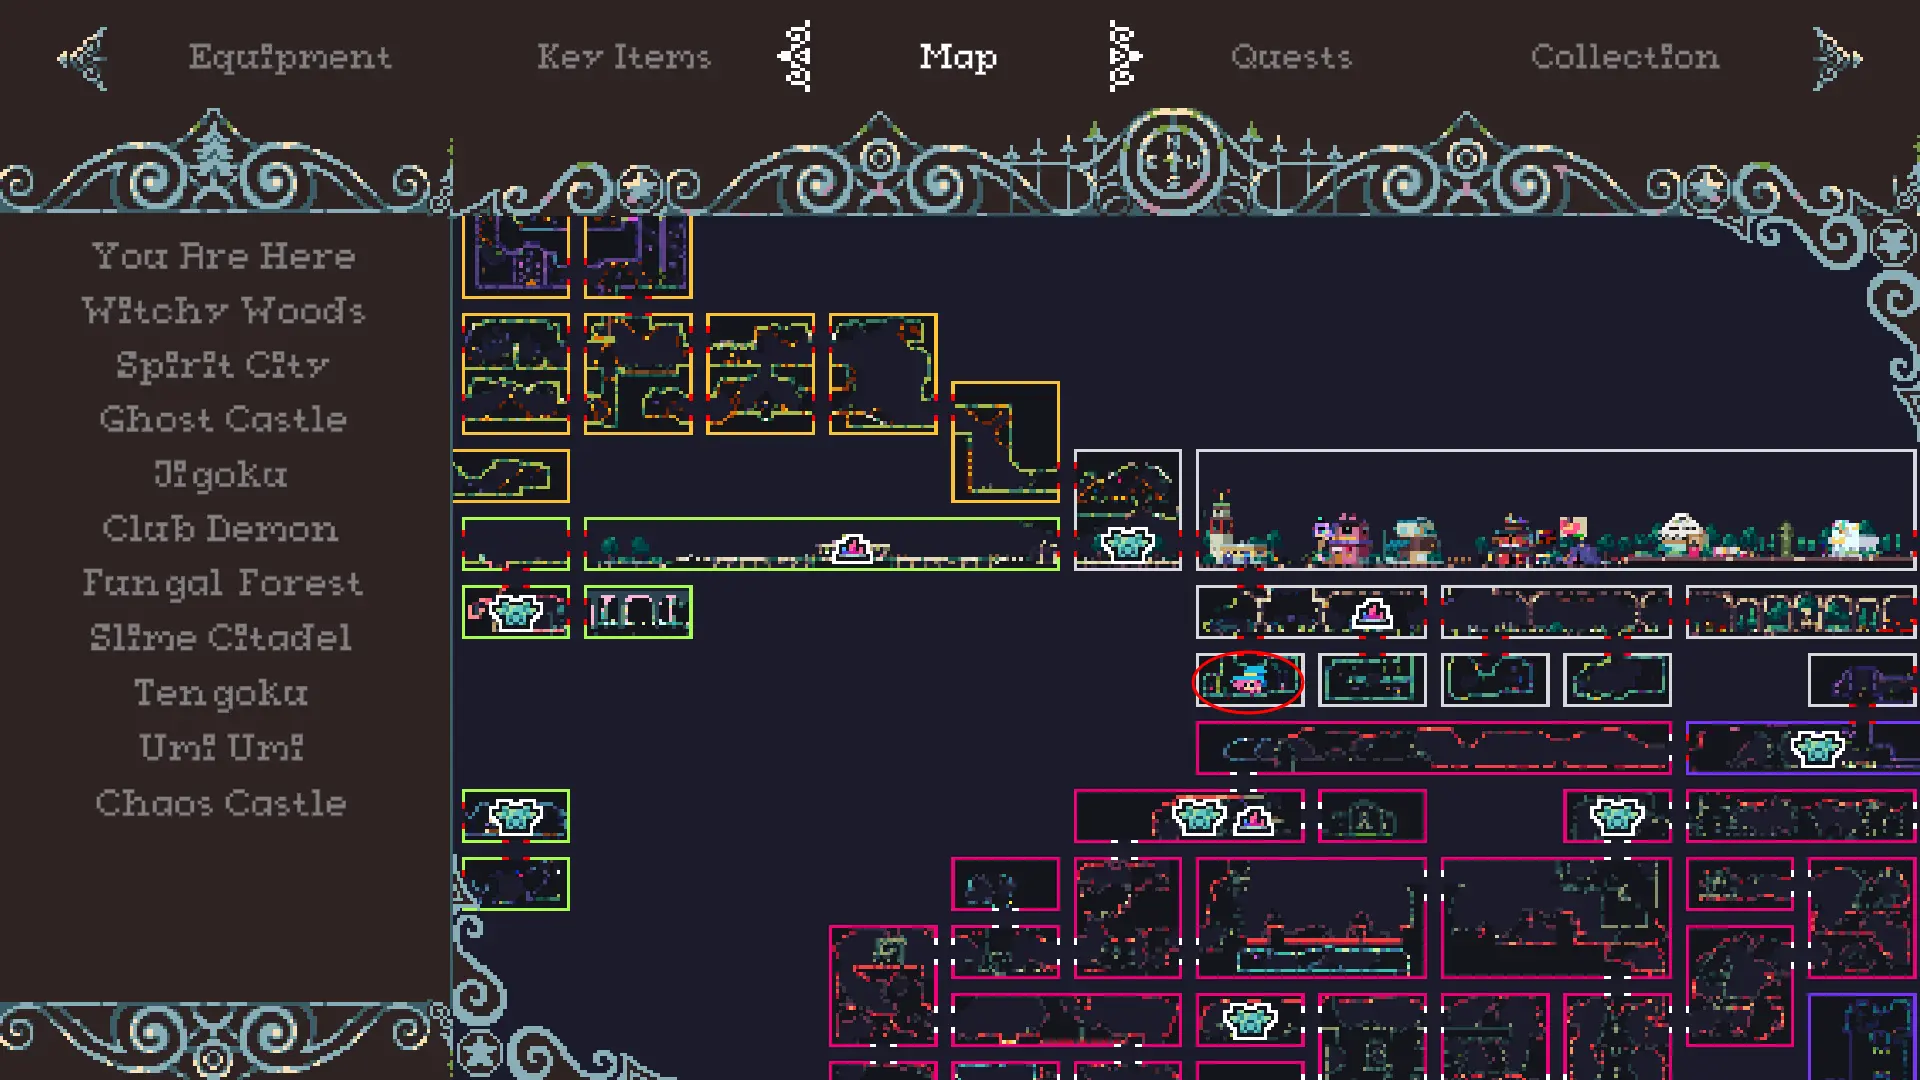
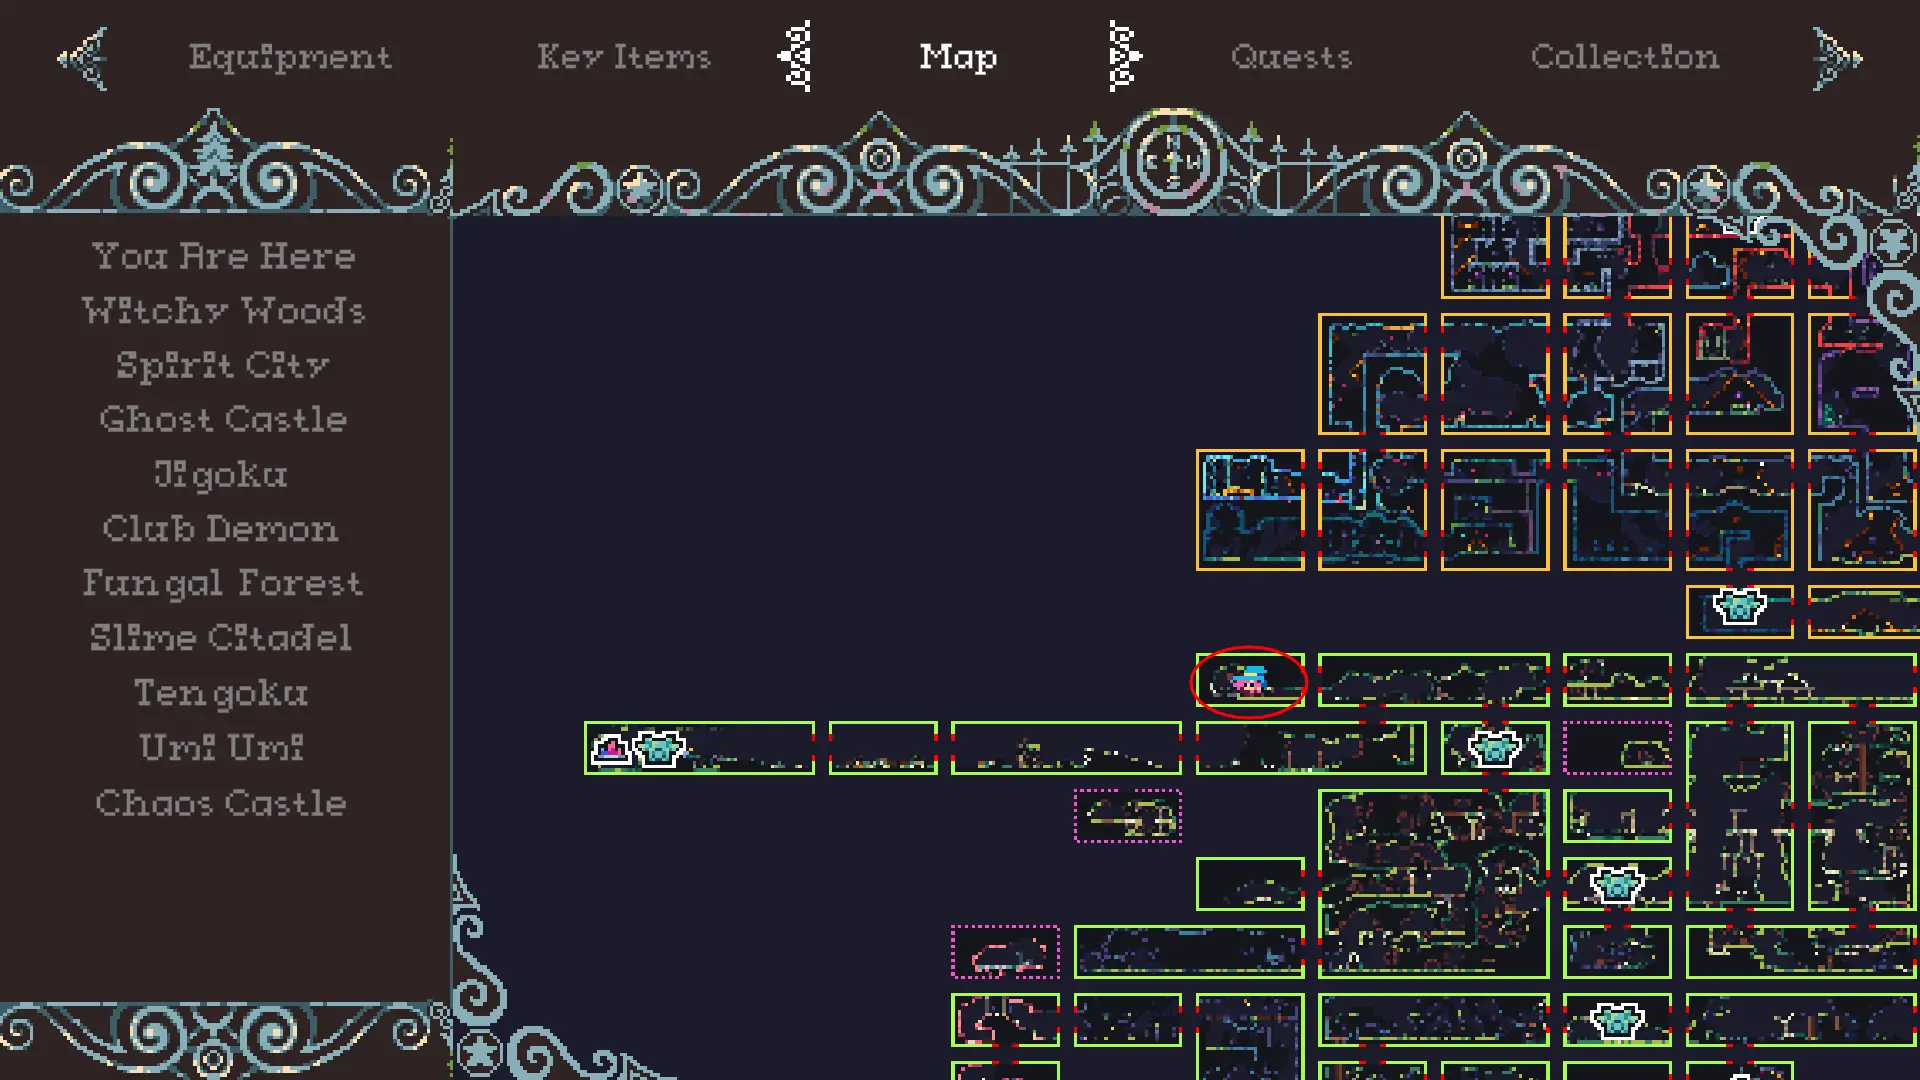
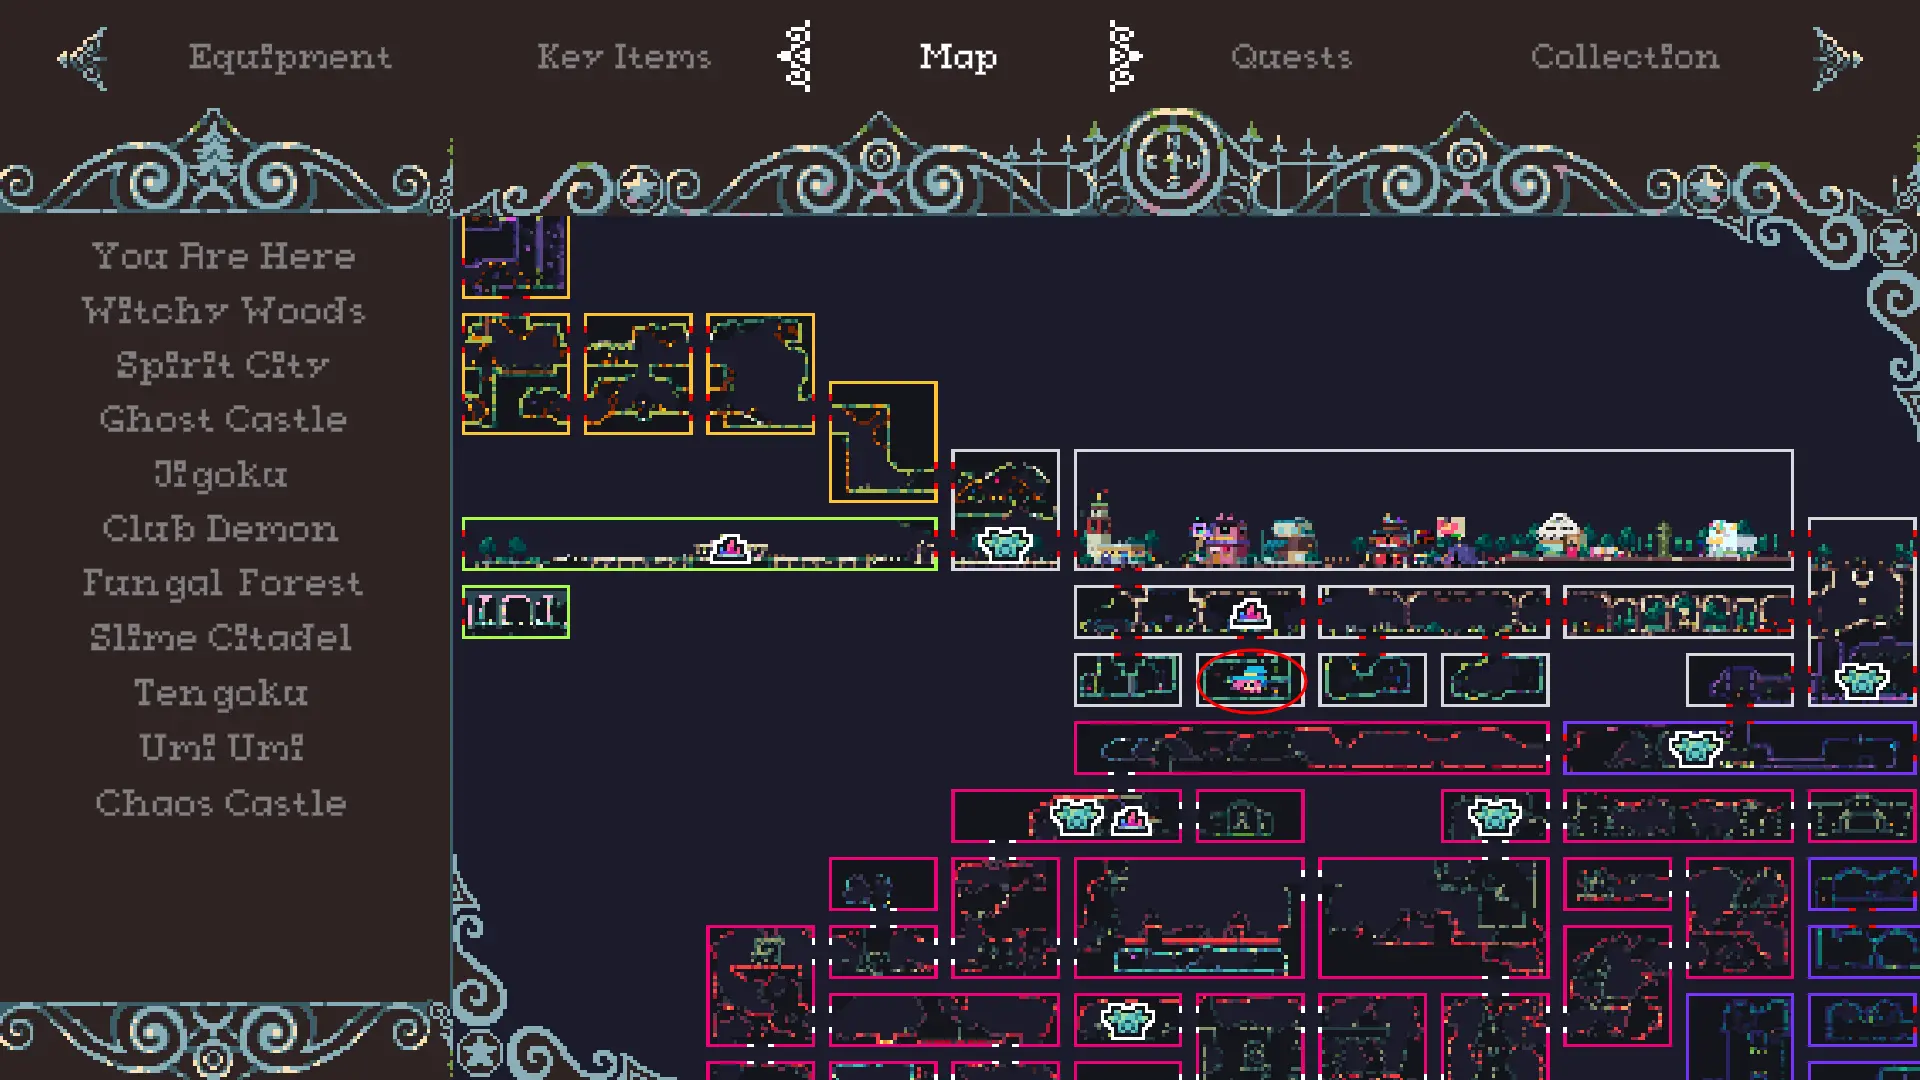
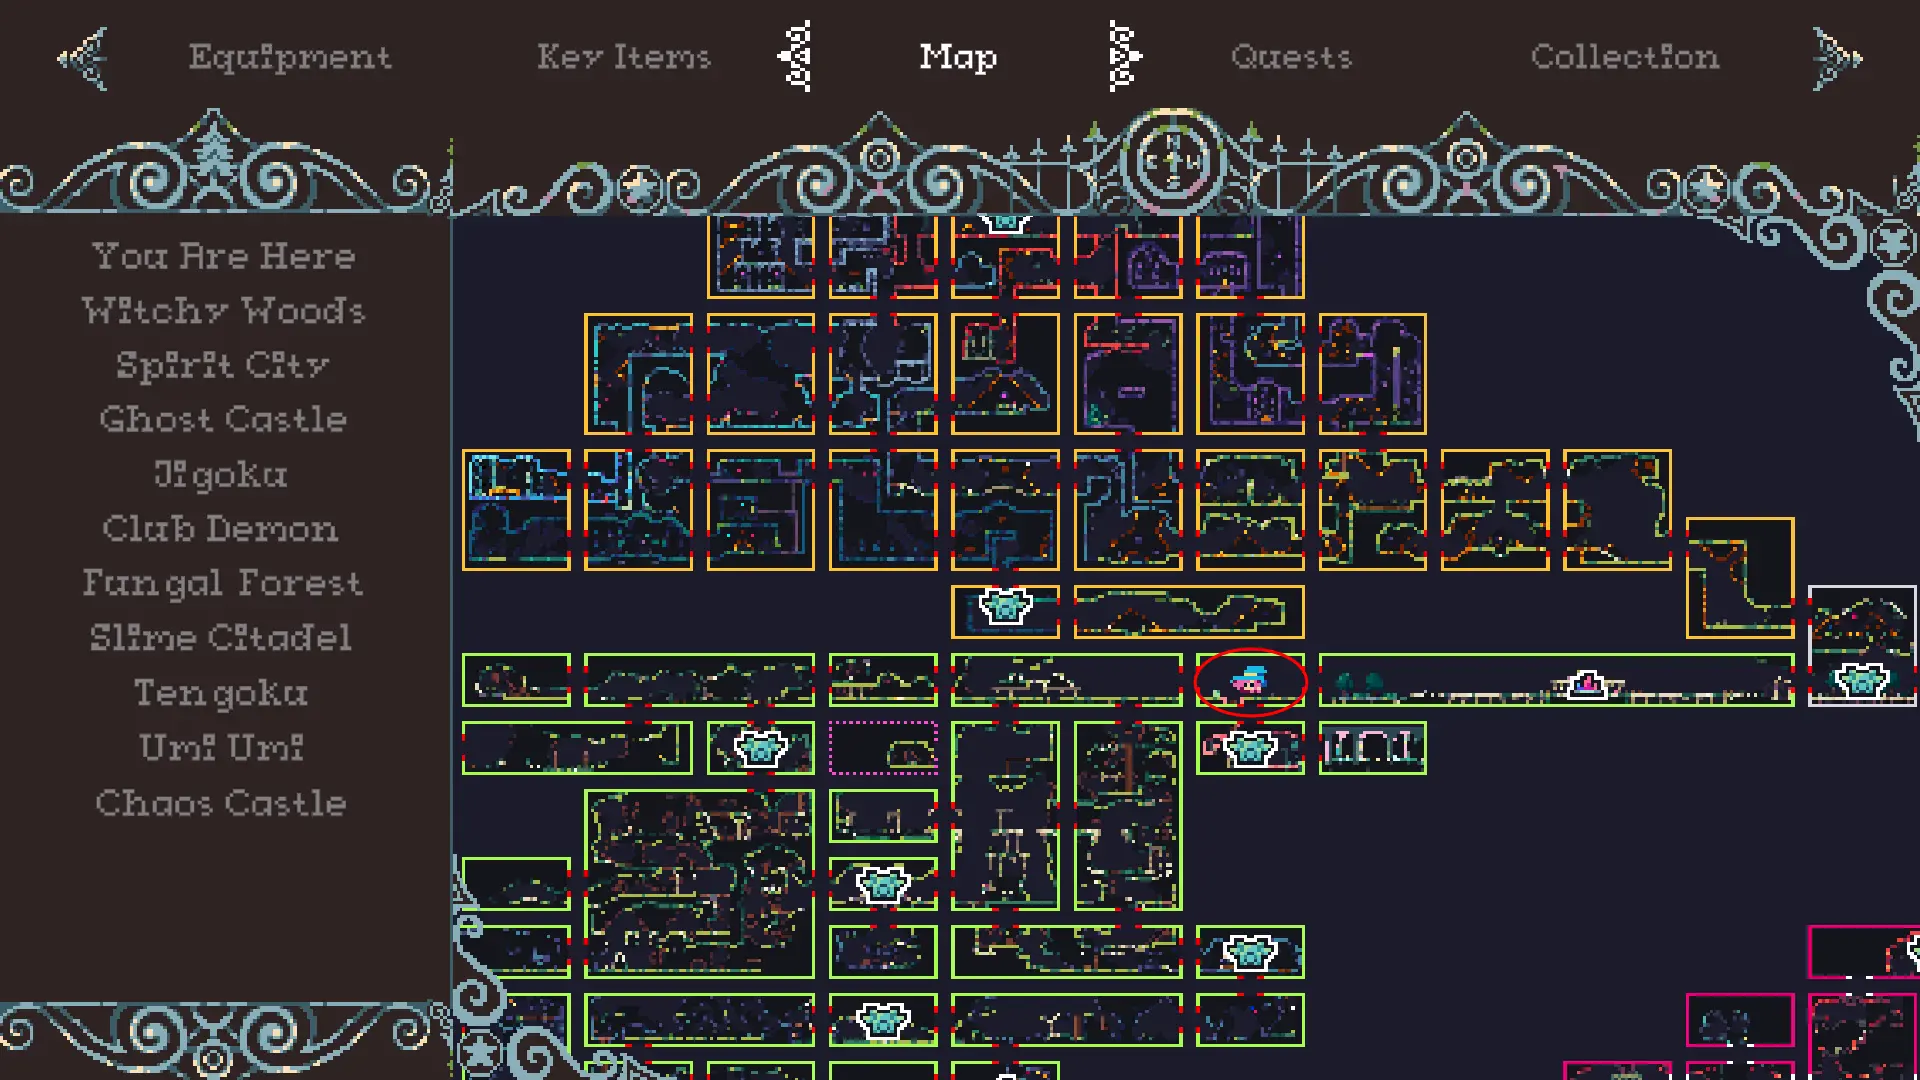
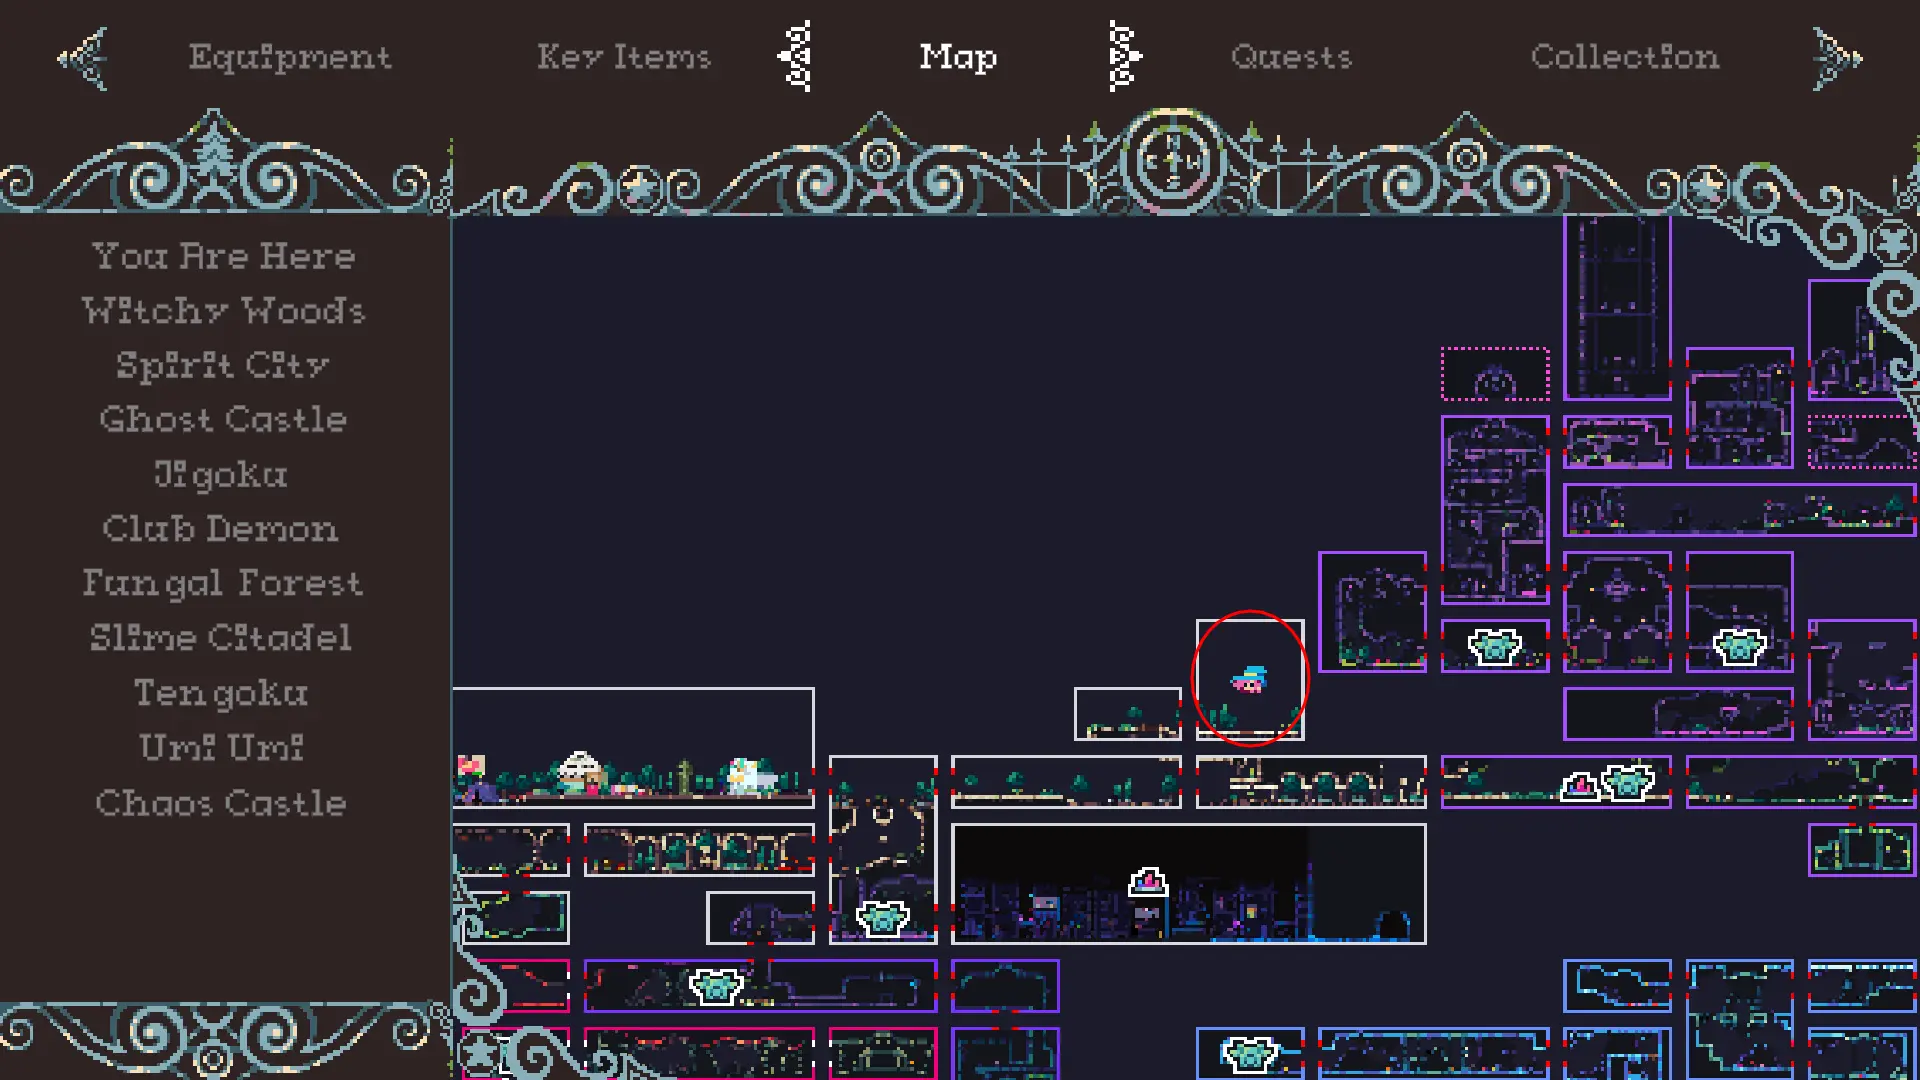
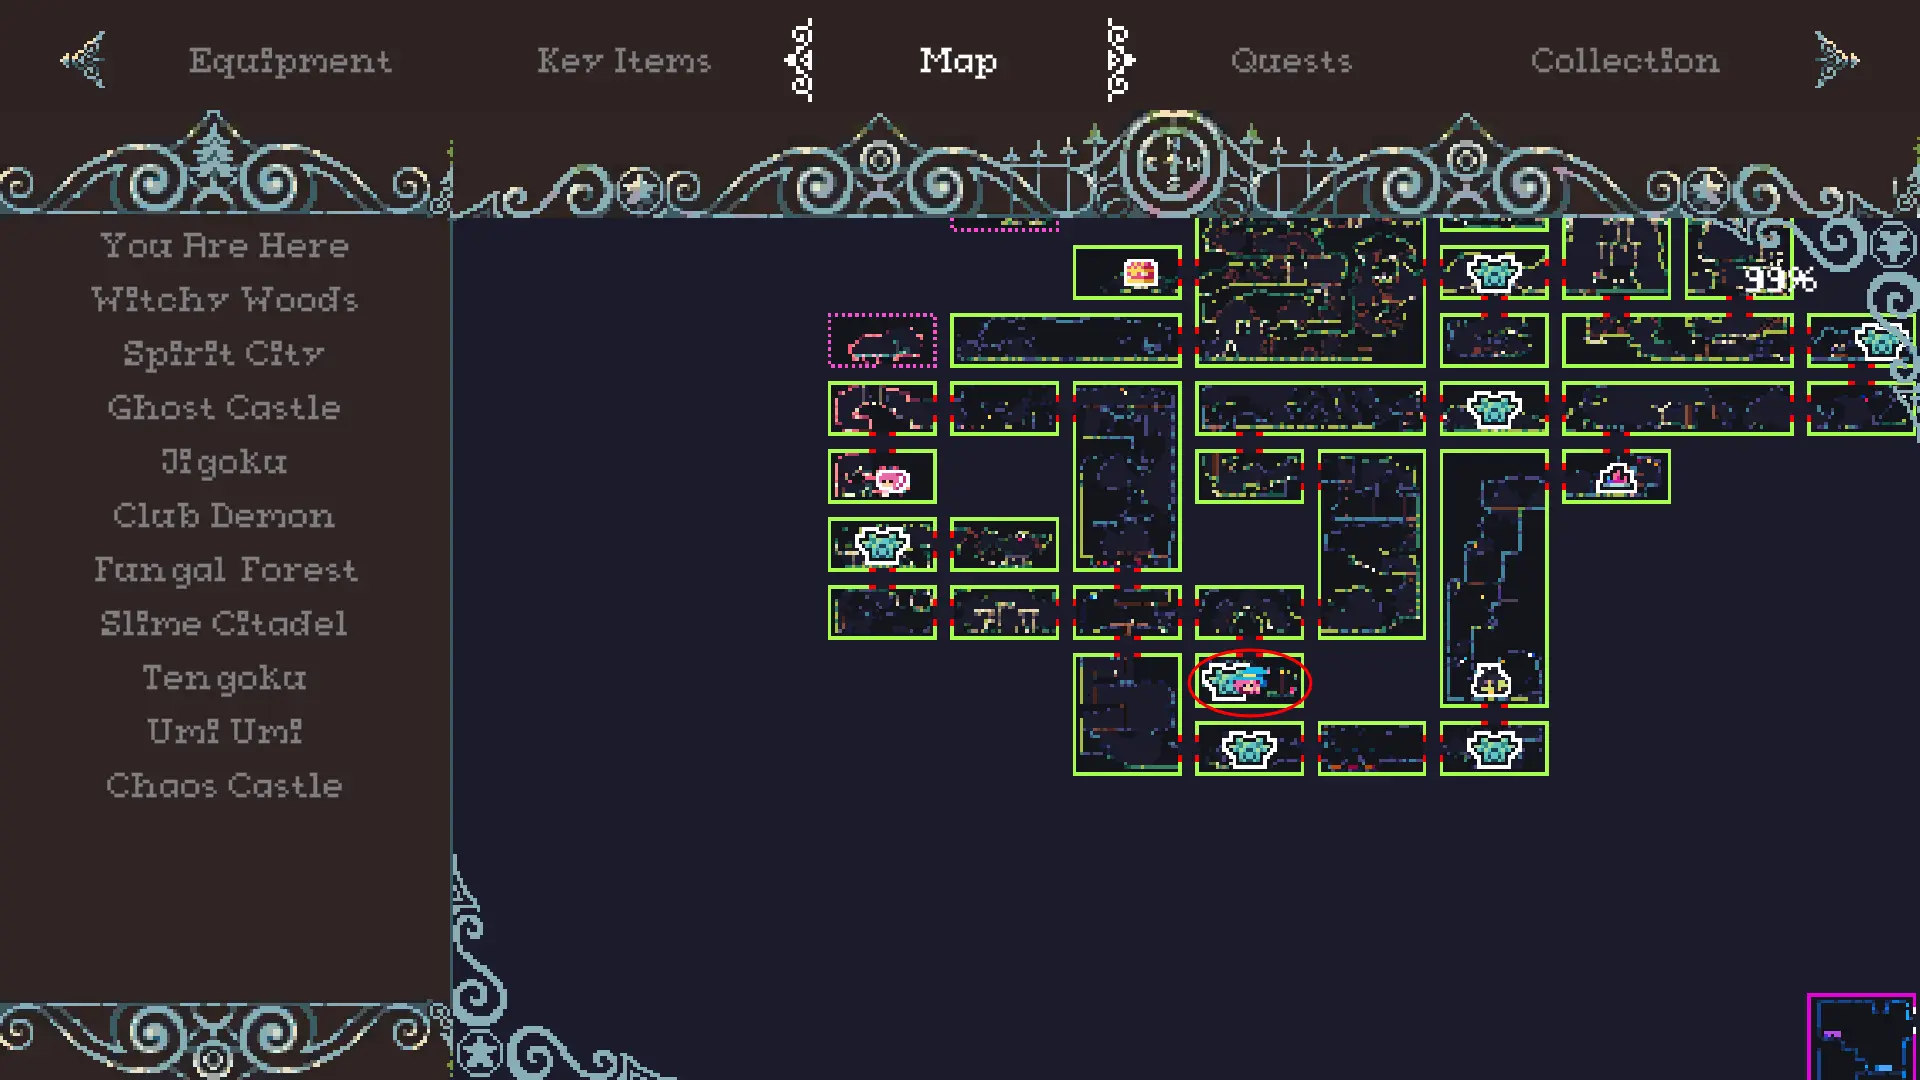
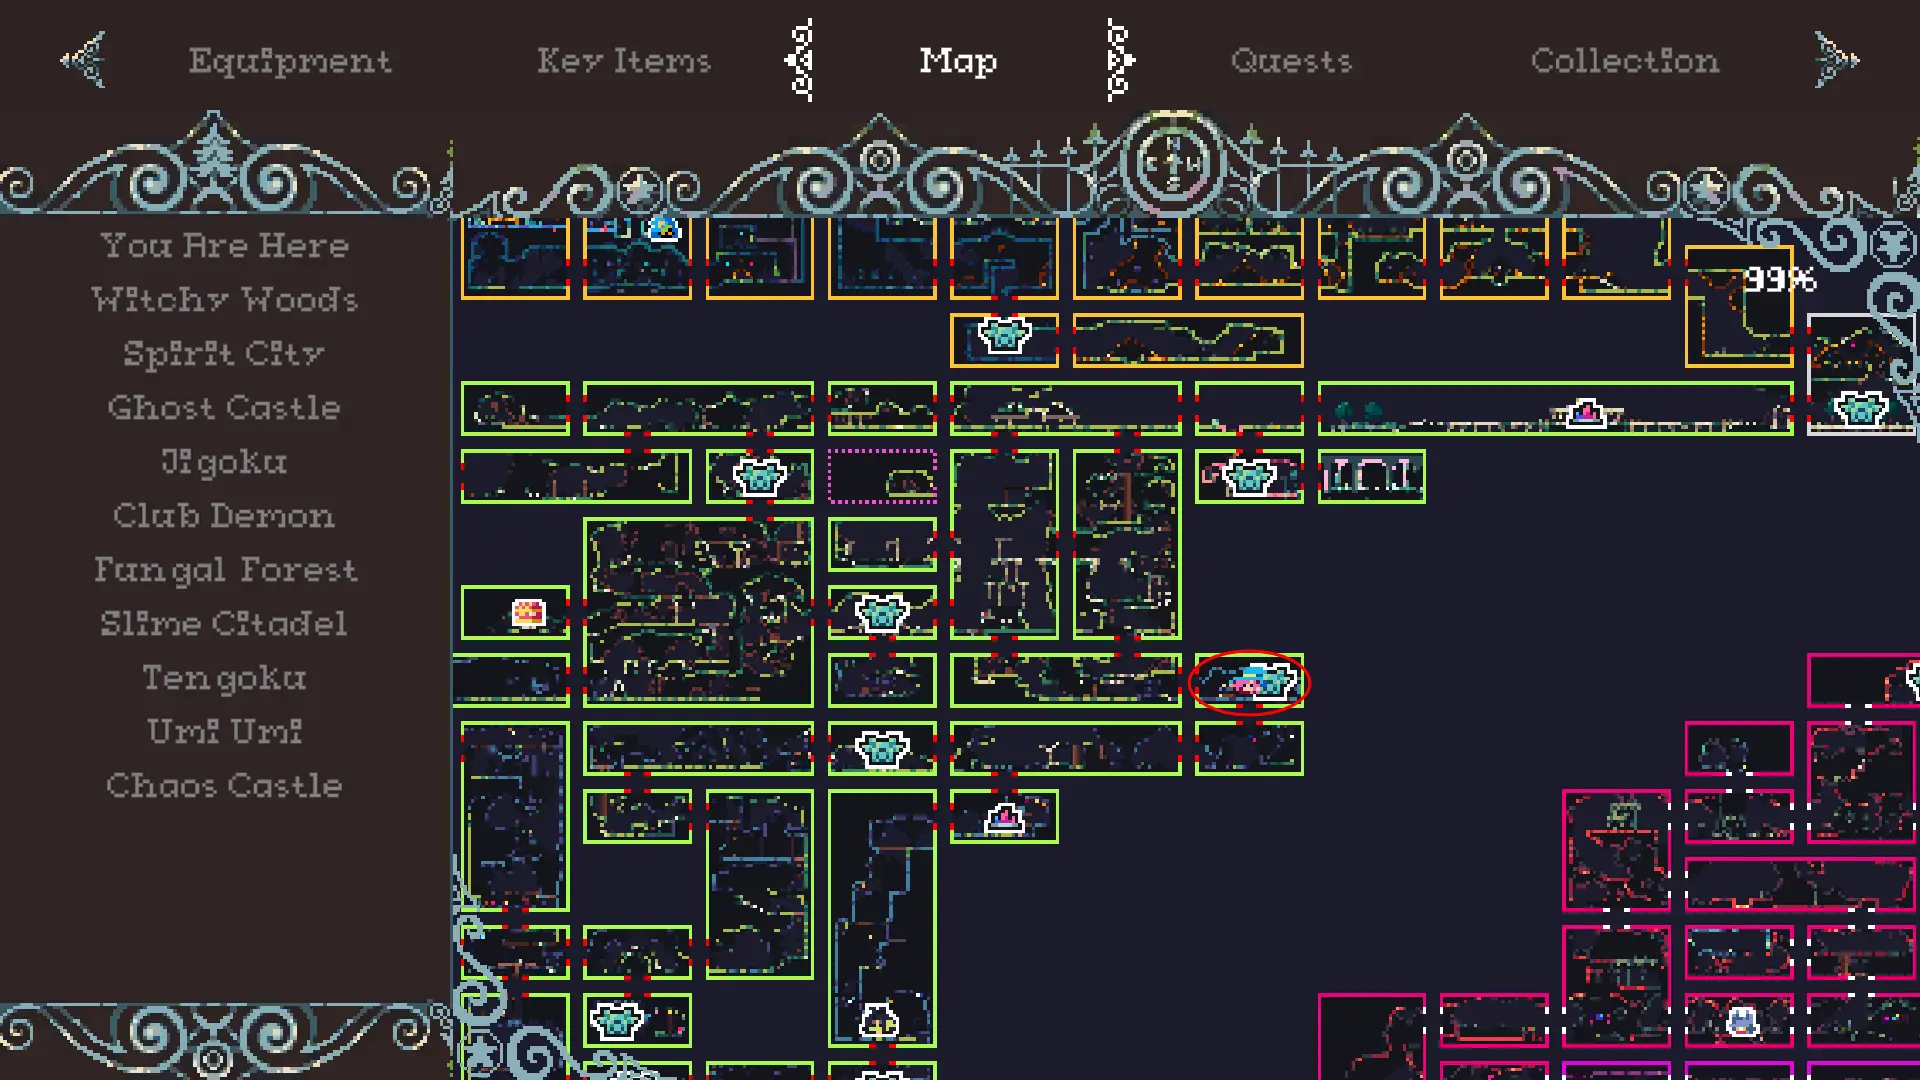
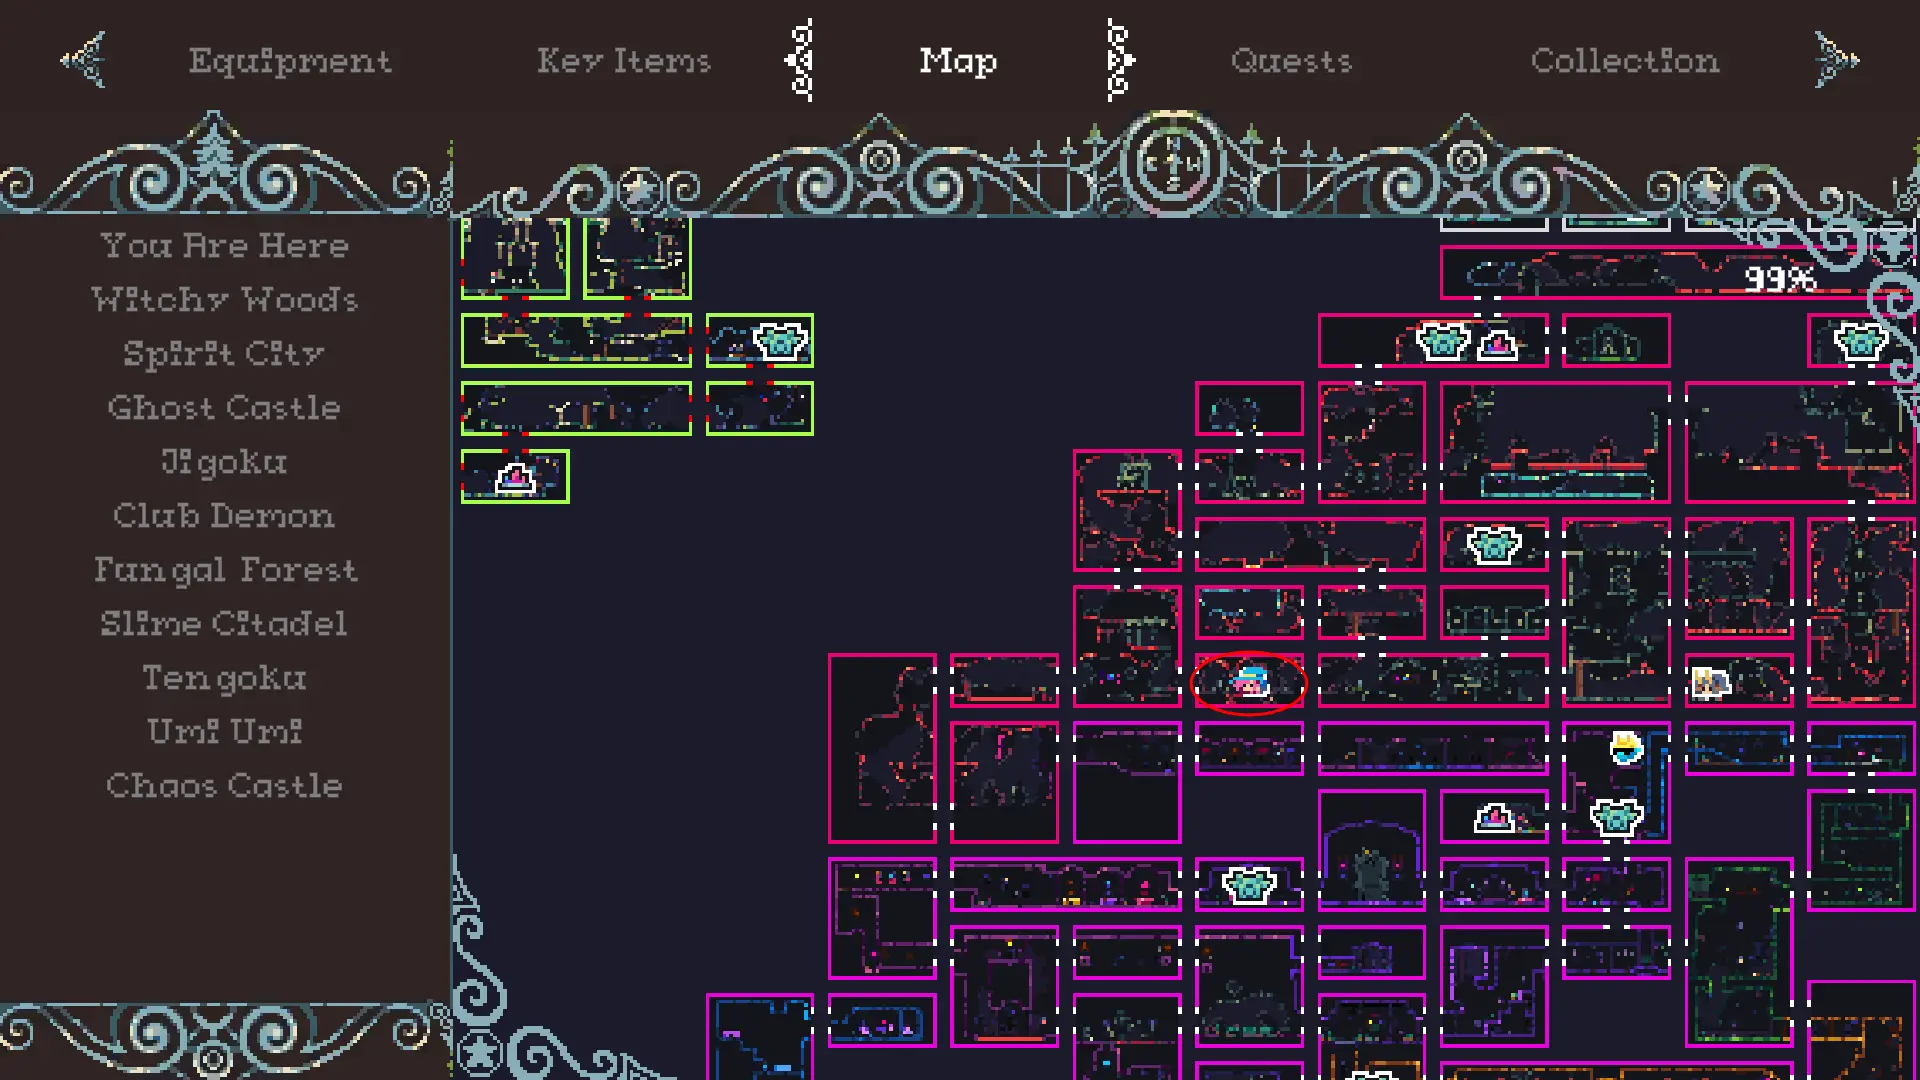
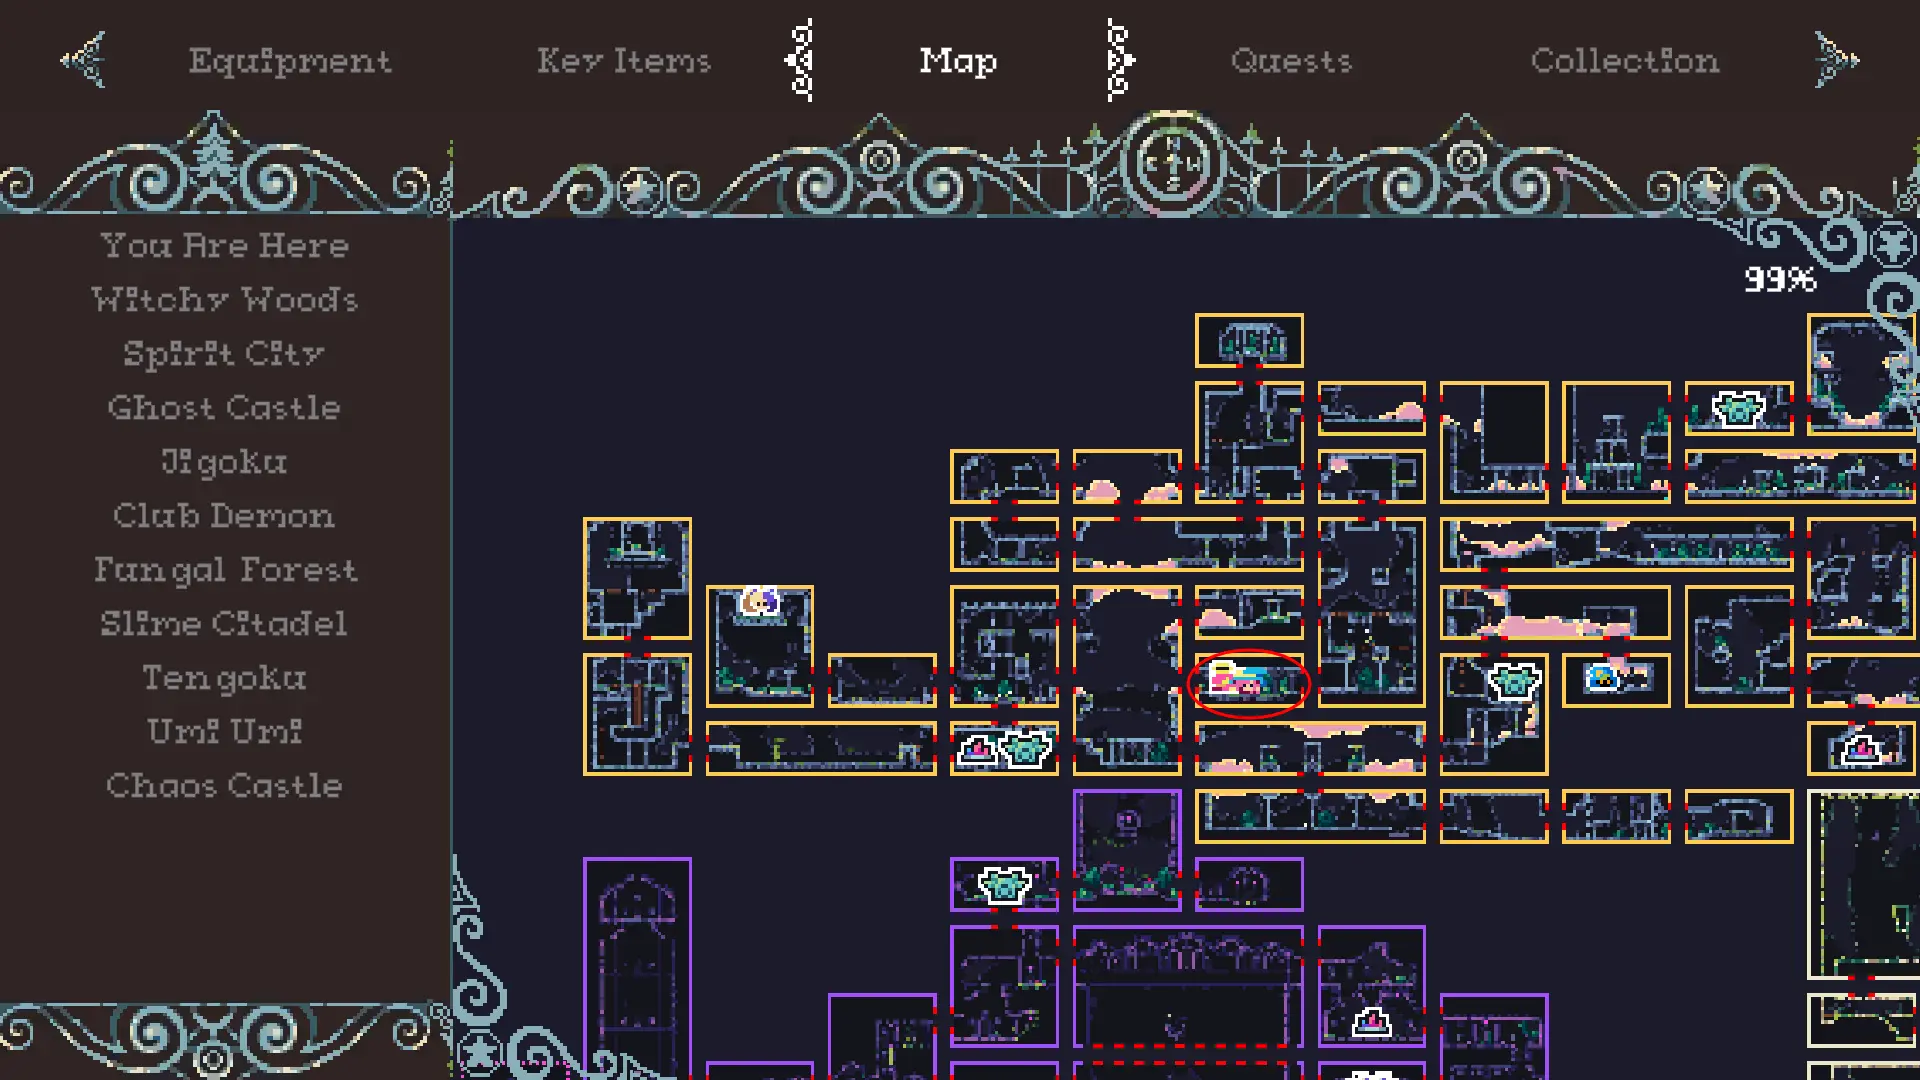
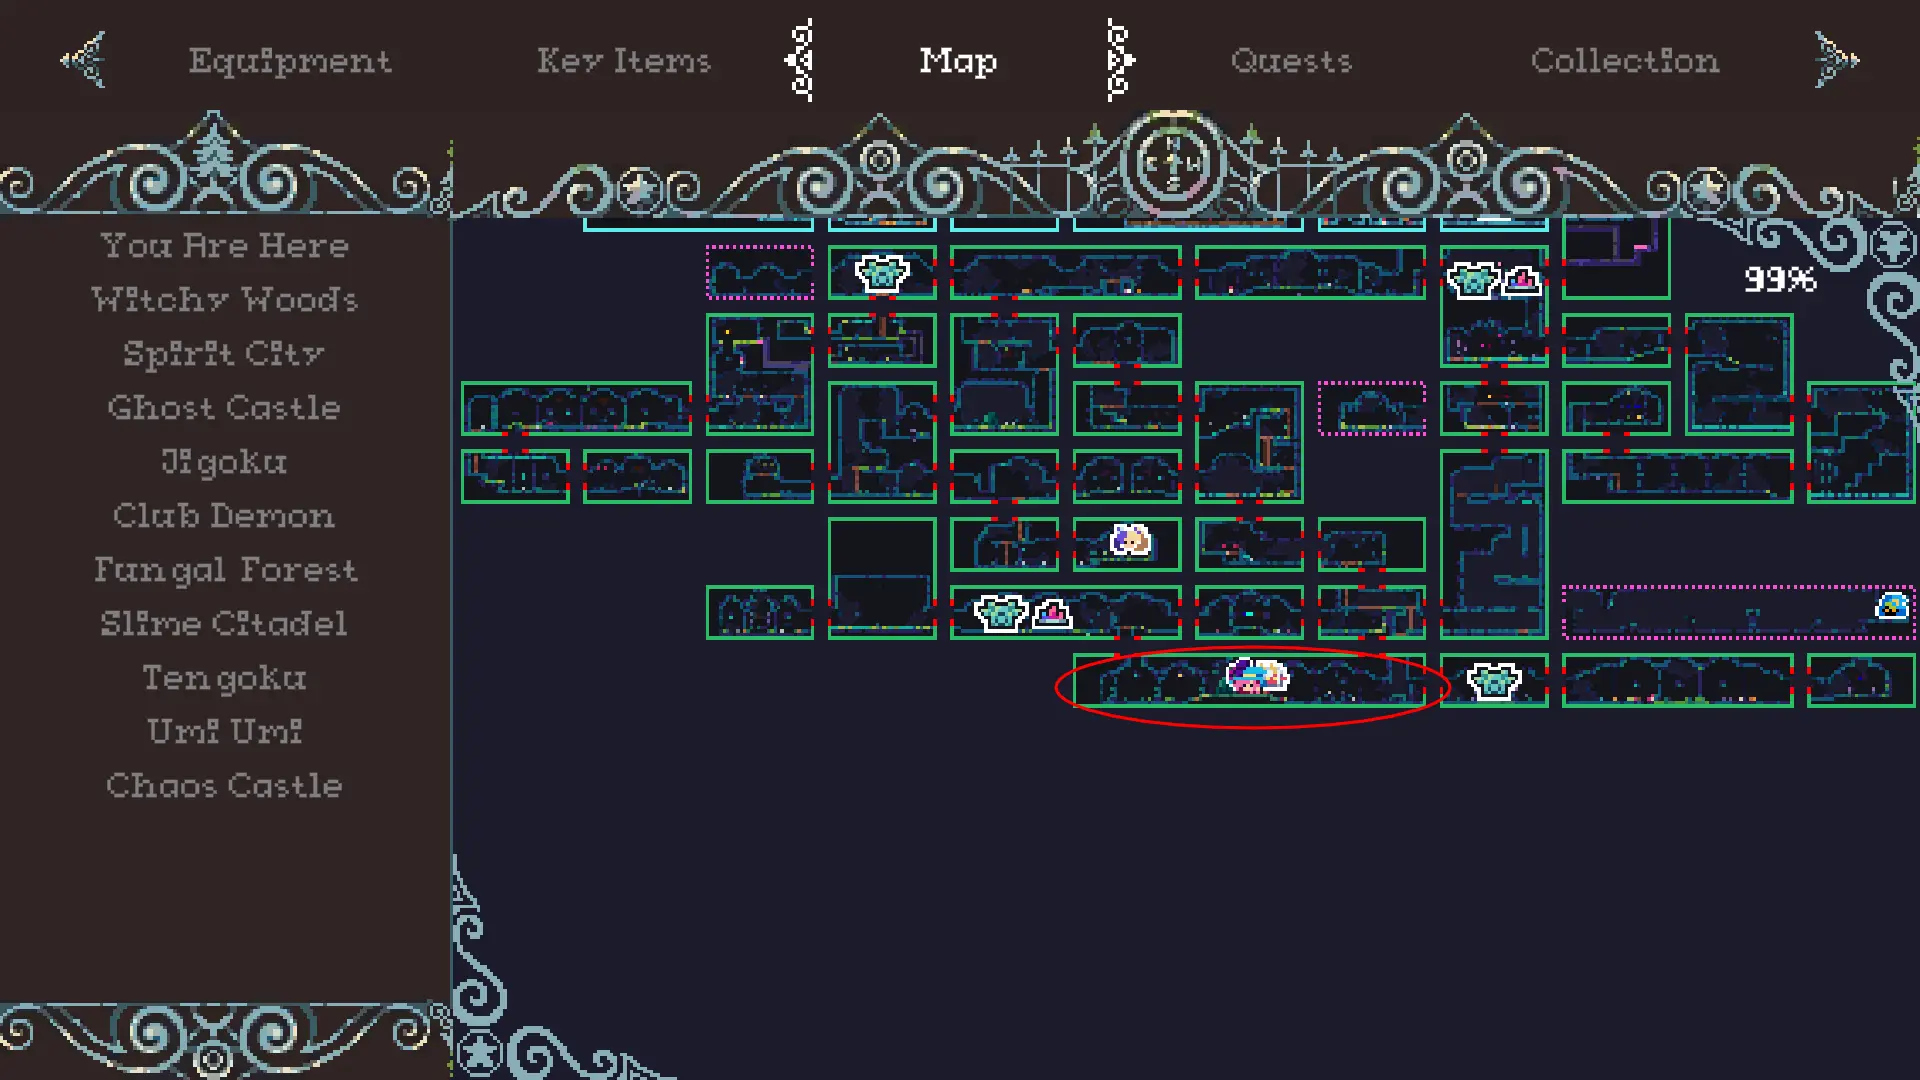
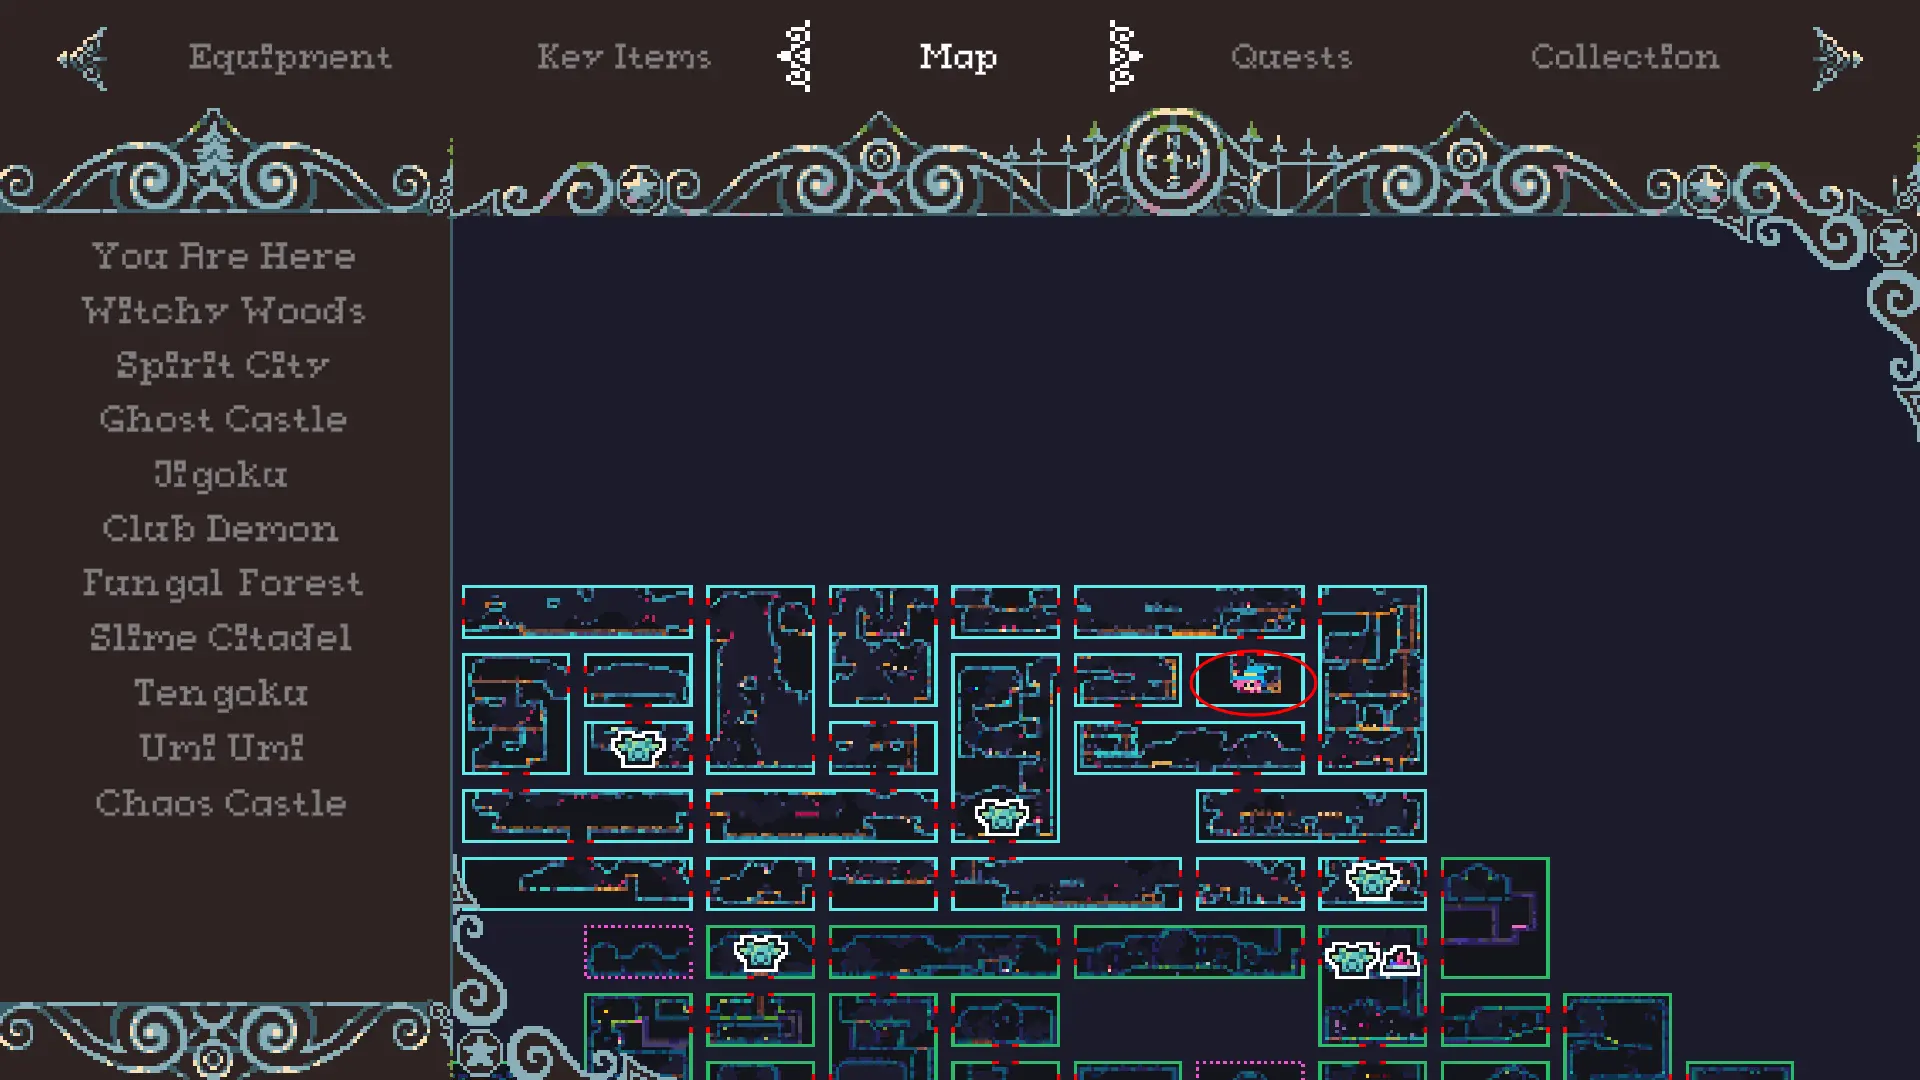
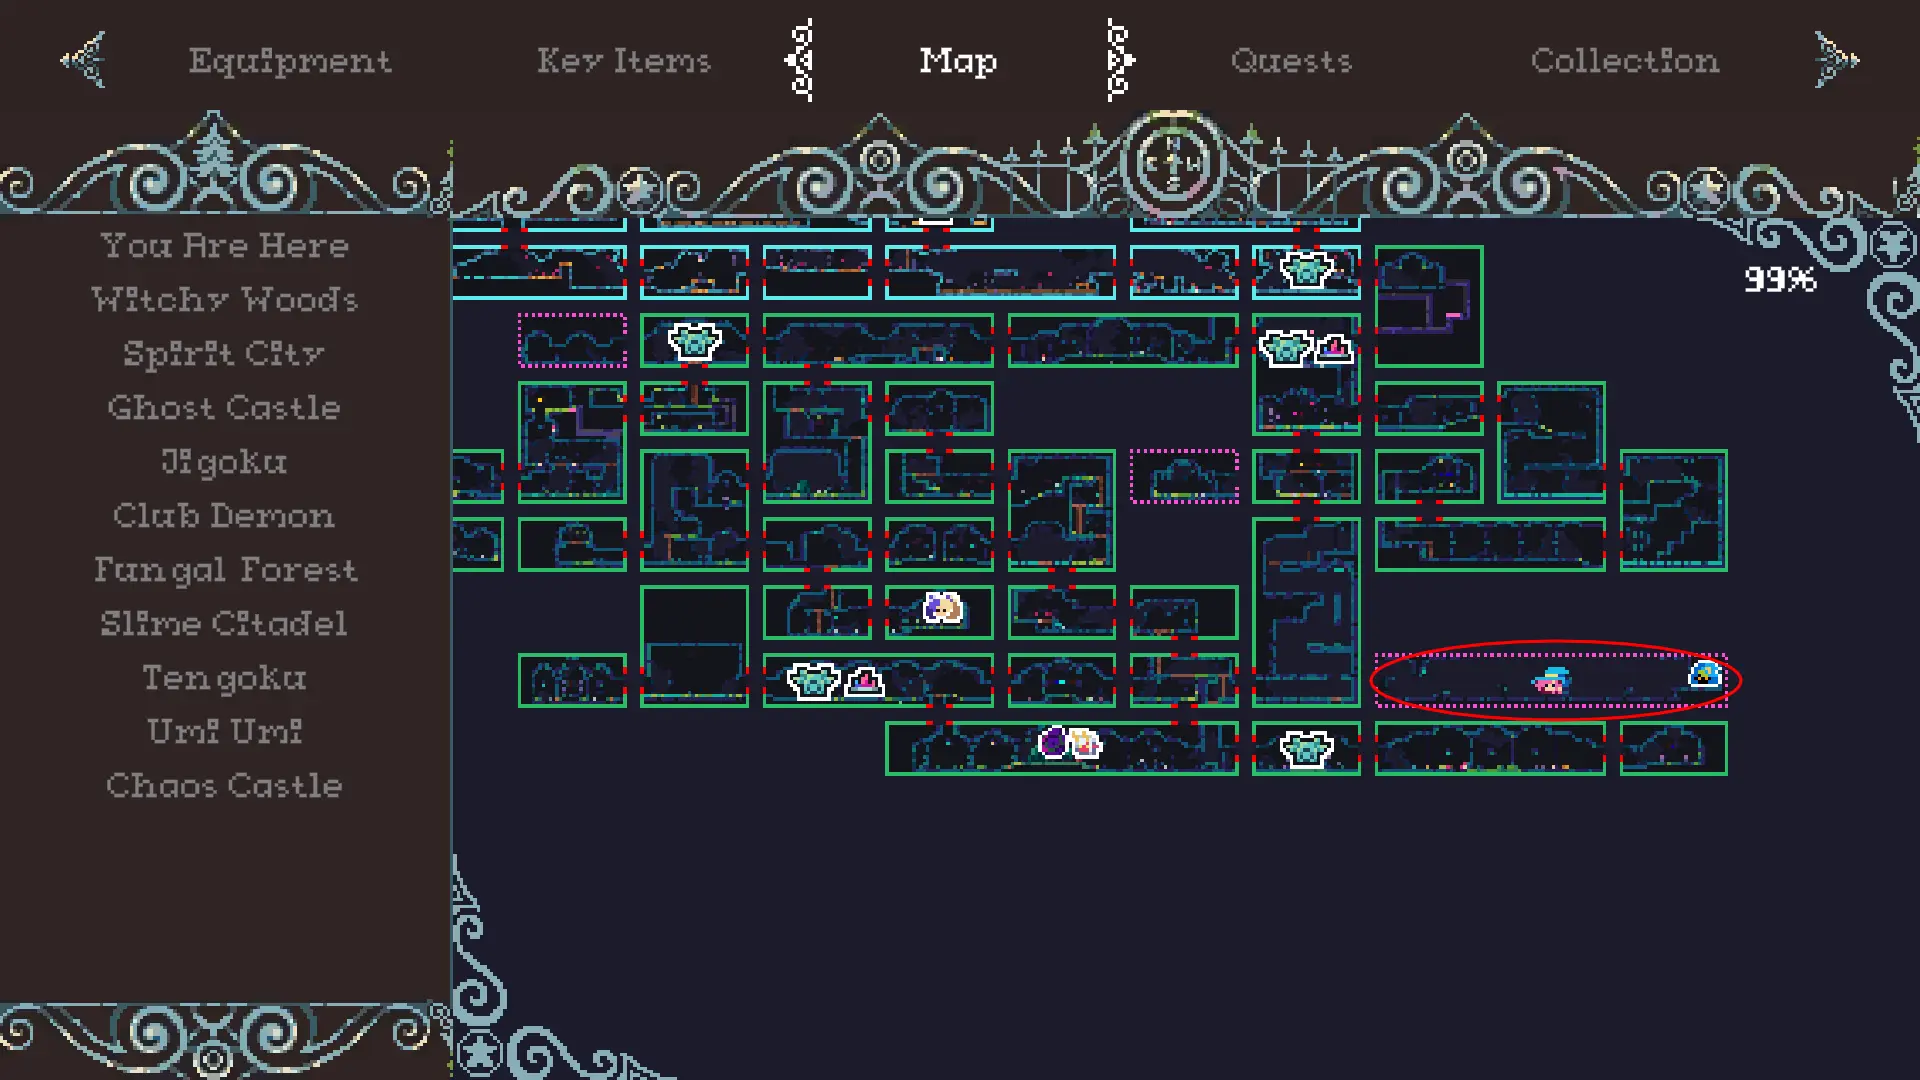
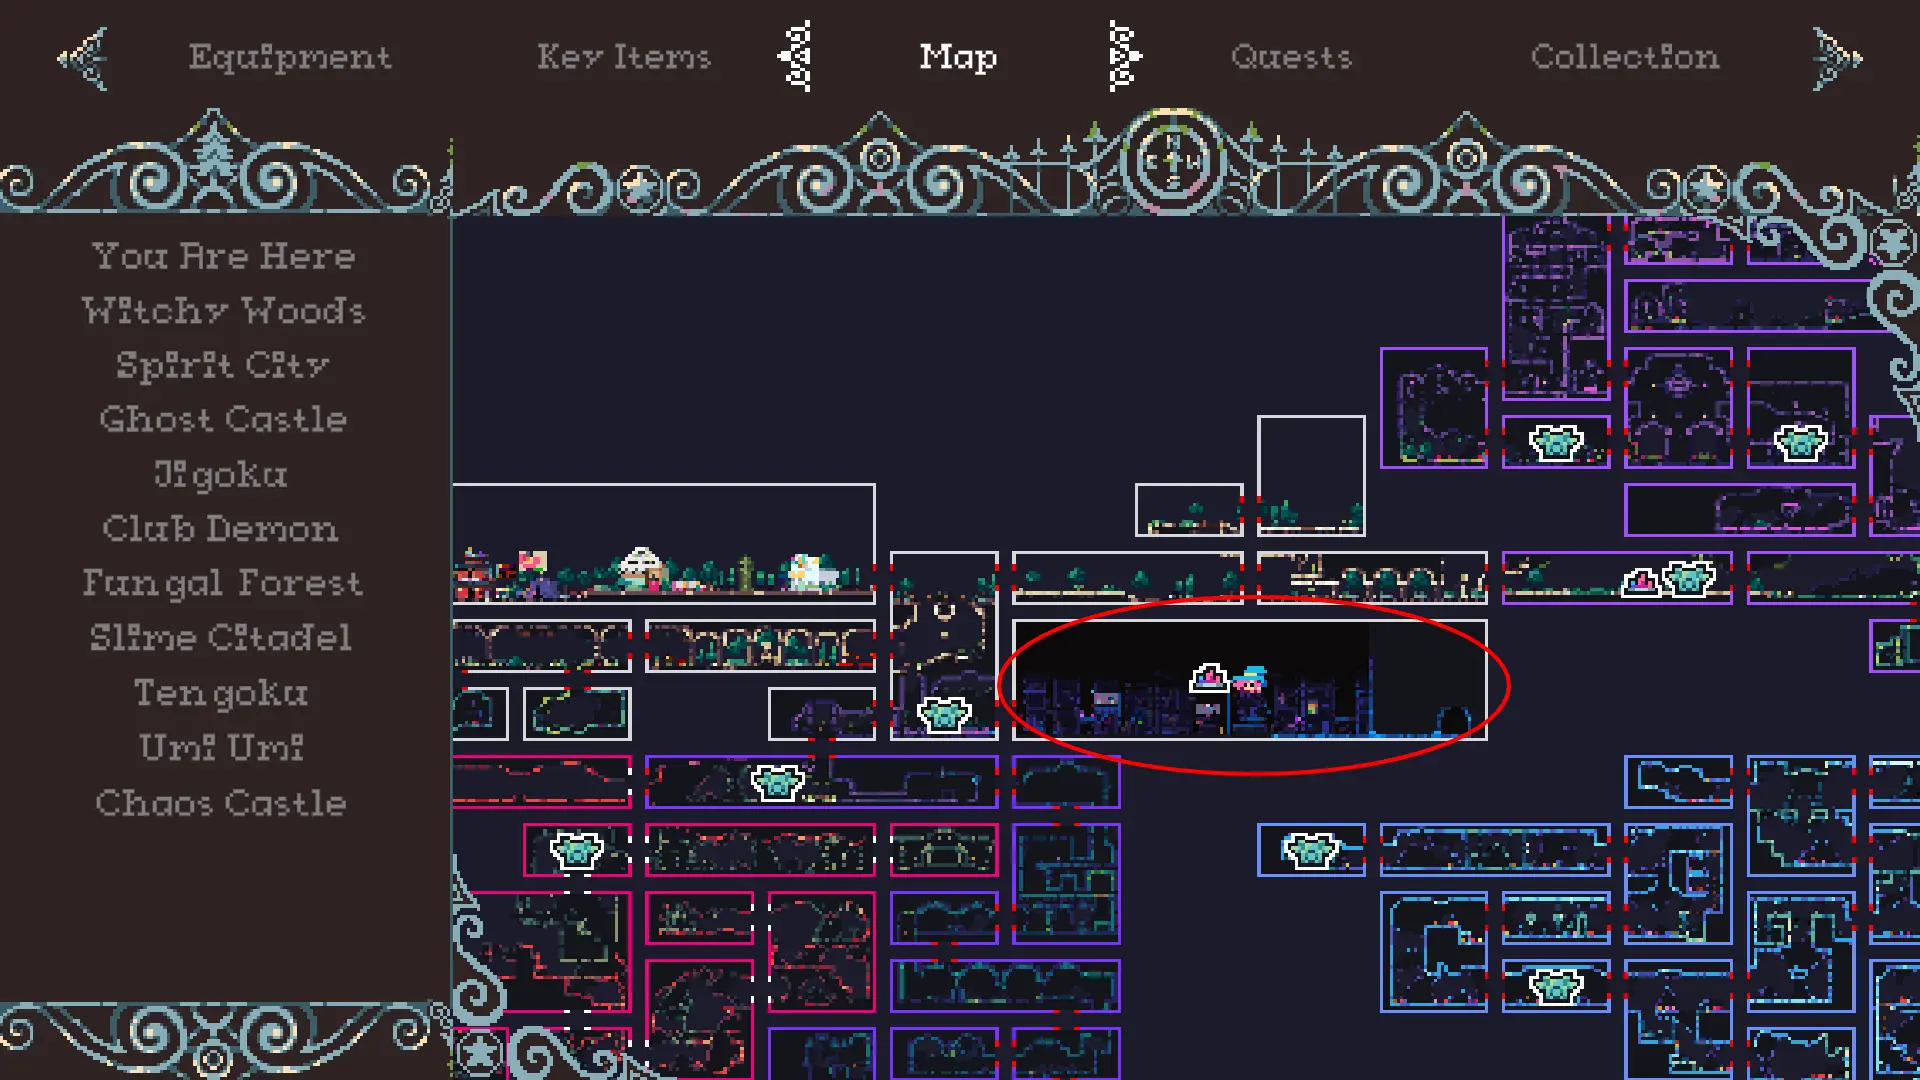
Map Section
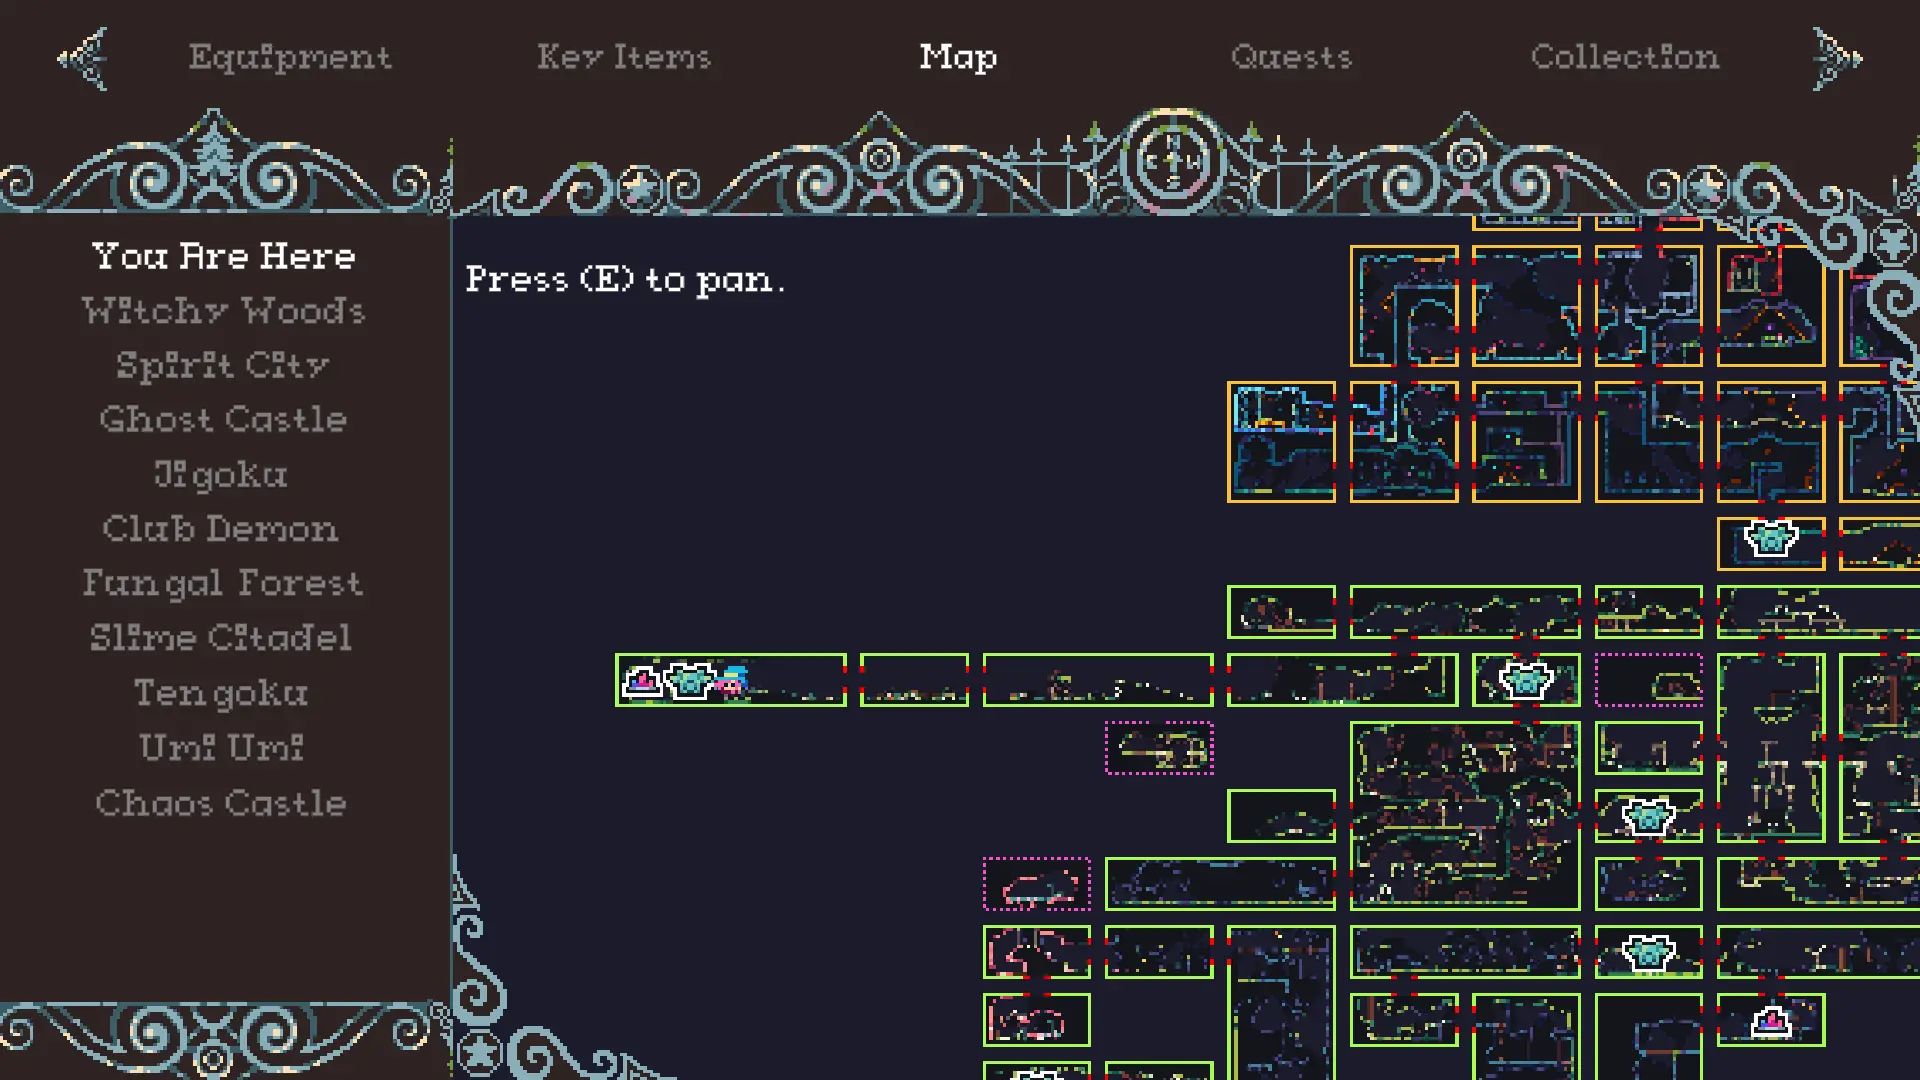
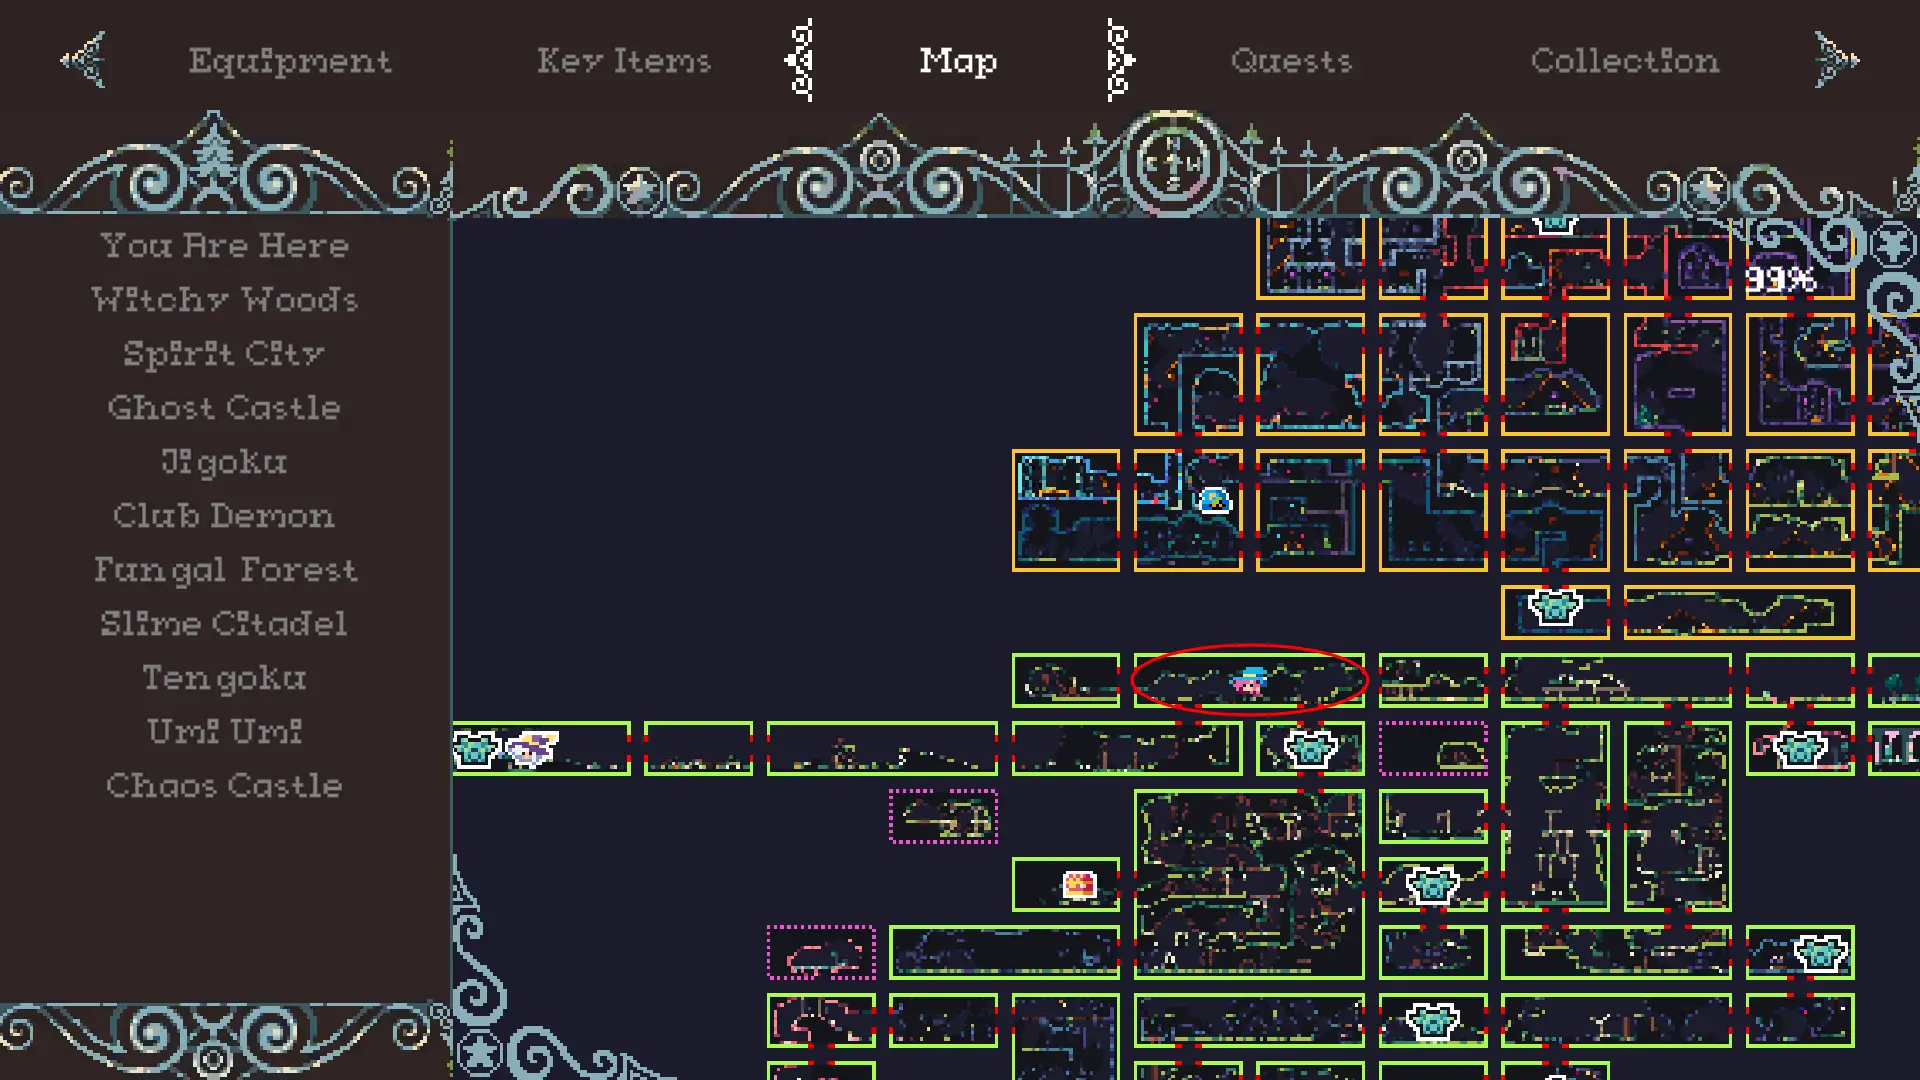
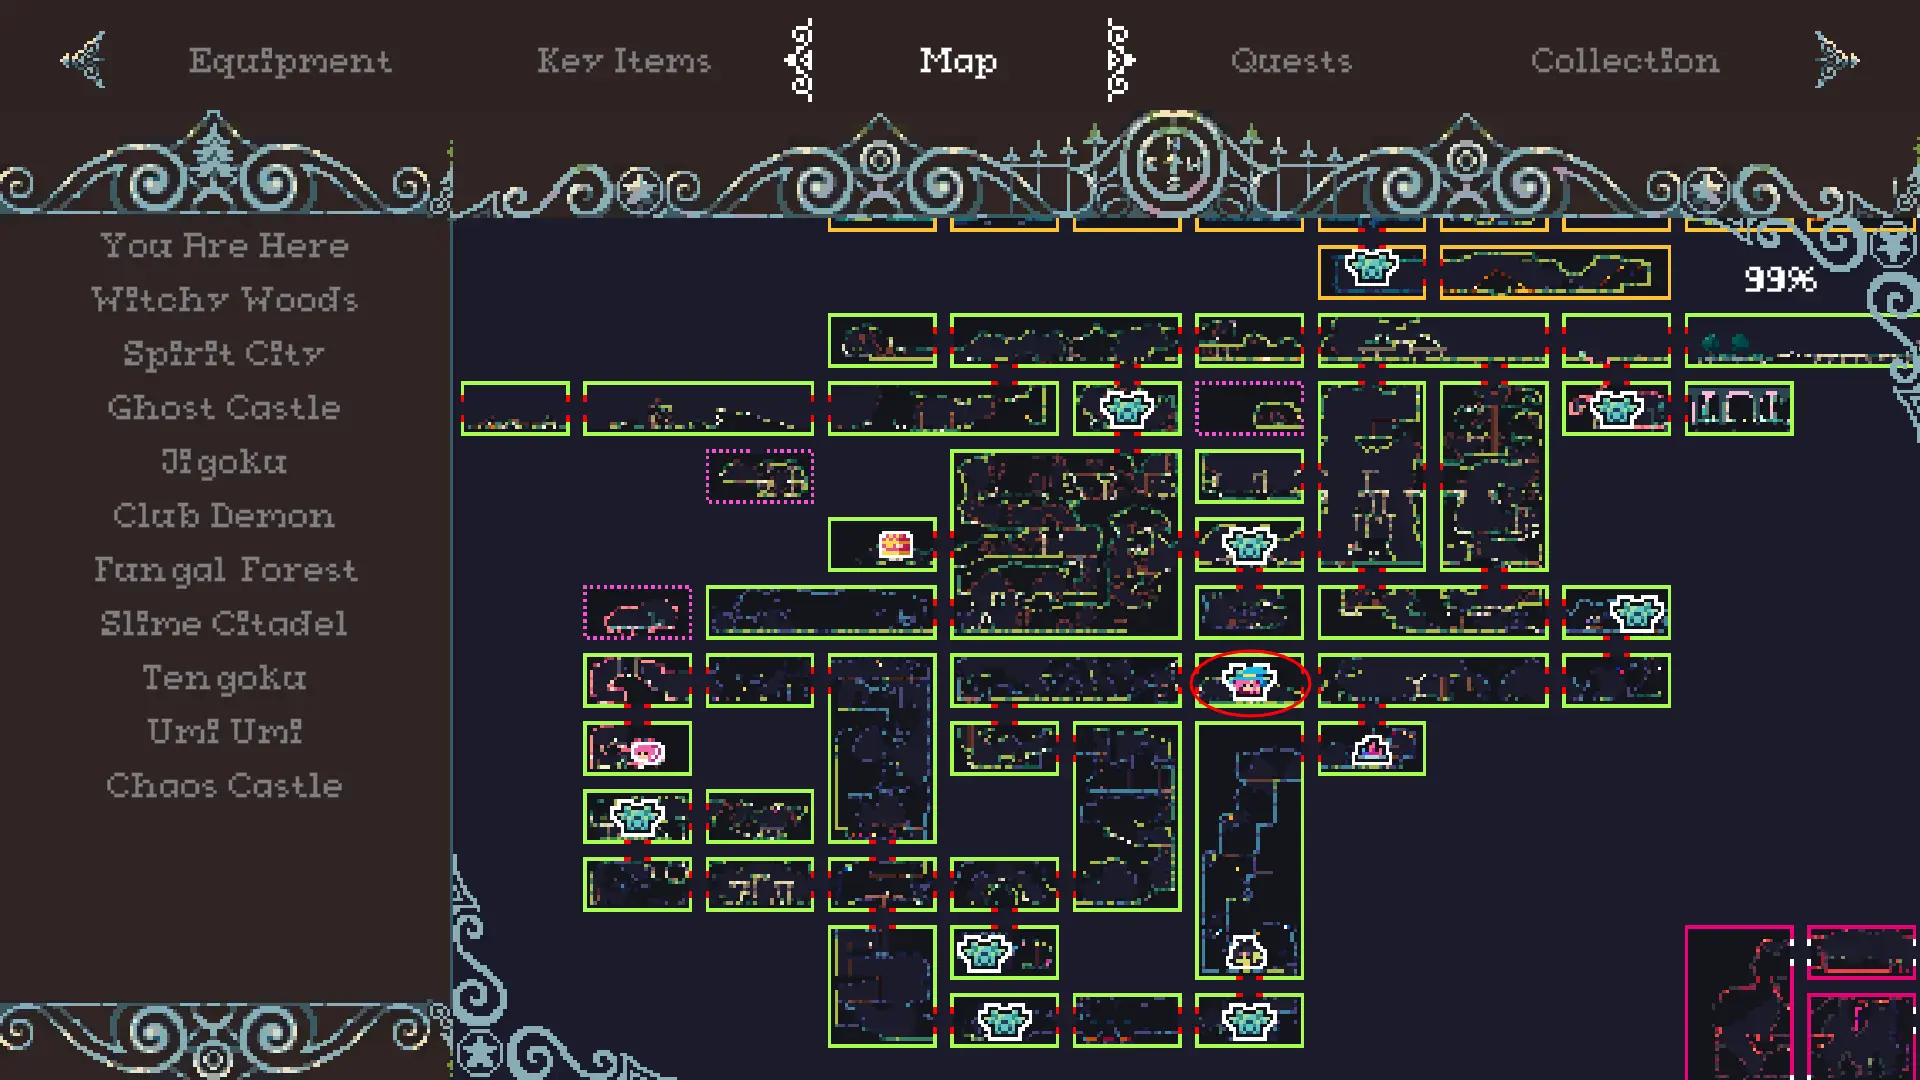
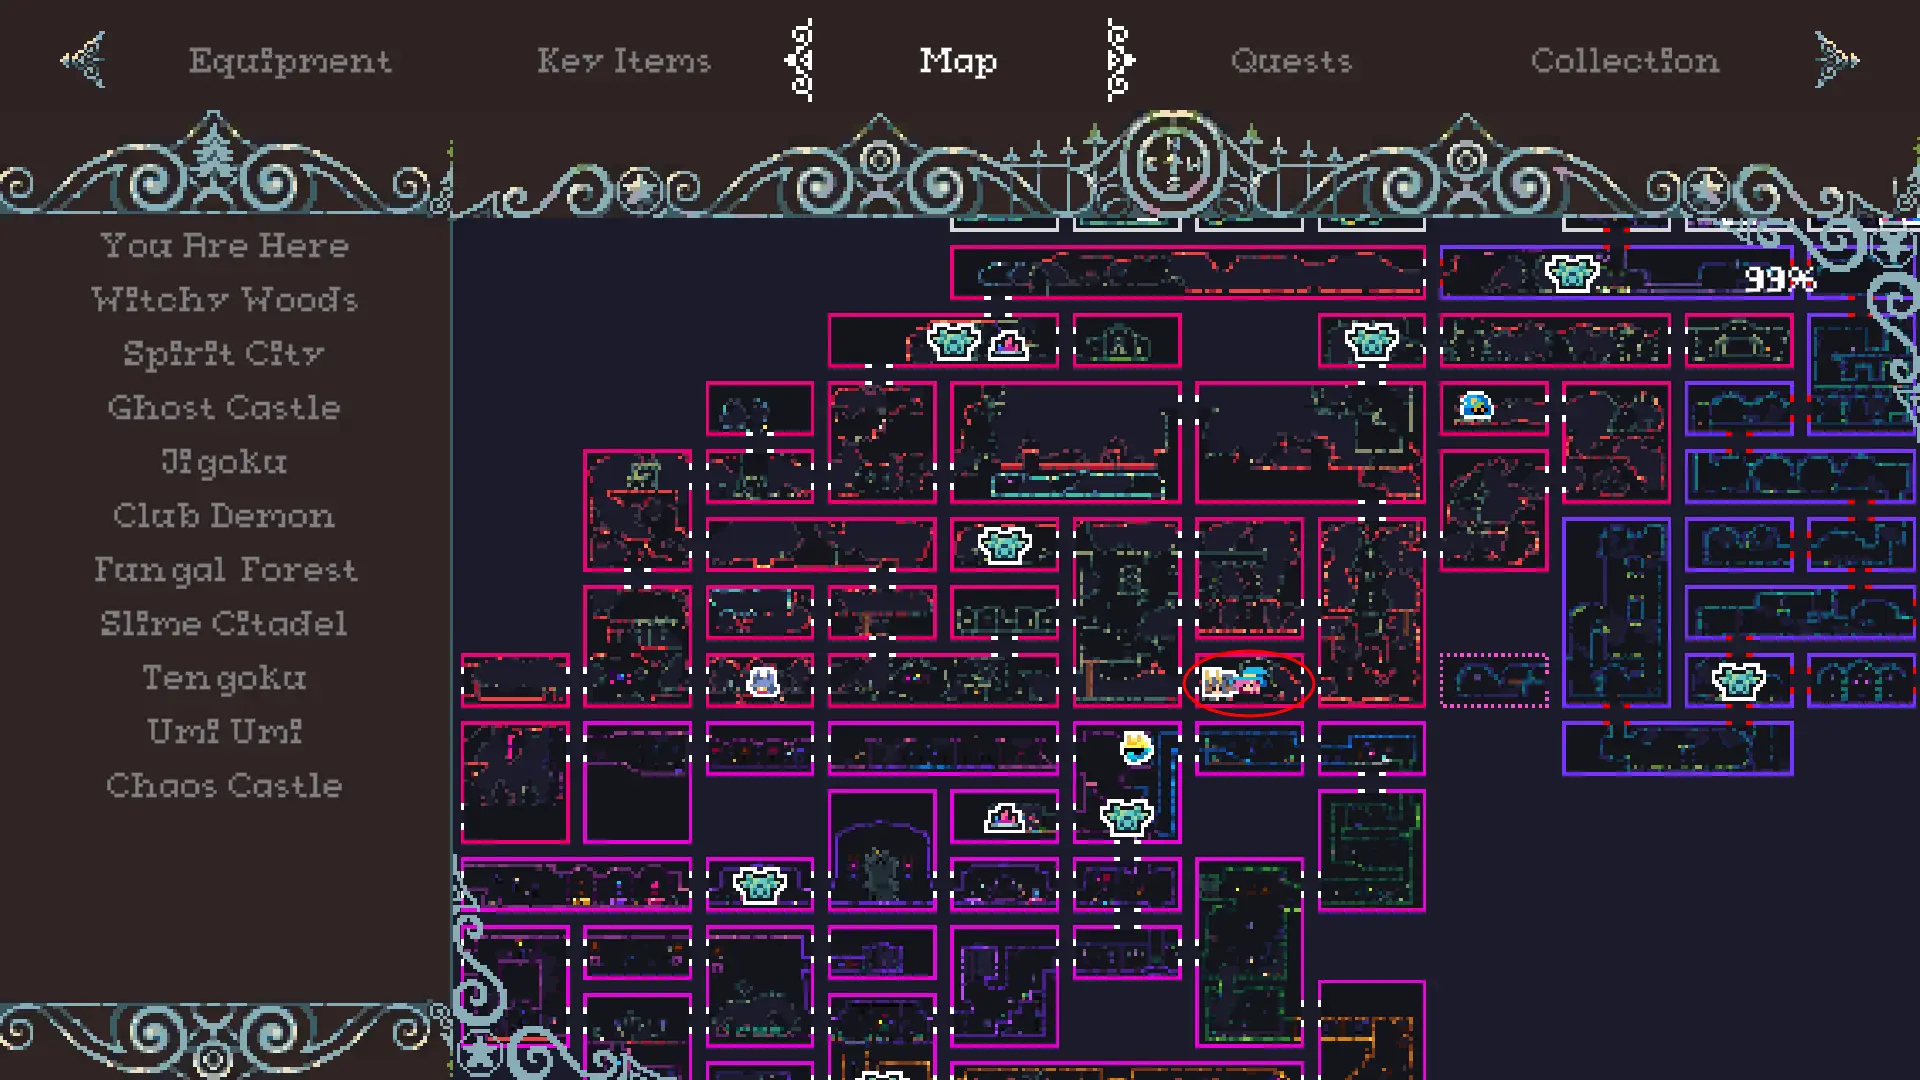
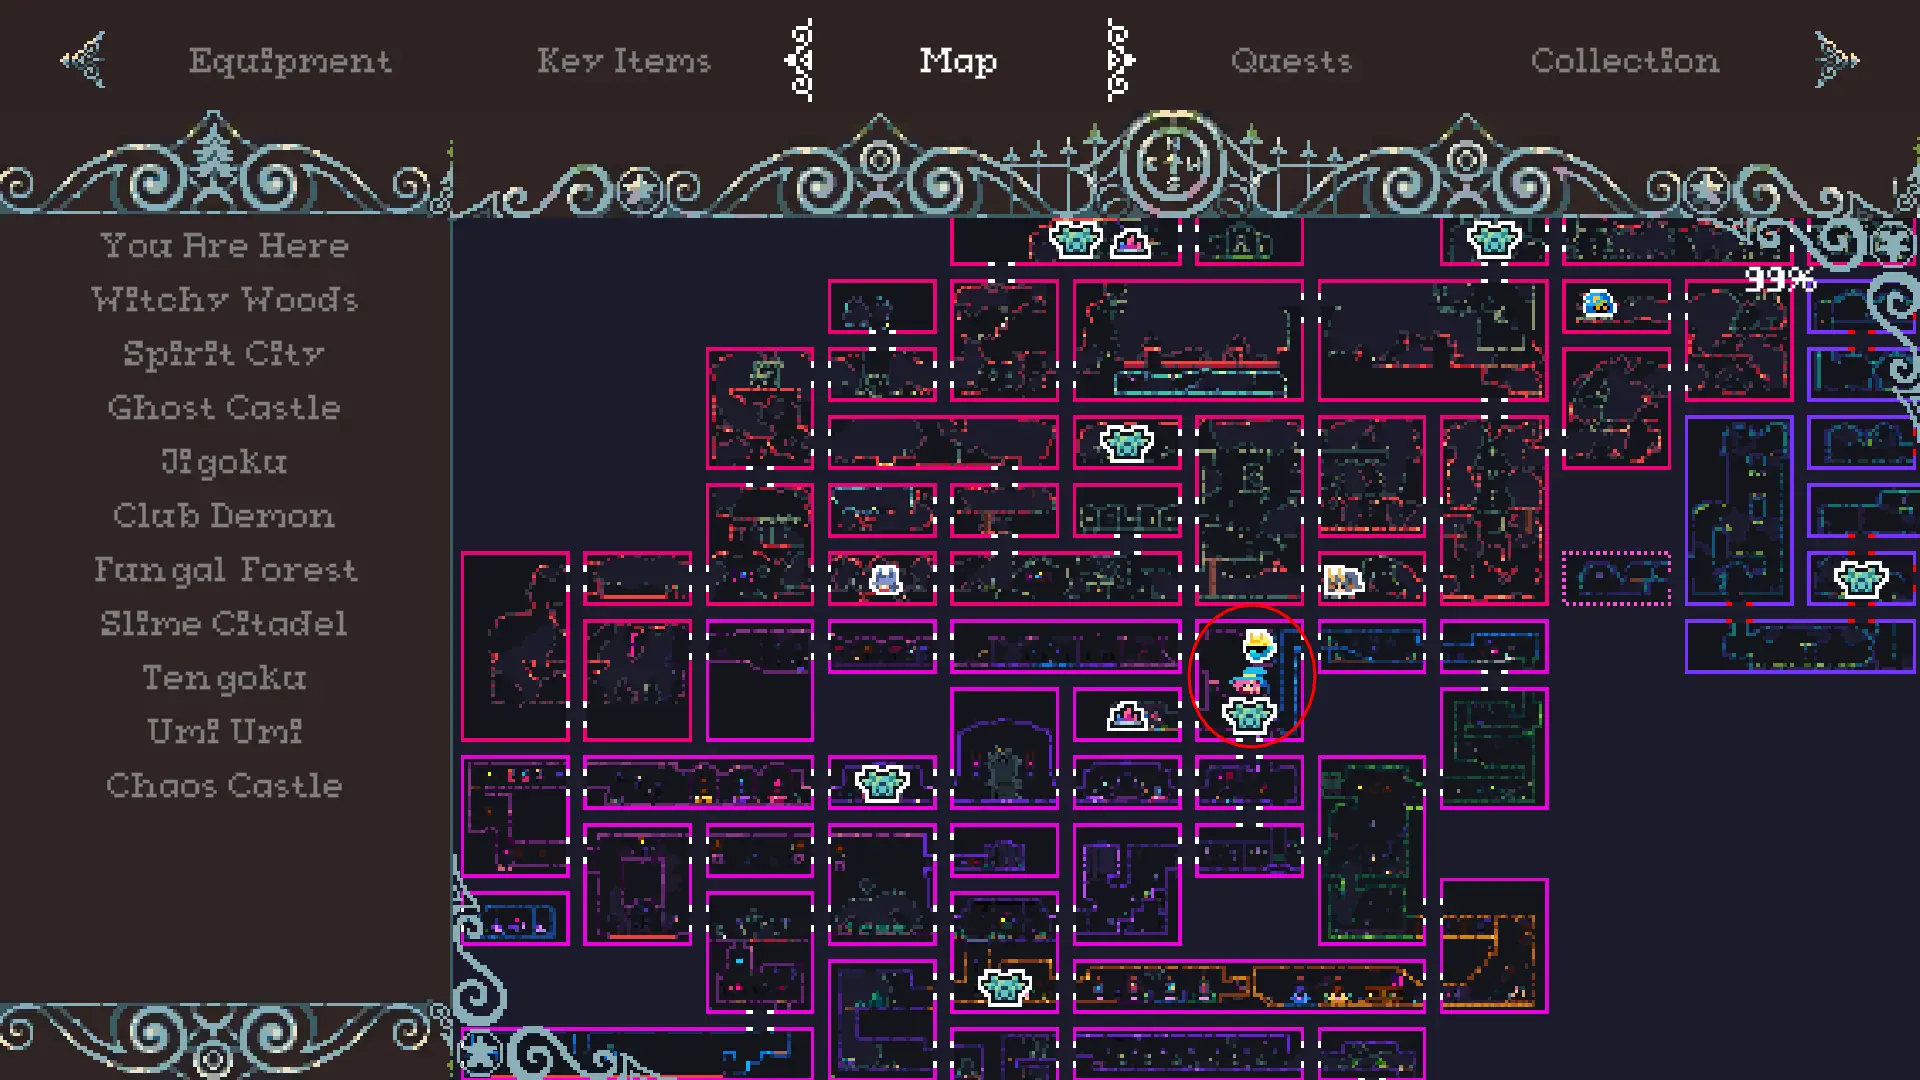
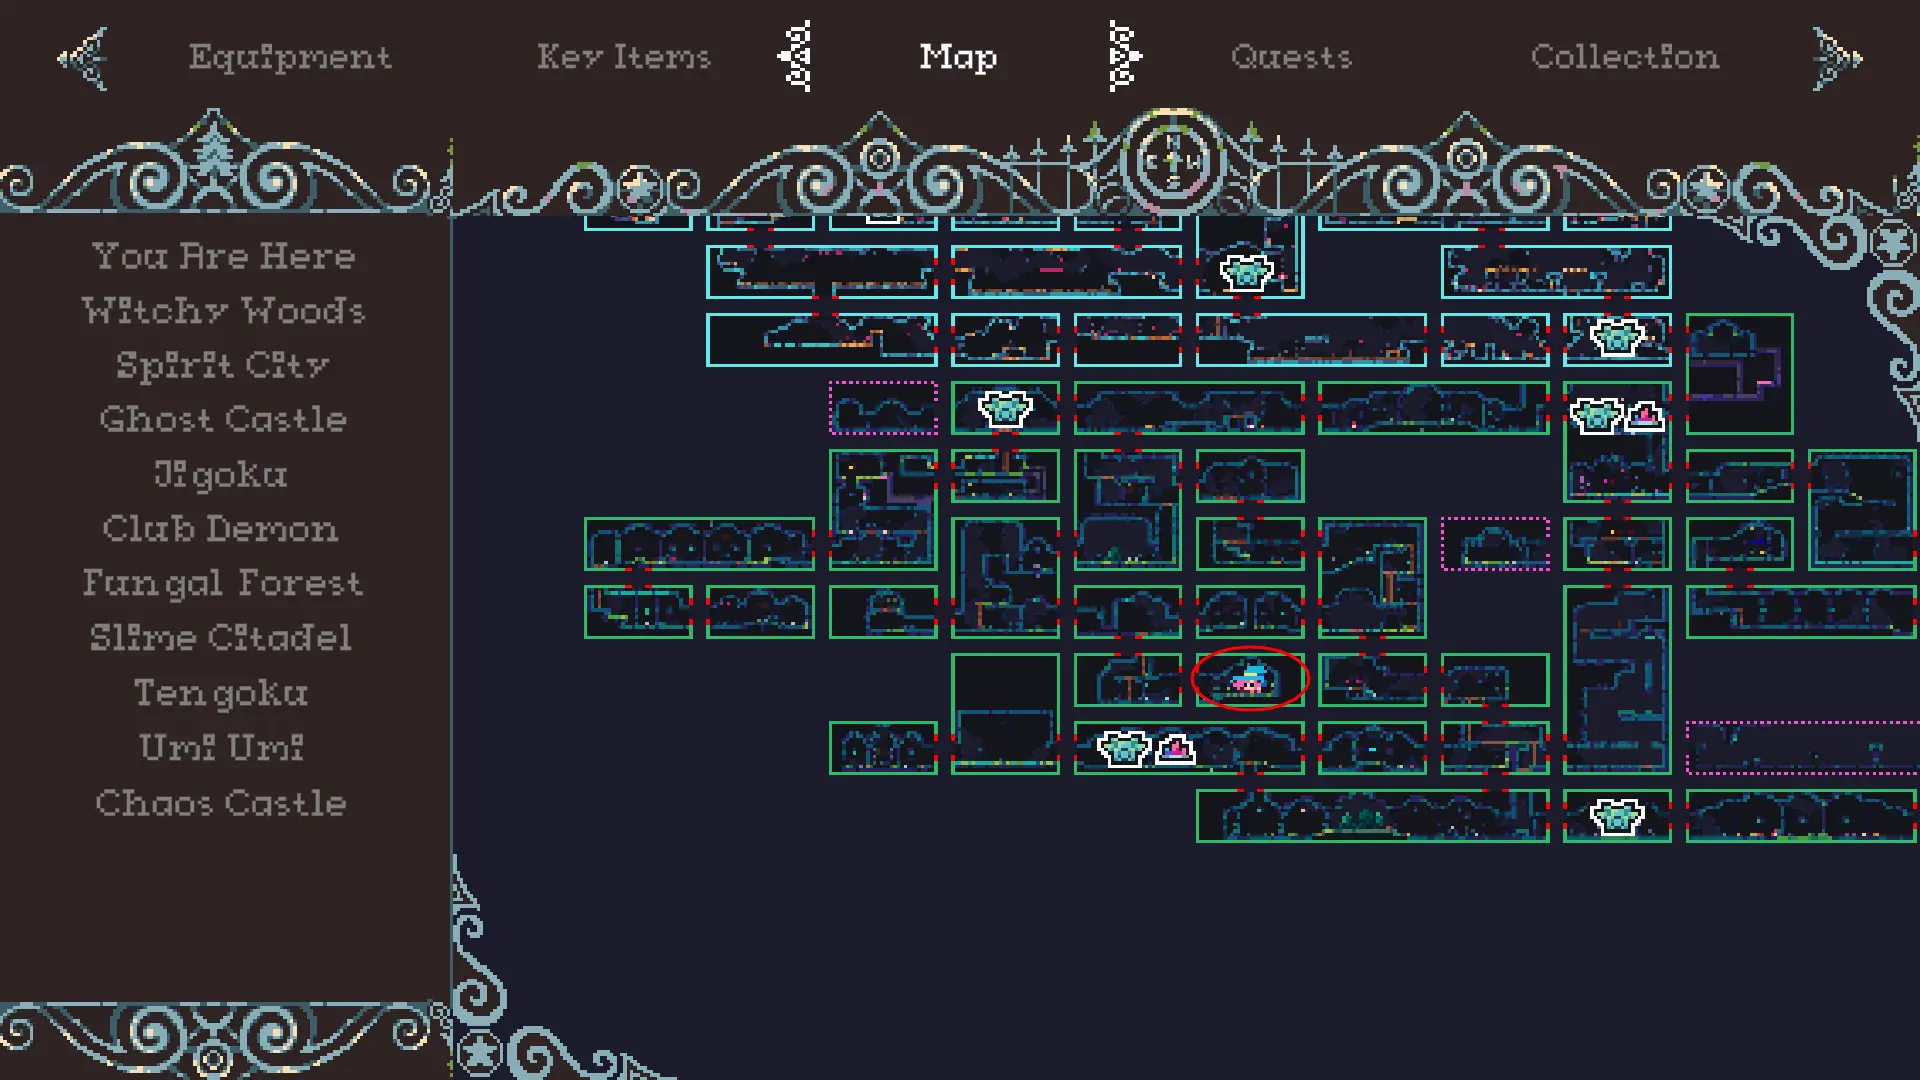
The map section provides the player with a map to help them navigate the single large metroidvania world of FlipWitch. The movement keys can be used to snap the view to listed locations. Otherwise, the player can use the interact key to open the map for panning and press the same key again to quit panning.
Quests Section
The quests section provides the player with a way to manage quests. The quest’s section uses “Completed” as a divider between active and completed quests i.e. quests above “Completed” are active quests and quests below are completed.
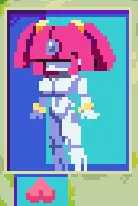
Collection Section
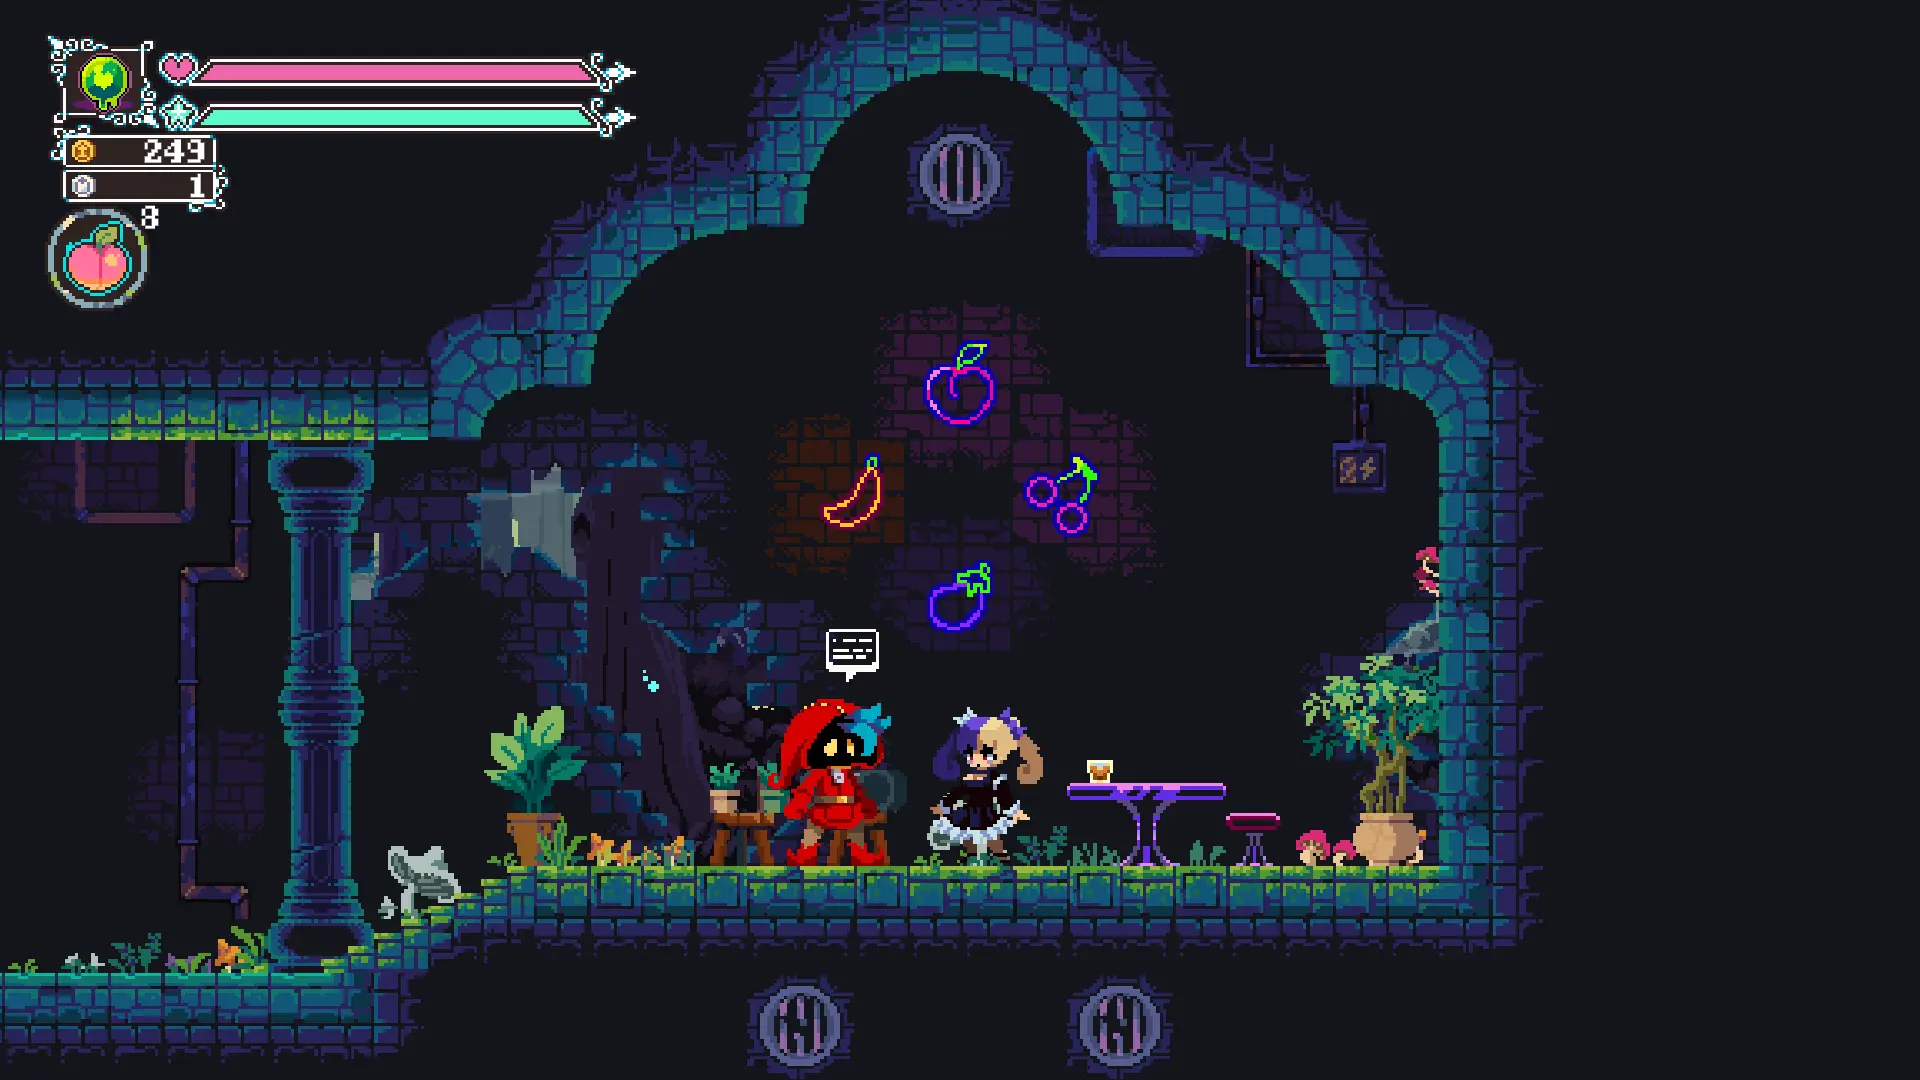
The collection section provides the player with a way to manage their gacha girl collection. The player can use the movement keys to cycle through this collection, with any current gacha girl collected and selected being displayed on the right-hand side.
Key Items Locations
In this section we’ll be discussing the two types of key items which can be found:
- Passive key items; and
- Non-passive key items.
Passive Key Items
Passive key items are items found, which provide the player with newfound abilities. The passive key items that can be obtained are:
- Peachy Peach;
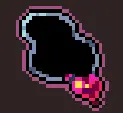
- Bewitched Bubble;
- Goblin Crystal;
- Demon Wings;
- Angel Feathers; and
- Mermaid Scale.
Peachy Peach

[The Peachy Peach is a crucial item for game progression and is awarded to the player from early game start. The maximum peaches a player can hold is 12 and is reached after all upgrades have been received by Beatrix. It enables the player to heal from damage taken during battles. Healing with the peach is an action that has to be performed. Thus, a player needs to chose wisely when to heal to avoid taking more damage during fights.]
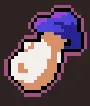
Bewitched Bubble

[The bewitched bubble is given to the player after obtaining the [b] rare bubble [/b] from the Great Fairy. Beatrix infuses the obtained rare bubble with magic and gives it to the player. This item enables the core mechanic of the game “Flipping”, which allows the player to switch between witch and wizard forms. This action is uninterruptible, meaning we can perform other actions simultaneously such as walking or rolling.]
Goblin Crystal

[The Goblin Crystal is an item obtained by looting the treasure room of the Goblin Queen boss, as part of the [quest name]. This item enables a core mechanic of the game, being fast-travel between fast-travel points (crystal teleporters).]
Demon Wings
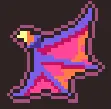
[The Demon Wings is an item obtained by looting the treasure room of the Sad Boss, as part of the [quest name]. This item enables a core mechanic of the game, being mid-air dashing that gives the player another dodge mechanic and ability to span greater distances through the air. Being in the air and pressing the roll action key will trigger the mid-air dash in the direction the player is facing. This is only available once in the air and is reset upon landing.]

Angel Feathers
[The Angel Feathers is an item obtained by looting a treasure chest in Angelic Hallways. This item enables a core mechanic of the game, being the ability to triple-jump. A player can combine mid-air dashing and triple jumping to further extend the distance traveled through the air. The triple jump is triggered by jumping three times in the air and is reset upon landing.]
Mermaid Scale

[The Mermaid Scale is an item obtained by looting the treasure room of the [?] Boss. This item enables a core mechanic of the game, being the passive ability to pass through water and breathe underwater.]
Non-passive Key Items
The non-passive key items do not enable special abilities or actions that can be performed by the player. The main purpose of these items is main and side quest progression.
Non-passive Key Items – Main Quest
The main quest items that need to be collected are 6 chaos keys in order to unlock Chaos Castle and fight the final boss, Chaos Witch. The chaos keys and where to obtain them are detailed below:
Chaos Key 1
Obtained by looting the treasure room of the Goblin Queen Boss.
Chaos Key 2

Obtained by looting the treasure room of the Ghost Boss.
Chaos Key 3
Obtained by looting the treasure room of the Club Demon Boss.
Chaos Key 4
Obtained by looting the treasure room of the Angel Boss.
Chaos Key 5
Obtained by looting the treasure room of the Frog Boss.
Chaos Key 6
Obtained by looting the treasure room of the Slime Boss.
Non-passive Key Items – Side Quests
These are the items purely required to complete side quests that enable the player to progress and upgrade their character. Each side quest item, the quest it relates to and how to obtain it is detailed below:
Mimic Chest Key

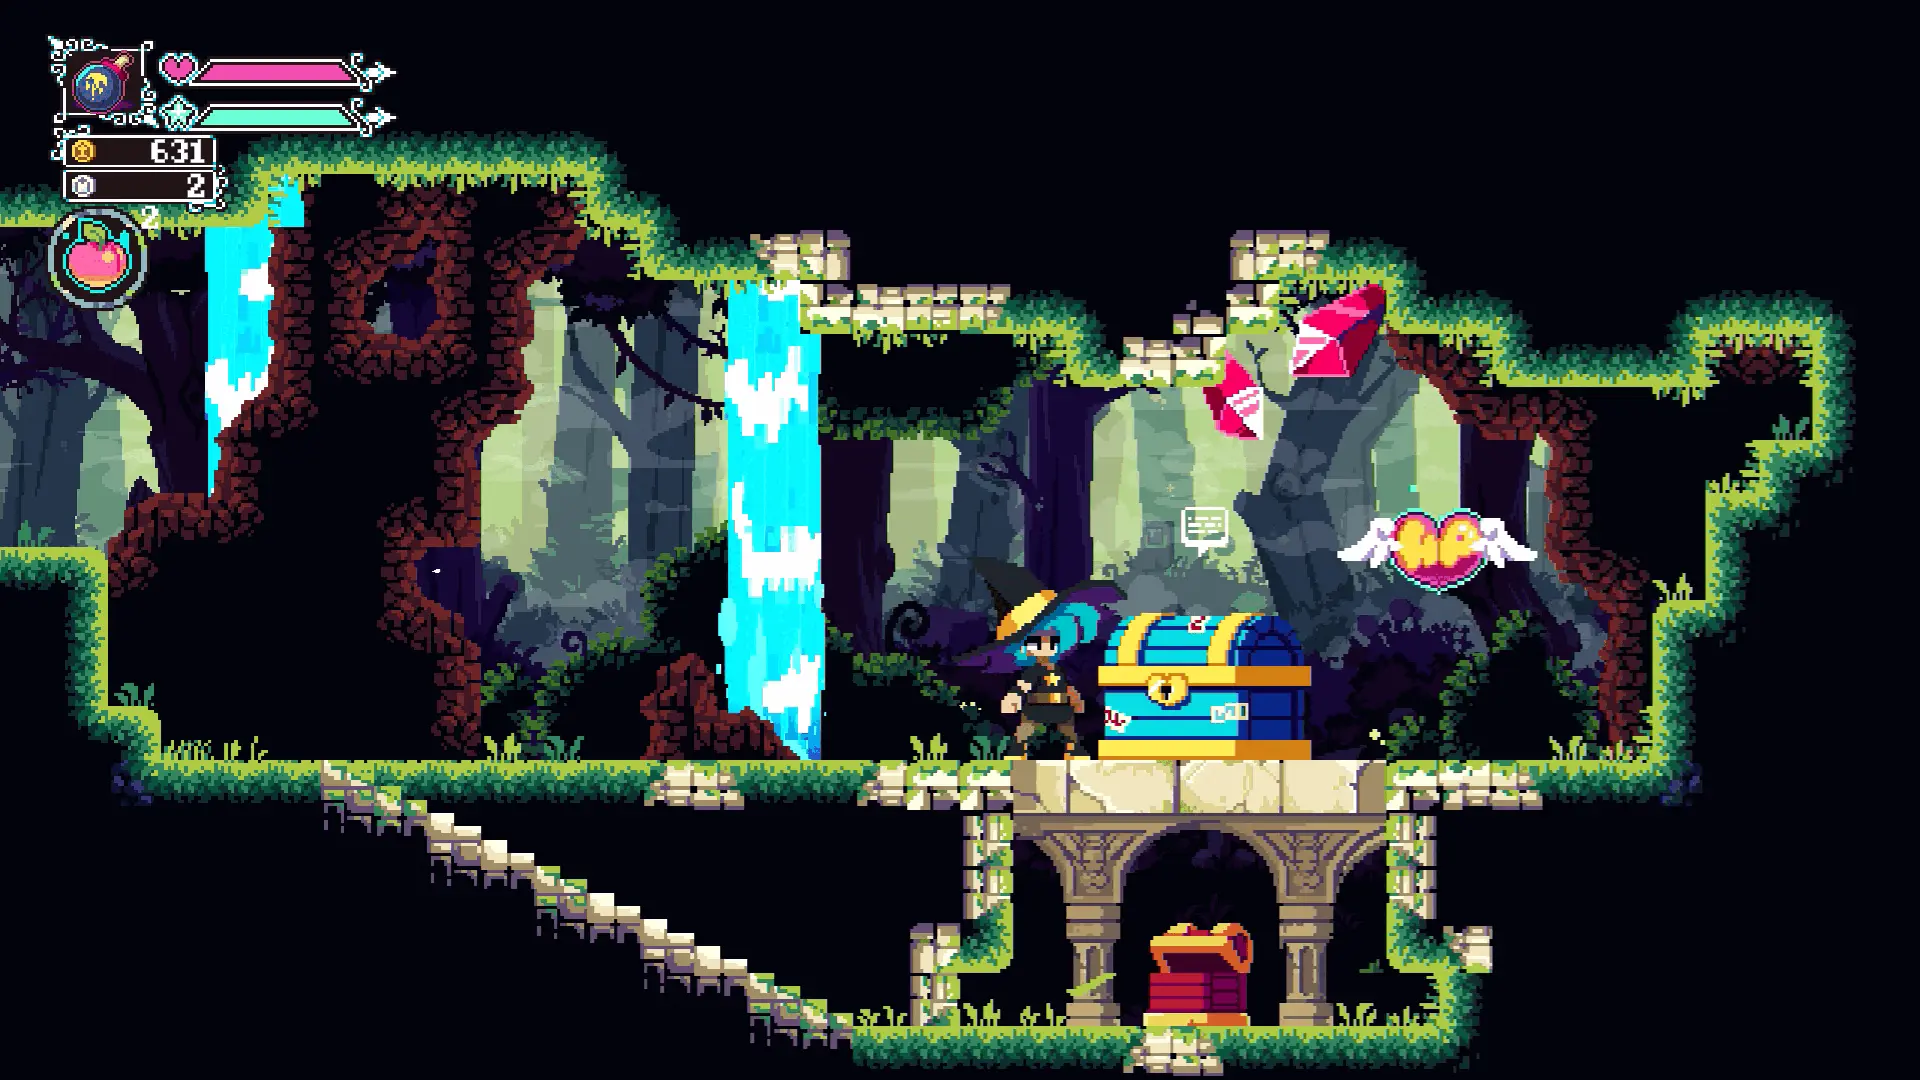
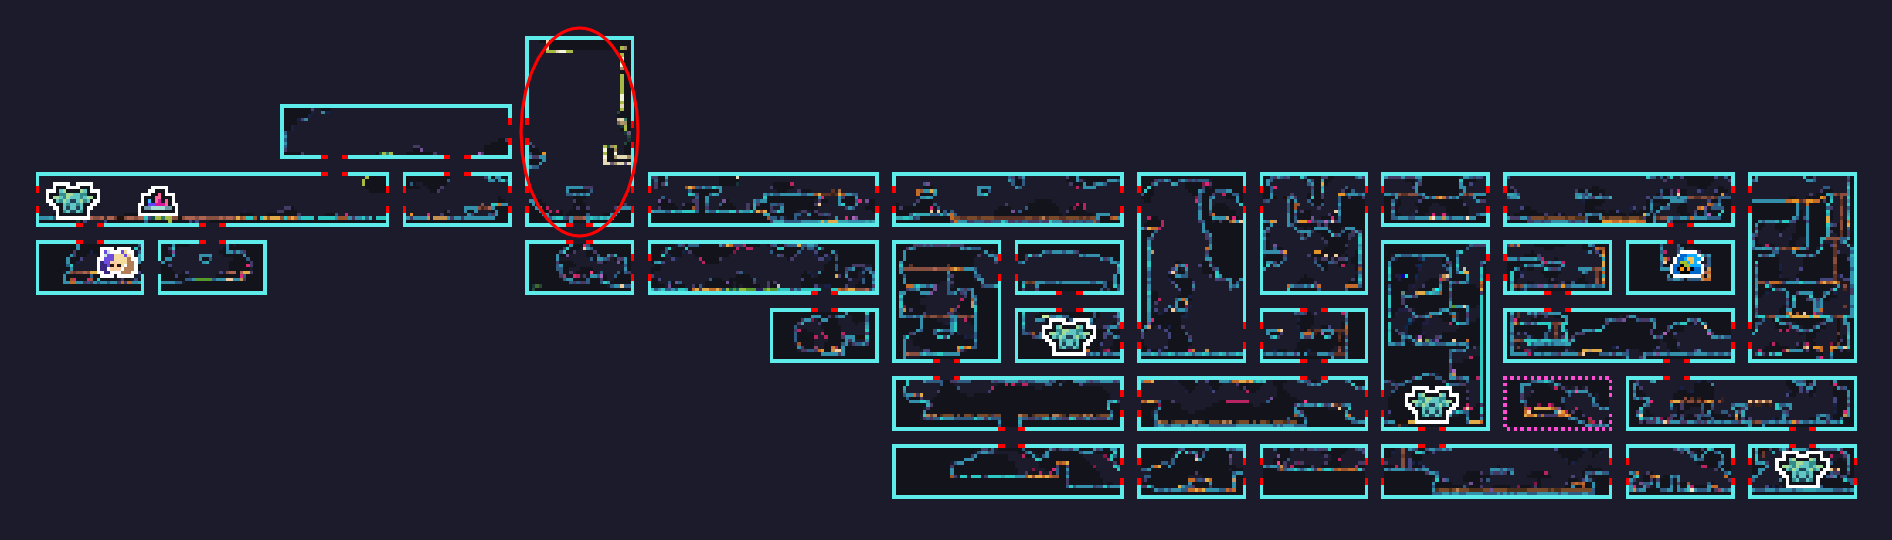
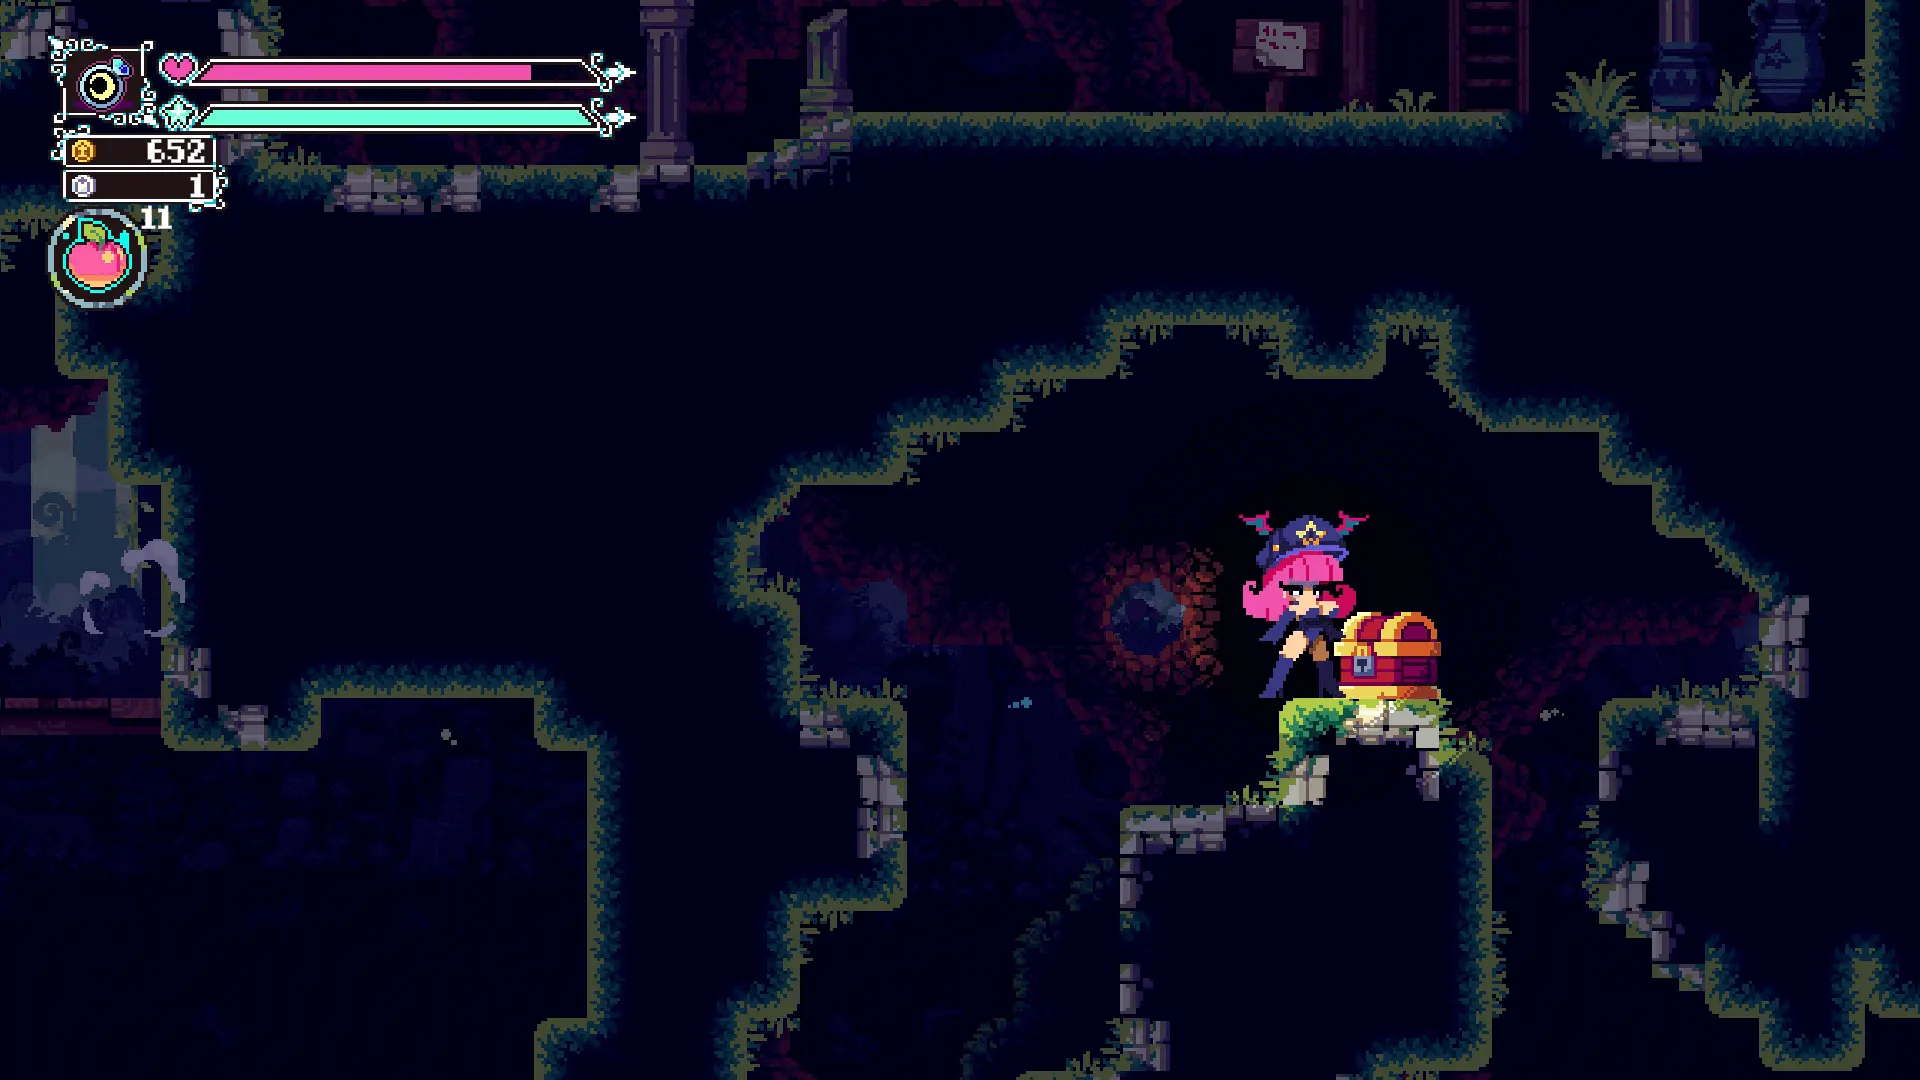
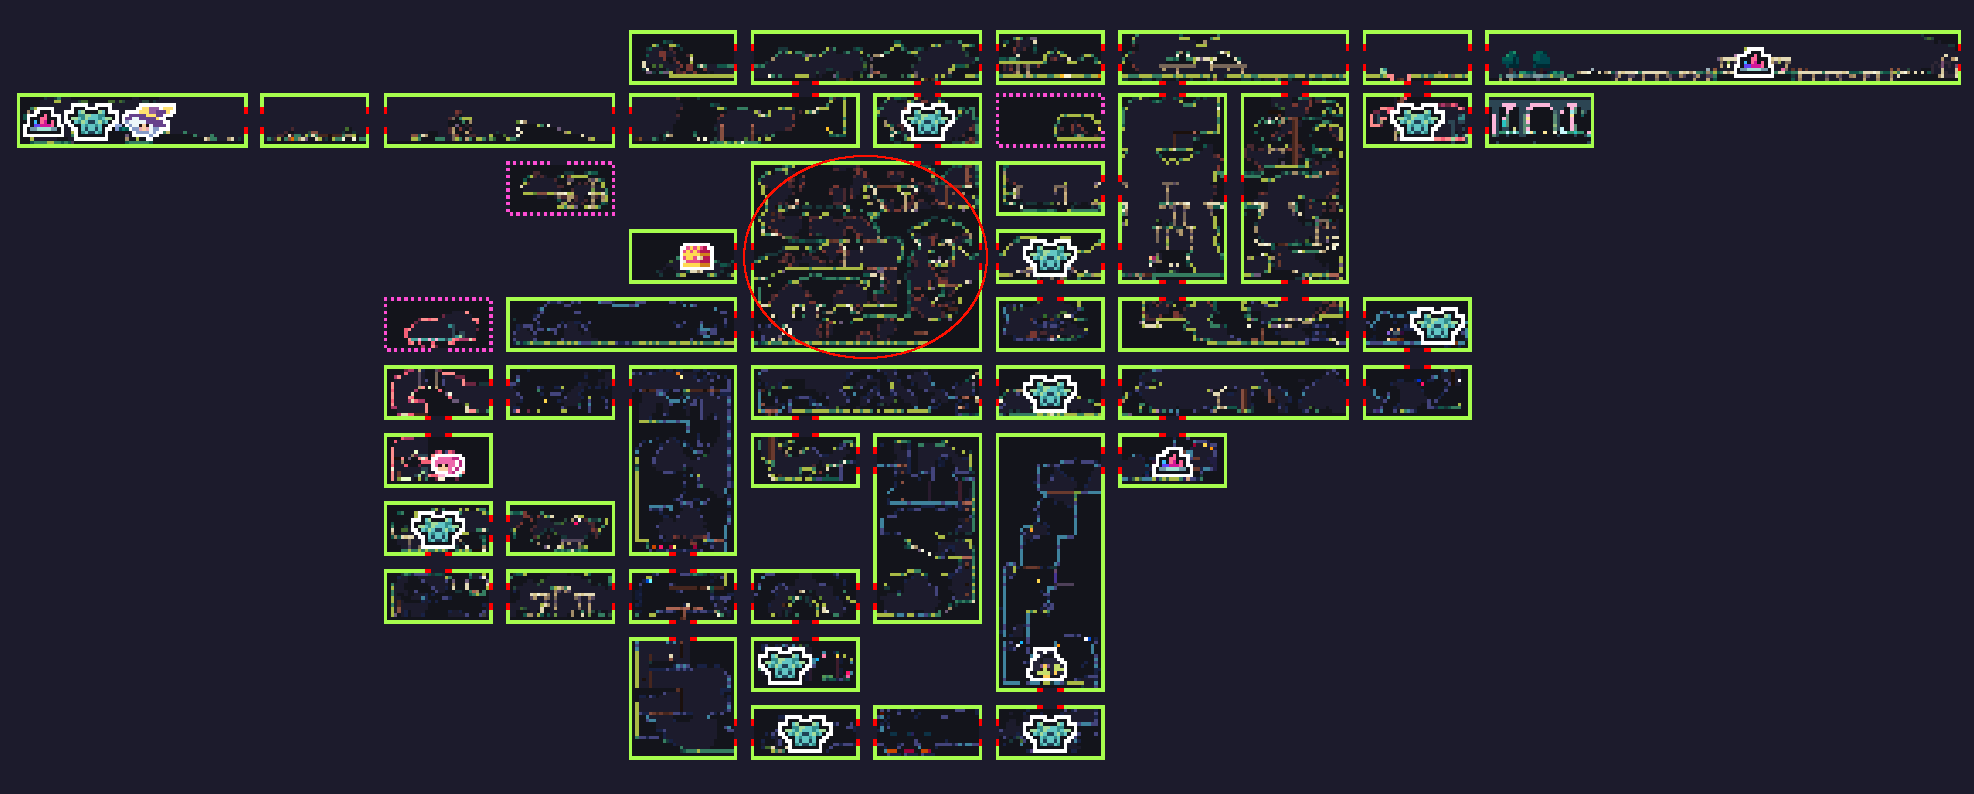
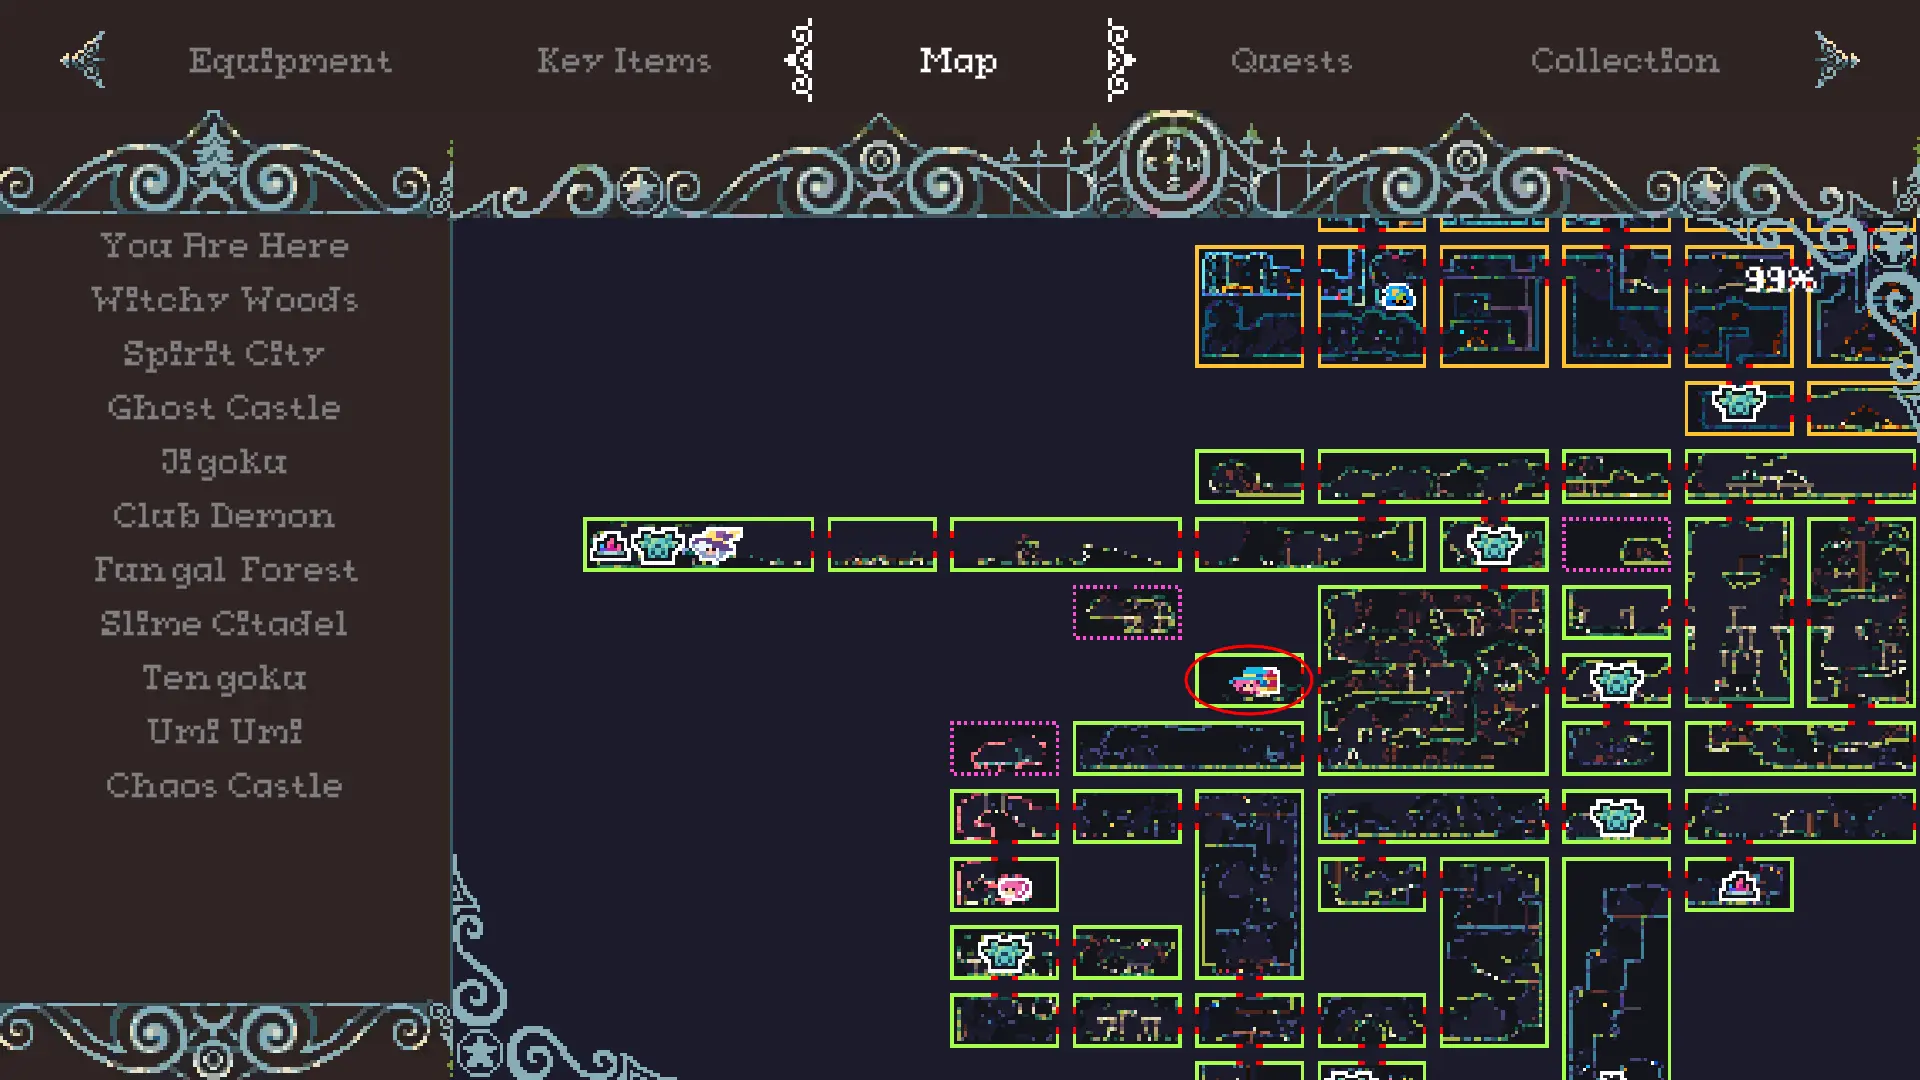
The Mimic Chest Key required to complete the “Giant Chest Key” quest given by Mimi. It is obtained by looting a Witchy Woods room. This room can be found below a bridge in Witchy Woods. Location of the chest:
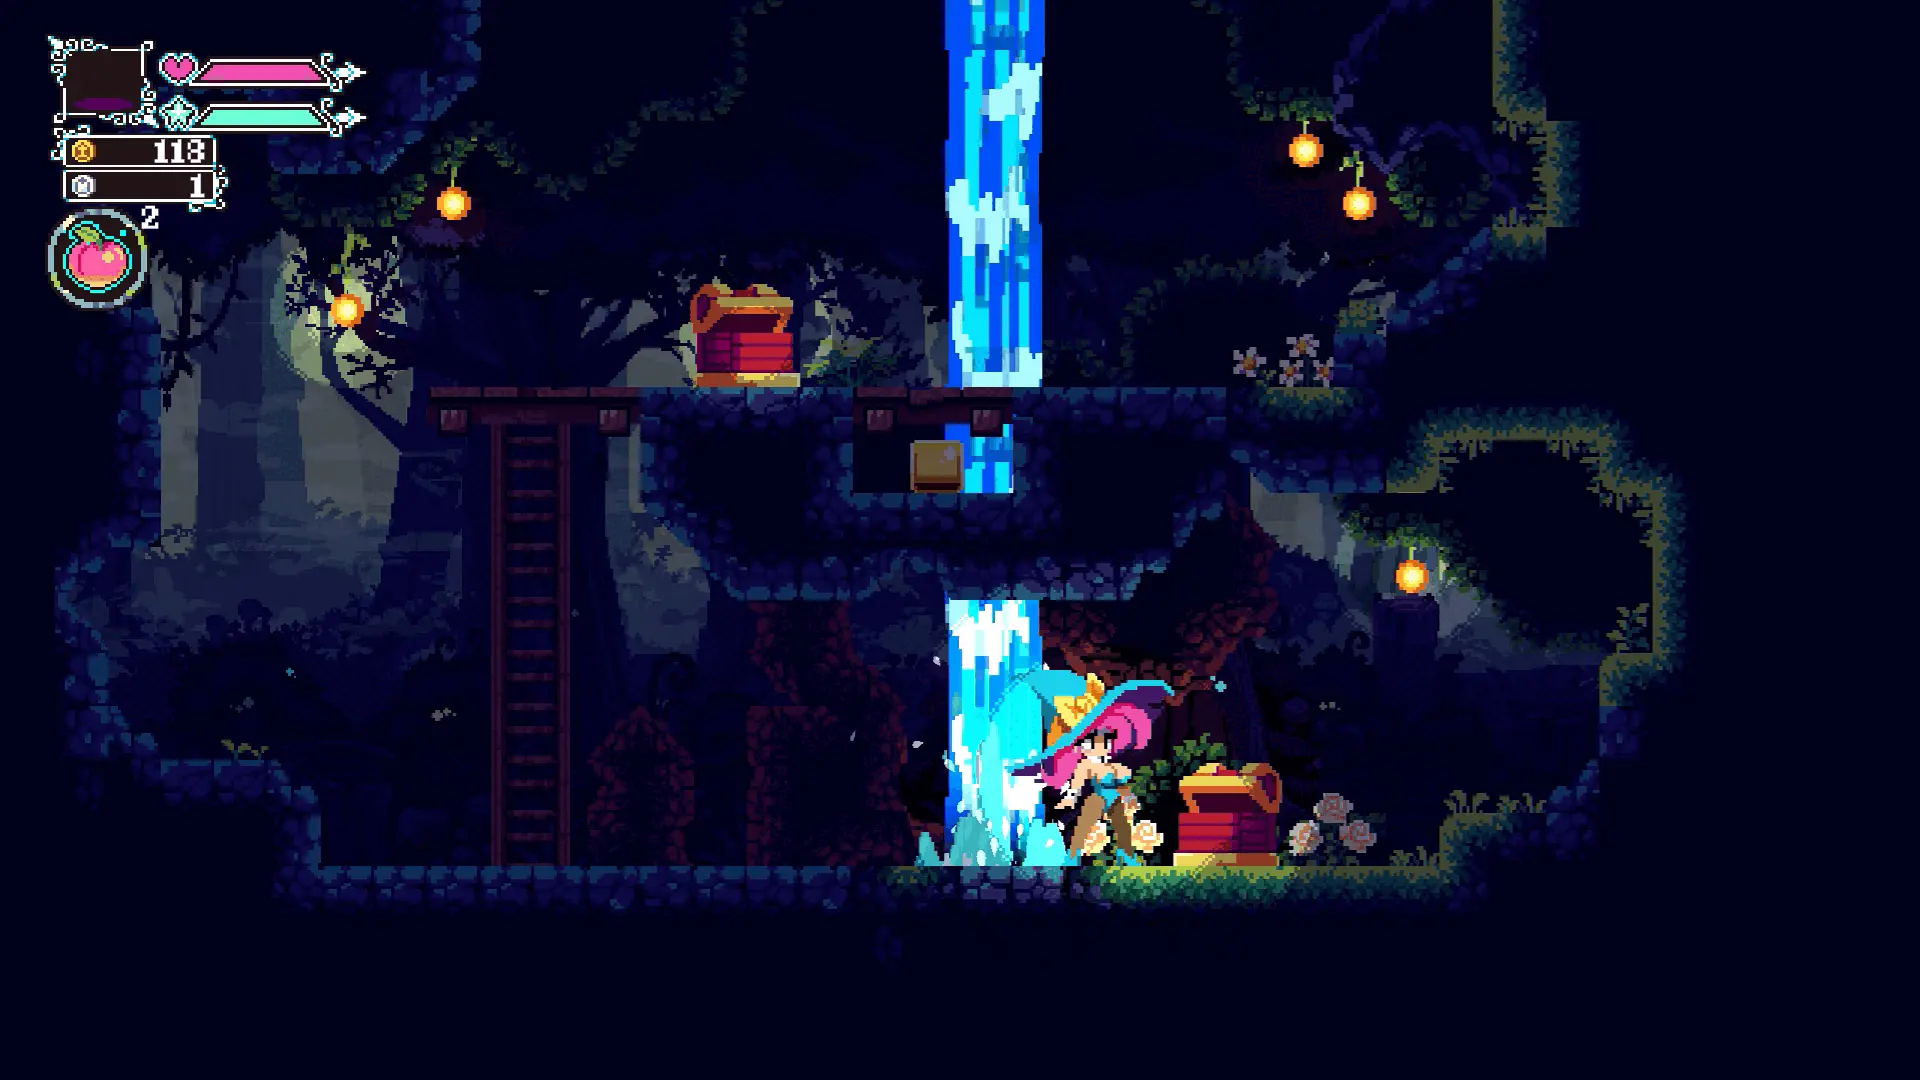
Belle’s Cowbell

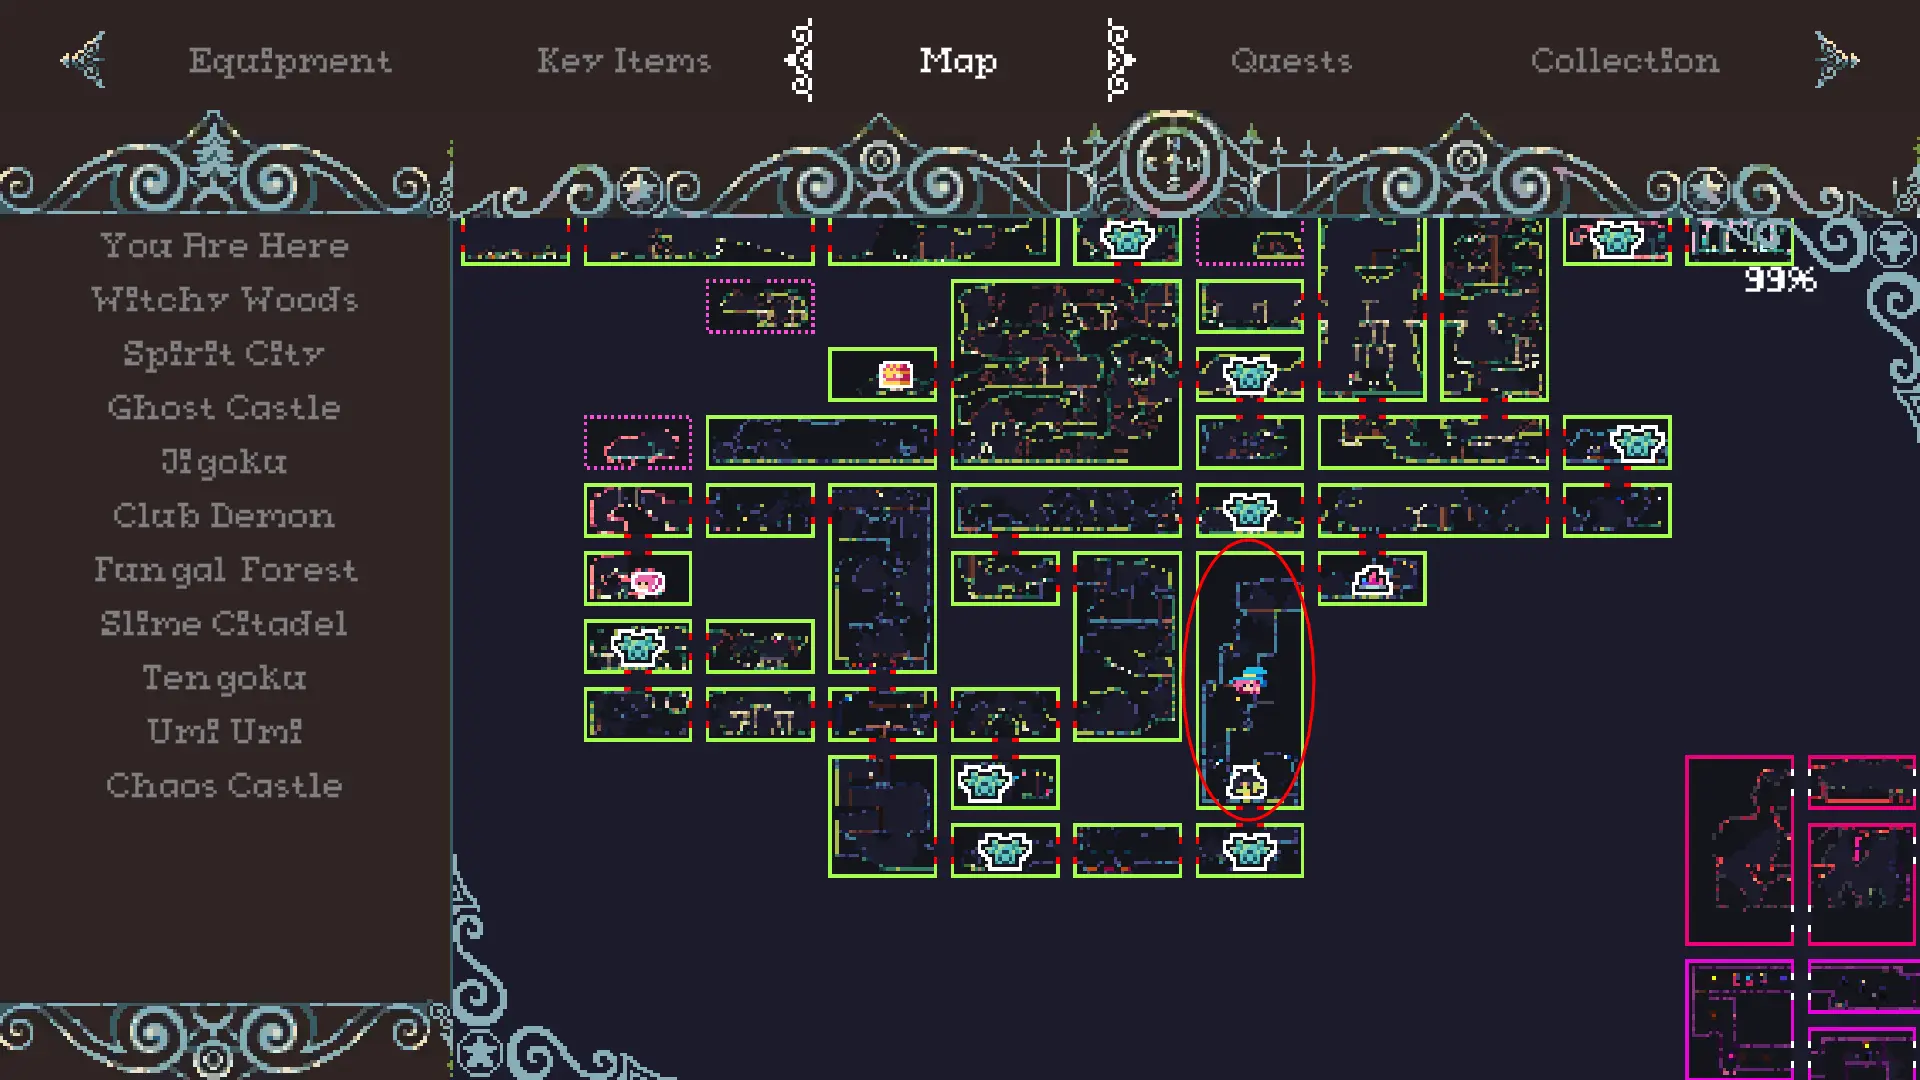
Belle’s Cowbell is required to complete the “Need My Cowbell” quest given by Belle. It is obtained by looting a chest found in Witchy Woods. Location of the chest:


Goblin Headshot

Goblin Headshot is required to complete the “Model Goblin” quest given by Gobliana and is obtained by interacting with Gobliana for the first time:
Key Items – Part 2
Goblin Business Card

The Goblin Business card is received by the player as part of the Model Goblin quest, after the player gives Legs the Goblin Headshot that Gobliana gave to the player. Legs can be found in the Goblin Man cave room that serves as the entrance to the Goblin Caves of Witchy Woods:
Momo Server Admin Password

The Momo Robot Server Admin Password is obtained by interacting with MomoRobot’s station for the first time. The MomoRobot station houses MomoRobot.
Gobliana’s Luggage

Gobliana’s Luggage is an item needed to complete the quest “Emotional Baggage”. This item can be found in the battle room of the sub-boss Ex-boyfriend.
Bundle of Clothes
The Bundle of Clothes is an item needed to complete the quest “Panty Raid”. This item can be found in the treasure room of the sub-boss Willow the Whiff.
Delicious Milk

The Delicious Milk item is received from Belle at the start of the quest “Deluxe Milkshake”.
Belle’s Milkshake
The Deluxe milkshake is received by Kyoni, after giving her the Delicious Milk item as part of the quest “Deluxe Milkshake”.
Hellish Dango

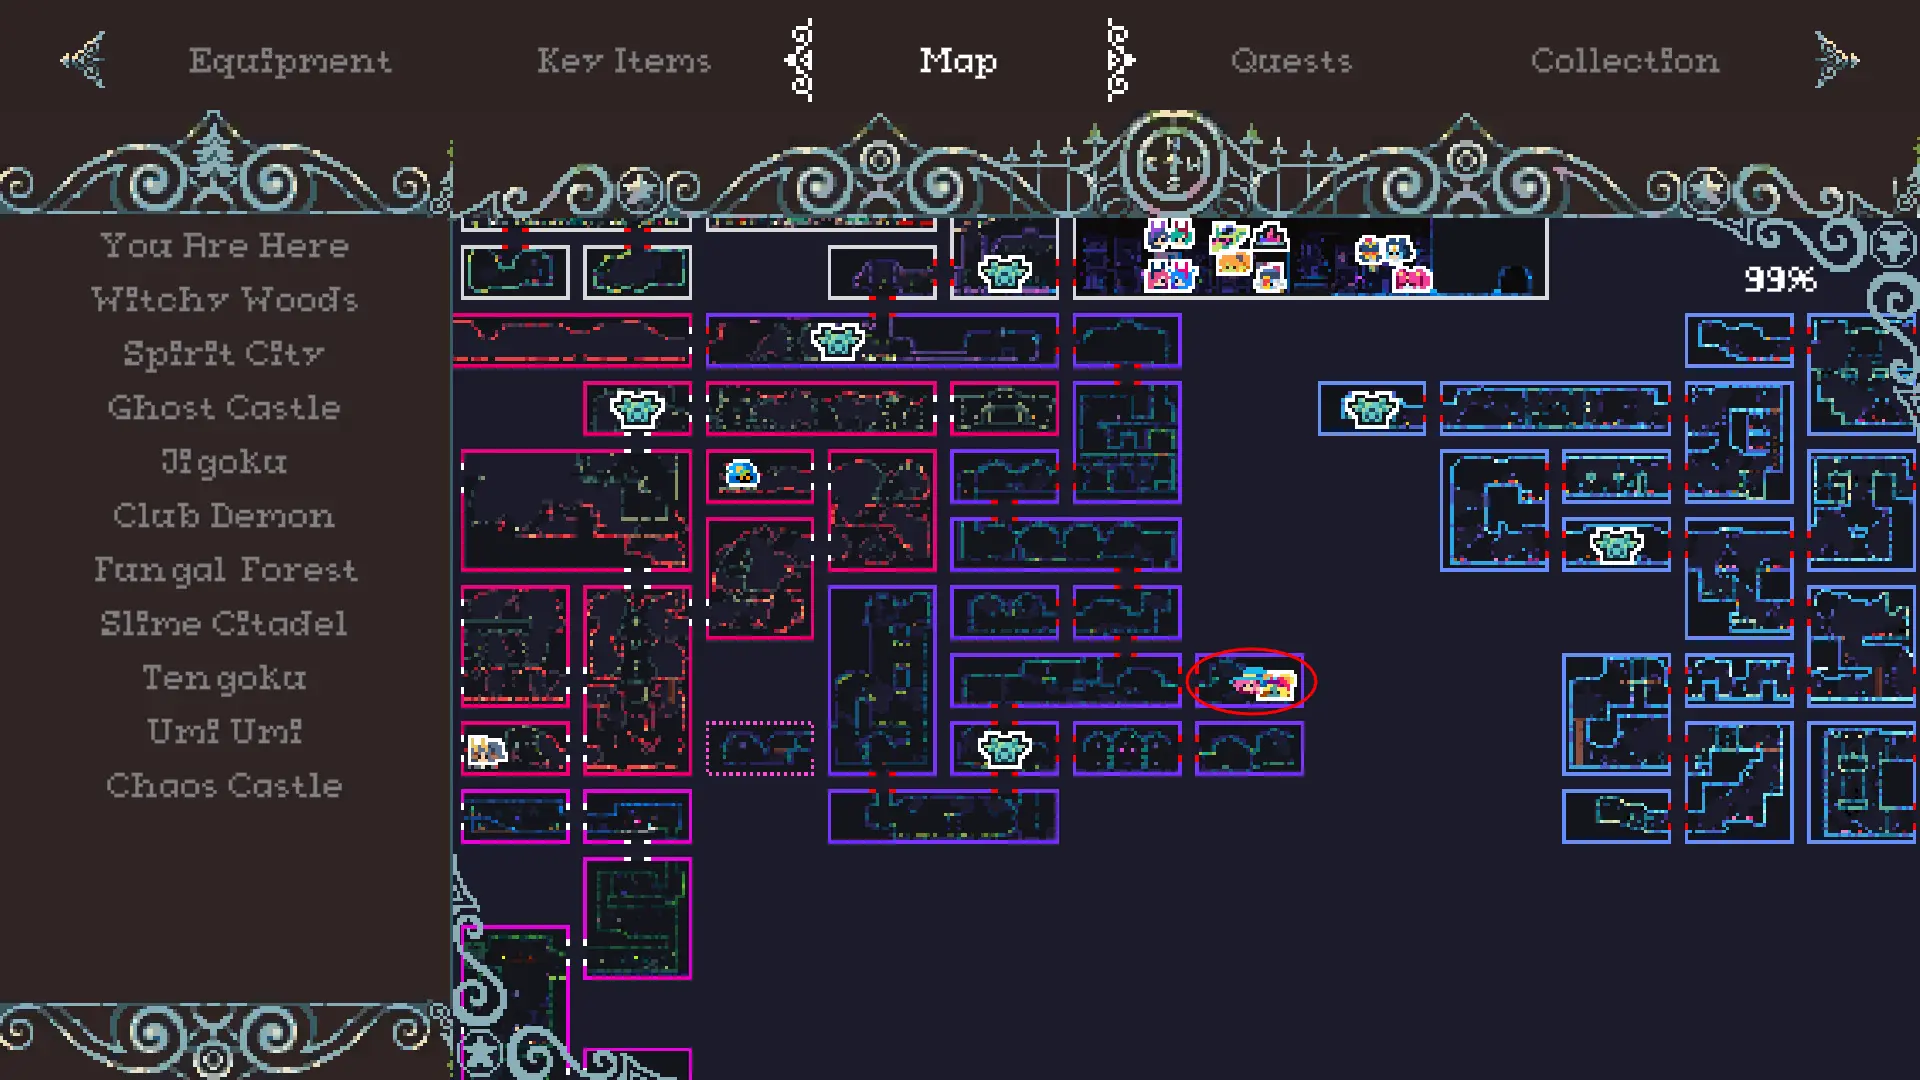
The Hellish Dango is required to complete the quest “Devilicious” and is obtained by looting the abandonment apartment room within Shady Alley of Spirit City:
Legendary Halo

The legendary halo is obtained by looting a chest in the treasure room of the sub-boss Cloudia. It is required to complete the quest “Legendary Chewtoy”. Location of the chest:

Silky Slime

The silky slime is required to complete the quest: “Find the Silky Slime”. The silky slime is obtained by looting a chest within one of the Slimy Depths rooms of Slime Citadel:

Angel Letter

The angel letter is required to complete the quest “Long-distance Relationship”. The angel letter is given at the start of the quest by Gabrielle.
Demon Letter

The demon letter is required to complete the quest “Long-distance Relationship”. The demon letter is given in return for giving Bad Boy the angel letter from Gabrielle.
Blue Jelly

The blue jelly is required to complete the quest “Jelly Mushroom”. The blue jelly is found in a chest within fungal forest:
Heavenly Daikon
The heavenly daikon is required to complete the quest “What’s a Daikon?”. The heavenly daikon is found in a chest in fungal forest:
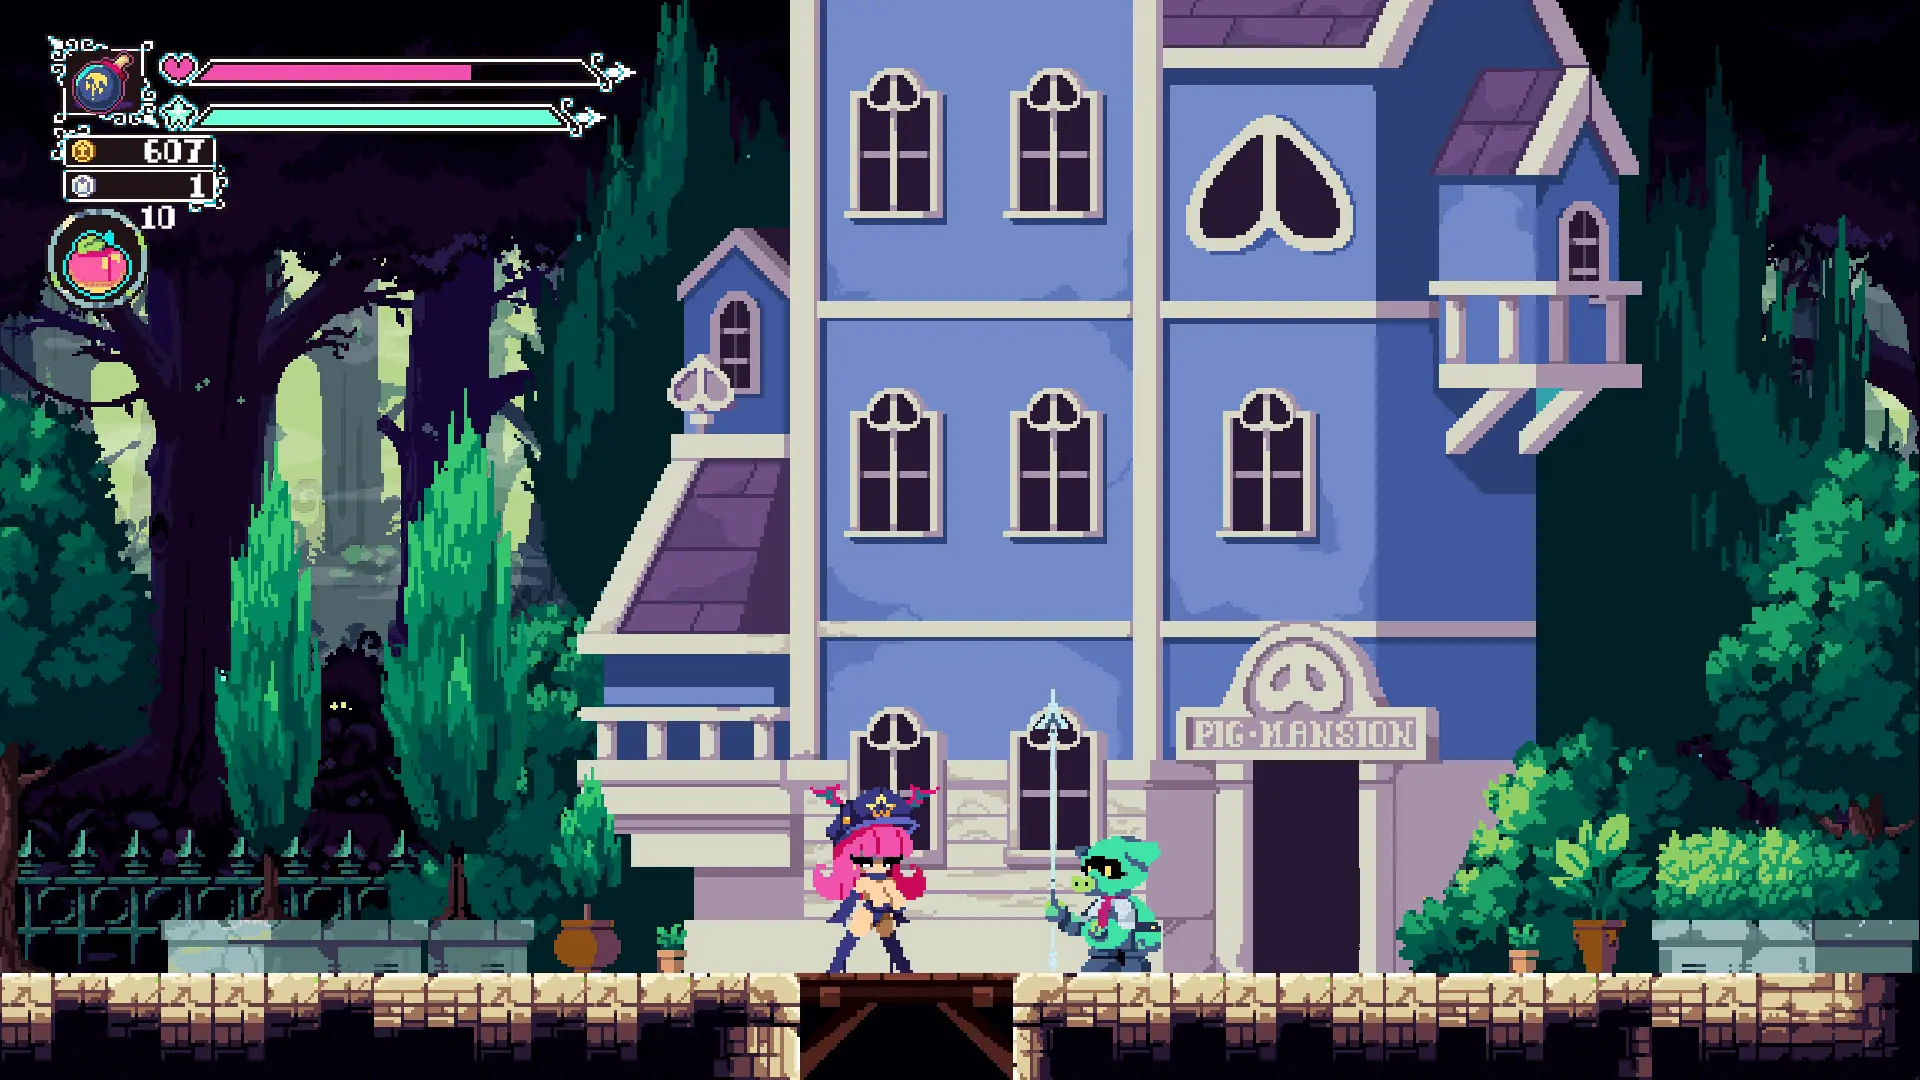
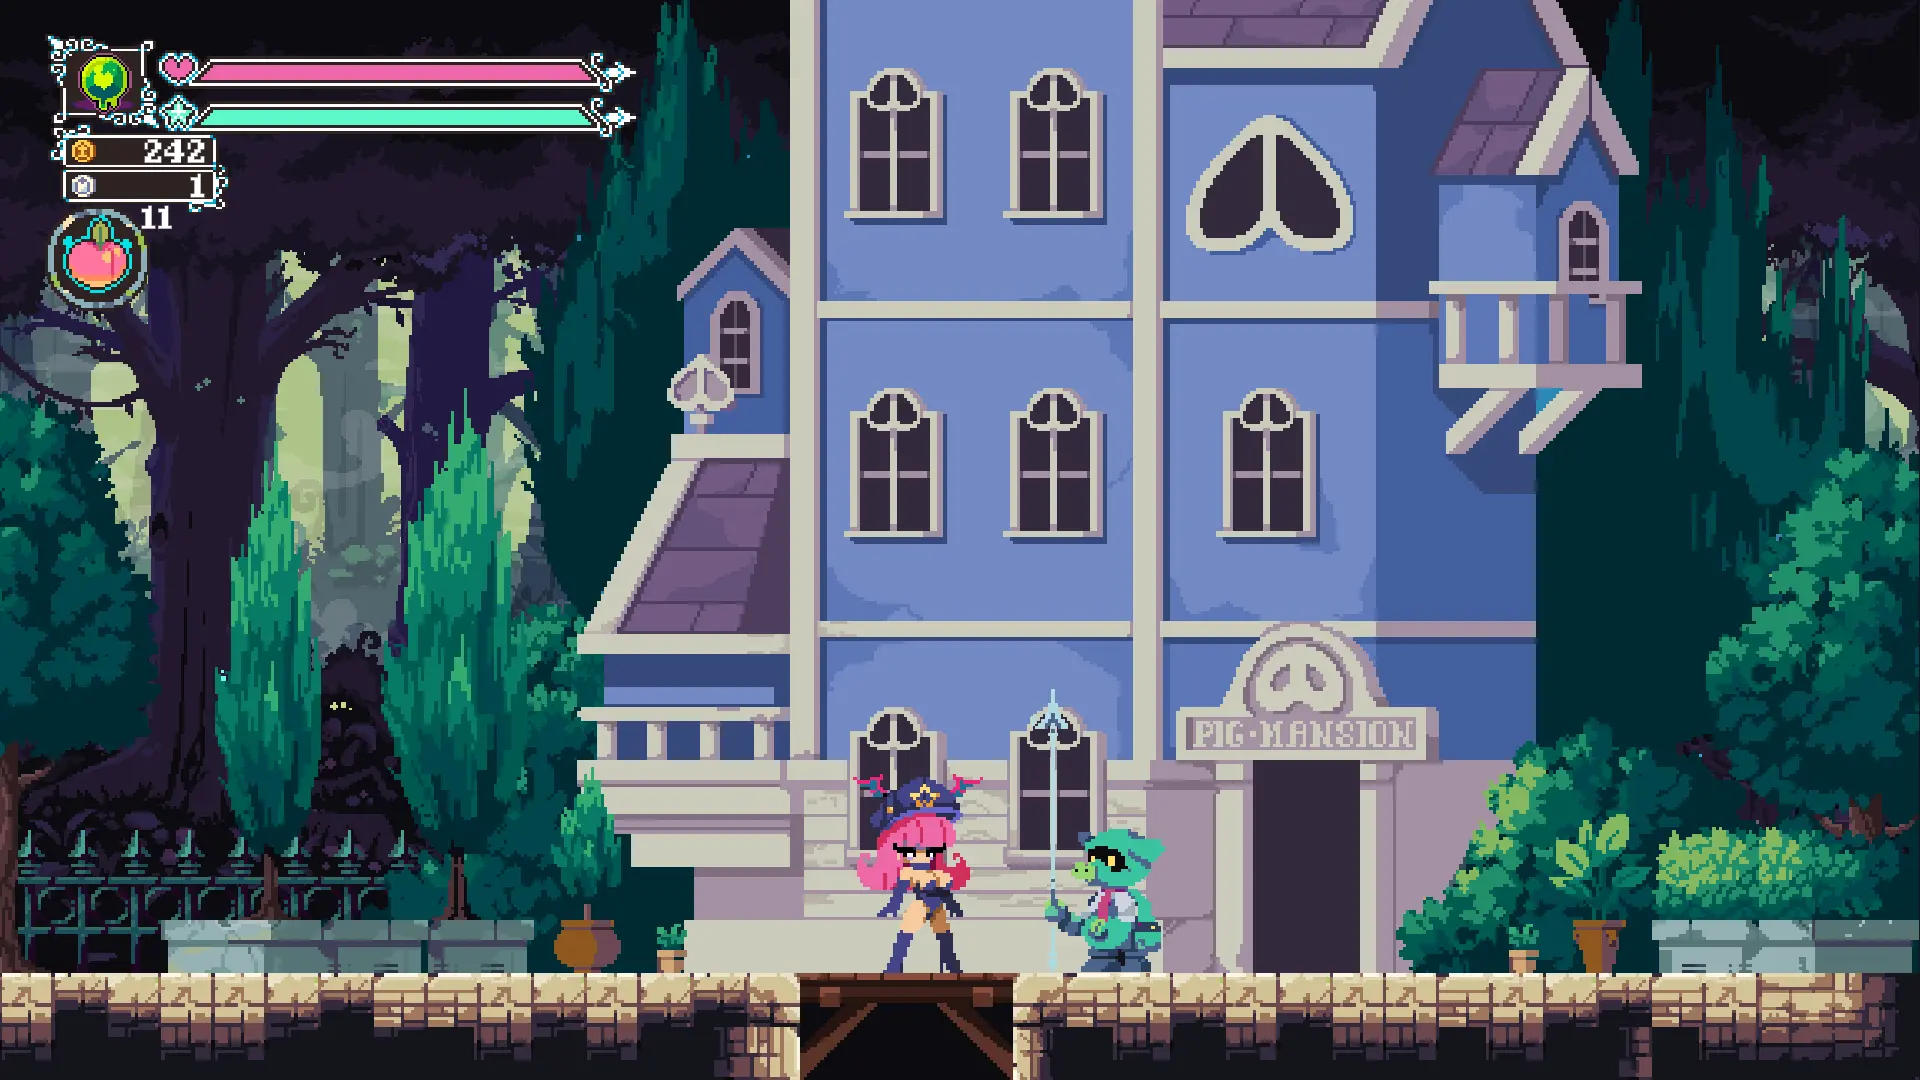
Maid Contract

The maid contract is an item required to complete the quest “Signing Bonus”. The contract is found in the Pig Mansion of Spirit City:

Deed to Fungal Forest

The deed to fungal forest is required to complete the quest “Tatil’s Tale” and is acquired by defeating the sub boss Fungella.
Red Wine

Red wine is an item required to complete the quest “Booze Bunny”. The item can be found in a chest within Witchy Woods’s largest room:
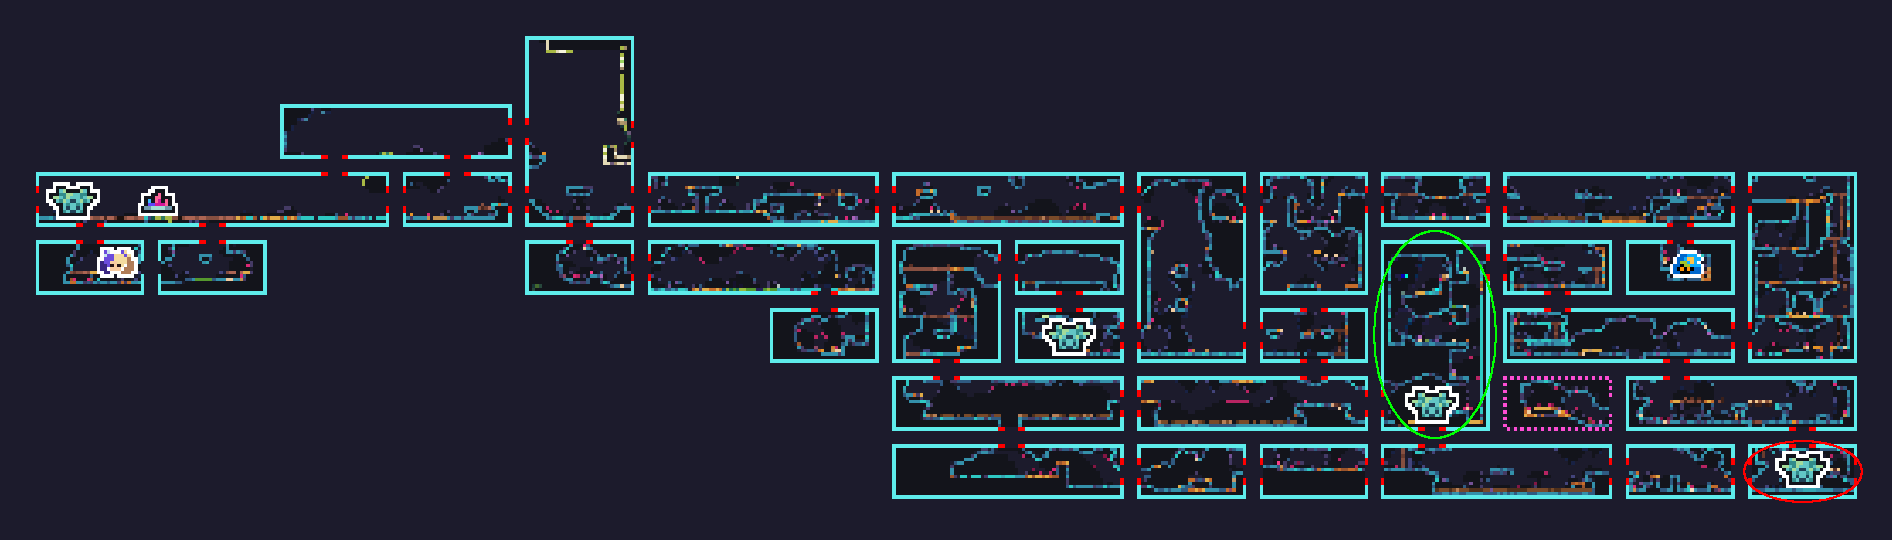
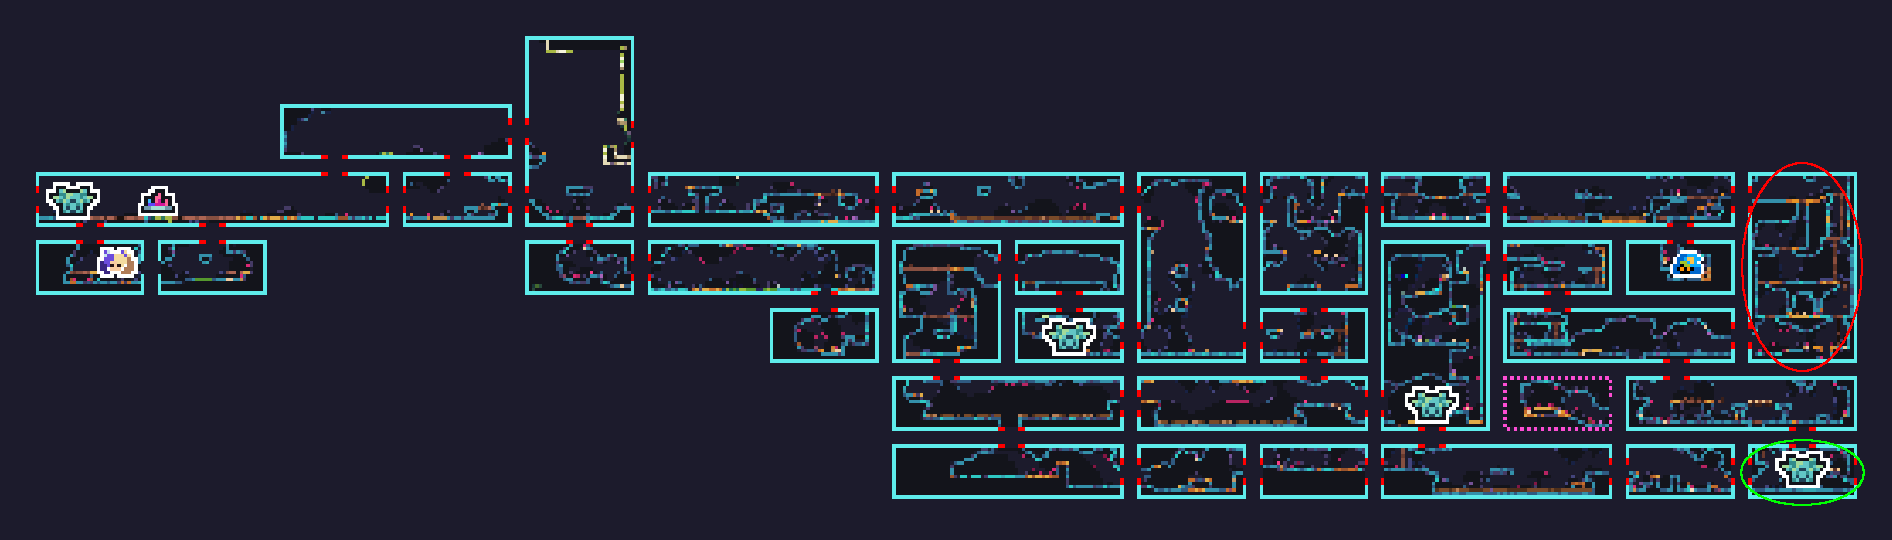
FlipWitch Janitor (Key & Door Locations) – Part 1
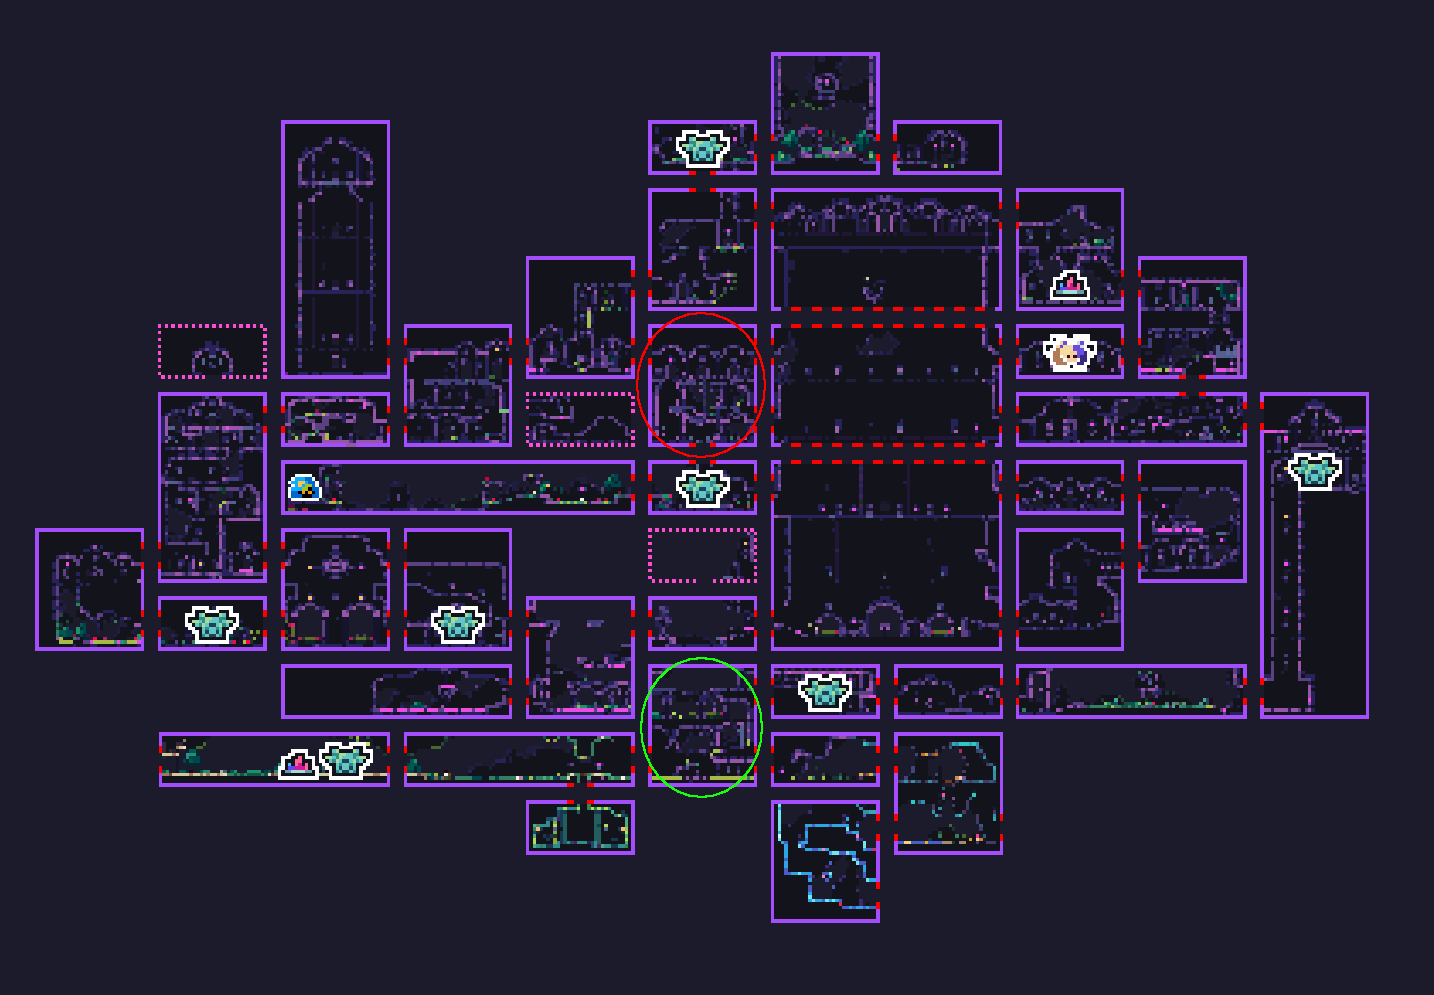
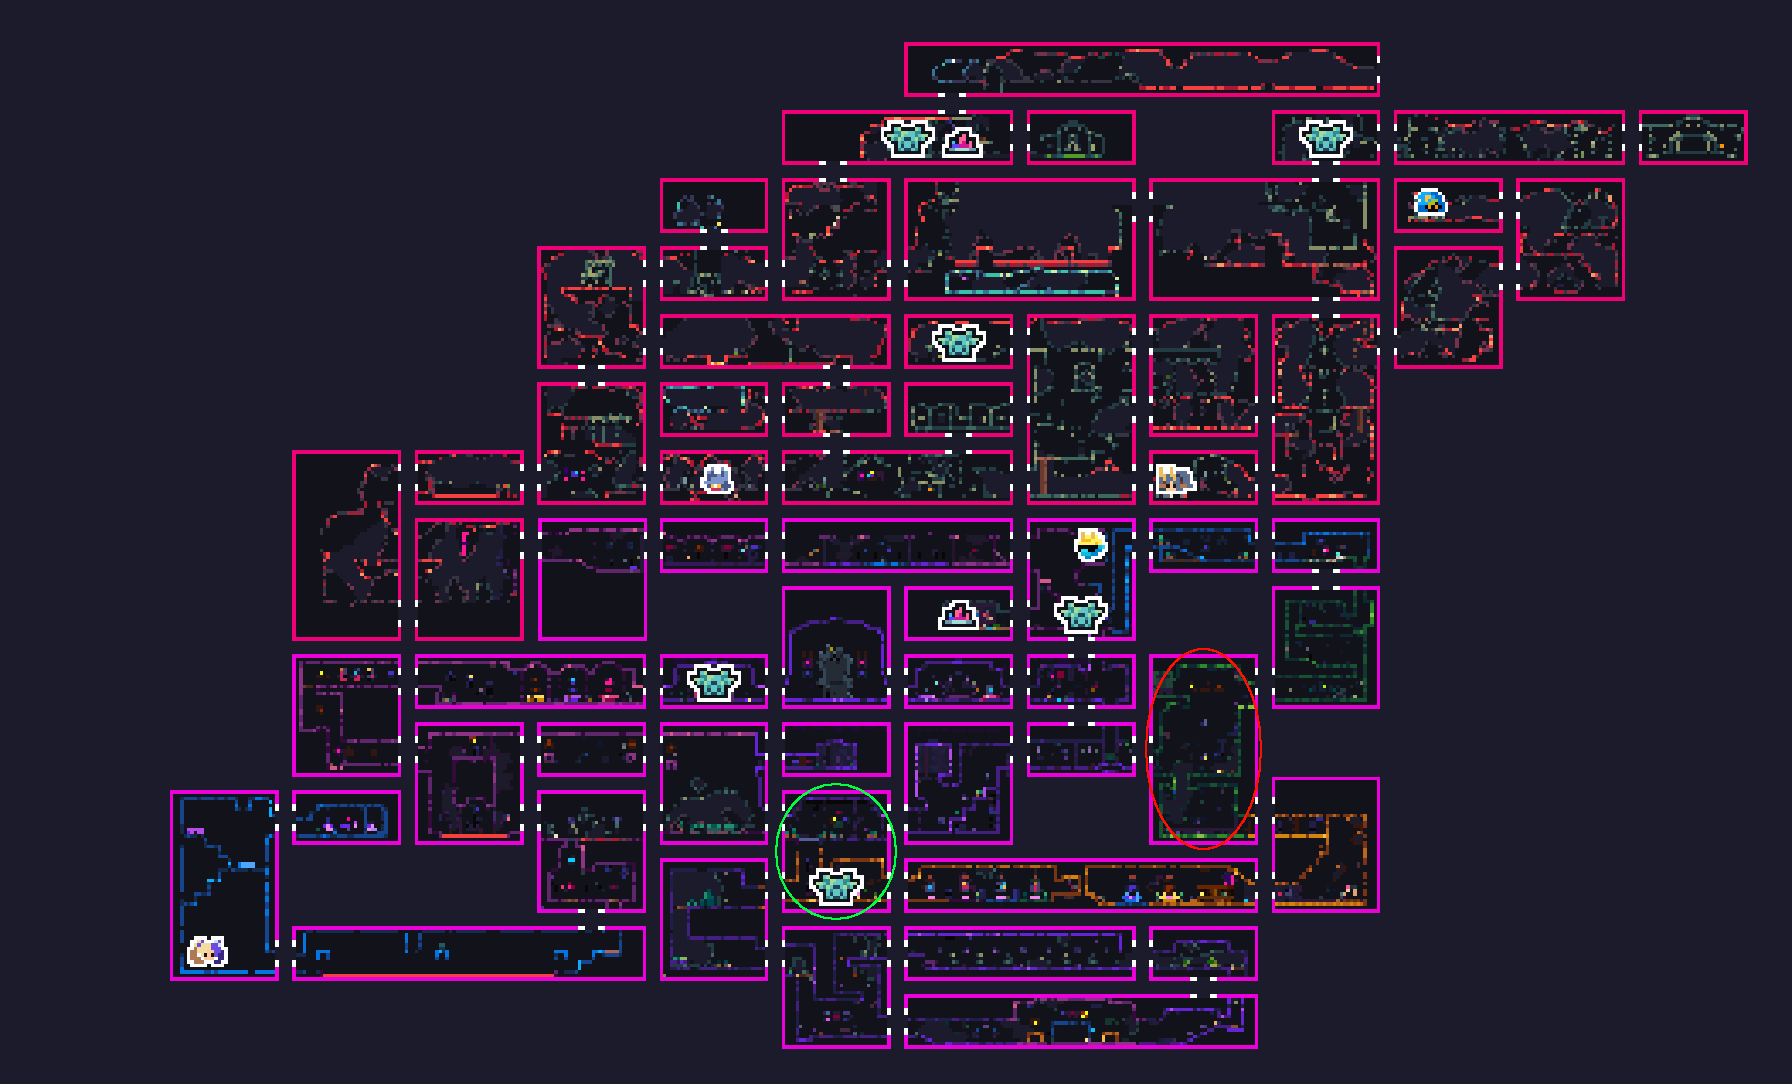
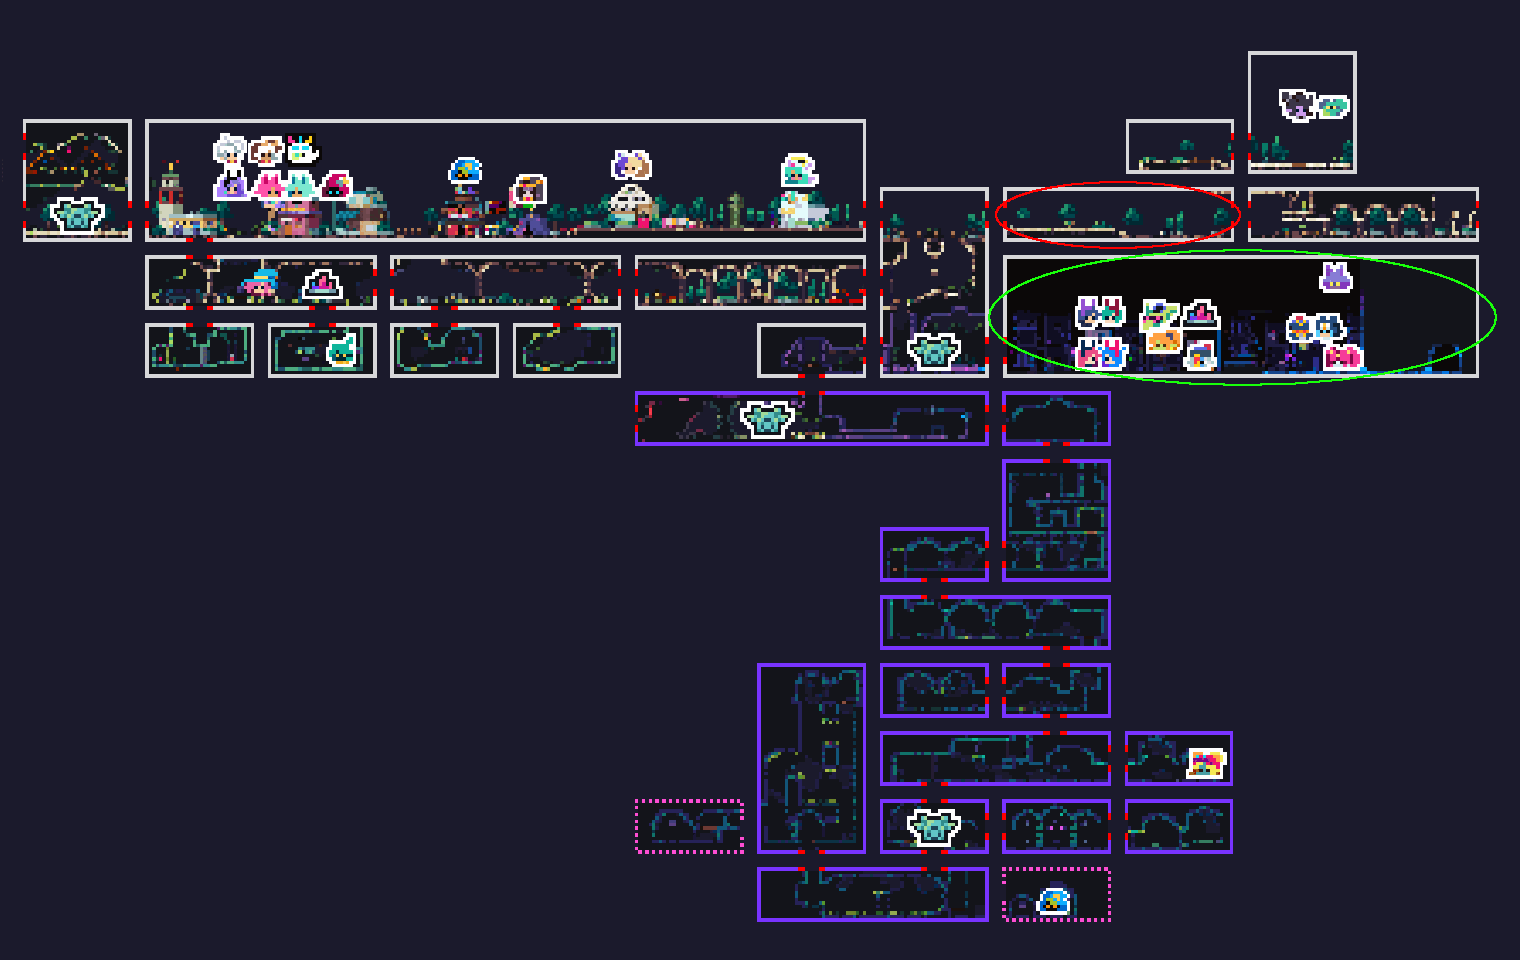
In this section, we’ll detail the keys that can be found in FlipWitch world and the doors that they unlock. The rooms of chests containing keys are shown in red and the rooms of doors that can be unlocked using those keys are shown in green. The keys will be separated into boss and non-boss keys.
Non-boss Keys
Witchwoods Rundown House Key (Witchy Woods)

The Witchwoods Rundown House Key is obtained by looting a chest found in Witchy Woods. This key opens the Witchwoods Rundown House door, which then creates a Spirit City shortcut for the player.

Ghostly Castle Key (Ghost Castle)

The Ghostly Castle Key is required to open the door to the entrance of Ghost Castle. It is found in a chest in one of the lower-level rooms of Spirit City.

Rose Garden Key (Ghost Castle)

The Rose Garden Key is needed to unlock the Rose Garden Door of Ghost Castle. It is found in a chest in the lowest room of the large 3 room interconnected centre of Ghost Castle.
Secrete Garden Key (Ghost Castle)

The Secrete Garden Key is needed to unlock the Secrete Garden Door of Ghost Castle. It is found in the chest of one of the surrounding centre rooms of the large 3 room interconnected centre of Ghost Castle.
Collapsed Temple Key (jigoku)

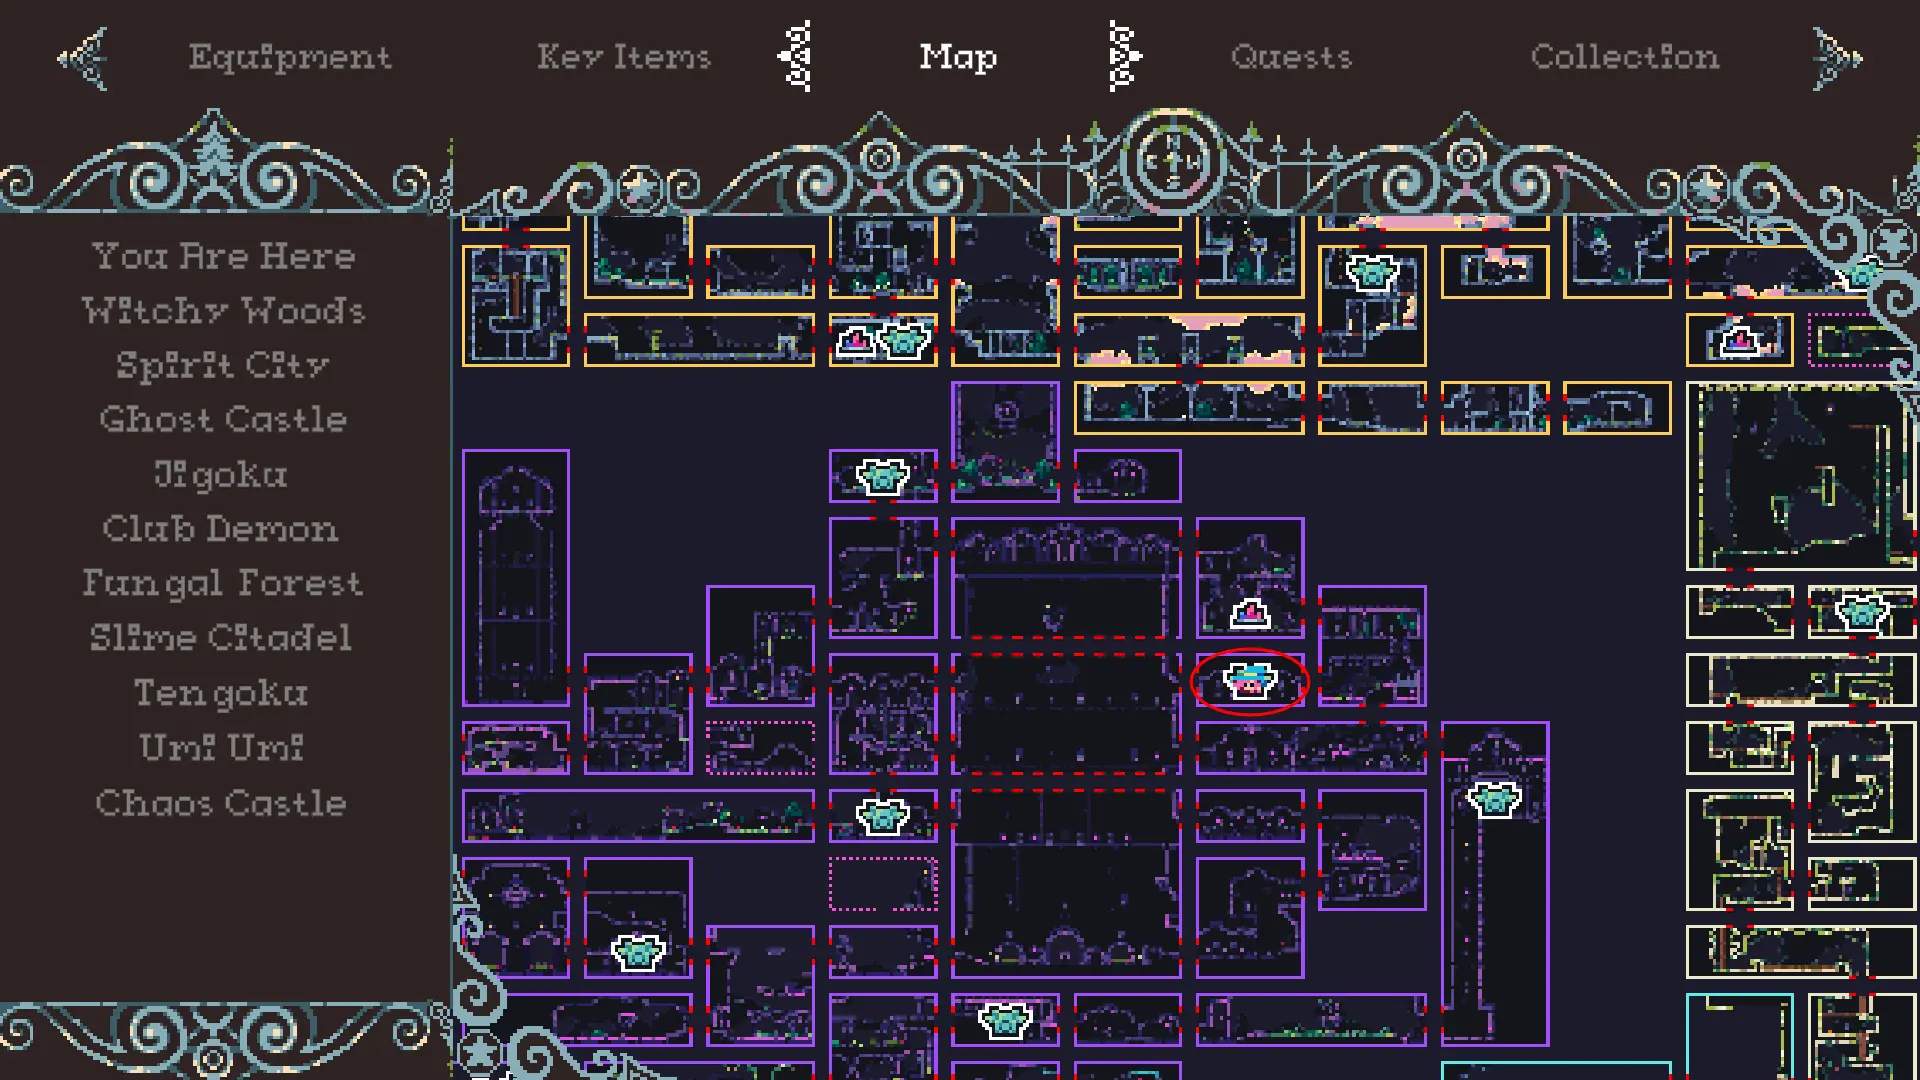
The Collapsed Temple Key is needed to unlock the Collapsed Temple door. It is found in the treasure room of the sub-boss Hot Guy:
Club Key (jigoku)

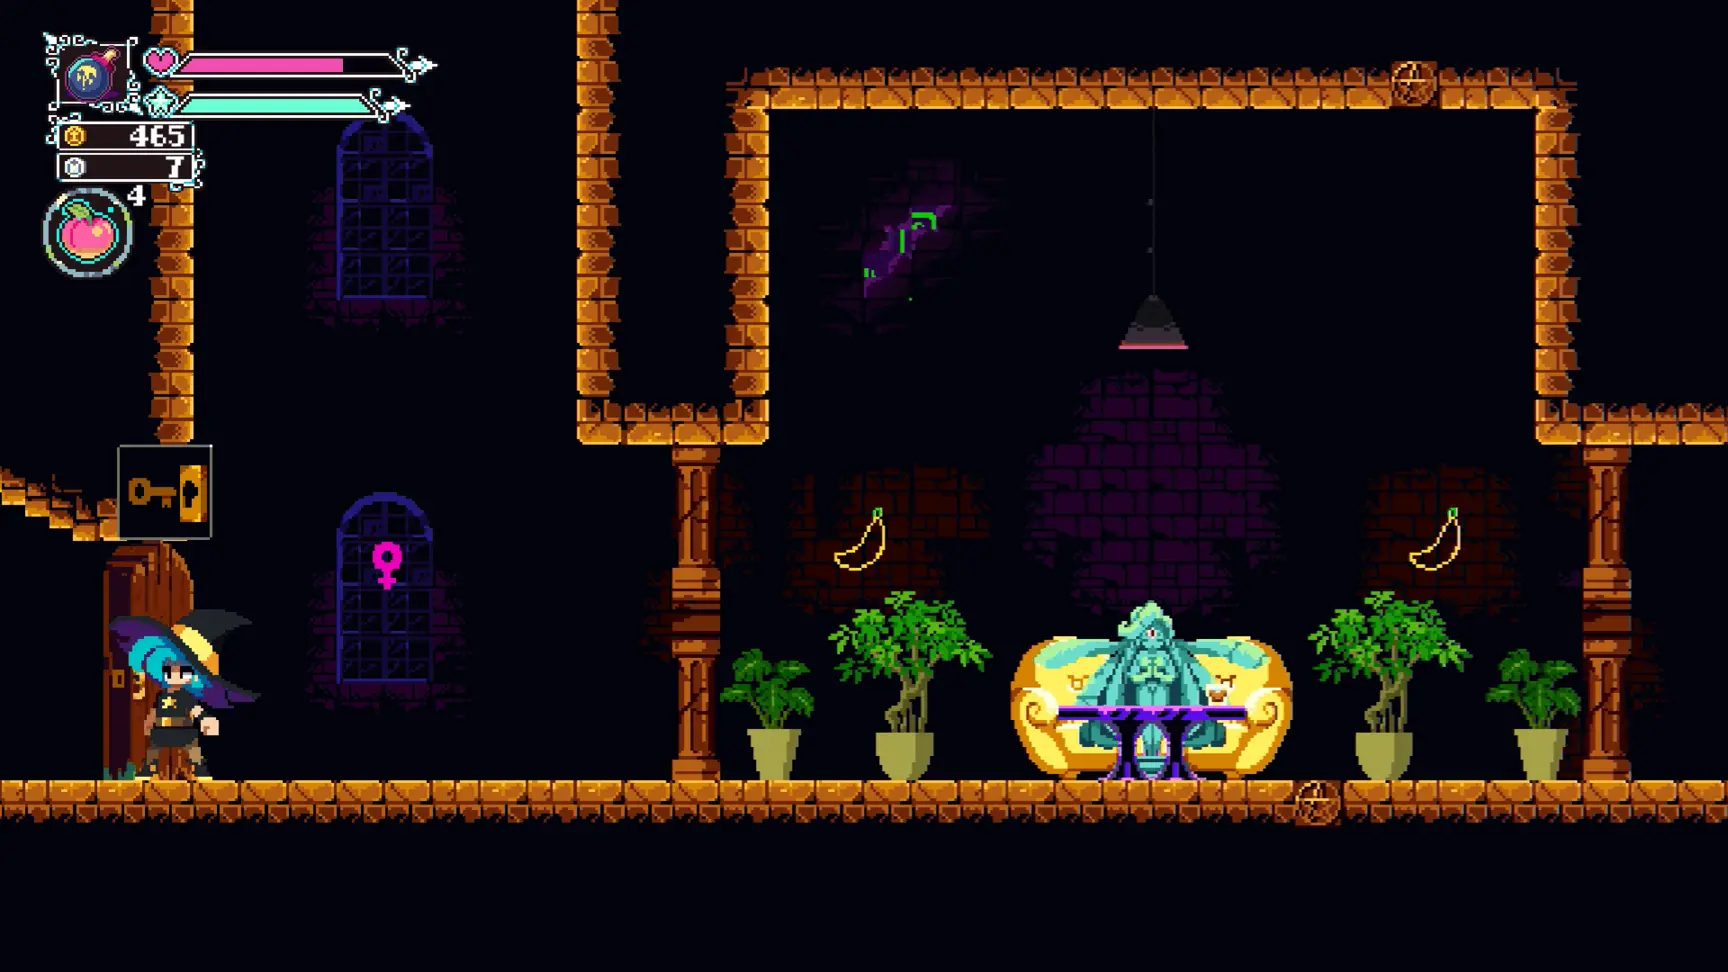
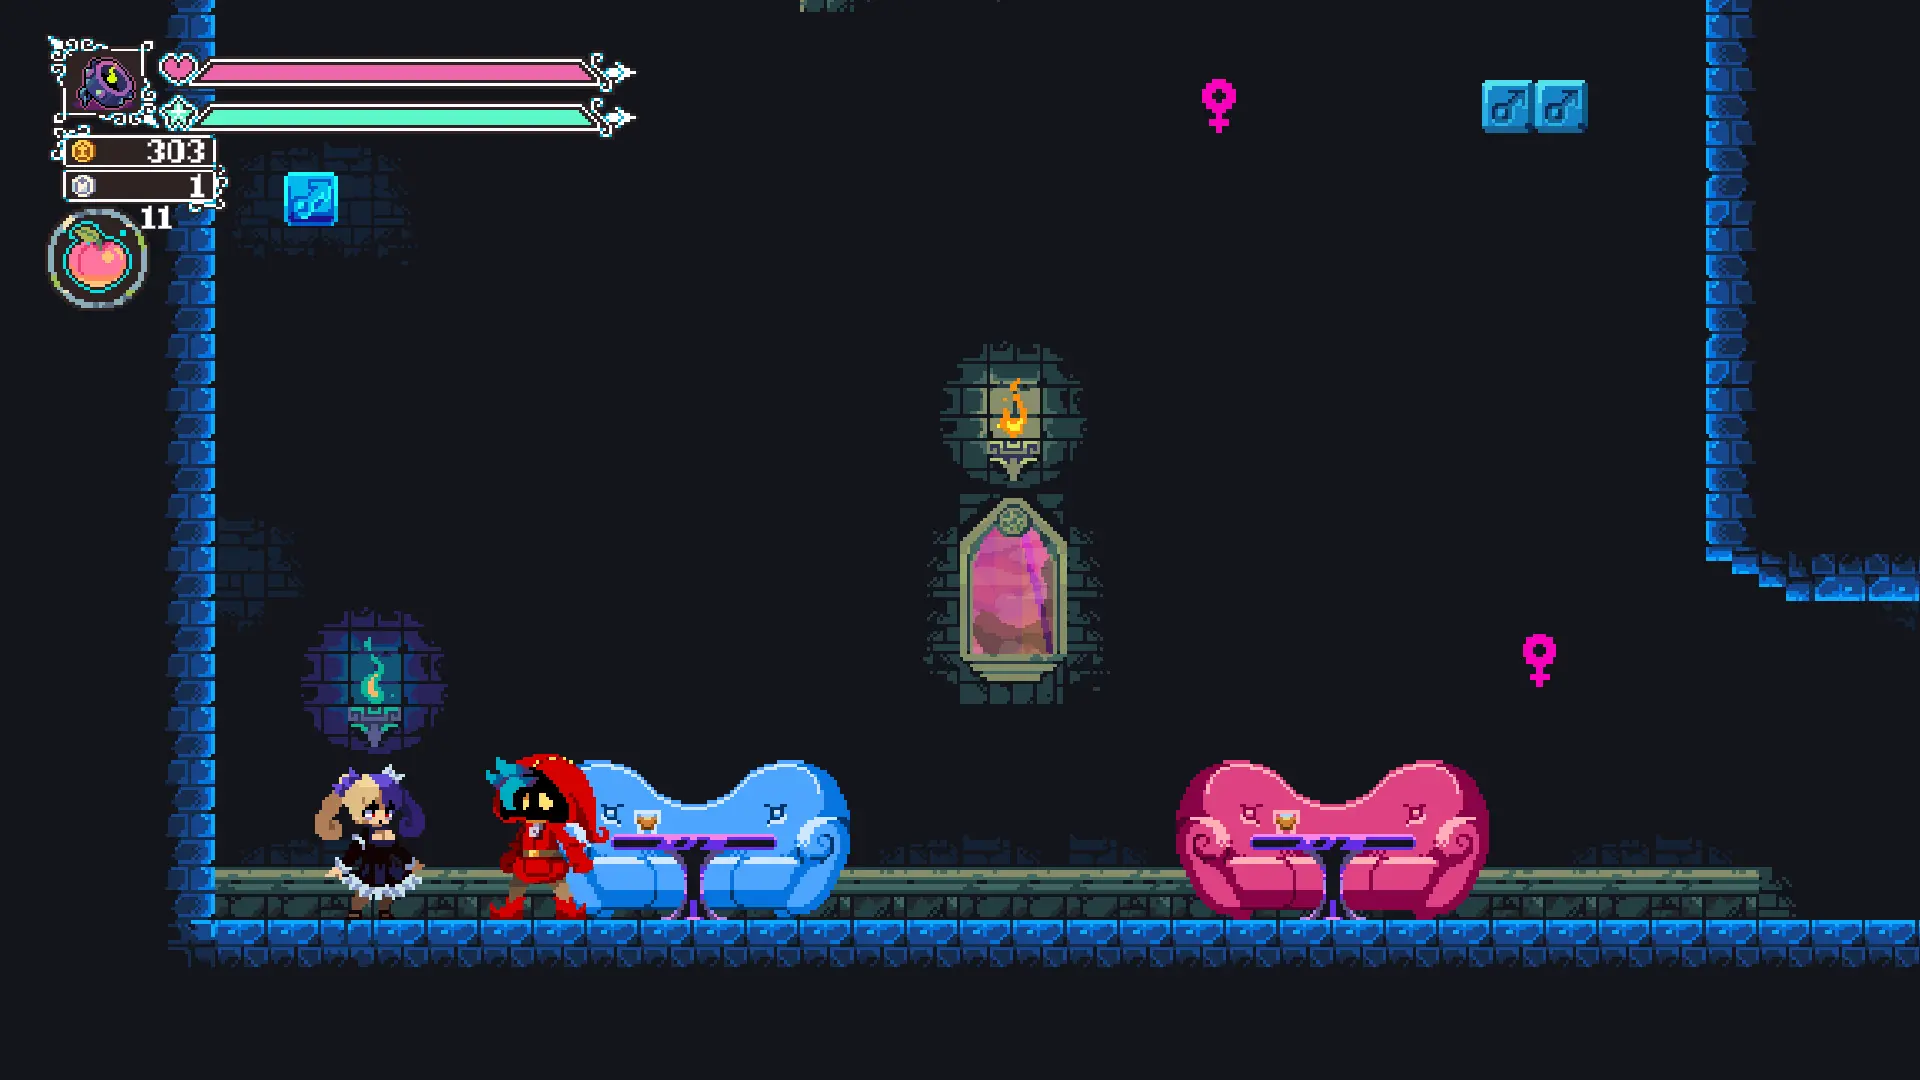
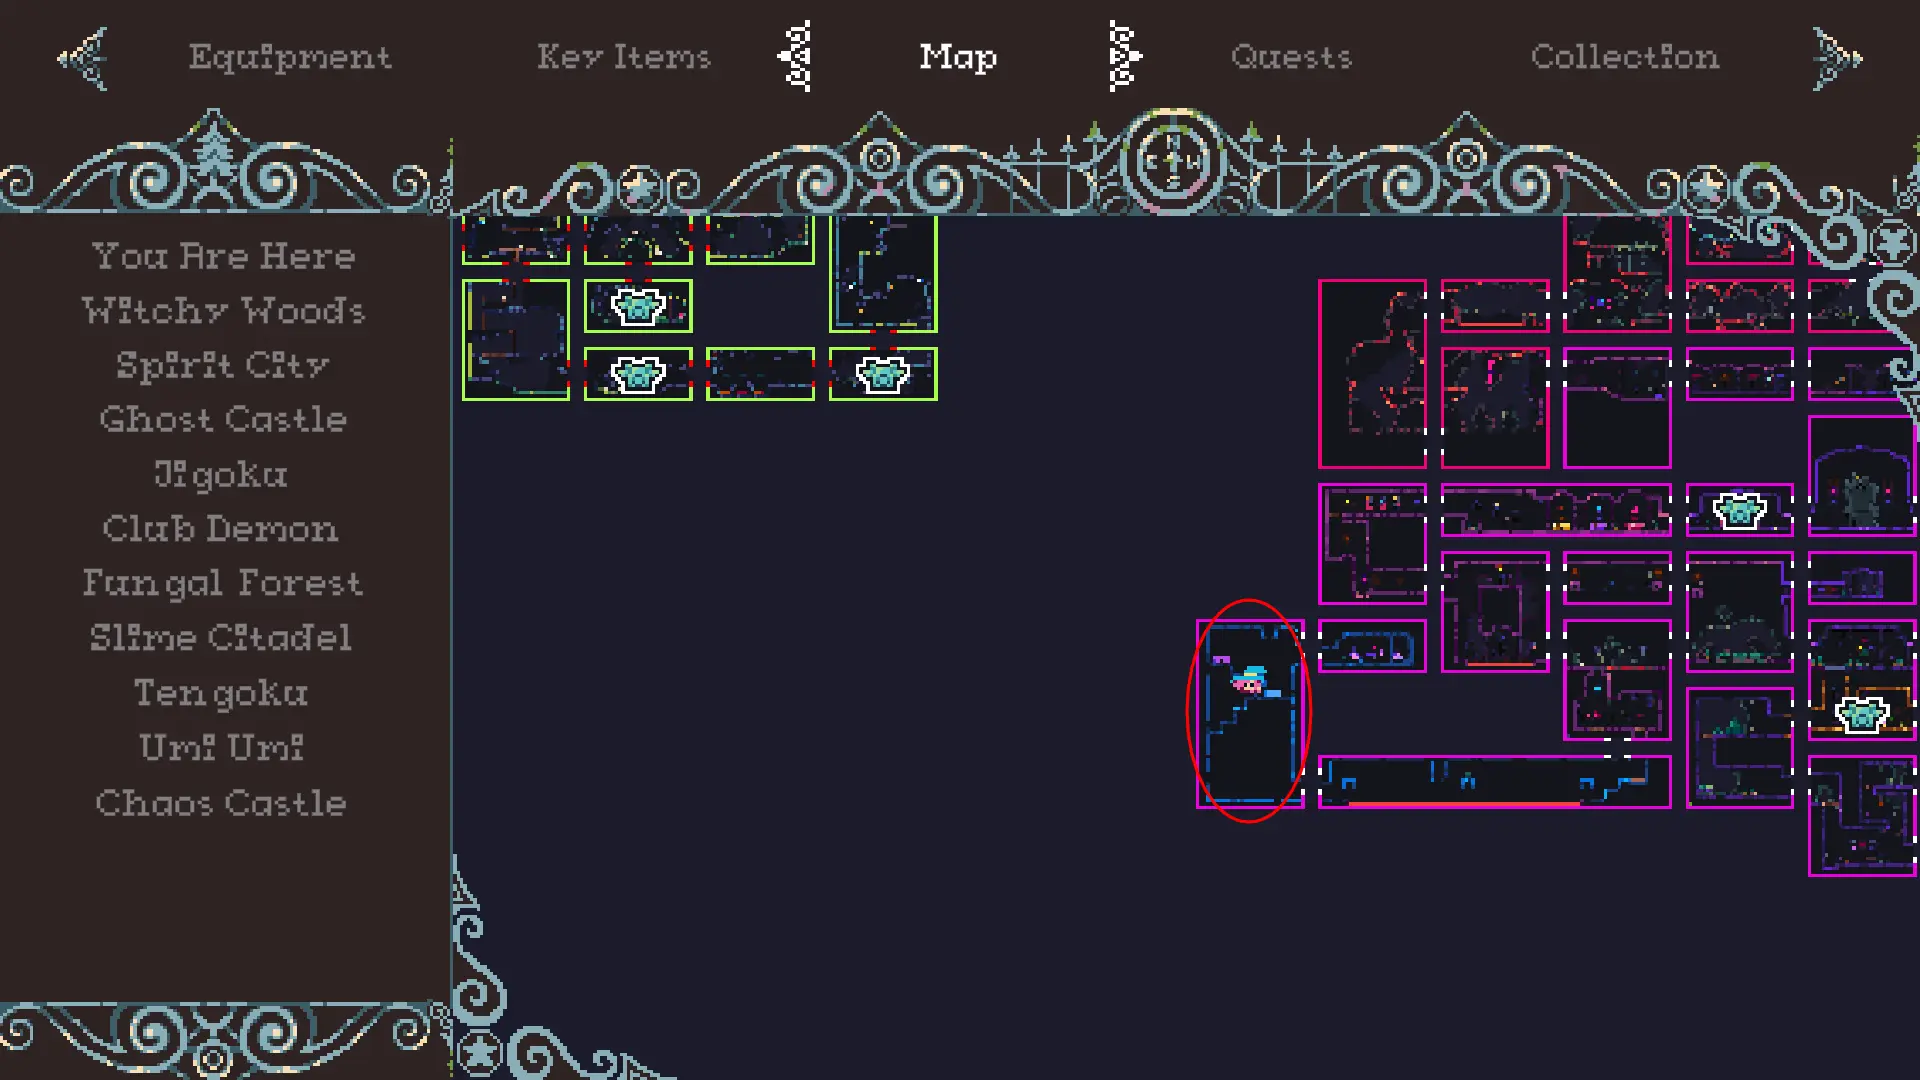
The Club Key is needed to unlock the Club door and is found in one of the sofa suite rooms of Club Demon:

Secrete Club Key (jigoku)

The Secrete Club Key is needed to unlock the Secrete Club door and is found in one of the sofa suite rooms of Club Demon:

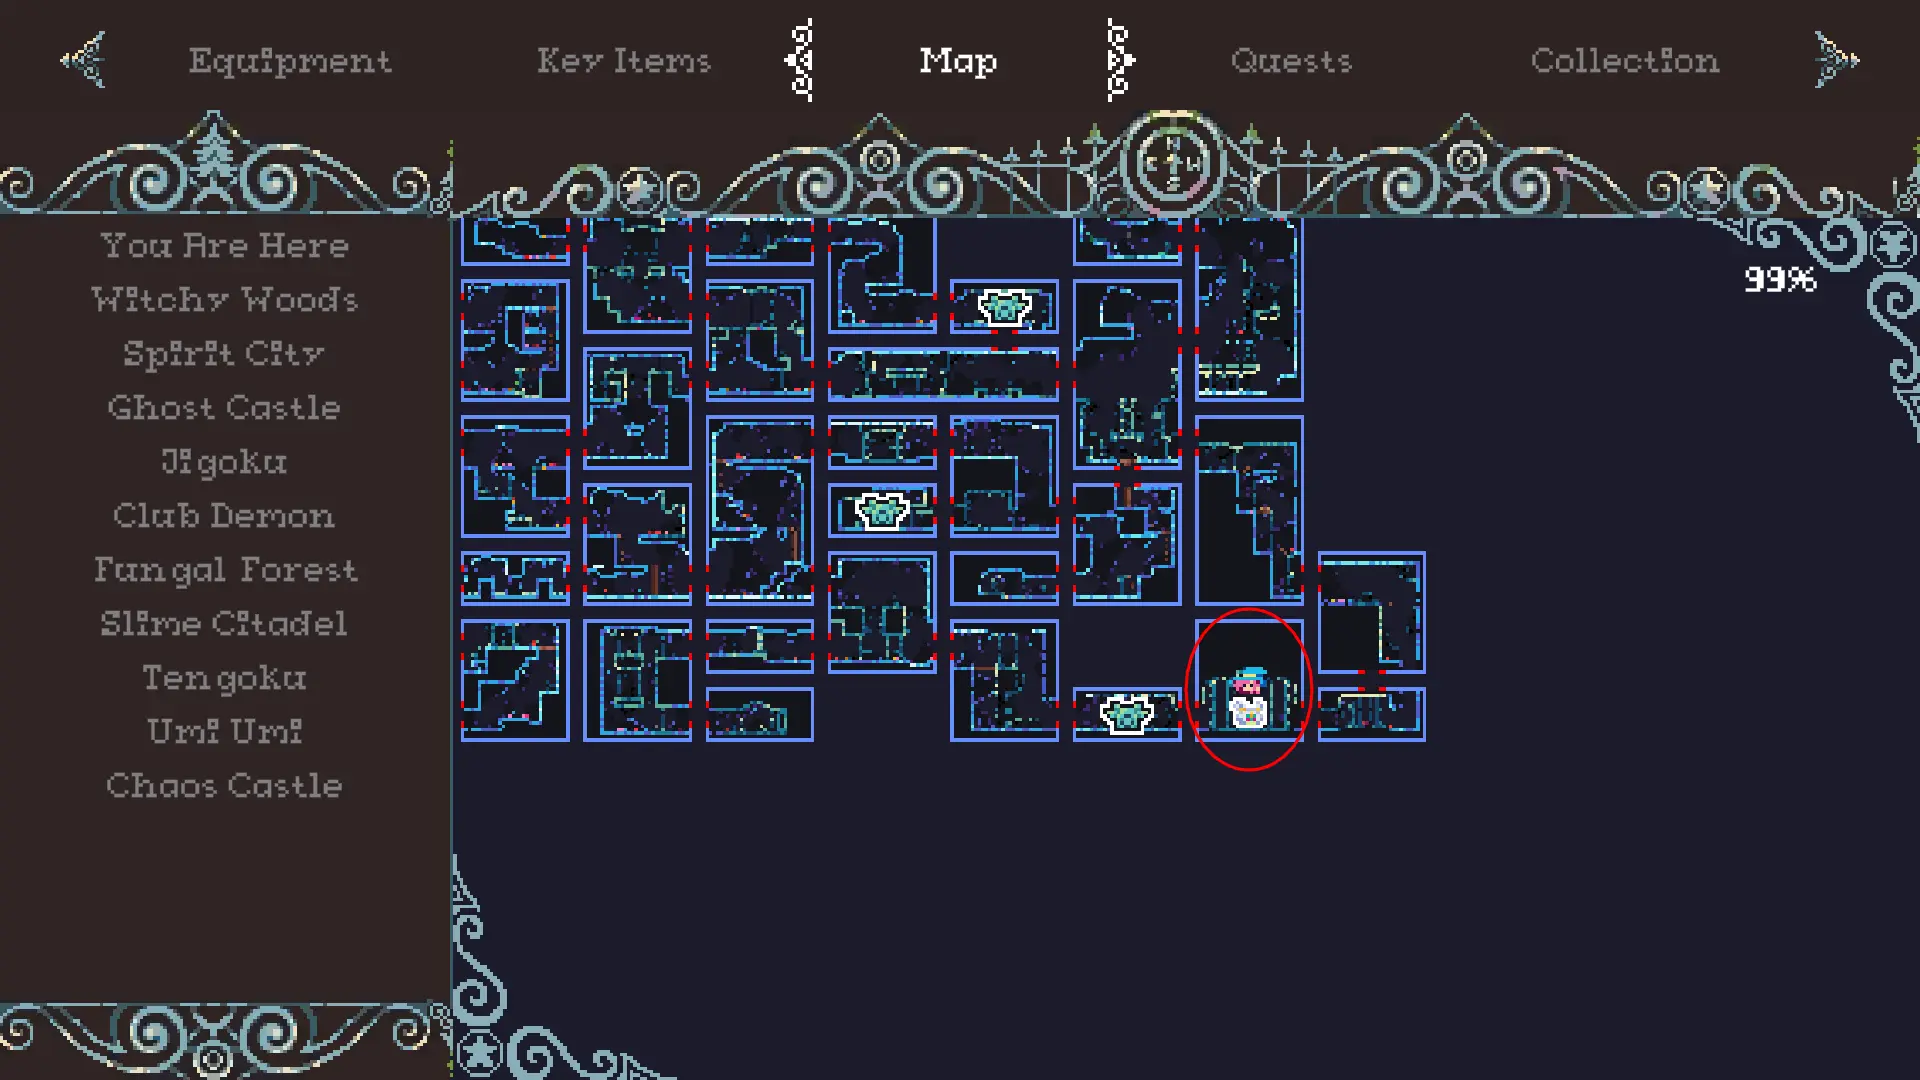
Abandoned Apartment Key (Spirit City)
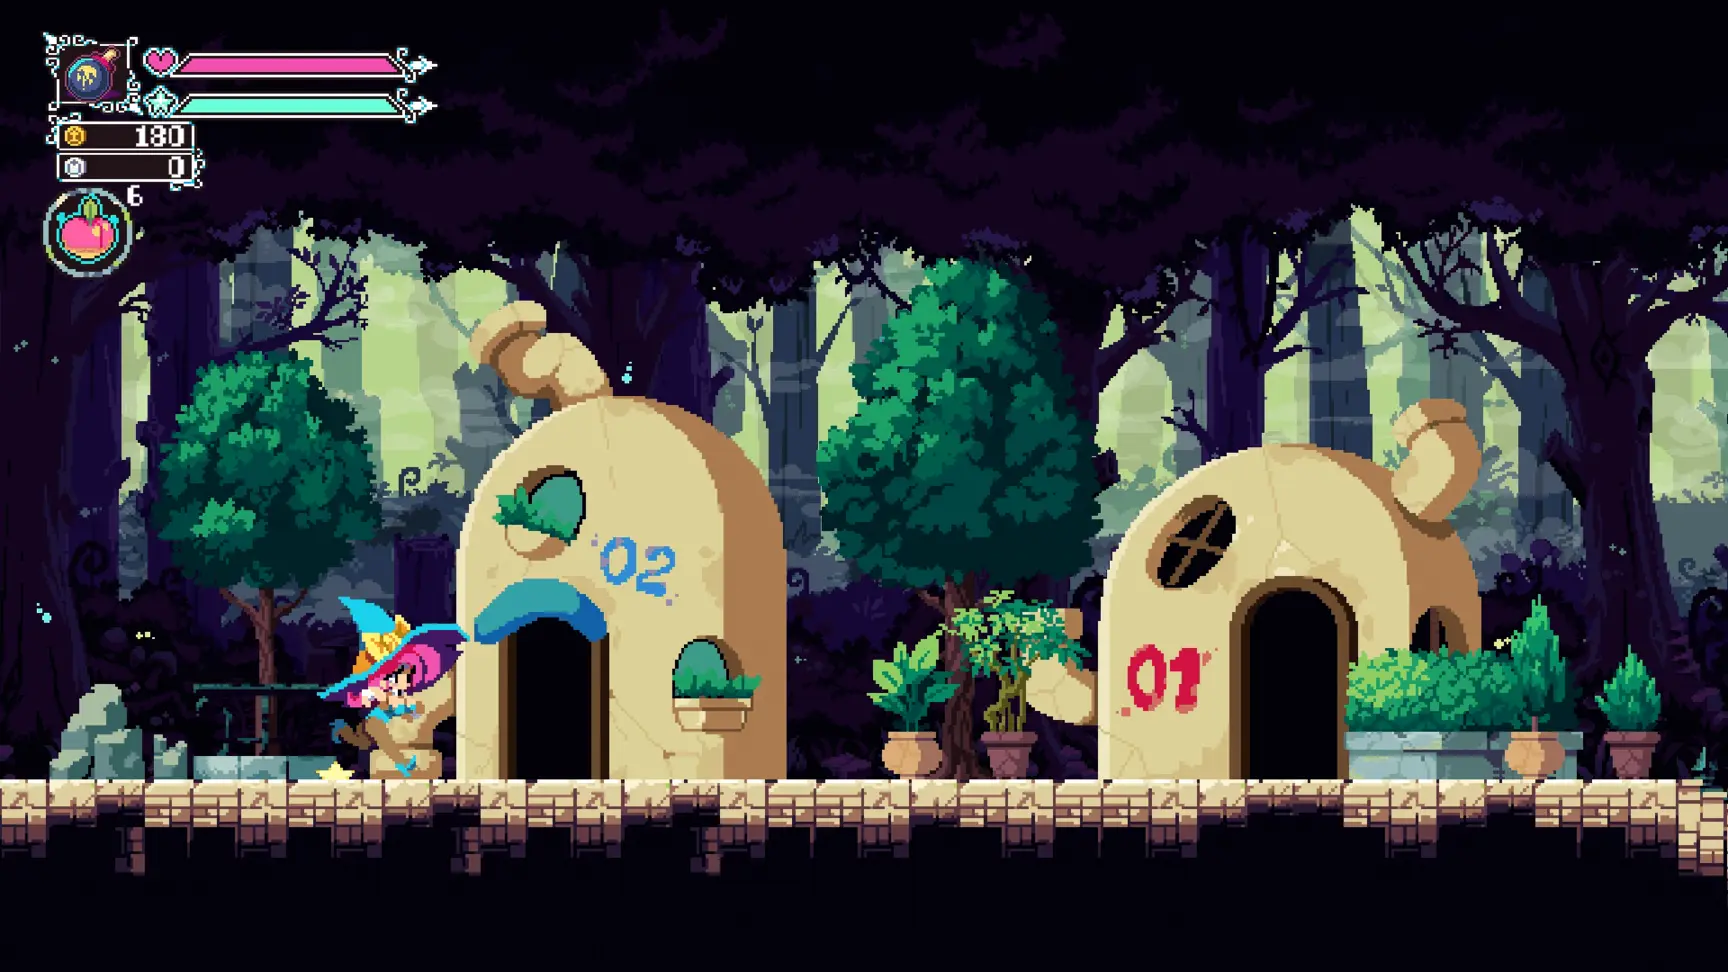
The abandoned Partment Key is needed to unlock the door to the abandonded apartment found in Shady Alley of Spirit City. The apartment room is a Chaos Encounter and also has a chest which contains the quest item Hellish dango. The key is found in Spirit City Hut Number 02:

Forgotten Fungal Door Key (Fungal Forest)

The forgotten fungal door key is needed to unlock the forgotten fungal door. It is found in a chest, by the Slime Citadel entrance of Fungal Forest:
Slime Citadel Key (Fungal Forest)

The slime citadel key is needed to unlock the slime citadel door. It is found in a chest at the centre of the ladder room found in Fungal Forest:

Magical Items & Locations
These are items which need to be equipped to 1 of your active magical item slots in order to use. There are 5 magical item slots available to the player. The magical items can then be cycled through during playthrough to select and designate the active magical item that the player wants to use. Magical items have to be charged before use. Charging is done by pressing and holding the ranged attack action key, then pressing the melee action key to trigger the magical item. The magical item will not activate if you do not have enough mana to use it.
Goblin Bomb

The Goblin Bomb is acquired by interacting with Gerry G Atric and is likely the first magical item the player is exposed to. It is throw infront of the player and explodes in a small area.
Harpy Feather
The Harpy Feather is acquired by [?]. This is thrown in the direction of the player and pierces through all enemies in its path.
Ghost Form

This is acquired by [?]. This changes the player’s form to ghost form, which allows the player to pass through vine barriers while rolling in this form.
Slime Form

This is acquired by [?]. This changes the player’s form to slime form, which allows the player to traverse pipe networks while in this form.
Sacrifical Dagger
The Sacrifical Dagger is acquired by [?]. This items trades HP for mana when activated.
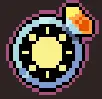
Ring of The Moon

The Ring of The Moon is purchased from Elf Merchant Location 5. This items creates a beam in the direction of the player, which damages all enemies caught in the beam periodically.
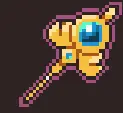
Haunted Scythe
The Haunted Scythe is purchased from Elf Merchant Location 8. This item radiates a damaging ring from the player. Using this item completely exhausts the player’s mana pool if they have enough mana to activate it.
Frilly Panties
The Frilly Panties is purchased from Elf Merchant Location 2. This item creates an empowering beam that buffs the player.

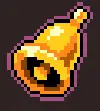
Disarming Bell
The Disarming Bell is purchased from Elf Merchant Location 3. This item radiates a disarming ring from the player that stuns enemies caught for a brief period of time.
Demonic Cuff
The Demonic Cuff is purchased from Elf Merchant Location 4. This item creates a bouncy fireball in the direction that the player is facing.
Magical Mushroom
The Magical Mushroom is purchased from Elf Merchant Location 6. This item creates a magic mushroom at the location of the player, which emits spores in a semi-radial pattern upwards from the spawned mushroom.
Ring of The Sun
The Ring of The Sun is purchased from Elf Merchant Location 6. This item creates an upward beam at the location of the player, which damages all enemies caught in the beam periodically.
Slime Sentry

The Slime Sentry is purchased from Elf Merchant Location 7. This item creates a blue slime girl infront of the player in the direction they are facing. The blue slime girl shoots damaging projectiles in the same direction. These projectiles do not pierce.
Charm Locations
These are items that can be equipped by the player which provides passive abillities. They only need to be equipped in 1 of the 3 charms slots to be used.
Fortune Cat

The Fortune Cat charm is purchased from Elf Merchant Location 2. This charm provides the player with the passive ability that enemies have a chance to drop more coins.
Magnetic Hairpin
The Magnetic Hairpin is acquired by [?]. This charm provides the player with the passive ability of pulling drops towards the player.
Flutter Knife Garter
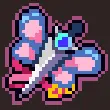
The Flutter Knife Garter is acquired by [?]. This charm provides the player with the passive ability of increased ranged attacks.
Heart Necklace
The Heart Necklace charm is purchased from the Elf Merchant Location 2. This charm provides the player with the passive ability that slaying enemies will give HP.
Star Bracelet

The Star Bracelet charm is purchased from Elf Merchant Location 2. This charm provides the player with the passive ability that slaying enemies will give mana.
Mind Mushroom

The Mind Mushroom charm is purchased from Elf Merchant Location 5. This charm provides the player with the passive ability of playing a chime whenever they enter a room with at least 1 undiscovered secrete.
Yellow Frog Talisman
The Yellow Frog Talisman charm is purchased from the Elf Merchant Location 4. This charm provides the player with the passive ability of recieving a temporary player buff when their HP is critically low.
Blue Frog Talisman
The Blue Frog Talisman charm is purchased from Elf Merchant Location 7. This charm provides the player with the passive ability of reducing the cost of casting magical items, when their HP is critically low.
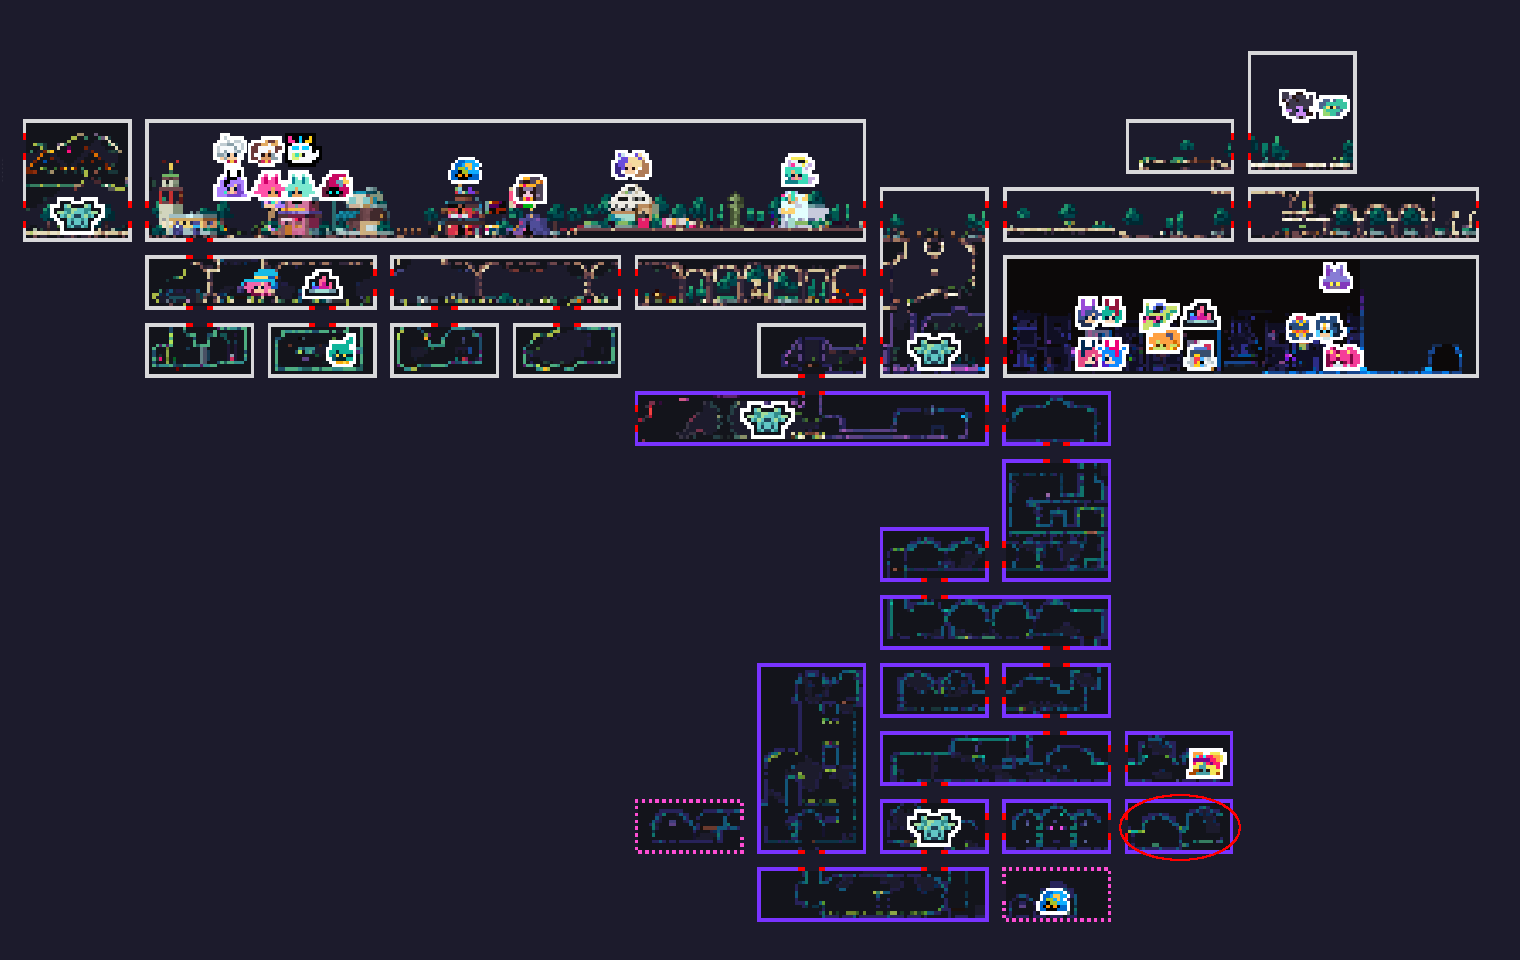
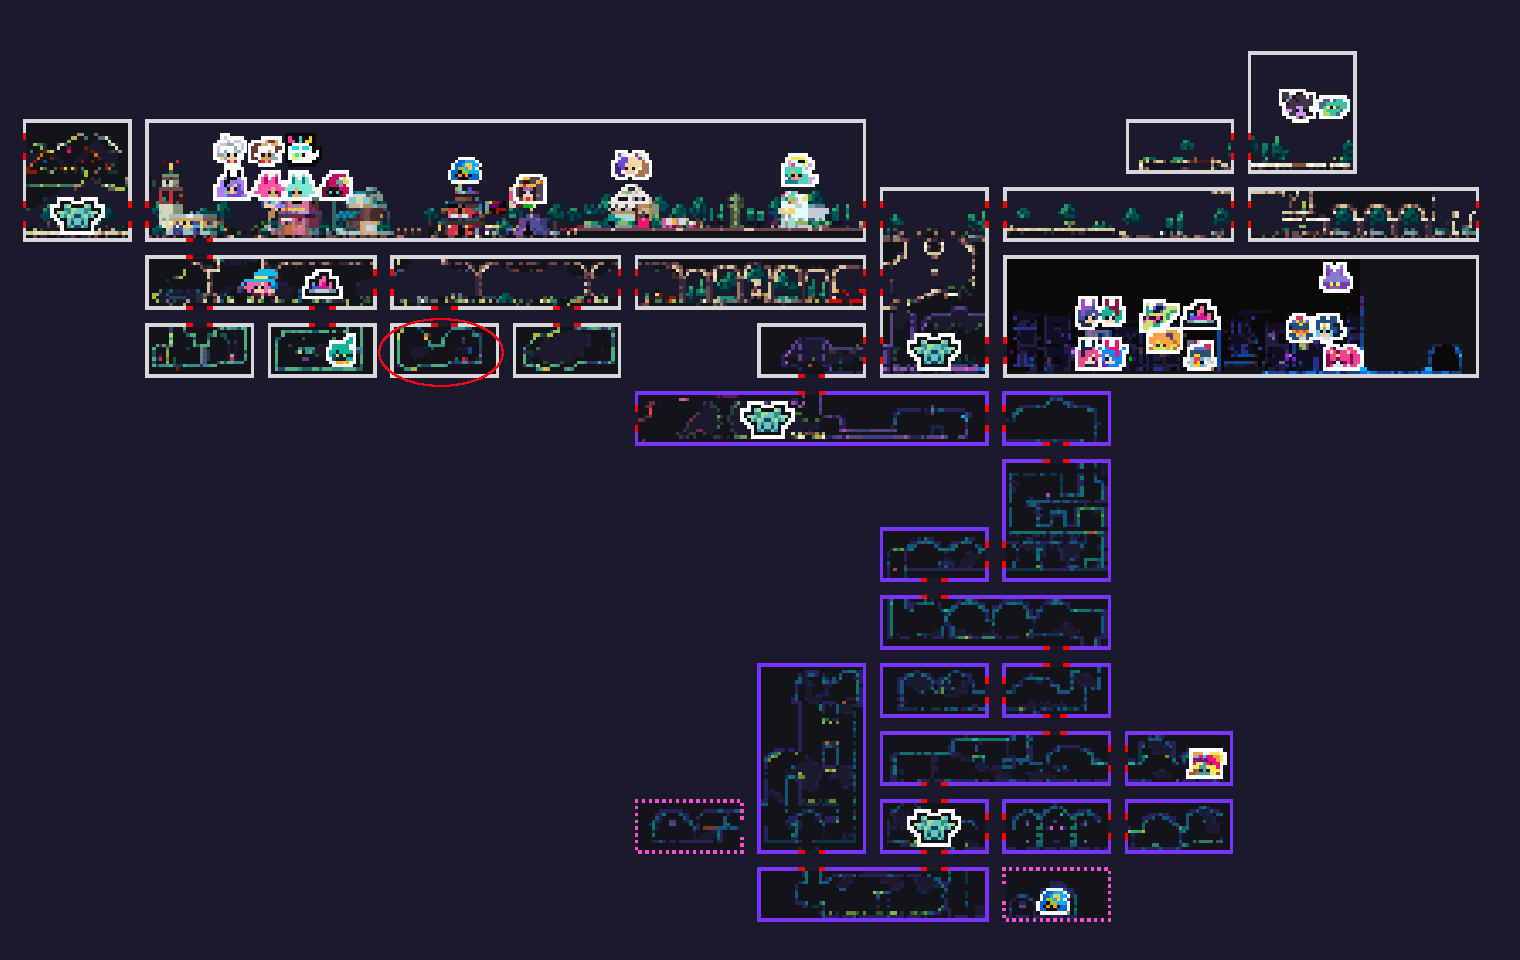
Map Layout
[This section will be left to last, as the map may be updated?]
Ally & Neutral NPC’s
In this section, we’ll detail the names of characters to make it easier to track whose who when completing quests or acquiring items. We’ll also include a little bit of info about the character, as well as where to initially find them.
(Note: this section has been split into separate parts. This is because when originally holding all the content as 1 section, Steam would become unresponsive making it impossible to edit and add to the section.)
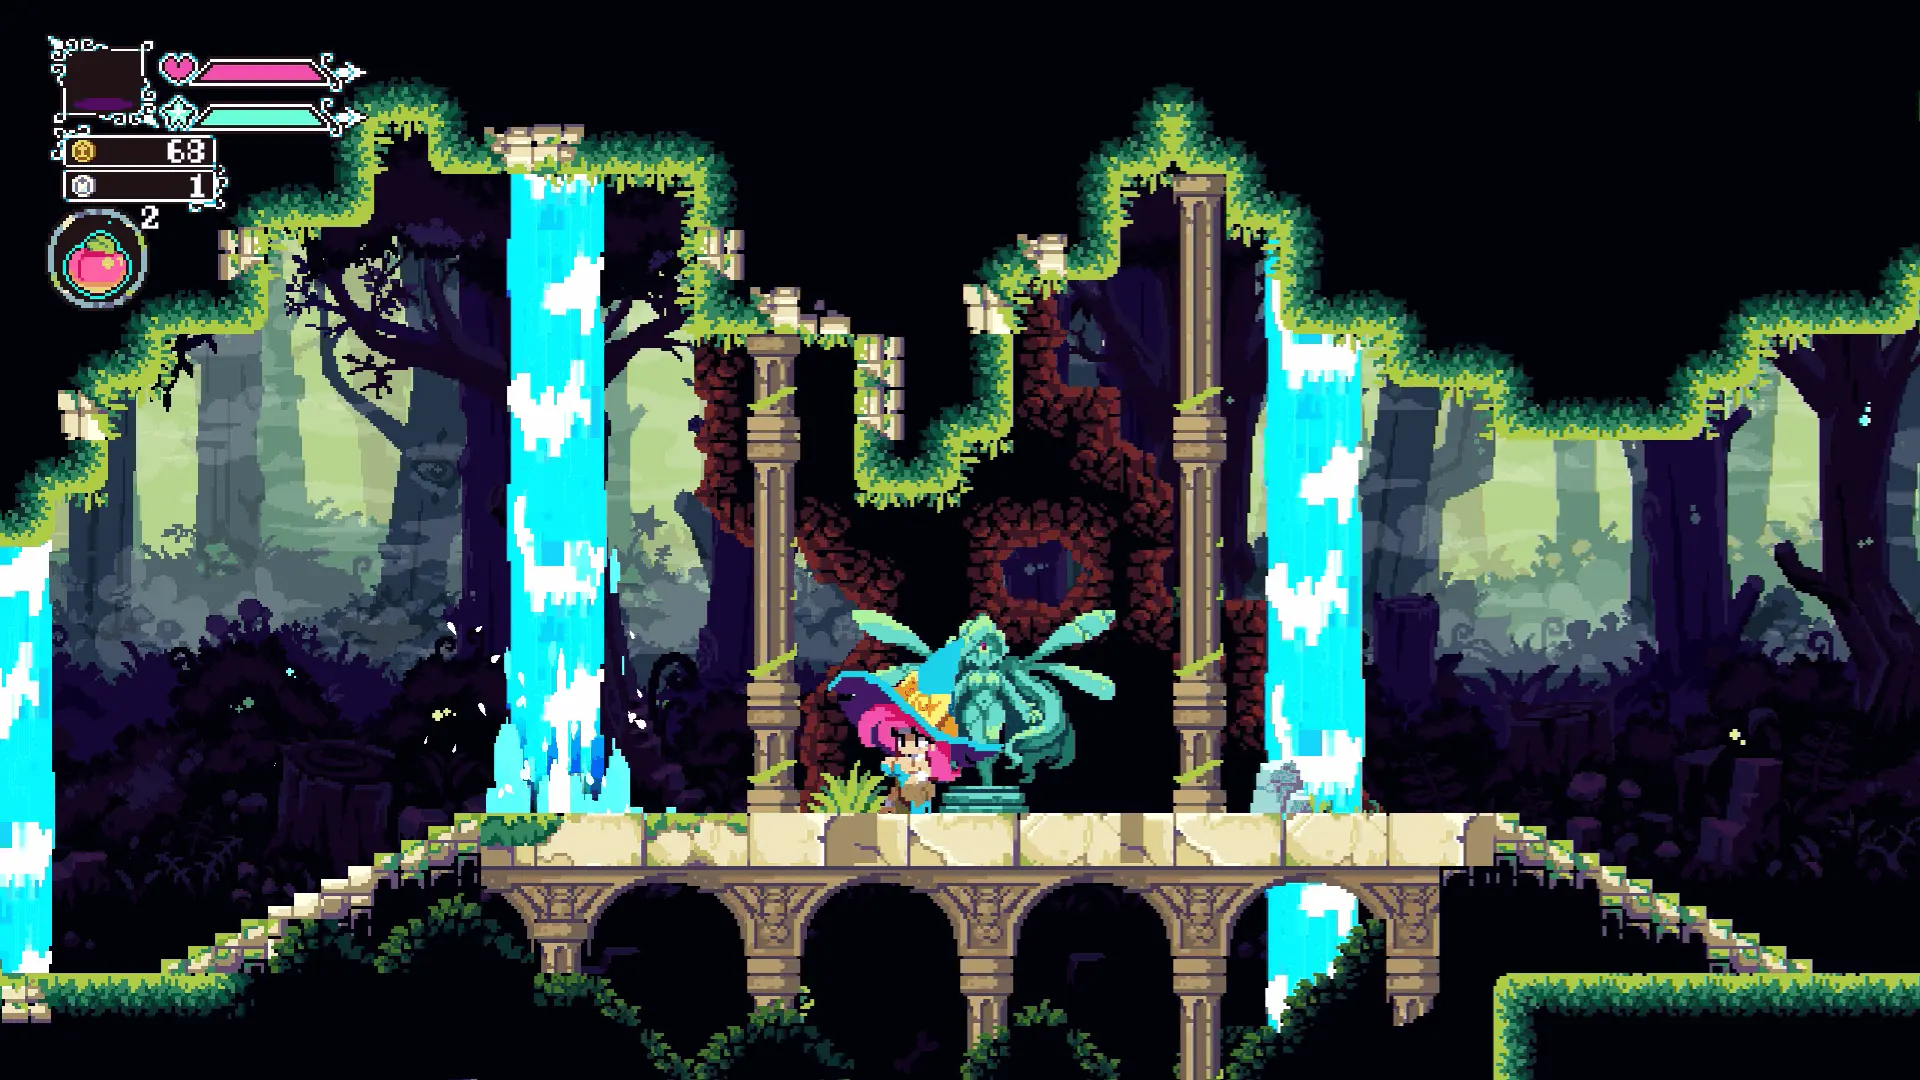
Beatrix
A very important character to the player. Beatrix gives the main quest and provides player upgrades in the form of attack upgrades and Peachy Peach capacity upgrades. She also enables the player to use the core mechanic of the game “Flipping“. Beatrix can be found at Sensi’s Hut within Witchy Woods:
The Merchant
This character enables the player to purchase various active magical and charm items. The Merchant is found at various locations throughout FlipWitch world. [Initially found just outside [b] Spirit City[/b]]. Refer to Elf Merchant & Thimble Locations and Offerings section on where to find this character.
Thimble
This character enables the player to purchase various costumes. Thimble is found at various locations throughout FlipWitch world. Refer to Elf Merchant & Thimble Locations and Offerings section on where to find this character.
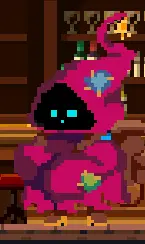
Fortune Teller
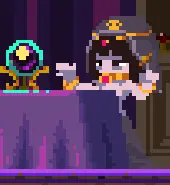
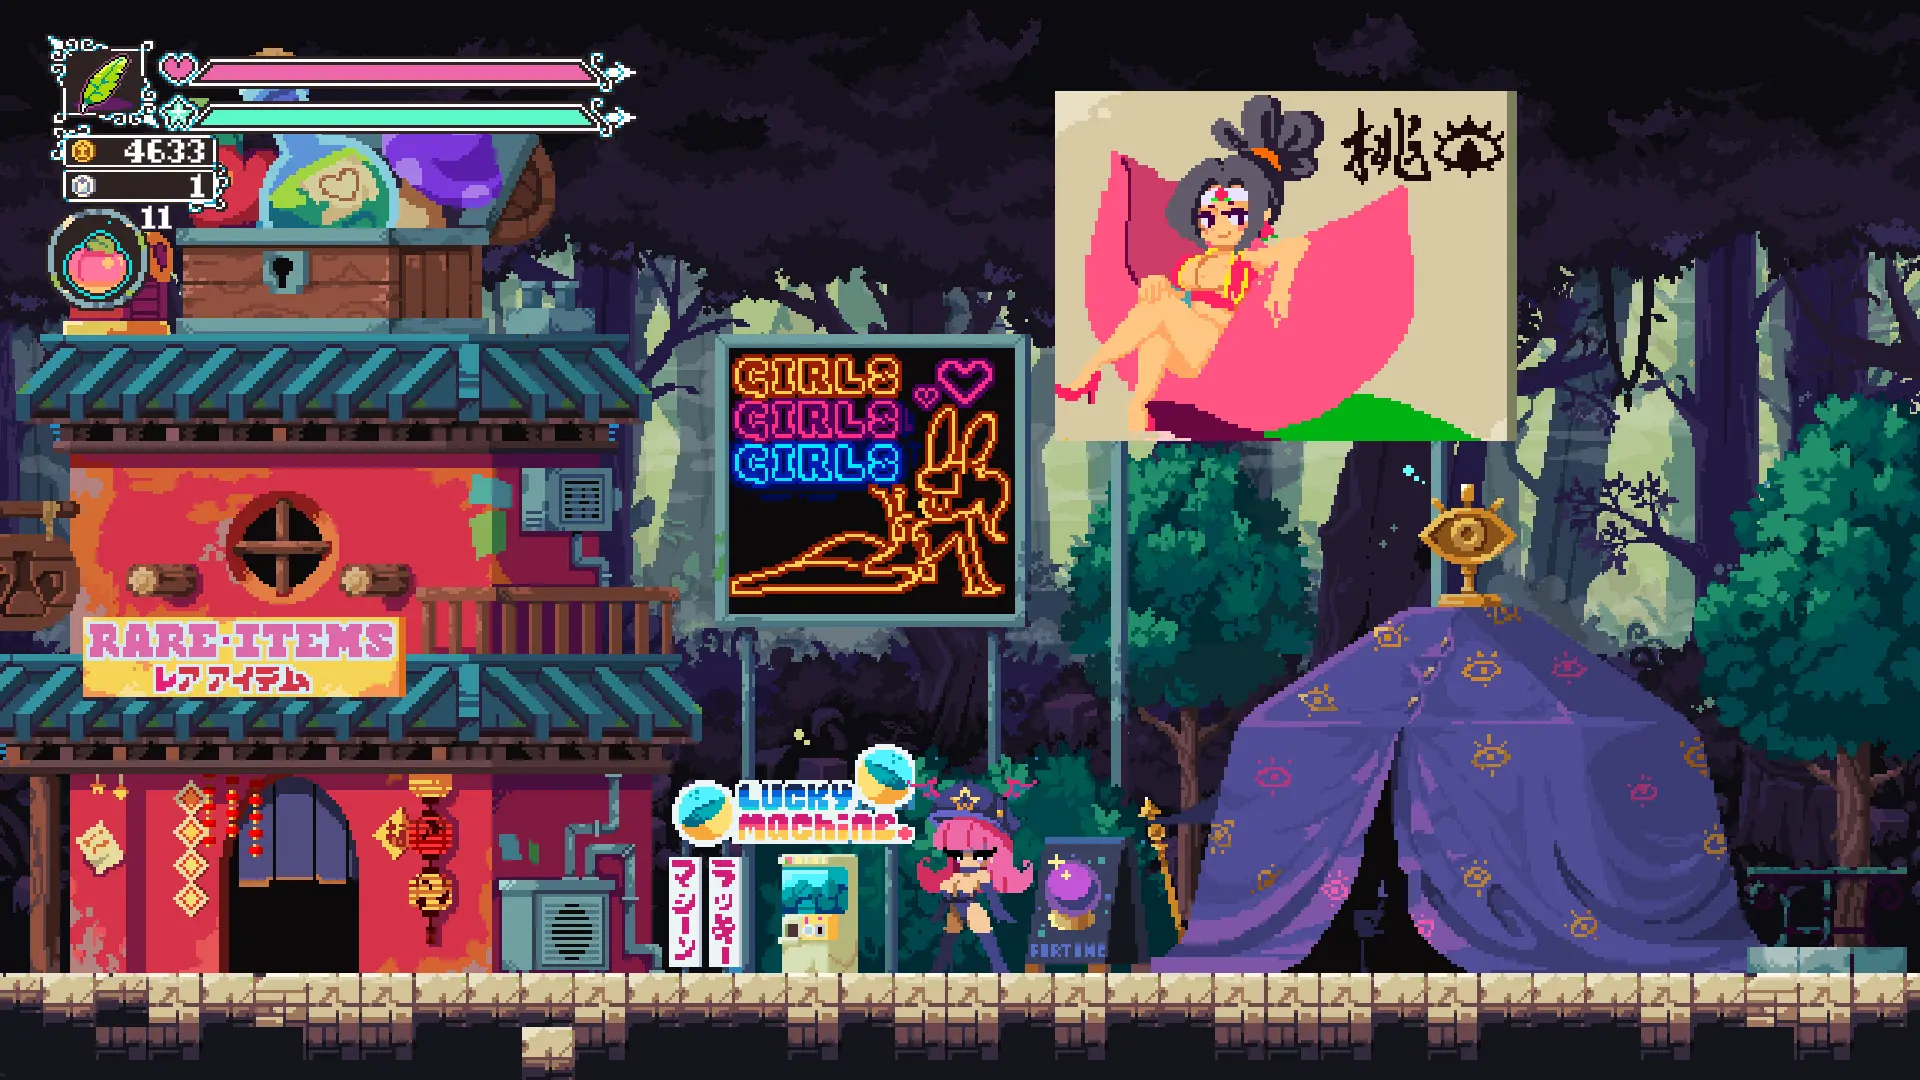
This character provides guidance on where the player should head next in order to complete their main quest of defeating the Chaos Witch. The Fortune Teller can be found inside the Psychic’s Tent at the centre of Spirit City:

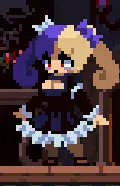
Janice

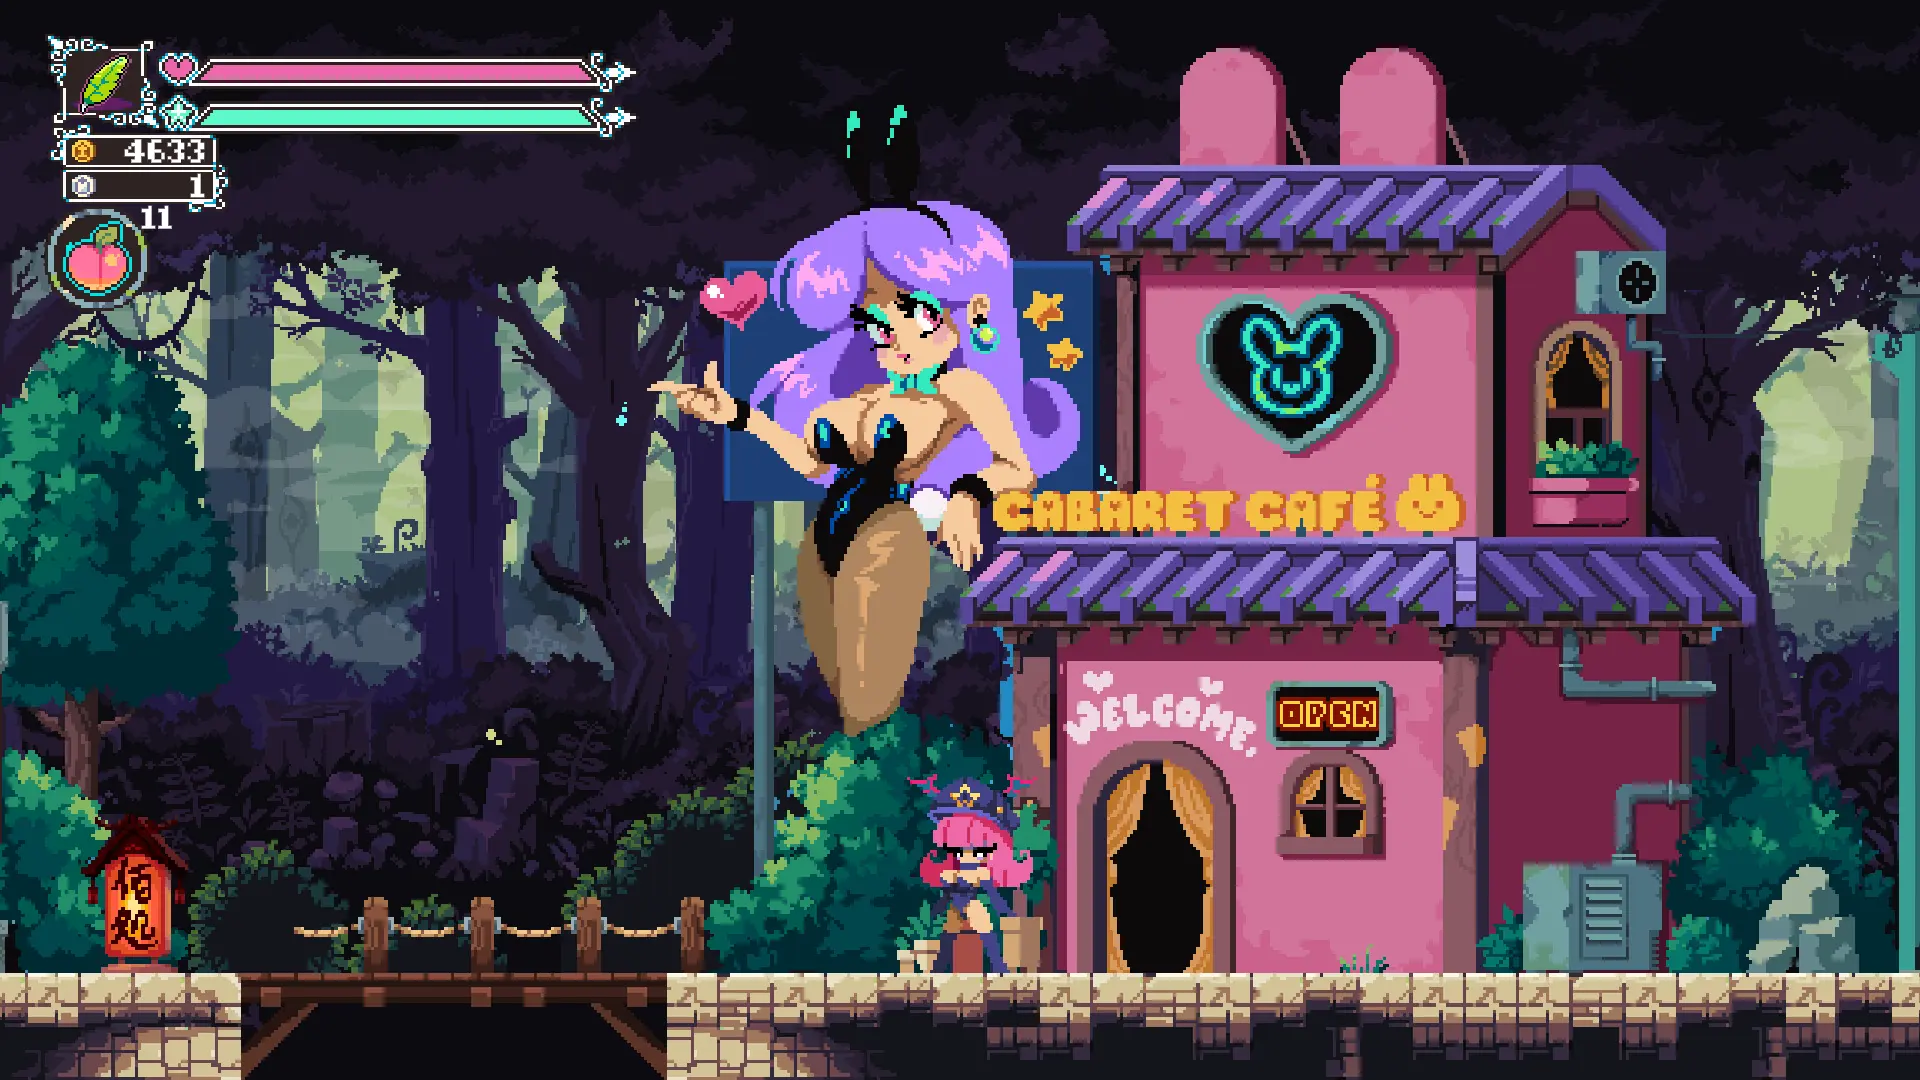
Bunny girl manager of the Cabaret Cafe. Janice can initially be found just outside the Cabaret Cafe to the left-hand side of Spirit City:


Roy
Dogboy employee of the Cabaret Cafe, initially found imprisoned in a cell. Roy can initially be found in one of the lower under-level rooms of Spirit City:
Belle
Cowgirl employee of the Cabaret Cafe, initially found distressed over a missing cowbell. Belle can initially be found to the west of one of the tutorial rooms in Witchy Woods:
Milk & Cream
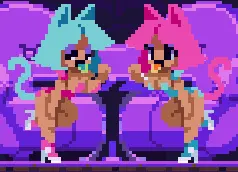
Cat girl employees of the Cabaret Cafe, initially found hiding in bush claiming their clothes have gone missing. Milk and Cream can initially be found within Ghost Castle in the rose garden room:

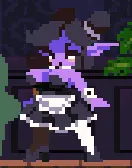
Pervy Ghost

A ghost that can be found lurking the male toilets’s secrete room of Cabaret Cafe. Pervy ghost will only appear after accepting the “Haunted Bathroom quest” from Milk & Cream and is found in the secrete room of the male toilets in Cabaret Cafe.
Ancient Being
An ancient being that can be found floating in one of the lower rooms of the under-levels of Spirit City:
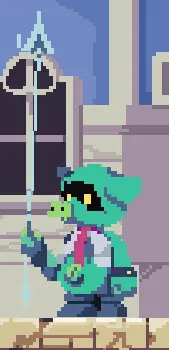
Spirit City Guard
The guard of Spirit City is initially found telling the player that the the pathway to Spirit City has been blocked by magical crystals. Spirit City Guard can initially be found in one of the Witchy Woods rooms just outside Spirit City:
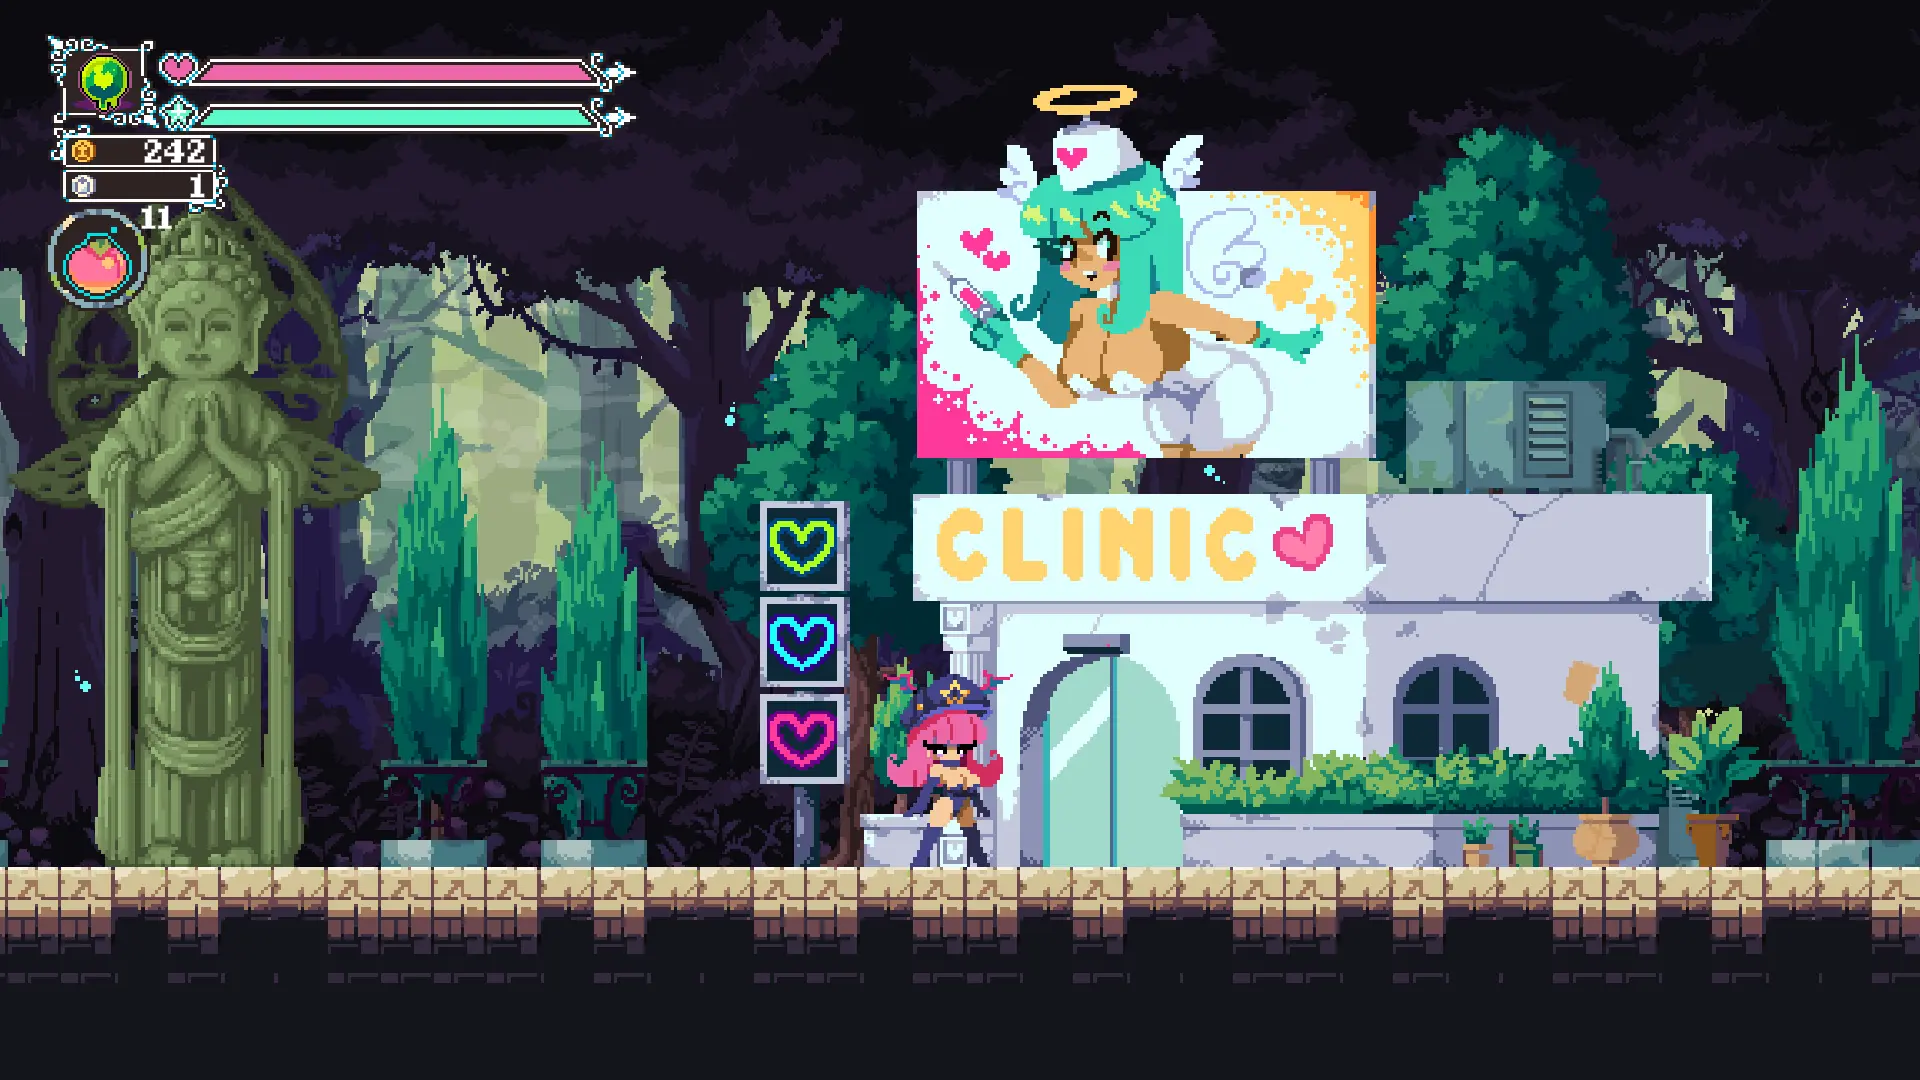
Angel Nurse

Angel Nurse is a nurse that can be found inside the Spirit City Clinic. The clinic can be found on the far right-hand side of Spirit City:

Pig Guard
A pig Guard that can be found guarding the Pig Mansion of Spirit City. The guard can be found in one of Spirit City‘s upper level rooms:


Tatil
Dark elf of Pig Mansion and assistant to the Pig King. The dark elf can be found inside Pig Mansion, within one of Spirit City‘s upper level rooms:


Pig King
The Pig King of Pig Mansion. The Pig King can be found inside Pig Mansion, within one of Spirit City’s upper level rooms:
Spice

A bunny girl of the Shady Bunny Club. She can be found outside, as well as inside the Shady Bunny Club on the left-hand side of Shady Alley:
Sugar
A bunny girl of the Shady Bunny Club. She can be found outside, as well as inside the Shady Bunny Club on the left-hand side of Shady Alley:

Bunny Girl Fans
2 dudes who are really into bunny girls. They can be found inside the Shady Bunny Club on the left-hand side of Shady Alley:

Kyoni
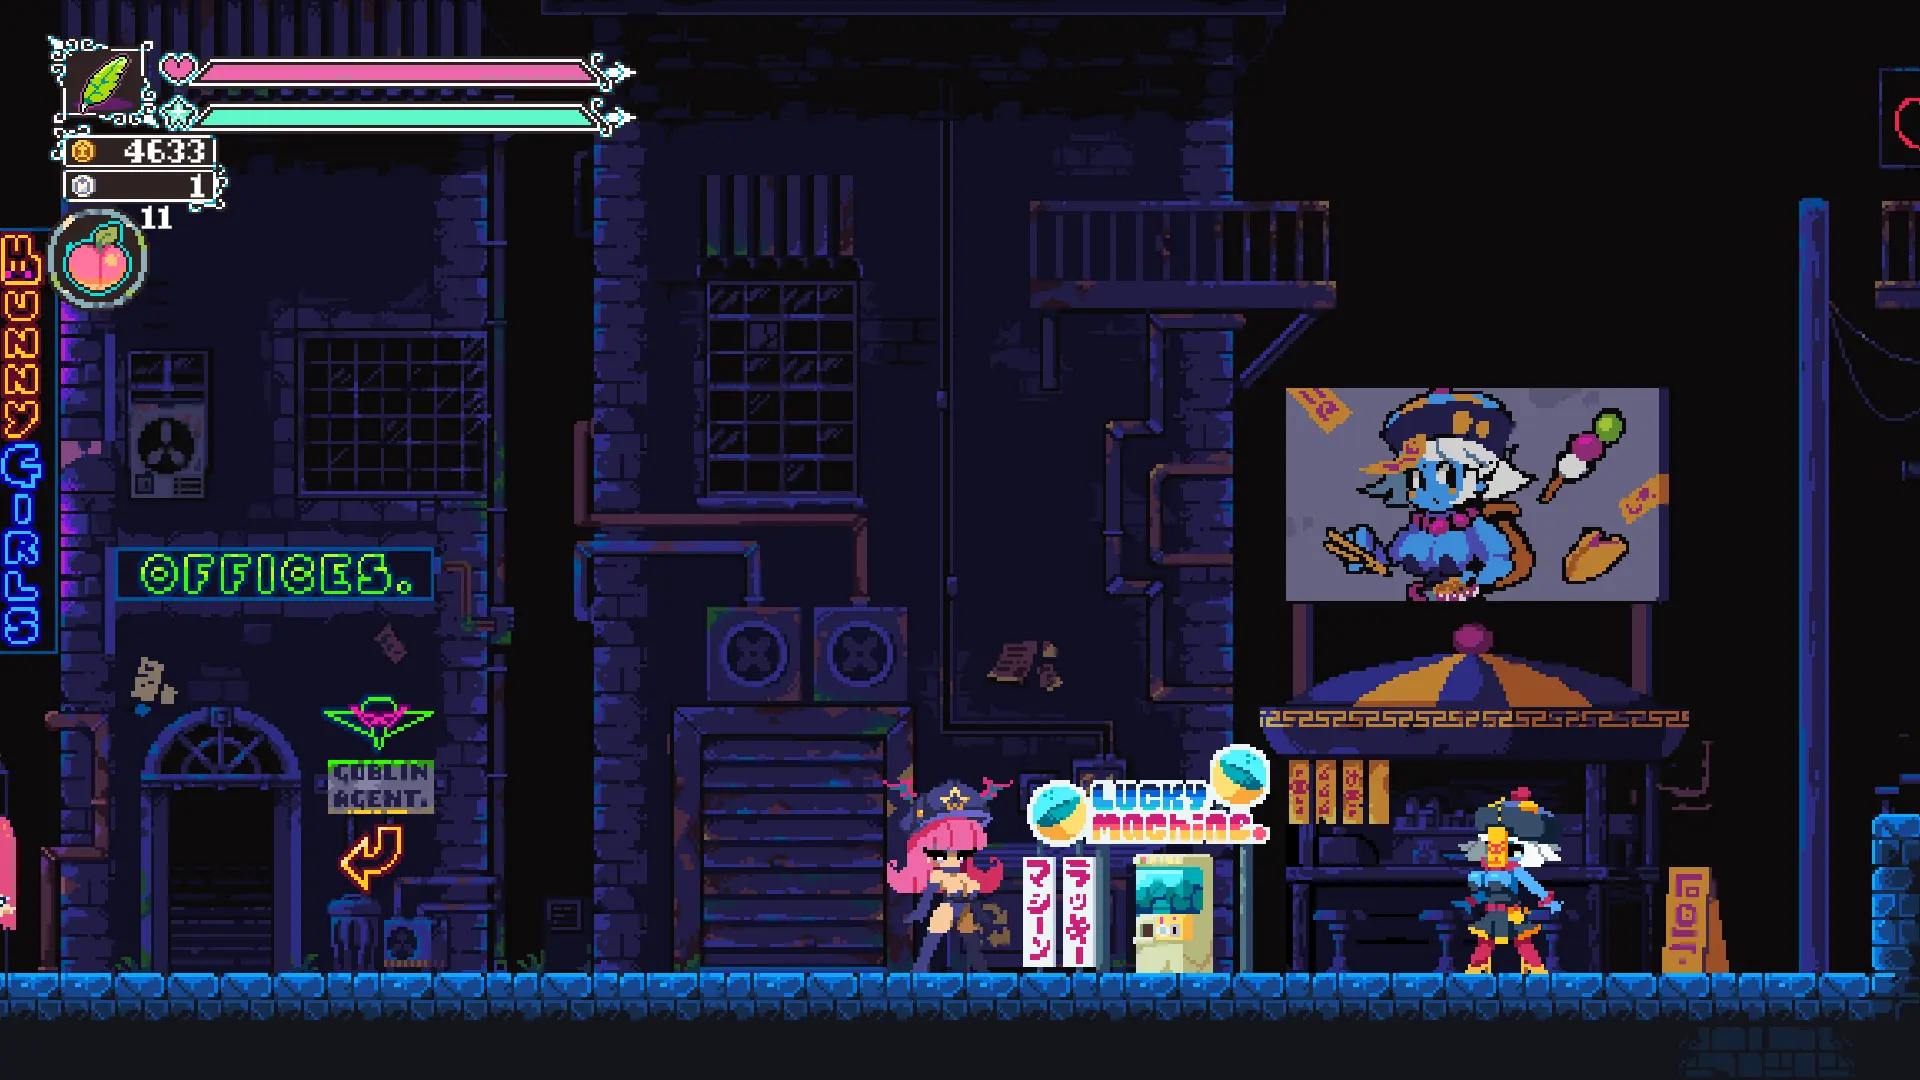
Chef and operator of her own foodstall. Kyoni can be found at the centre of Shady Alley:

Legs
A goblin member of the Man Cave room and agent wannabe, who wants to make a business of being an agent for models. Legs can initially be found in the Goblin Man cave:

Cammy
A photographer angel who can be found in one of the rooms of Angelic Hallways within Tengoku:
Gobliana
A goblin banished by the Goblin Queen Boss for having a long nose. Gobliana can initially be found within one of the lower Goblin Caves rooms of Witchy Woods:
MomoRobot
A robot of of MomoRobot Servers. MomoRobot can be found on the far right-hand side of Shady Alley:

Dusty
A cat who can be found perching on a secrete spot within Shady Alley:

Genesis

A blue being that introduces the player to the girl gacha system. Genesis can be found in one of the tutorial rooms within Witchy Woods:
Great Fairy
The Great Fairy of Witchy Woods, can be found in one of the rooms on the far right-hand side of Witchy Woods:

Gerry G. Atric
A retired goblin bomber, who can be found in one of the rooms of Goblin Caves within Witchy Woods:
Gosh
Goblin member of the Man Cave room which serves as the entrance to the Goblin Caves within Witchy Woods:

Gonny
Goblin member of the Man Cave room which serves as the entrance to the Goblin Caves within Witchy Woods:
Flying Fairy
A fairy of Witchy Woods, found in one of the rooms to the far west-side of Goblin Caves within Witchy Woods:
Mimi
Presumably a girl ghoul that can be found on the west-side of the largest room within Witchy Woods:
Goblin Princess
The daughter and prisoner of the Goblin Queen Boss, in desparate need of a prince. Goblin Princess can be found in one of the rooms of Goblin Caves within Witchy Woods:
Annahell
A goat girl that can be found in a room to the far east of Jigoku:
Bad Boy
A pimped-out version of the Demon Brutes found in Jigoku. Bad boy can be found loitering in one of the Club Demon rooms within Jigouk:
Unlucky Cat
Unlucky Cat is a cat that spawns after the completion of the collection quest “Unlucky Cat Statue“. Unlucky Cat and his main statue can be found in one of the lower rooms to the west-side of Jigoku:
Gabrielle
An angel that can be found in one of the rooms west of Angelic Hallways within Tengoku:
Ratchel
A gym rat that can be found in one of the bottom-most rooms of the Shady Alley Sewer System within Spirit City:
Keroku
The non-boss frog girl form of the Frog Boss, achieved by defeating and releasing the Frog Boss from the Chaos Witch‘s curse. Keroku can be found in the boss battle room of the Frog Boss which is within the lower east-side of Umi-umi:
Philosopher’s Stone
A studious demon spawned by completing the quest “ Summoning Stones“. Philosopher’s Stone and their main philosopher stone can be found in one of the lower rooms of Slimey Depths Within Slime Citadel:
Enemy & Bosses
coming soon…
Boss Battle Tips & Tricks
coming soon…
Elf Merchant & Thimble Locations
In this section, we’ll be giving the details of the locations and what is offered by the Elf Merchant and Thimble, whom can be found at various locations throughout the FlipWitch World.
Elf Merchant Locations
Location 1: [somewhere outside city, purchase rare bubble]
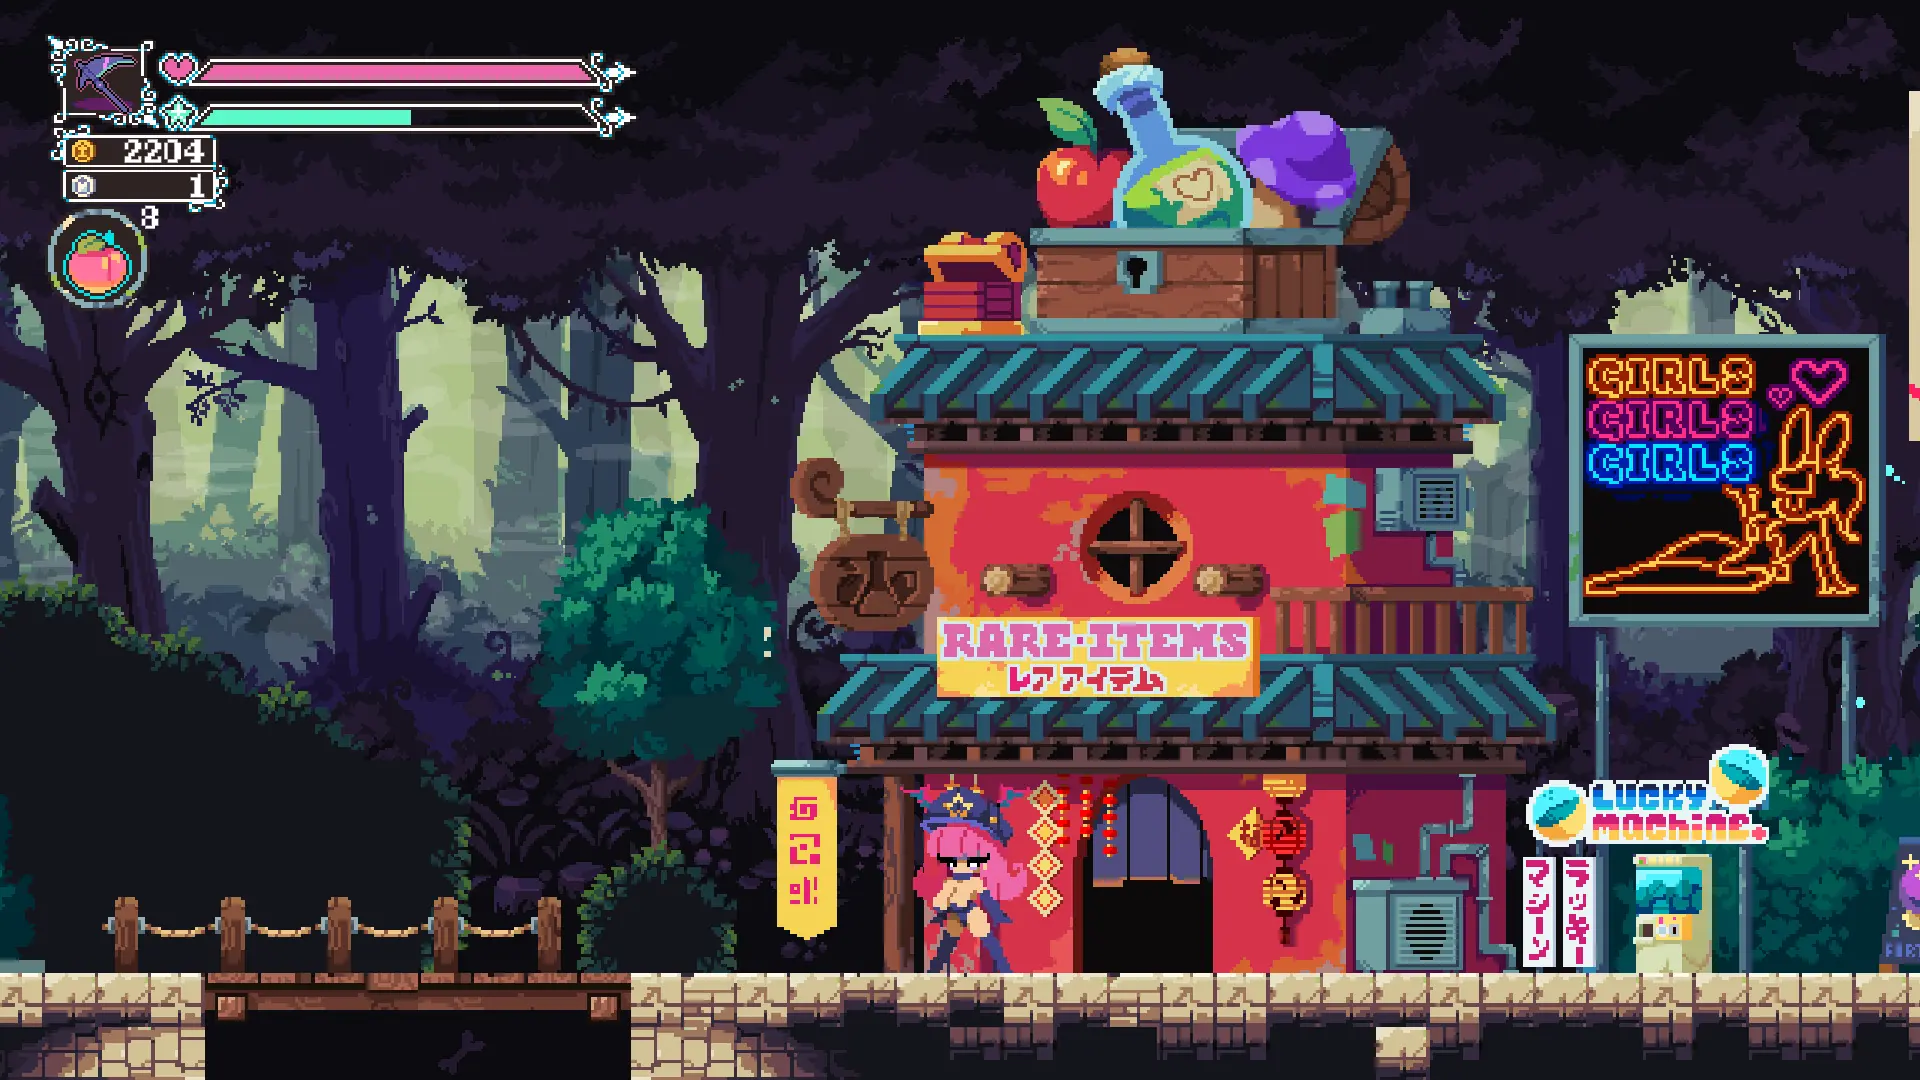
Location 2: Rare Items Shop – Spirit City
In order to find this location, you’ll first need to find the Rare Items Shop, which can be found at the centre of Spirit City. Once inside, head towards the back and you should find the Elf Merchant.
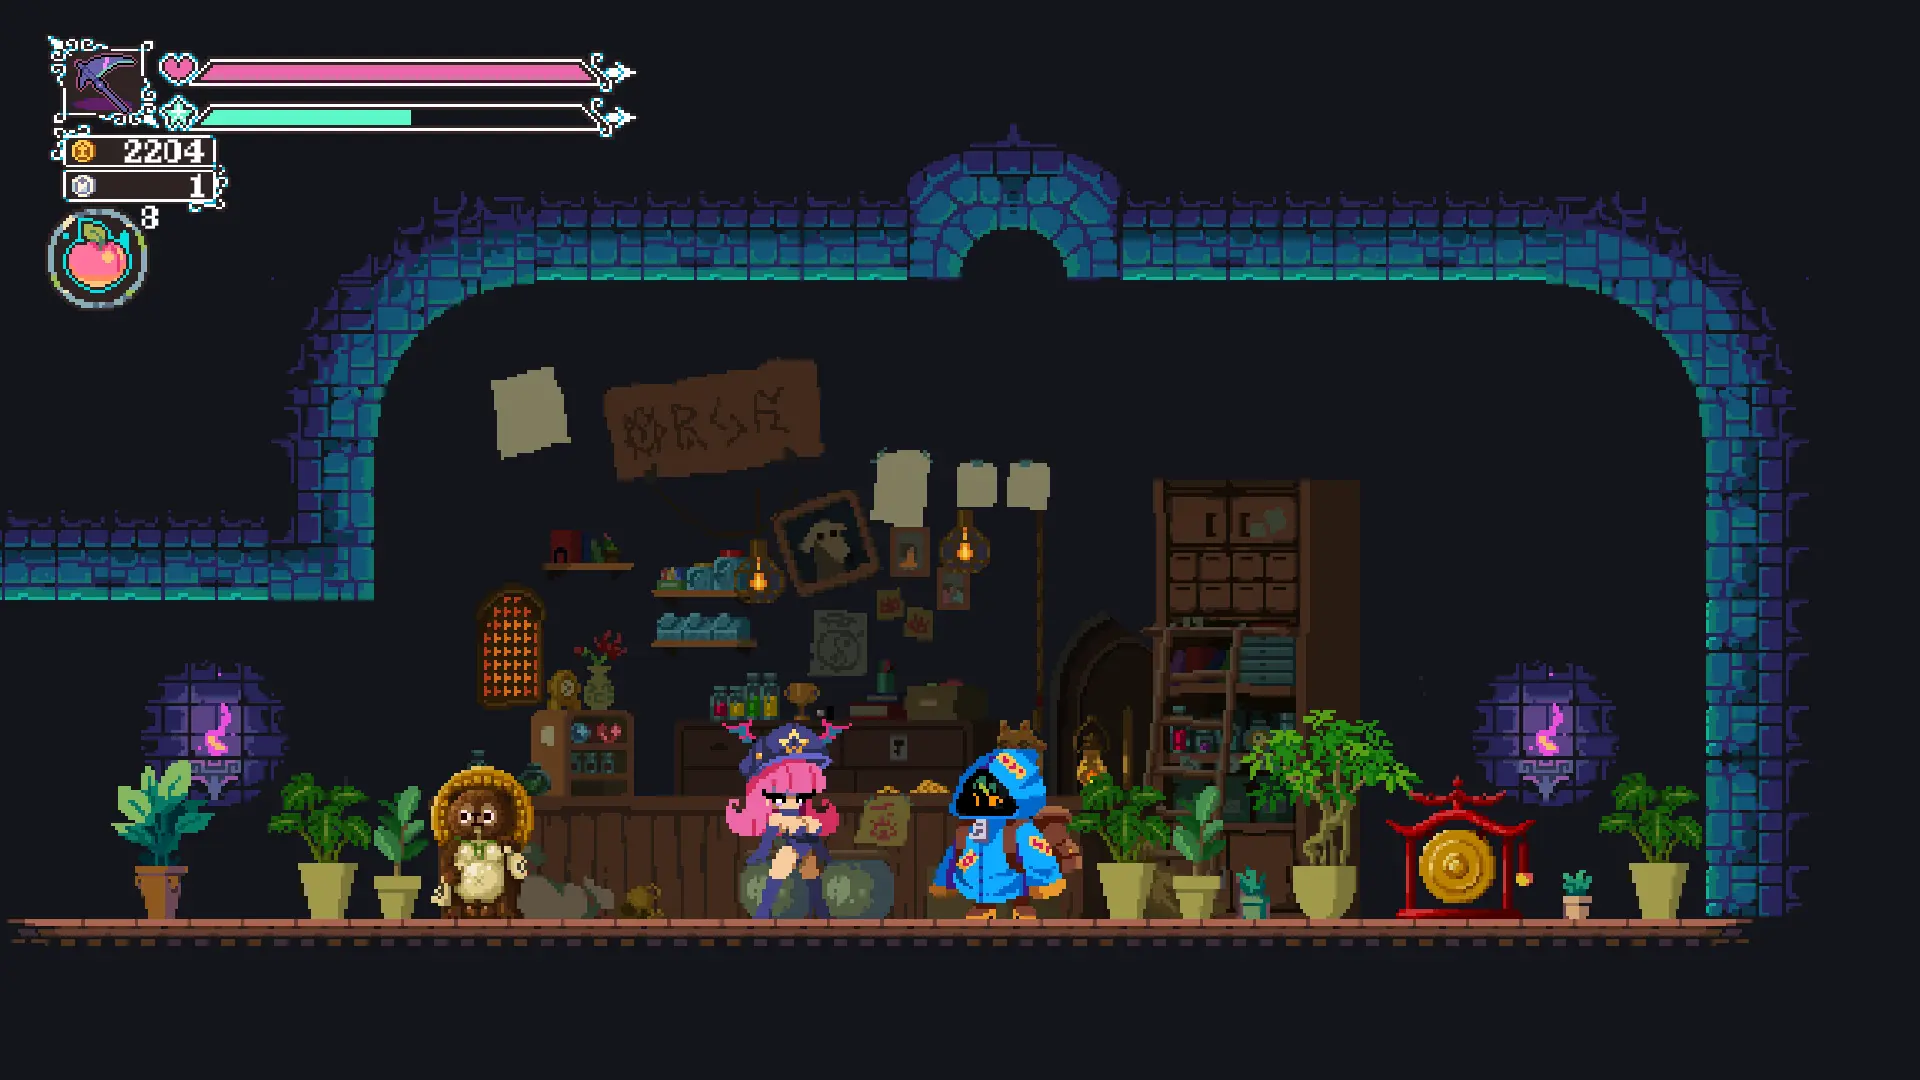

This location offers:
- Fortune Cat (500G);
- Heart Necklace (1 000G);
- Star Bracelet (?G); and
- Frilly Panties (1 000G).
Location 3: Rose Garden – Ghost Castle
In order to find this location, you’ll need to travel to Ghost Castle. The Elf Merchant should be in the rose garden to the west of the large 3-room centre of the Ghost Castle.
This location offers:
- Disarming Bell (?G).
Location 4: Outskirts of Jigoku – Jigoku
In order to find this location, you’ll need to travel to Jigoku. The Elf Merchant can be found in one of the rooms on the east outskirts of Jigoku.
This location offers:
- Demonic Cuff (?G); and
- Yellow Frog Talisman (?G).
Location 5: Secrete Room – Tengoku
In order to find this location, you’ll need to travel to Tengoku. The Elf Merchant can be found in one of the secrete rooms close to the center of Angelic Hallways.


This location offers:
- Mind Mushroom (?G); and
- Ring of The Moon (?G).
Location 6: Treasure Room – Fungal Forest
In order to find this location, you’ll need to travel to Fungal Forest. The Elf Merchant can be found in one of the treasure rooms to the east of Fungal Forest.
This location offers:
- Magical Mushroom (?G); and
- Ring of The Sun (?G).
Location 7: Secrete Room – Slime Citadel
In order to find this location, you’ll need to travel to Slime Citadel. The Elft Merchant can be found in one of the secrete rooms to the far bottom-right of Slime Citadel.

This location offers:
- Slimy Sentry (1 000G); and
- Blue Frog Talisman (500G).
Location 8: Treasure Room – Chaos Castle
- Haunted Scythe (0G?).
Thimble Locations
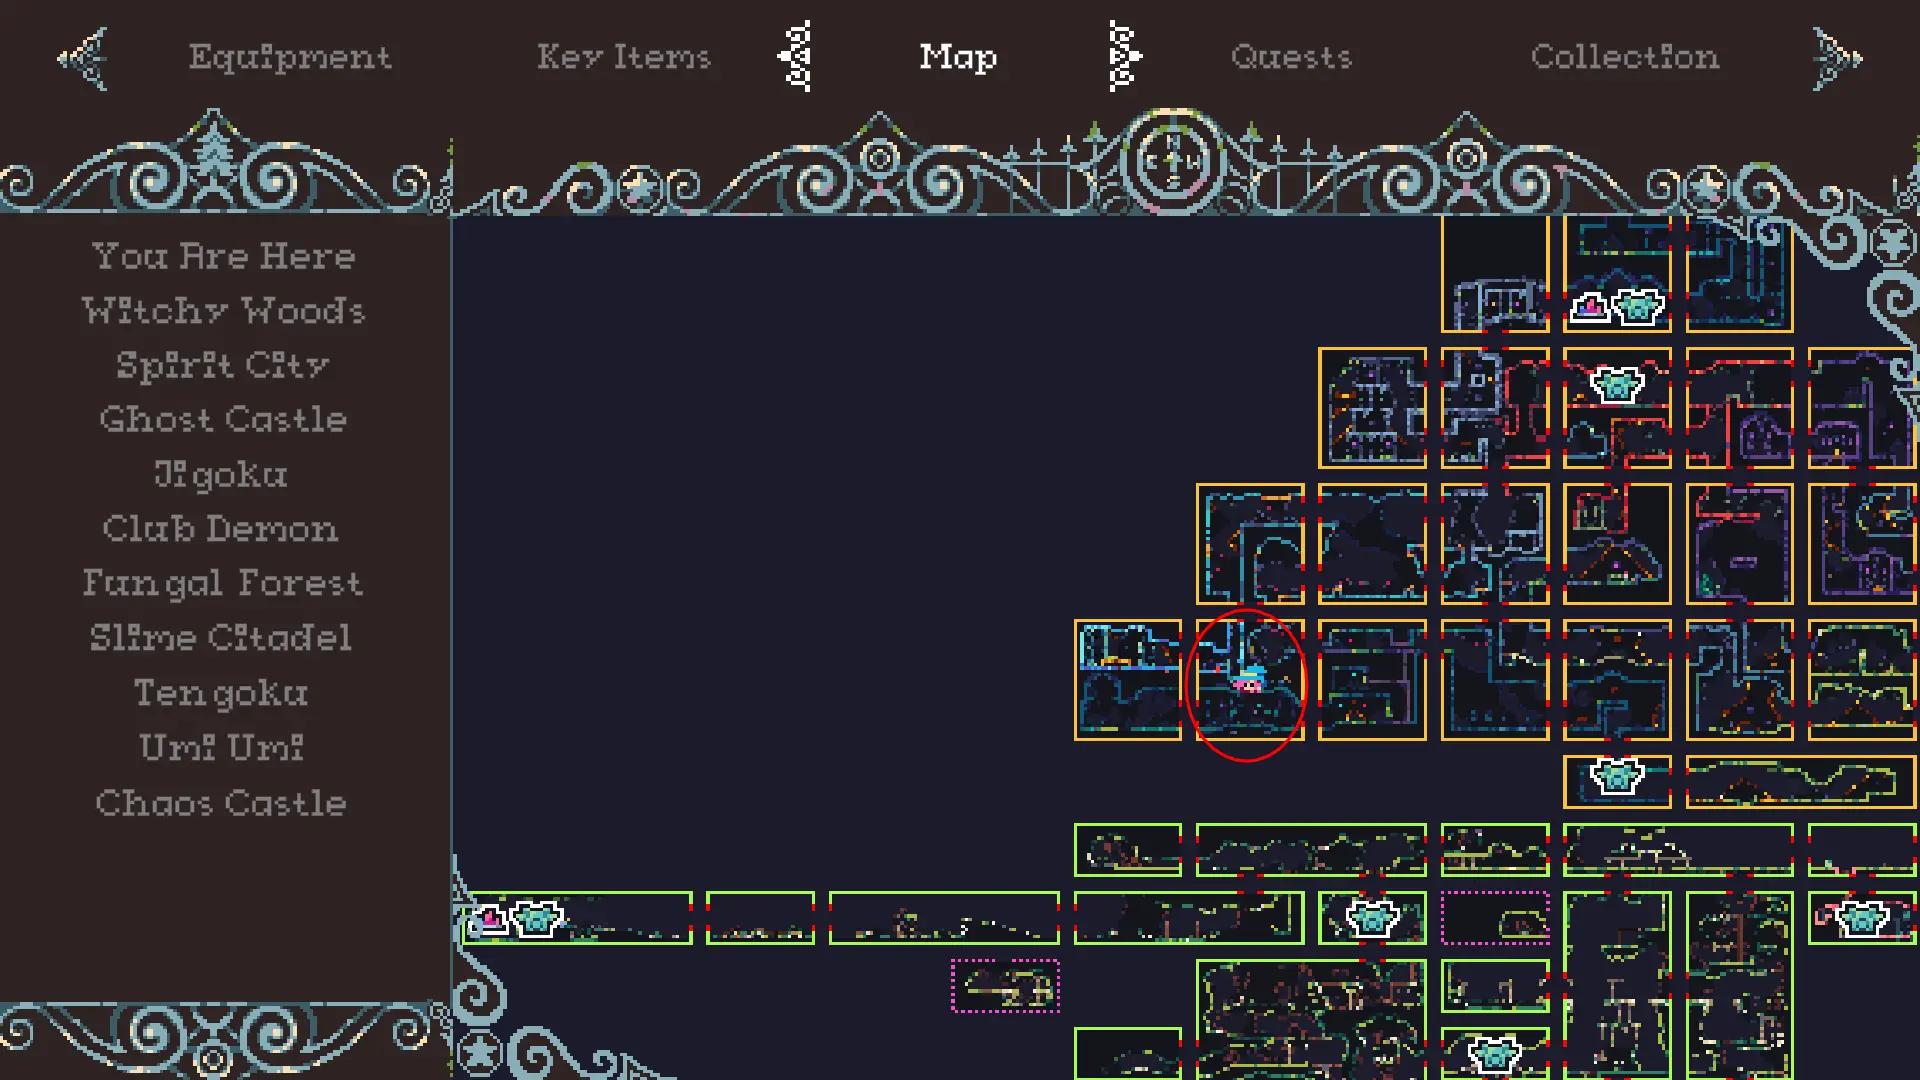
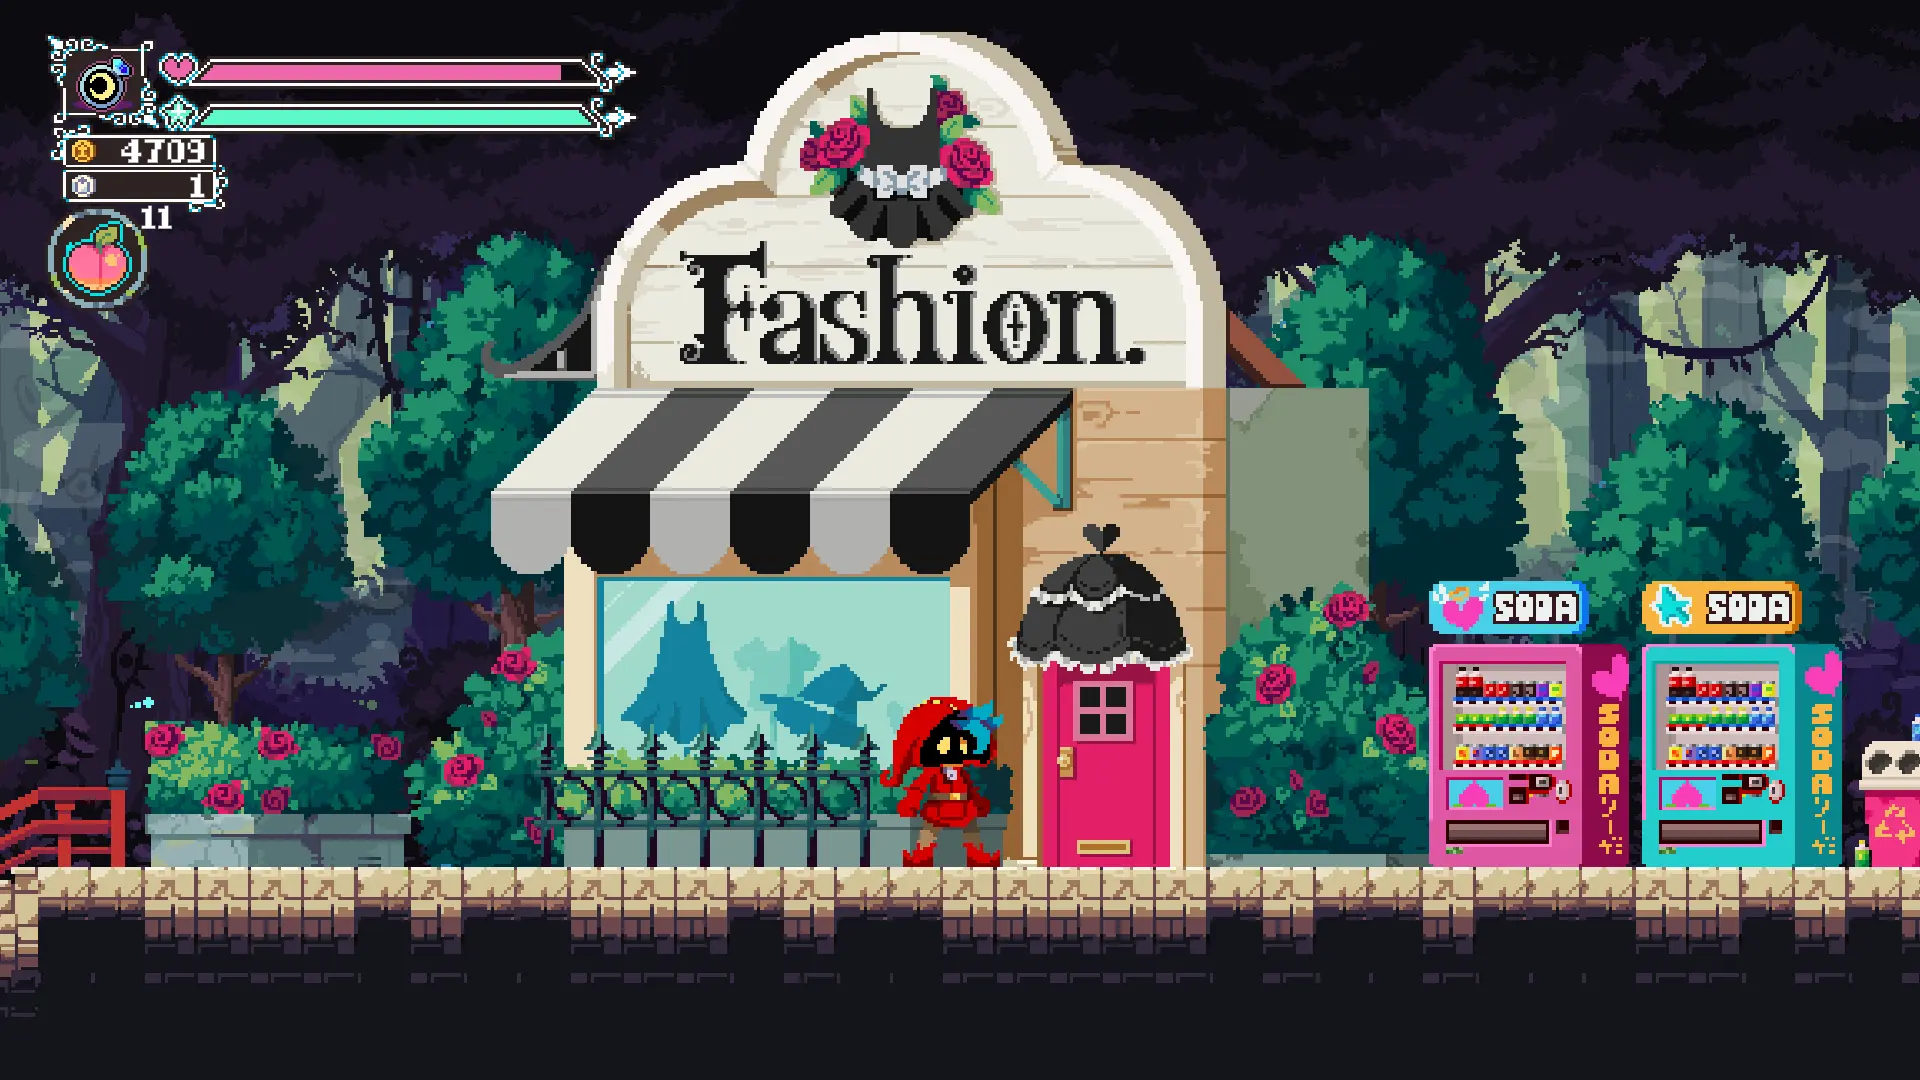
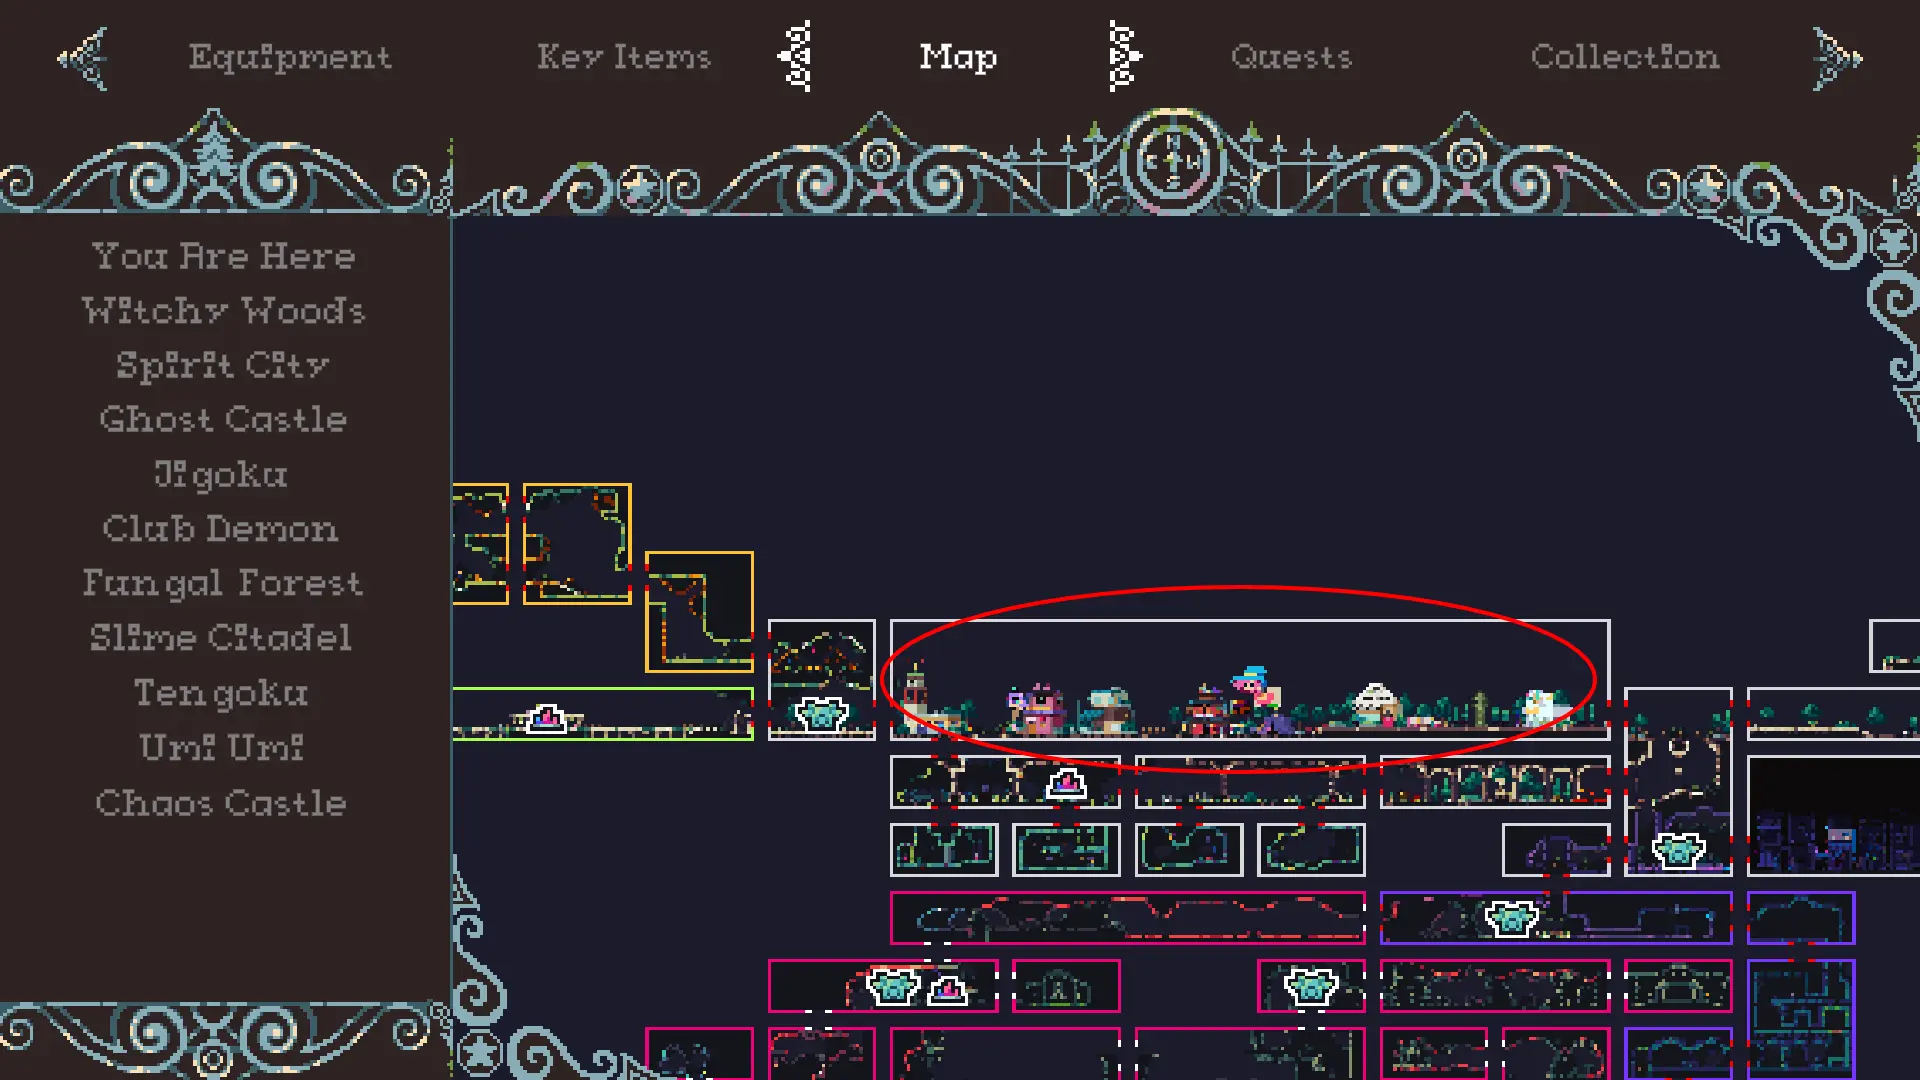
Location 1: Fashion Shop – Spirit City
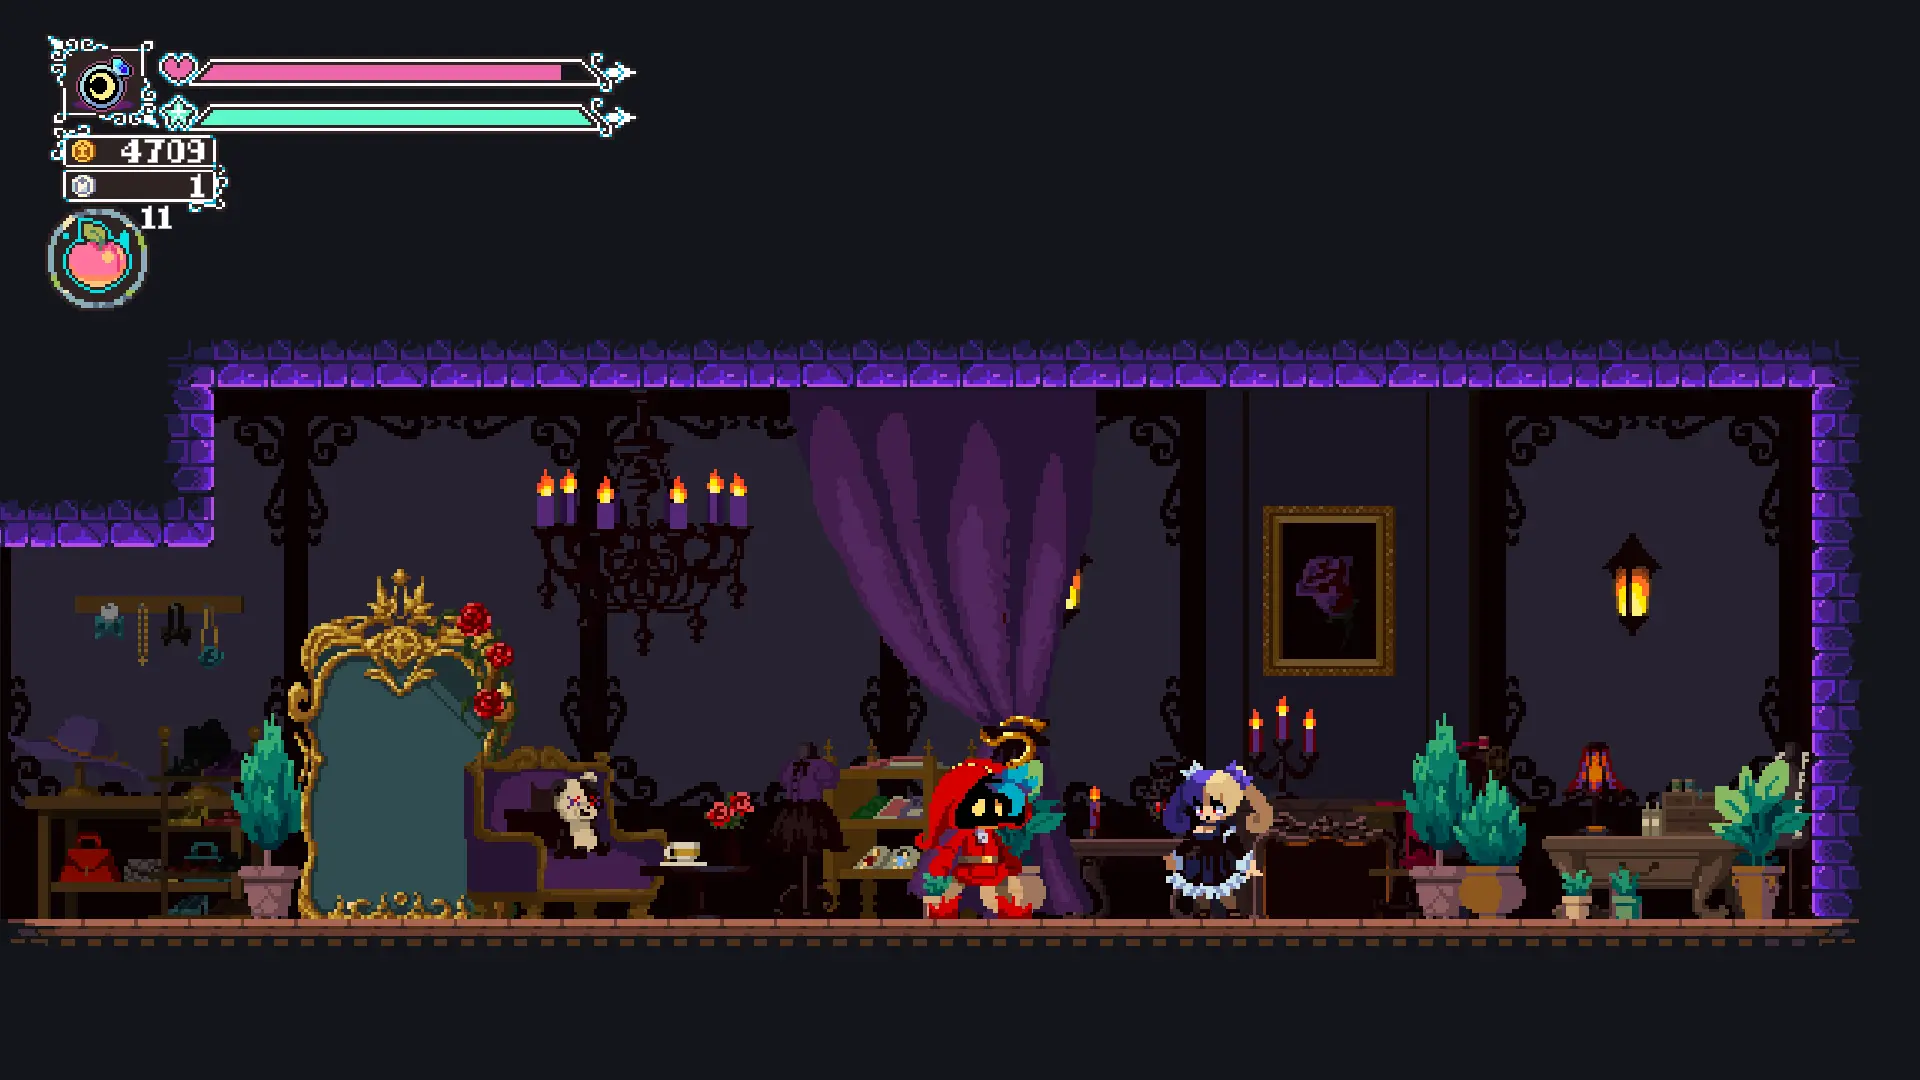
In order to find this location, you’ll first need to find the Fashion Shop, which can be found on the right-hand side of Spirit City. Once inside, head towards the back and you should find Thimble.
This location offers:
- Cat Costume (500G); and
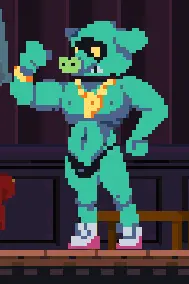
- Goblin Costume (?G).
Location 2: Corridor – Ghost Castle
In order to find this location, you’ll need to travel to Ghost Castle. Thimble should be in one of the corridors of Ghost Castle.
This location offers:
- Nun costume (500G); and
- Priest costume (500G).
Location 3: Sofa Suite – Club Demon
In order to find this location, you’ll need to travel to Club Demon within Jigoku. Thimble should be in one of the sofa suite rooms to the west-side of Club Demon.
This location offers:
- Miko costume (500G); and
- Farmer costume (500G).
Location 4: Secrete Room – Tengoku
In order to find this location, you’ll need to travel to Tengoku. Thimble should be in one of the rooms to the far west-side of Angelic Hallways:
This location offers:
- Postman costume (500G); and
- Nurse costume (500G).
Location 5: Fungal Forest Bridge – Fungal Forest
In order to find this location, you’ll need to travel to Fungal Forest. Thimble should be under the bridge, right at the start of the Fungal Forest biome.
This location offers:
- Maid costume (1 000G); and
- Pigman costume (?G).
Location 6: Boombox Room – Slime Citadel
In order to find this location, you’ll need to travel to Slimy Depths within Slime Citadel. Thimble should be in the room with a boombox in it. This room is slightly below the center of Slime Citadel.
This location offers:
- Dominating costume (500G); and
- Alchemist costume (500G).
Lucky Coin Collector (Girl Gacha Completion)
In order to complete the girl gacha collection, we’ll need to collect 41 Lucky Coins (there are 42 Lucky Coins in total that can be collected). First off, we’ll start with the location of all the girl gacha machines, then we’ll go through the locations of all 42 Lucky Coins.
Girl Gacha Machine Locations
Special Promotion Gacha Machine – Witch Woods
The first gacha machine we encounter can be found within Witchy Woods:


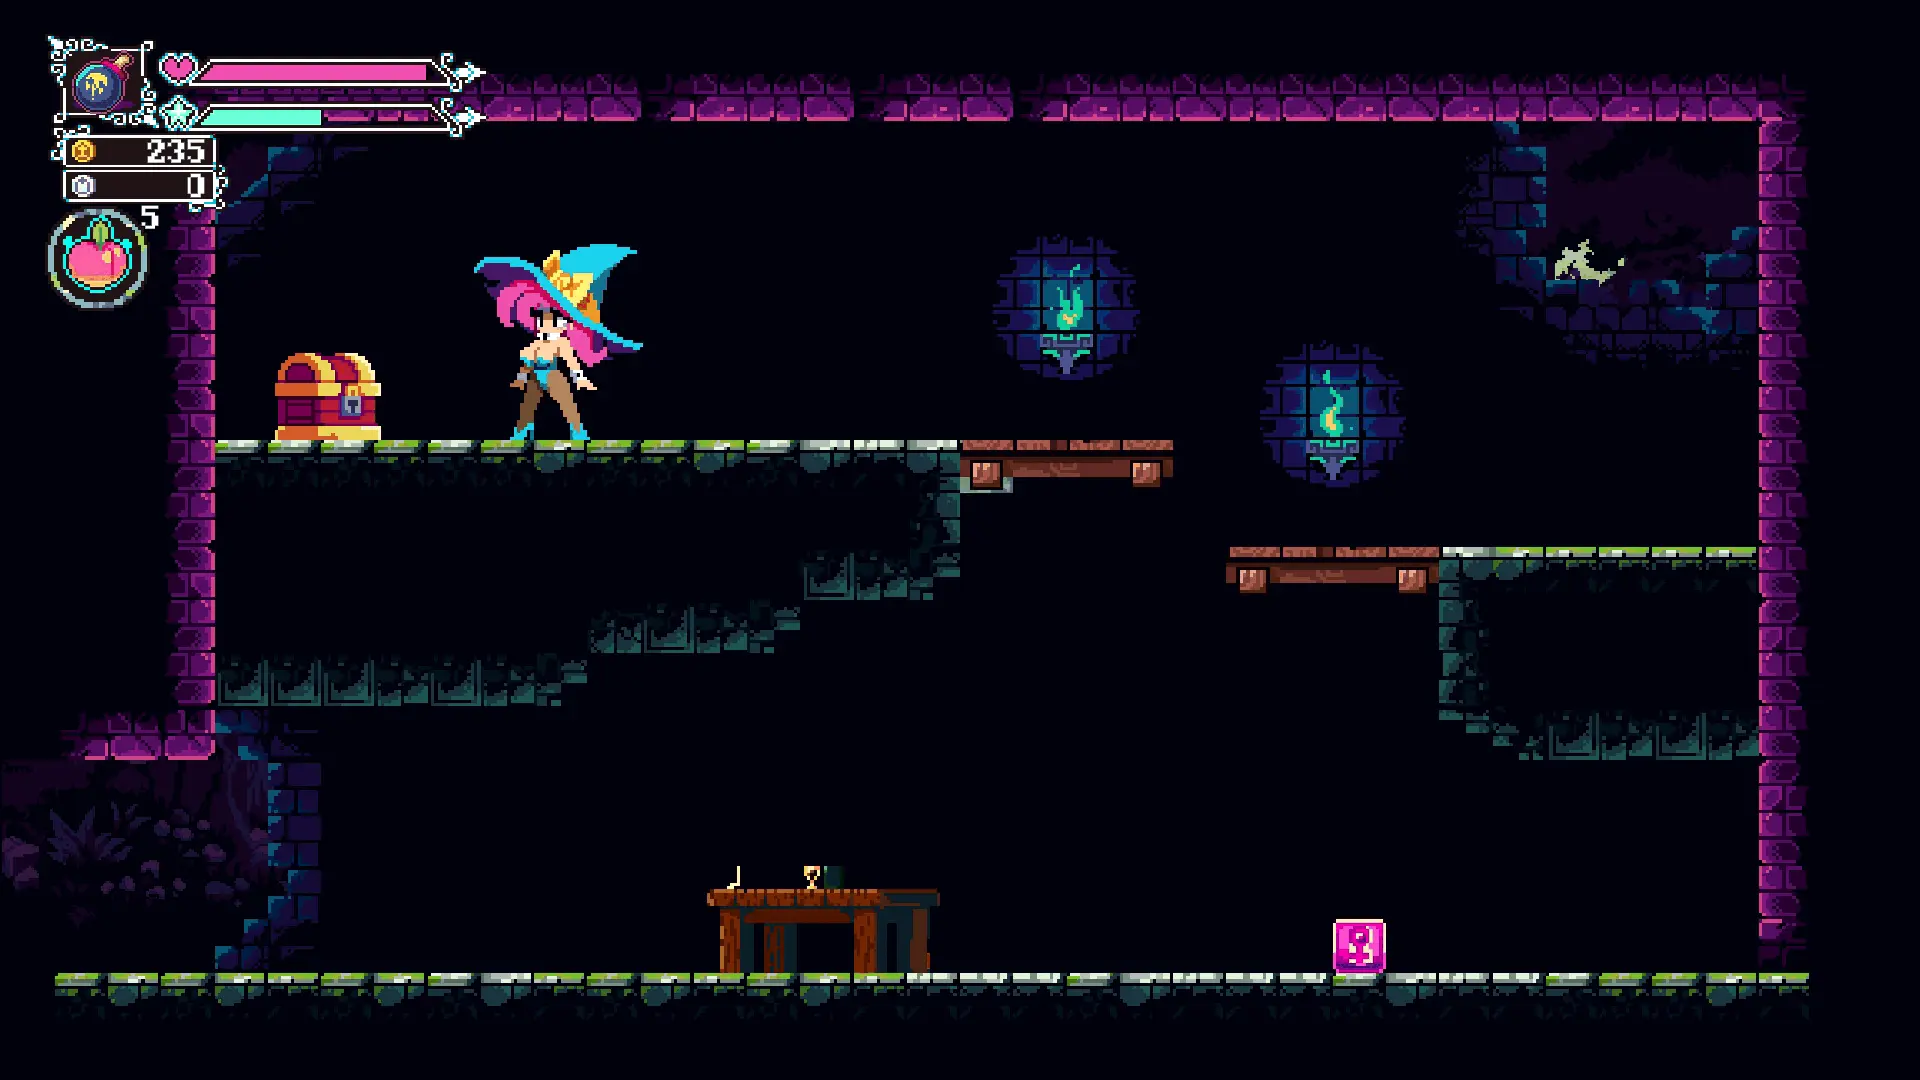
Animal Girls Gacha Machine – Spirit City
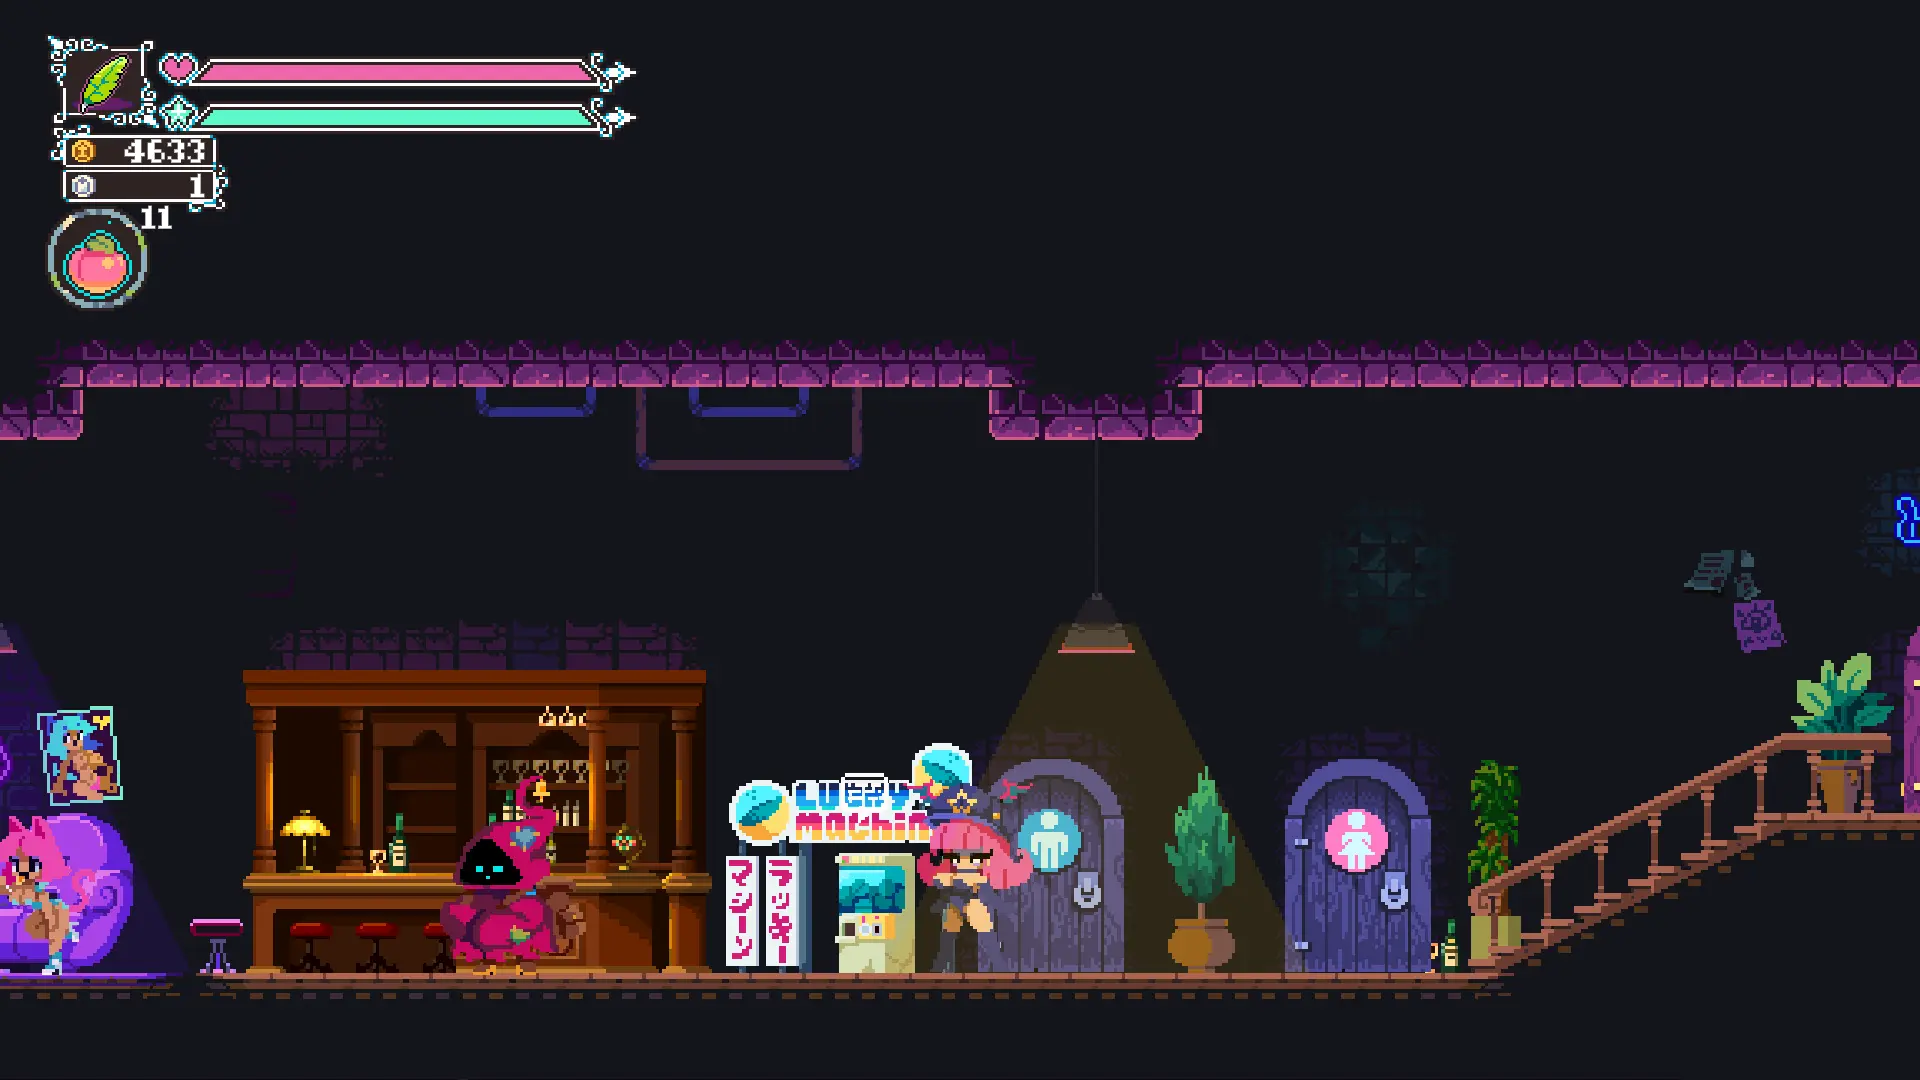
In order to find this gacha machine, we’ll need to find Cabaret Cafe (must be unlocked first). Once inside, head towards the back and you should find it just after the bar:
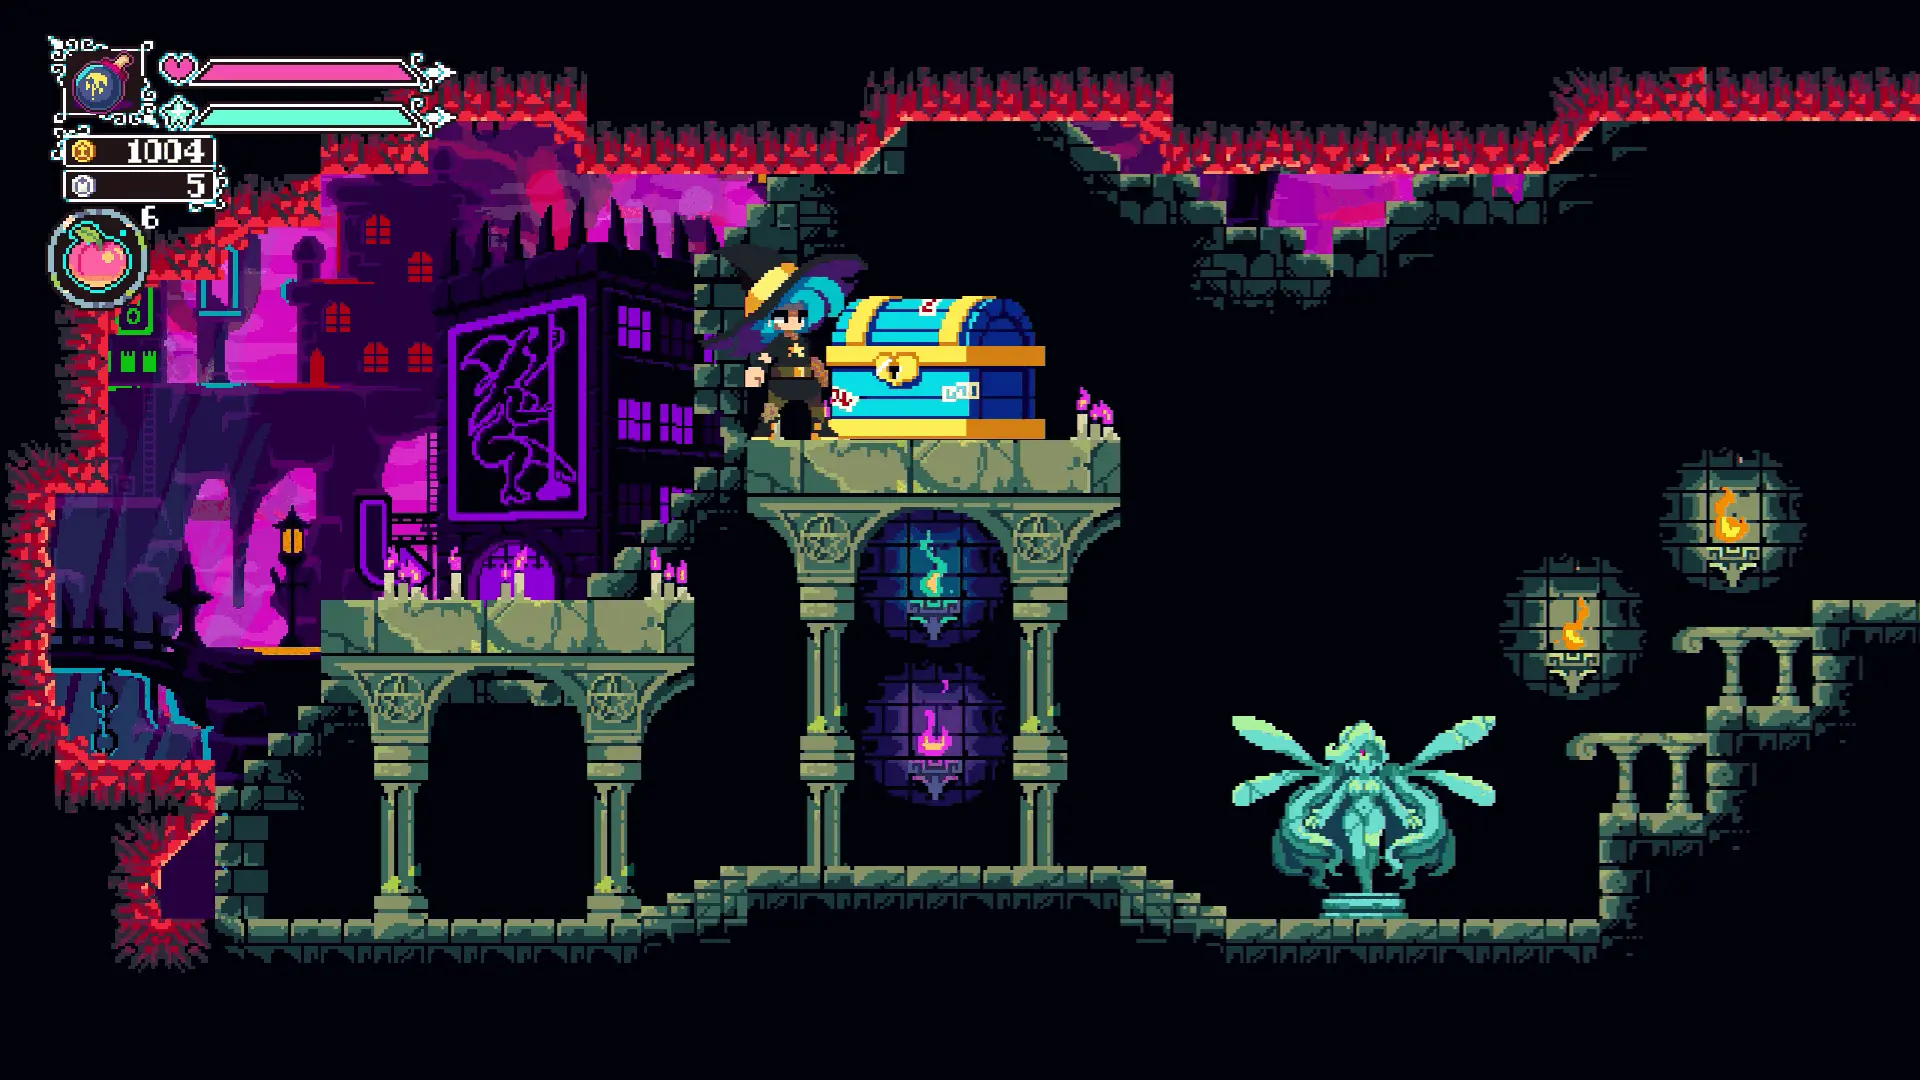
Angels & Demons Gacha Machine – Spirit City
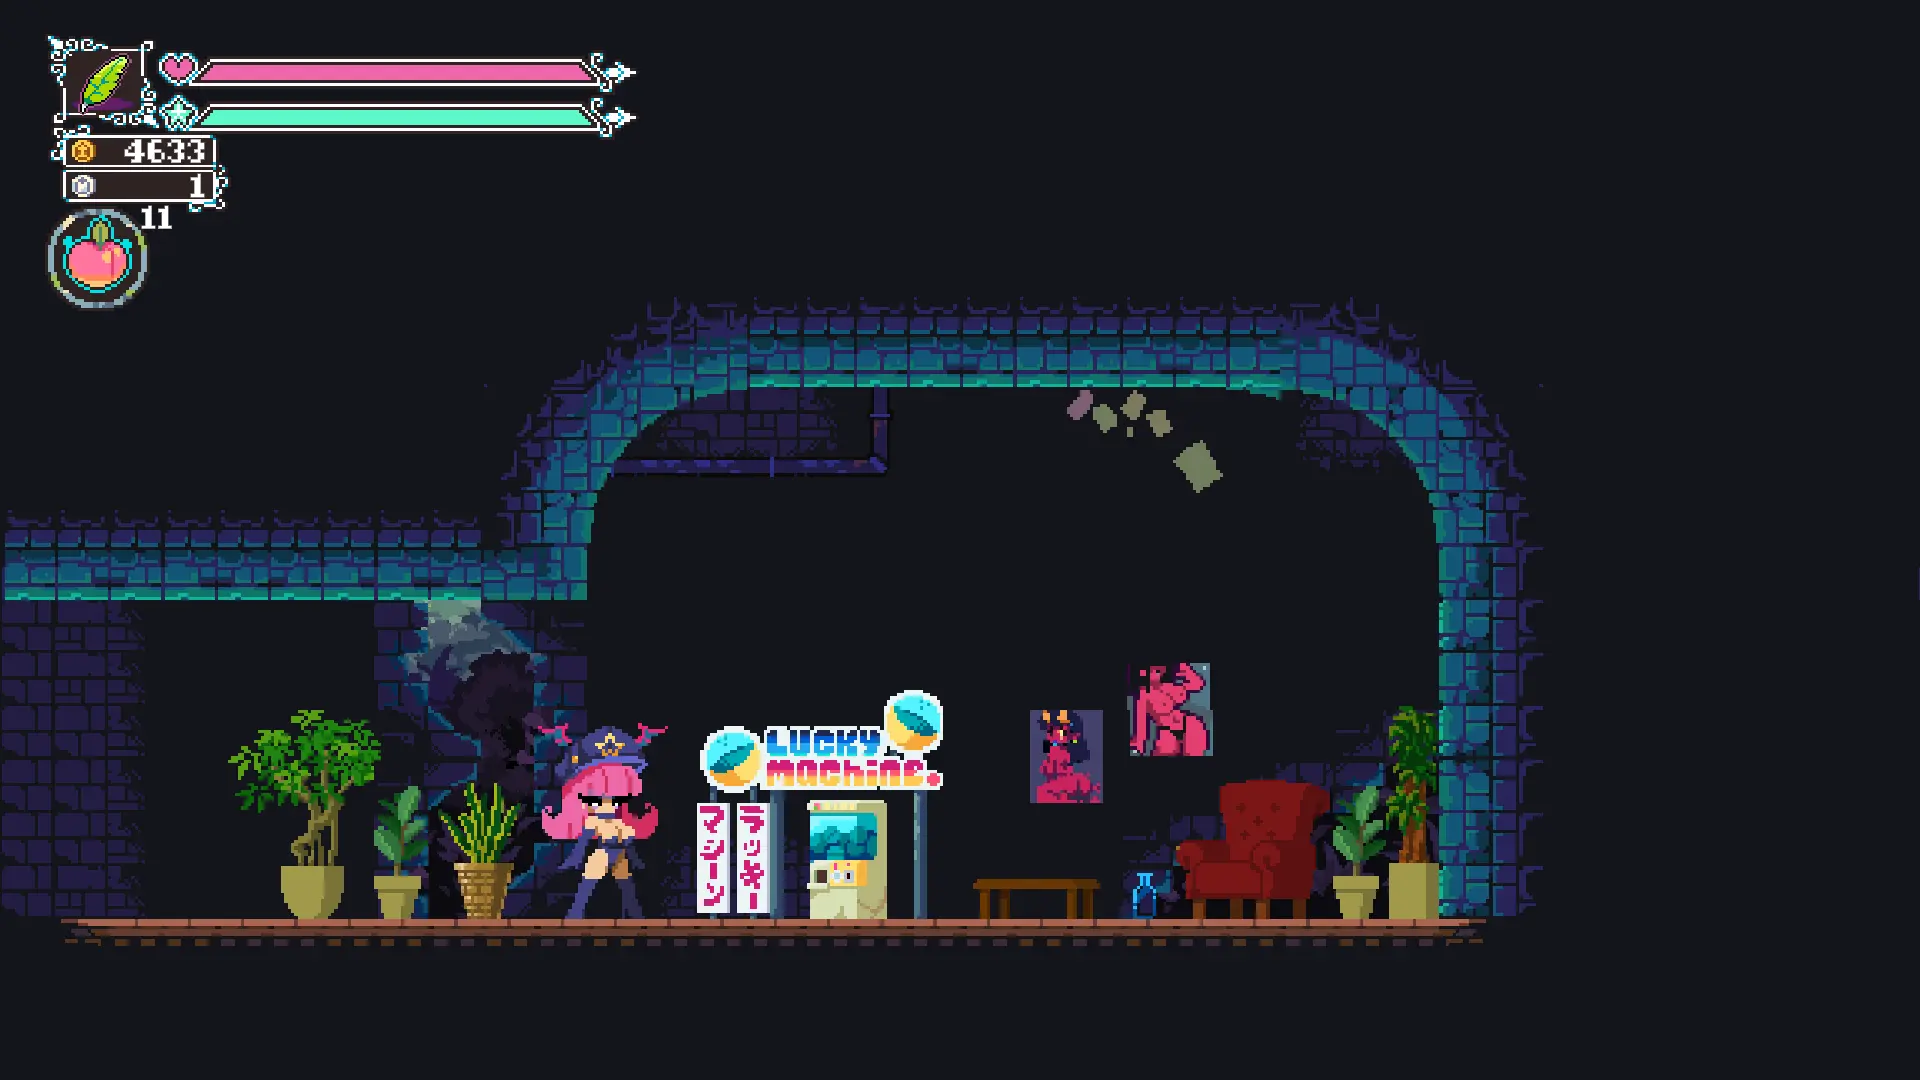
In order to find this gacha machine, we’ll need to find the Spirit City apartment. Once inside, head towards the back and you will find it:
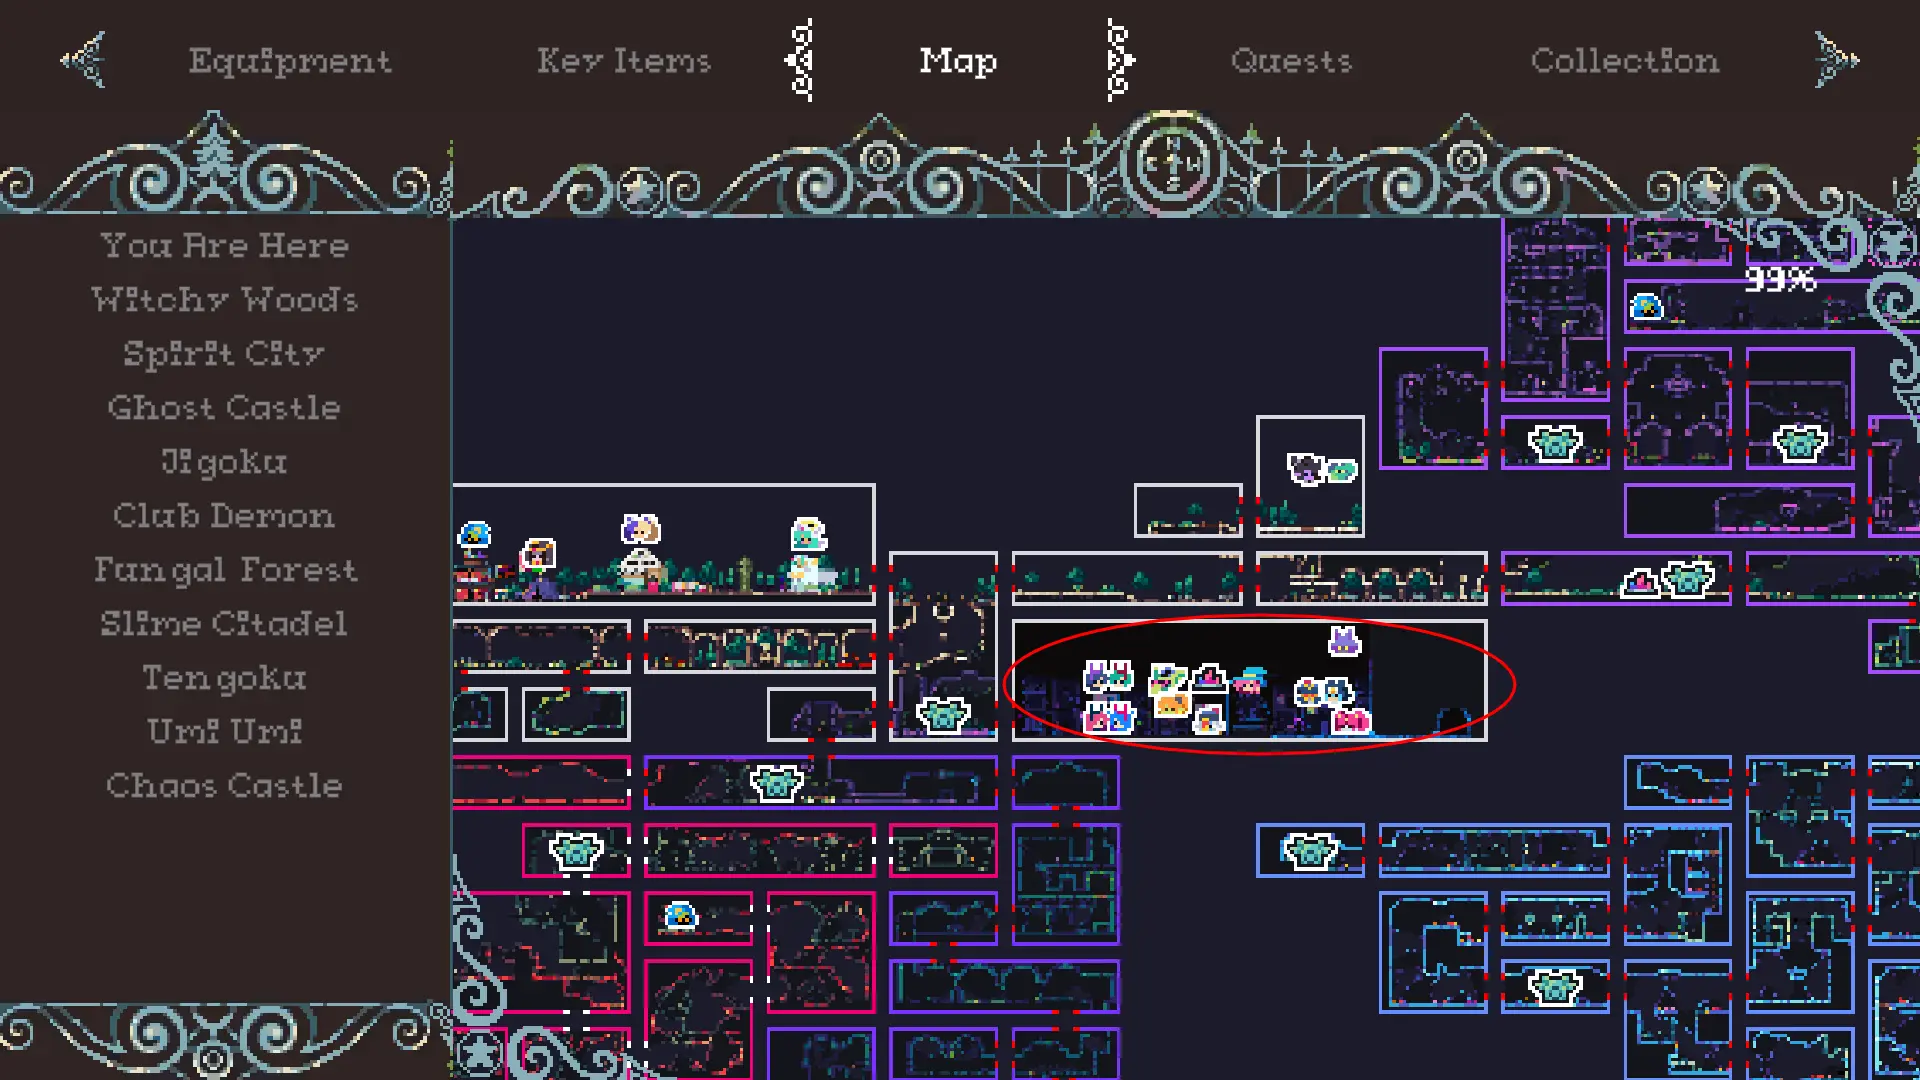
Monster Girls Gacha Machine – Spirit City
In order to find this gacha machine, you’ll need to travel towards the centre of Spirit City. It can be found between the Rare Items Shop and the Psychic’s Tent:
Note, all of the above Spirit City Gacha Machines can be found within this room on the map at previously mentioned locations:

Bunny Girls Gacha Machine – Shady Alley
In order to find this gacha machine, you’ll need to travel to Shady Alley and find Kyoni‘s foodstall. It should be just before Kyoni‘s foodstall:
Lucky Coin Locations
Hope its finished and not left on To be continued D: