Looking for a quick guide to the tactics, team building and mechanics you’ll need in Limbus Company? You are in the right place. In this guide, you’ll find tactics, how to build a team, and more to help you succeed at Limbus Company! Start reading the tactics you need at Limbus Company without wasting your time!
We know that there are people who have a hard time finishing the Limbus Company game. If you are one of those who find it difficult to finish the game, let’s take you to our Limbus Company guide.
Limbus Company Tactics & Team Building Guide
Welcome to our Limbus Company Tactics & Team Building Guide. There is no defined meta as of yet, and some mechanics might not be understood entirely. That being said, many people are reporting getting hard-stuck on 2-18 or 2-12, which means that the tactical level of the game might be tough to wrap one’s head around. We’ll do my best to explain what it takes to win.
Fundamental Overview
This guide isn’t intended to touch on the basics of combat, as that is more or less well explained in the game and the project moon tutorial videos, starting with this one.
That being said, we can touch on a few important things.

This is what your action looks like. It’s how you tell what your ability actually does.
The numbers on the right (5/11 in this example) are your roll ranges. The 4 you see to the left of the glowing 100% is your actual base damage. In this case, the roll starts with a 5 minimum because of some contextual bonus in the case of the screenshot that I can’t quite identify.
The 11 is your theoretical max roll/damage. You’ll notice the +6 next to the coin. This tells you that you will recieve plus 6 base damage on a successful coin flip landing on heads, which is what the roll range refers to. It’s not a proper random range like most games, and is instead a literal 50/50 between 5 and 11, not counting external factors.
Understand that the 100% does not affect your roll, only your damage. So a successful hit in this case with a heads will lead to 22 damage. (probably.)
The sword and shield icon, aka the attack and defense stats, decide the roll if you turn that ability into a defensive one, by long pressing the icon in the action bar (thanks to Manokla for that info)
Def corresponds to dodge and guard, meaning that turning this action into a guard will give you a roll of 16. The sword specifically refers to counters, which is the last of the three defensive options. Each identity has access to one defensive maneuver, so take that into account.
Also, in regards to attack stats, a higher attack stat than the opponent will increase your roll, by +1 for every multiple of five. A subtle mechanic, and mostly useless, but good to know. (Thanks to Karuadin on reddit for this.)
So now you know how attacks work. What about clashing?
What defines a clash is pretty well explained, so i won’t go over it here. However, how coins work in clashes in not.
In essence, it goes like this. If you win a clash with a higher coin, neither takes damage. However, the loser loses that coin, and the winner keeps his. For instance, if a sinner with three coins in his attack clashses with an opponent with two, and the sinner manages to beat both of the opponents attacks, he will strike him uncontested three times for every coin. However, if the opponent manages to beat one of the clashes, the sinner will consume that coin before clashing again.
In this example, if the opponent wins one clash but loses two, the sinner will strike him two times.
Really though, this is the least important part.
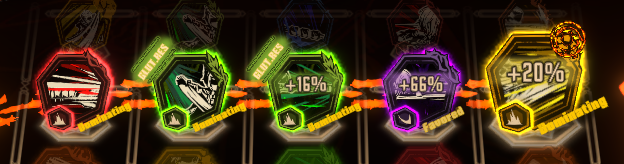
This is what you want to look out for. The game will just outright tell you how hard the advantage lies on you for any individual attack. It goes from favored to dominating in positive, and struggling to hopeless in negative. If you simply select actions that are positive, then you will be fine for that round. You don’t really need to study the intricacies of every move.
And one last thing to note that is extremely important: sanity affects the likelihood of a positive or negative roll. If you aren’t using your ego’s and are building a positive sanity for your team, then you will most likely roll heads almost every time, making it consistent and reliable.
Teambuilding, Affinity and Tactics
Now for what trips people up the most.
The long and short of teambuilding is this: focus on a few affinities to keep your egos fed.
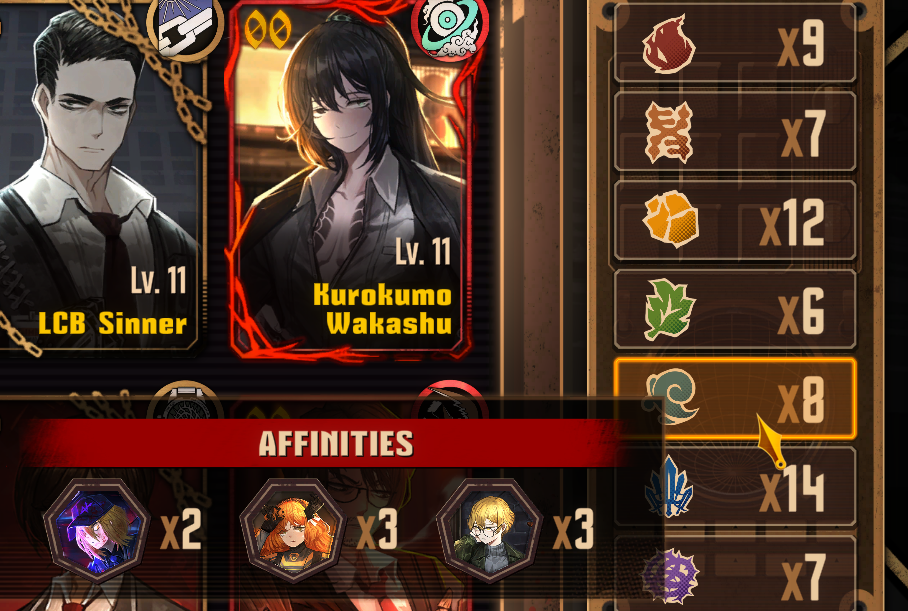
Mousing over an affinity will tell you which units you have that can trigger it. This is decided by individual attacks. In the previous section, look at the example image again. Notice the color and icon on the top right of the attack illustration. In this case, it is blade affinity (or whatever the it’s actually called.).
Using this abillity will give you one blade affinity. Some, especially skill threes, can give even more.
This is the currency used for EGO attacks.
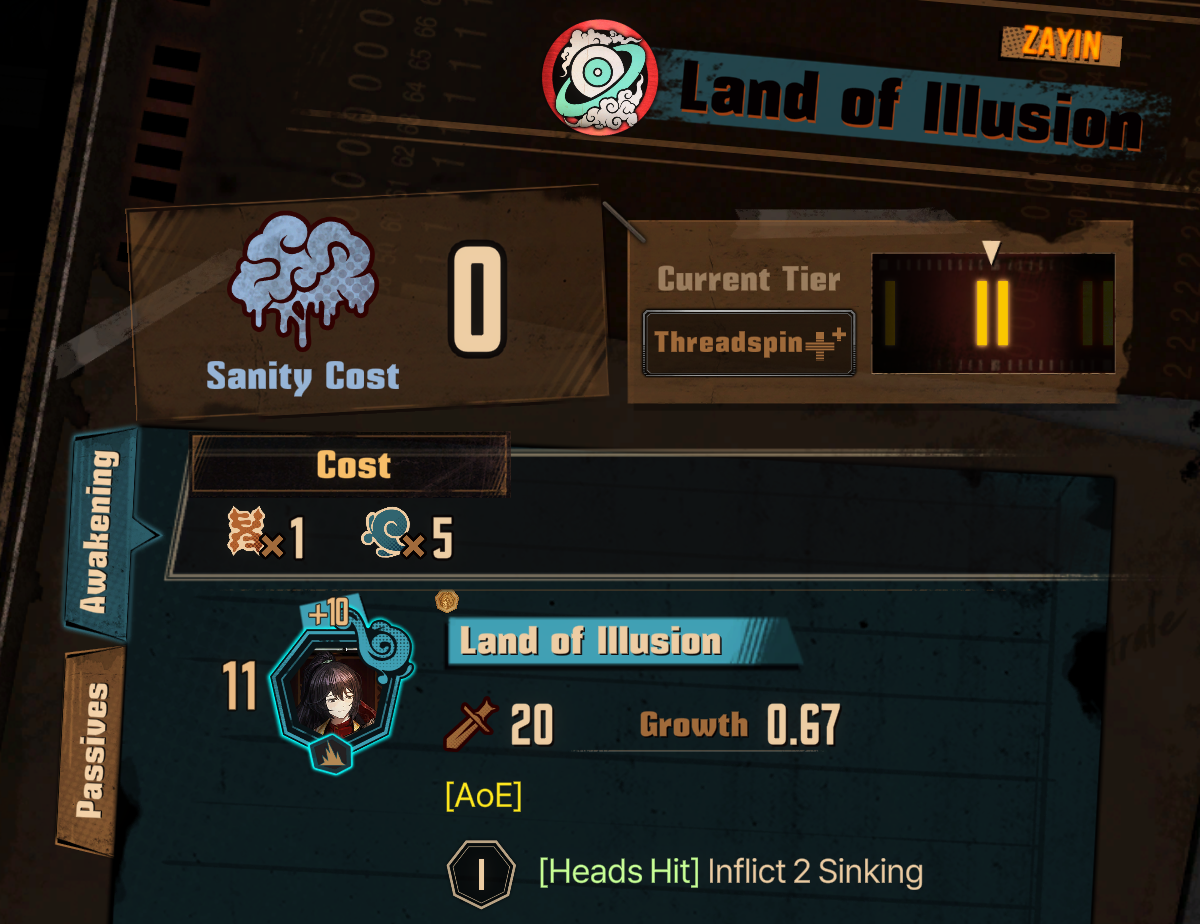
In this example, you need five water and 1 DNA. (again, not what they’re called, but me if i can remember all that.).
Now this is where the secret sauce comes in. The whole point of teambuilding is to build teams that can fuel the affinities necessary to use powerful egos. Rarity is not important whatsoever, instead, how your team syncs together is.
This game has no roles, or characters who are especially defensive or based on dodging and whatnot – every single character is designed to throw down and win clashes in their own way. What sets them apart is effectively just flavor and affinities.

Here is an example team, my default team.
More Teambuilding, Affinity and Tactics
You might notice that all three units that generate water are on this team. As five water is quite expensive, this effectively means I’m constantly generating water affinity just by using what attacks I would be using on those three characters, Sinclair, Ishmael, and Don. The only other thing it takes is one DNA, which multiple characters generate on that team. With this, I can consistently put out his EGO move, which is a powerful AoE.
I won’t go into the details on this particular team, but all but Sinclair will have their egos up consistently. Every single affinity that this team generates is also used by this team, save for one, the dark thorns. (I really need to look up these names.).
In this case, I avoid using the thorn abilities if I need to generate ego desperately. As it so happens, the thorn abilities are generally the heavy hitters on this team anyway.
To elaborate, every unit has three skill 1, two skill 2, and 1 skill 3 abilities you can use in sequence before it resets. Meaning that if a unit’s skill 1 is a certain affinity, you will naturally generate more of that affinity as the fight goes on.
It is important to note, however, that trying to fuel every member of the team’s egos is most likely a fool’s errand. It is best to focus on just a few that you can output consistently. For instance, Sinclair literally cannot use his ego on this team. It requires the green affinity, and not a single sinner on this team has a green affinity attack. Sinclair exists because his attacks fill an affinity gap on the team. Nobody else can output fire here, and yet Yi Sang requires a small amount of fire to trigger his EGO.
I hope you’re getting the idea behind the team building. Feel free to copy my team, but the idea is to use this knowledge to build your own team.
Remember this: teams are built around EGO’s, and identities fuel the ego. Some are clearly better than others in regards to raw damage, but since every unit does raw damage one way or another, it’s important to consider affinity as well. If you throw all your highest damage units on one team with no consideration for affinity, then you are.
Now, you might be asking, “why is ego so important? is that extra damage really so valuable?”
In essence, they are important for this reason: winning clashes.
Often you will be forced into a clash you know you are almost definitely going to lose, and since auto targeting is a thing, you might be in a really bad spot because of this. That’s when you bust out your ego, and clash with the ego. Any ego will almost definitely win any clash straight up, though it’s not technically a guarantee. Not only that, but you will likely do enough damage to stagger the opponent, or at least set them up for a stagger.
With proper ego usage, you can turn a situation where you would have gotten your sinner staggered and thus starting a domino effect where you get team wiped, to instead taking zero damage and staggering the opponent, thus starting a domino effect in a direction you want, and shifting the momentum of the fight.
But to be able to do that, you need the juice to do it. And to get that juice, you need your sinners to support each other properly.
And that’s about it. Please leave comments if you have any valuable input. As this is just day one, some information may be wrong or misguided.
(Comment and rate if you will, if enough people want ill sit down and properly format and organize this, and elaborate on specific team comps and difficult levels as I plan to blow through chapter 3 tonight.)