Hello from our Lords of the Fallen Walkthrough 2023 guide. In the year 2023, Lords of the Fallen unfolds within the enigmatic realm of Mournstead, a land plunged into darkness and turmoil by the malevolent Demon God Adyr. As you step into the shoes of the Dark Crusader, your journey unfolds, guiding you through a series of distinct and captivating domains, each linked to the quest of extinguishing the flames of five pivotal beacons.
Lords of the Fallen Walkthrough Guide
Welcome to our Lords of the Fallen Walkthrough 2023 Guide. Throughout your odyssey, we will serve as your trusted companions, directing you to valuable equipment upgrades, hidden collectibles, and pivotal items that bear significance in your quest. In addition, we will shed light on the optional side quests that lie in wait for your exploration as you navigate between the realms of Axiom and Umbral. Furthermore, we’ll offer indispensable advice and strategies to empower you in your pursuit of vanquishing the formidable adversaries that stand as sentinel bosses along your path.
Defiled Sepulchre Walkthrough in Lords of the Fallen
The Defiled Sepulchre serves as your initial location in Lords of the Fallen, where you’ll receive your first lessons in the game’s fundamental controls and mechanics. In this segment of our Lords of the Fallen Walkthrough, we will guide you through your inaugural adventure step by step, offering insights into the adversaries you’ll confront and highlighting significant discoveries.
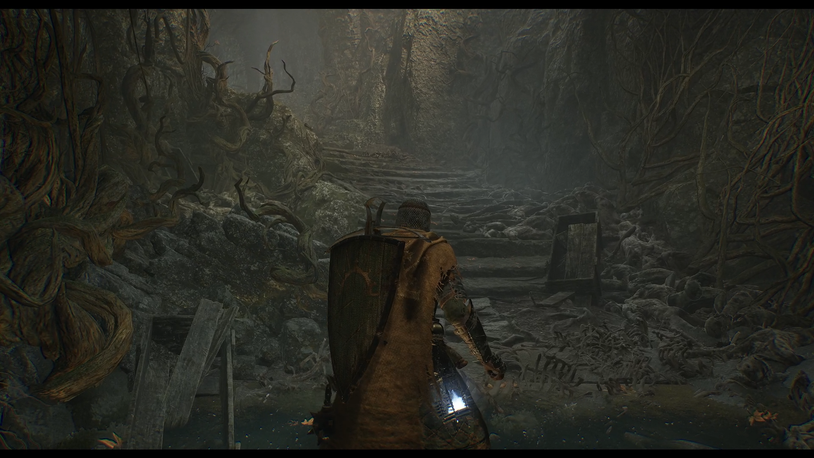
Once you’ve selected your character class and shaped your avatar, your journey commences within the Defiled Sepulchre. Here, you’ll find yourself equipped with a radiant blue lamp, a gift from a enigmatic stranger who instructs you to rendezvous with them later on the bridge’s boughs.
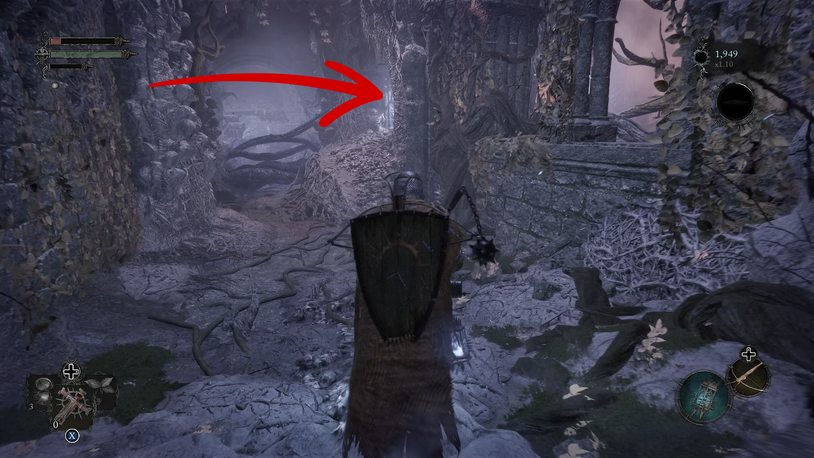
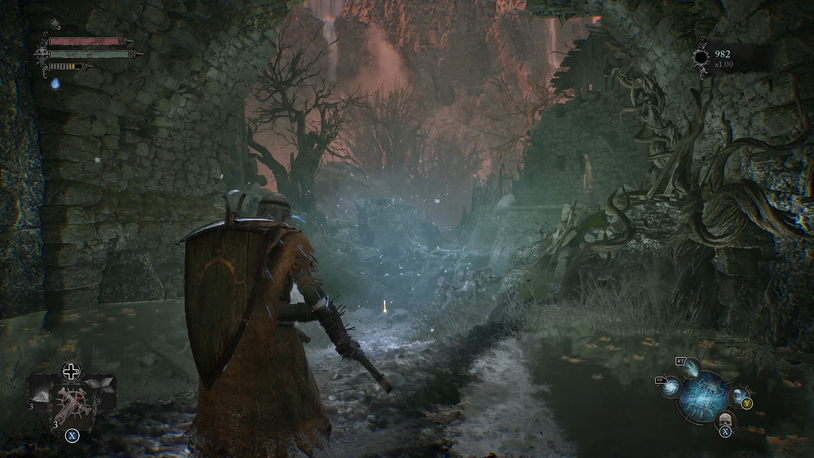
Begin your journey by ascending the stairs directly ahead. Upon reaching the summit, you might initially perceive it as a dead-end, with overgrown branches obstructing your view through the windows. Pivot to the left, where you’ll observe destructible wooden crates and coffins partially obscuring the entrance to the subsequent area. Smash through these obstructions to enter the following room, where you’ll encounter your inaugural adversary and have the opportunity to put your combat prowess to the test.
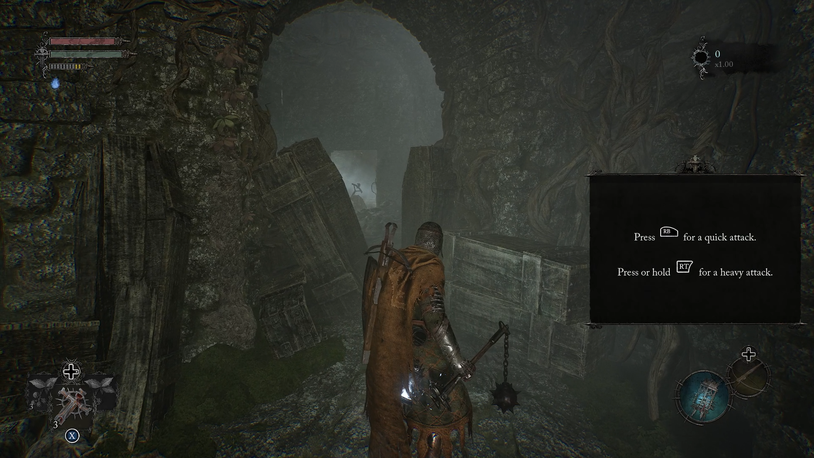
Combat Tutorial
How to Execute Attacks
To perform a Quick Attack, simply press the Left Mouse Button or RB. For a more powerful Heavy Attack, press and hold the Right Mouse Button or RT.
In this room, your adversary wields a wooden cross, making their attacks deliberate and slow. They take their time preparing for an attack, raising the cross high above their head before forcefully slamming it down into the ground.
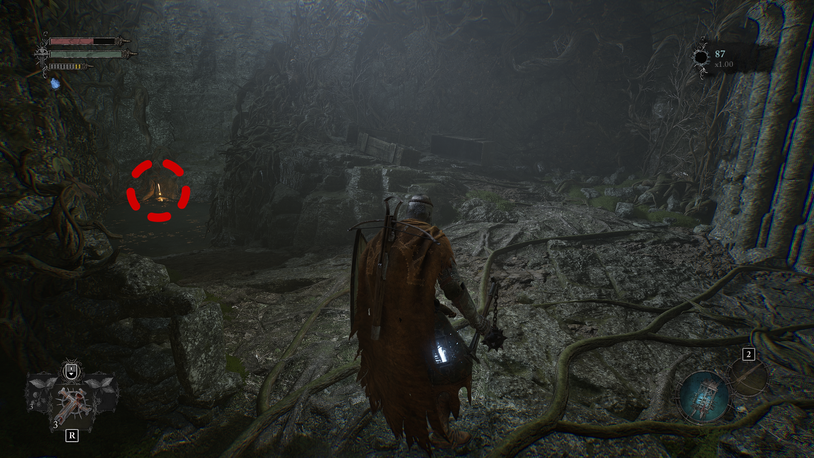
Once you’ve successfully dealt with this opponent, proceed through the ancient ruins. You’ll eventually arrive at a stone doorway leading to the right. However, before passing through it, take a moment to look to your left, where a radiant golden shimmer signifies the presence of an item waiting for you. Descend to the waterlogged area to retrieve this item, which happens to be an Enervated Vigor Skull.
Now, return to the uphill path and venture through the stone doorway to continue your journey. In the next chamber, you’ll receive instruction on how to lock onto targets and switch between them.
Target Locking Tutorial
How to Engage Target Lock
On your mouse, utilize the Mouse Wheel or Middle Mouse Button to lock onto your chosen target. If you’re using a controller, employ the Right Stick for this purpose. Once locked on, you can shift between targets by moving the Right Stick left and right, or by pressing Z and X on your keyboard.
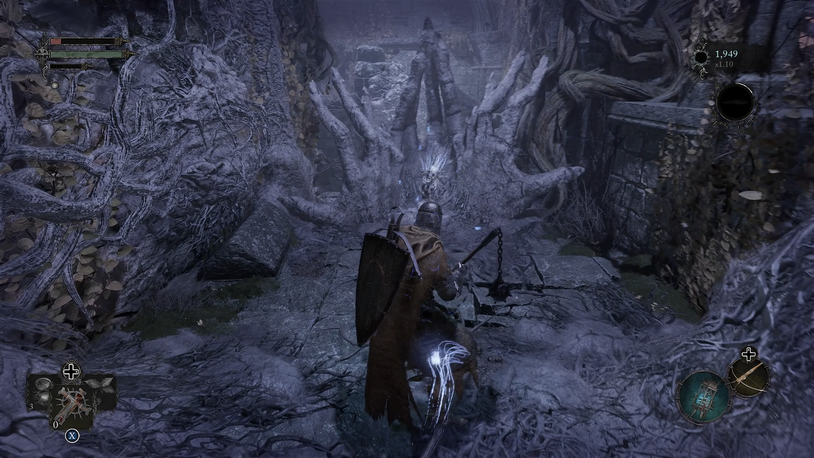
Within this chamber, you’ll encounter two adversaries identical to the one you confronted in the Defiled Sepulchre. They employ methodical, powerful attacks, allowing you ample time to practice the art of switching between targets and evading their assaults.
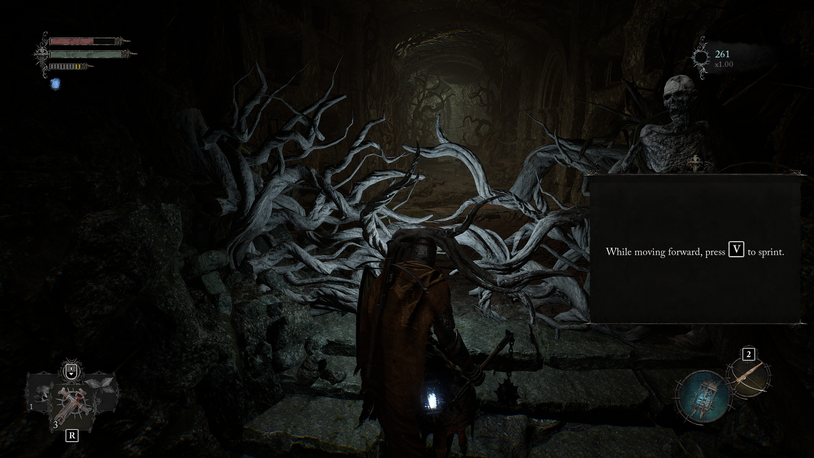
After vanquishing these foes, ascend the small staircase situated on the left side of the statue. You’ll find this staircase in the far-right corner of the room if you’re standing at its initial entrance.
Sprinting and Jumping Instructions
You’ll now have the opportunity to test your sprinting and jumping skills. To sprint up the stairs, press the Left Stick or V, and as you reach the top, break through the thorny barrier adjacent to the skeleton, unveiling the passageway.
Next, you’ll be prompted to sprint and leap across the gap directly ahead in the corridor. However, if you decide to descend here, you can retrieve one of the available Tincts in the game—specifically, the Forsworn Tinct.
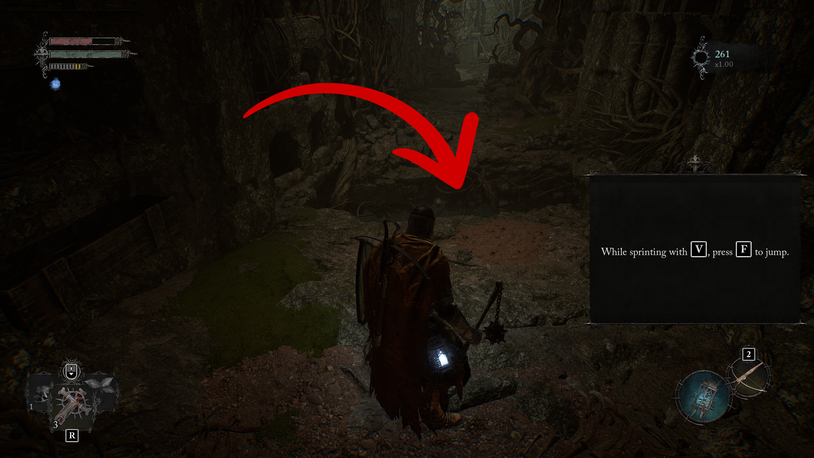
Running and Jumping Over Gaps
To sprint and jump, use the Left Stick and A on your controller, or V and F on your keyboard.
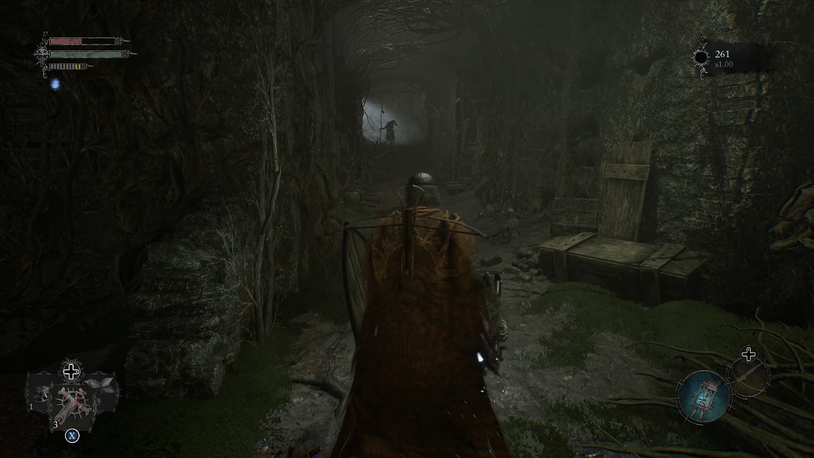
Upon exiting the room, you’ll return to the area with the statue where you recently engaged the two targets. Ascend the stairs once more, then sprint and leap over the gap to access the other side. As you approach the end of the corridor, you’ll veer left and encounter an adversary at the opposite end, who employs ranged attacks, triggering a tutorial on evading such assaults.
Dash and Roll Tutorial
How to Dodge Attacks
To evade incoming attacks, employ the Space Bar, or use B on your controller. A double-tap of these buttons will perform a rolling maneuver, allowing you to swiftly avoid oncoming threats.
After successfully dodging the incoming fireballs and subduing the ranged attacker, ascend the stairs to exit the area. At the pinnacle, don’t forget to collect the Throwing Rock item.
With an understanding of your inventory and gear, you’re now poised to delve into ranged combat.
Ranged Combat Guide
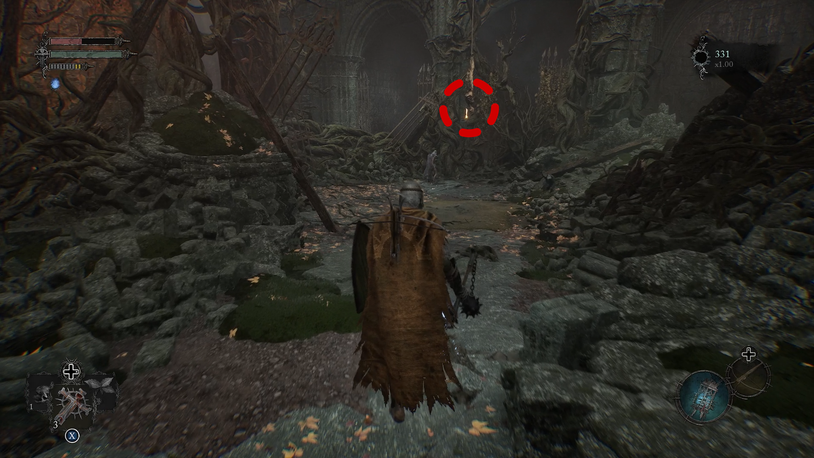
As you venture deeper into the debris-laden terrain, you’ll come across a solitary adversary beneath a hanging corpse. This foe, like the others, wields a lumbering wooden cross, but there’s no need to fret, as you’re encouraged to test your ranged combat abilities. After dealing with the enemy below, employ your ranged weapon to target the suspended skeleton and dislodge the item, revealing your very own Wooden Cross.
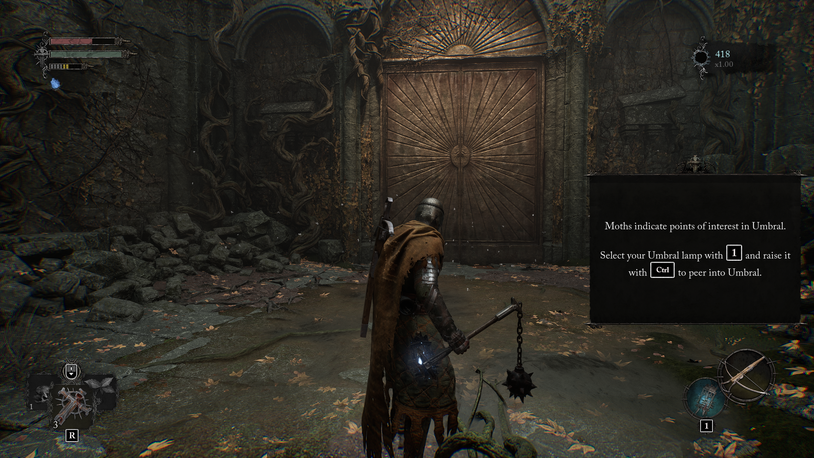
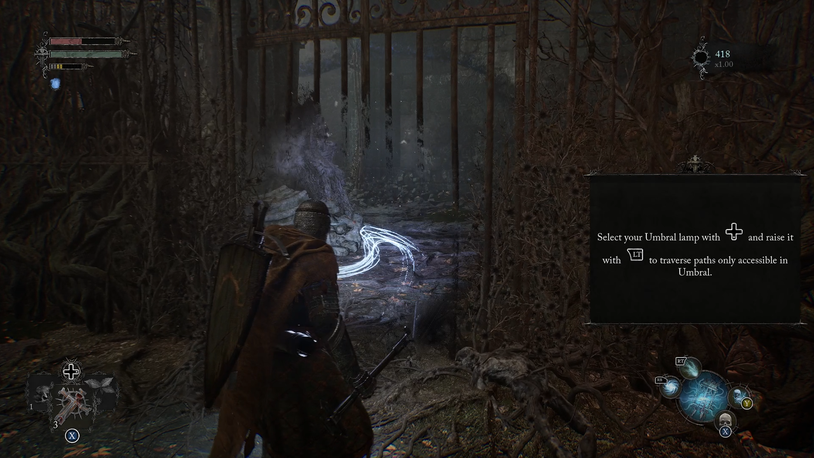
Proceed to the right, making your way towards a door framed by a cluster of fluttering moths outside. This serves as a signal that it’s time to use your Umbral Lamp to exit Axiom and transition into the afterlife realm of Umbral. Raise your Umbral Lamp and gaze through it.
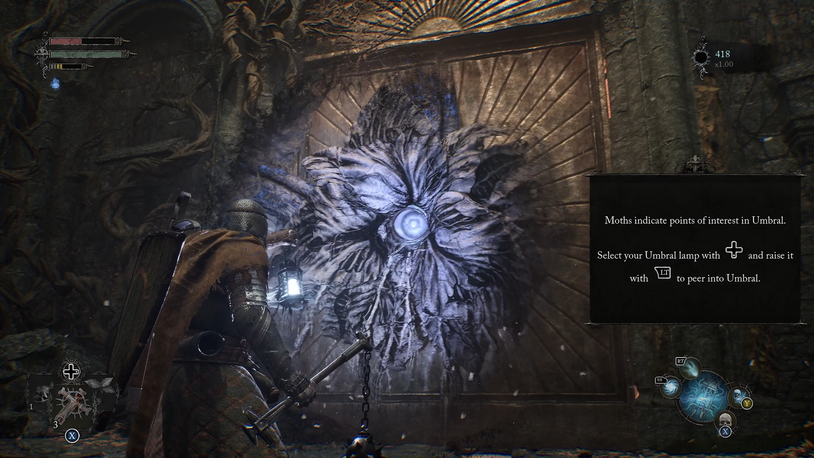
The door will transform into one with a watchful eye, yet your progress will be impeded by the Umbral Entity.
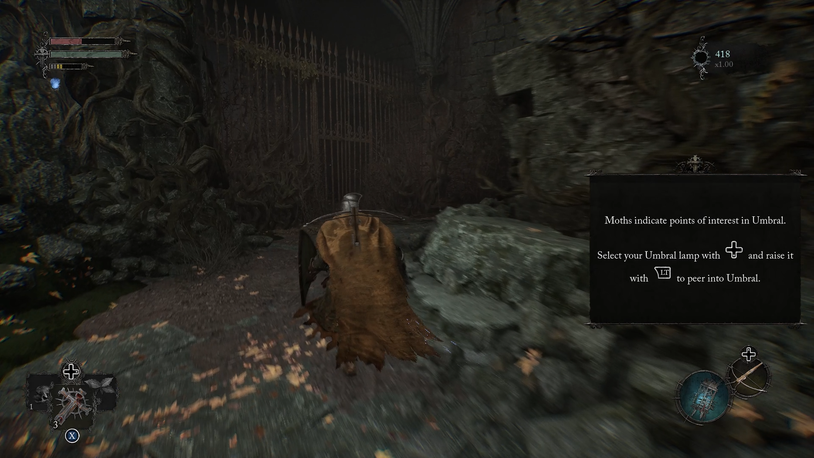
Turn left and approach the iron gate. When you reach it, activate your Umbral Lamp to make the door vanish, granting you passage.
Upon entering this new area, you’ll encounter an adversary awaiting your arrival. Defeat this foe, then head left to gain insight into Attack Combinations and confront two additional enemies up ahead. Proceed past the rubble and into the corridor bathed in a crimson hue, where you’ll receive instructions on Healing and the role of the Sanguinarix.
Progressing through this segment, you’ll reach yet another cul-de-sac, featuring a fractured bridge and a body of water below. Gazing into the Umbral, you’ll spot two hands that nearly connect, offering a potential pathway to the other side. However, attempting to traverse them while merely peering through the lamp will lead to a fall and the disappearance of the Umbral. Instead, you must engage in a rift into Umbral to access the next section.
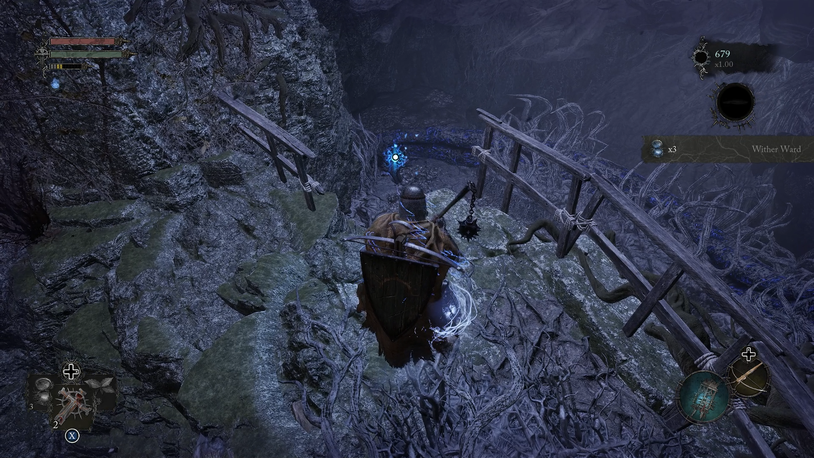
Once you’ve completed the rift, make your way across the two outstretched hands and acquire the 3 x Wither Ward from the cadaver on the opposite side. Descend to your left and target the blue-glowing body positioned in the left corner. This is a Soulflay obstacle, requiring you to execute a Soulflay maneuver to eliminate the obstructive thorns on your path.
Proceed downward to the lower ledge and then descend to your right, continuing along the trail. Having mastered the art of Soulflaying obstacles, you’ll also discover here how to Soulflay targets and manipulate their actions to your advantage. After honing your skills on the target at the base of this area, ascend the slope on the left, commencing with the section resembling a hand.
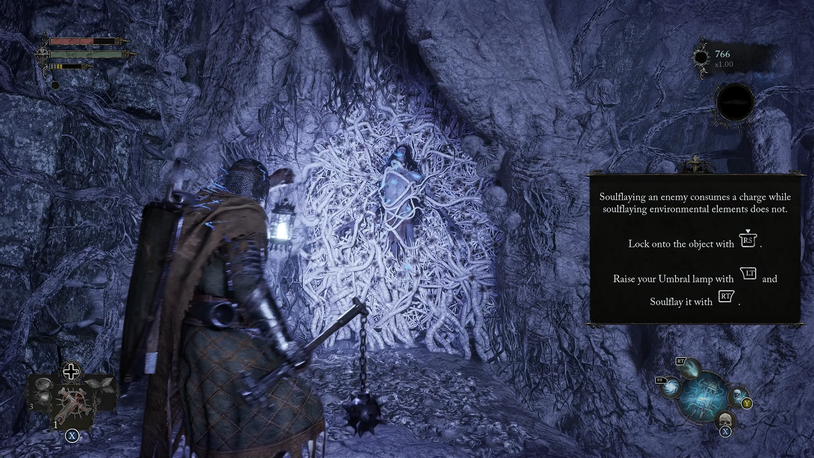
Your progression will once again be thwarted by a mass of thorns and a suspended body. Lock onto the target and employ Soulflay to dispel the thorns. At this juncture, you may have likely depleted your Soulflay charges, so it’s advisable to replenish them by siphoning energy from foes and blisters situated around the room.
Follow the path to confront the next adversary and gain insight into the Wither effect, which influences your health in Umbral. Eliminate the initial enemy, then proceed to the left to spot two adversaries positioned beneath a statue. Clear this area of threats, then lock onto the statue and utilize your Soulflay on it, causing it to release an item—specifically, a Saintly Quintessence.
Move around to the right and execute a daring plunge attack from the top ledge onto an enemy below. After the assault, face the bone ramp and ascend it to practice controlling an enemy’s movements with Soulflay.
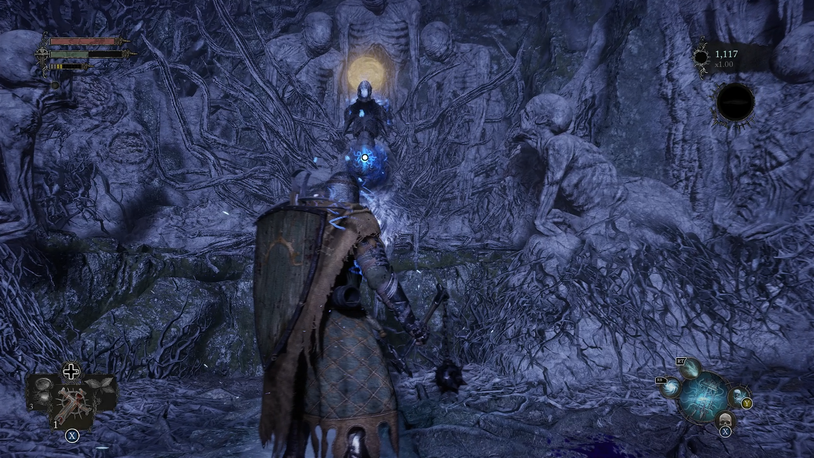
Upon reaching the summit, ascend the ladder and venture into the corridor, where you’ll immediately encounter a thorny obstruction. Step outside through the opening on your right and employ Soulflay on the target suspended there. This action not only eradicates the thorny barrier but also triggers a cutscene featuring the door that was earlier sealed by the Umbral Entity. By Soulflaying the final target, you’ll now gain access to this door.
As you reach the conclusion of the corridor, you’ll come face to face with an Effigy. These artifacts serve as your means to exit Umbral and return to Axiom. You’ll encounter them sporadically throughout your journey in Mournstead, and it’s only at these designated points that you can transition back to Axiom.
Back in Axiom, a pathway will unveil, enabling you to descend the left stairs. Near the bottom, you’ll encounter another adversary, affording you an opportunity to practice knocking foes from elevated ledges. Subsequently, drop down, and you’ll find yourself back at the door you encountered earlier. Open it, and you’ll conclude your adventure within the Defiled Sepulchre and complete your tutorial for Lords of the Fallen, embarking on your journey into Abandoned Redcopse.
Abandoned Redcopse Walkthrough in Lords of the Fallen
Abandoned Redcopse marks the second destination on your odyssey through Mournstead. Having completed the tutorial within the Defiled Sepulchre, the path now leads you towards your inaugural boss battle in the game. In this portion of our Lords of the Fallen Walkthrough, we’ll provide a detailed, step-by-step guide to this fresh expanse, encompassing details on item locations, adversaries to confront, and strategies for vanquishing the forthcoming bosses.
Upon exiting the Defiled Sepulchre through the recently unbarred door, you’ll step into Abandoned Reedcopsey. The initial sight to greet you in this open expanse is a statue adorned with a cluster of ethereal blue butterflies—an emblematic Vestige known as the Vestige of Ranik. By activating your first Vestige, you’ll be rewarded with a Desiccated Vestige Moth.
Utilizing Vestiges
You’ll come across Vestiges throughout Mournstead, serving as crucial waypoints. These Vestiges allow you to rest, replenish your Sanguinarix, enhance your character’s abilities, and as you unlock more Vestiges, facilitate your transit to diverse locales. In the unfortunate event of your demise within Umbral, you’ll respawn at the most recently used Vestige.
Proceed left from the Vestige of Ranik and keep an eye out for the radiant gleam emanating from items near the body positioned beneath the tree. Gather these items to acquire Tacitus’ Journal and the Map of Mournstead. You’ll notice the newly added Journal tab in your menu, housing all your maps throughout the game.
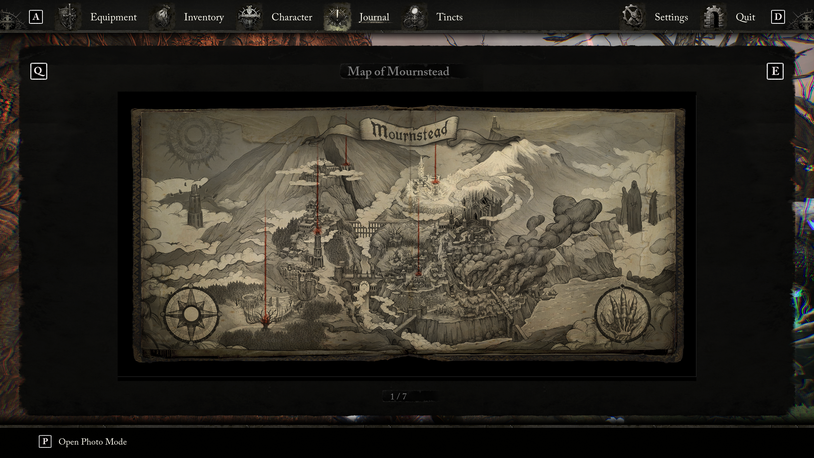
The Map of Mournstead will display five crimson beacons. These beacons represent the five locations you must visit and ultimately extinguish throughout your journey to diminish Adyr’s encroaching darkness and rekindle the light in Mournstead.
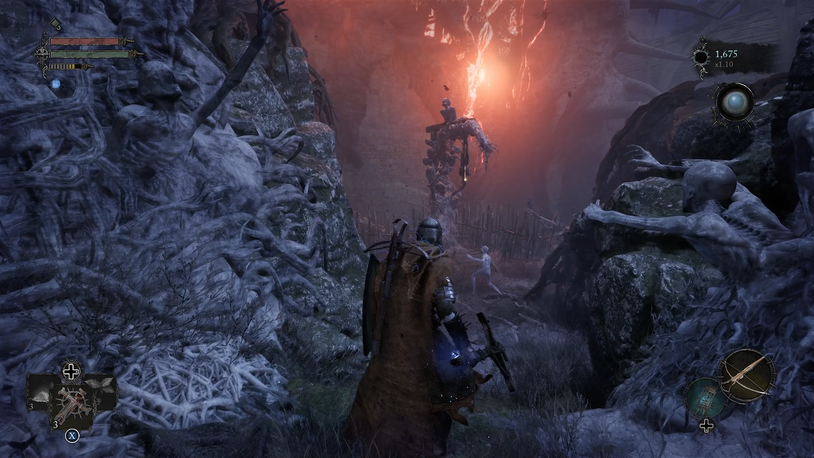
Continue descending the slope, and you’ll find yourself in an arena, where a solitary figure awaits at the center. It’s time for your inaugural boss battle in the game!
Blocking and Parrying Instructions
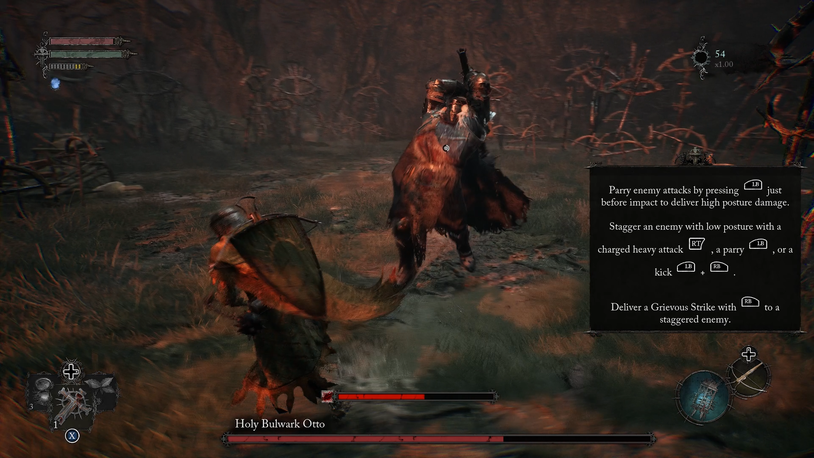
Blocking attacks will cause a portion of your health bar to transition to grey, representing your Withered health. Successfully landing an attack on an enemy without taking any hits in return allows you to recover this greyed-out health. However, if you’re struck by an enemy’s attack, you’ll lose all the health marked in grey. Parrying an attack reduces the size of your Withered health bar and affects the enemy’s posture.
An enemy’s posture is visualized by a circle that materializes when you lock onto them. Initially, this circle appears full but diminishes with each successful parry. When an enemy’s posture has decreased significantly, you gain the ability to execute a kick, heavy attack, or another parry to destabilize the enemy. The posture circle will turn red, signaling your chance to unleash a powerful Grevious Strike by pressing the attack button.
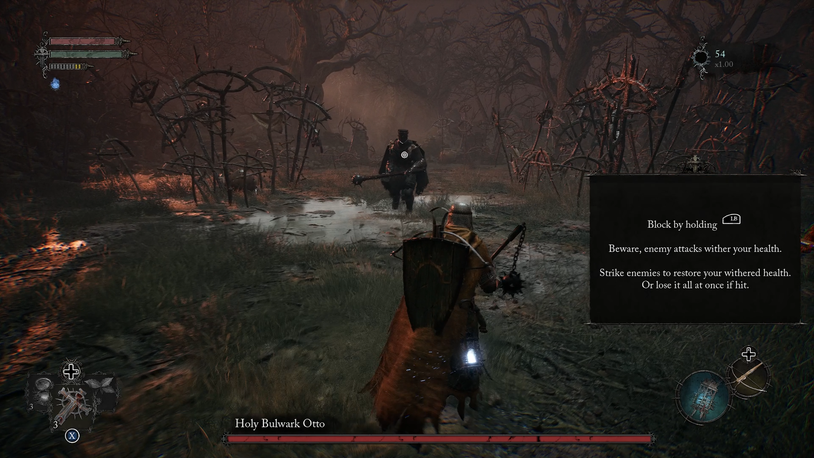
As you step onto the arena’s stage, Holy Bulwark Otto will advance towards you. This skirmish serves as a tutorial for the boss battles you’ll face throughout the game, offering a prime opportunity to hone your skills in blocking and parrying attacks. These formidable encounters feature foes with substantial health reserves and serve as formidable obstacles in your quest to progress through the main storyline.
Holy Bulwark Otto
Due to his hefty two-handed weapon, Holy Bulwark Otto’s movements and attacks exhibit a deliberate pace. He prominently favors an overhead slam, frequently raising his weapon high above his head and then forcefully driving it into the ground. Following this assault, he momentarily requires time to recover, presenting a window for you to deliver several strikes.
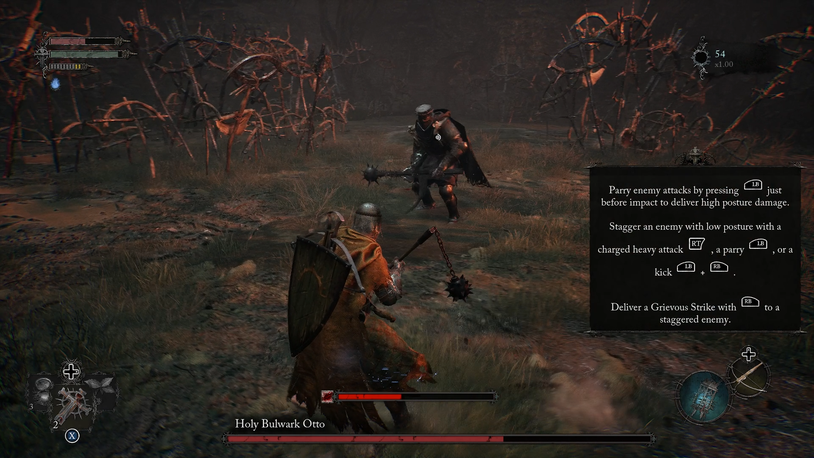
In addition to his overhead slam, he’ll execute side-swing attacks with his imposing weapon. These maneuvers can be evaded quite readily, but they also serve as valuable training for refining your blocking and parrying timing. Should he manage to strike you, you’ll suffer from bleeding damage. A bleed bar, visible above your health bar, will accumulate with each hit. If it fills completely, you’ll start to bleed out, causing your health bar to steadily deplete until you take action to address it.
Occasionally, Holy Bulwark Otto will spin his mace around his head before performing a lunging slam, which propels him forward. It’s crucial to dodge or consider blocking these attacks. However, once he’s completed this move, make sure to close in on him swiftly, as he’ll take a bit longer to dislodge his weapon from the ground, providing an opportunity to stagger him.
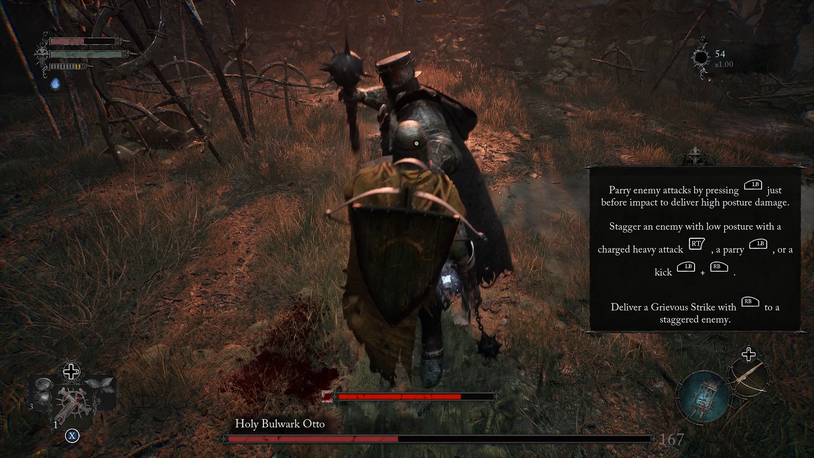
One move to be particularly cautious of is when he hoists his left hand and lunges towards you. If he successfully captures you, he’ll grasp your throat and use his mace to deal substantial damage to your health bar, propelling you backward.
Upon vanquishing Holy Bulwark Otto, a cutscene will commence, with The Lightreaper descending to take over the battle in place of Holy Bulwark Otto.
Confronting The Lightreaper
Although it is possible to challenge and defeat The Lightreaper in this encounter, it proves to be an exceedingly demanding task at your current low level. The intended outcome is for you to succumb to The Lightreaper here. Nonetheless, for seasoned players, there may be a chance to emerge victorious.
Progressing Further in Abandoned Redcopse
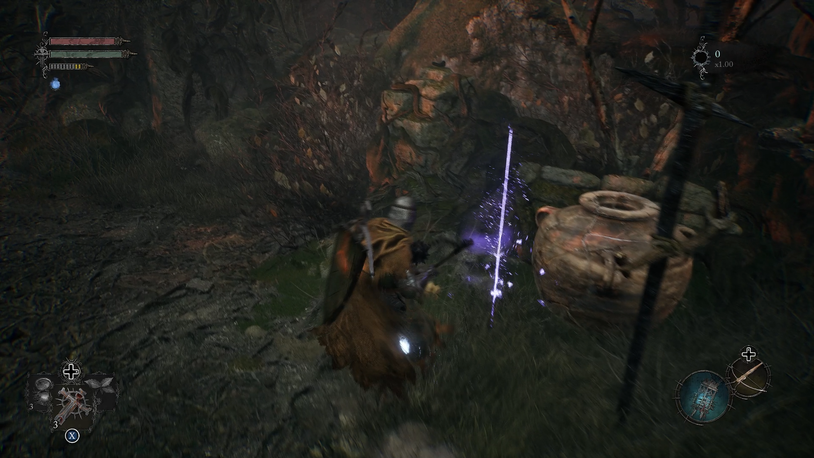
In the event of your defeat by The Lightreaper, you will be resurrected at the Vestige. Return to the arena and replenish your Vigor. Start by moving behind the tree and follow the path to the right. This path eventually leads to a cul-de-sac, and even in Umbral, you won’t find a way to bypass the appearing door. However, you can collect the item (Flayed Skin) here. Next, retrace your steps and head in the opposite direction until you encounter an adversary near the edge.
This is where you’ll learn the technique for extracting parasites from enemies. Eliminate the parasite and defeat the enemy, allowing you to pick up an item situated beside it—the Map of Abandoned Redcopse. This location may also appear as a dead end if you are not already in Umbral. In Axiom, your Umbral Lamp will illuminate, and spectral ribbons will emanate from it, while a swarm of moths flutters near the edge. This signals the need to transition to Umbral to proceed, as the path can only be unlocked in this realm.
Use your Soulflay maneuver to target the soul tethered to the rock and draw it toward you, facilitating your crossing to the other side. Ascend the bone ramp to reach another Vestige point (Vestige of Hannelore), where you’ll encounter a enigmatic individual known as The Iron Wayfarer.
Resting at a Vestige
If you wish to transition from the Umbral realm back to Axiom, you can take a moment to rest at the Vestige points.
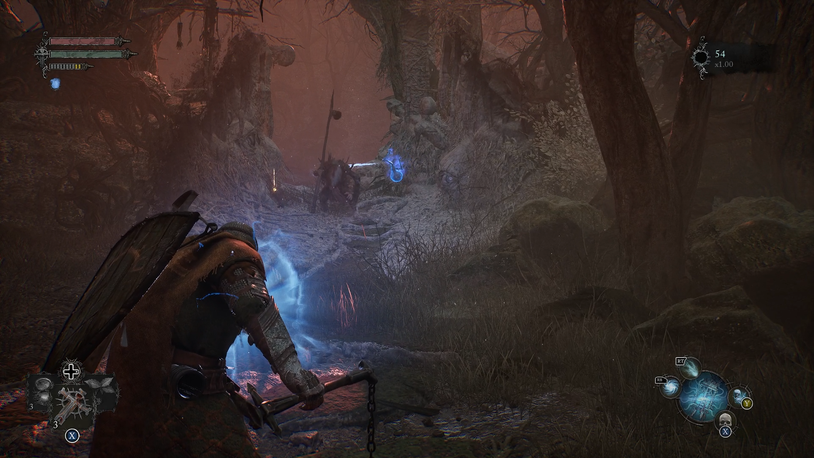
Remain in the Umbral realm here or return to it if you’ve taken respite at the Vestige. Staying in Umbral is necessary to witness the memory that materializes in the forthcoming segment. Proceed left from the Vestige, and descend to perceive what appears to be a soul kneeling.
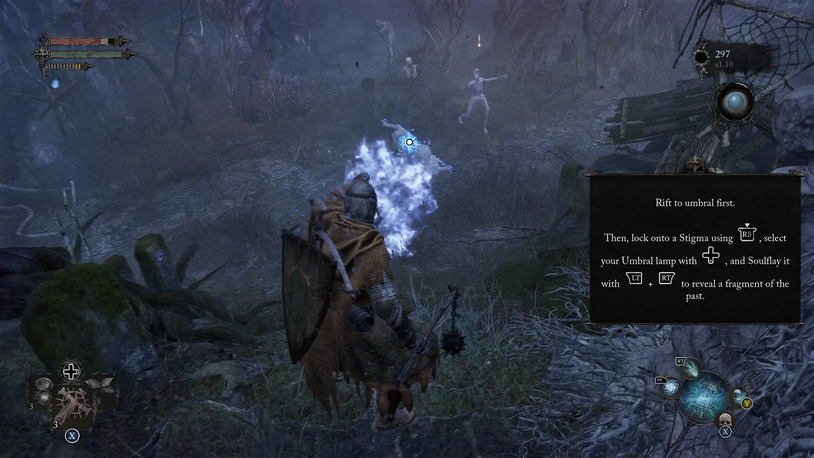
Employ Soulflay to extract the memory from the soul figure here and observe the memory unfold. These are known as Stigmas, offering fragments of the past. Veer left from the Stigma to retrieve 3x Minor Holy Salts.
Retrace your steps toward the Stigma, then head left into the thicket. This not only leads you to an item but also allows you to flank an adversary positioned at the end of this section. Collect 3x Fire Ward and then engage the enemy. Prepare yourself to confront two more as you exit this path.
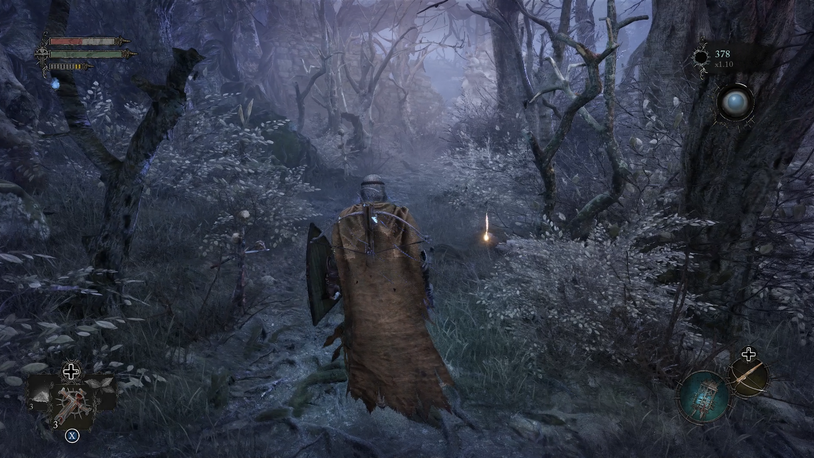
Continue along this route, and you’ll spot an Effigy on the left, granting you the option to exit Umbral. Directly to your right, you’ll discern a narrow passage. Three adversaries lurk within, although you’ll likely spot only one from the Effigy’s vantage point.

Eliminate them, then proceed toward the next segment, where a suspended corpse dangles from a tree, bearing an item in the distance. Rather than heading directly for the item and the corpse, opt to take the first gate on the left. Within, you’ll notice the radiant glow of another item. An enemy awaits at the far end of this passage, but exercise caution as you approach, for another adversary will emerge from the wooden wall on the left. You can gain the upper hand by smashing through the wooden wall and dispatching them. Once this area is cleared, seize the Broken Sword.

As you approach the tree, look upward to locate an enemy perched on higher ground, hurling fireballs in your direction. Prioritize dealing with them to then concentrate on the two foes circling the tree. Furthermore, in this area, you’ll encounter another creature capable of hurling fireballs, with a parasite affixed to it. This creature paces up and down on the right-hand side of the elevated platform where the other enemy stands. Employ your Umbral Lamp to eliminate the parasite, rendering the creature vulnerable to your attacks. Once this area is rid of threats, interact with the corpse on the tree to procure the Pilgrim Garb and Pilgrim Skirt.
Now, venture behind the tree to your left. Just by the iron gates on your right, you’ll encounter another lurking enemy. Once you’ve disposed of them, head left towards the wooden crates. These crates are all destructible, concealing enemies behind them, as well as items from the body in the left corner, containing 2x Ammunition Pouch and 2x Small Manastone Cluster.
Transition into the Umbral realm now and proceed towards the exit of this area, which is where you previously encountered the enemy with the parasite. As you make your way towards the stairs, cast your gaze to the right to spot an enemy brandishing a heavy sword and an item near the barn door. This adversary can be formidable at the outset of the game, employing fire attacks, projectiles, and powerful sword swings. Take your time or consider bypassing it.
Retrieve the item (Orian Preacher Shield) and then head right to ascend a ladder. Crossing a bone bridge from here, you’ll access the roof of the thatched house, where you’ll encounter a corpse holding an item. Dislodge the item from the corpse and drop down on the opposite side to face two more adversaries and collect additional items in this vicinity. Among the items you should be able to gather here are a Raw Mangler Axe and 2x Enervated Vigor Skull.
When you’ve finished here, ascend the wooden slope on the right and circle back to the stairs leading upward and out of the area. You can depart the Umbral realm here to return to Axiom and continue your ascent. As you reach the wooden planks, you’ll spot two enemies taking cover behind them. Once they are eliminated, proceed up the stairs and watch for an enemy concealed to the left by the door.
Upon reaching the summit, you’ll notice an enemy gazing into the distance. Here, you’ll receive a tutorial on how to stagger enemies and strike them from behind. Upon completion, veer to the left of the enemy’s former position and dismantle the planks. In this corner, you can secure 3x Unripe Berries. Continue to the left and ascend the next set of stairs.
As you arrive at the pinnacle of the stairs, you’ll encounter a door. Currently locked, so move towards it, but instead, make a left turn. Hidden away, you’ll discern the next Vestige—the Vestige of Marco the Axe. Rest here if necessary and utilize it as a checkpoint.

Enter the Umbral realm at this location, and while facing the door, head to the left and peer down. Here, you can employ Soulflay to interact with a soul, lowering a ledge that permits you to drop down. Proceed to the right, descend to the bottom, and utilize Soulflay on the target surrounded by stone-like souls to retrieve the Umbral Eye of Betrayed Eliard. Then, head to the right of this statue to find another Stigma you can Soulflay, rewarding you with 2x Umbral Scouring.
Once you’ve completed your exploration in this area, climb the bone ladder positioned behind the statue. Descend from the wooden planks, then loop back around and ascend to the Vestige to return to Axiom. With your back facing the door (opposite to the slope you ascended from), head left to continue your journey.
Across on the right, you’ll spot another suspended body bearing an item. Once you’ve purged the area of threats, seize the Mineowner’s Ring. Near the body, you’ll discern a broken bridge. Cast your gaze to the left to identify your route, as the bridge is currently impassable.
Follow the slope descending to the bottom, where you’ll observe that it’s submerged. Activate your Umbral Lamp to transition into the Umbral realm, allowing you to proceed along the path. Eventually, you’ll encounter a corridor branching off to the left, adorned with egg-shaped vessels. Just before entering the corridor, retrieve an Ammunition Pouch and a Large Manastone Cluster from a nearby body.
Advance through the corridor to confront multiple ghouls as you move toward the opposite side. After crossing, veer to the right to locate a statue from which an item hangs. Dislodge the item to acquire a Pilgrim Hood and Pilgrim Bandages. Next, retrace your steps and look toward the wall you just passed to identify a bone ladder ascending.
Upon reaching the upper portion of this area, you’ll encounter the butchers wandering about. Here, you have the option to exit Umbral and return to Axiom. Proceed to the left to dislodge the plank and establish a bridge, providing a shortcut.
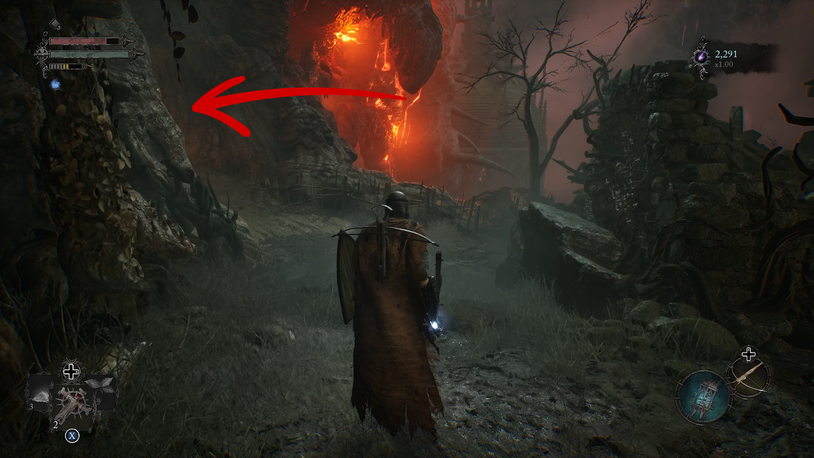
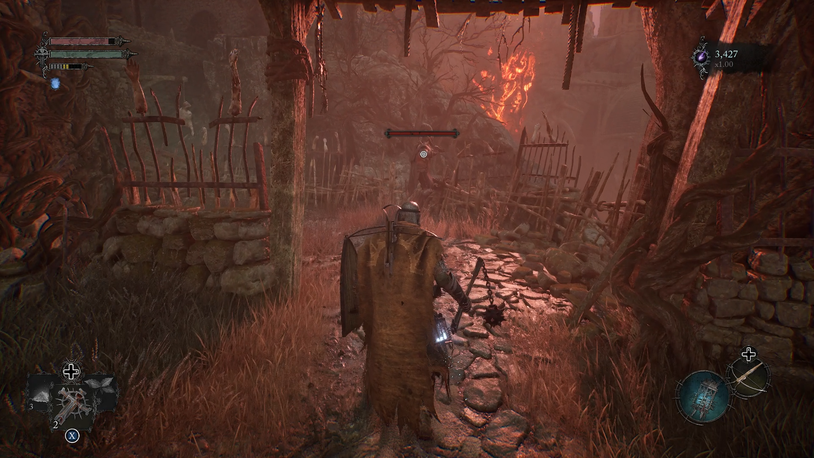
Having executed this, veer right and persist in this direction until you observe a distant blaze. If you veer right, you’ll simply circle back to the statue, so opt for the leftward path. Ascend and claim 3x Holy Ward from the nearby body. Subsequently, proceed to the right and descend on the left to enter the building.
Inside, you’ll encounter the Iron Wayfarer, who will elucidate the functioning of Vestige Seedlings. Utilize a Vestige Seedling to create a transient vestige, granting you a resting place. Now, ascend the ladder to the right to depart the building. Ascend the ladders to the summit, reaching the land engulfed in flames.
Progress to the right to observe an ongoing clash between different creatures. Dispatch them to unearth various items. Subsequently, head towards the remnants of the building on the left, preparing for your impending boss battle.
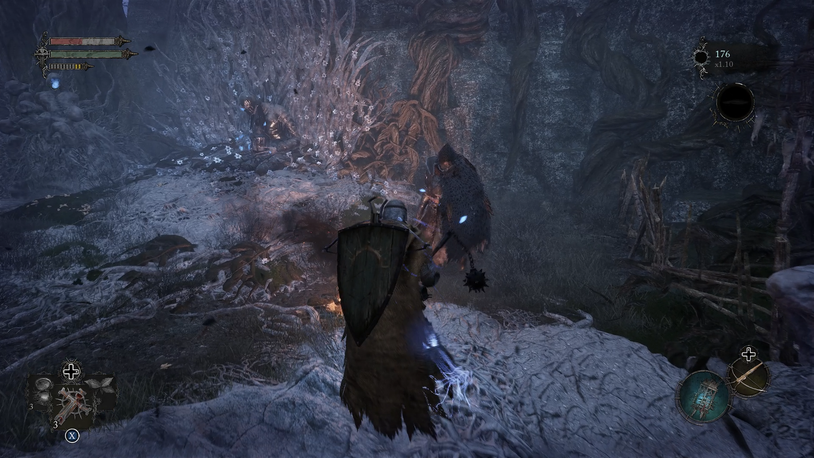
Pieta, the Divine Renewal
As you commence the battle against Pieta, she approaches with a vigilant posture. Her attacks encompass a combination of sword strikes and radiant beams. When wielding her sword, she executes wide-reaching swipes, commencing slowly and gaining momentum as she swings. These strikes can be evaded, parried, or blocked. Typically, she performs a sequence of 2-3 sword swings before pausing, presenting a window of vulnerability for counterattacks. Furthermore, she can leap into the air and bring her sword down forcefully, lengthening her recovery time and offering an opportunity for you to strike.
When unleashing her radiant beams, she takes a brief moment to charge up and then releases a potent beam. You’ll notice her intentions as she extends her sword forward, emitting a radiant glow along the blade’s edge. She also incorporates a sword attack that tracks your movements, forming a direct path from Pieta to your location. Both of these attacks can be evaded and entirely avoided.
The Second Phase of the Pieta, the Divine Renewal Battle
In the second phase, Pieta ascends to one end of the battleground, suspending herself in mid-air for a moment. This interval allows you ample time to reposition and evade her impending onslaught. To do so effectively, position yourself on either side of the arena, steering clear of the central area. Pieta will promptly dash forward, creating a radiant arc that cuts through her path, while a cascade of golden arrows descends from above. In this phase, Pieta may repeat this attack and occasionally introduce golden duplicates of herself. When this occurs, it’s advisable to view the battlefield as three distinct lanes, designating one as safe and the other two susceptible to the replicas’ attacks.
Rewards for Conquering Pieta, the Divine Renewal
Upon vanquishing Pieta, venture into the Umbral realm if you’re not already there. Utilize Soulflay on Pieta’s body to access a memory, granting you Pieta’s unique Remembrance of Pieta, the Divine Renewal, and 2x Umbral Scouring.